Waitlists dashboard
Once you enable waitlist for your product, anyone who enters your checkout will be able to sign up.
To track the signups, and export waitlist data, use the Waitlists dashboard in your Store tab - just go to Store → Waitlists:
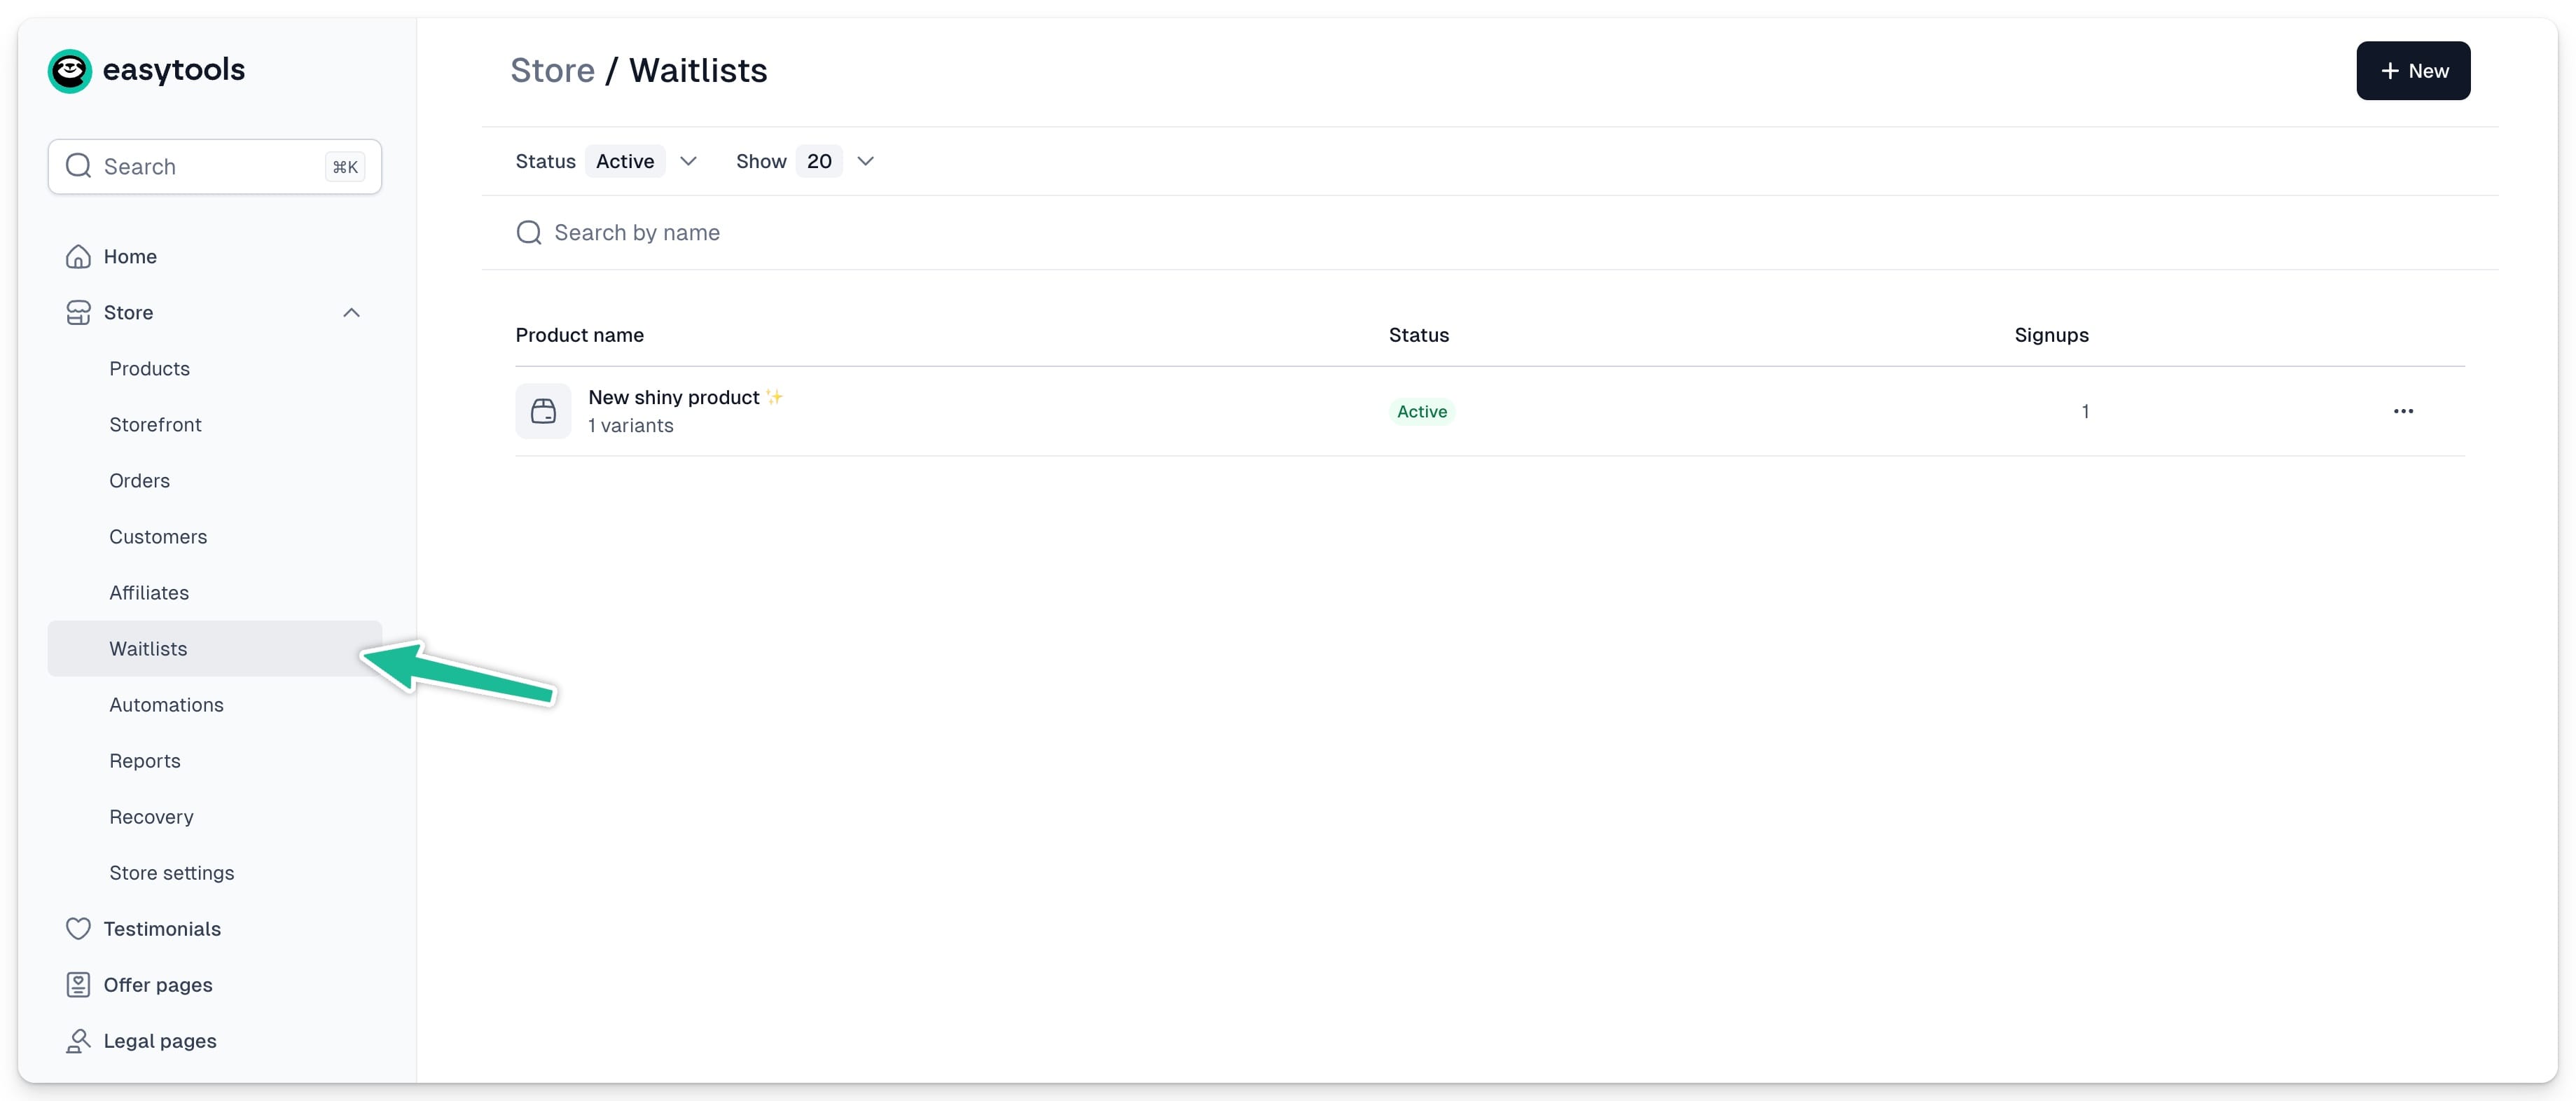
All products with created waitlists will show up here. You can filter them by active or inactive lists. To view signups for a specific waitlist, just click the product name.
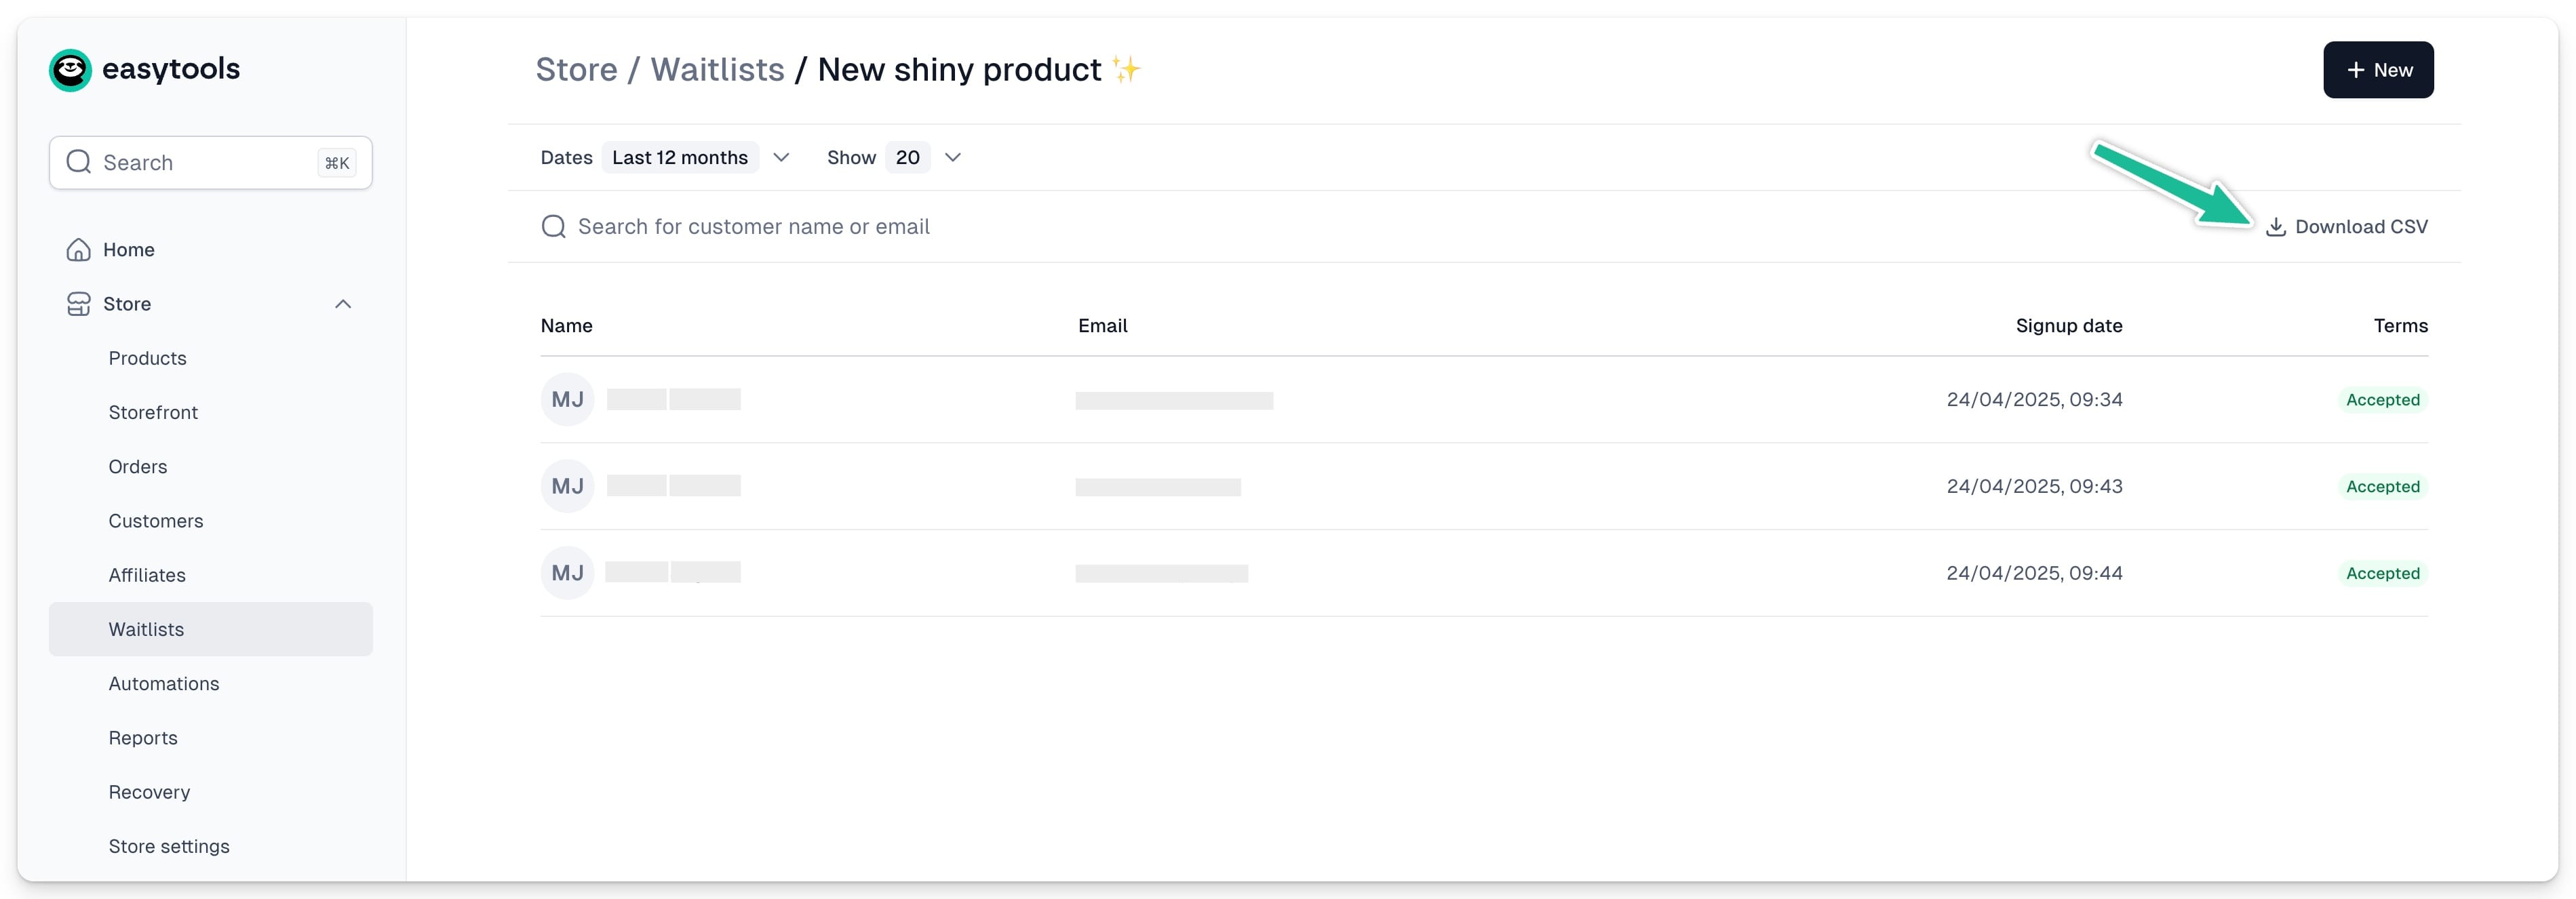
From here, you can:
- Filter the signups by date
- Search for a specific customer or email
- Download CSV with all the signup details
Using the waitlist
When your product availability changes, the waitlist will automatically show or hide. However, we won’t send notifications to users on your behalf.
To contact users who signed up, you can:
- Download CSV and manually import the data into your email marketing tool
- Set up an automation to add users to your email tool as they sign up
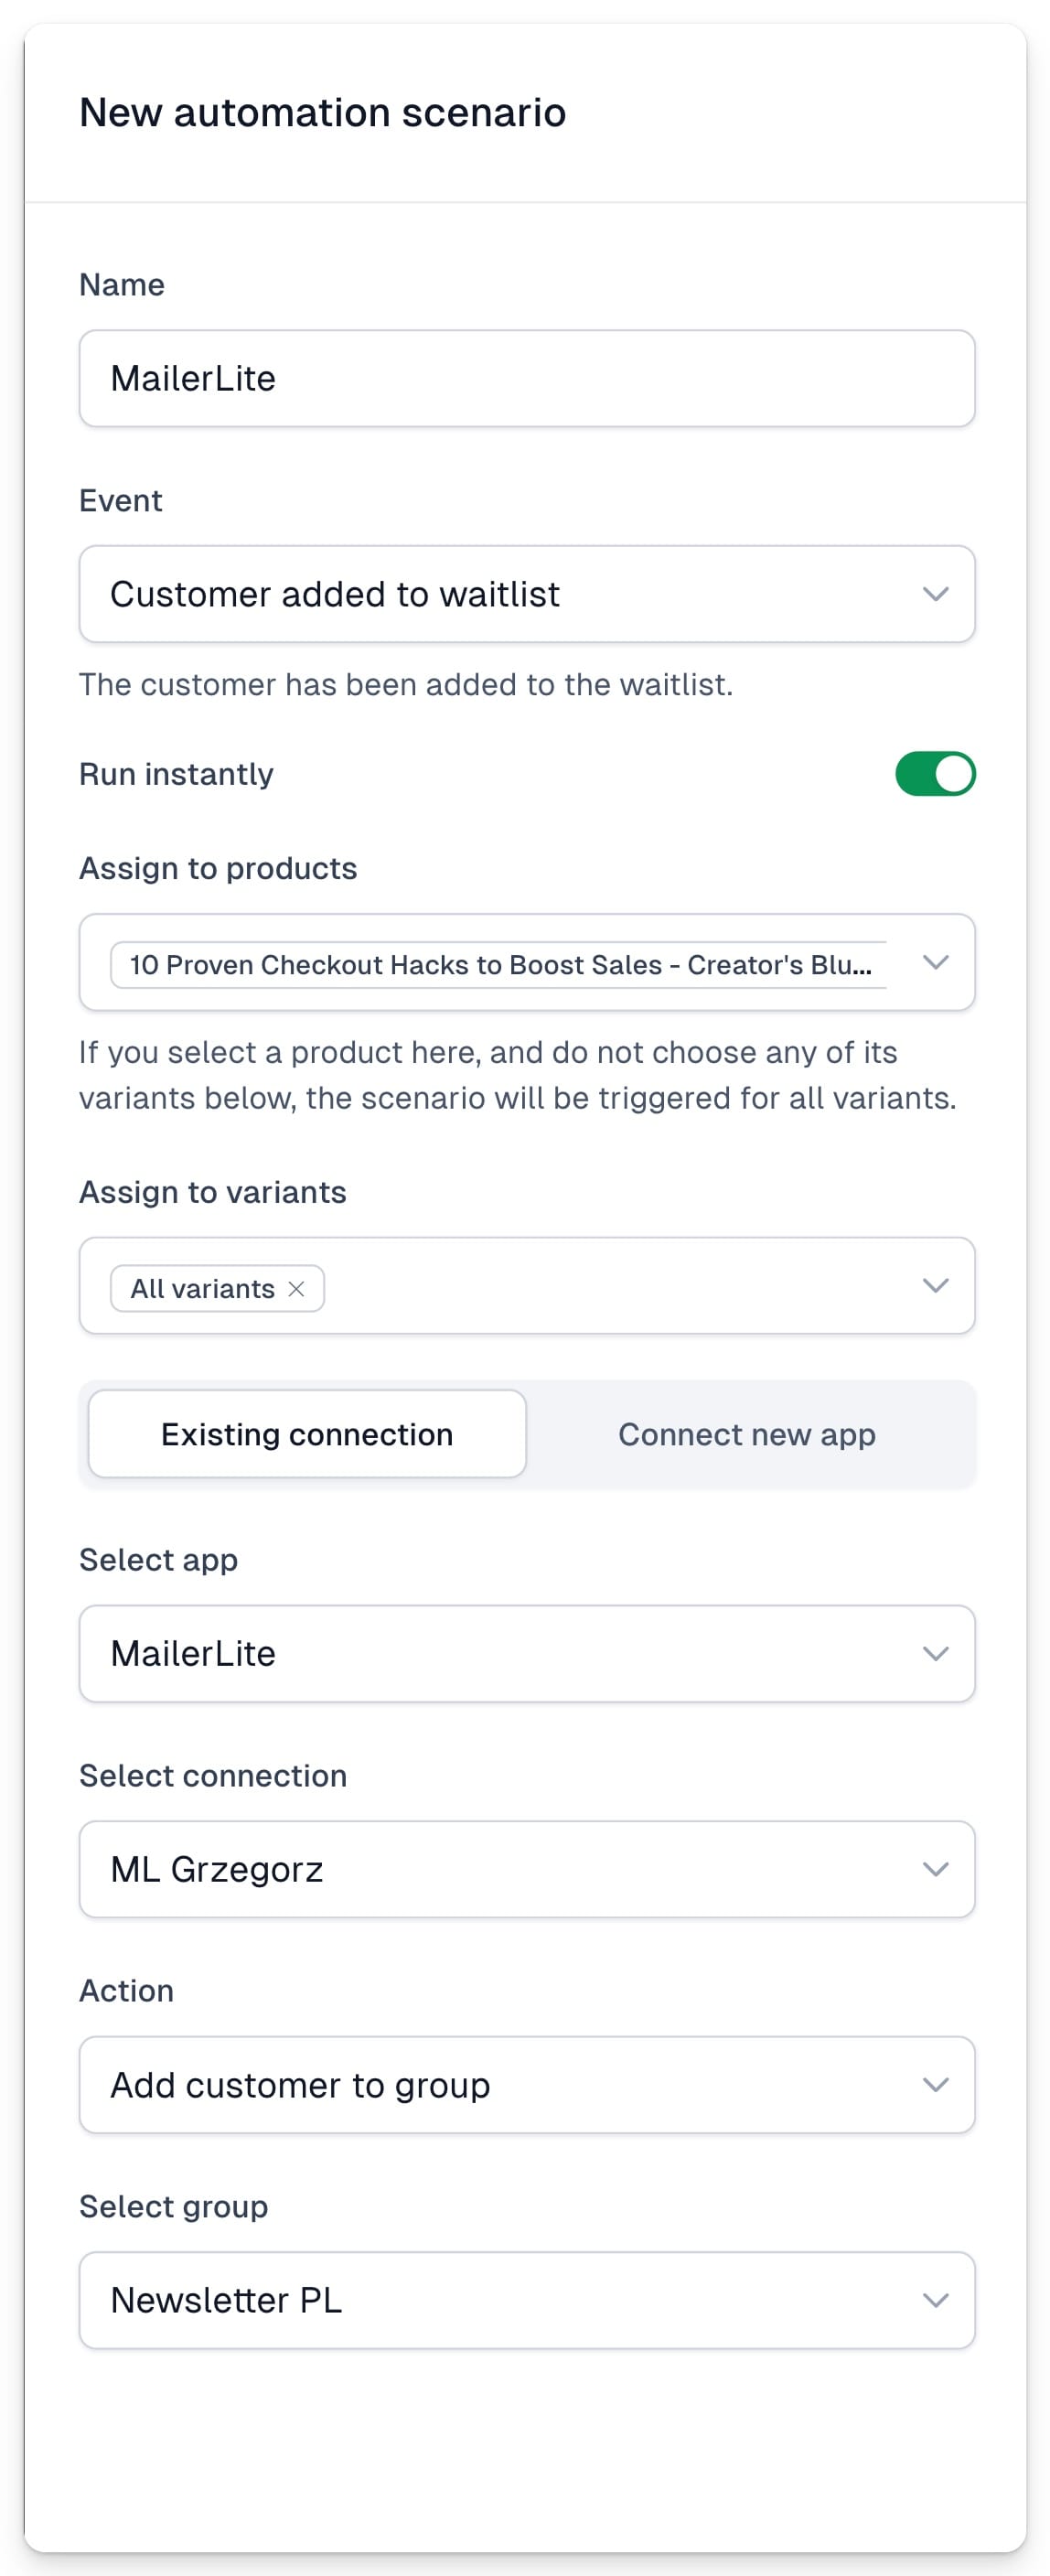
Setting up waitlist automation
To automatically add users who sign up to your email marketing tool, you need to first create a connection with the platform you use, and then set up the automation scenario. Here’s how:
- Go to Store → Automations
- Open the Apps tab
- Click +New App
- Choose your tool and enter its API Key
(If it’s already connected, skip this step.)
To view all the apps that we are integrated with, check this page or explore our docs.
Now let’s create the automation scenario:
- Go to Scenarios tab
- Click +New scenario
- Set the trigger: Customer added to waitlist
- Select the product
- Choose your email app from the list
- Pick the action: add or remove someone from a list
- Choose the list or group (if no list or group appears, make sure you’ve set one up in your email tool)
- Click Save