Blog
9 Best online course platforms in 2026! (Tested all of them)
Best online course platforms: 1. Easytools, 2. Teachable, 3. Gumroad, 4. Udemy, 5. Podia and more - Tested them all!

9 Best online course platforms in 2026! (tested all of them)
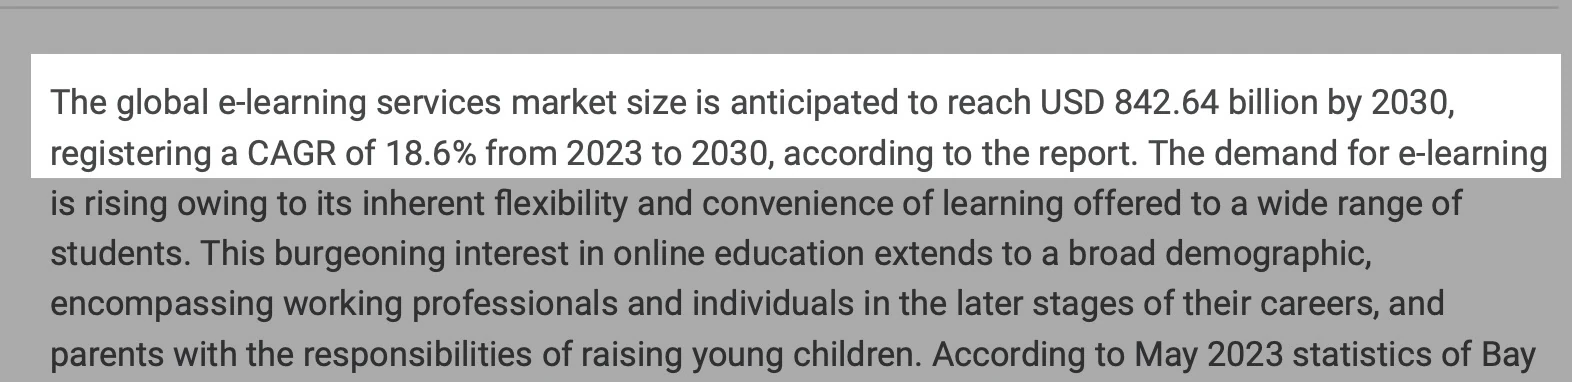
According to this study, by 2030, “the global land e-learning services market size is anticipated to reach $842.64 billion.”
So what does this mean?
It simply means that online course selling is a fast-growing, multi-hundred-million-dollar industry.
If you’re already a creator or instructor of online courses, you’re in a sector poised to continue growing. The next best thing you can do now is to choose the best online course platform to sell on.
So, after reading these research findings, I decided to take matters into my own hands and test the most popular online course platforms to help you. I was able to narrow the list to my nine best.
Keep reading to learn more about how I reviewed these platforms, how you can choose the right online course platform, and some important questions to ask while you decide.
Key takeaways
- The best online course platforms are 1. Easytools, 2. Teachable, 3. Gumroad, 4. Udemy, 5. Skillshare. 6. Podia, 7. LearnWorlds, 8. Mighty Networks, and 9. Payhip
- To choose the right online course platform, check customization options, calculate pricing and transaction fees, assess ease of use, and review payment options.
- The best online course platforms that give certificates to your students: 1. Easytools, 2. Teachable, and 3. Thinkific.
Online course platforms compared
9 Best online course platforms in 2026
The best online course platforms are:
- Easytools
- Teachable
- Gumroad
- Udemy
- Skillshare
- Podia
- LearnWorlds
- Mighty Networks and
- Payhip
Let’s review each of them in more detail.
1. Easytools
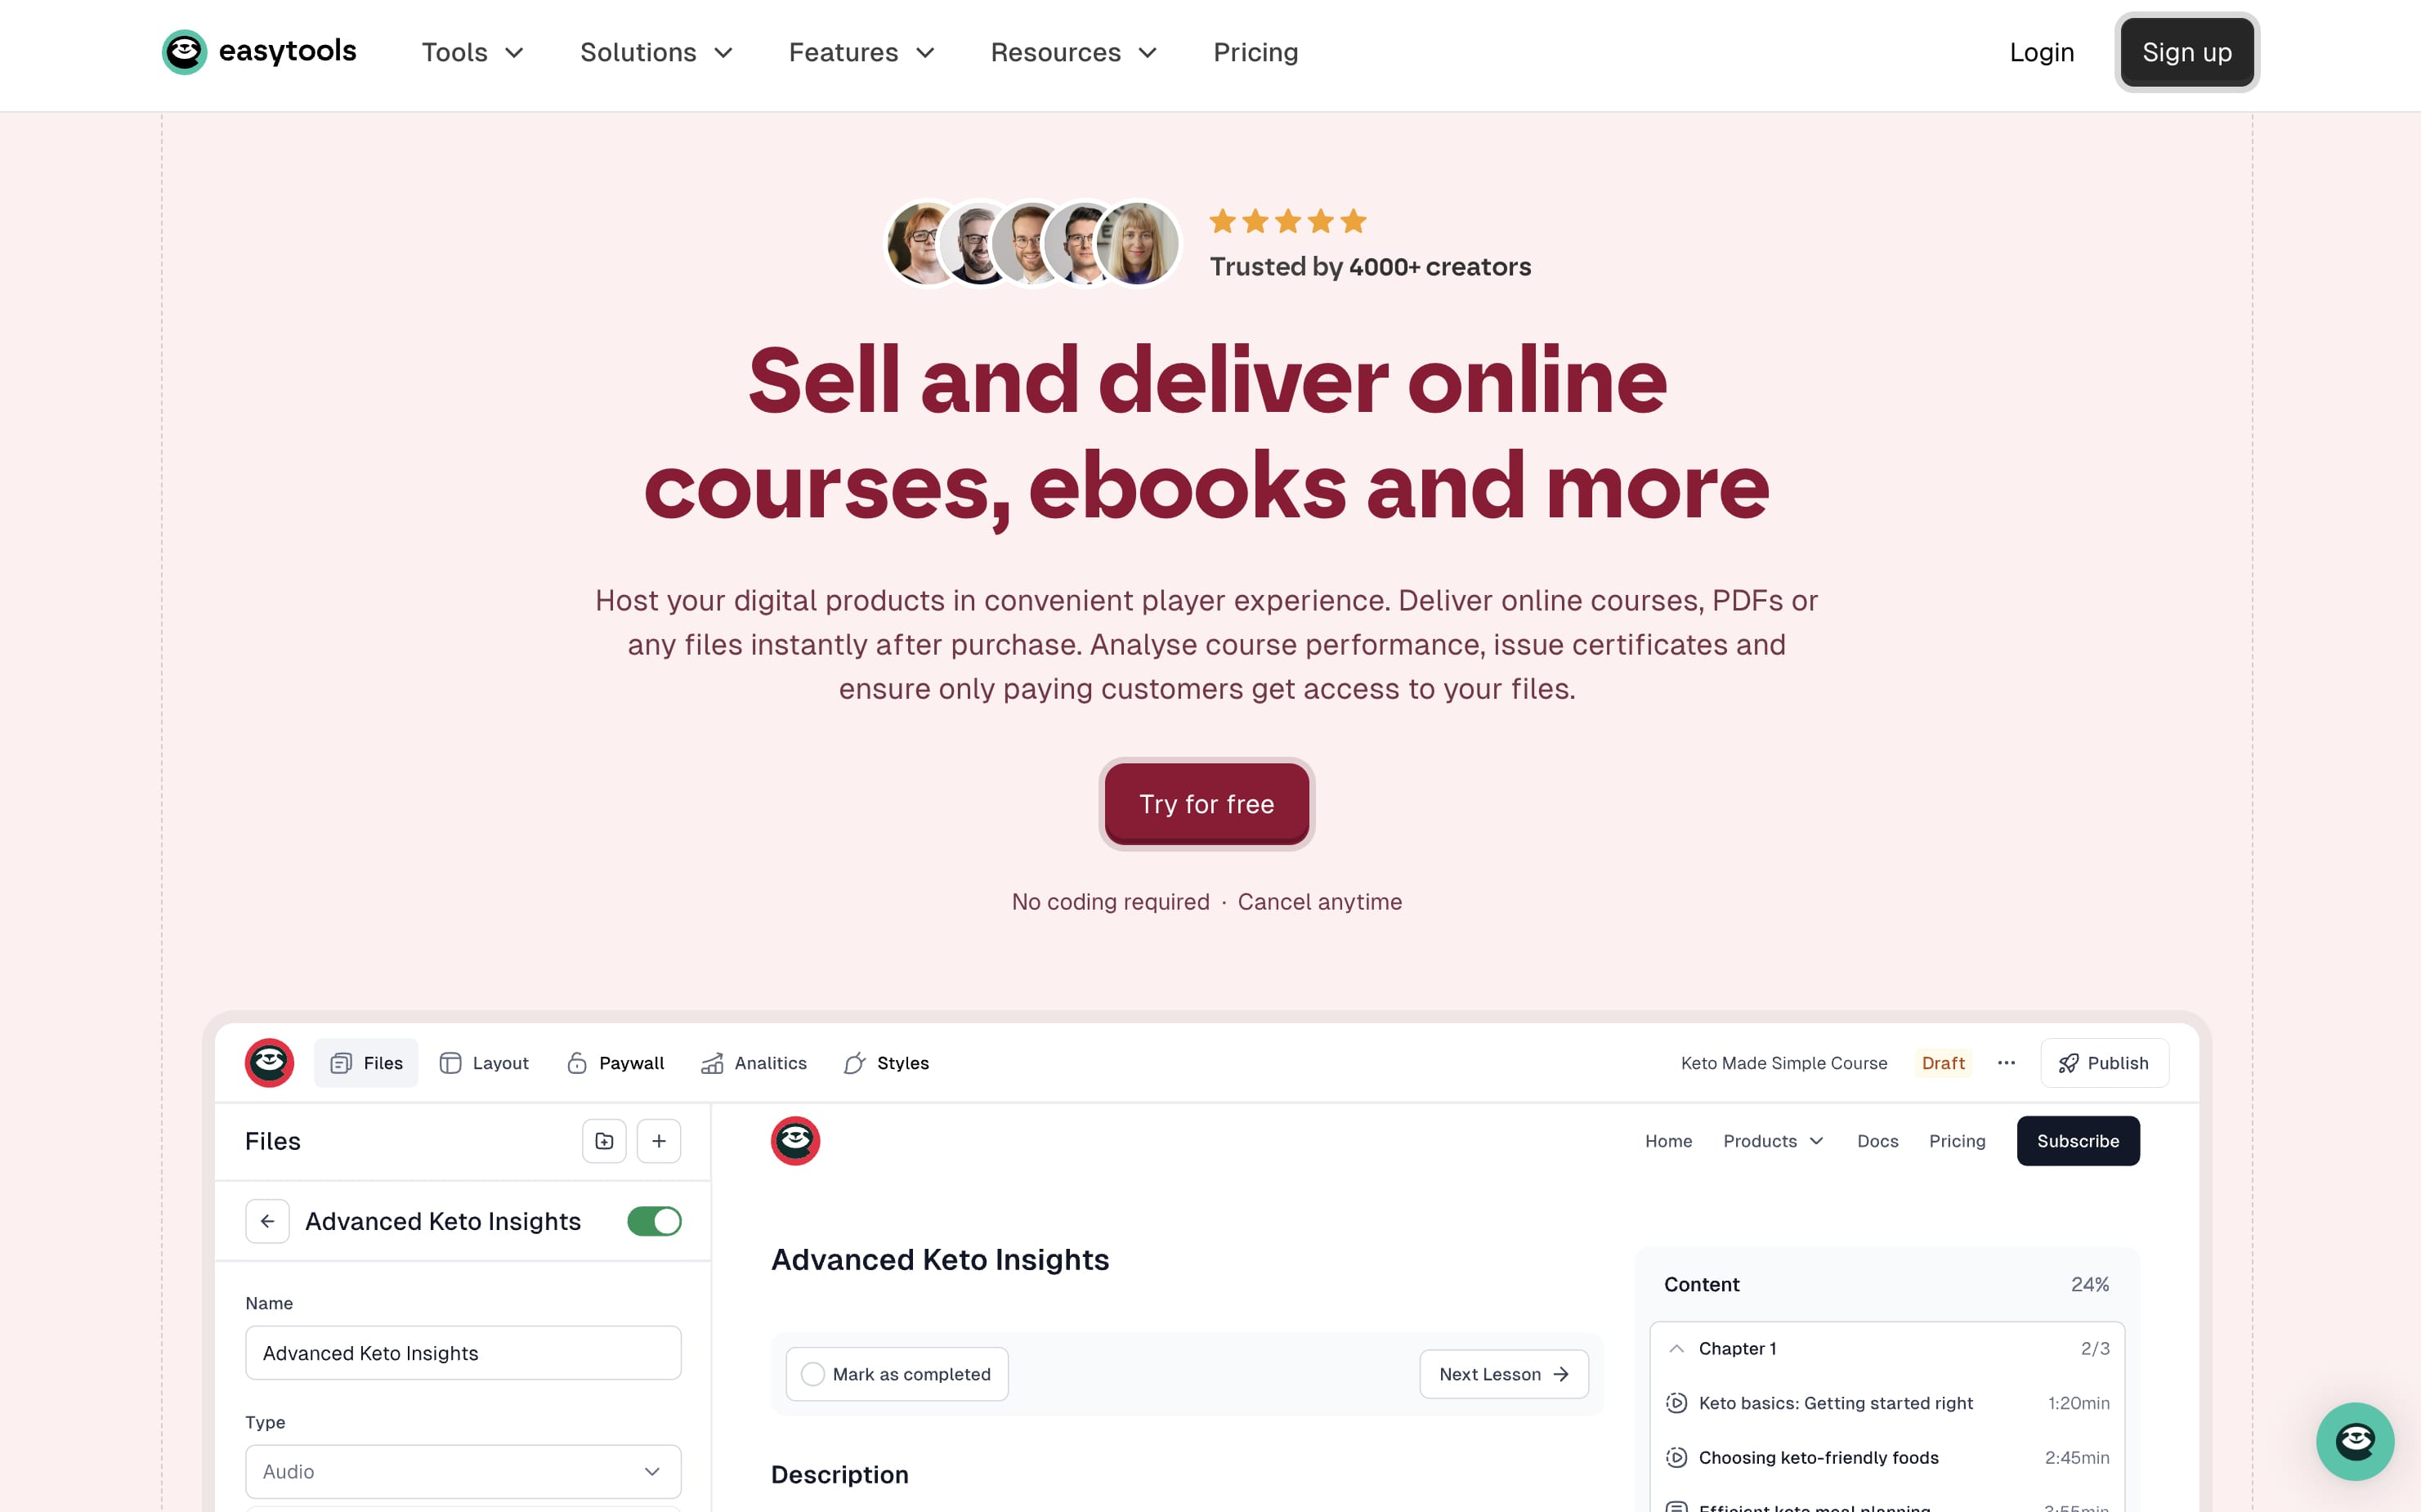
Easytools is first on my list of the ten best online course platforms, and for good reason. For one, it’s easy to use. Also, it has very low transaction fees and offers a suite of tools for course creation and more.

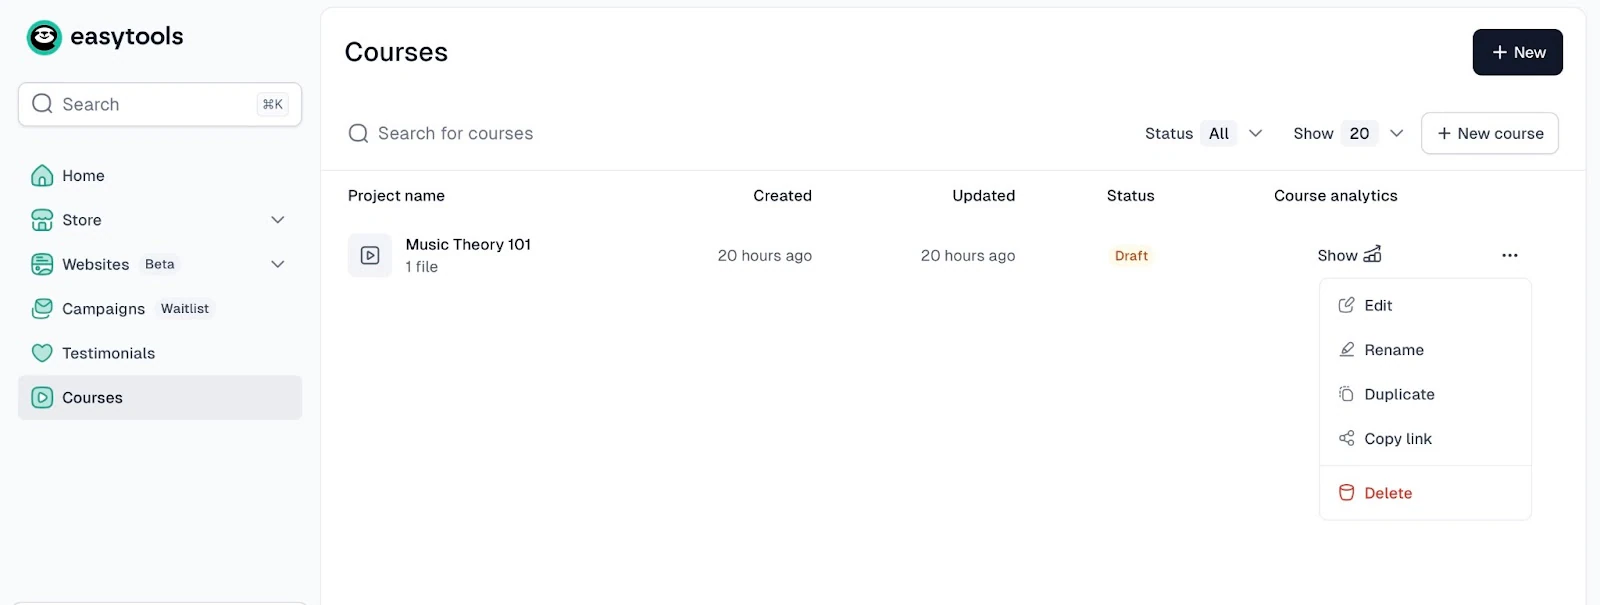
With Easytools’ courses tool, you can create your own player for your online course. . It allows you to upload different file formats (video, image, docs, etc.), create modules and lessons and issue certificates.
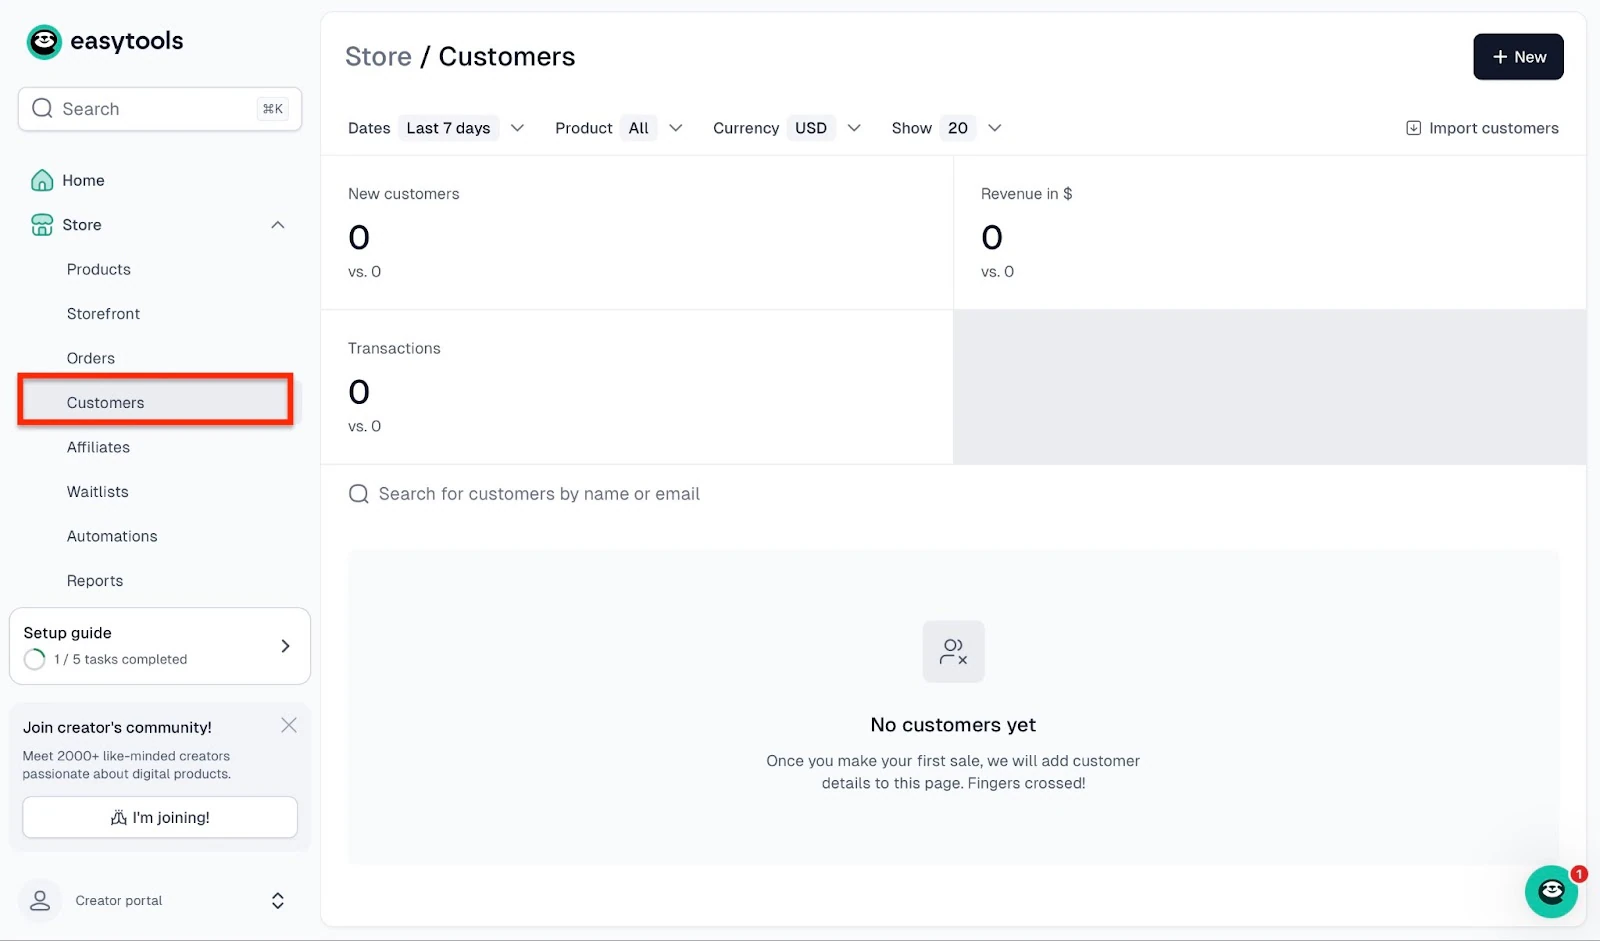
Thanks to Easytools store feature, you can create a checkout to sell your course, manage your orders, customers, and affiliates. You can also check waitlists, reports, store analytics, and customer checkout sessions.
But that’s not all. You can also create automations and edit store settings.
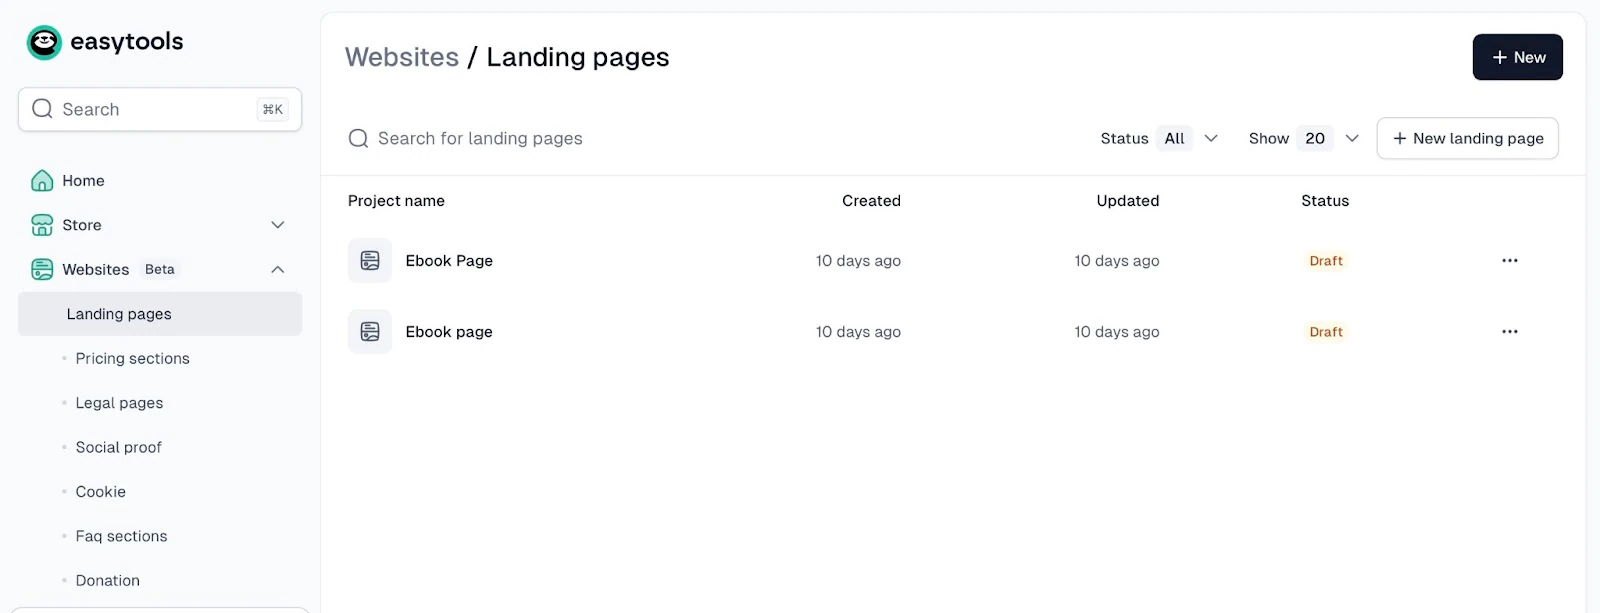
Moreover, Easytools’ websites feature lets you create, add, and view landing pages. Beyond that, you can add legal disclaimers, cookies, FAQs, social proof, and donation sections to your landing pages.
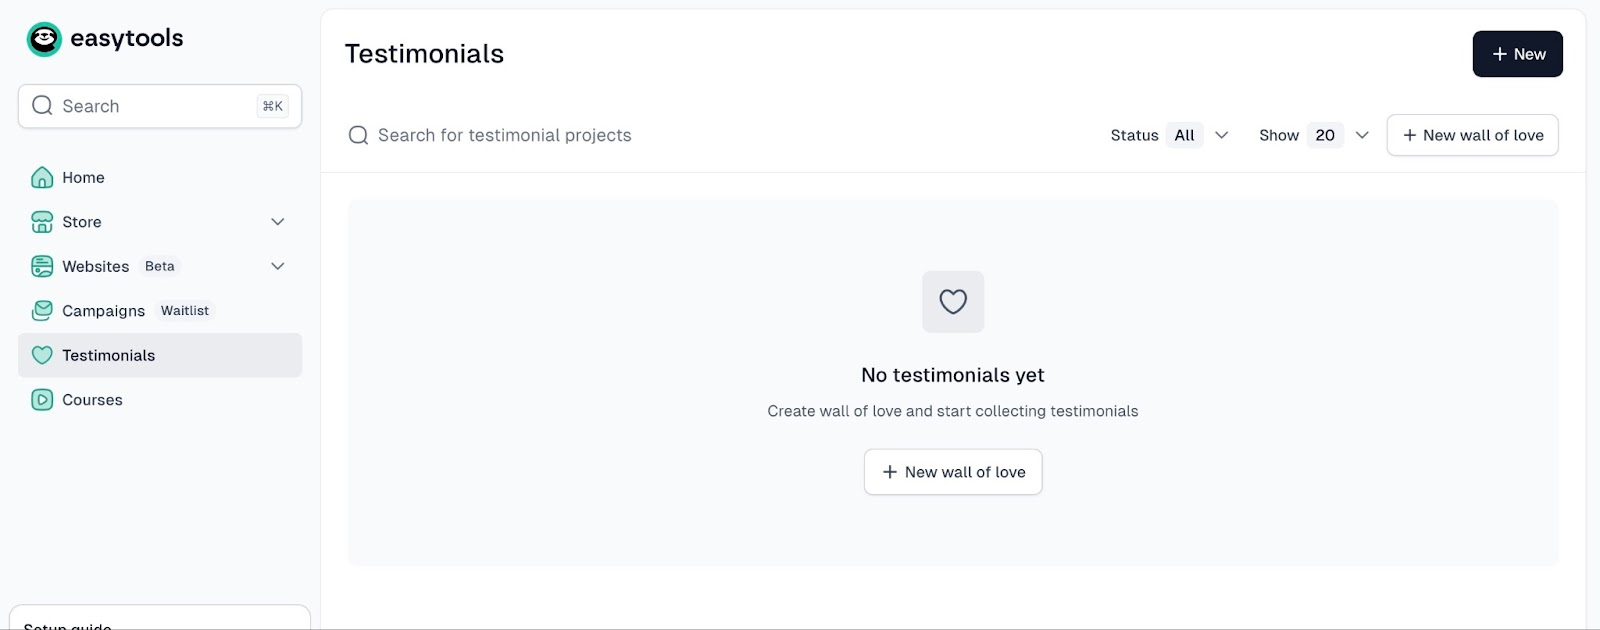
There is more. The testimonial feature lets you create a section for reviews called “wall of love,” which you can embed into your website.
The feature displays customer names, images, and star ratings. It also integrates directly into your storefront.
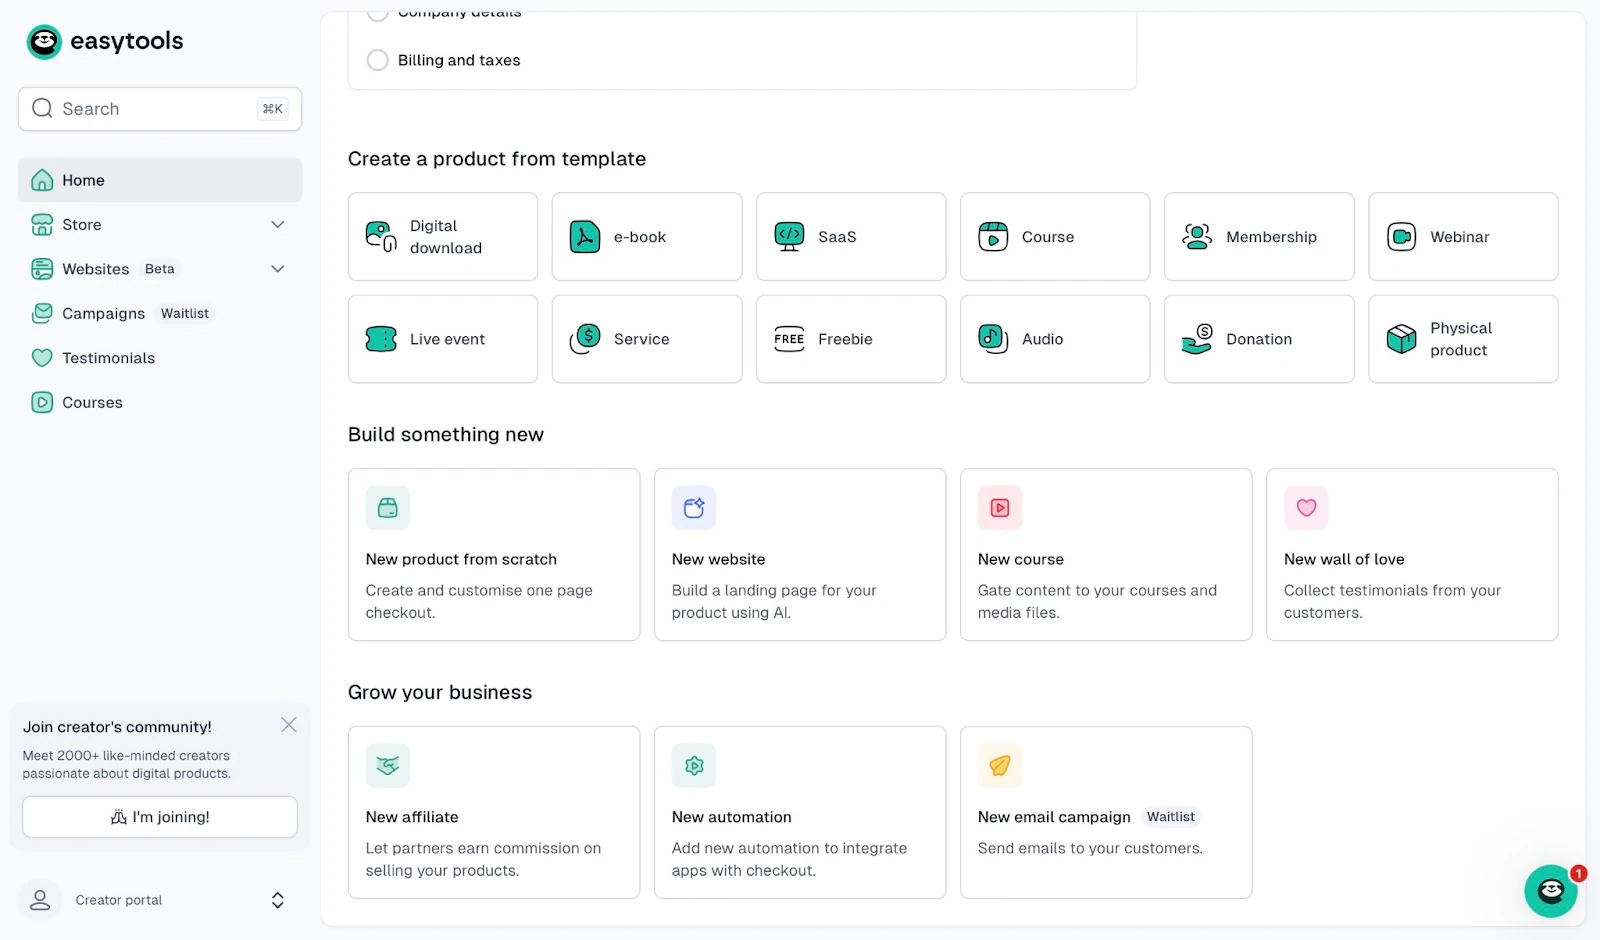
In a few simple steps, I’ll guide you through creating your first course on Easytools.
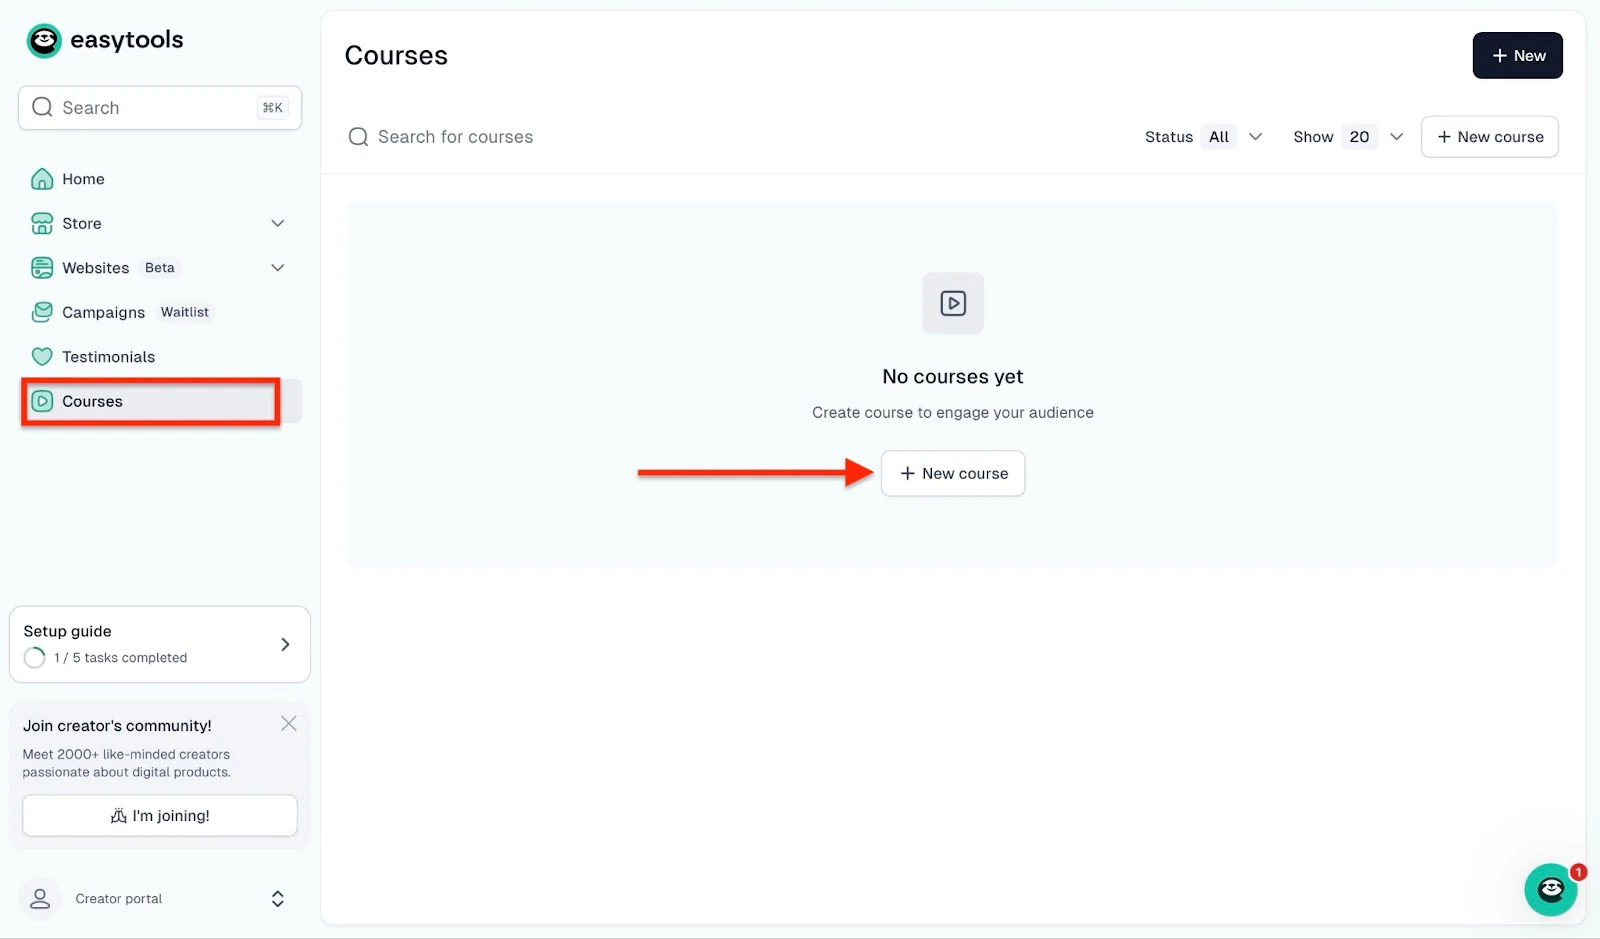
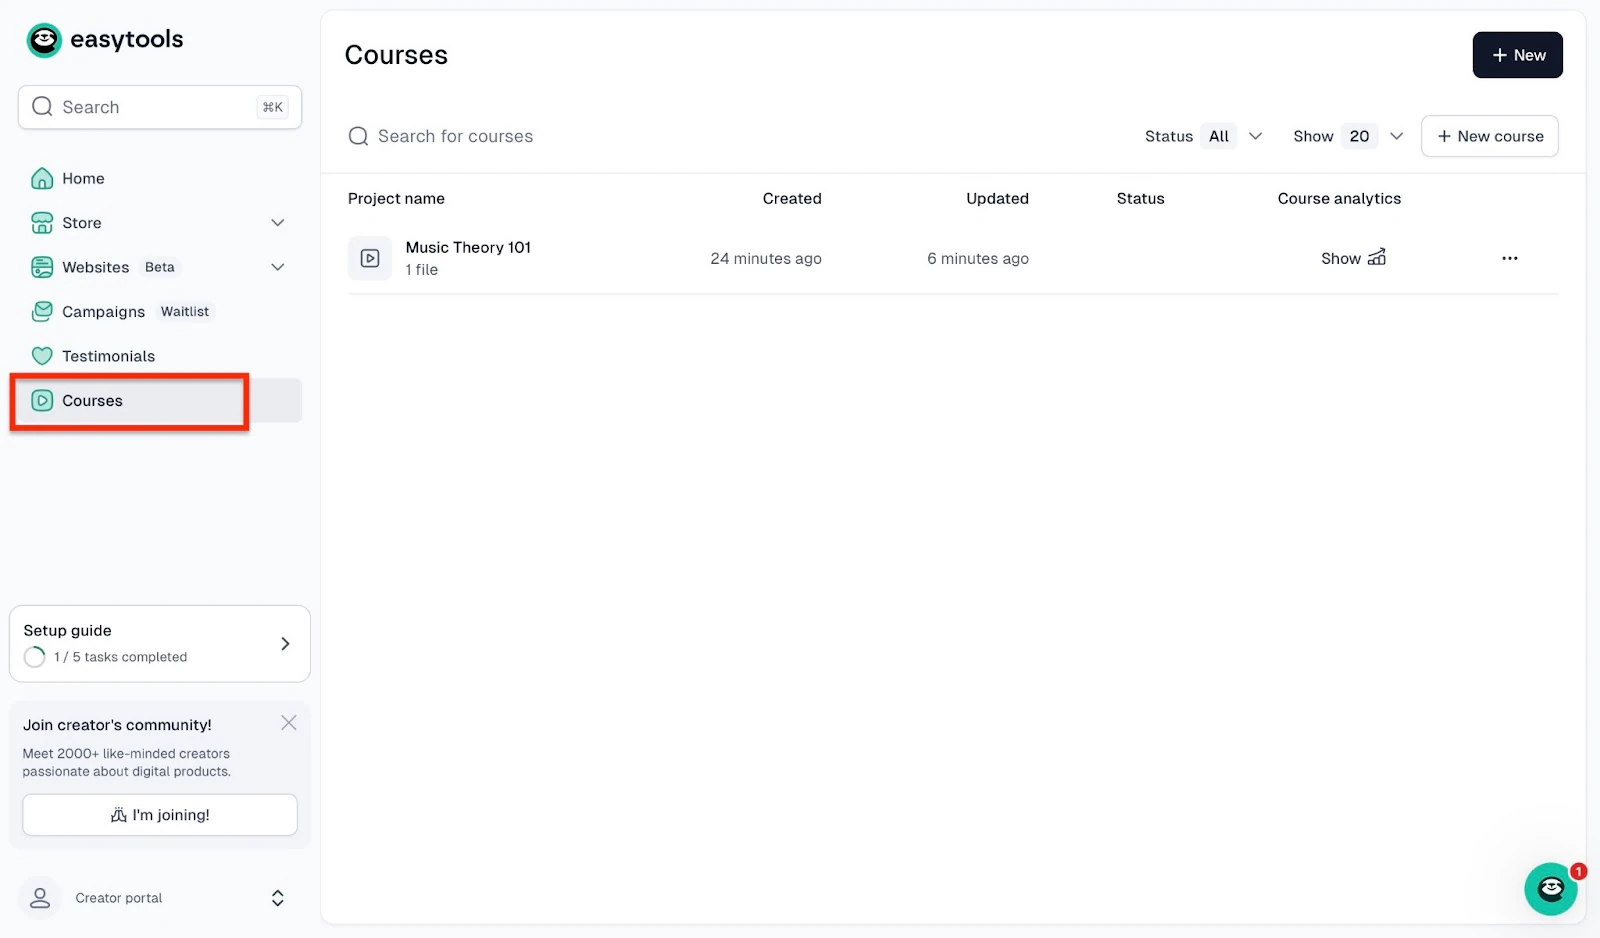
First, sign up on Easytools, and then, from the homepage, click “Courses” in the sidebar. Next, click “+ New Course” in the middle of the window.
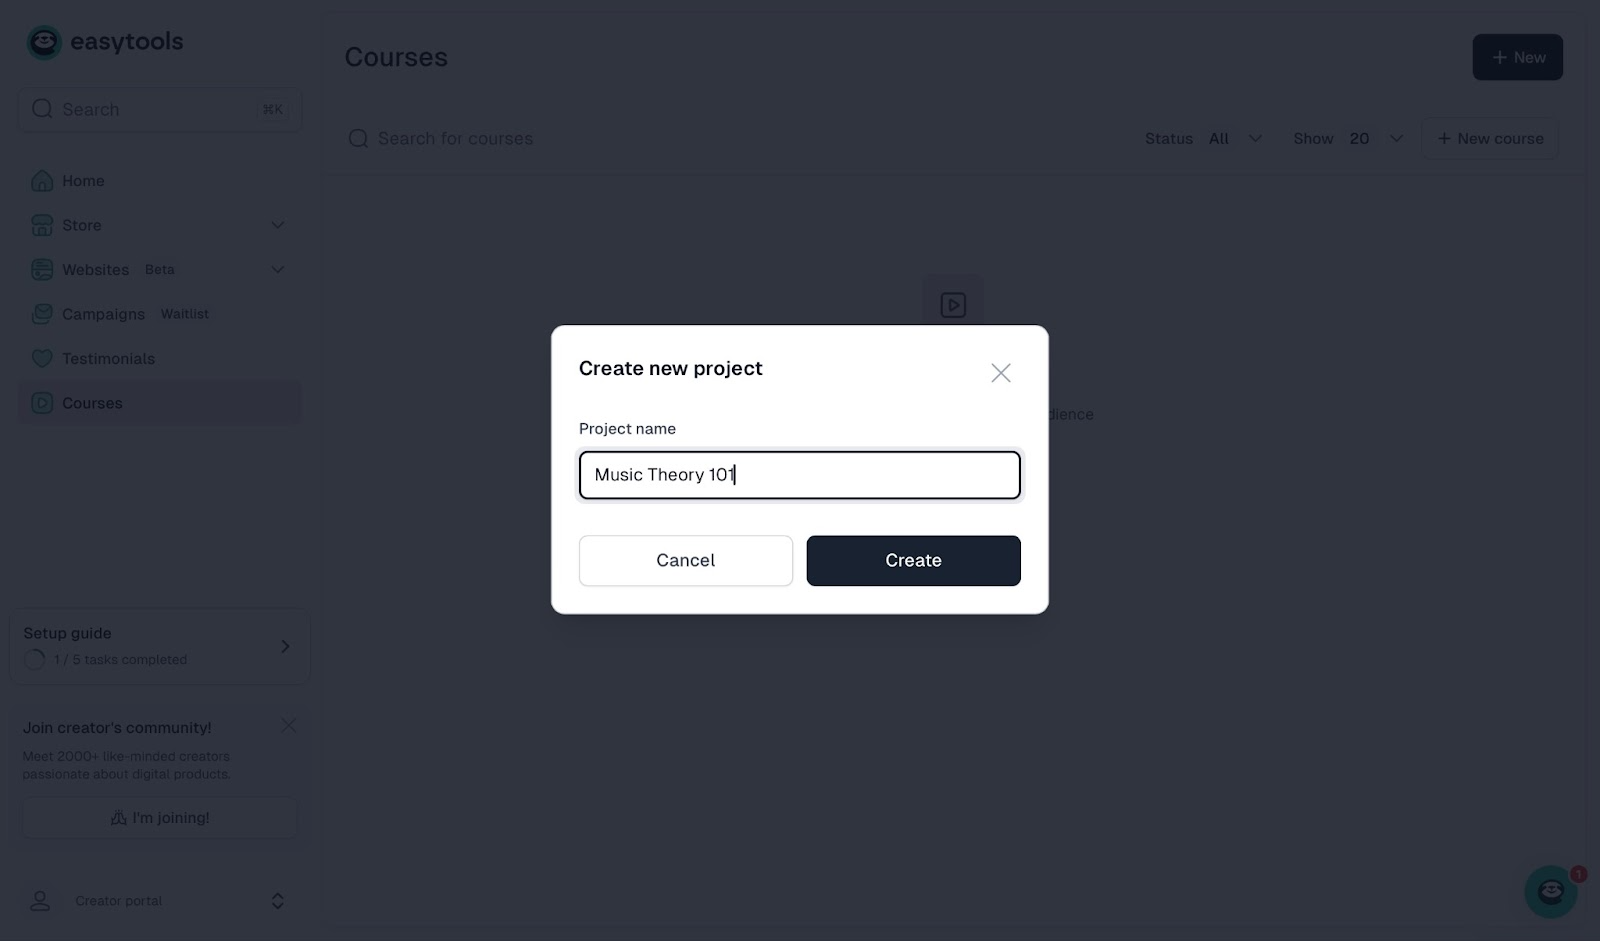
In the pop-up window, type in the project name and click “Create.”
Here you will see a course creation wizard. The first option is to generate the player based on the existing Easytools product (the generator will automatically create a course draft based on your product details).
You can also start without a product and choose one of the course templates or start with a blank course page. I will choose Video template.
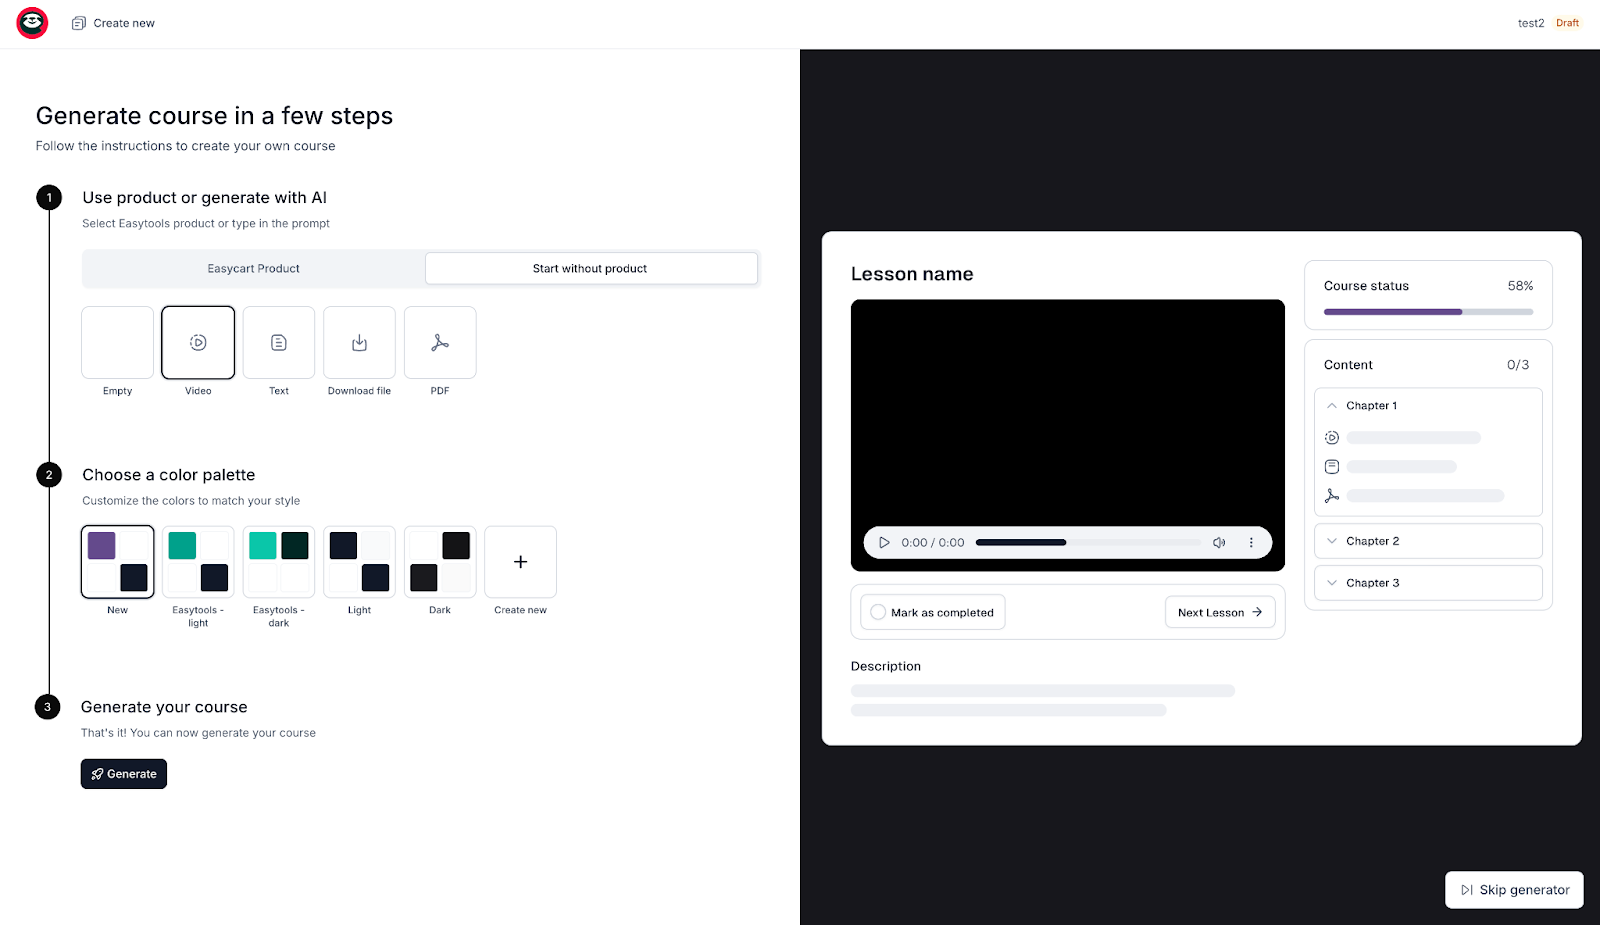
You will then see your player draft and a configurator - from here you can add more lessons in different formats, organize them in modules, add duration and additional files.
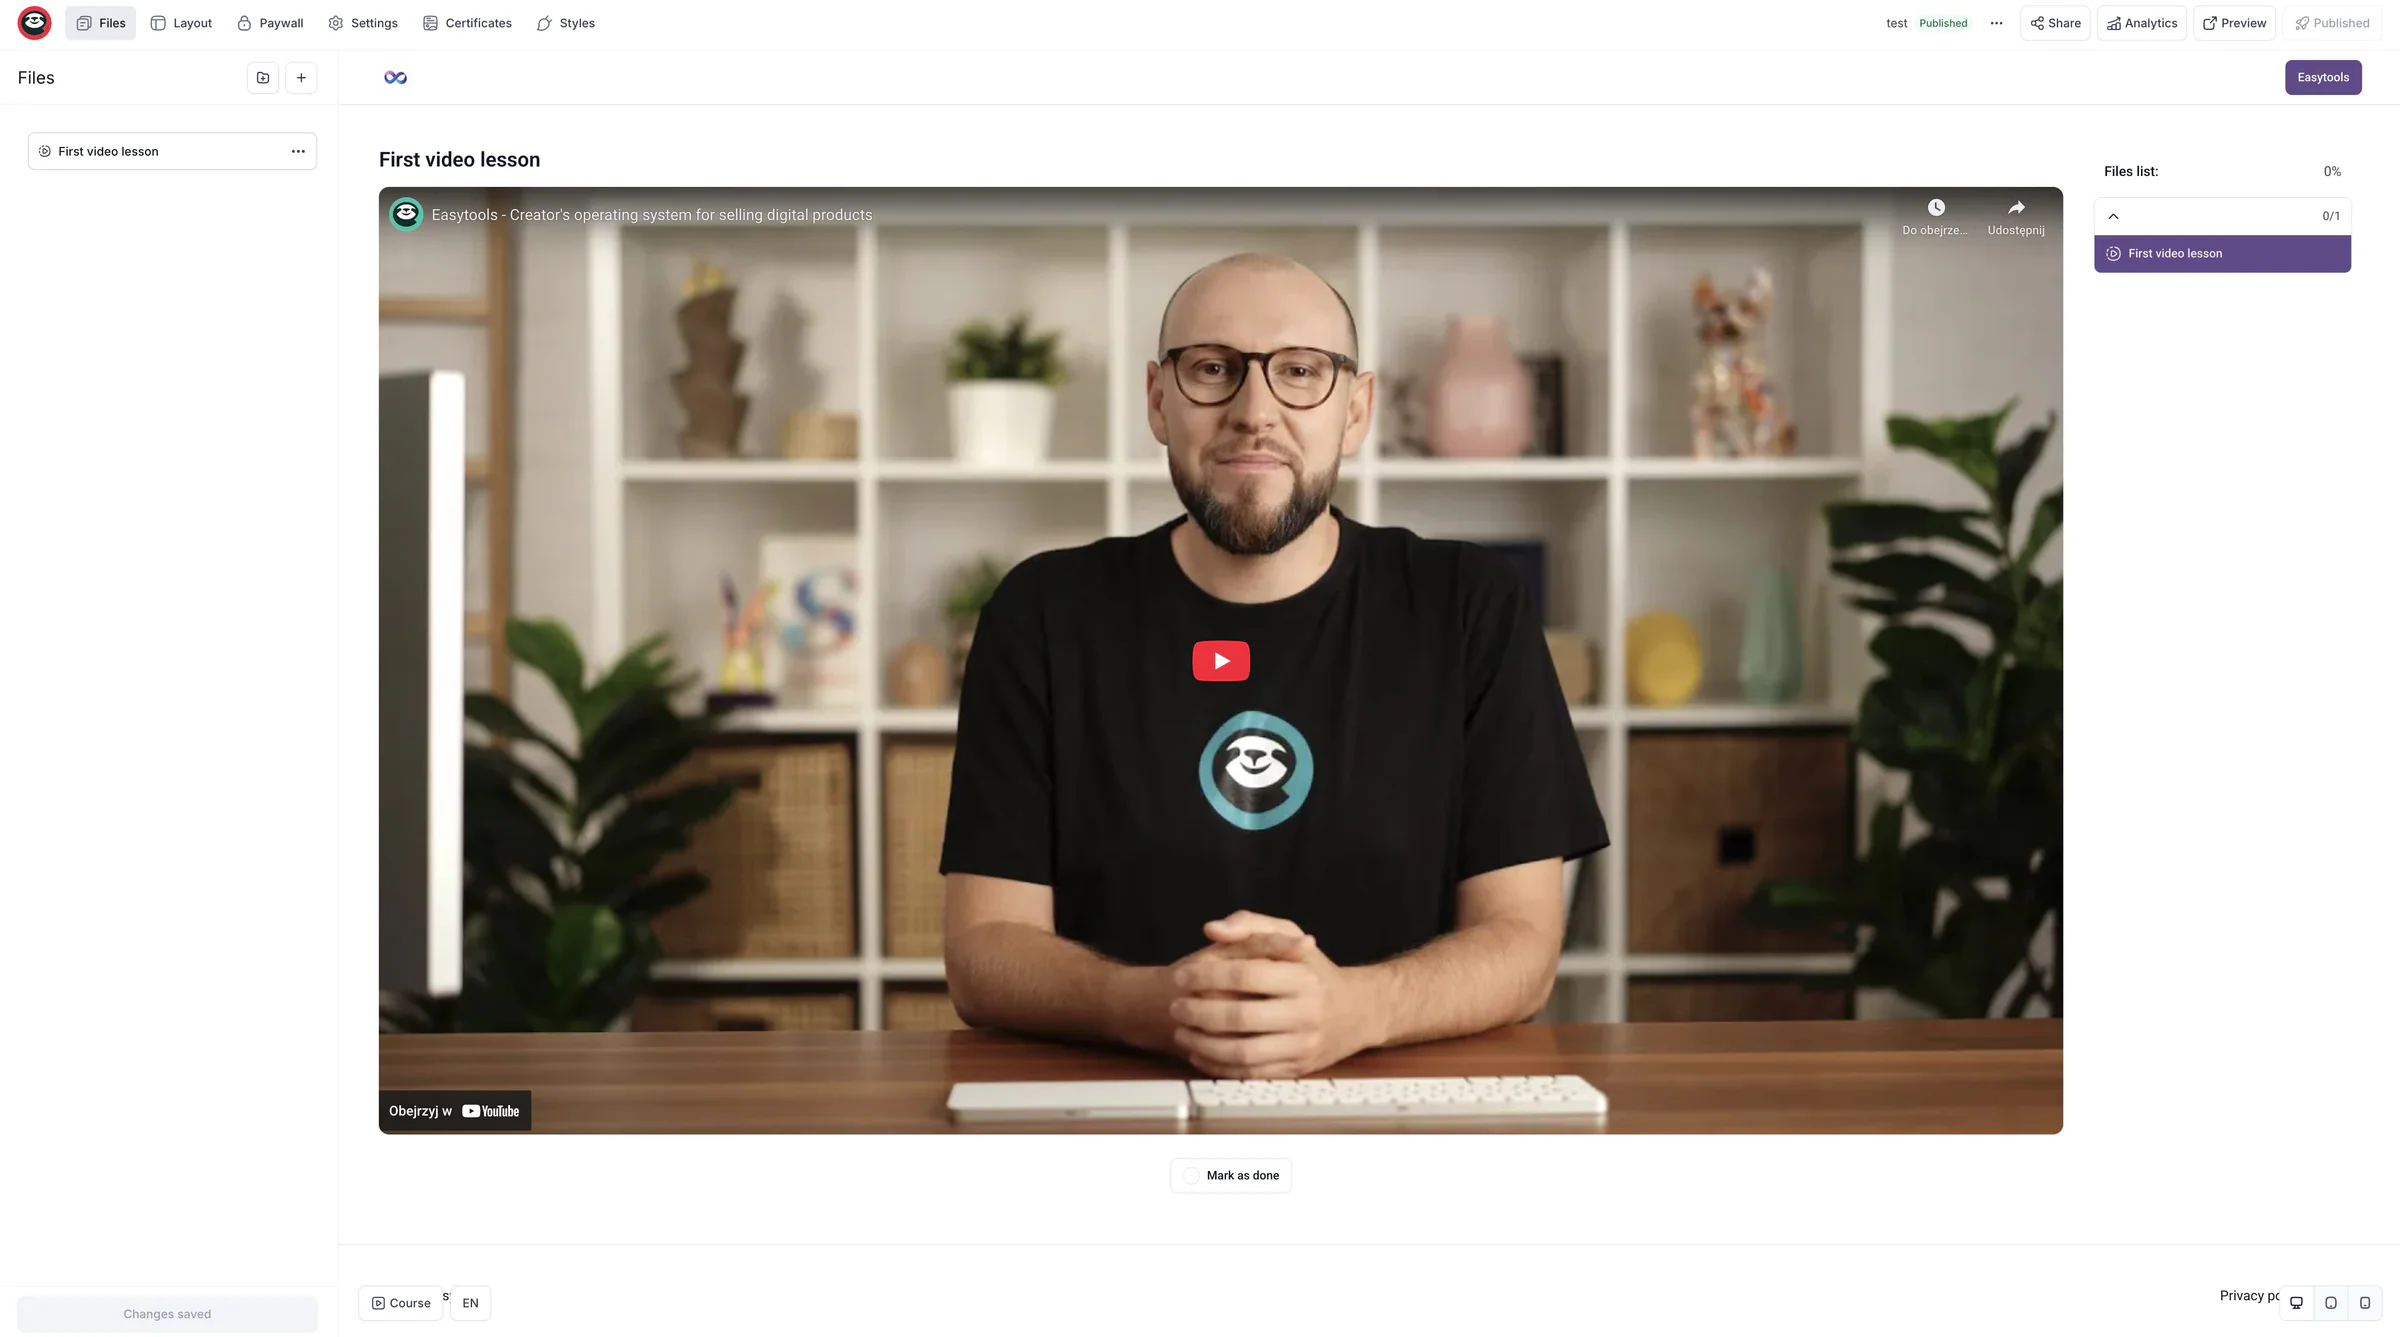
When your course is ready you simply hit publish.
The next step will be securing access to your player and allowing people to buy it.
To do so, go to the Paywall tab and click “+ Add new product”.
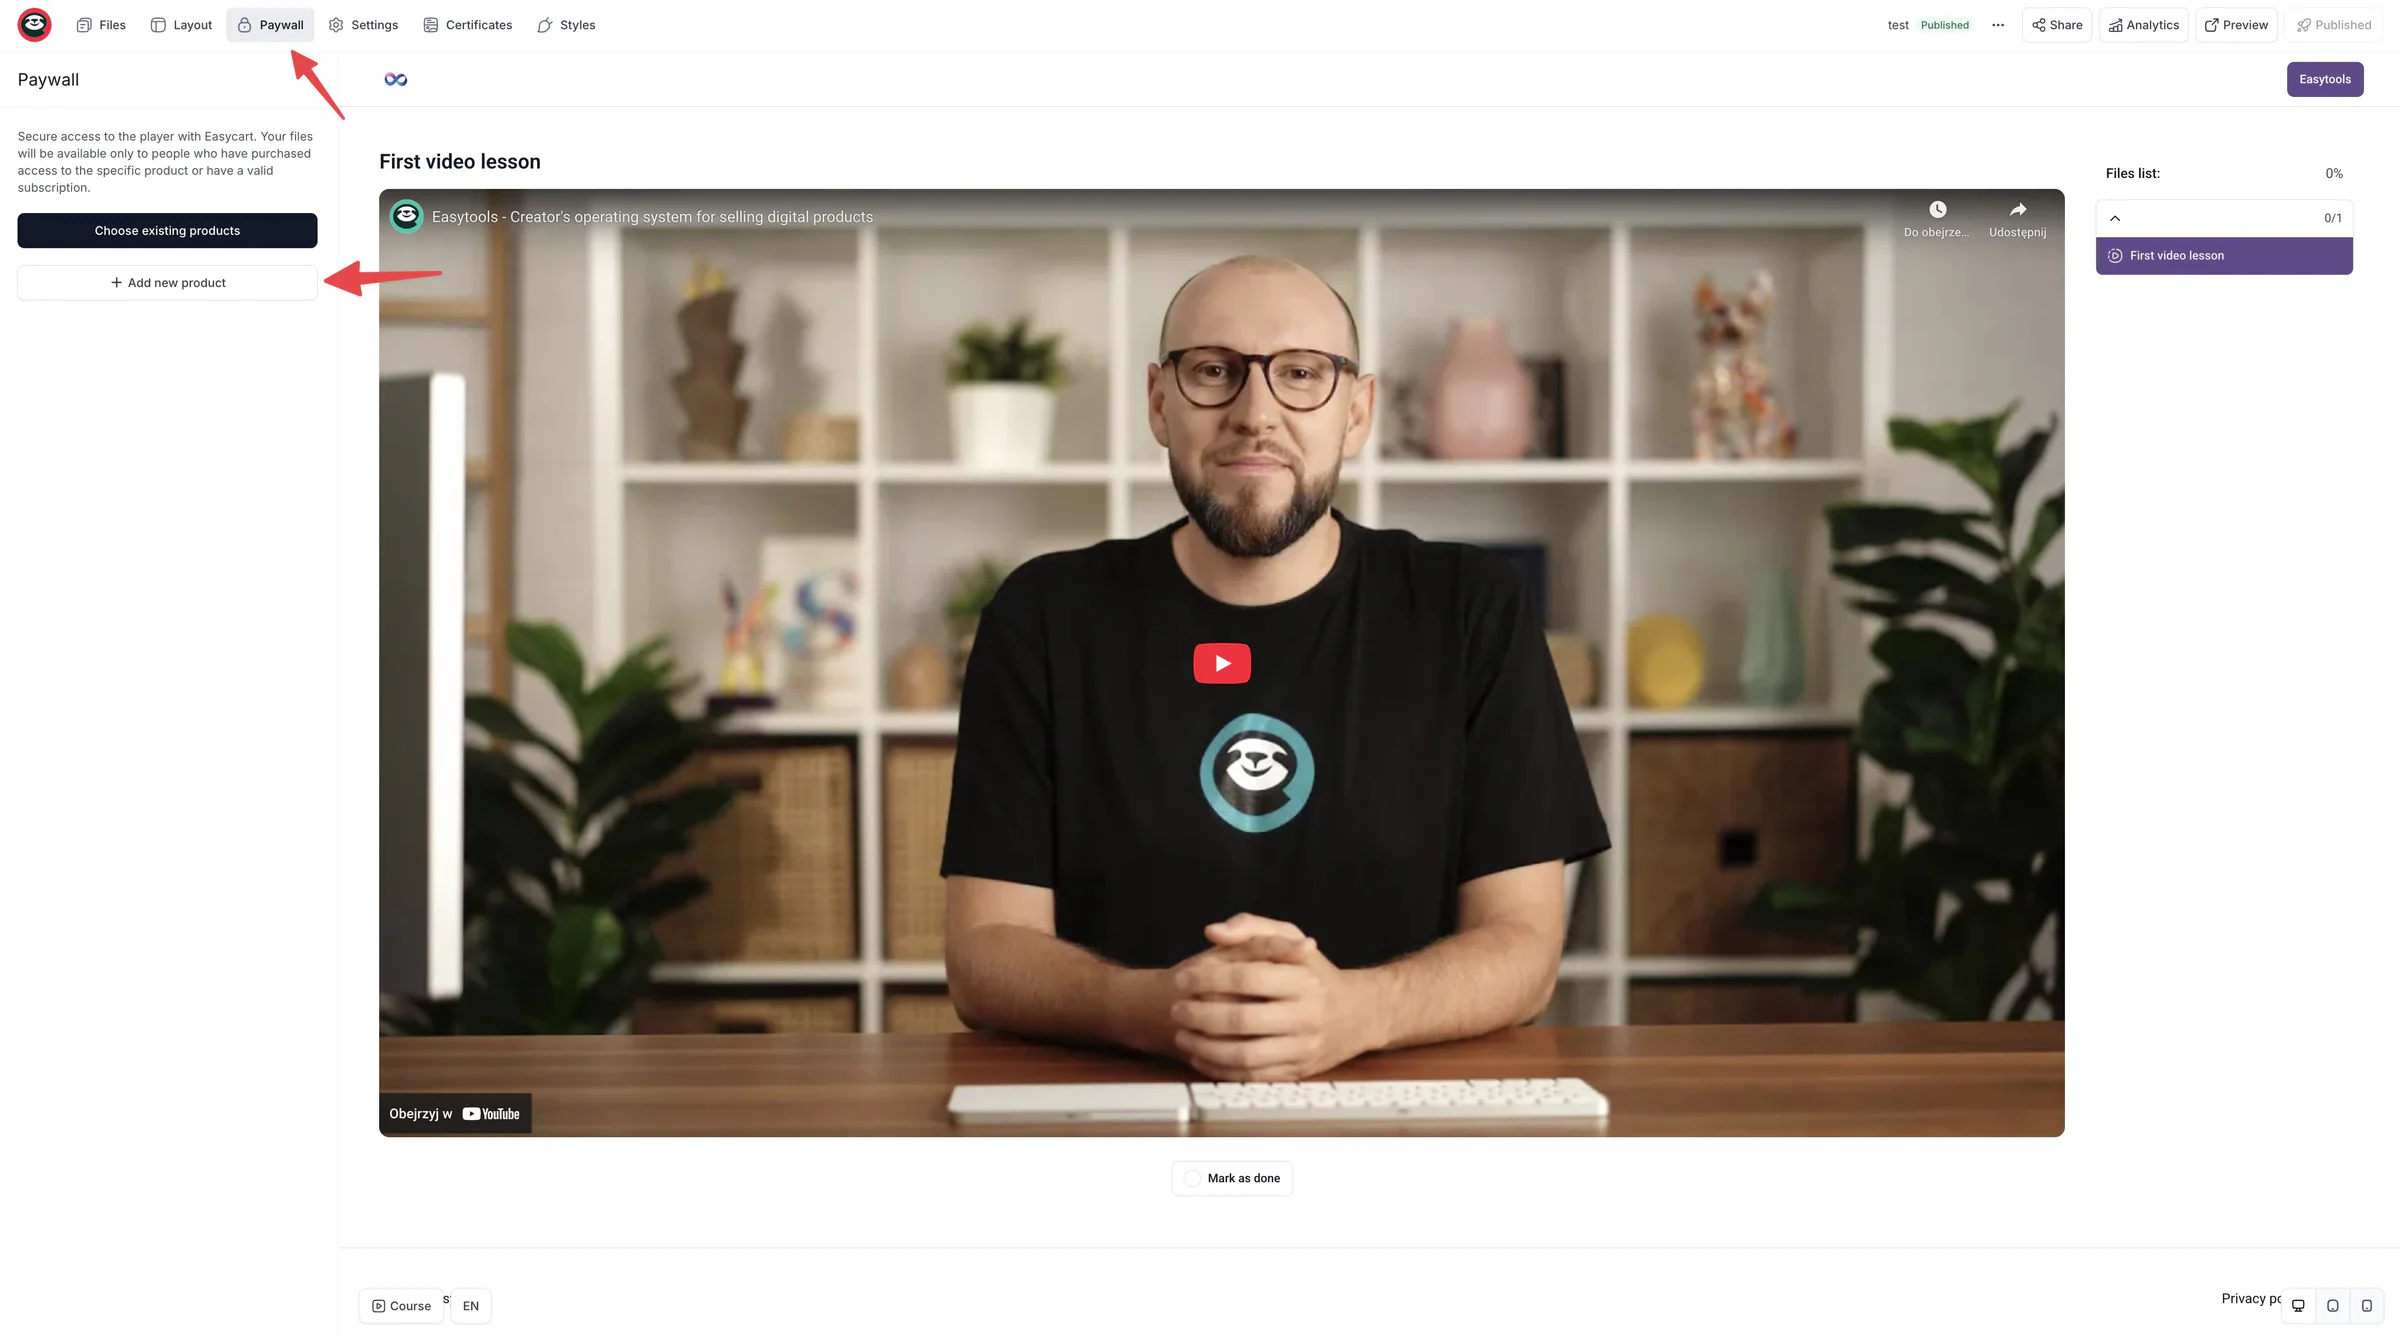
Then in the product configurator add the product name and description in the regions provided.
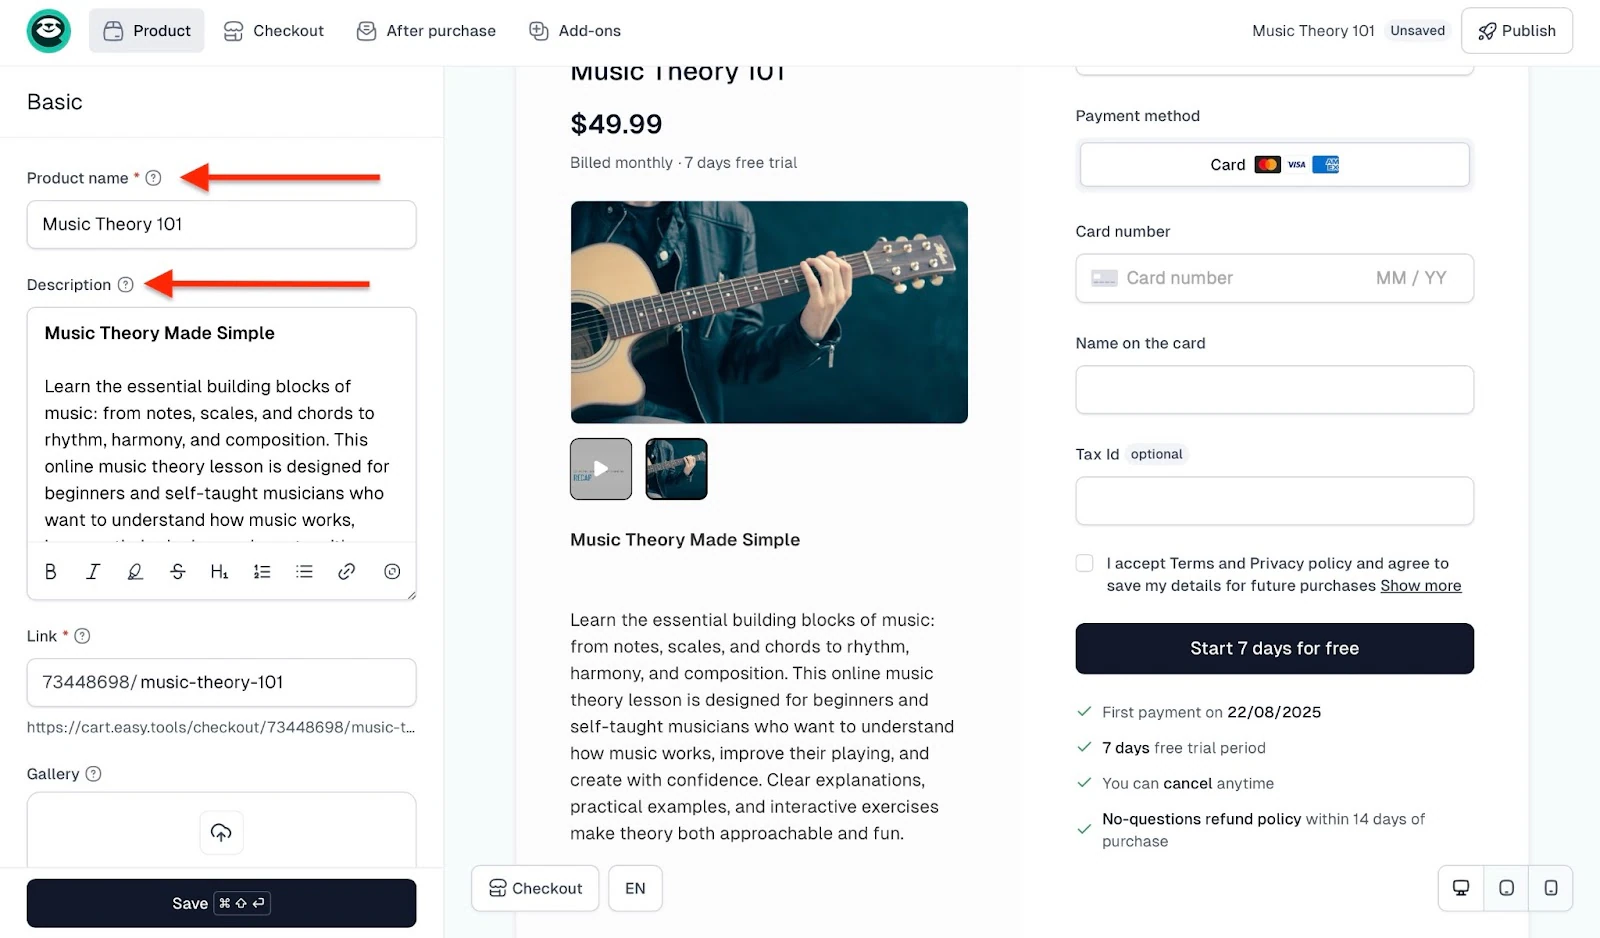
Afterward, add an image file in PNG, JPG, or GIF format. You can also upload an MP4-format video with a maximum size of 50 megabytes.
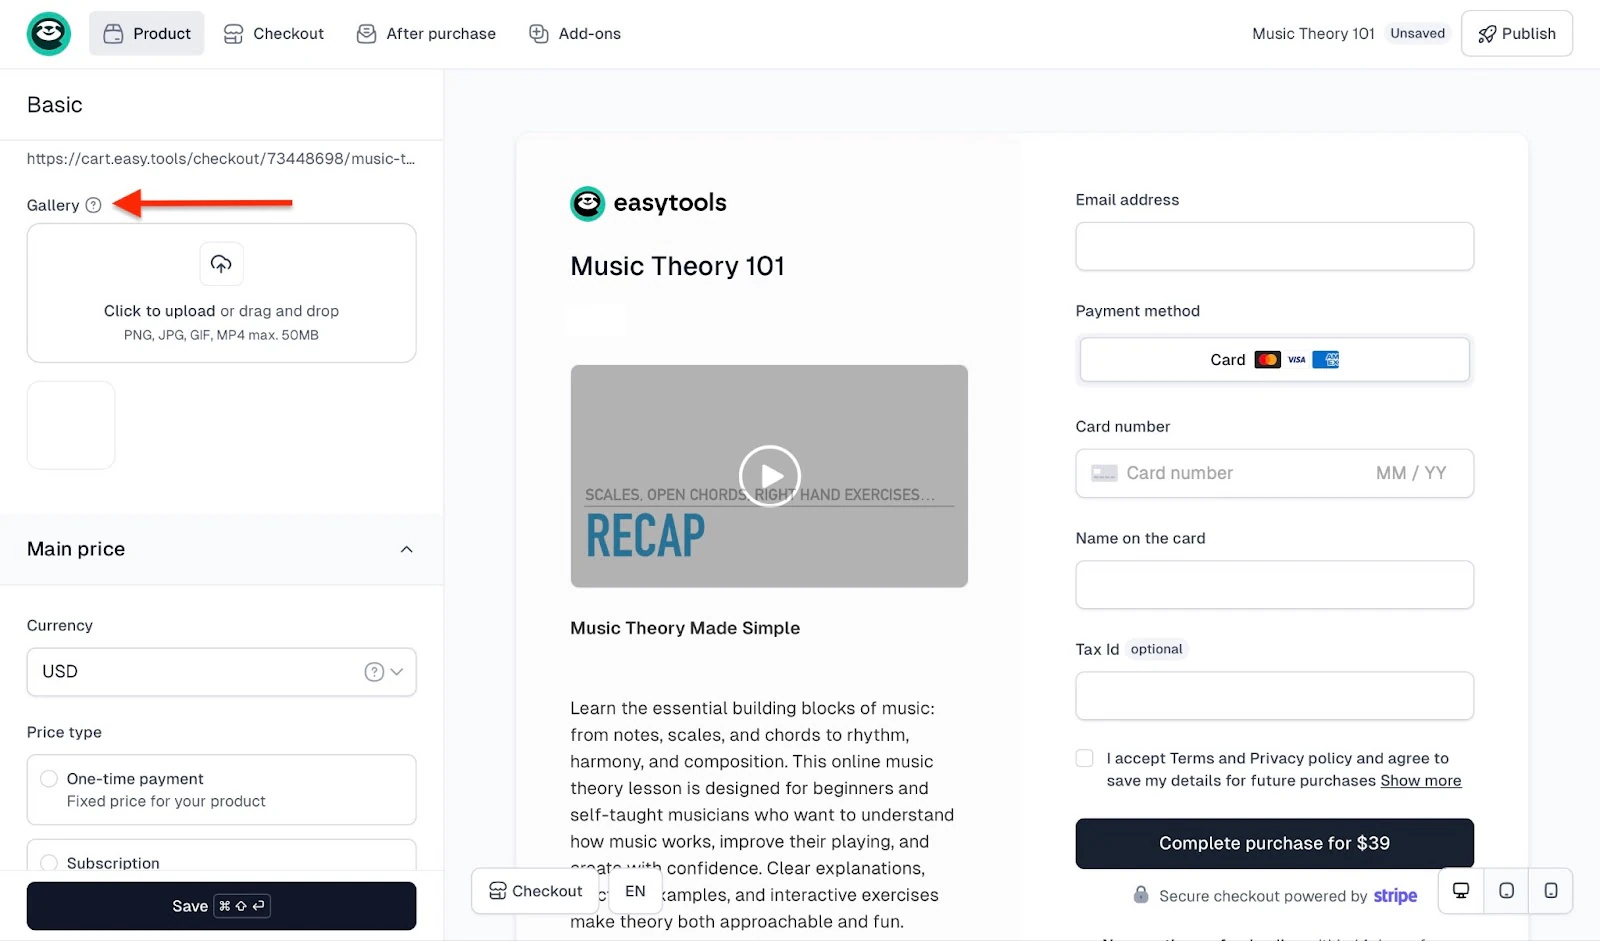
Next, choose the price type, add the price, and select the general tax category.
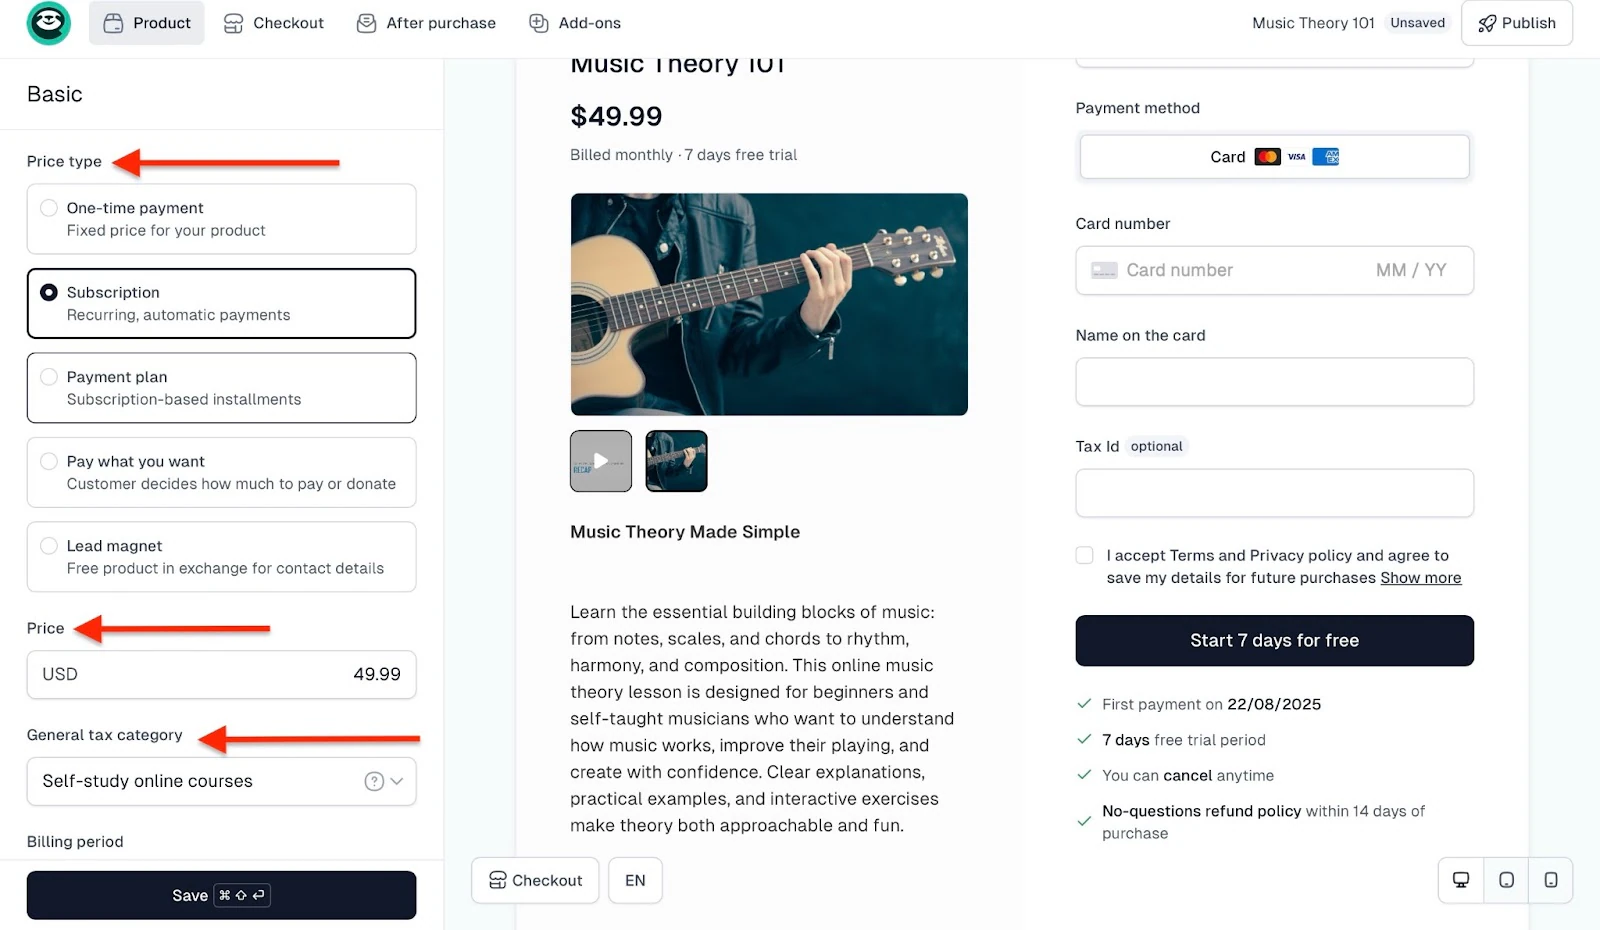
After that, scroll further down and click on the upload icon to share more product files.
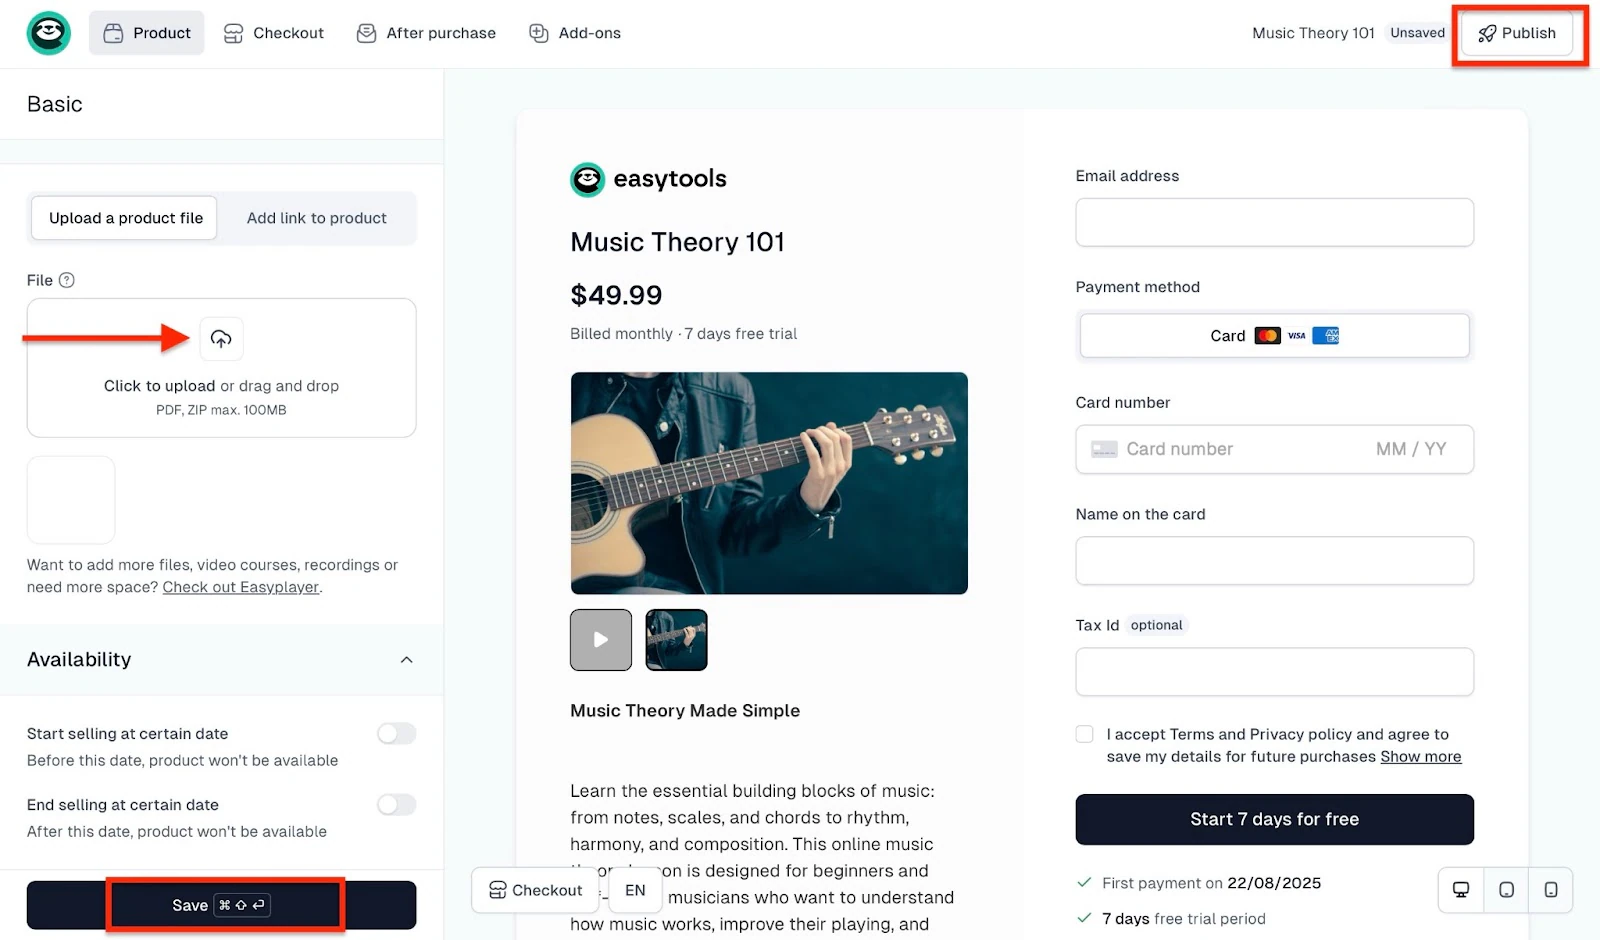
Finally, click “Save” and “Publish” the checkout.
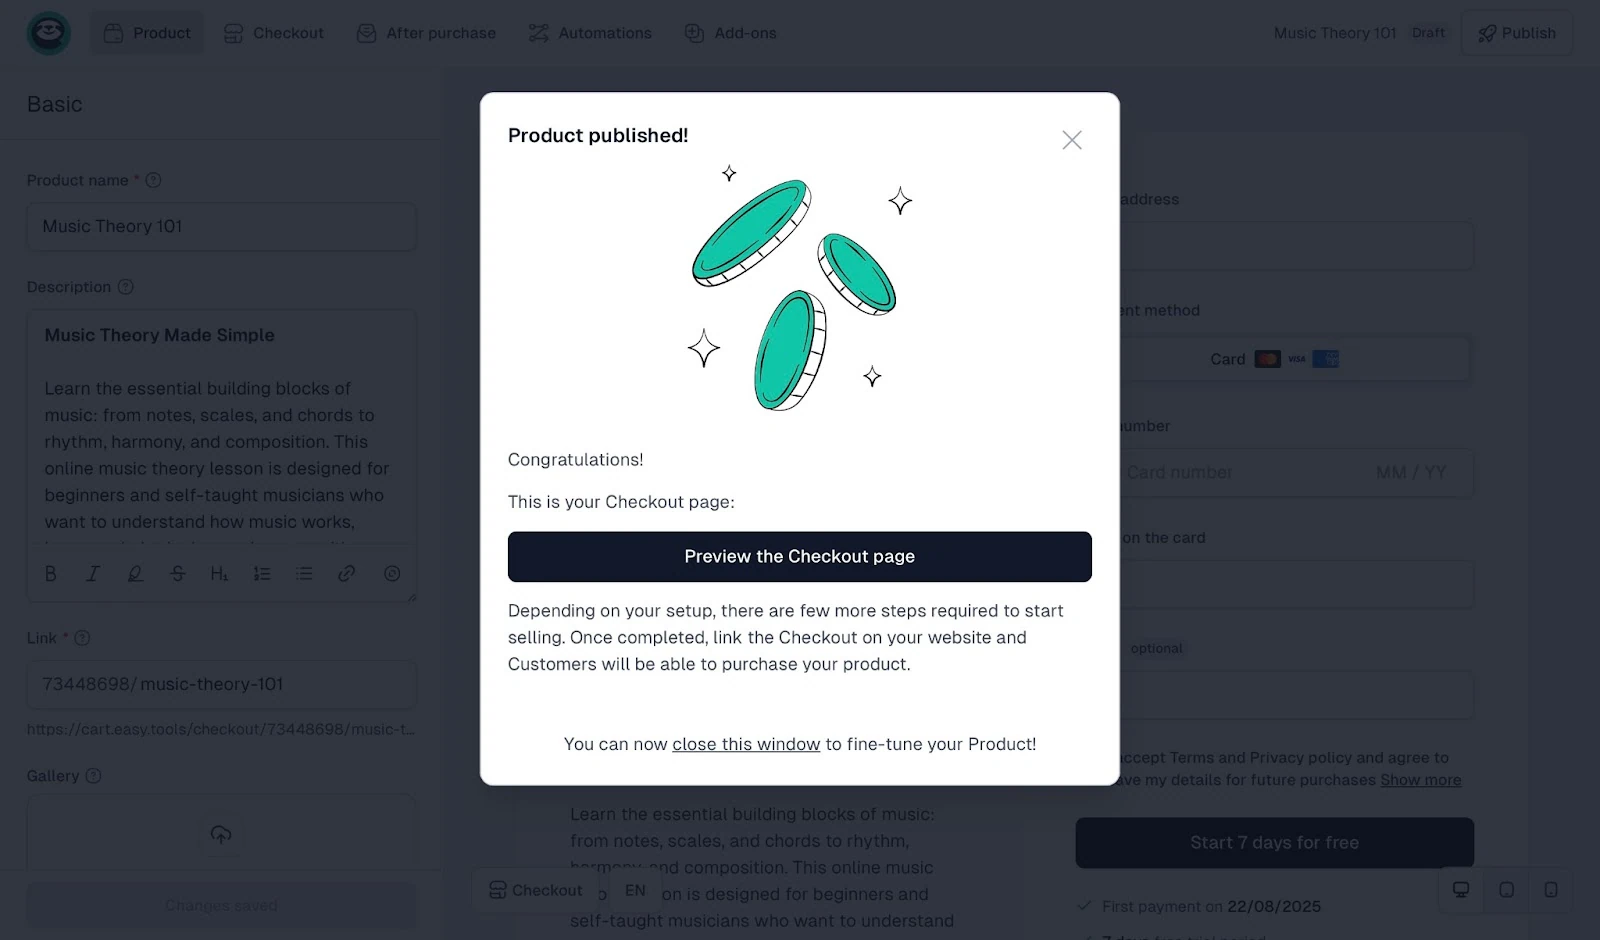
Your course is now connected to your cart—only verified buyers will get access.
The new course you just created will be listed in the Courses window.
Easytools is, without a doubt, one of the best platforms for digital products.
Key features
1. Certificates
In my experience, instructors and businesses mostly add quizzes at the end of their courses and reward students who meet the mark with certificates.
The purpose of the course is to incentivize them to continue learning.
Easytools allows you to automatically issue certificates for your students. All you need to do is activating the certificates feature in your course panel:
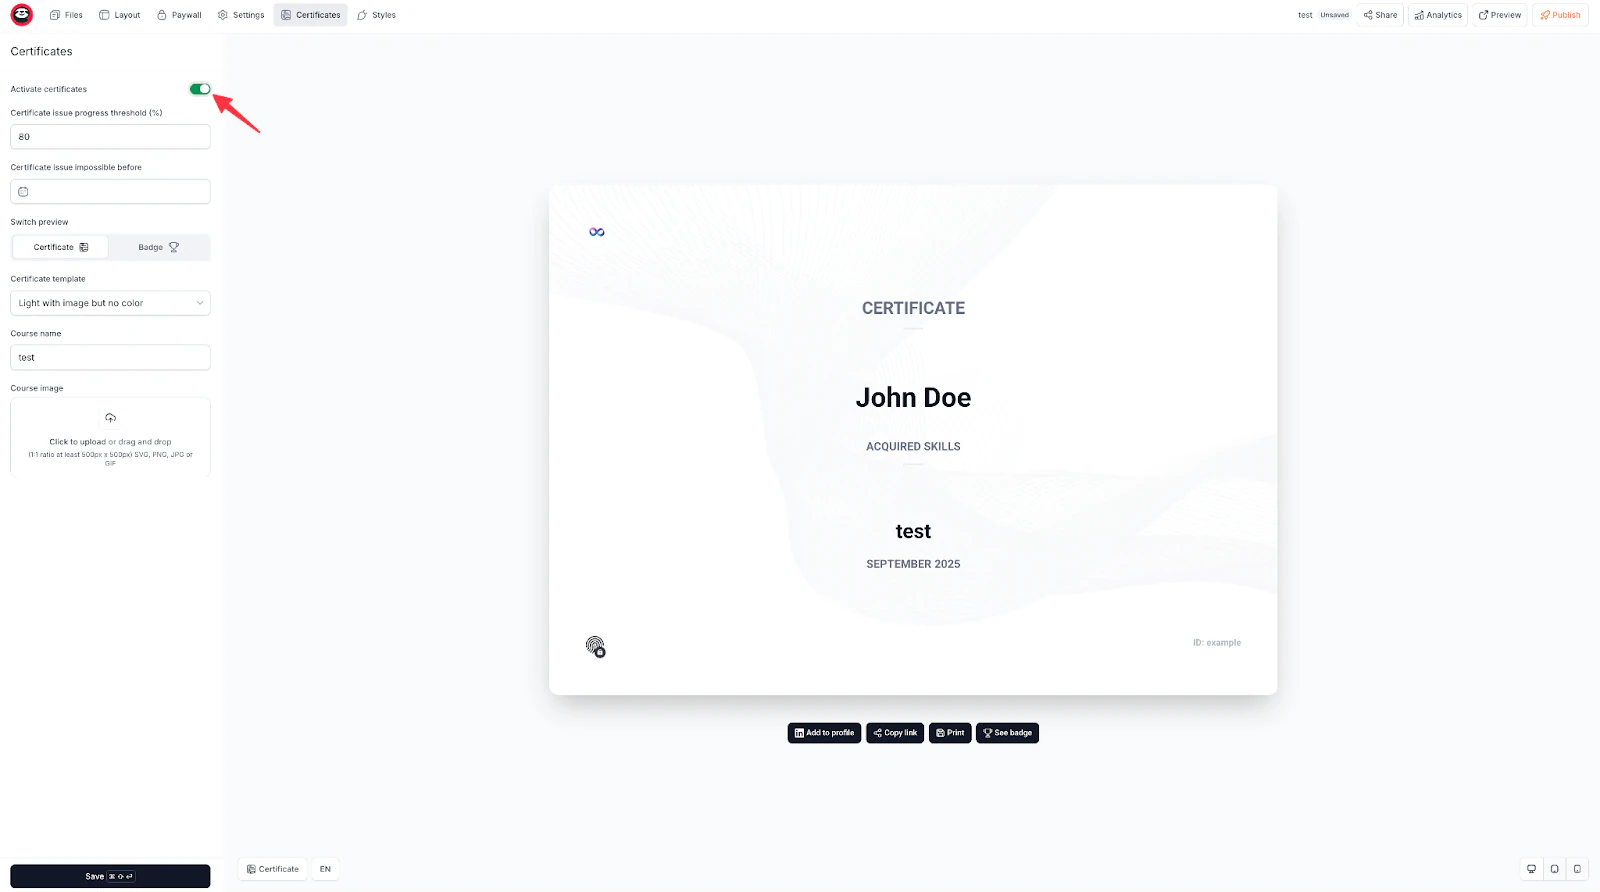
You can then set a progress threshold after which the certificate will be released, choose the template and upload your image.
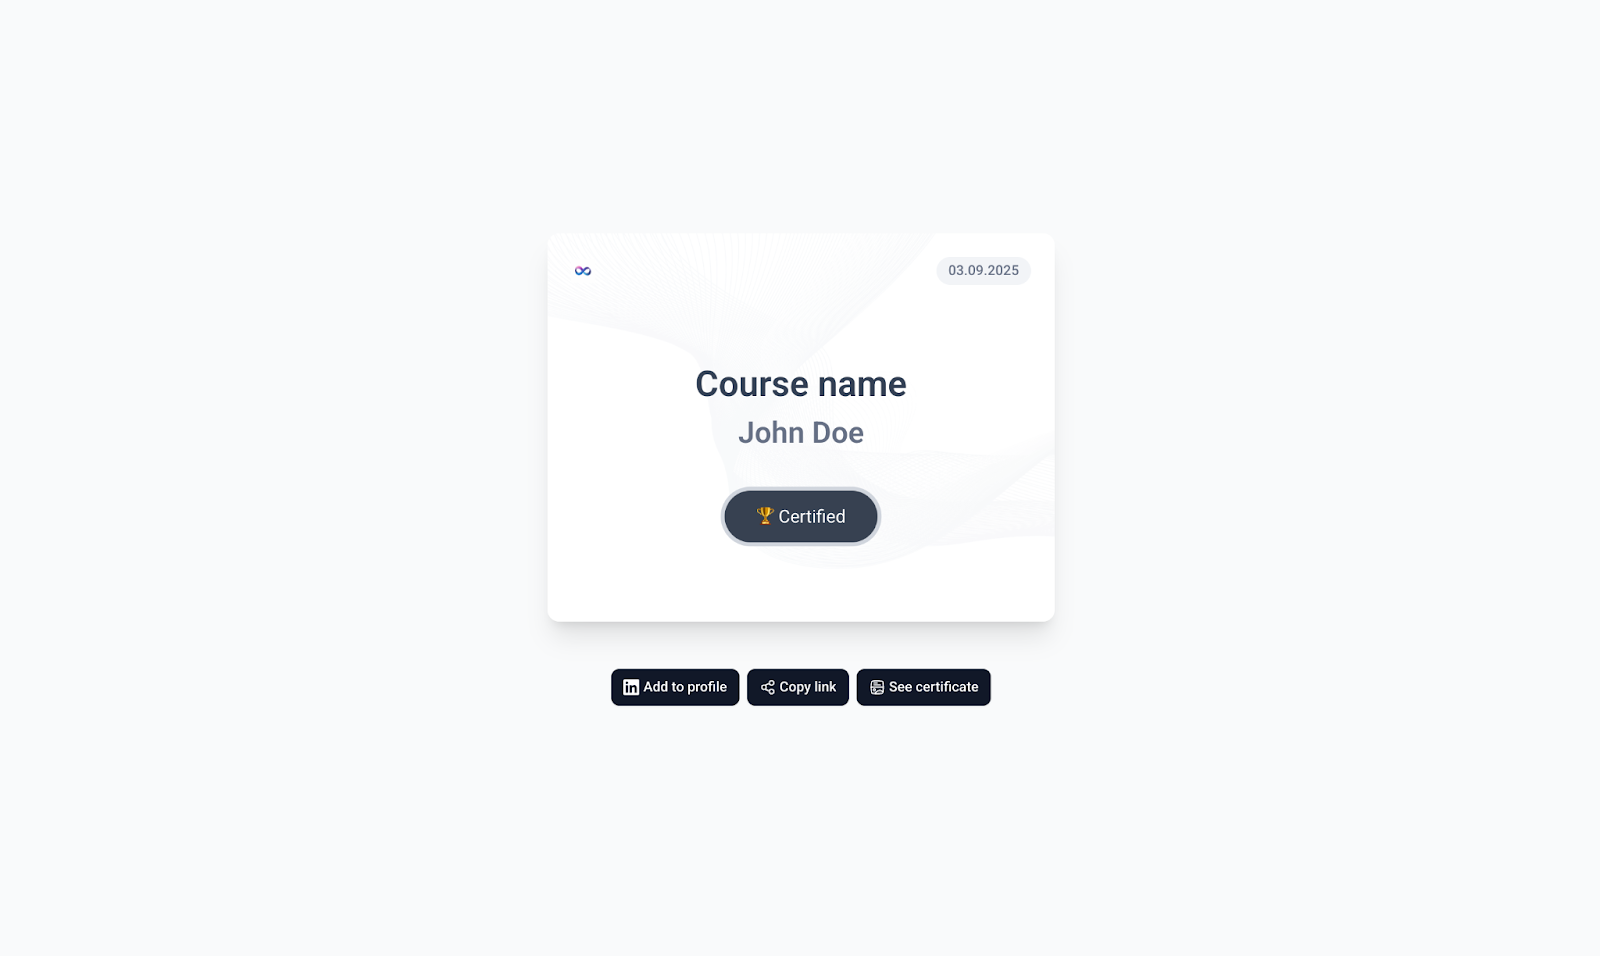
Once the certificate is released, your students will be able to download it in PDF, or as a badge, that they can later share on their social media.
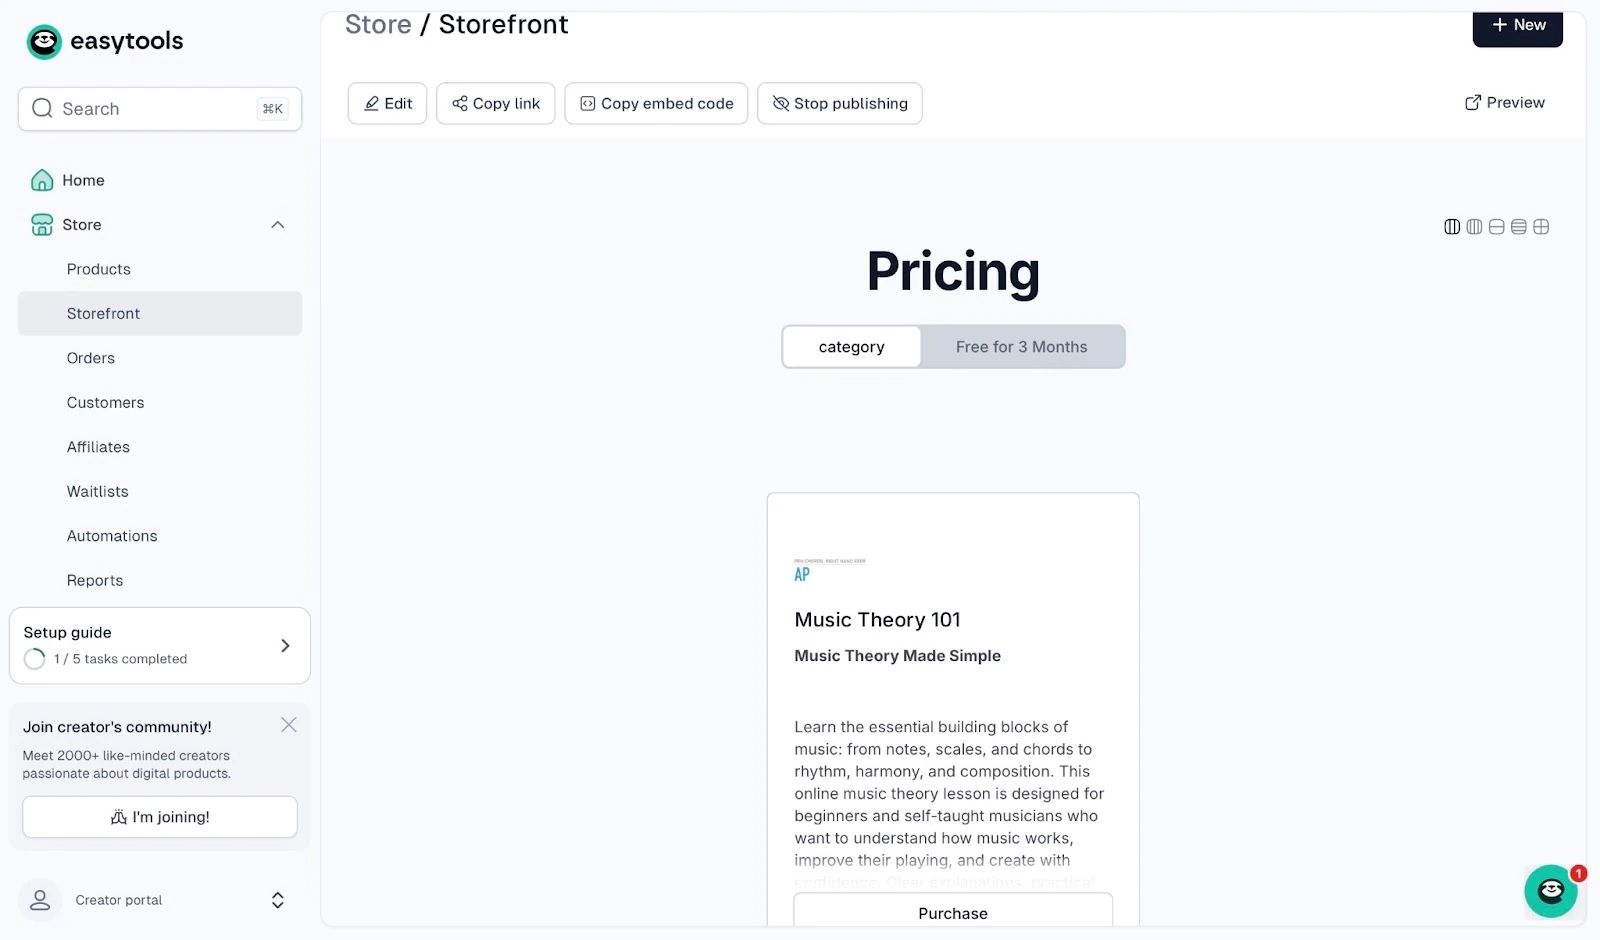
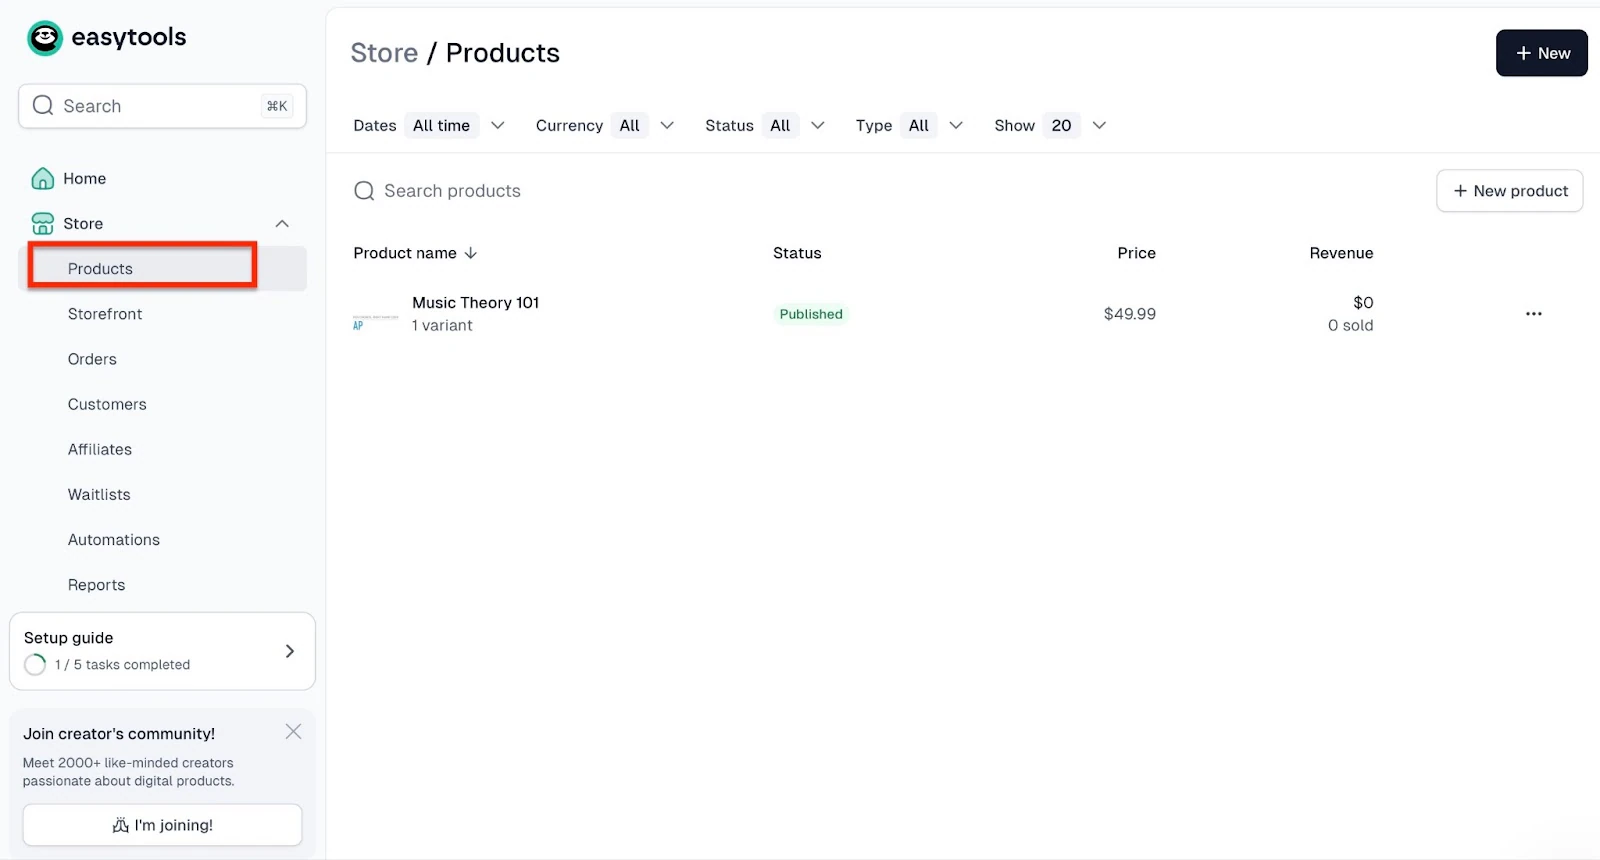
2. Storefront
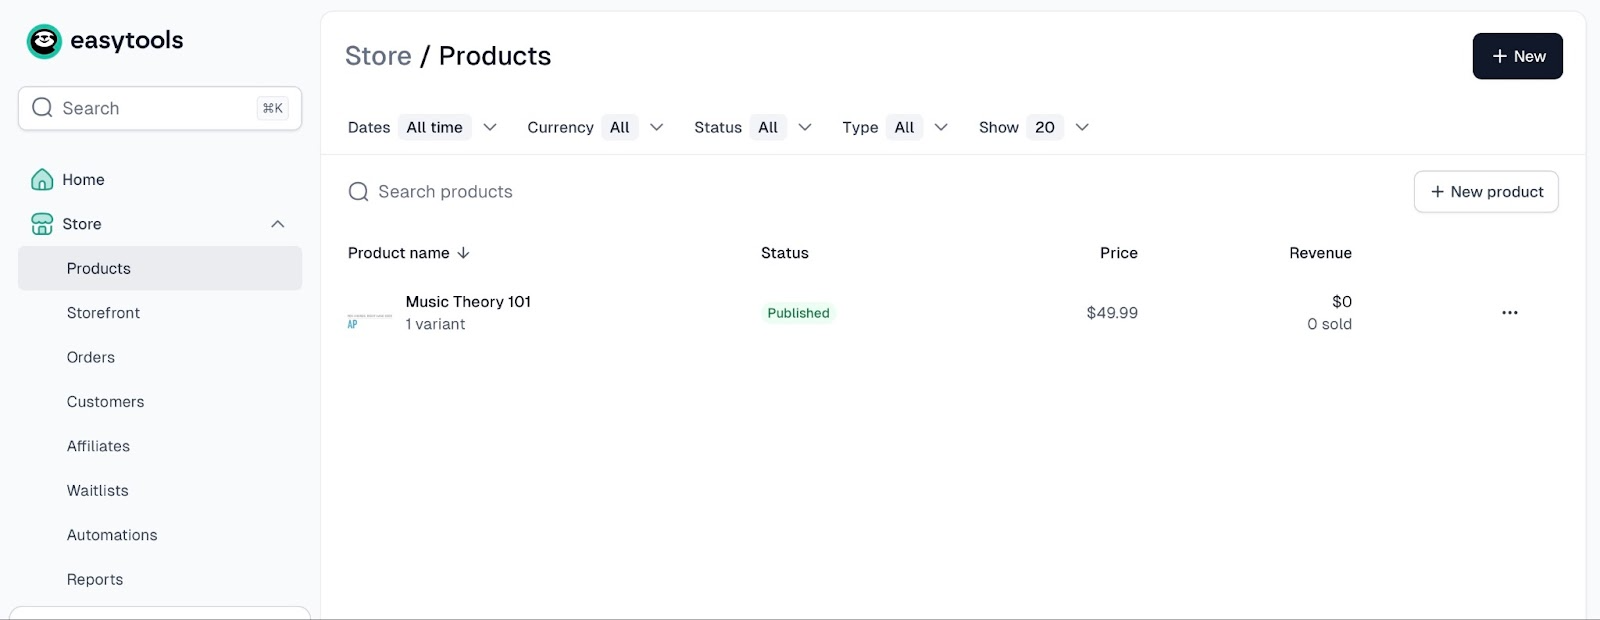
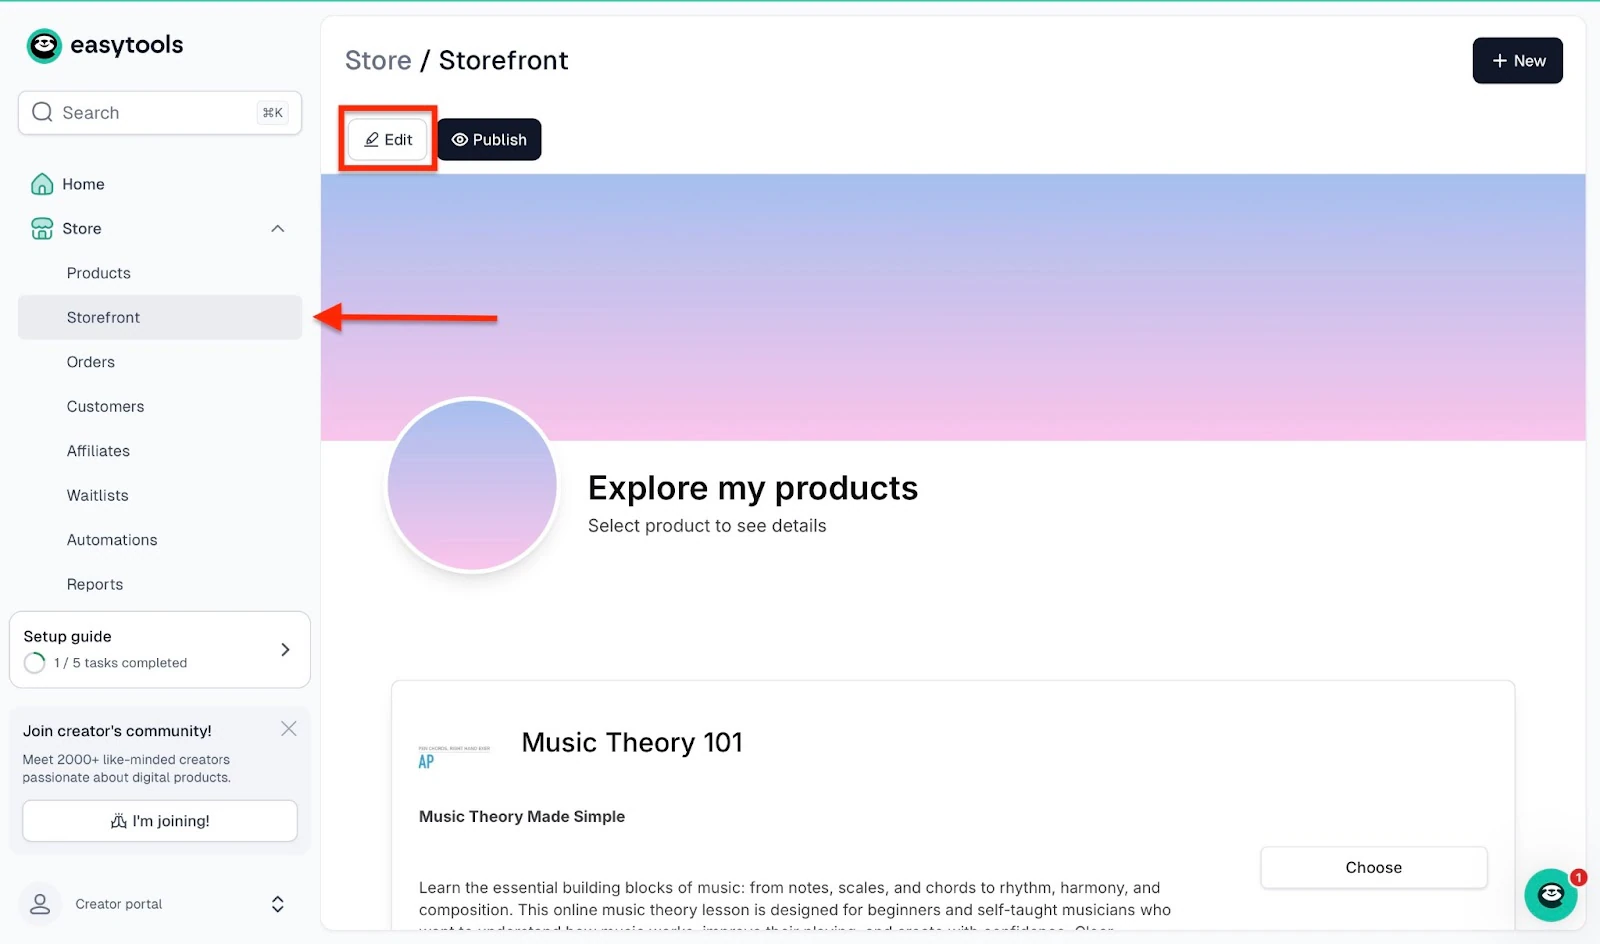
Easytools’ storefront feature displays your courses, ebooks, arts, books, and other digital products. Easytools automatically creates the storefront when you add a product via Easycart.
To edit a storefront, click “Store” and then select “Storefront.” Next, click “Edit”.
On the generator page, select the options that fit your preferences and click “Generate.”
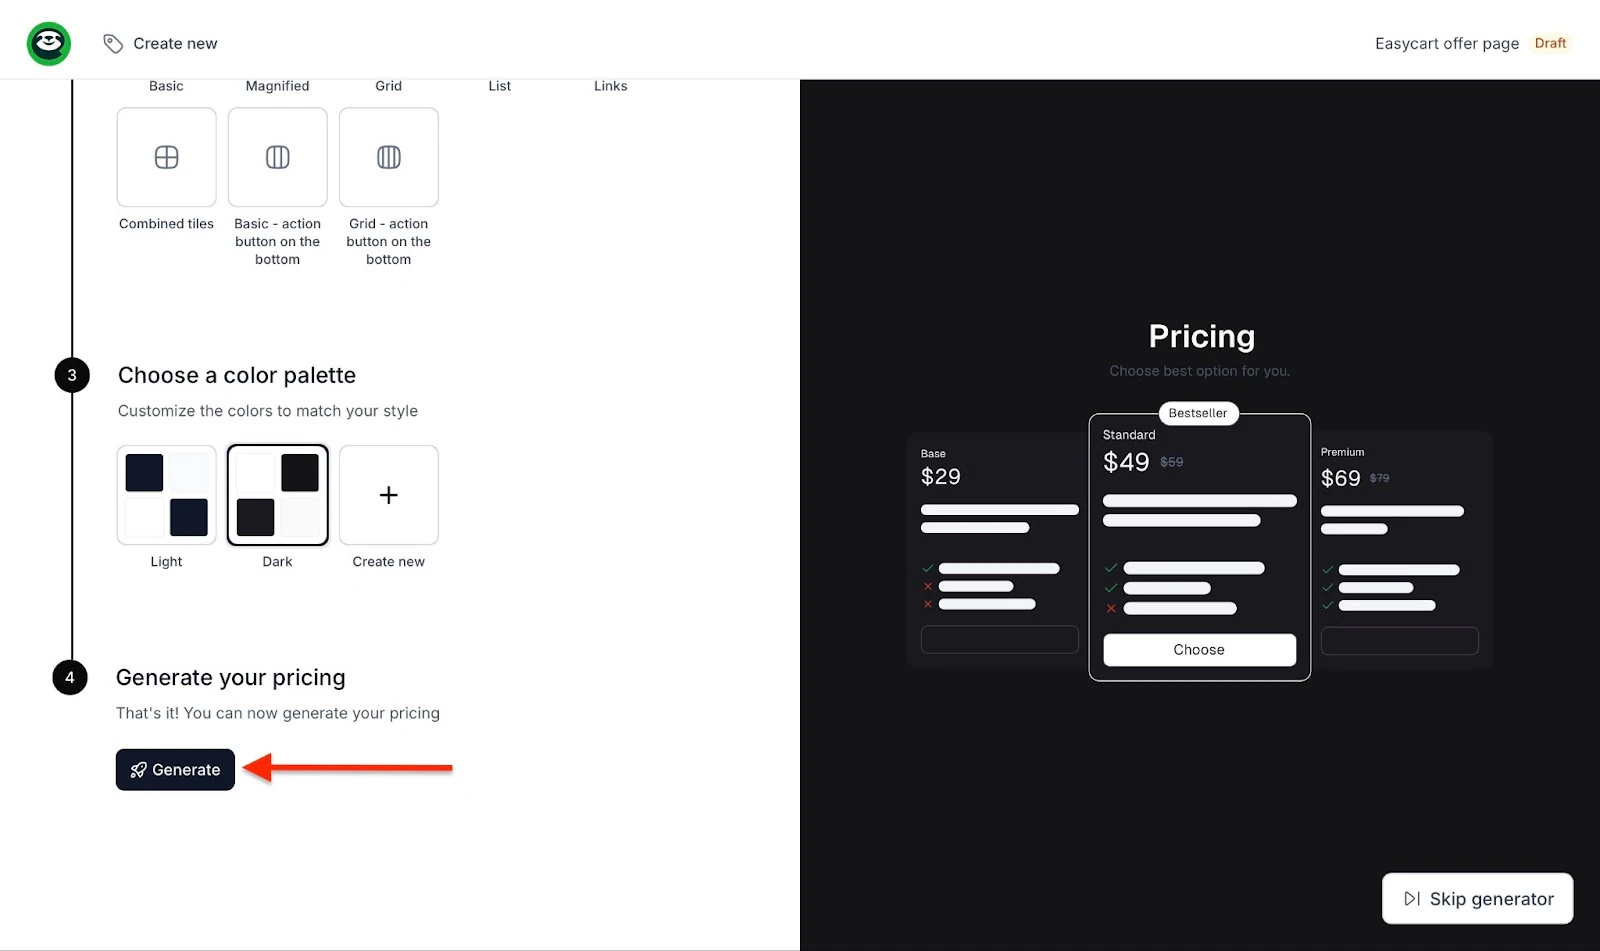
After the AI has generated the offer page, click on the tabs at the top of the window to add price variants, customize the layout and header, and change colors and fonts. Next, click “Publish.”

The edited page will display in the storefront window.
3. Affiliates
Not only is the affiliate feature easy to use, but it also helps you get partners who sell your products and share profits with you.
To set up and affiliate, click “Store” in the sidebar and select “Affiliates.”
Next, click “+ New affiliate.”
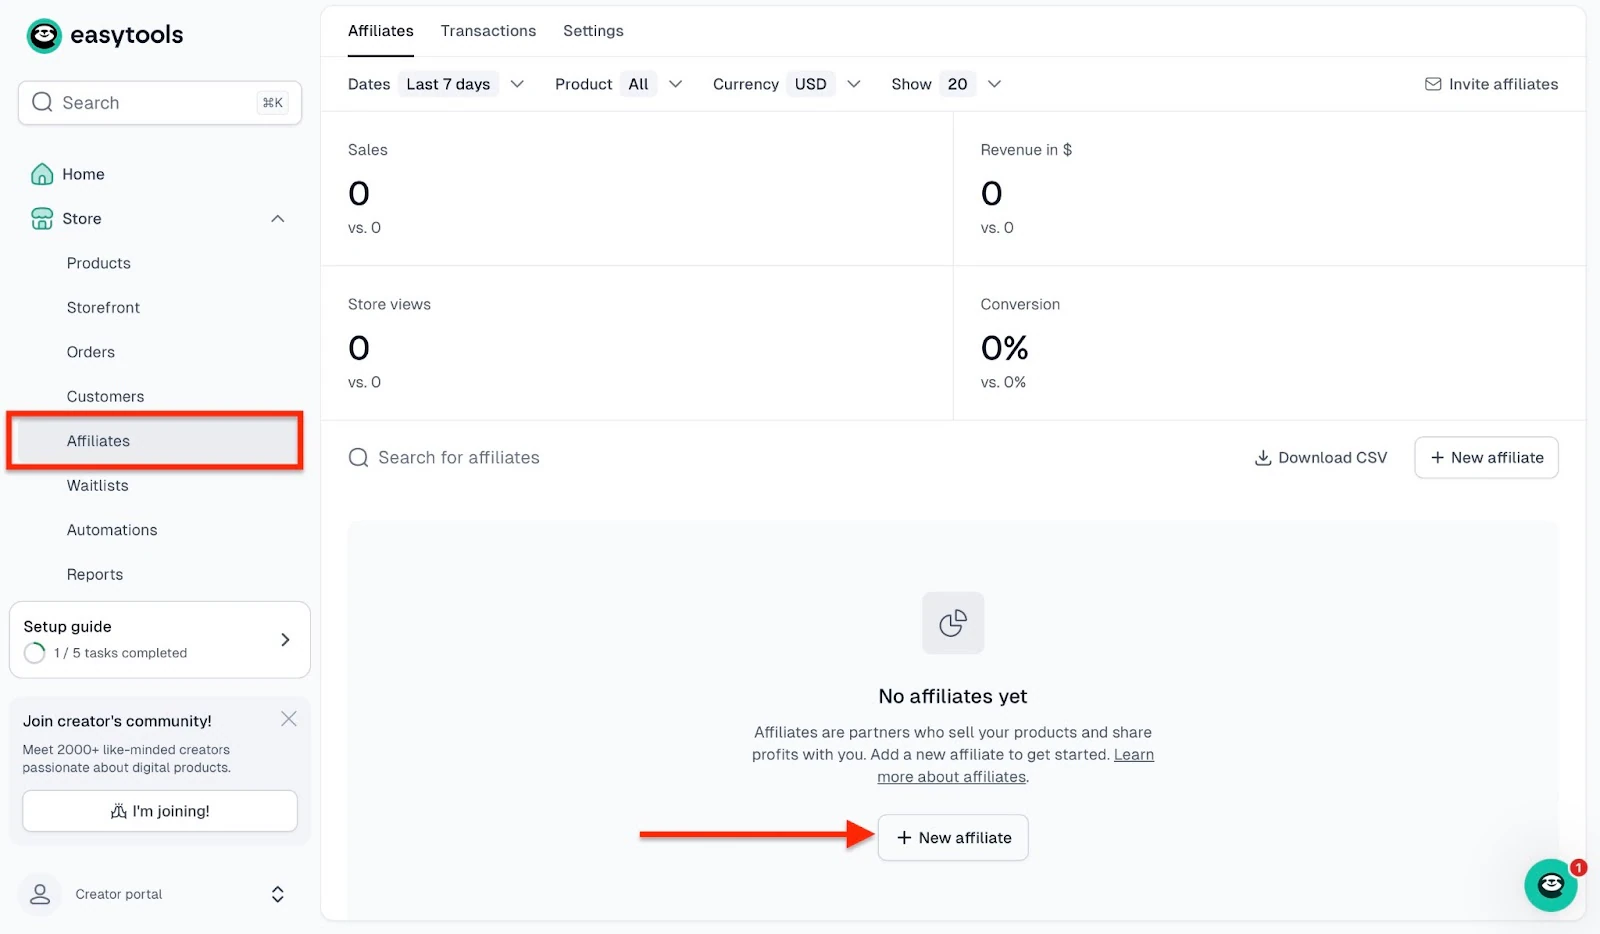
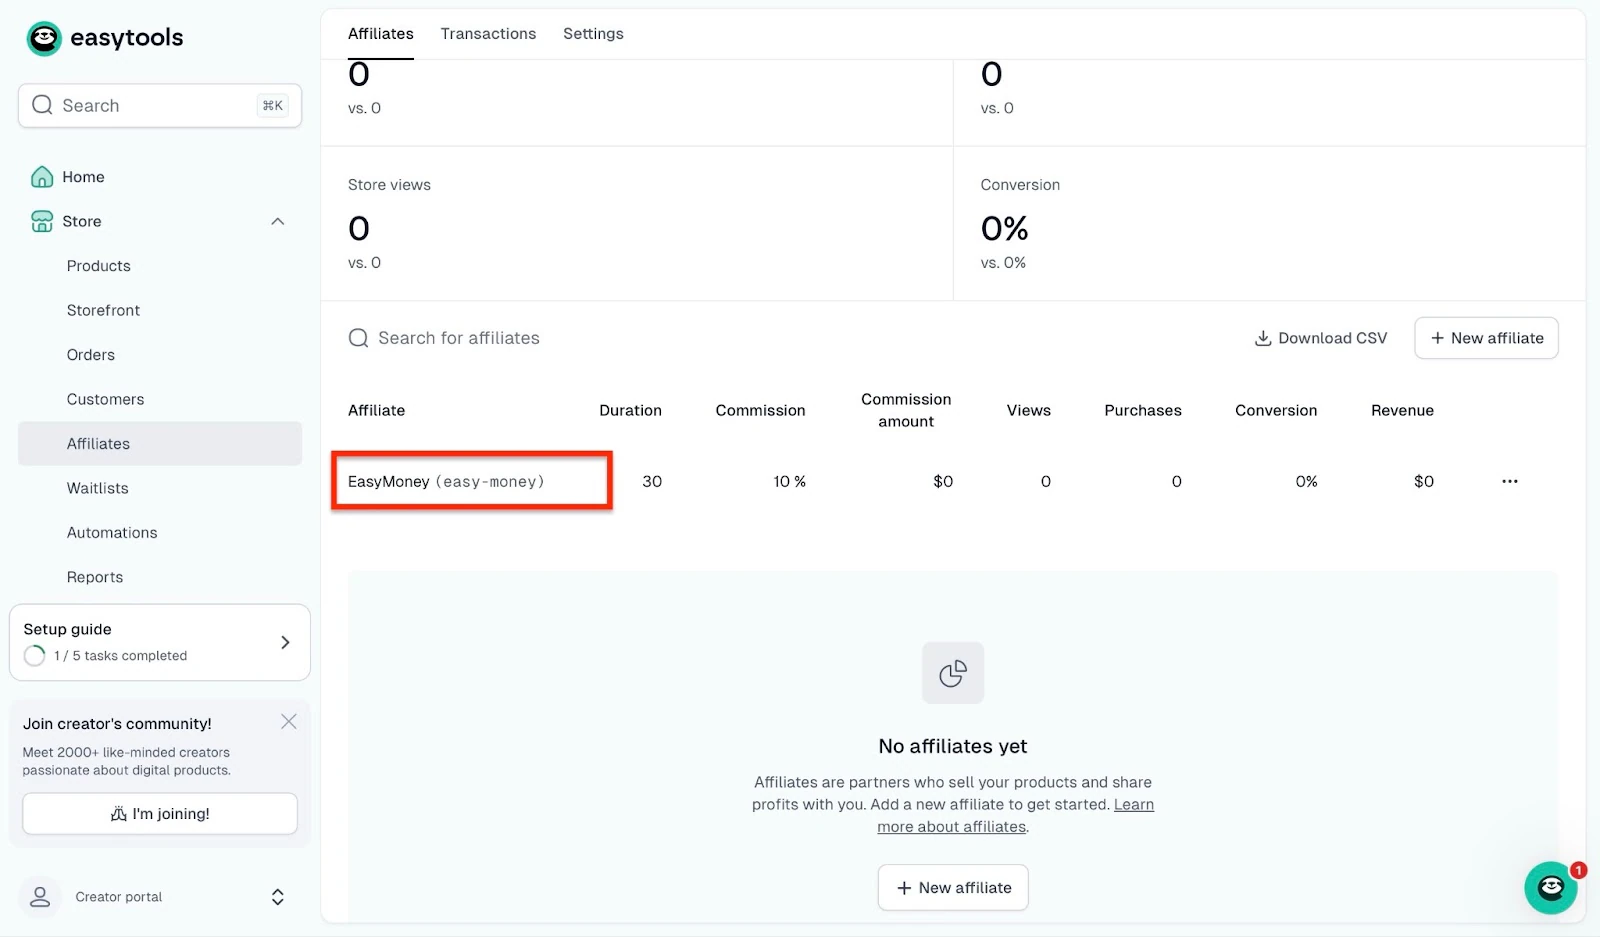
Then, fill in the form. Add the affiliate name, slug, and commission percentage, among other details, and click “Save.”

You can locate the affiliate link in the affiliates feature window.
Best for
- Creators, influencers, and entrepreneurs wanting a user-friendly global platform to sell online courses and other digital products.
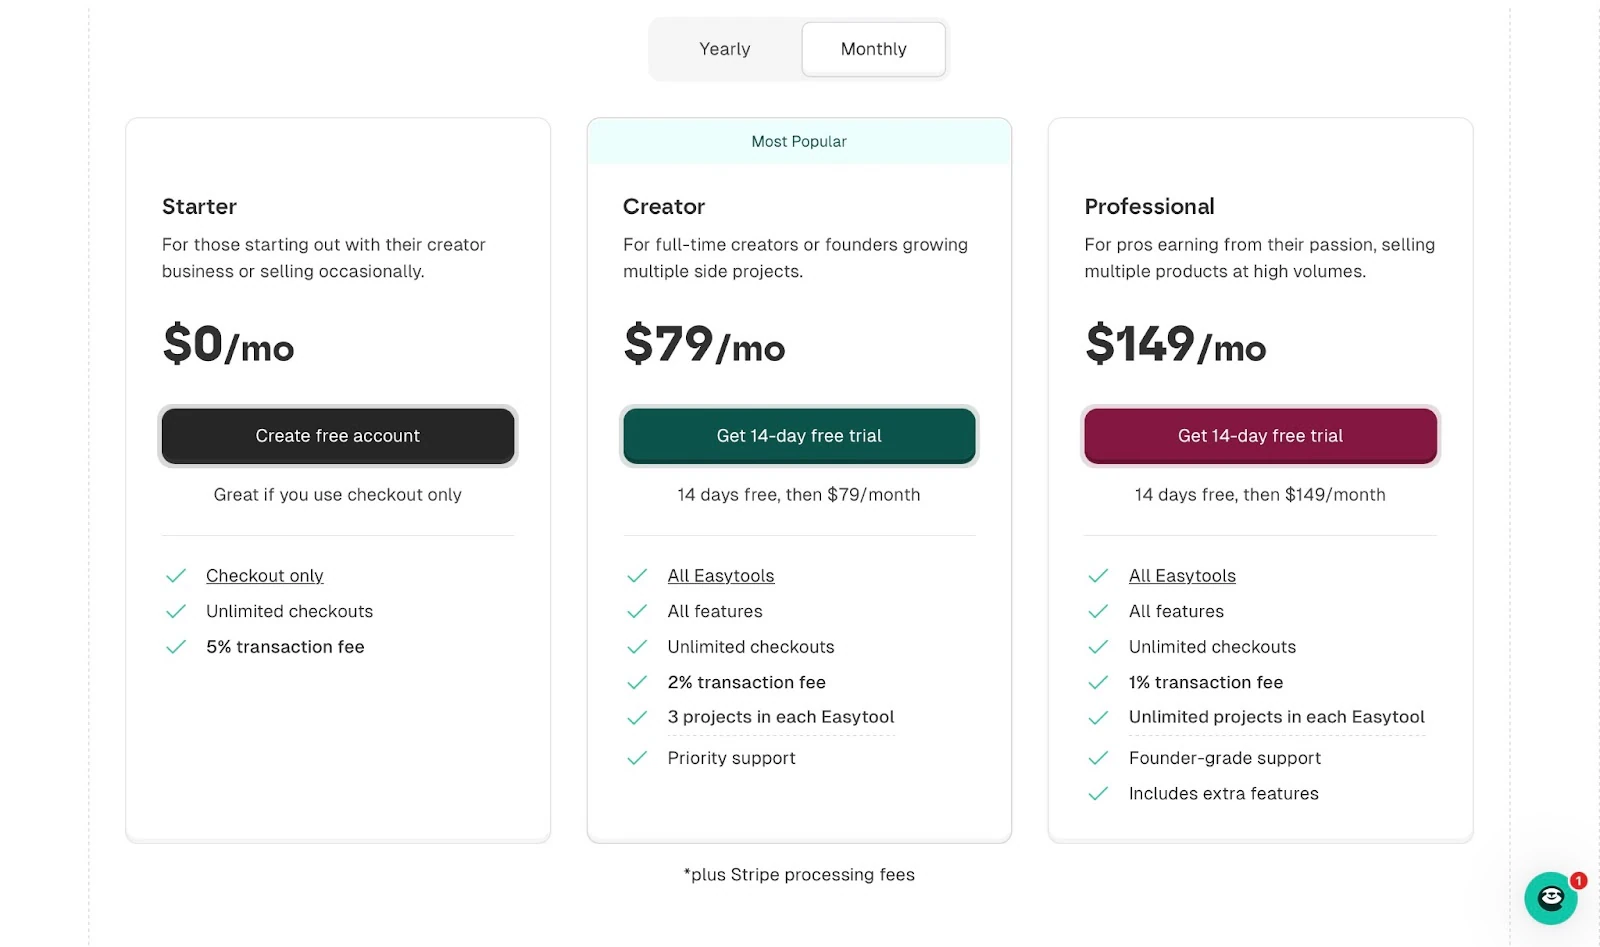
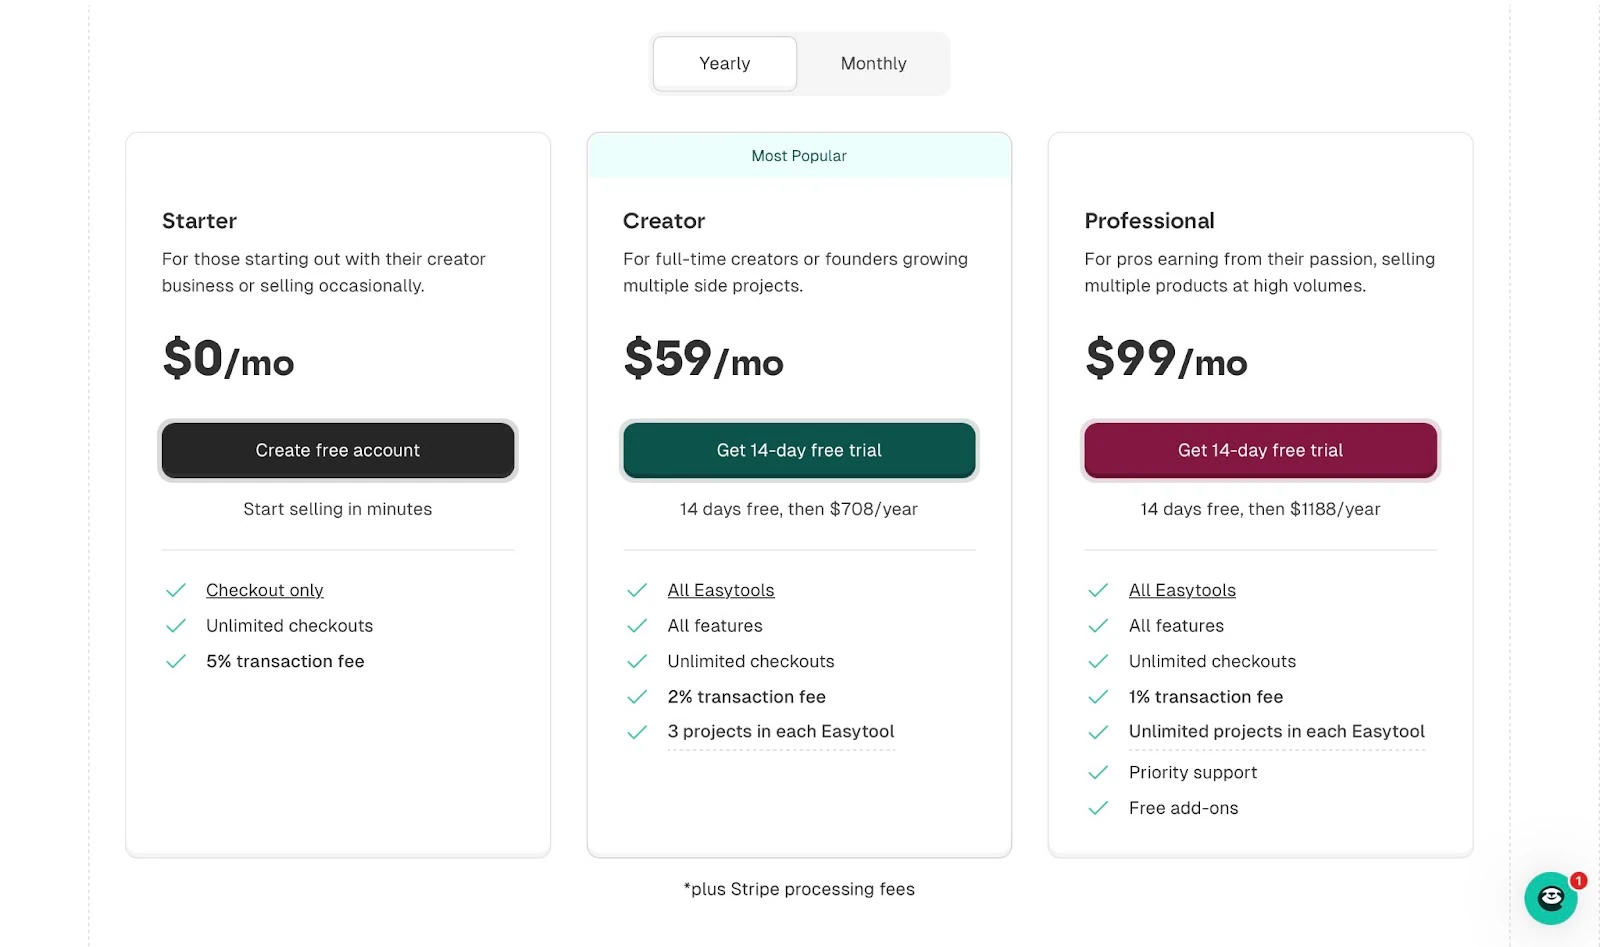
Pricing
- Starter: $0/month
- Creator: $79/month
- Professional: $149/month
2. Teachable
Teachable is second on my list of the ten best online course platforms. It’s designed primarily with e-learning in mind. However, apart from online courses, you can sell coaching, downloads, memberships, and create communities.
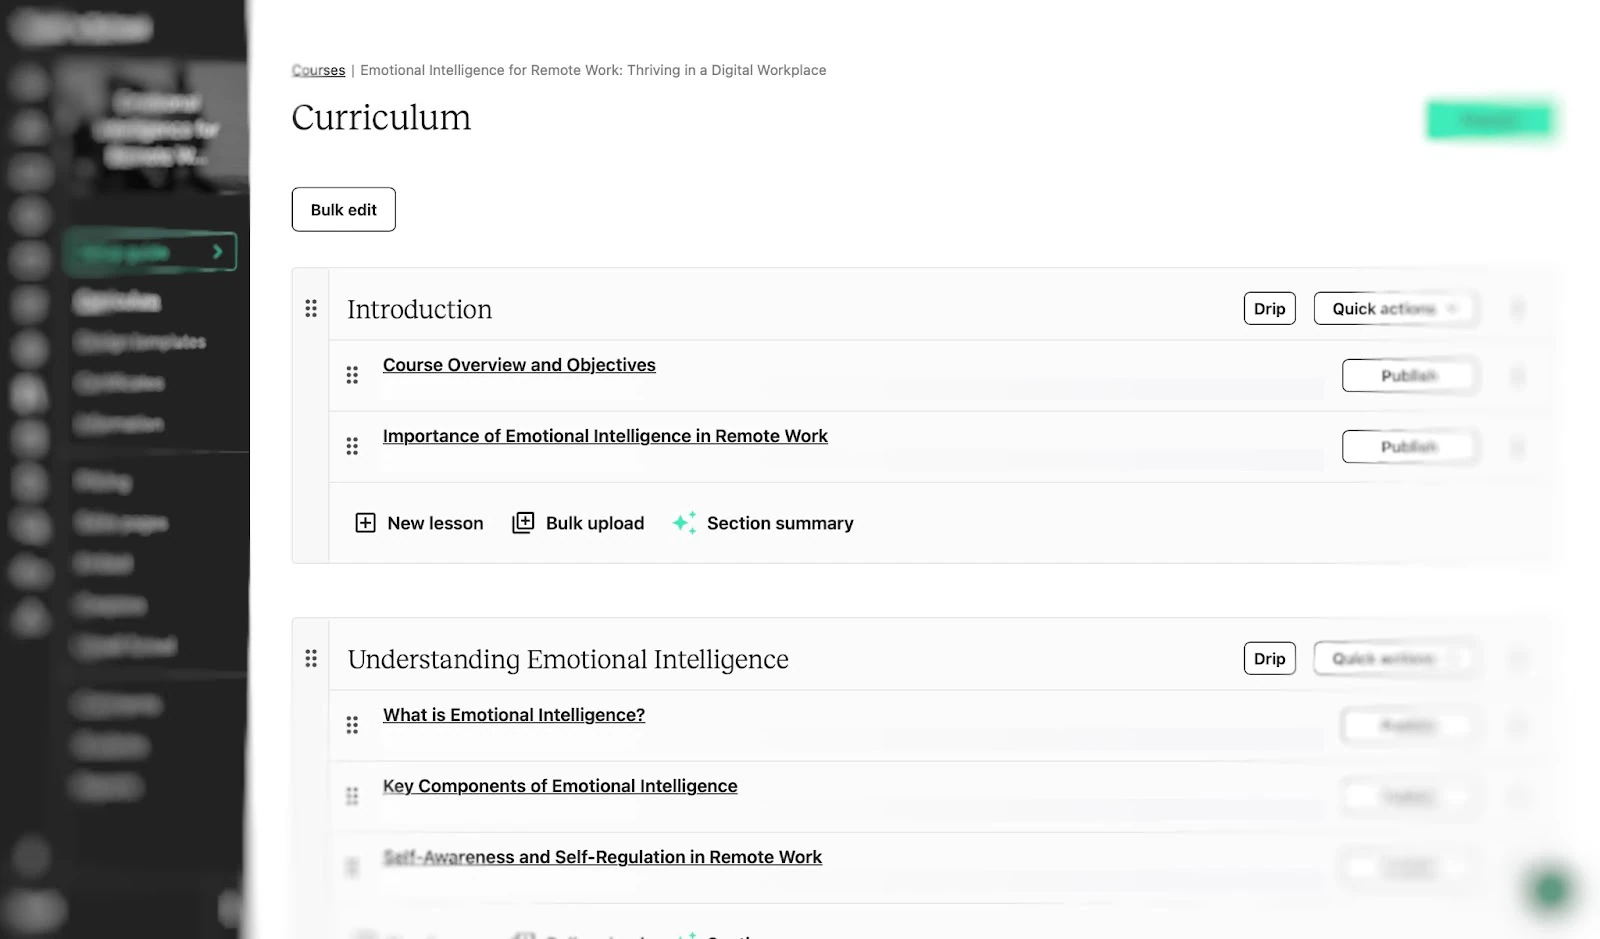
Teachable’s curriculum feature allows you to edit, publish, rename, duplicate, or delete lessons within your course. It also lets you edit lessons in bulk or work on each one separately.
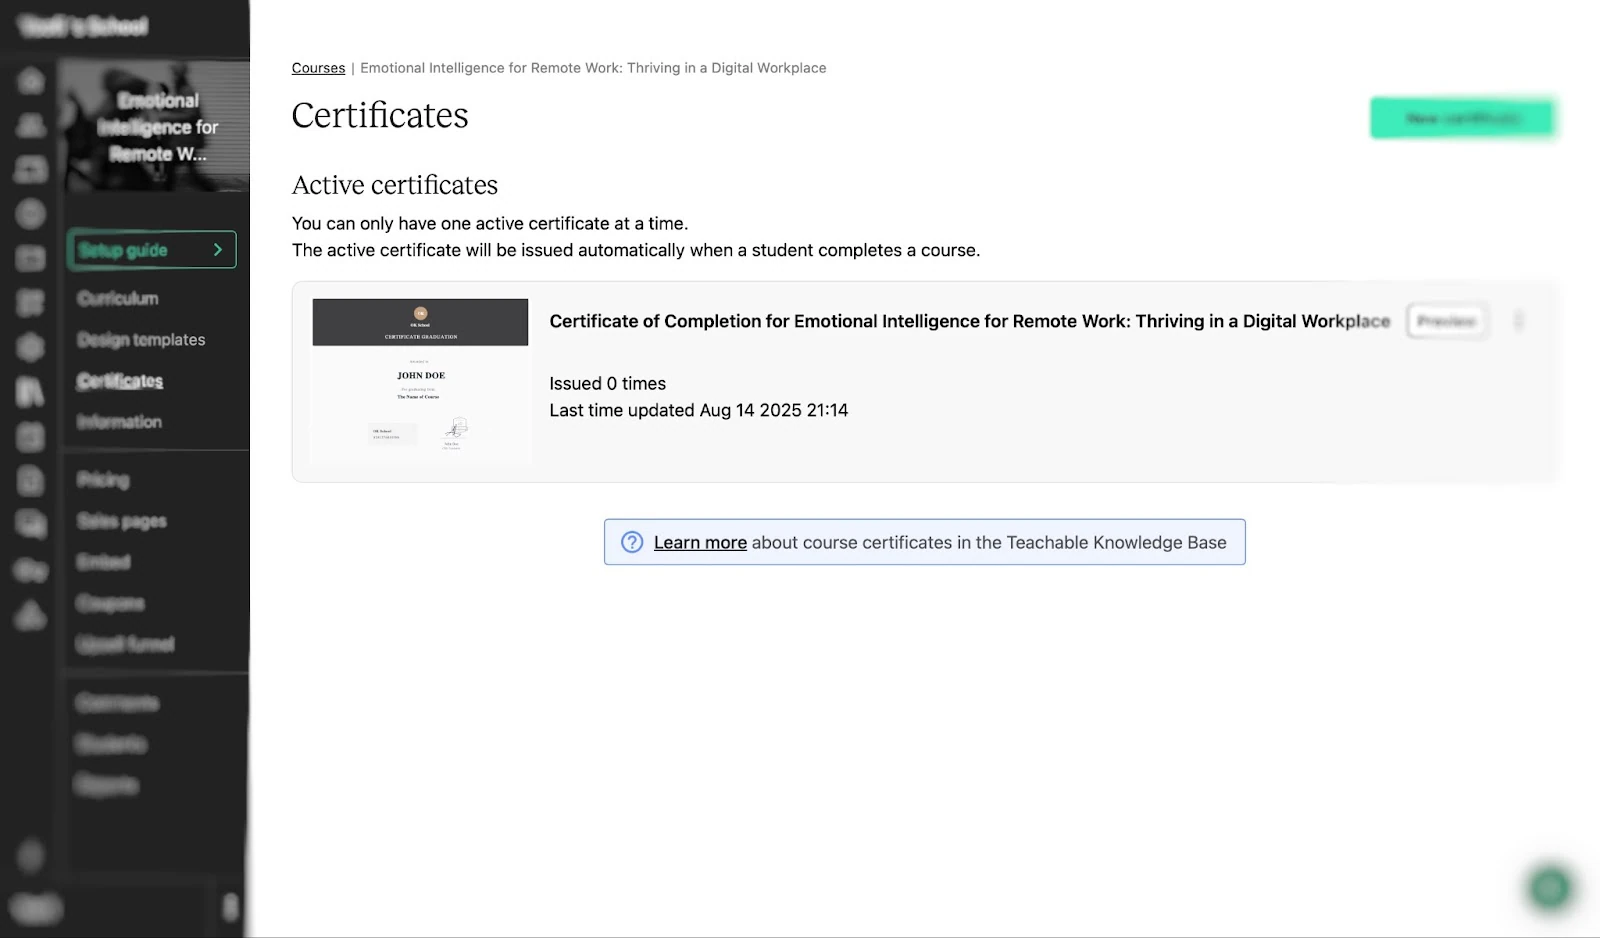
With the certificates feature, you can create certificates that would be issued automatically to students upon completion of your course. More so, you can edit, deactivate, delete, or preview your certificate from a dedicated window.
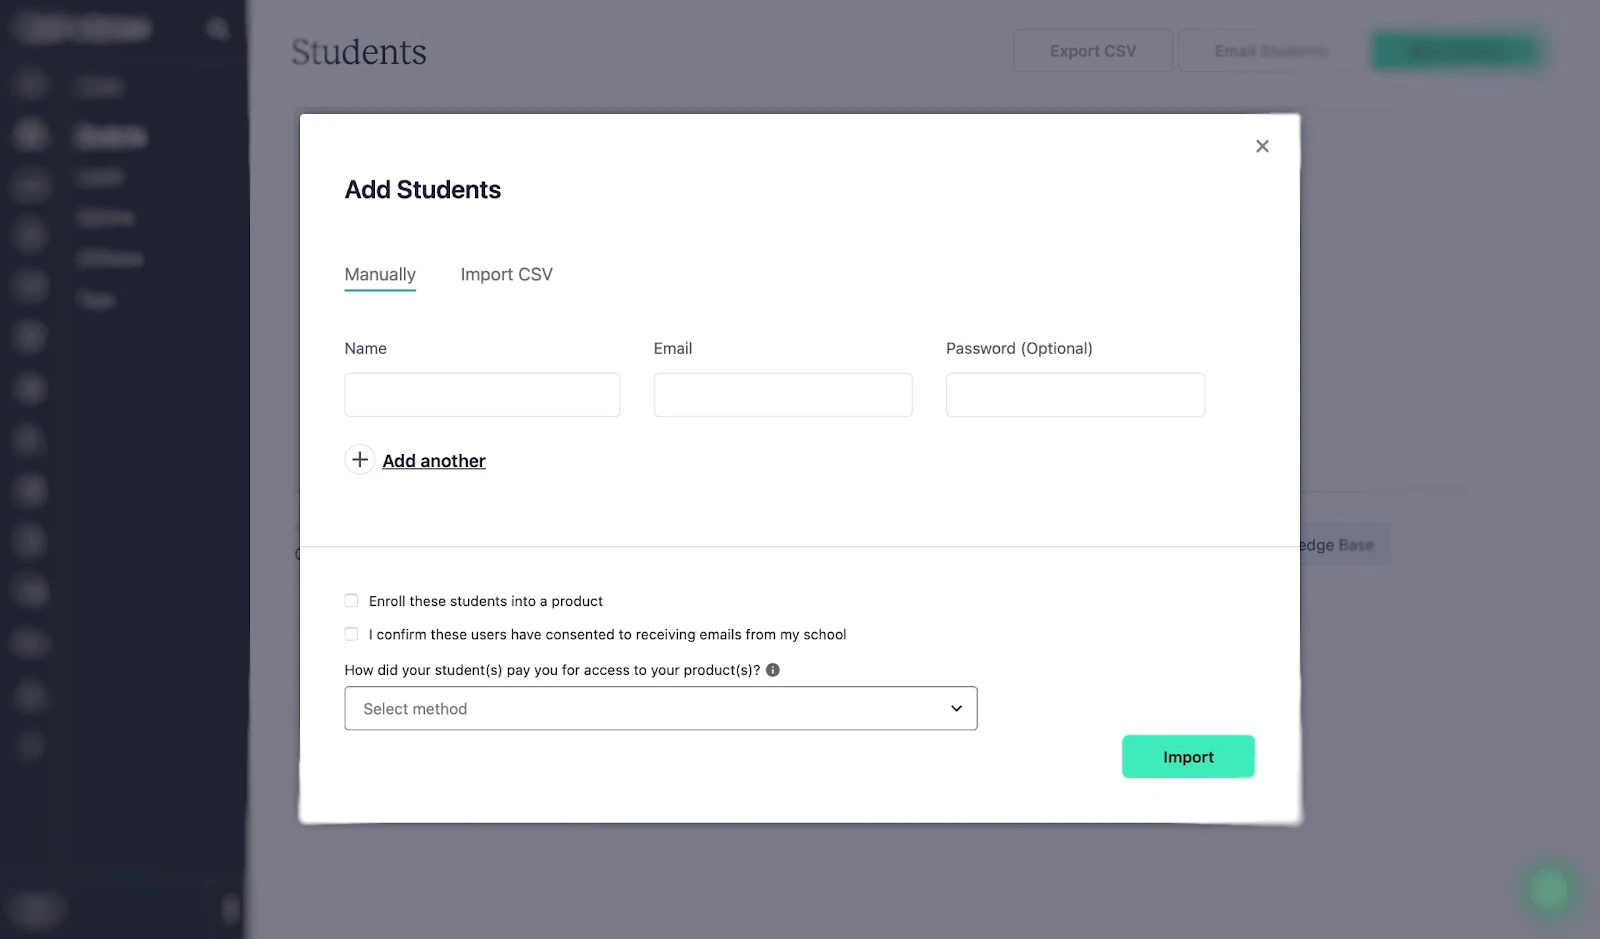
Using the students feature, Teachable lets you add students, email them, or export a CSV file. It is also possible to add students manually or import a CSV file that has the names and email addresses.
Teachable’s coupon feature lets you create coupons that can be used multiple times. There’s also the option to create one-time-use coupons for many recipients.
Now, let me guide you through the process of creating a course on Teachable.
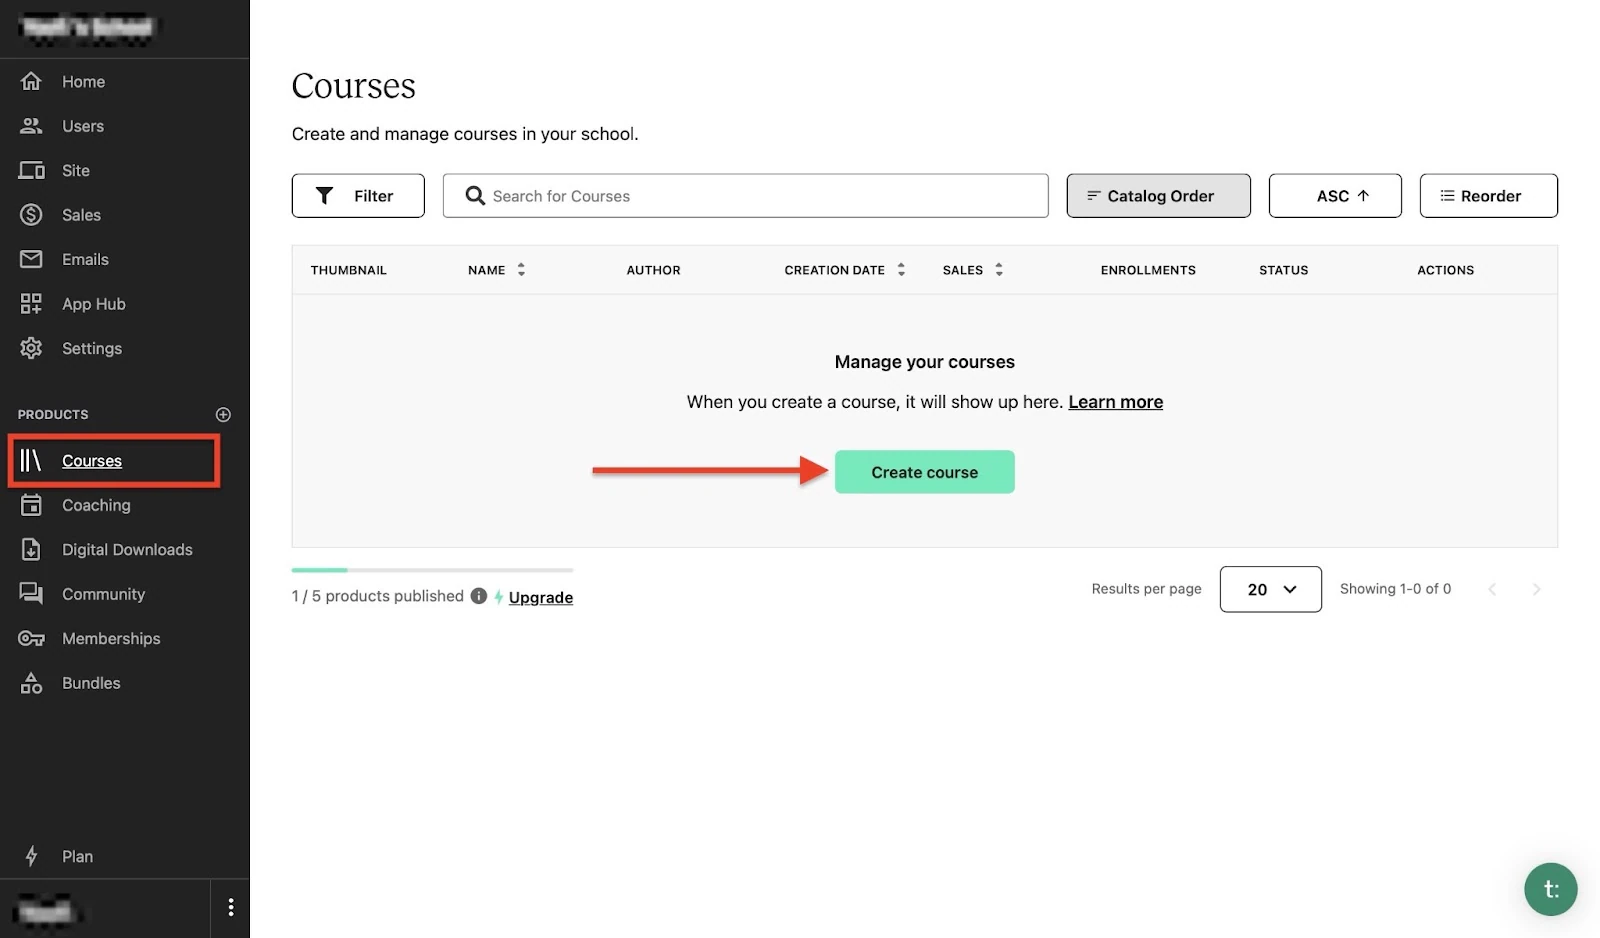
From your account homepage, select “Courses, ” the first item under “Products.” Then click “Create course.”
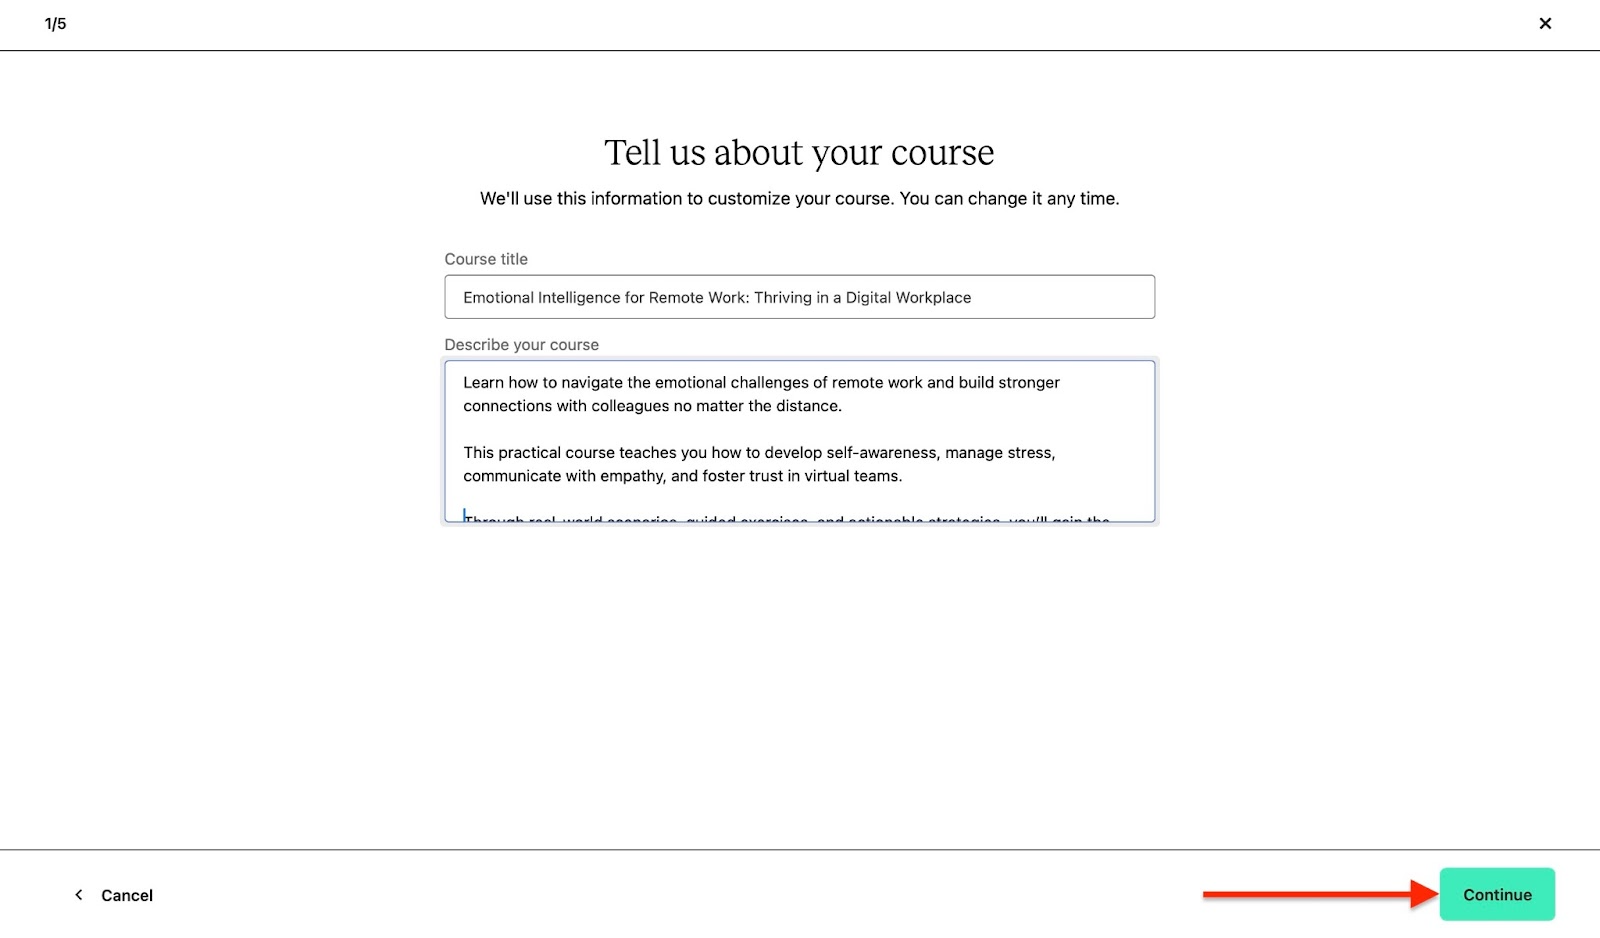
Type the title of your course and its description in the provided fields and click “Continue.”
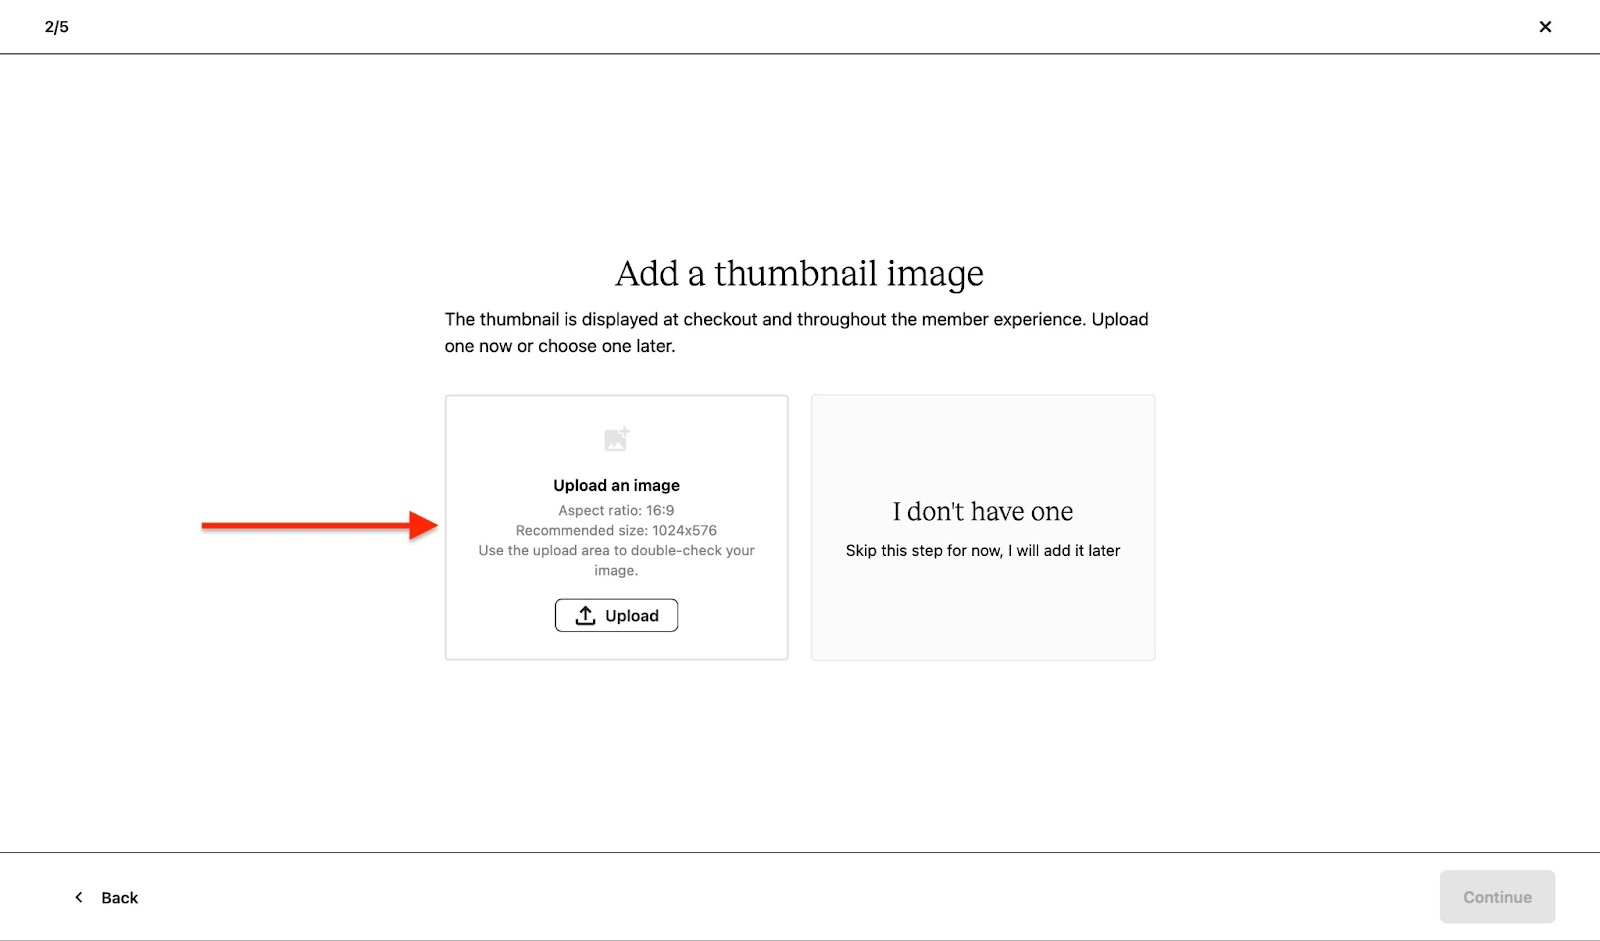
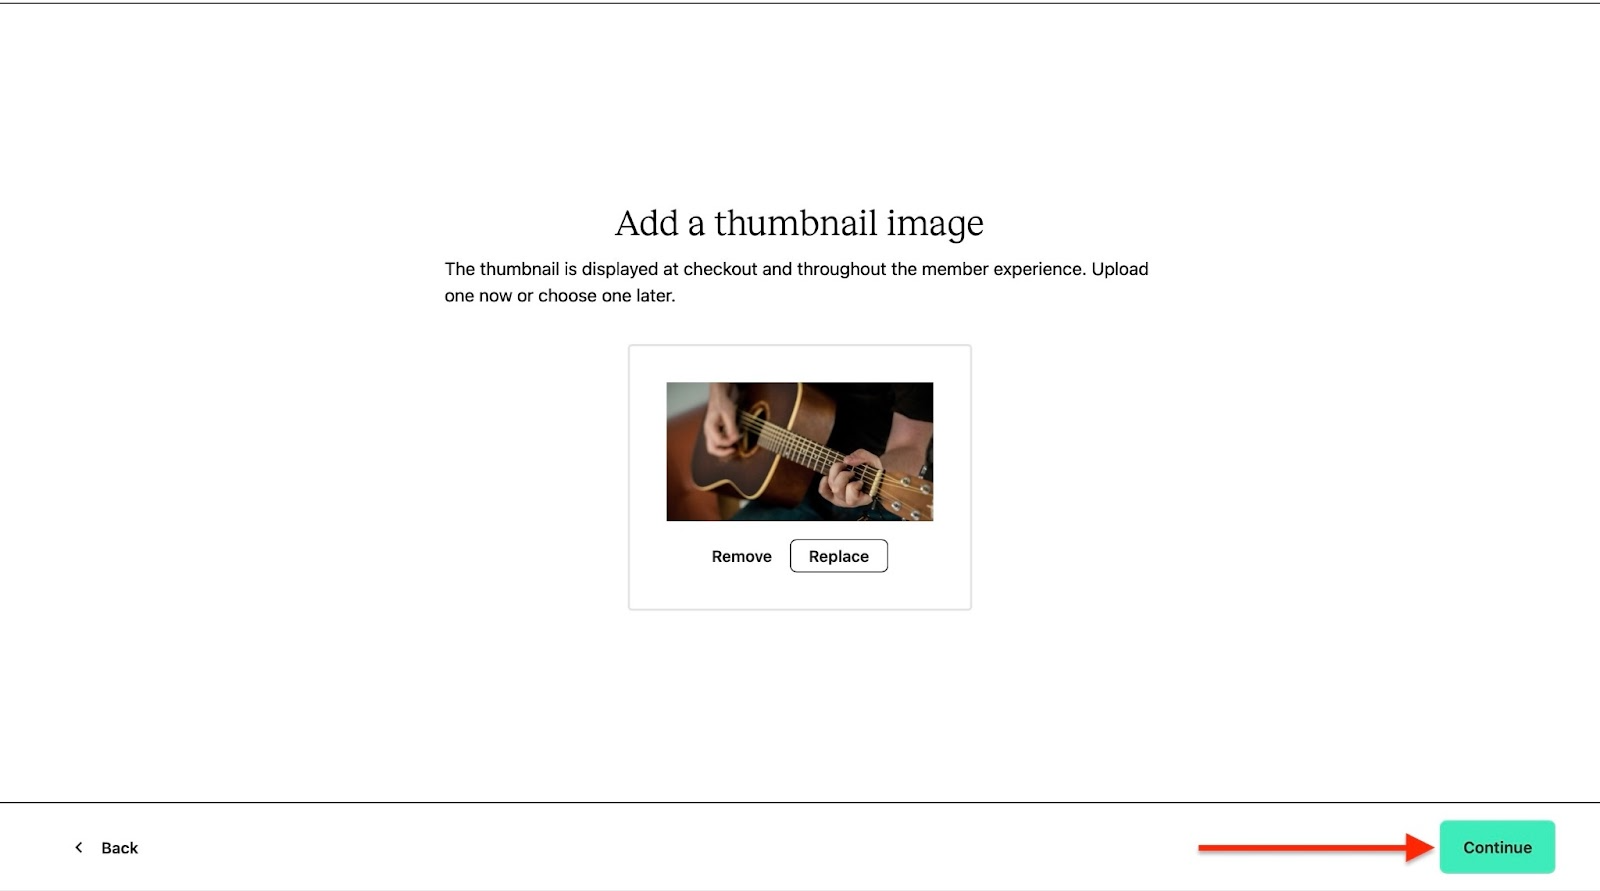
The next window is for adding a thumbnail for your course.
Your image must have an aspect ratio of 16:9 and a recommended size of 1024 x 576. If you are unsure about your image’s dimensions, you can use the upload area to double-check that.
Now, click “Upload” to select a thumbnail image.
Choose it natively from your device or share the image’s URL link. You can also import it from either your Google Drive or Dropbox.
To choose an image from your computer, click “My device” or the highlighted text: “browse files.”

You can choose to either “Remove” or “Replace” the uploaded thumbnail afterwards. However, if you’re satisfied with the thumbnail, click “Continue.”
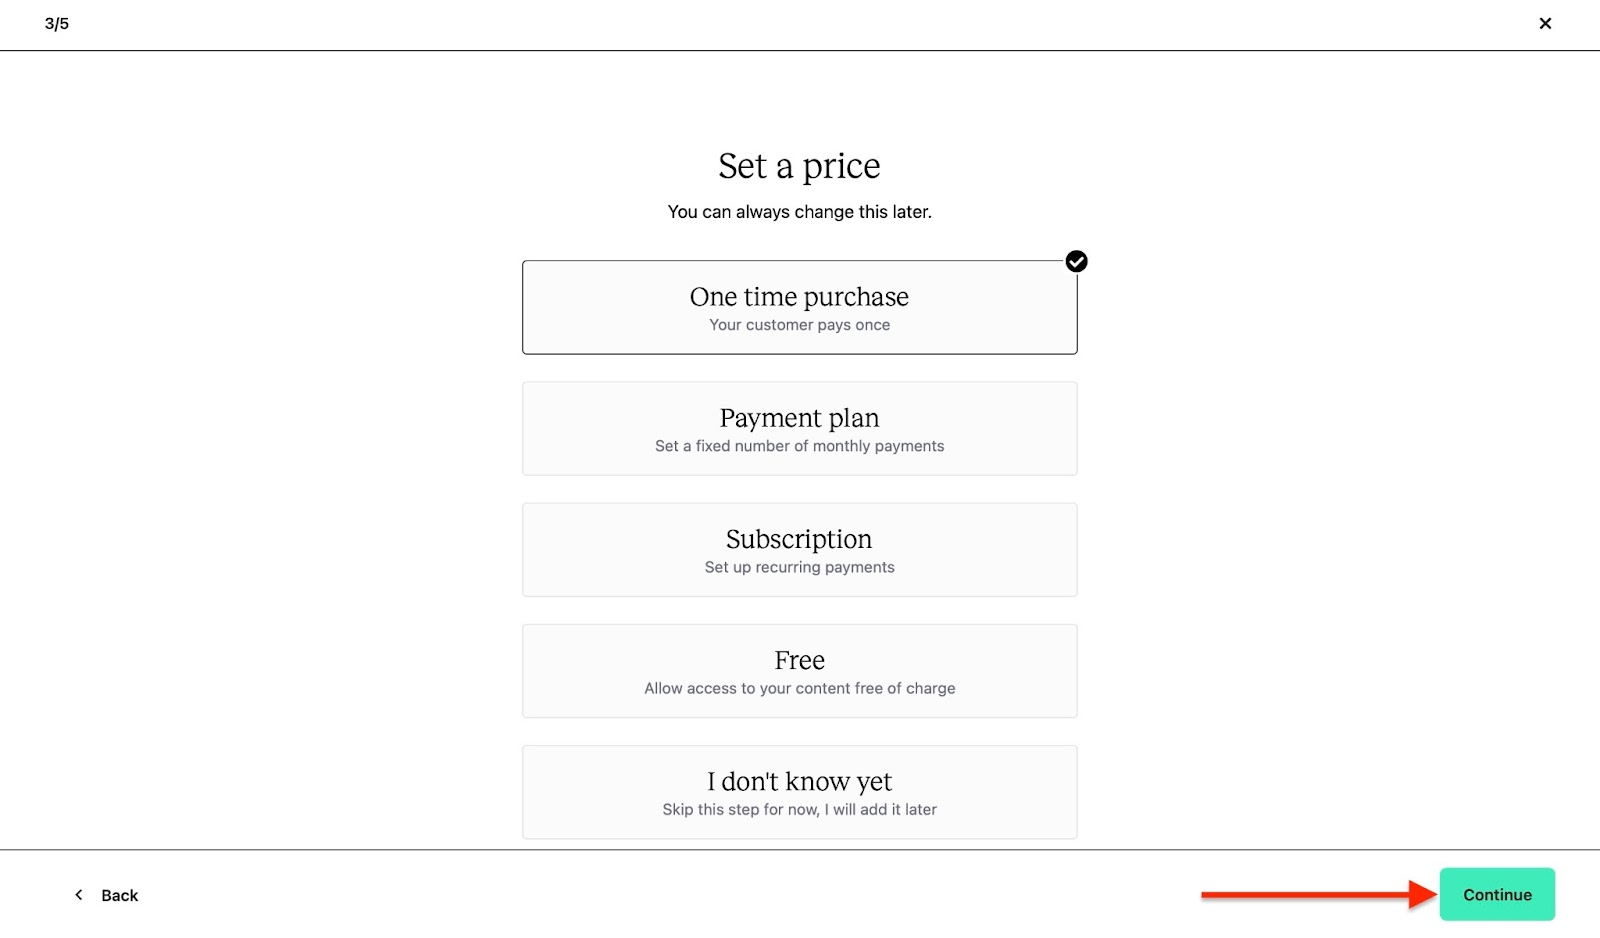
Now, set the price you’d like students to pay for this online course. You can choose to make it free or accept a one-time purchase.
You can also choose the payment plan or a subscription. If you are undecided about the price, you can always select “I don’t know yet.” In this case, let’s choose “One-time purchase” and click “Continue.”
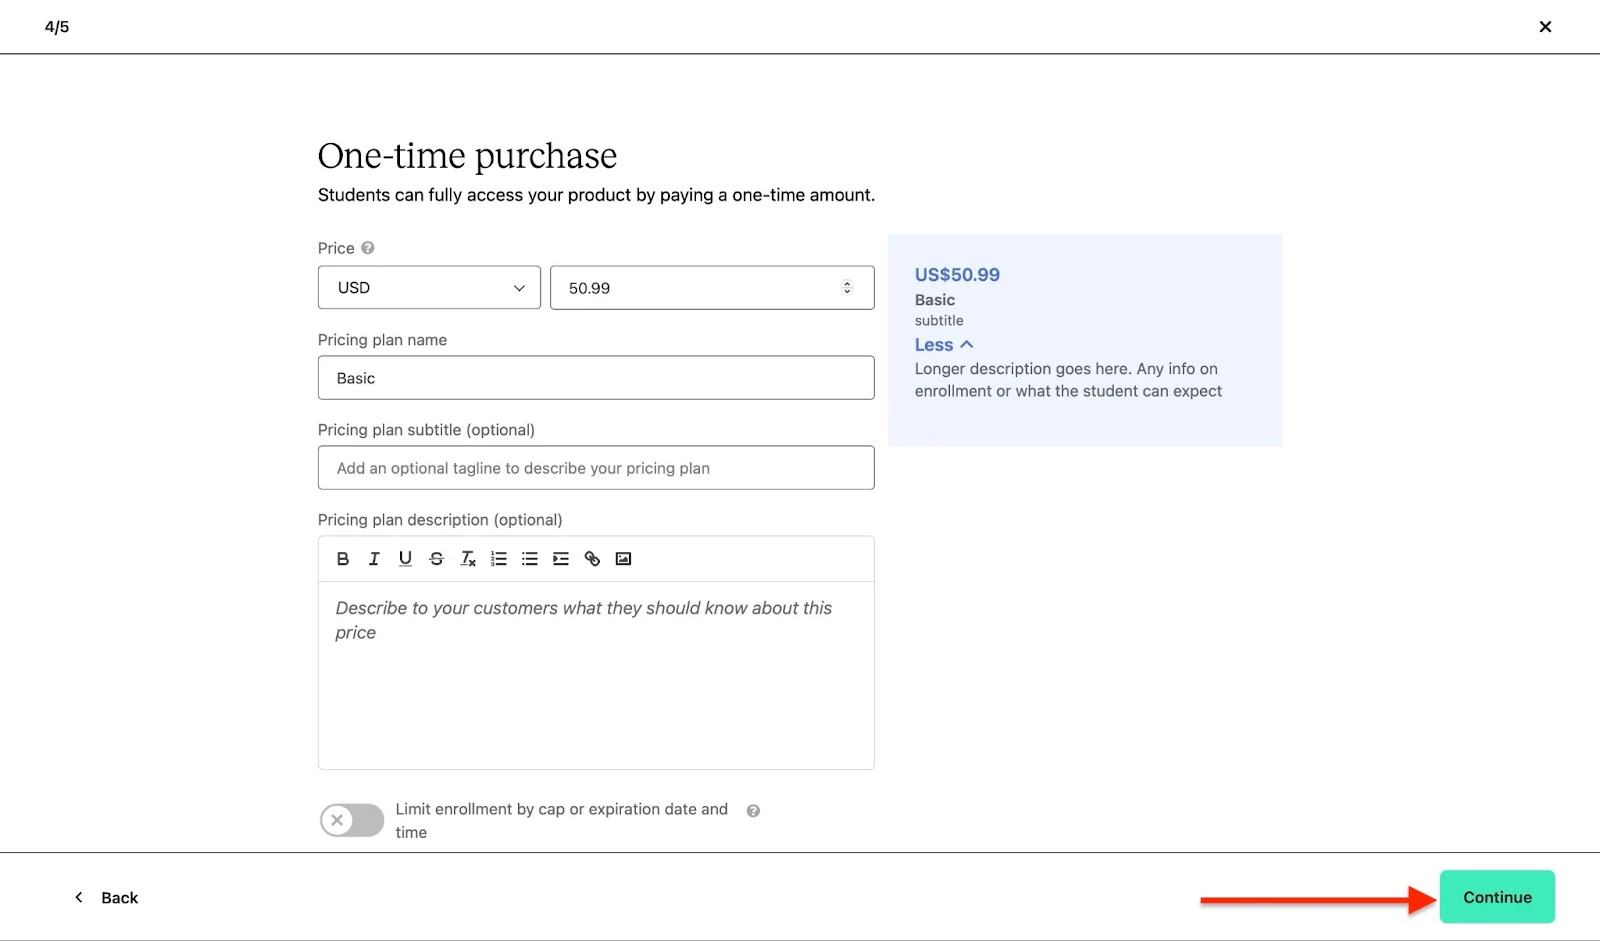
In the next window, select the specific price for your online course, type the name of the pricing plan, and add a subtitle and its description.
Scroll down to add a limit on enrollment or the course’s start and end dates. You can limit product access, too. Once done, click “Continue.”
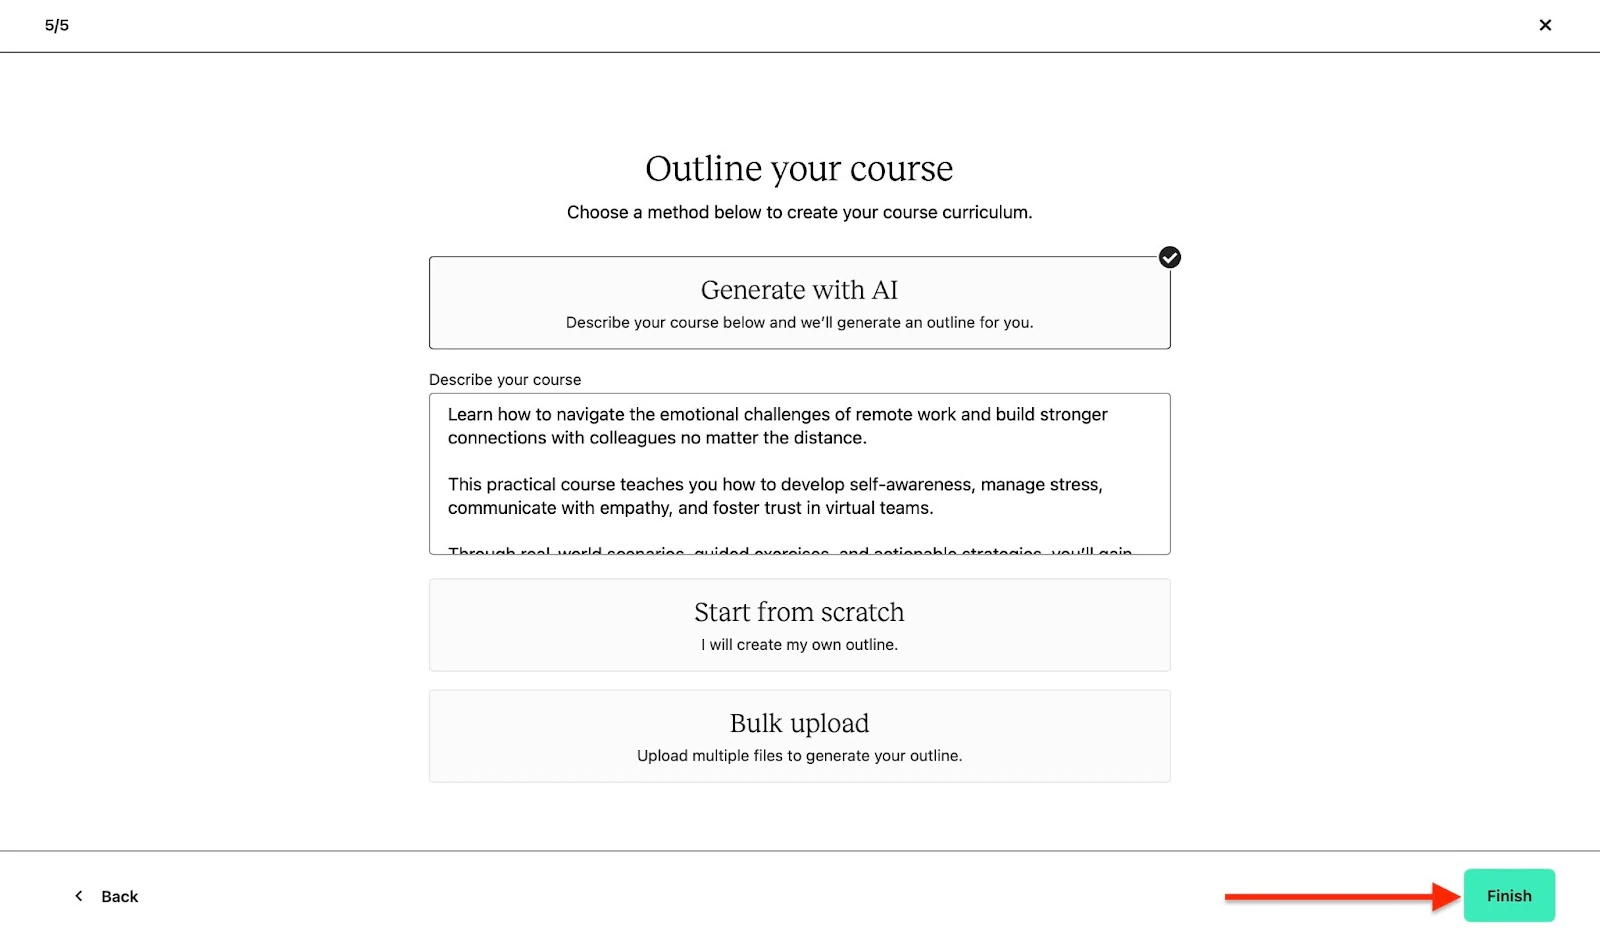
Next, click on the appropriate option to generate an outline for your course with AI or start from scratch. You can also upload multiple files to create your outline.
Let’s choose “Generate with AI.” After that, click “Finish.”
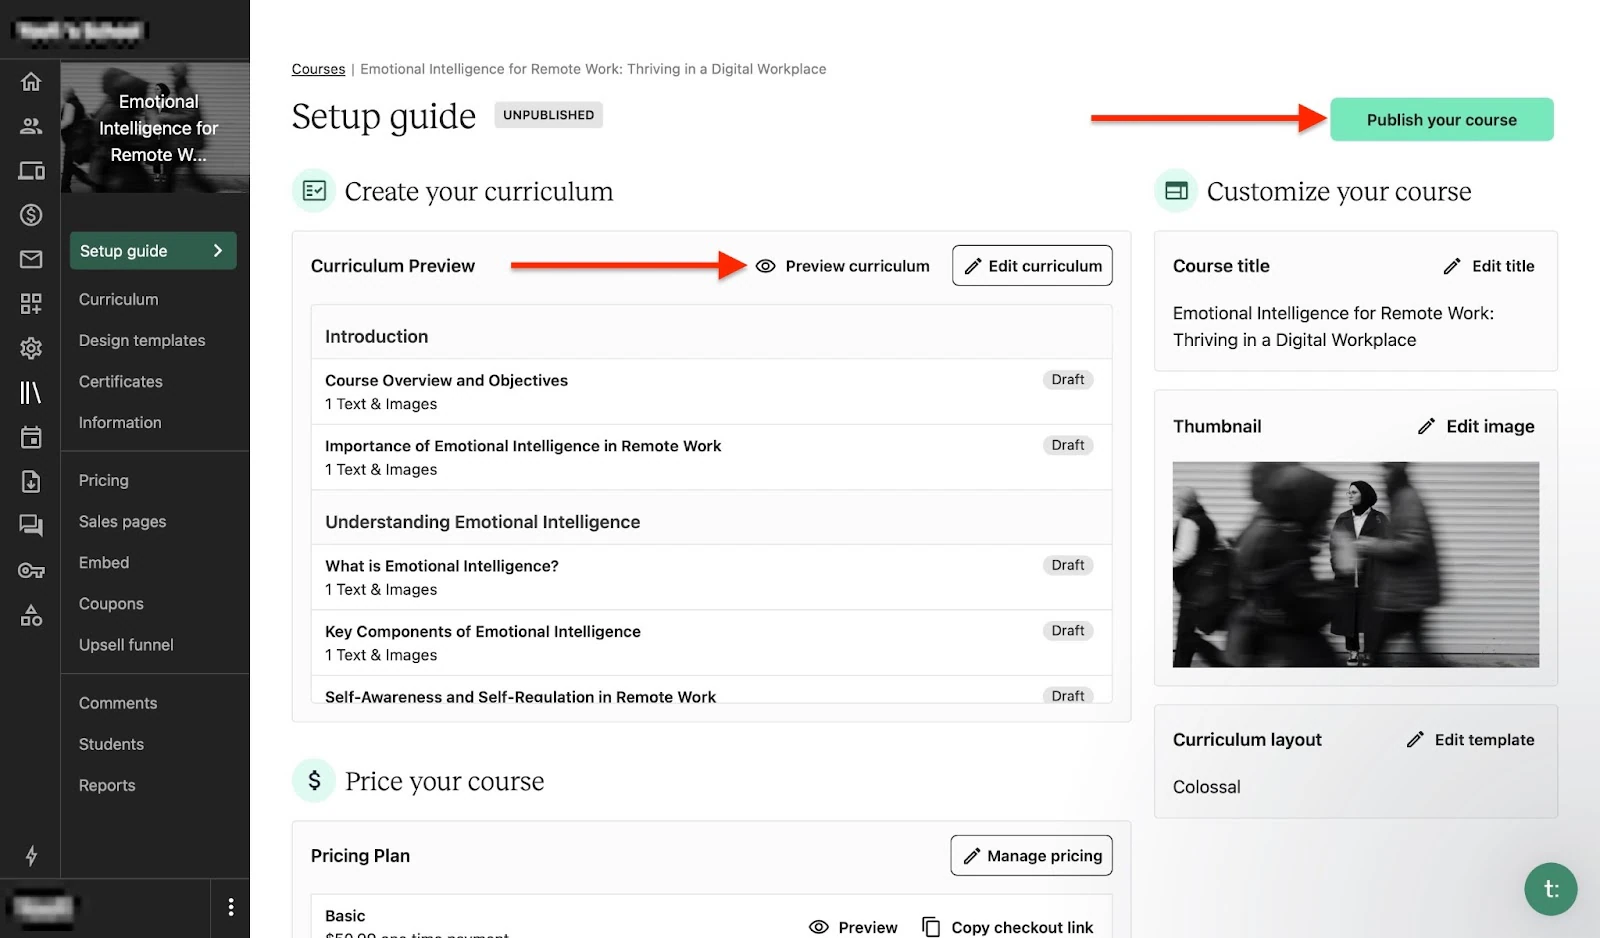
In the new window, click on “Edit curriculum” to add more content. Choose “Preview curriculum” to check how your course will look when published.
Finally, click “Publish your course” to make it accessible to students.
Key features
1. Certificates
You can create a certificate on Teachable to give to students. Let me show you how in a few steps.
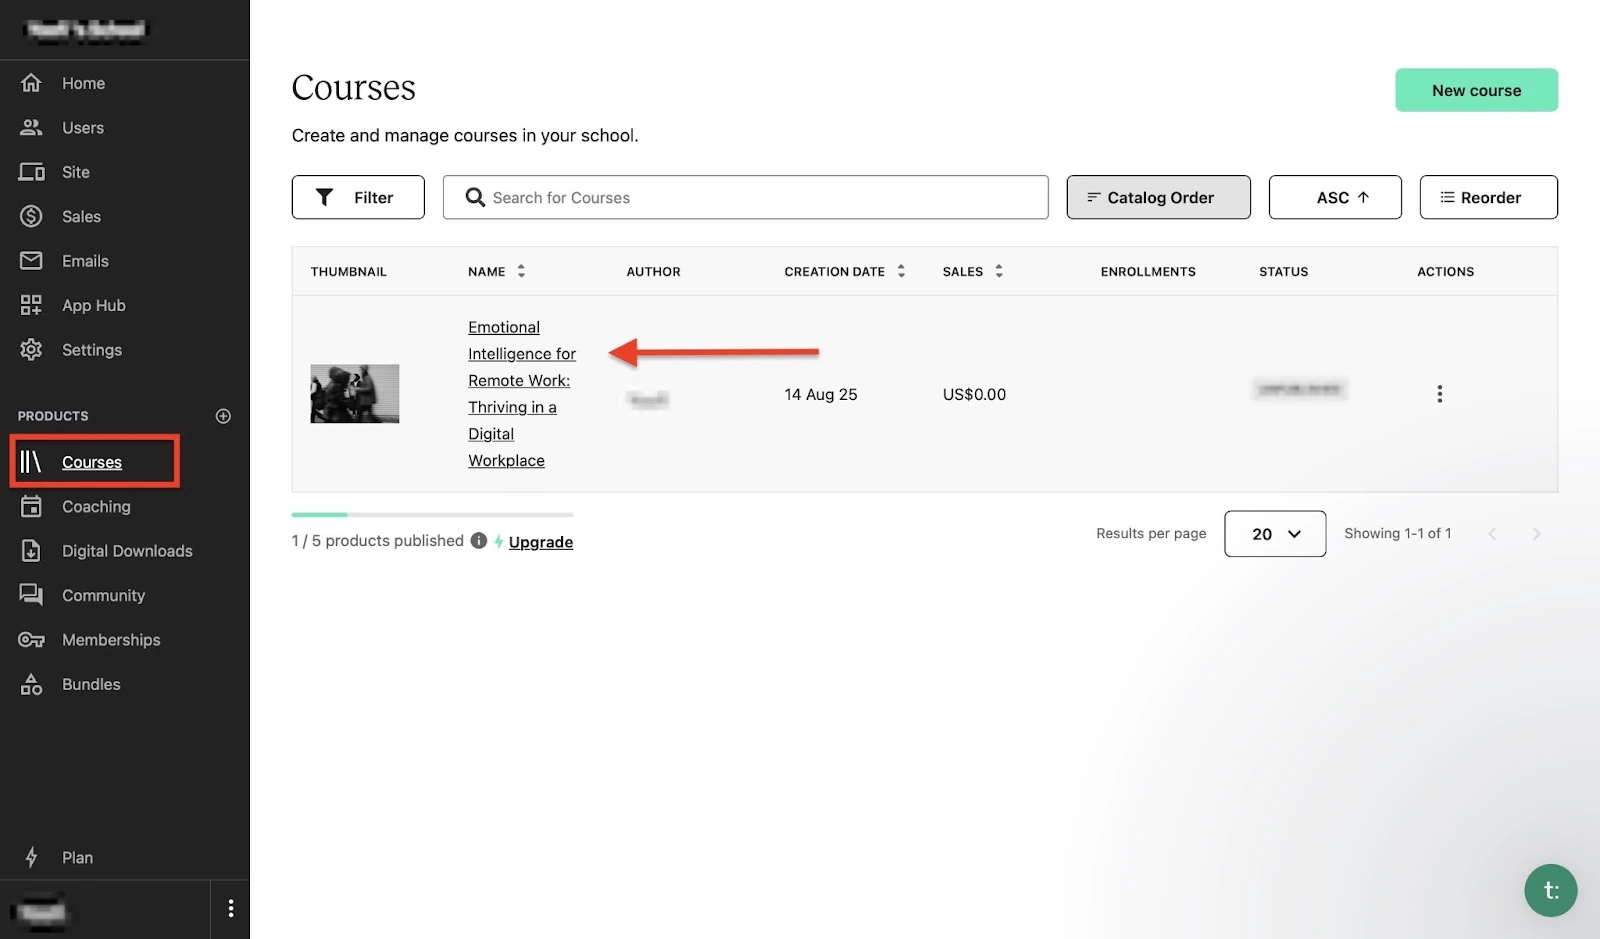
First, right from the homepage, click “Courses” in the sidebar and select a course.
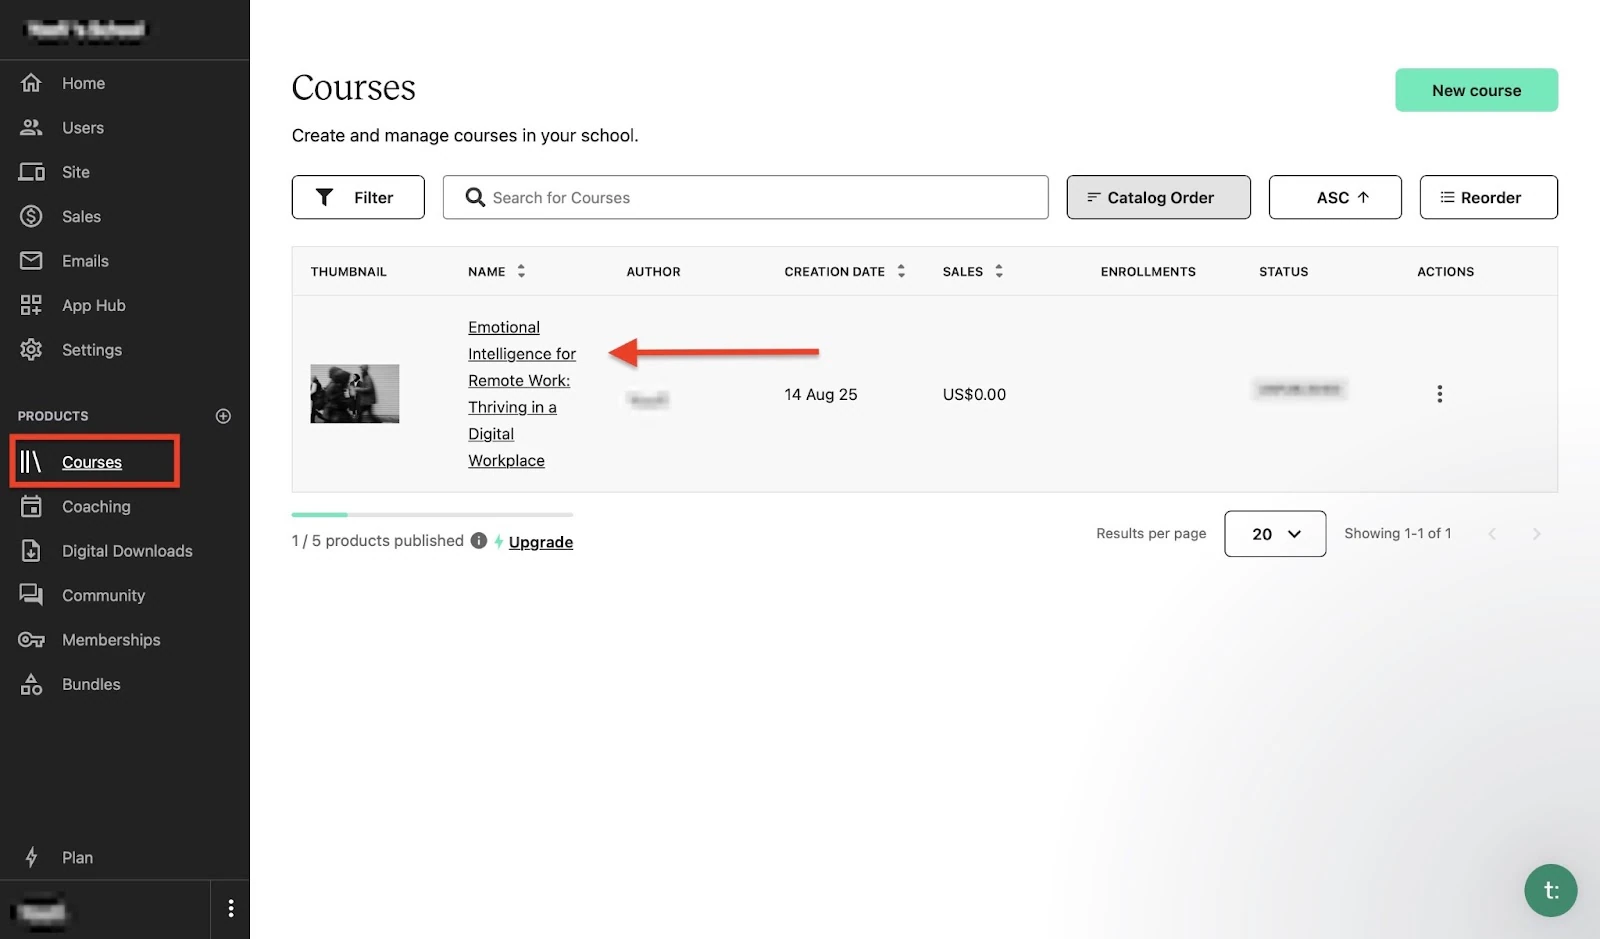
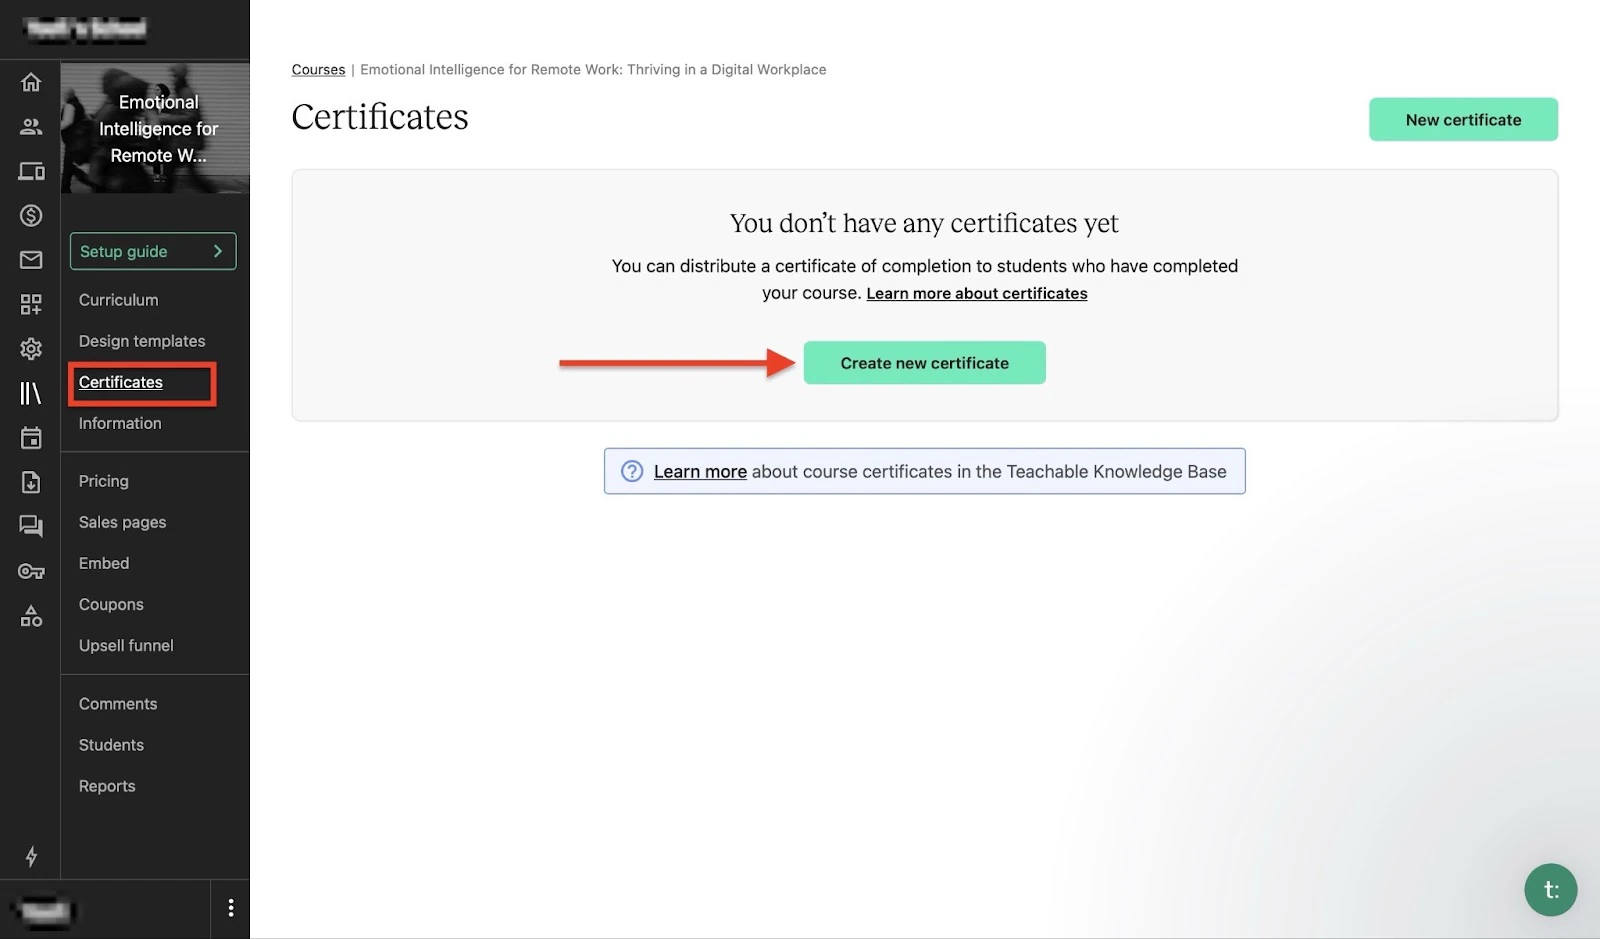
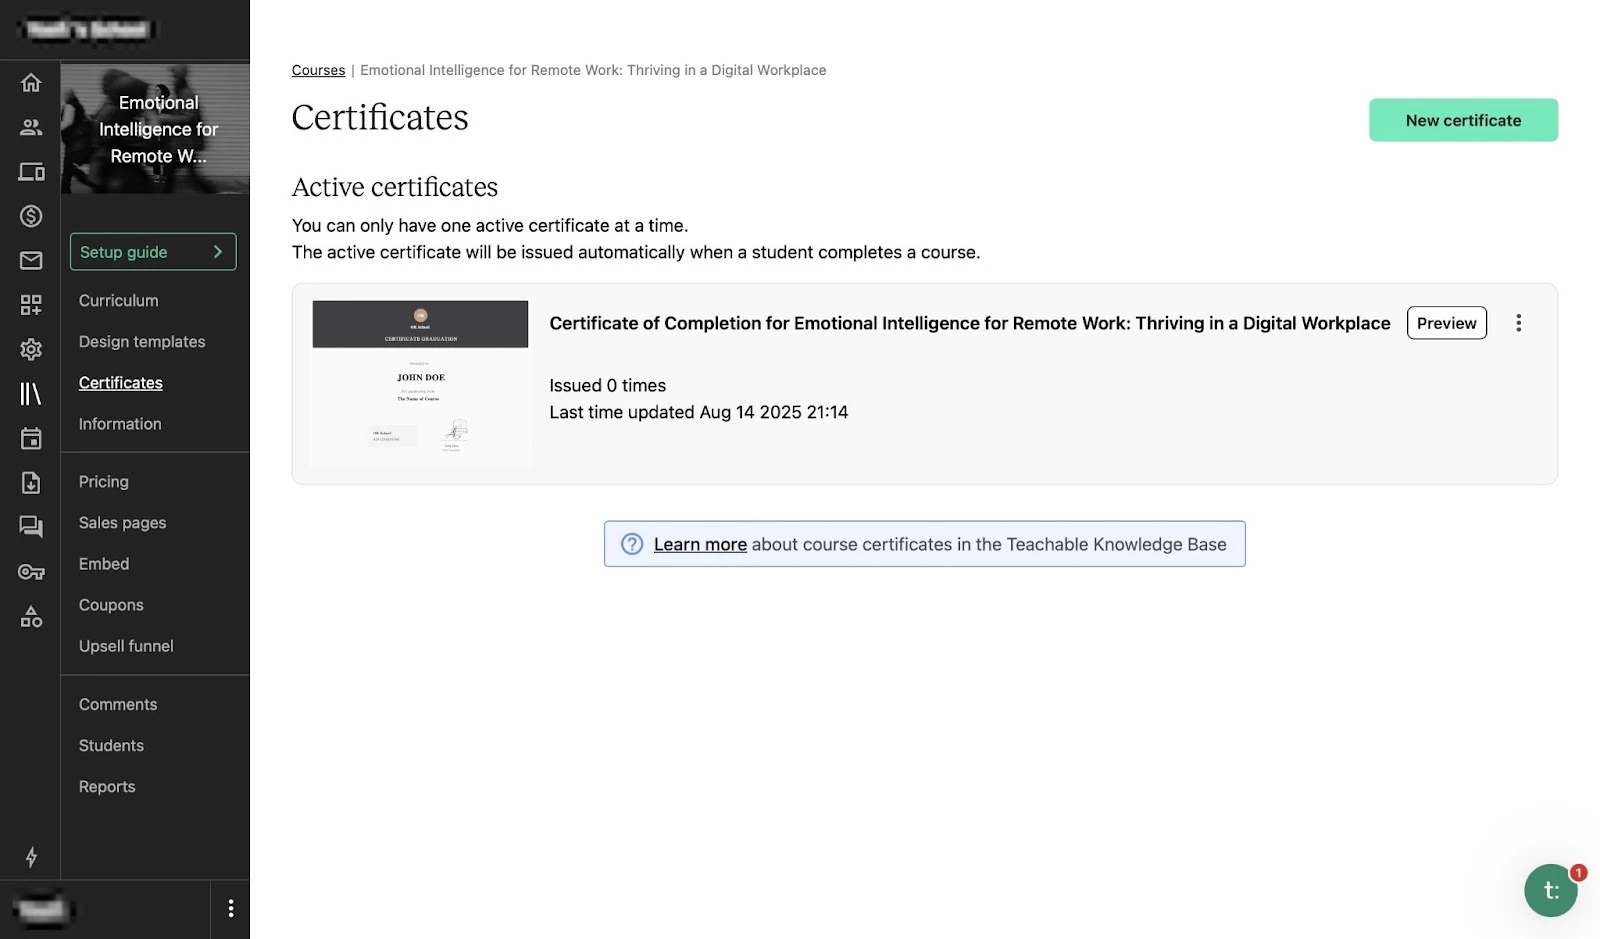
That will open the course’s setup guide. Now, select “Certificates,” which is the fourth item from the top, and click “Create new certificate.”
Select a template certificate from the available list and click “Next.”

Now, edit the certificate. Add a logo, title, subtitle, the institute awarding the certificate, date, signature, and serial number. You can also make slight edits to the background color, primary, and secondary text colors by clicking “Design.”
After making the necessary changes, click “Finish” at the top right corner of the window and choose whether or not to activate the certificate.
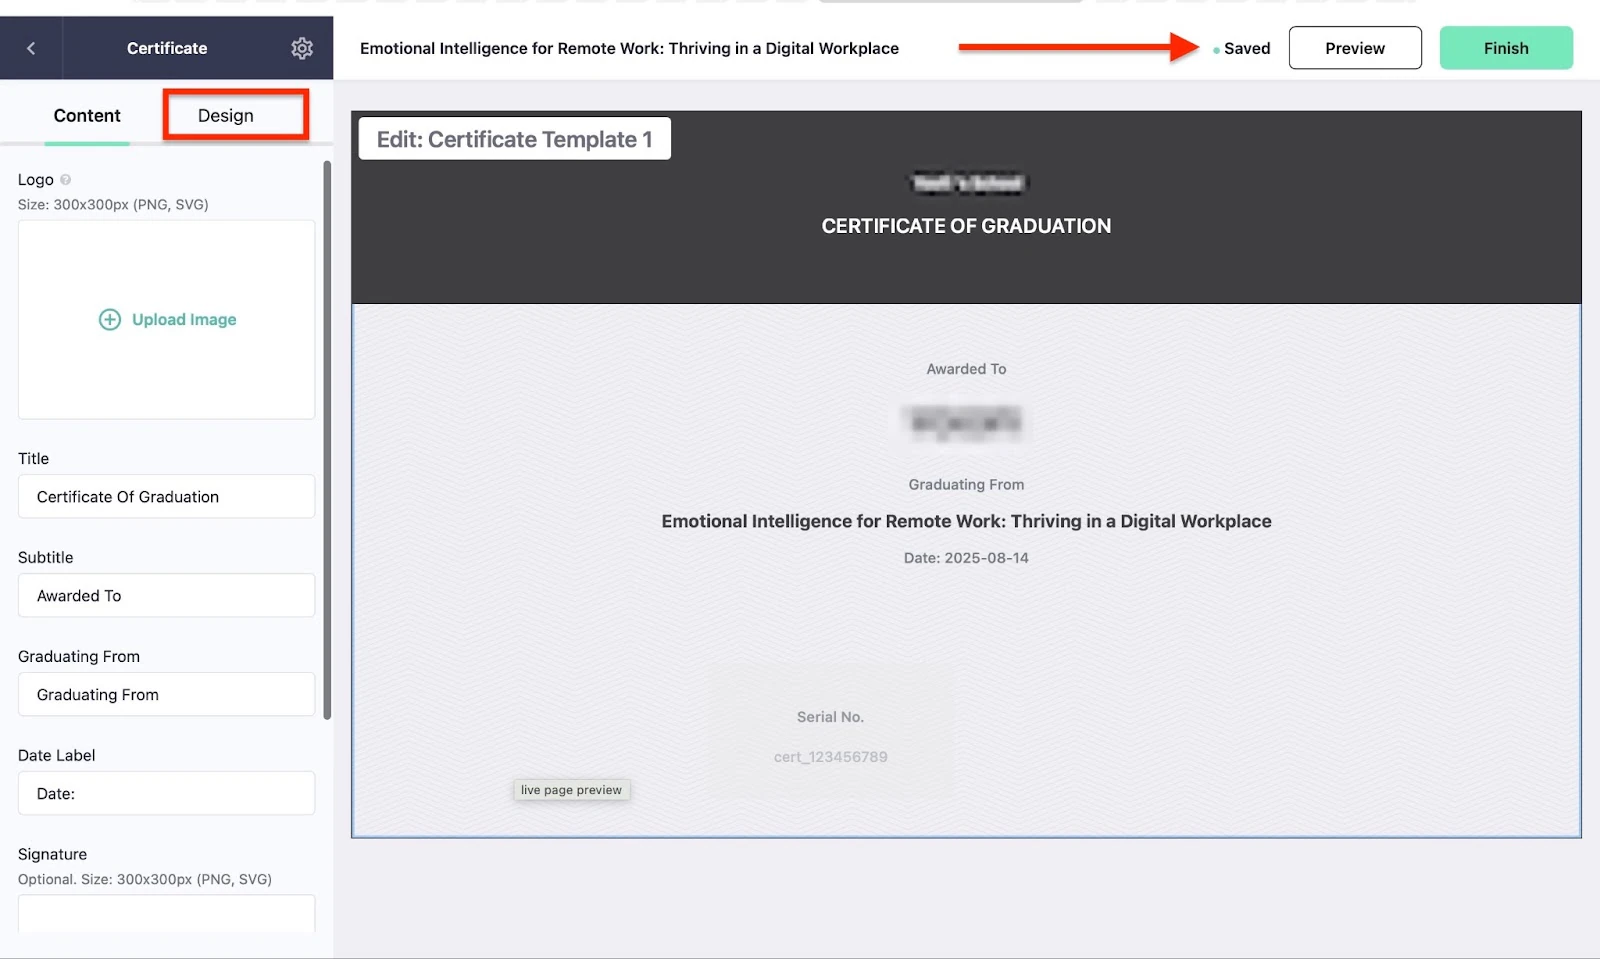
The certificate you just created will be listed under “Active Certificates” in the Certificates window. You can view it by clicking “Preview.”
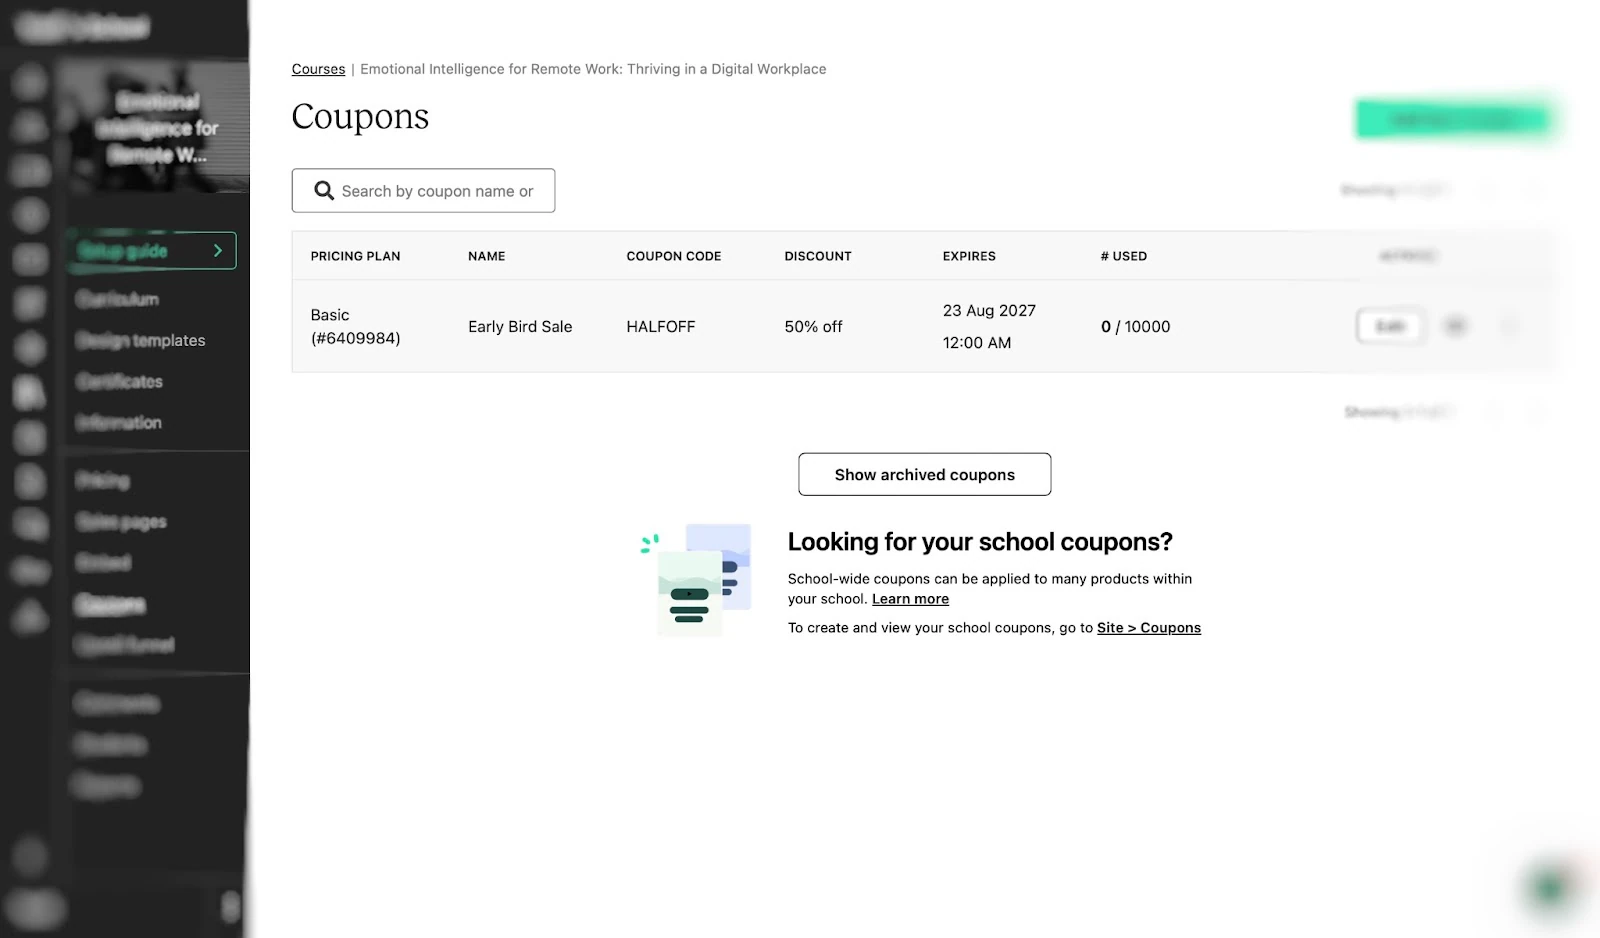
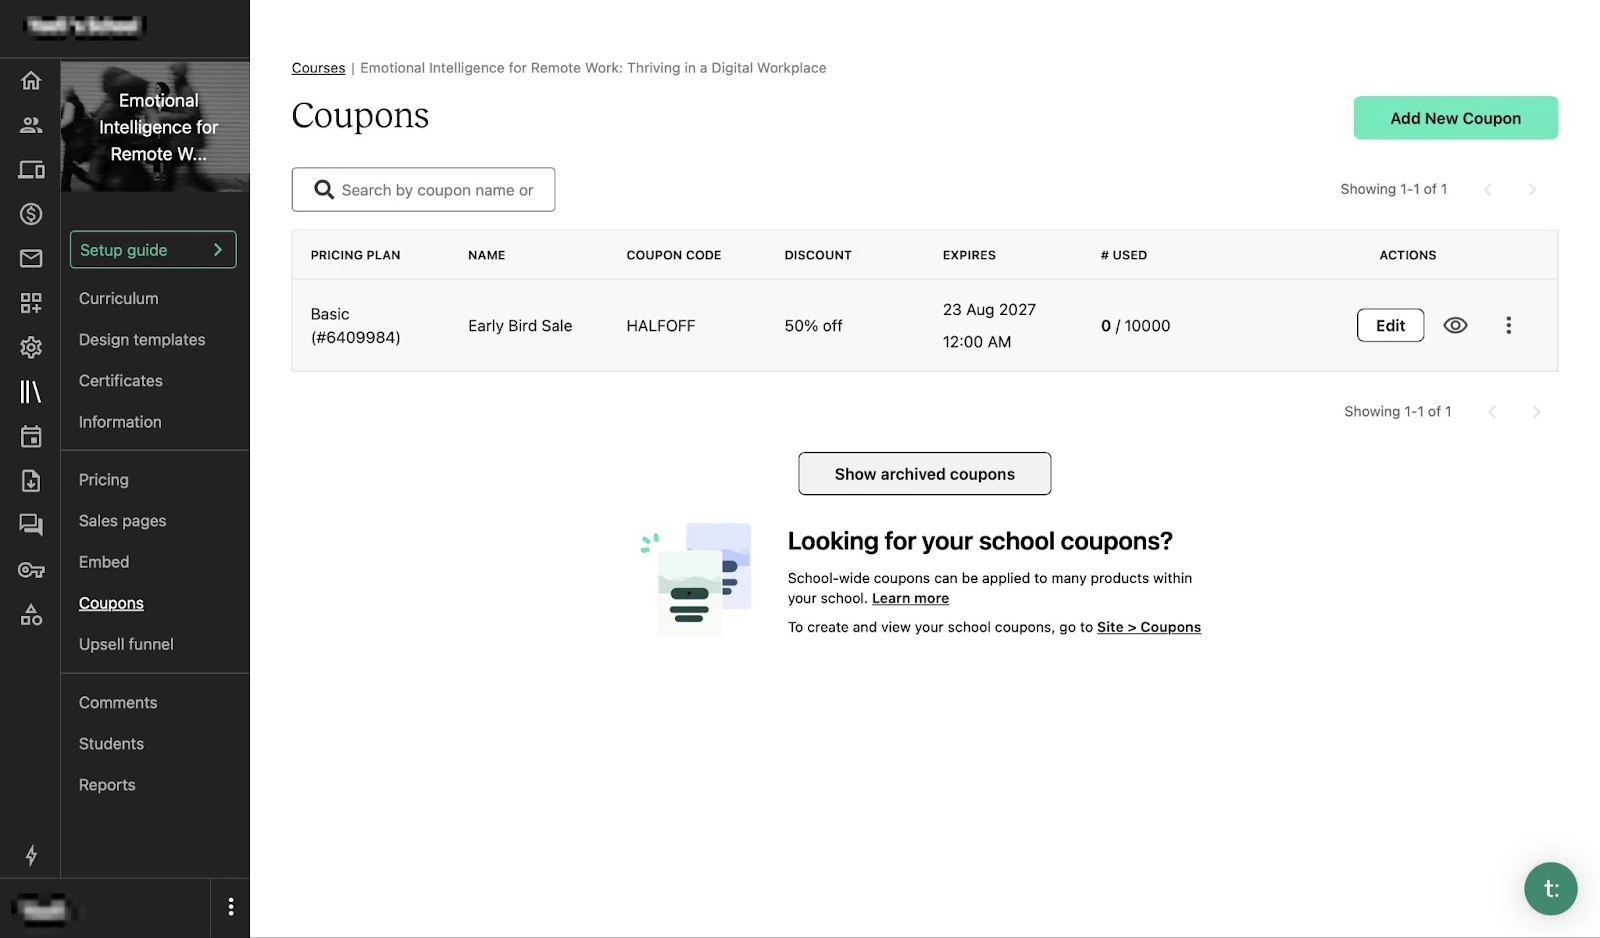
2. Coupons
Coupons are a great perk when selling your online course because they can easily convince customers to make a purchase.
To create a coupon in Teachable, start by clicking “Courses” in the sidebar of the homepage. Next, select your course.
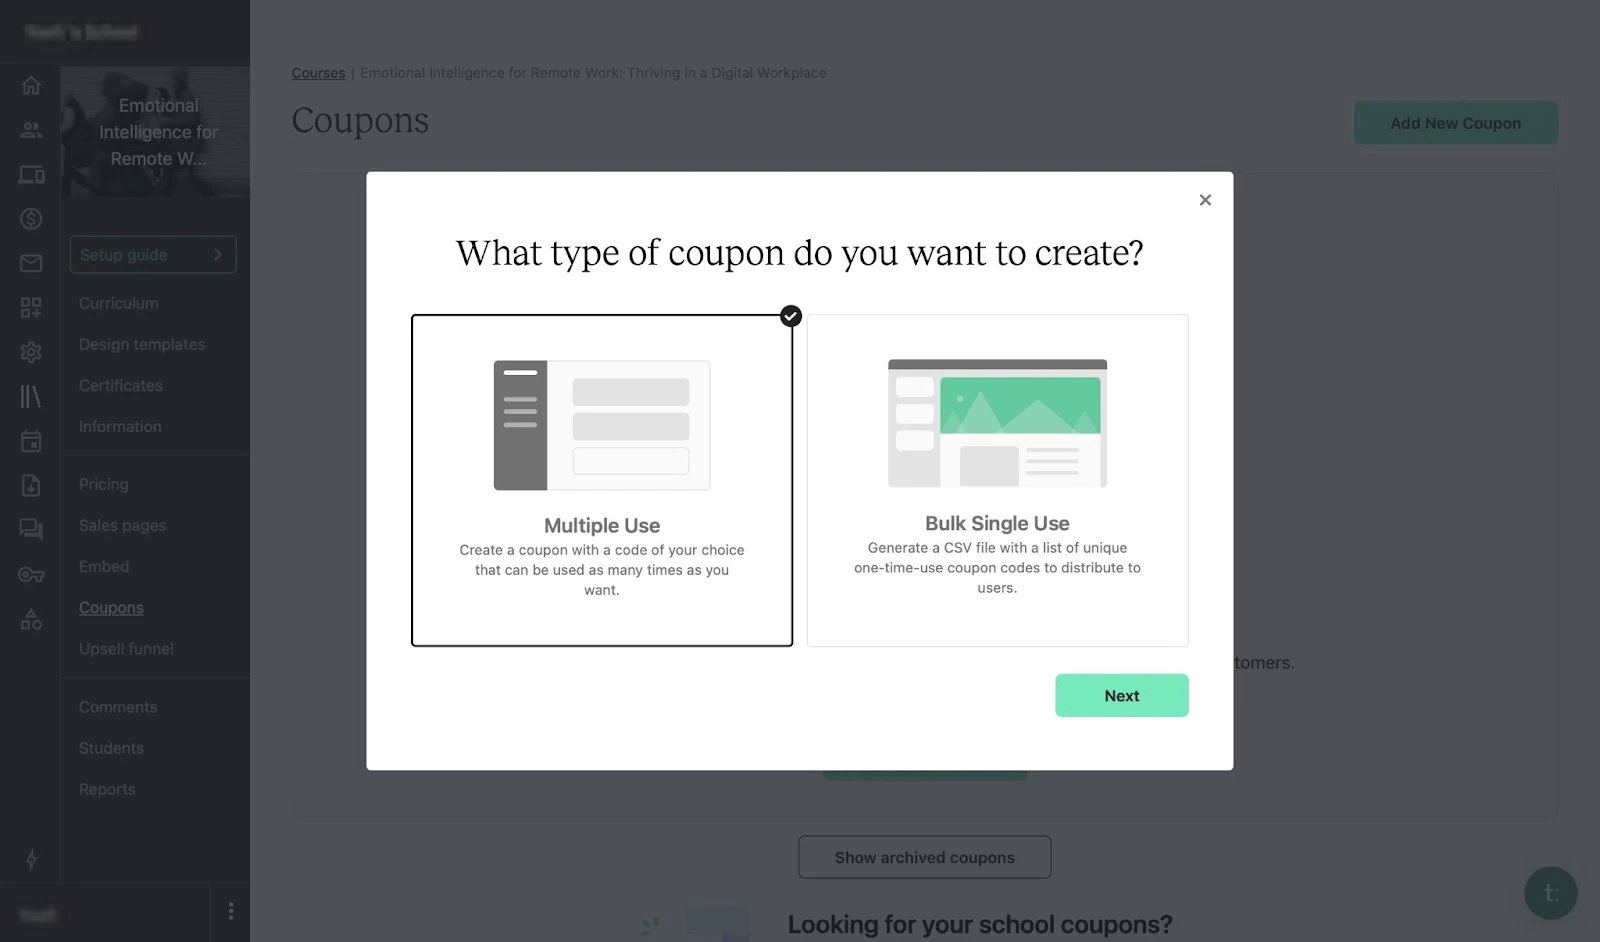
After that, select “Coupons.” Then, click “Add New Coupon.”

In the pop-up window, select the type of coupon you want to create and click “Next.”
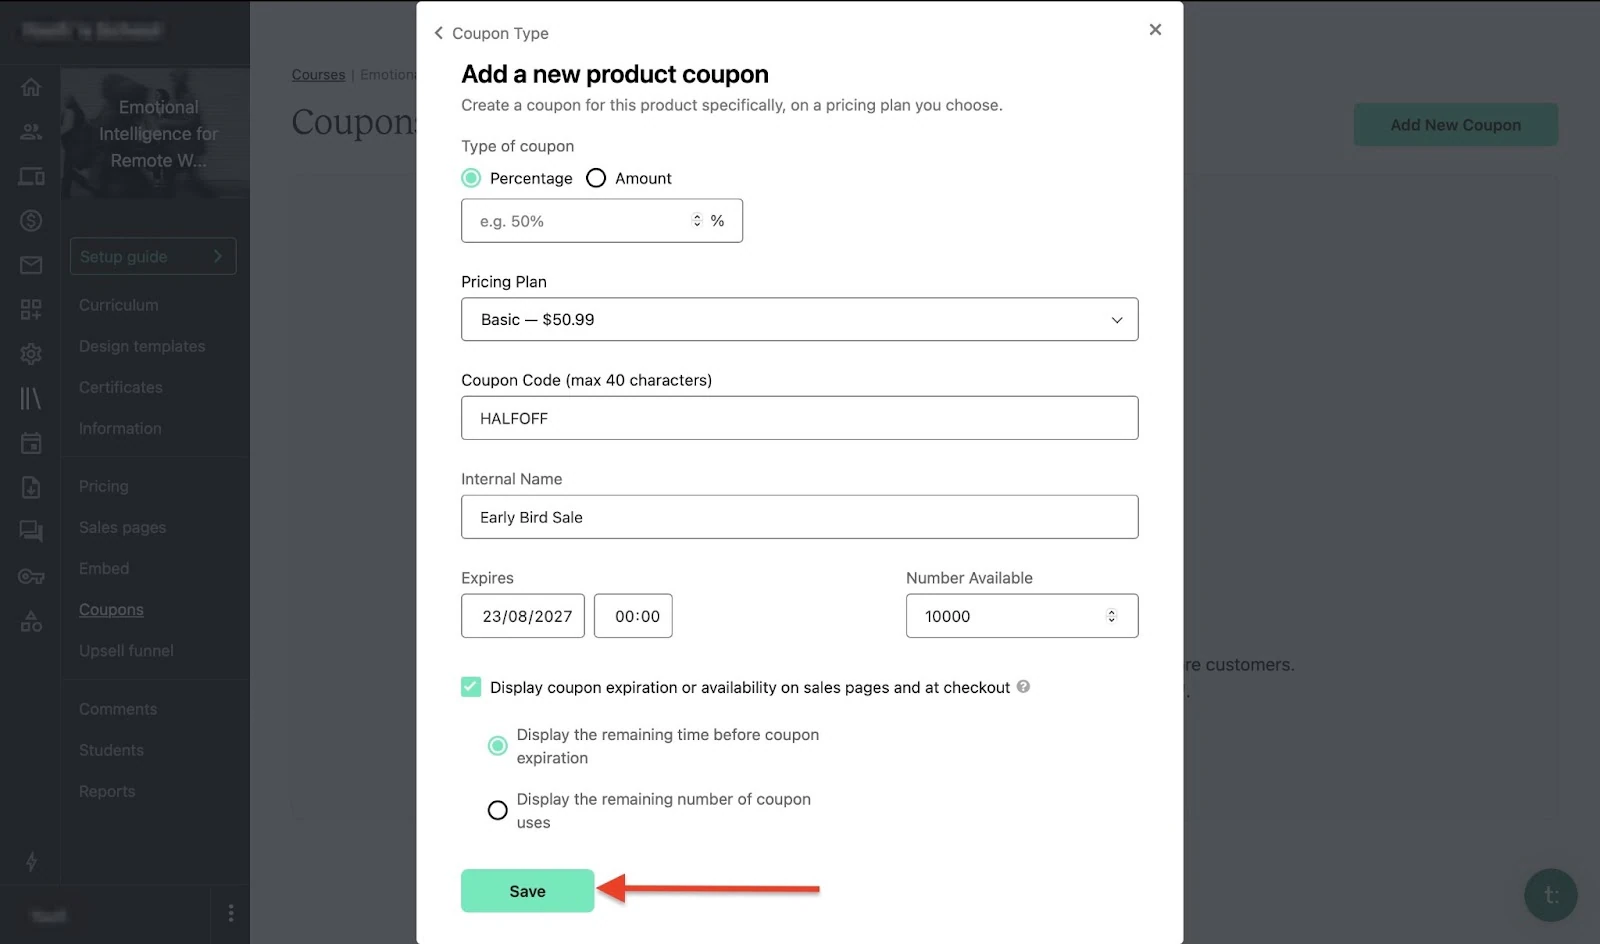
Fill out the coupon form, add the necessary information, and click “Save.”
Your new coupon will be listed in the Coupons window. You can edit it by selecting the “Edit” button. To preview it, click the eye icon.
Best for
- Educators and teachers looking for a simple platform to create, market, and sell courses or coaching services.
Pricing
- Starter: $39/month
- Builder: $89/month
- Growth: $189/month
- Advanced: $399/month
- Custom: Contact for pricing

3. Gumroad
Third on my list of the best online course platforms is Gumroad. It allows instructors and small businesses to sell digital products like online courses directly to their audience.

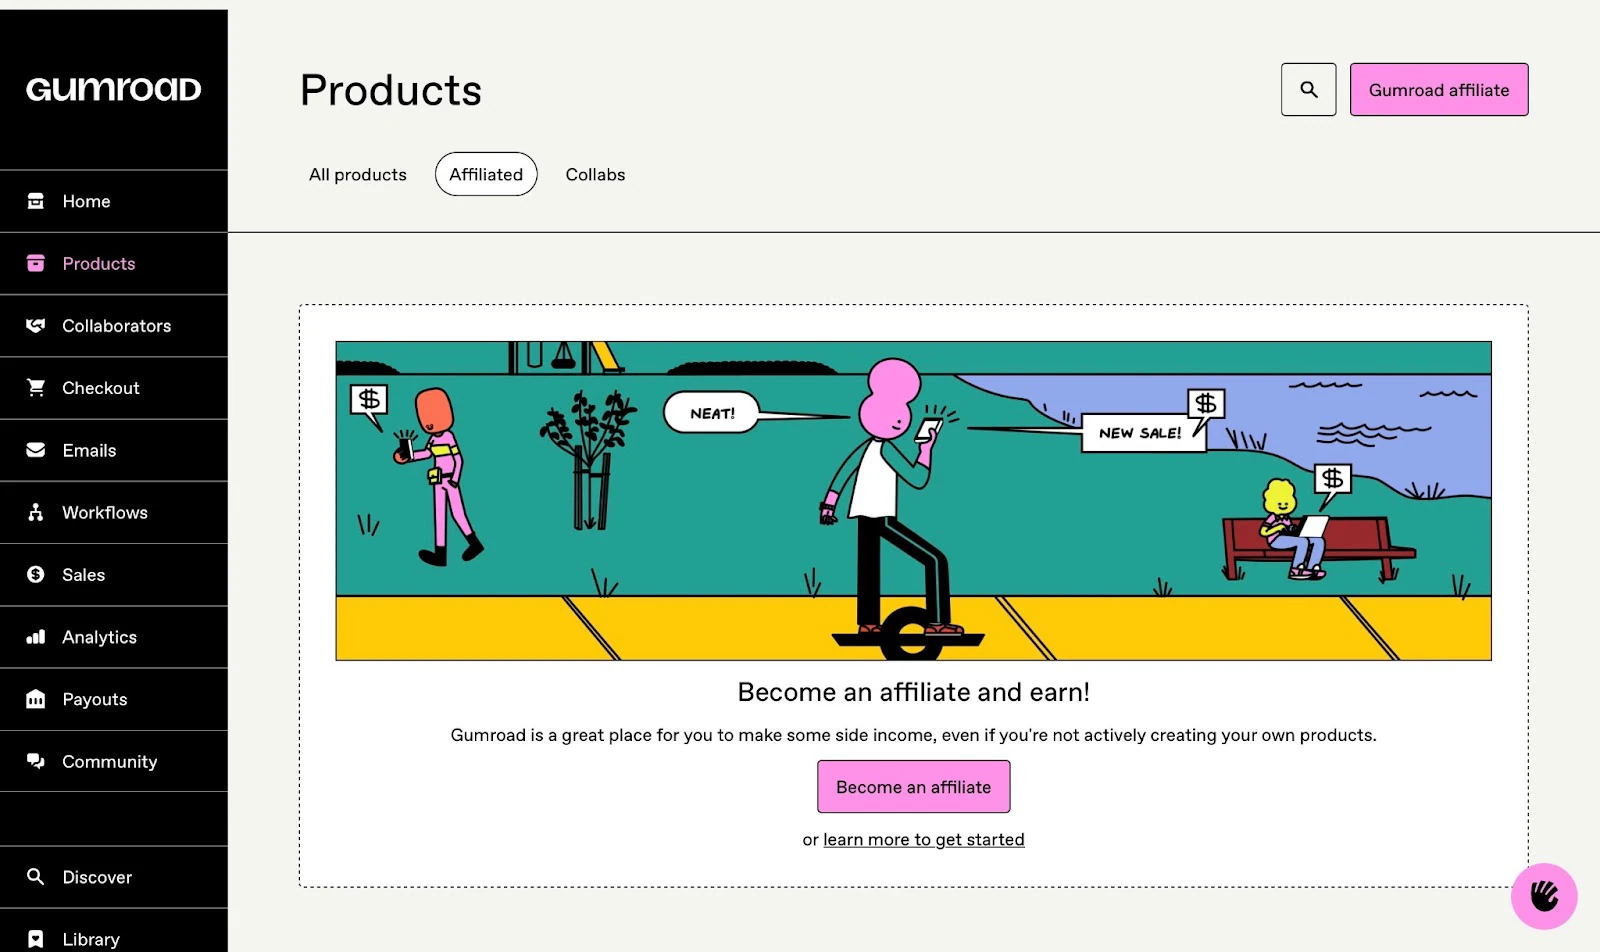
Gumroad’s products feature lets you create and add digital products on the platform. You also have the option to offer a product through collaboration with another creator and split the revenue.
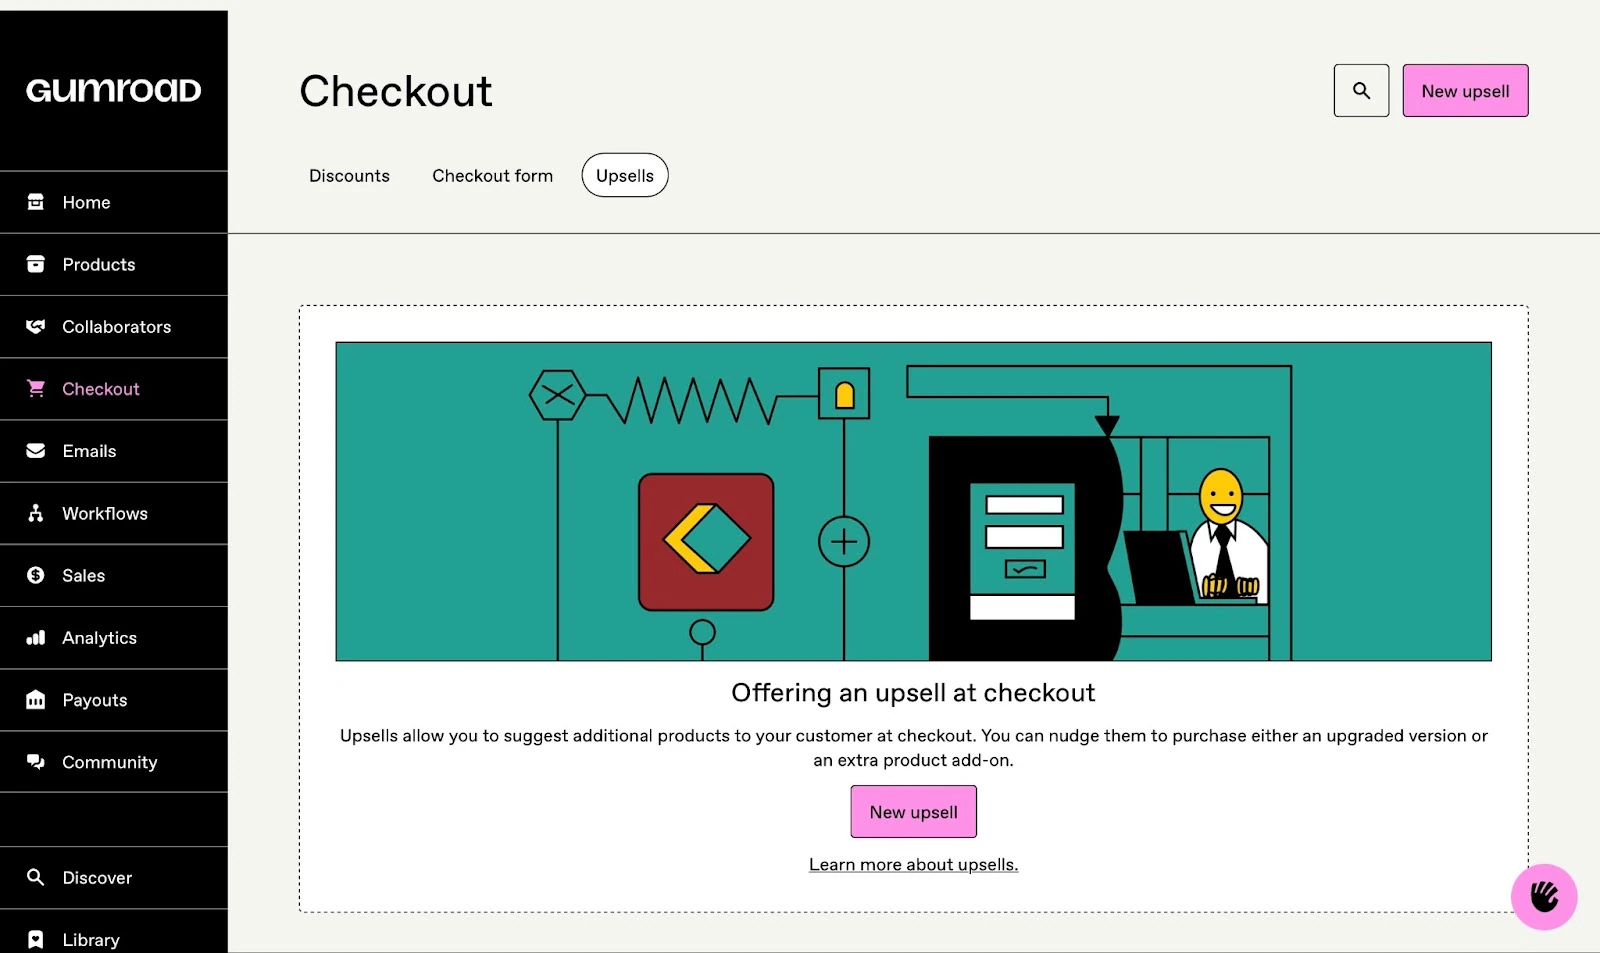
The checkout feature on Gumroad allows you to create discounts, edit the checkout form, and offer upsells.
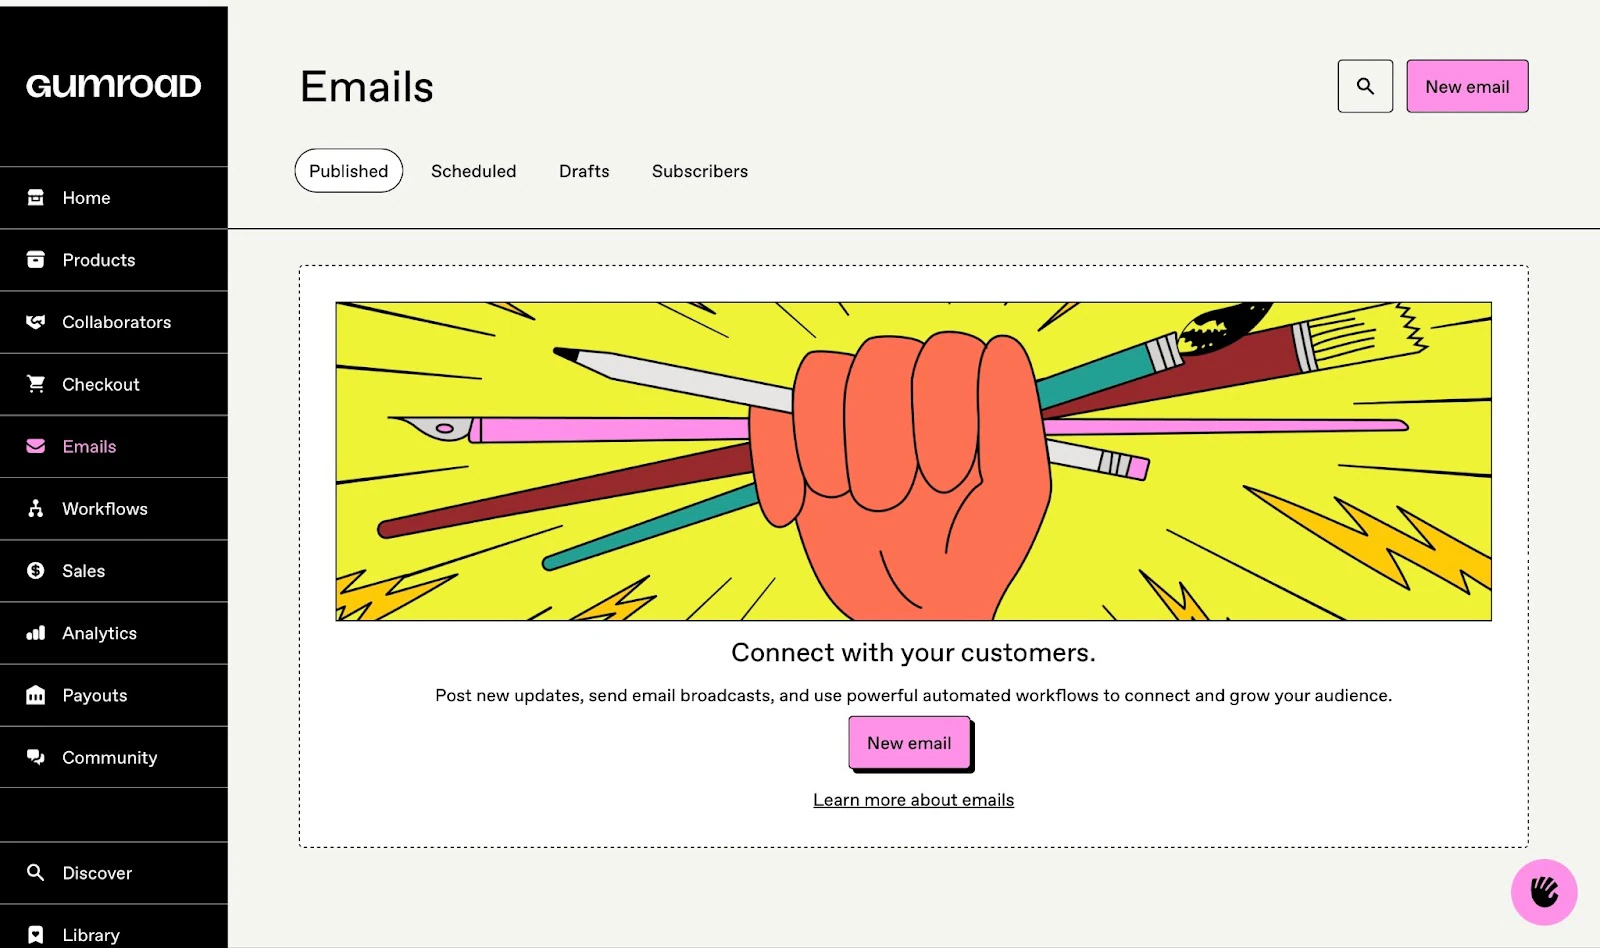
Using the emails feature, I could draft and schedule emails. I could download my customers’ email list as a CSV file.
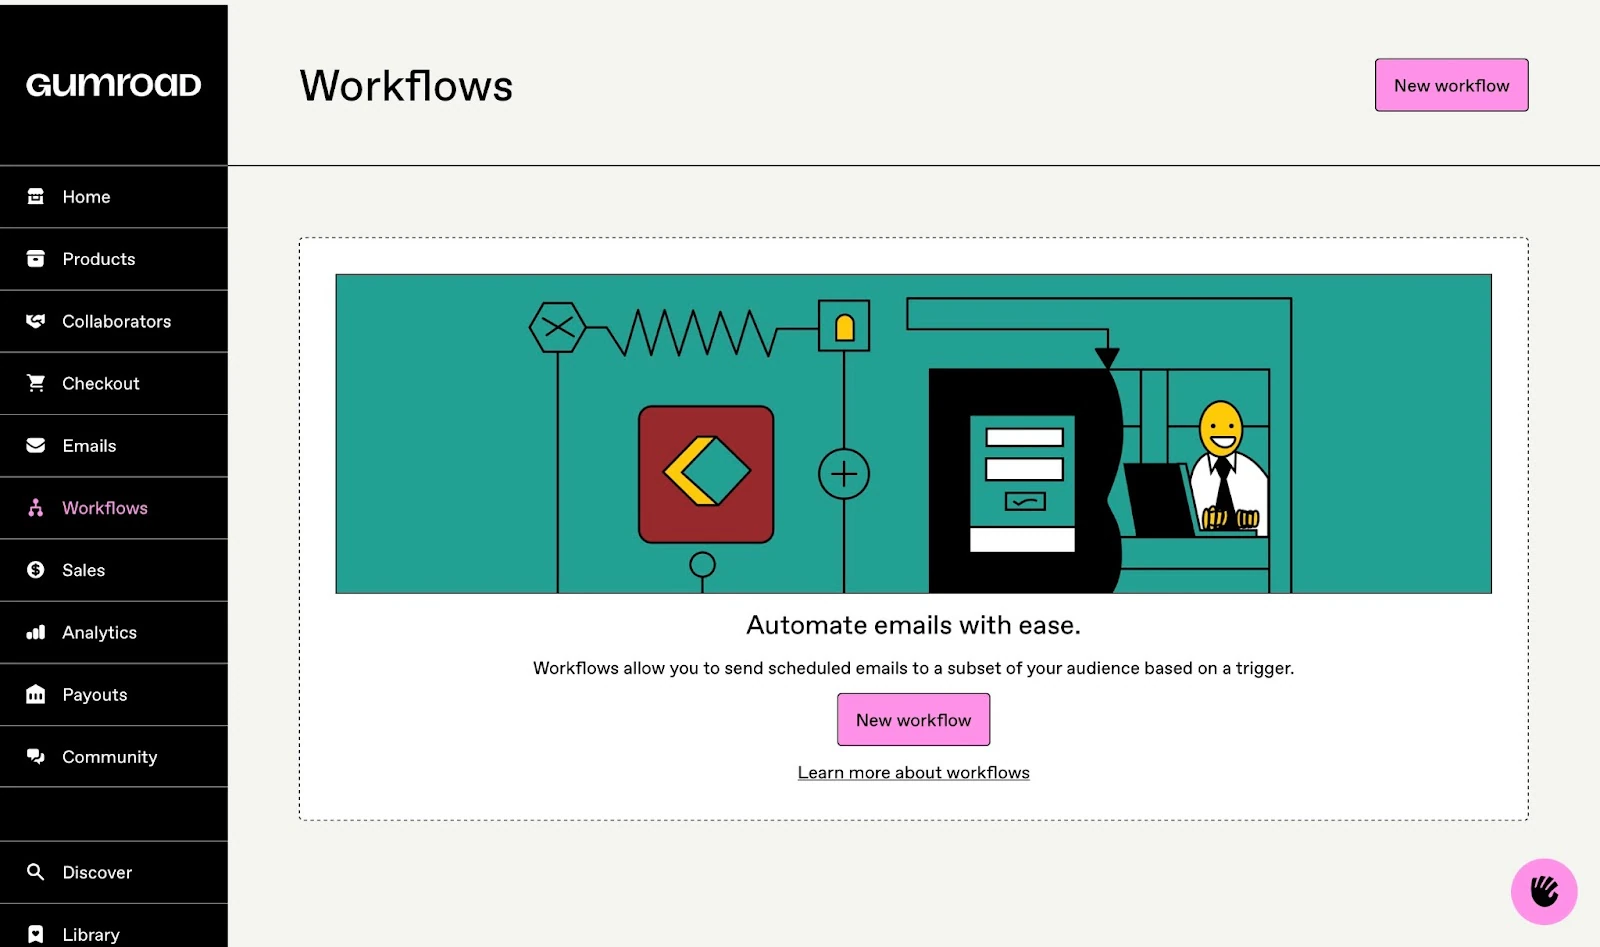
With Gumroad’s workflows feature, you can create automated tasks like tagging customers, sending follow-up emails, and grouping customers based on their actions.
In the next few steps, I’ll show you how to publish your first course on Gumroad.
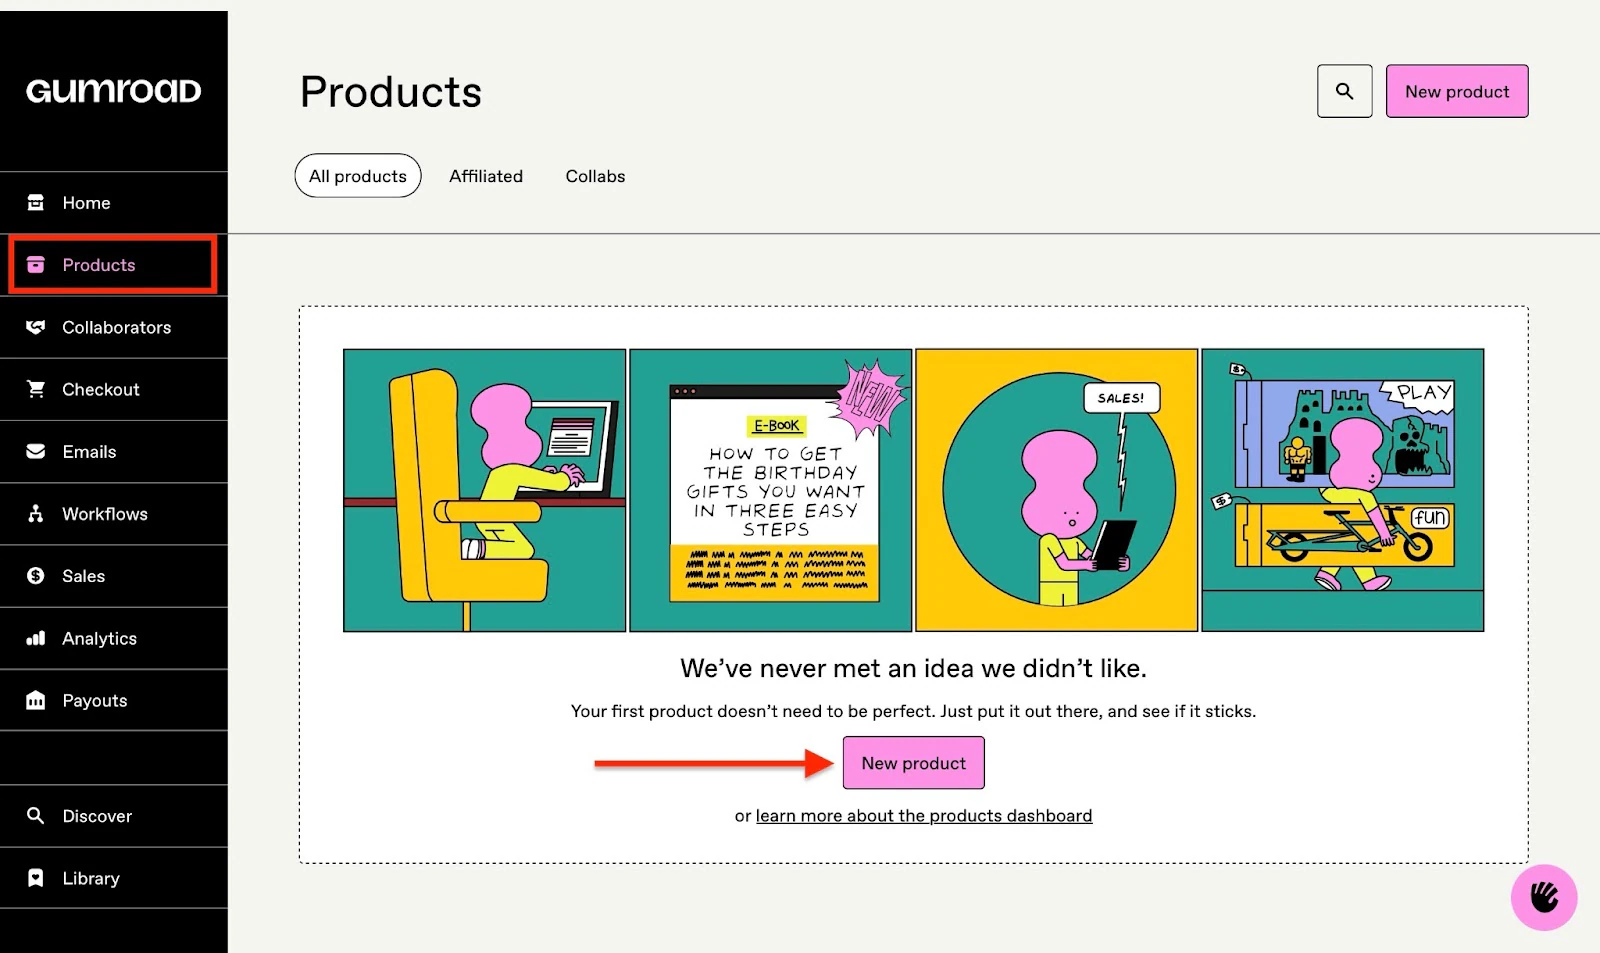
Start by selecting “Products” in the sidebar and then clicking “New product.”
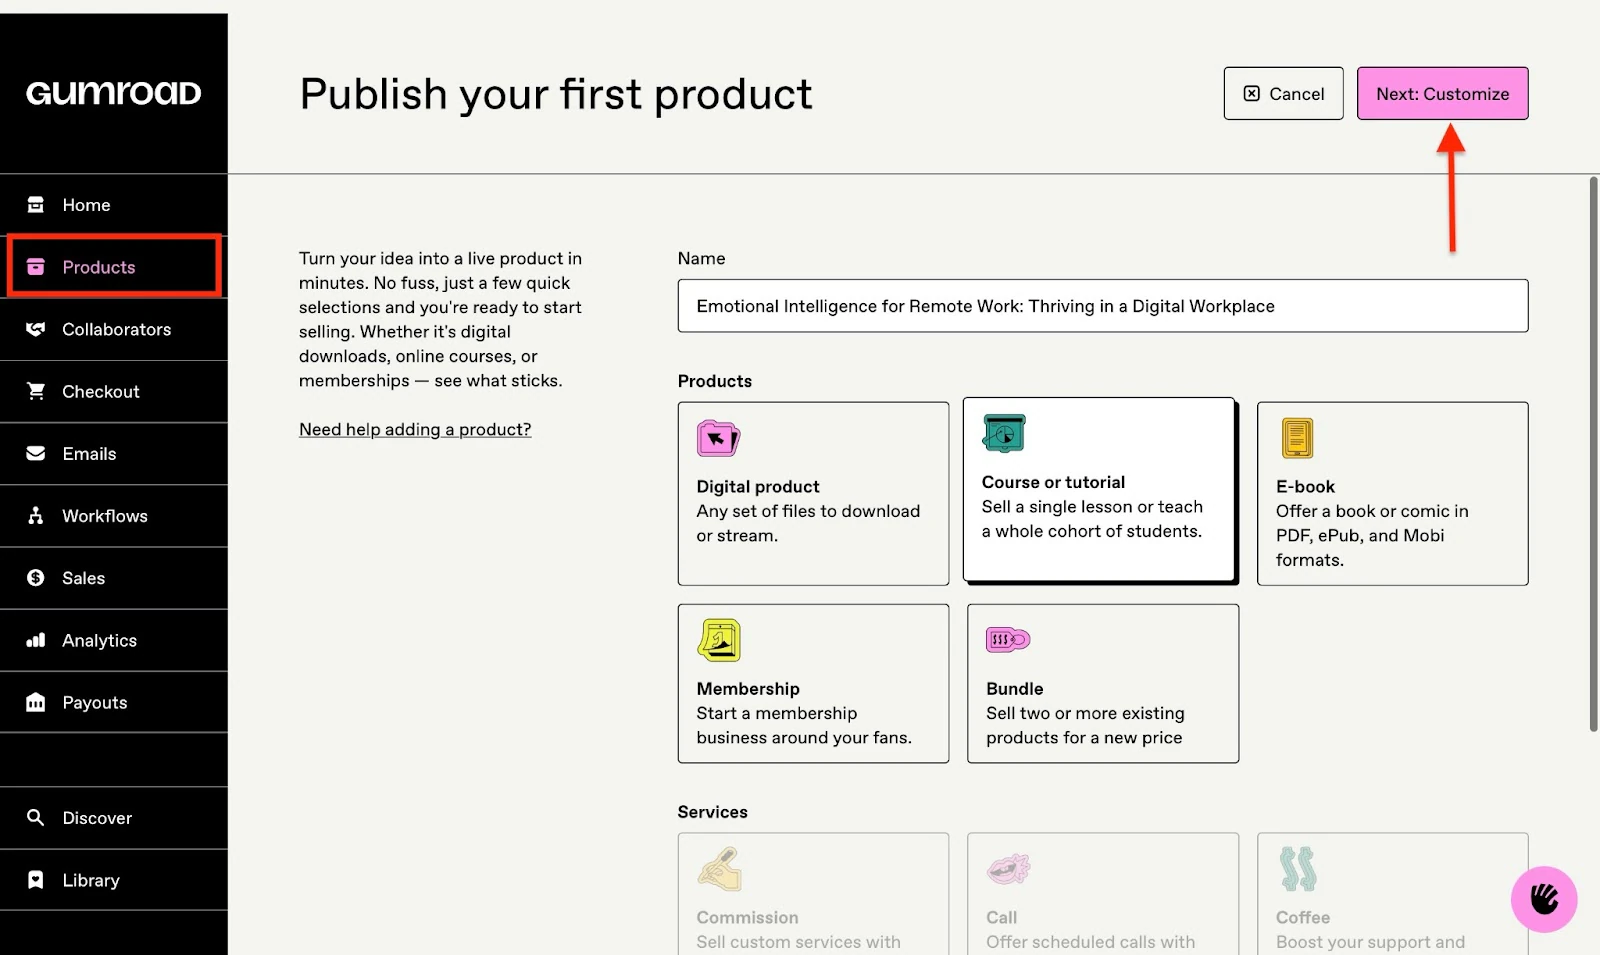
Next, type the name of your course in the field provided, and select the “Course or tutorial” card.
Then scroll down to add the price of your course. After that, proceed to customize it.
In the next window, maintain, edit, or change your course name by clicking in that box. Then, add the course description.
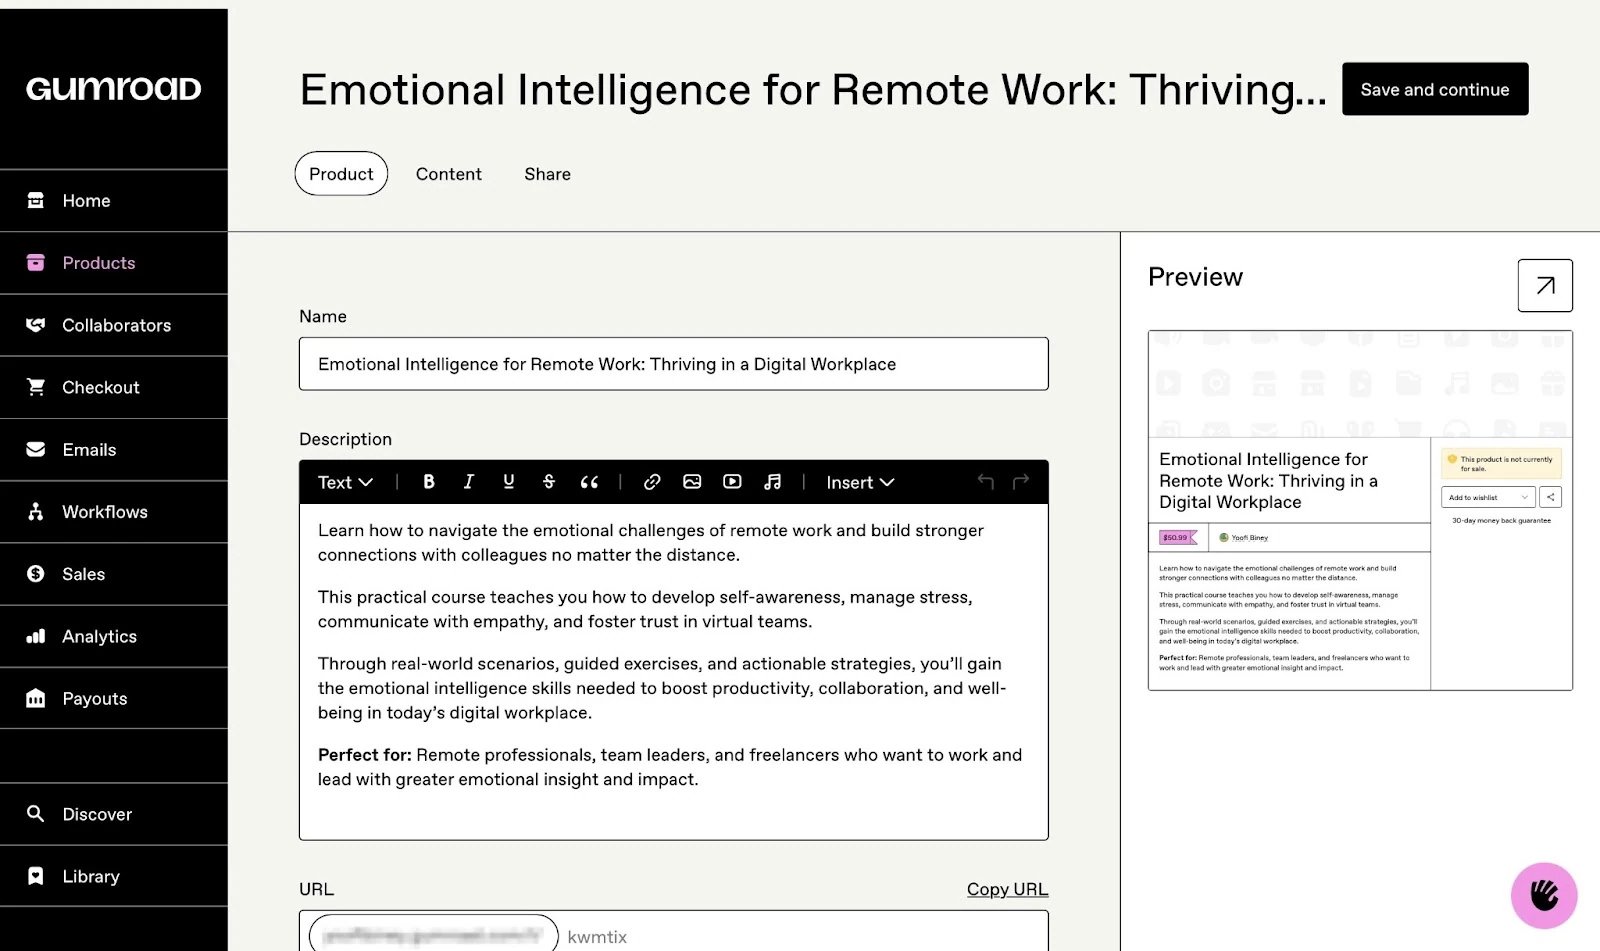
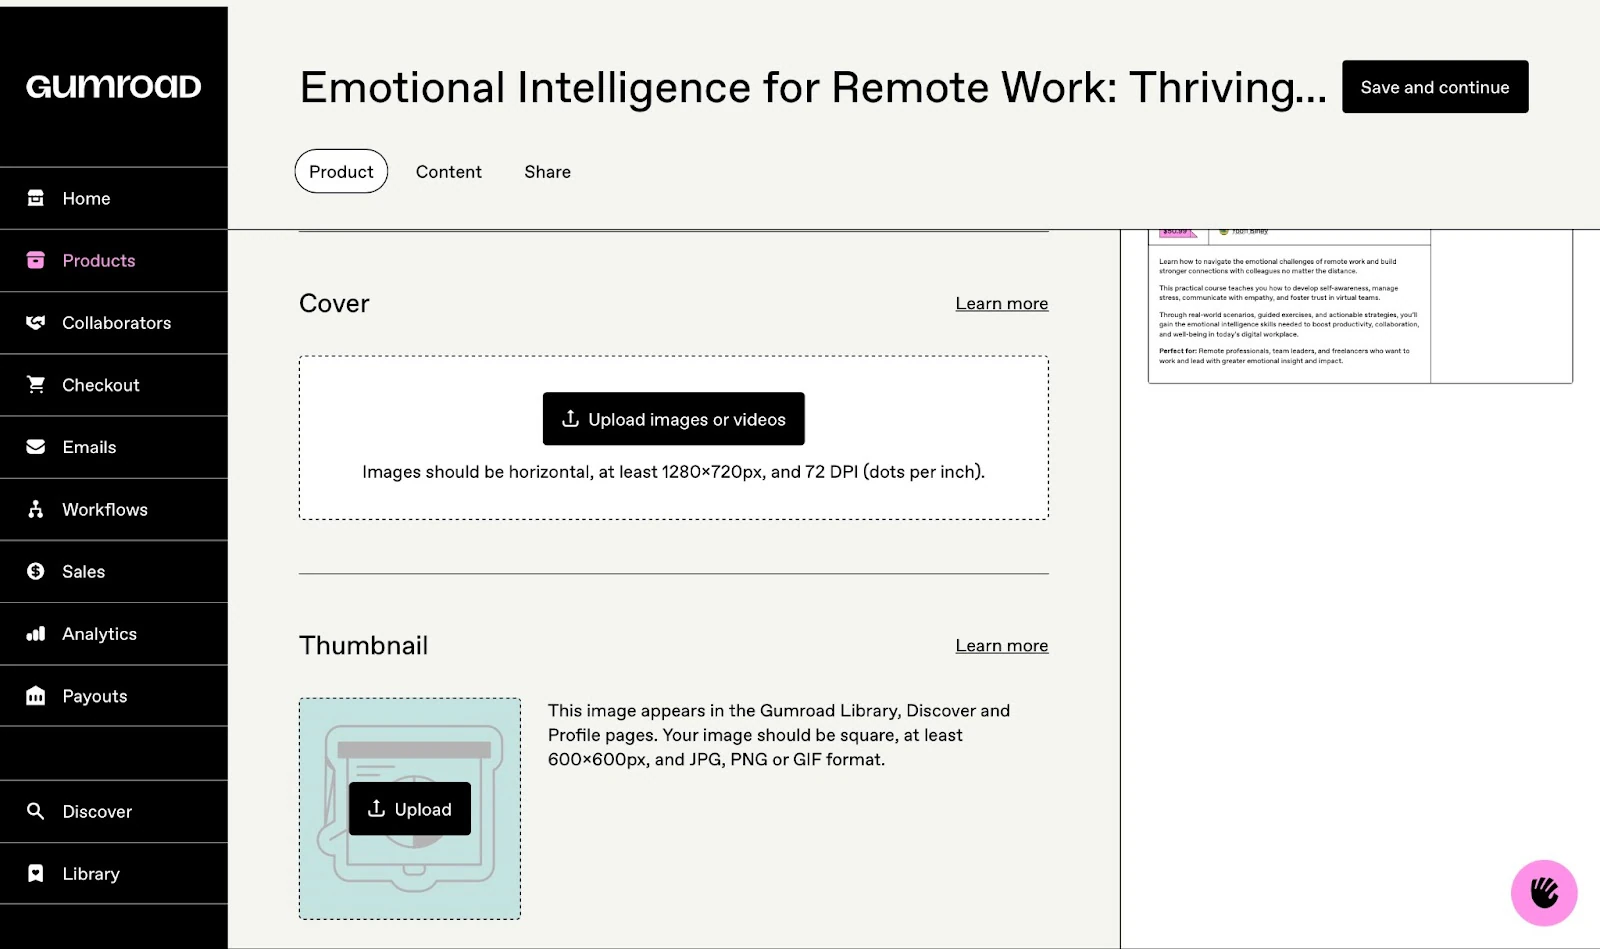
Scroll down to customize the course URL link. Click “Upload images or videos” to add a cover image to your course. You can also click “Upload” in the thumbnail section to add a thumbnail.
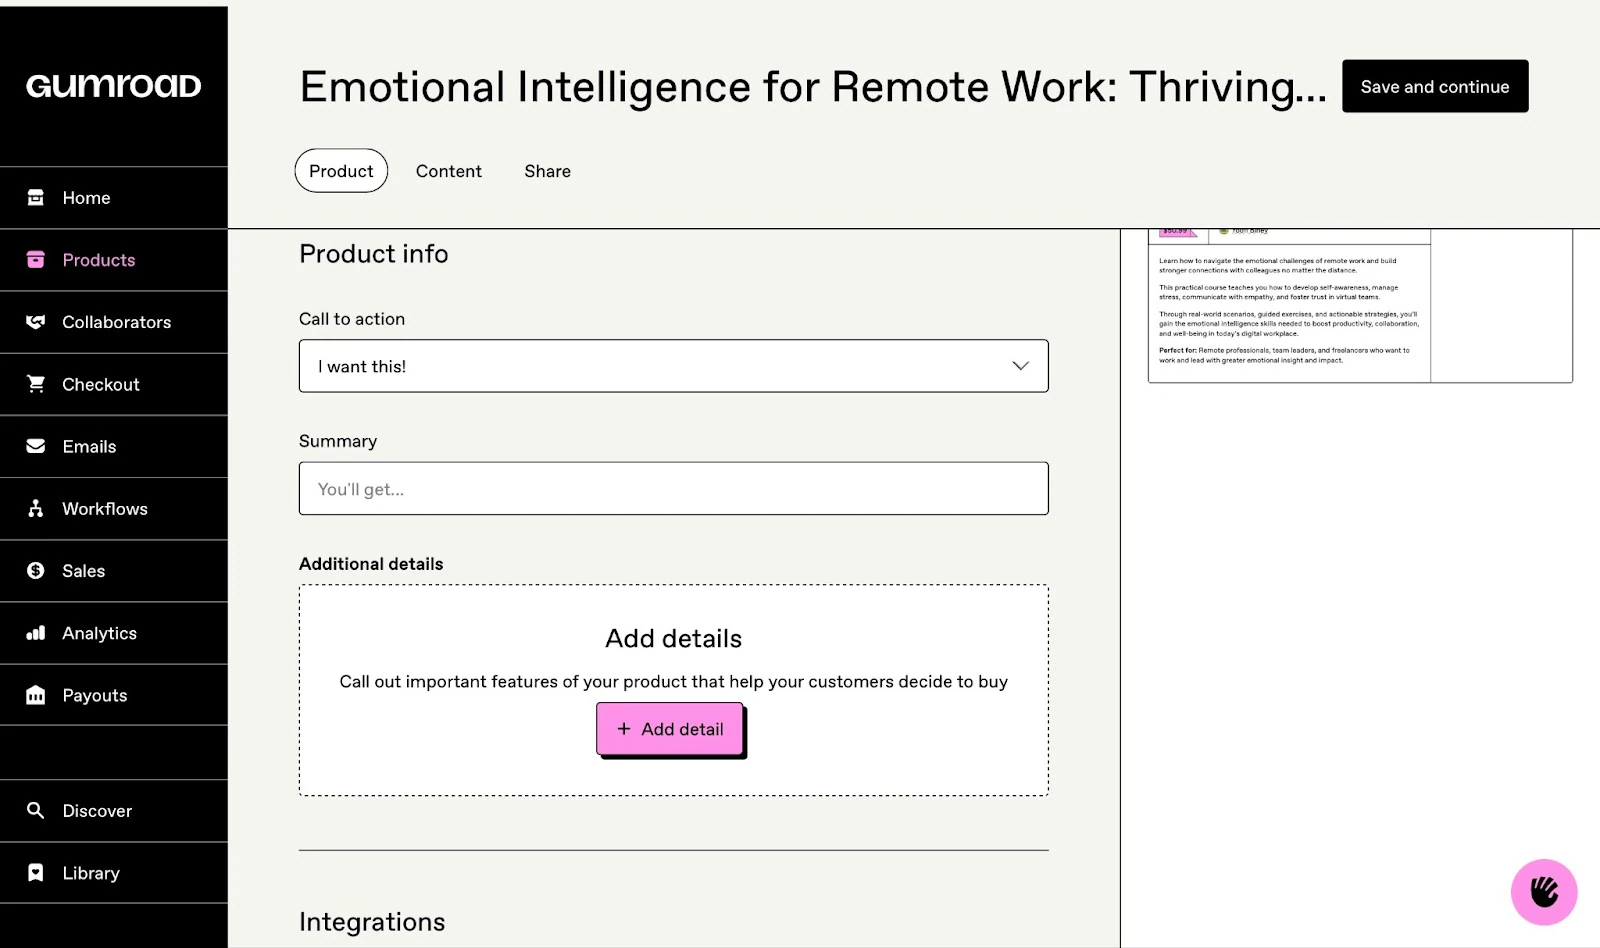
Then, scroll further down to add key information like a call-to-action (CTA) and course summary.
Click “+ Add detail” to add additional details that can serve as selling points to help your audience and customers decide to buy from you.
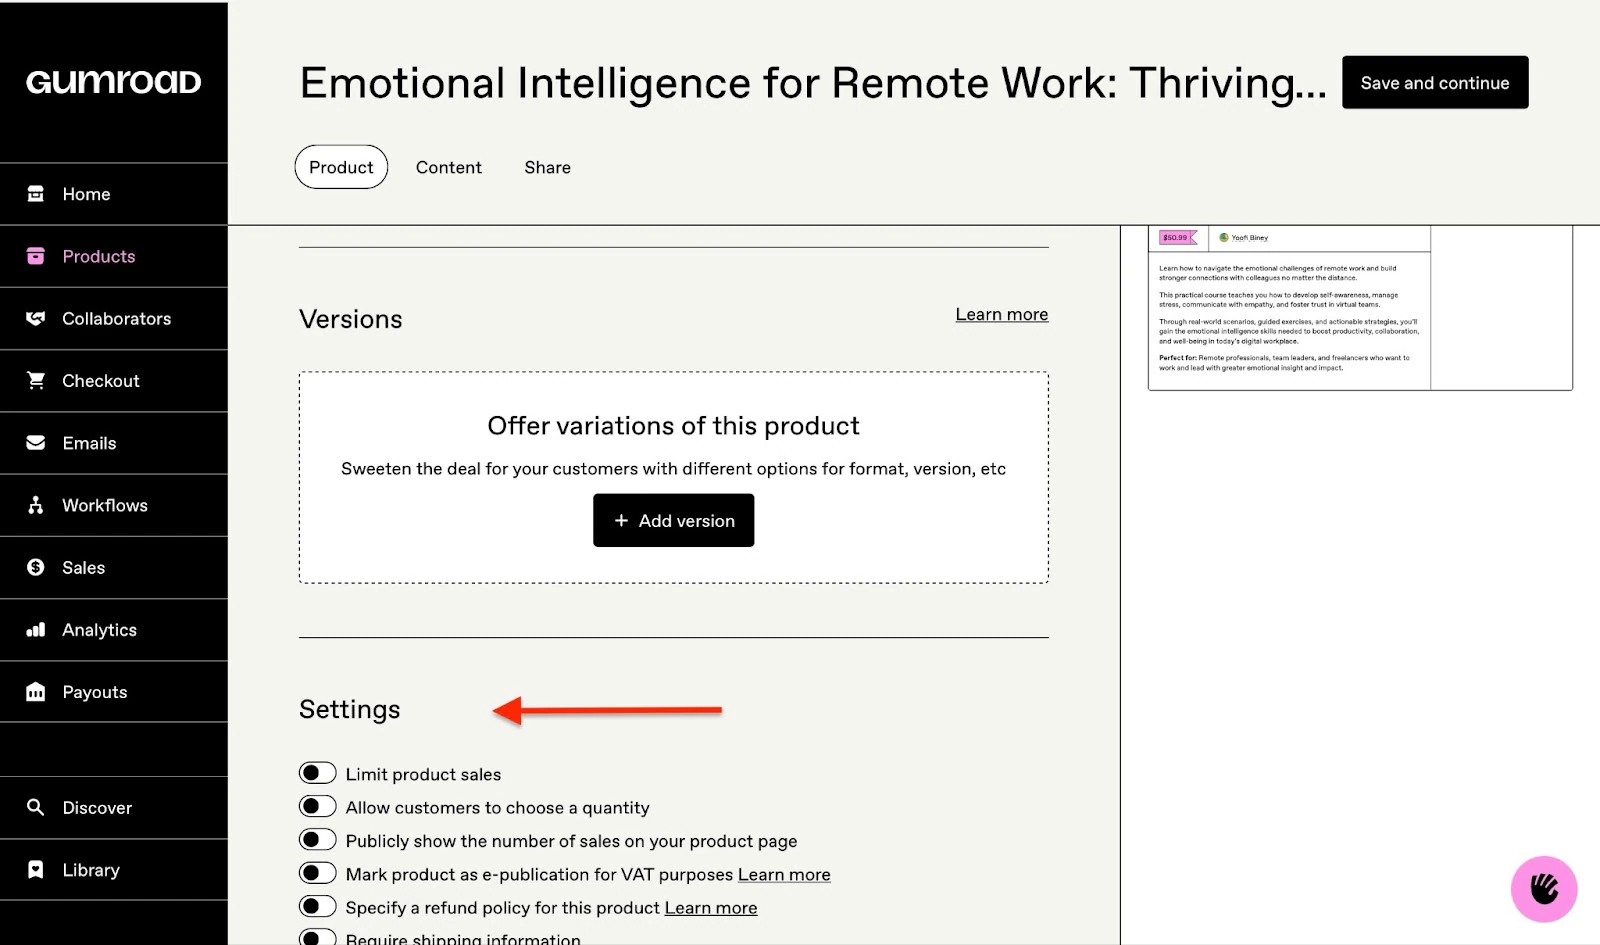
At the very bottom of this window, add community integrations, edit pricing, or add additional incentives to it.
Click “+ Add version” to offer more variations of your course. Select the appropriate settings by turning the toggles on or off, and click “Save and continue.”
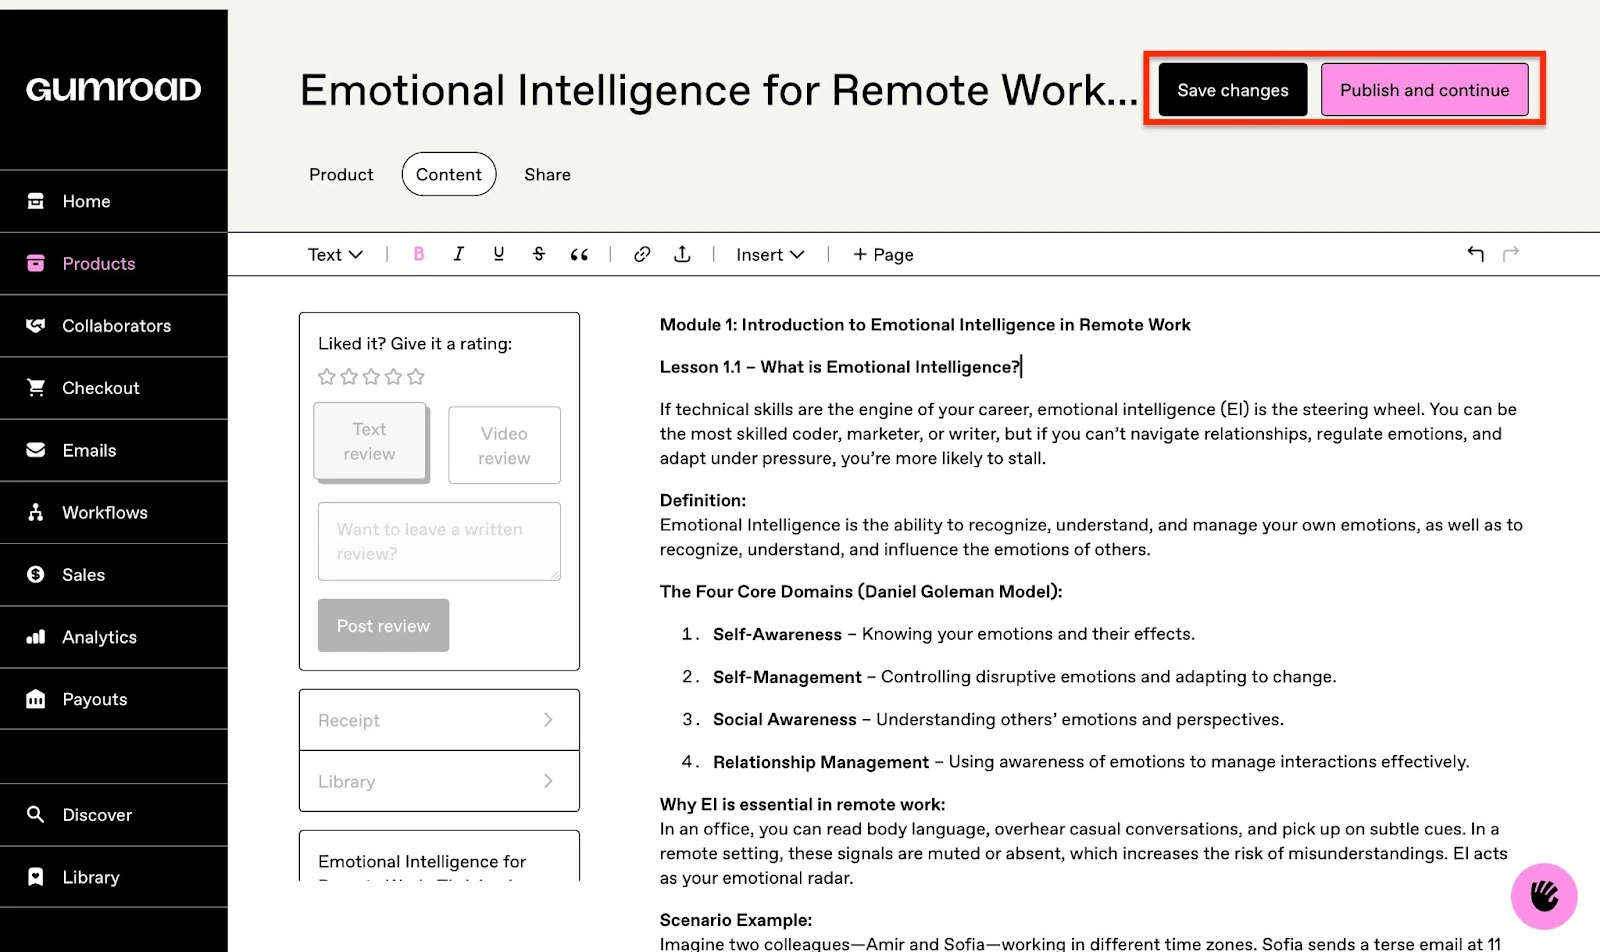
The content tab next to the product tab opens after your last choice. It’s a content editor. Click the blank area on your right to add your content, and apply edits where necessary.
You can also click on the upload icon to select a PDF or EPUB file of your course from your device or Dropbox.
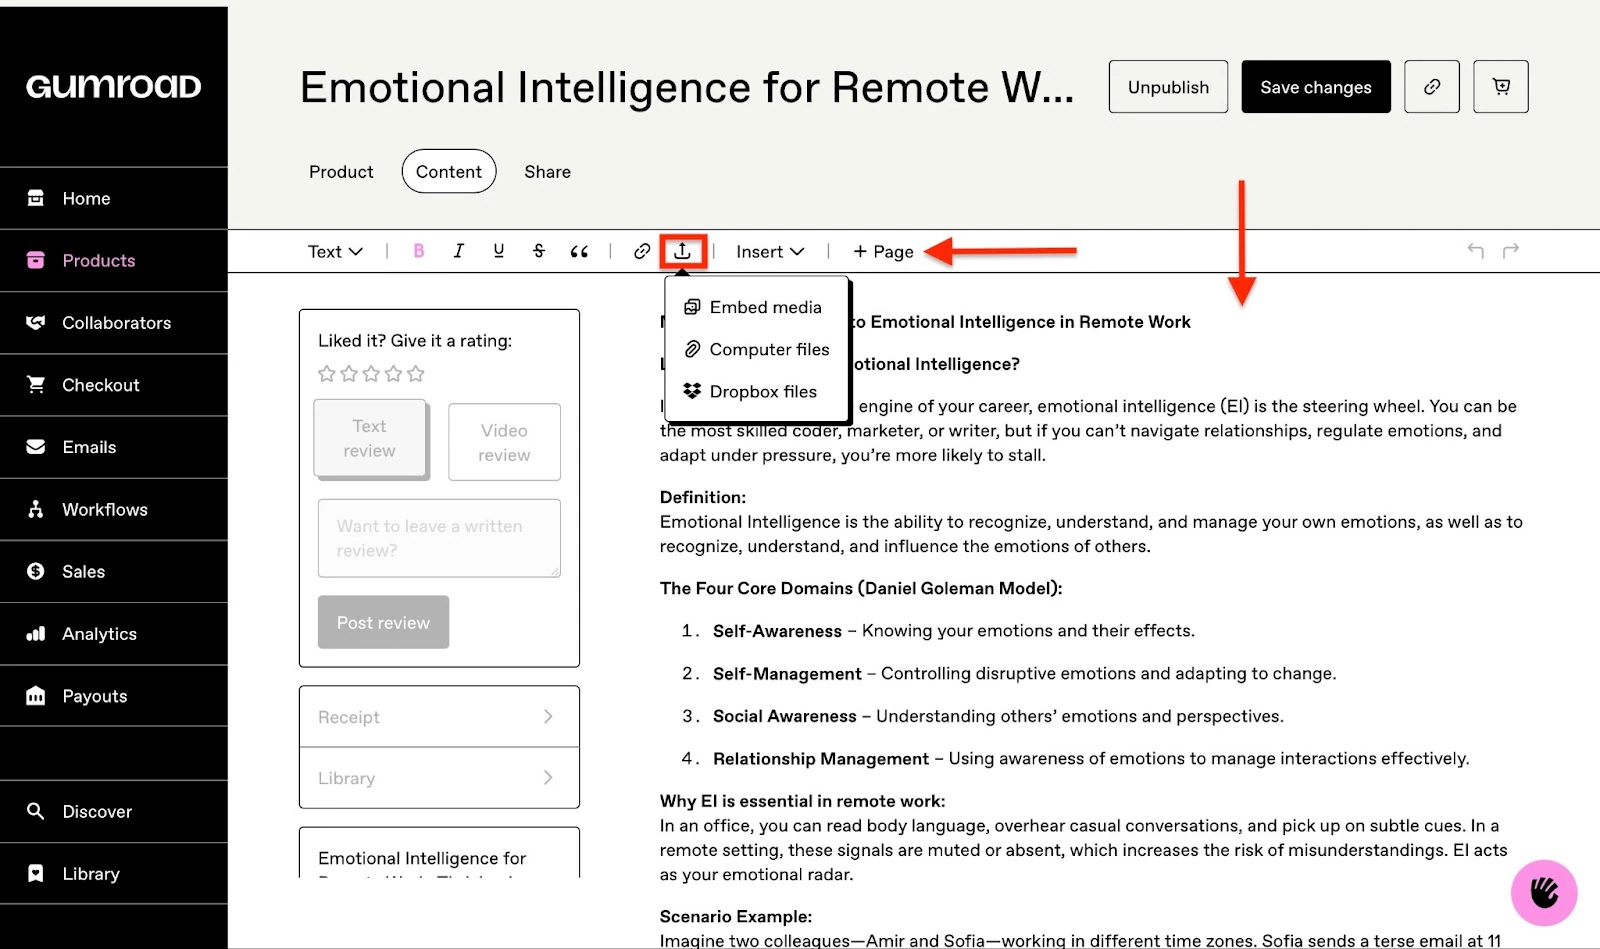
Once you are through with it, click “Save changes” to save your edits and additions. When you’re done with content editing and additions, click “Publish and continue.”
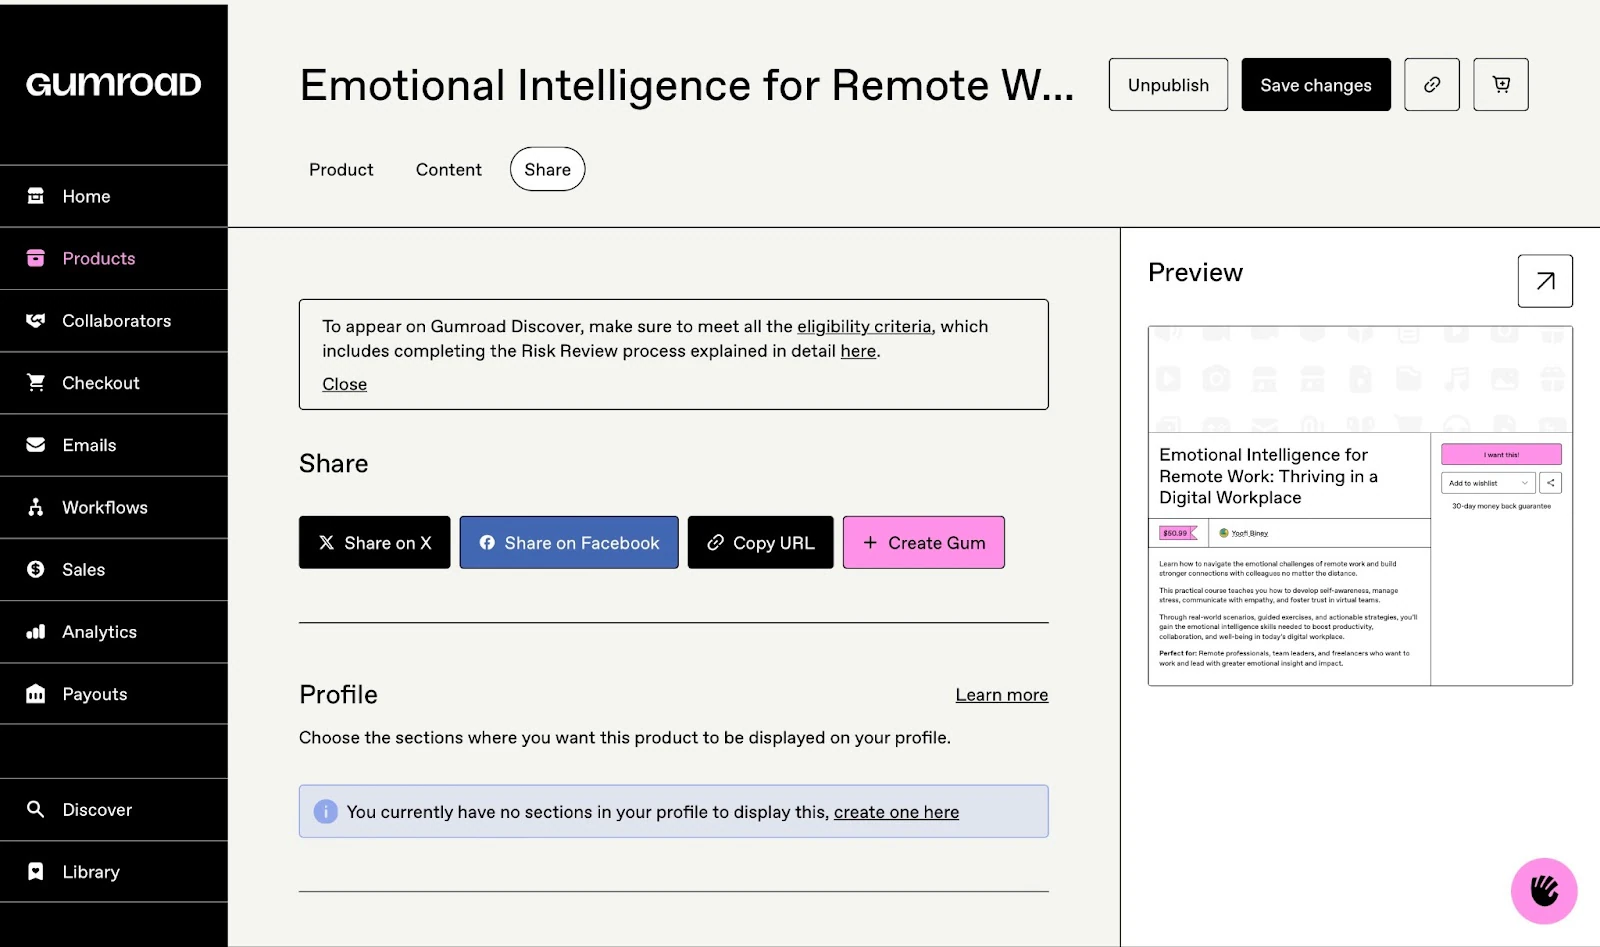
This opens the share tab. You can share your course on Facebook or X or copy the course’s URL link. Click “+ Create Gum” for a quick landing page for your course.
Now, scroll further down to fill in the necessary information for Gumroad’s marketplace (Gumroad Discover). Select the appropriate category for your course and add search tags. Then, click “Save Changes” to finish.
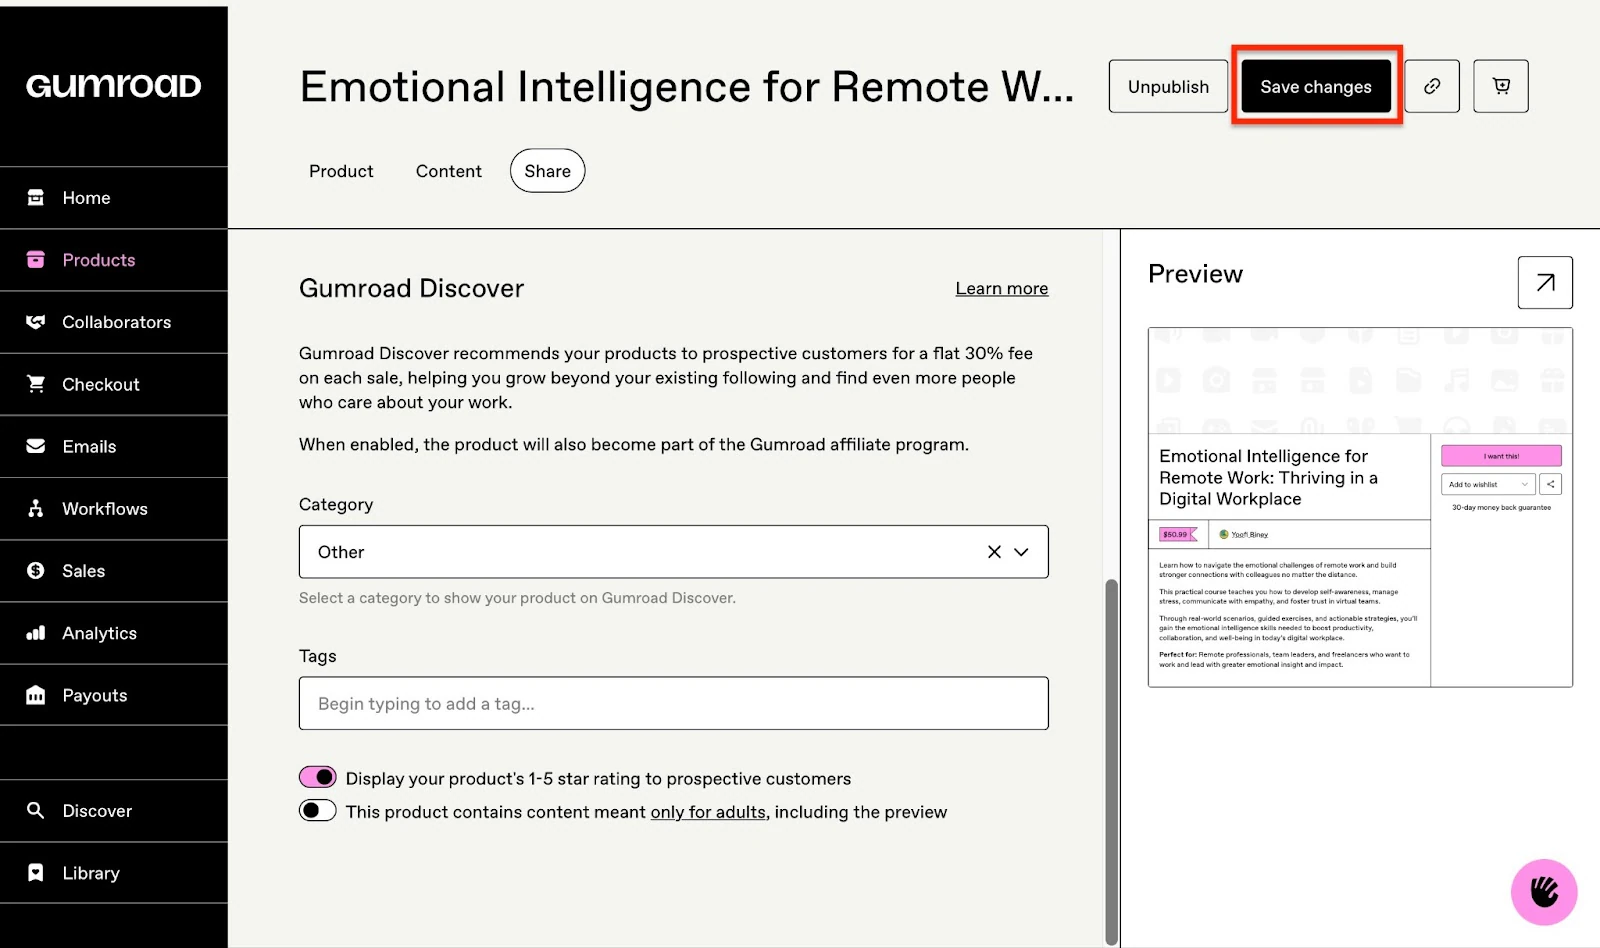
Your course will be listed in the products window. To view it, click “Products” on the sidebar directly from the share tab window.

Key features
1. Checkout
Now that your course has been published, Gumroad’s checkout feature can help you maximize your earnings. With the checkout feature, you can customize your checkout page and add discounts and upsells.
Let me show you how to add a discount.
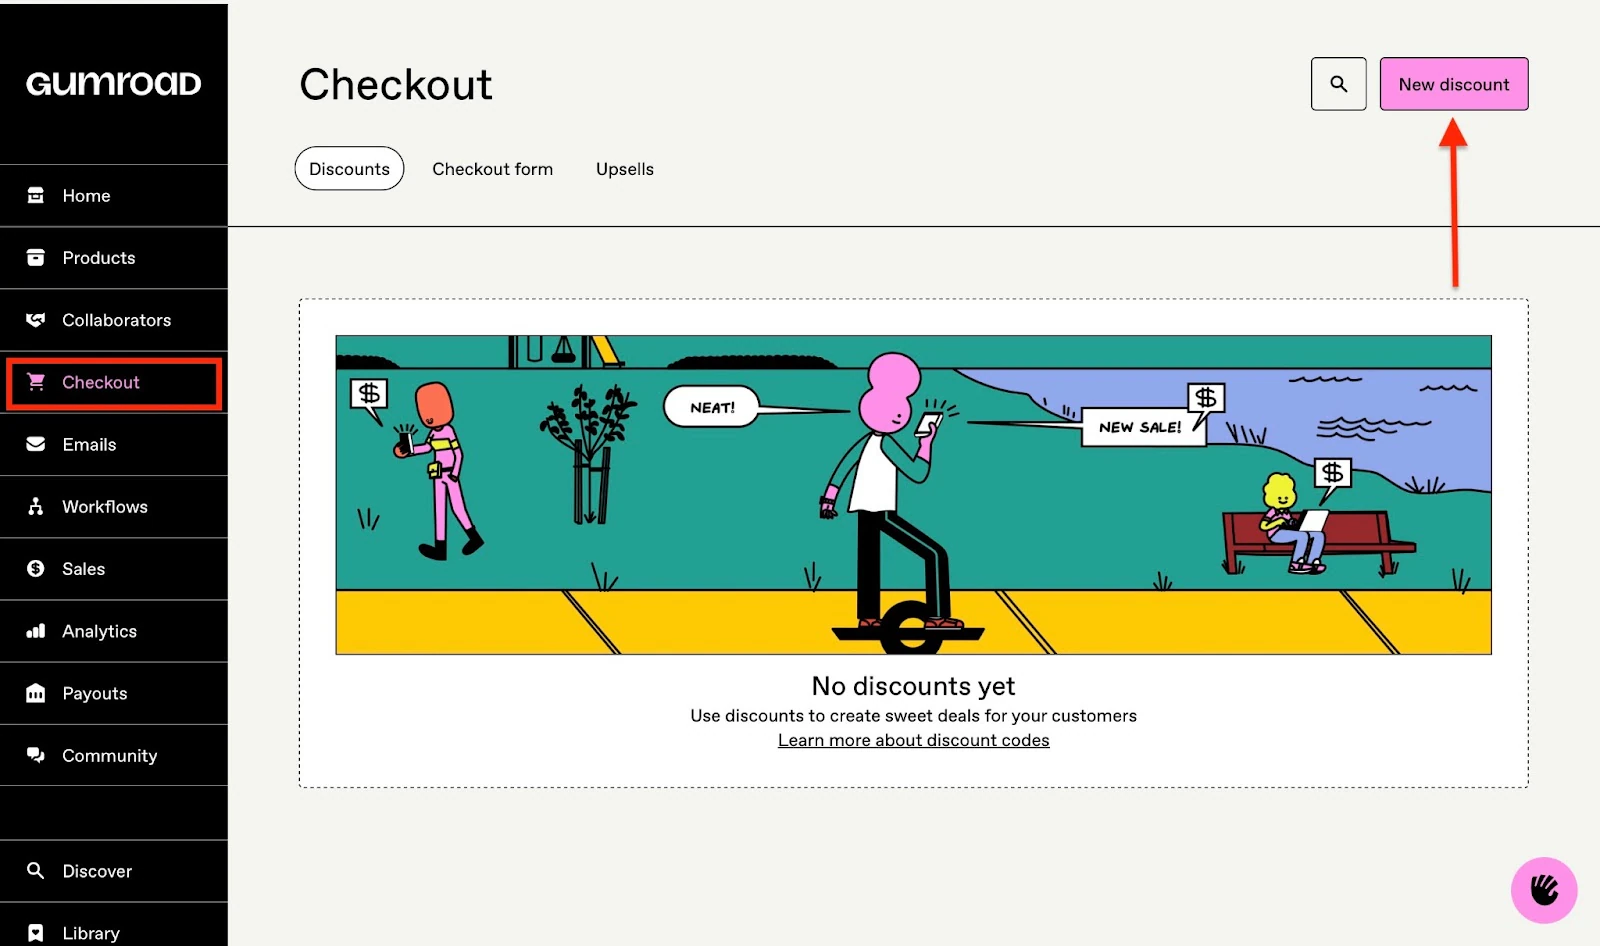
Begin by clicking “Checkout” in the sidebar. This will naturally open to the discounts tab. Then click “New discount.”
Now, create the discount by adding the necessary information in the fields displayed. Like the discount’s name, the unique code, and other details.
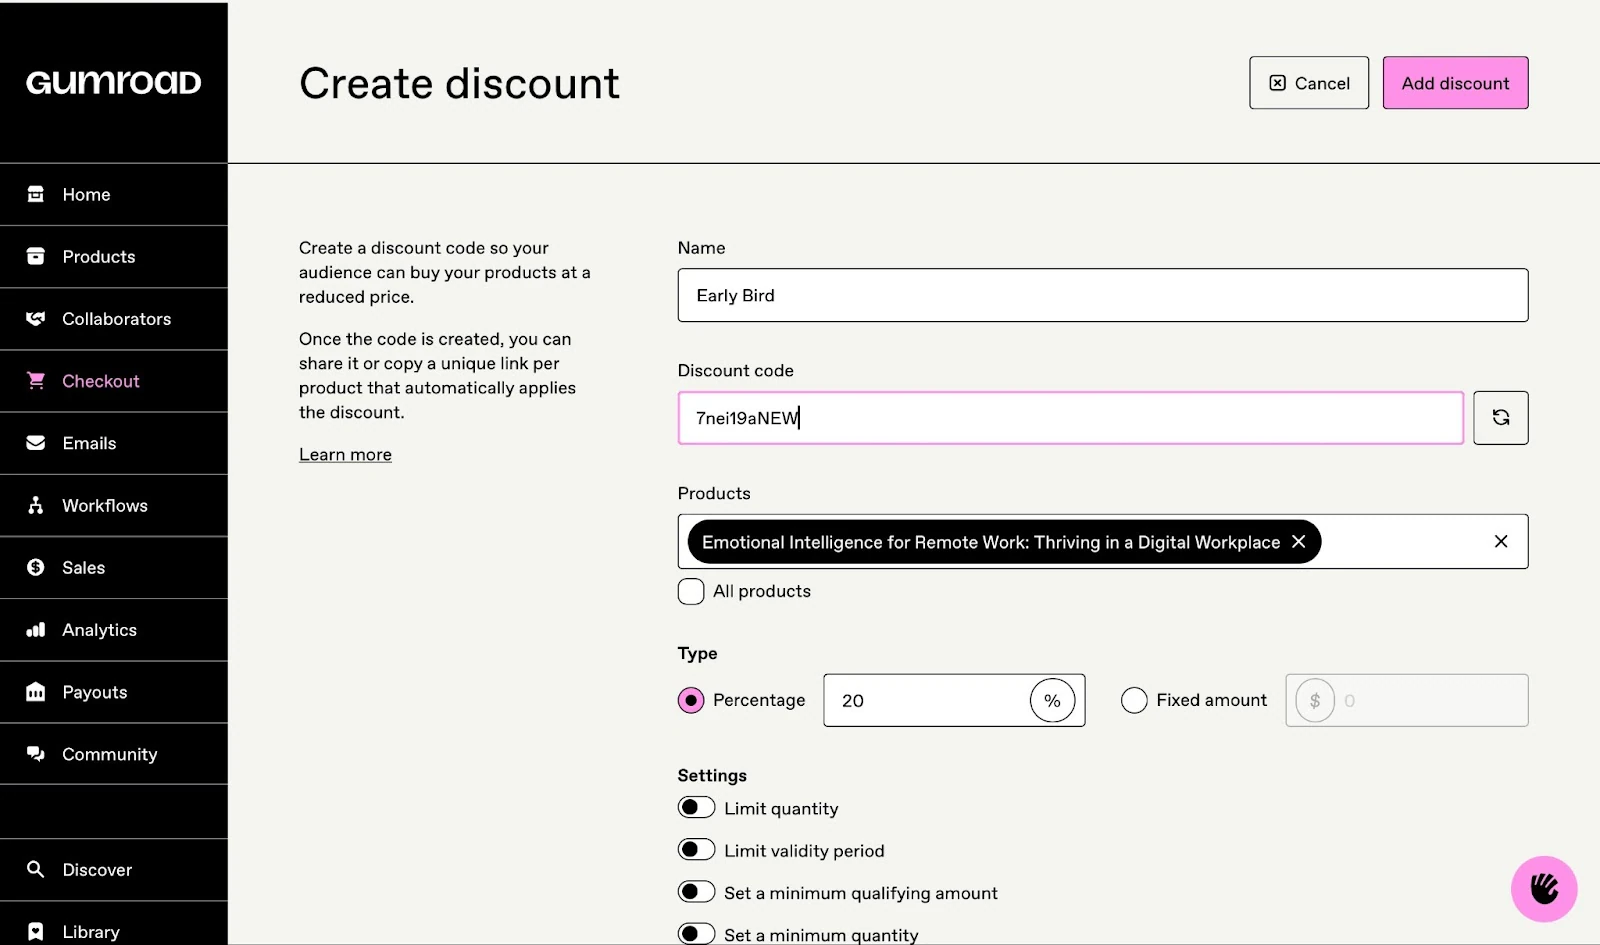
After that, click “Add discount” to finish.
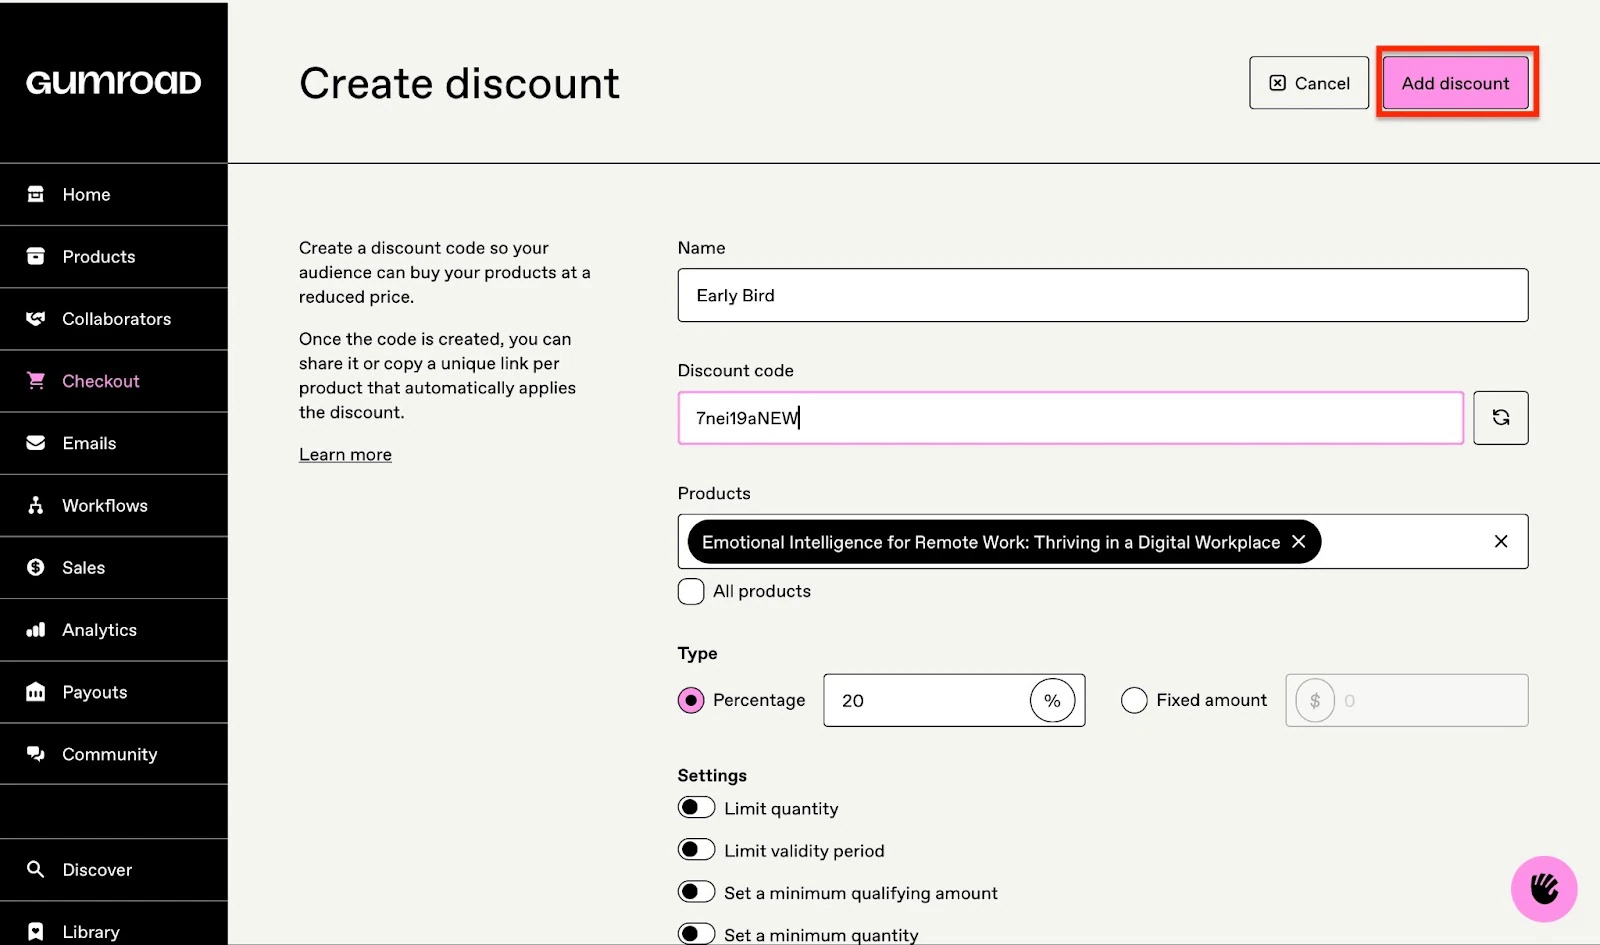
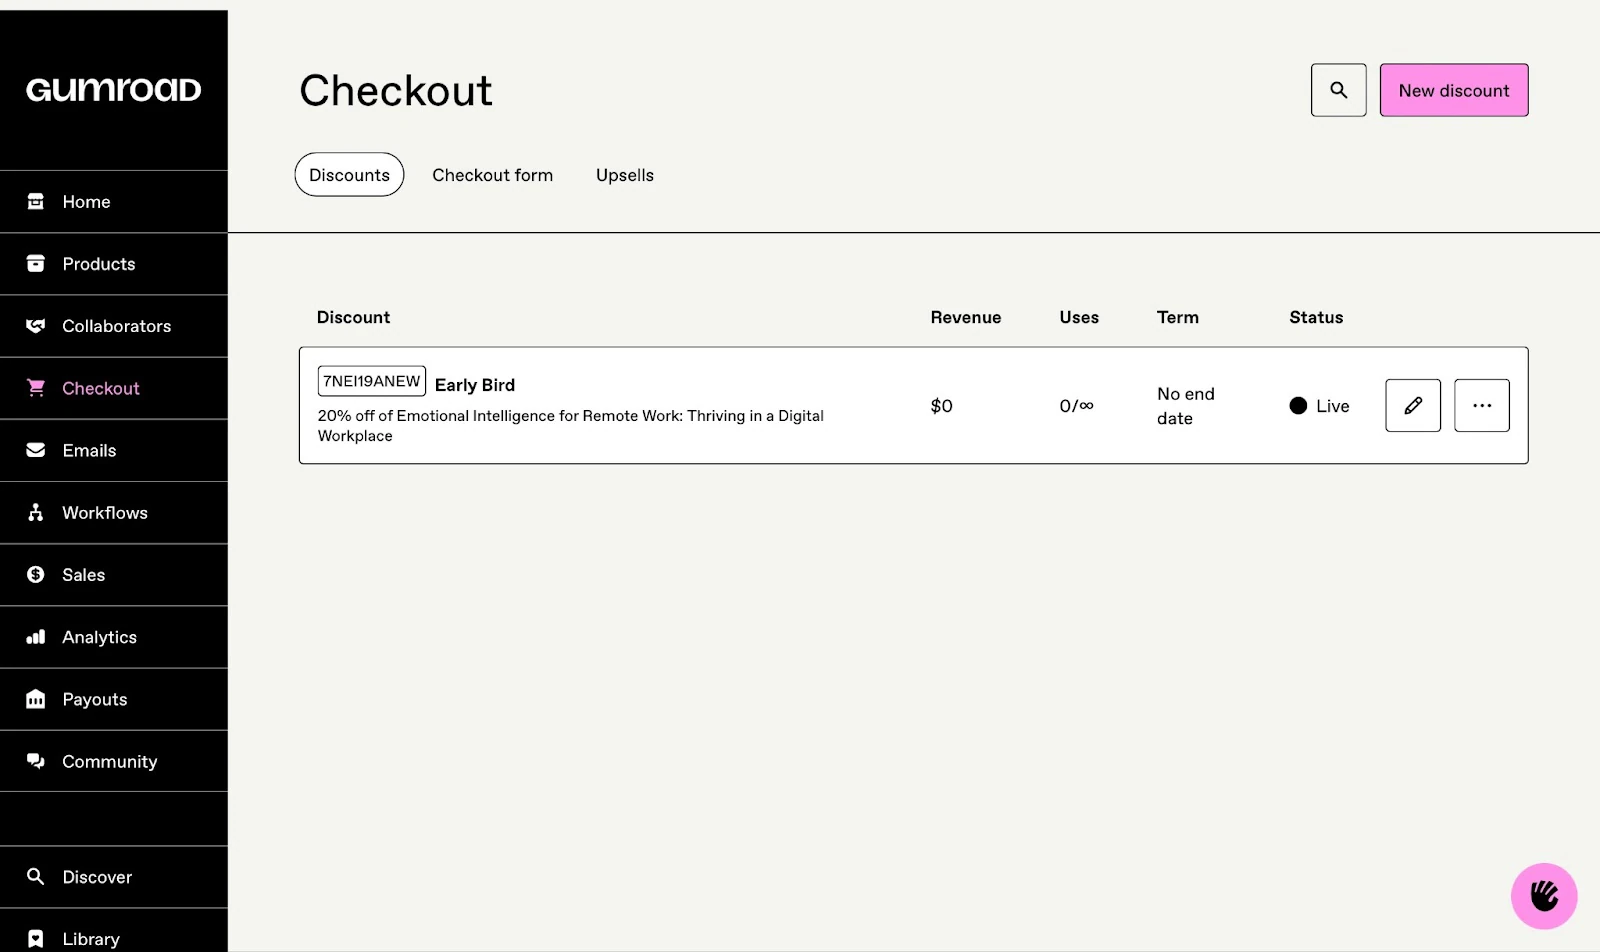
Your new discount code will be displayed in the discounts tab window.
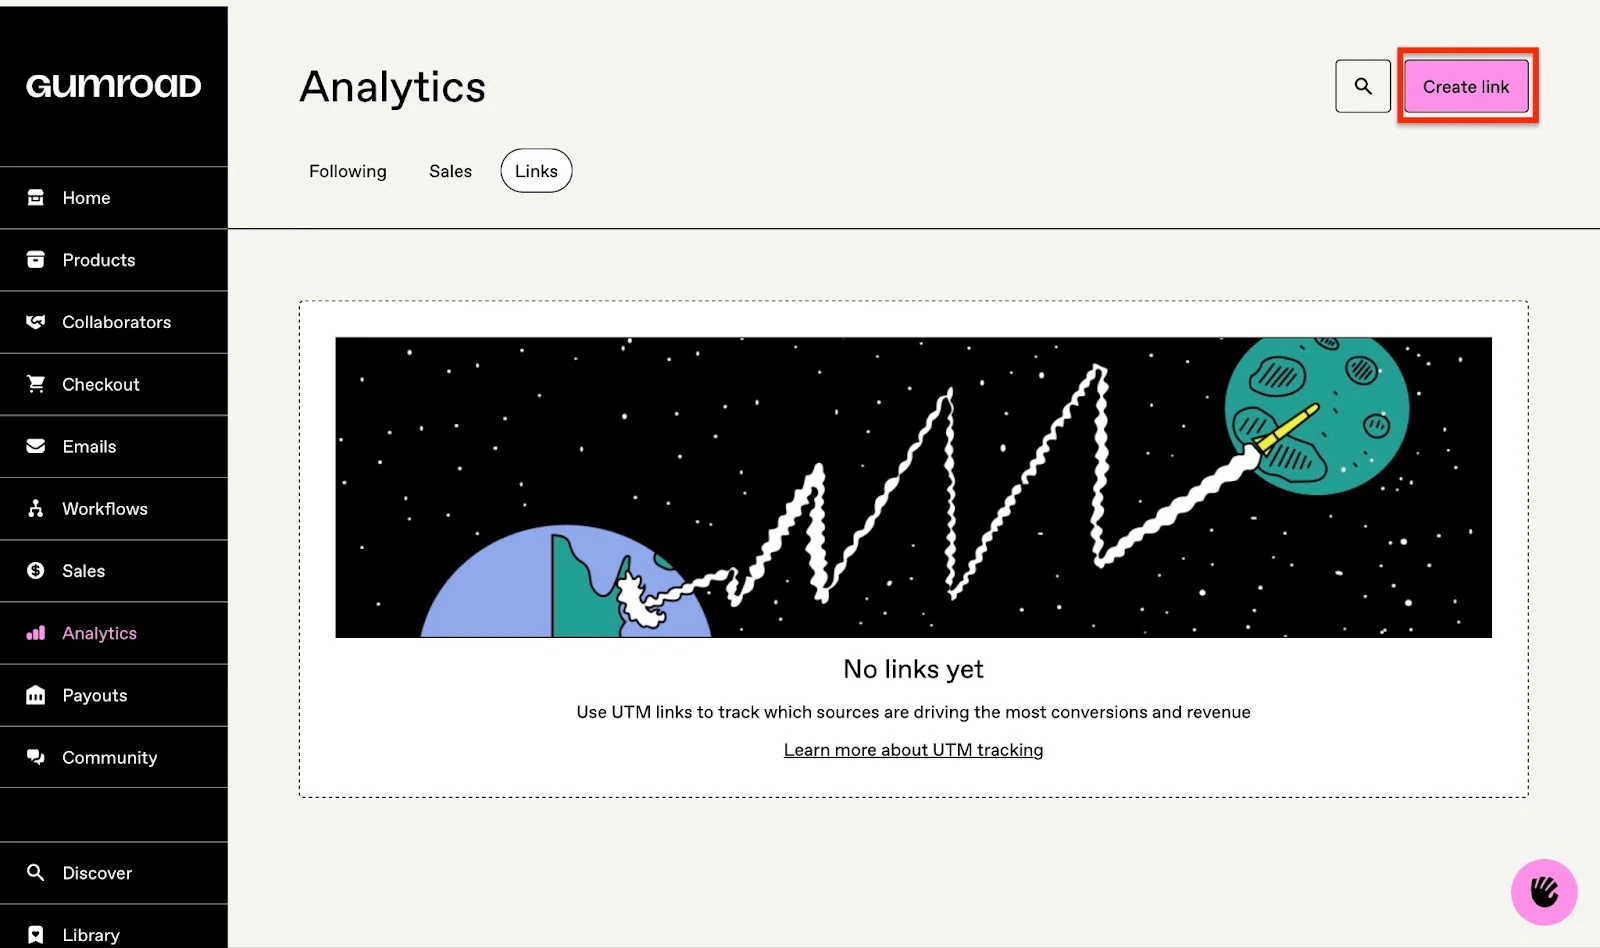
2. Analytics
The analytics feature keeps you informed about sales, conversions, revenue, and your following on Gumroad. This feature also lets you create Urchin Tracking Module (UTM) links to track the performance of your courses.
To create UTM links, start by clicking “Analytics” in the sidebar. The Sales tab opens organically, so click “Links” right next to it.
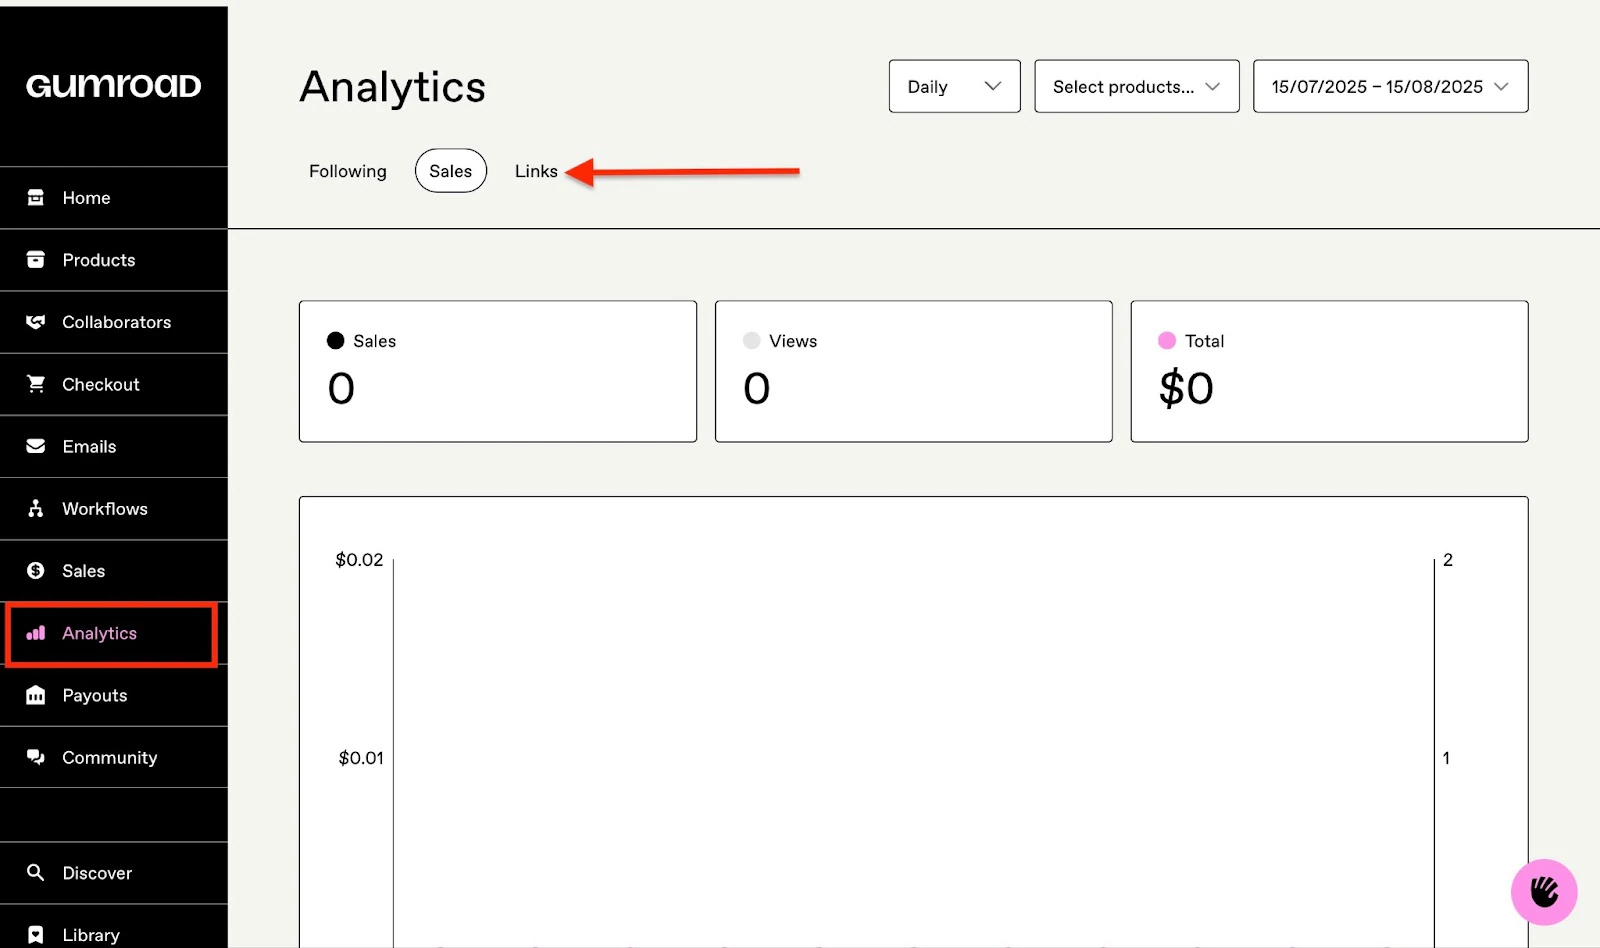
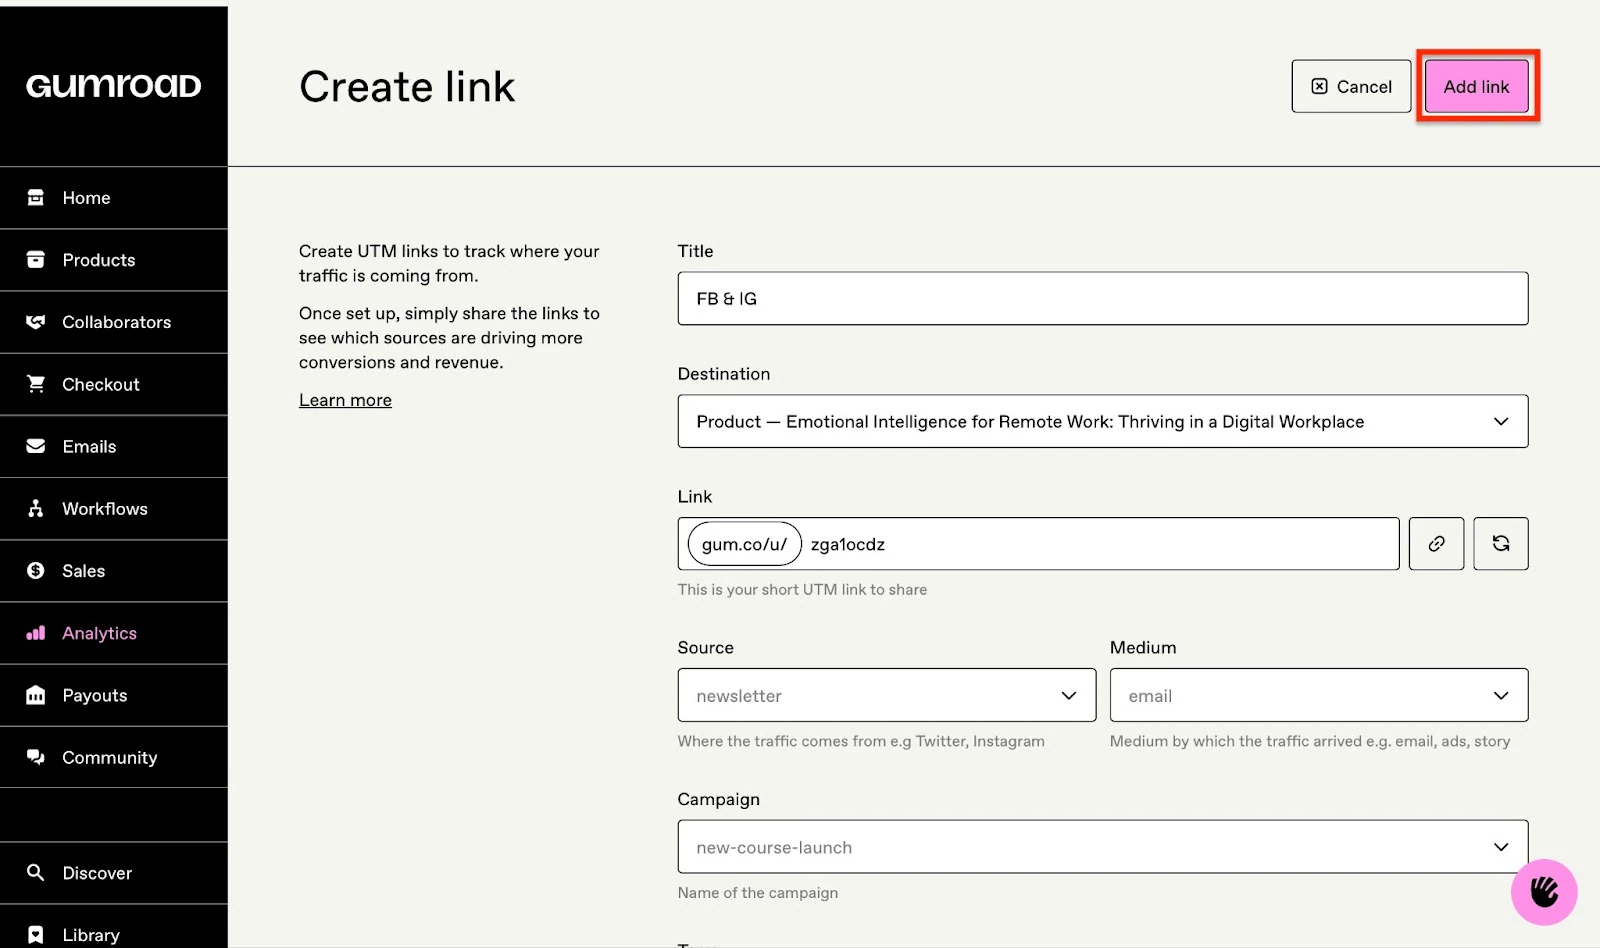
Now, click “Create link.”
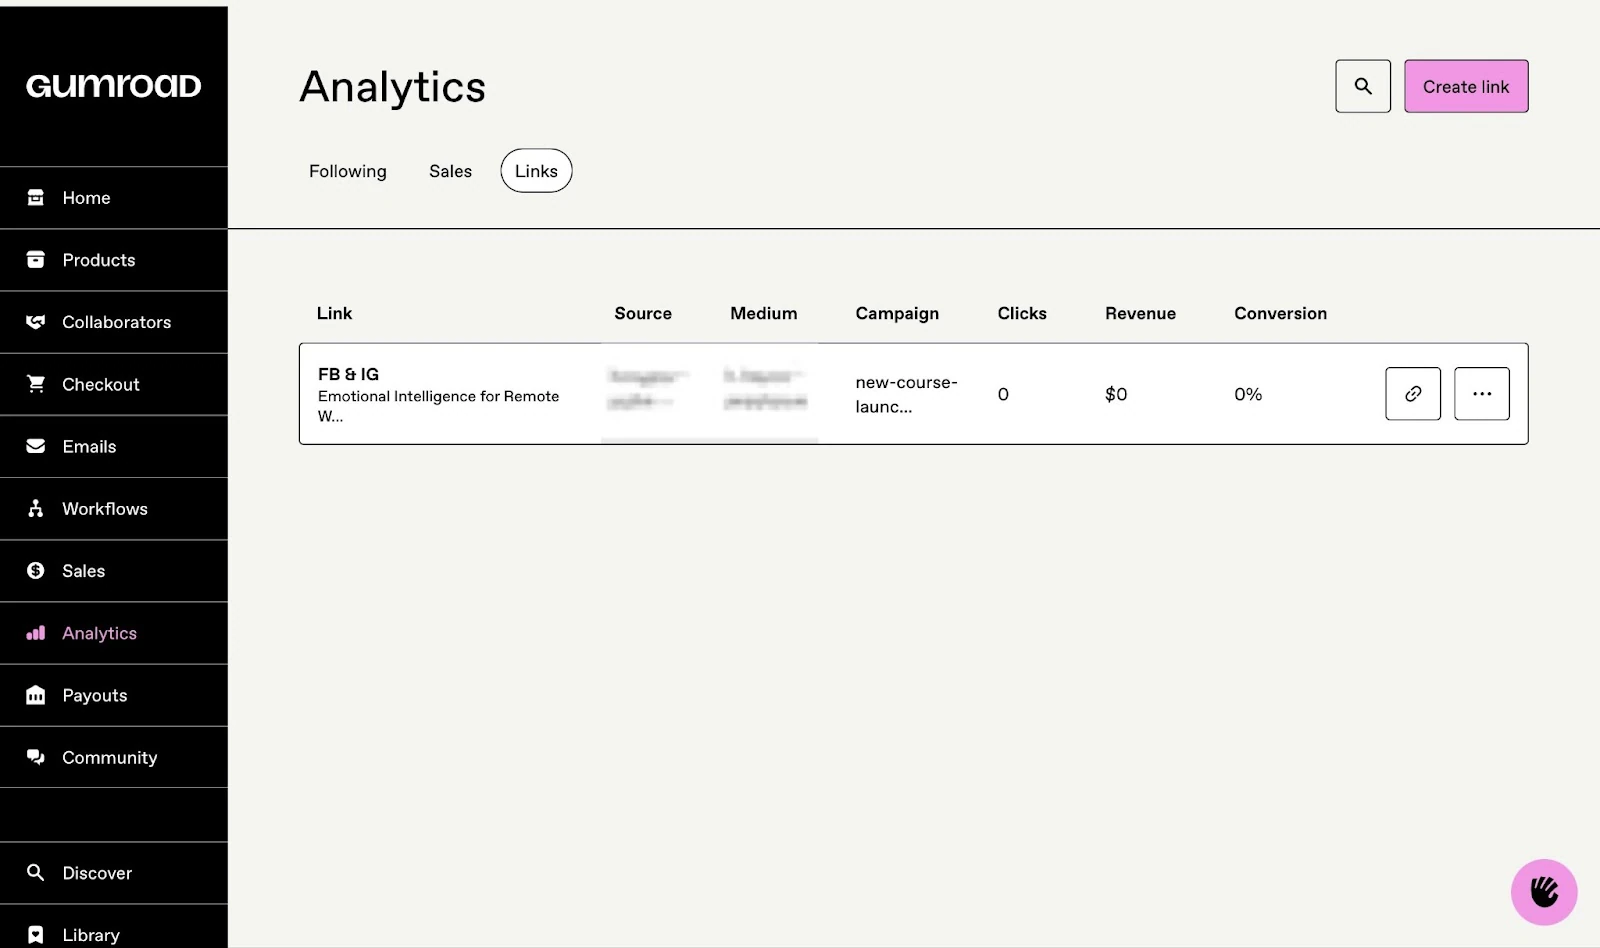
Fill in the necessary information in the fields indicated and click “Add link” to finish.
The new UTM link will show in the links tab window.
Best for
- Creators, artists, and sellers requiring a clean, minimal interface to sell online courses, ebooks, music, and art.
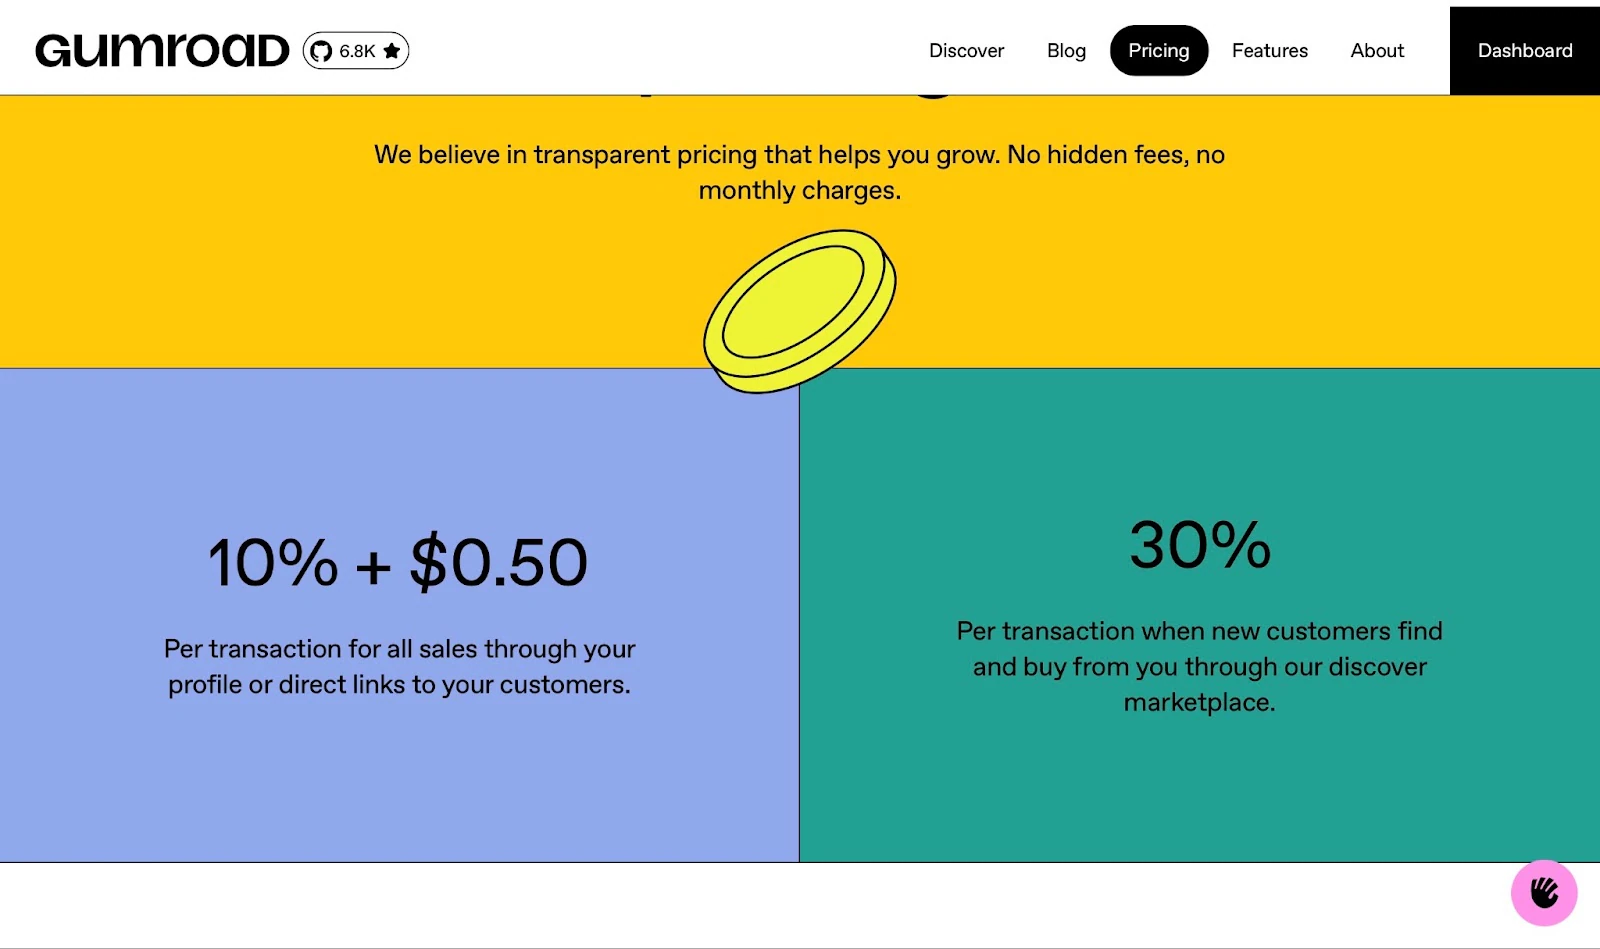
Pricing
- 10% + $0.50: Per transaction for all sales through your profile or direct links to your customers.
- 30%: Per transaction, when new customers find and buy from you through the Discover Marketplace.
4. Udemy
Next on my list of the ten best online course platforms is Udemy. Primarily, it’s an online course marketplace, but instructors and businesses can create, teach, and sell their courses on the platform.

Udemy’s course feature lets you create online courses. You can add video lessons and upload supplementary resources like PDFs or slides.
Using the tools feature on Udemy, you can get expert feedback on your course’s audio and video. There’s also an option to check Udemy’s marketplace insight and identify profitable course topics.

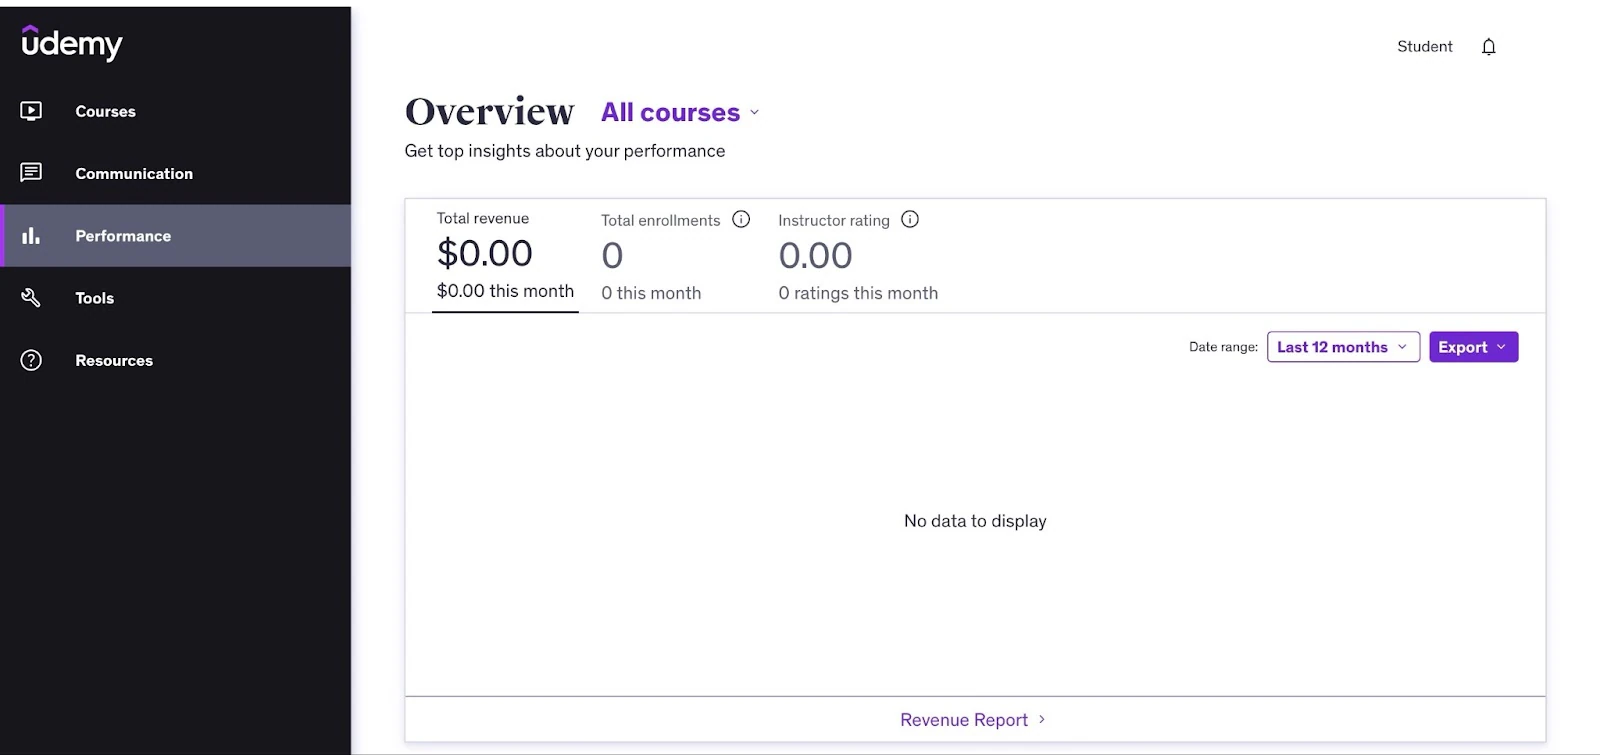
The performance feature helps you track metrics for a variety of items, such as enrollment, revenue, engagement, traffic, conversion, and student ratings.
With Udemy’s communication feature, you can check your messages from students and other instructors. You also have the option to send promotional and educational emails. It also lets you respond directly to students’ questions.
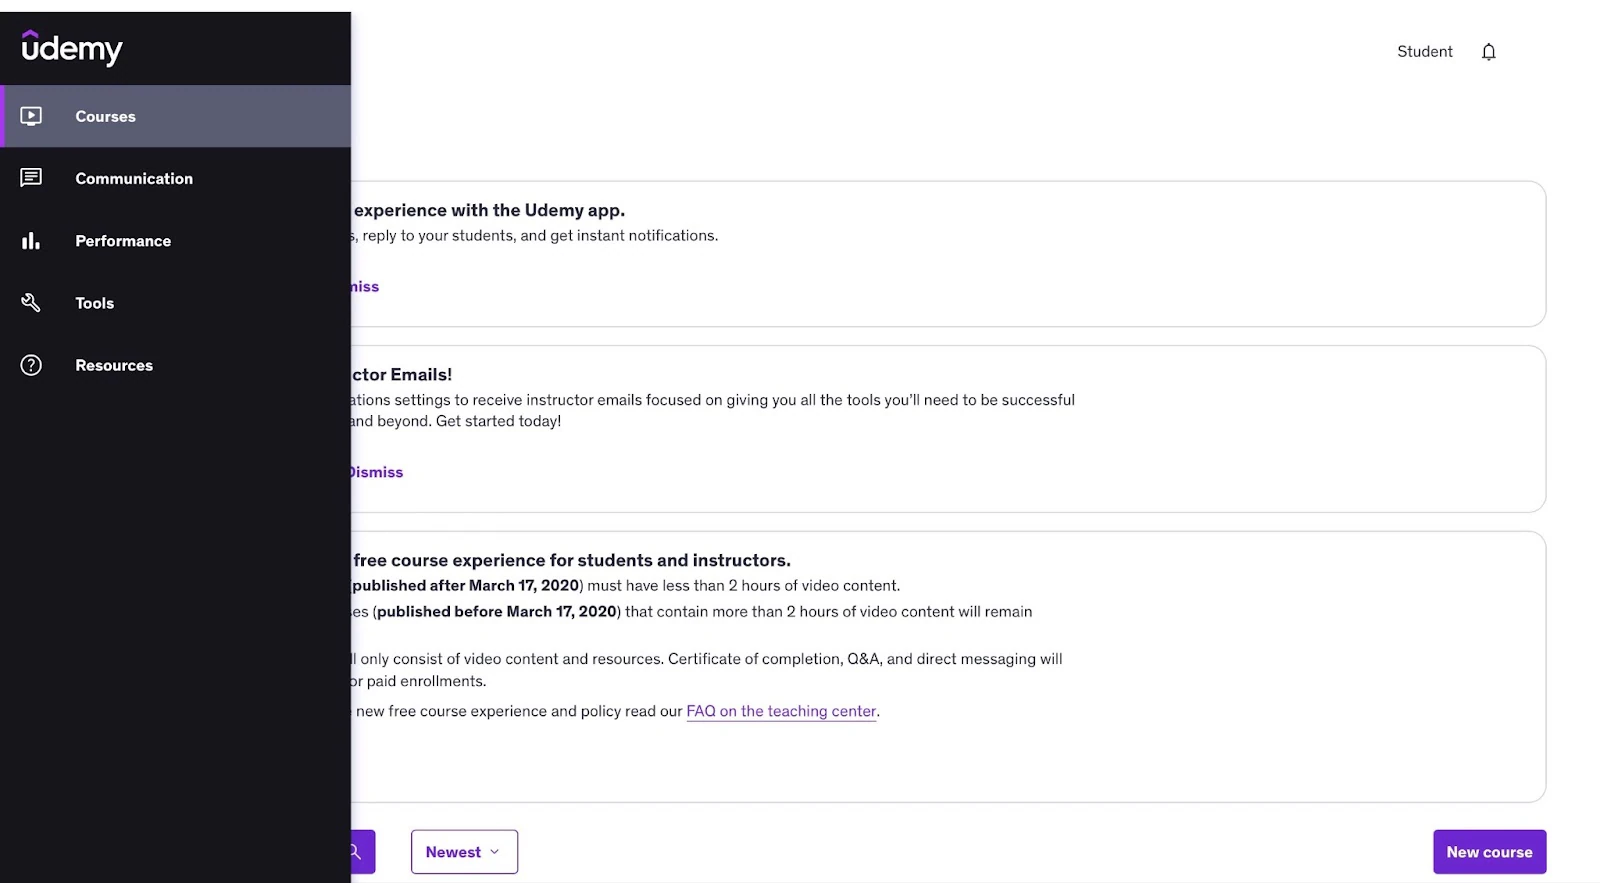
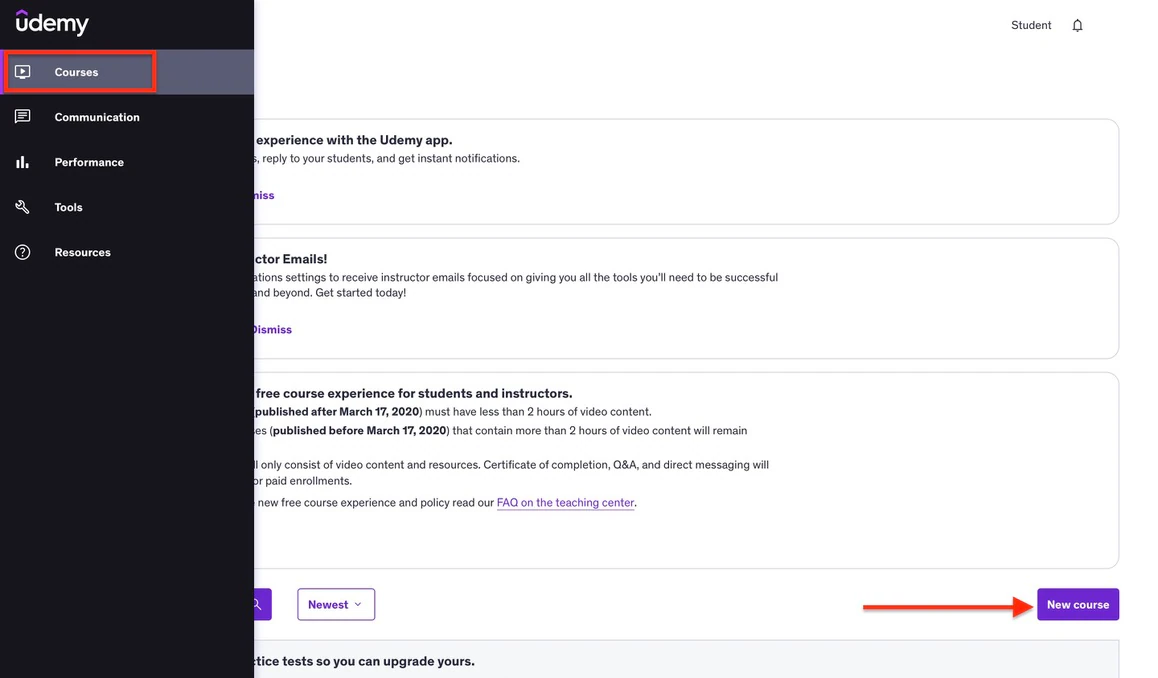
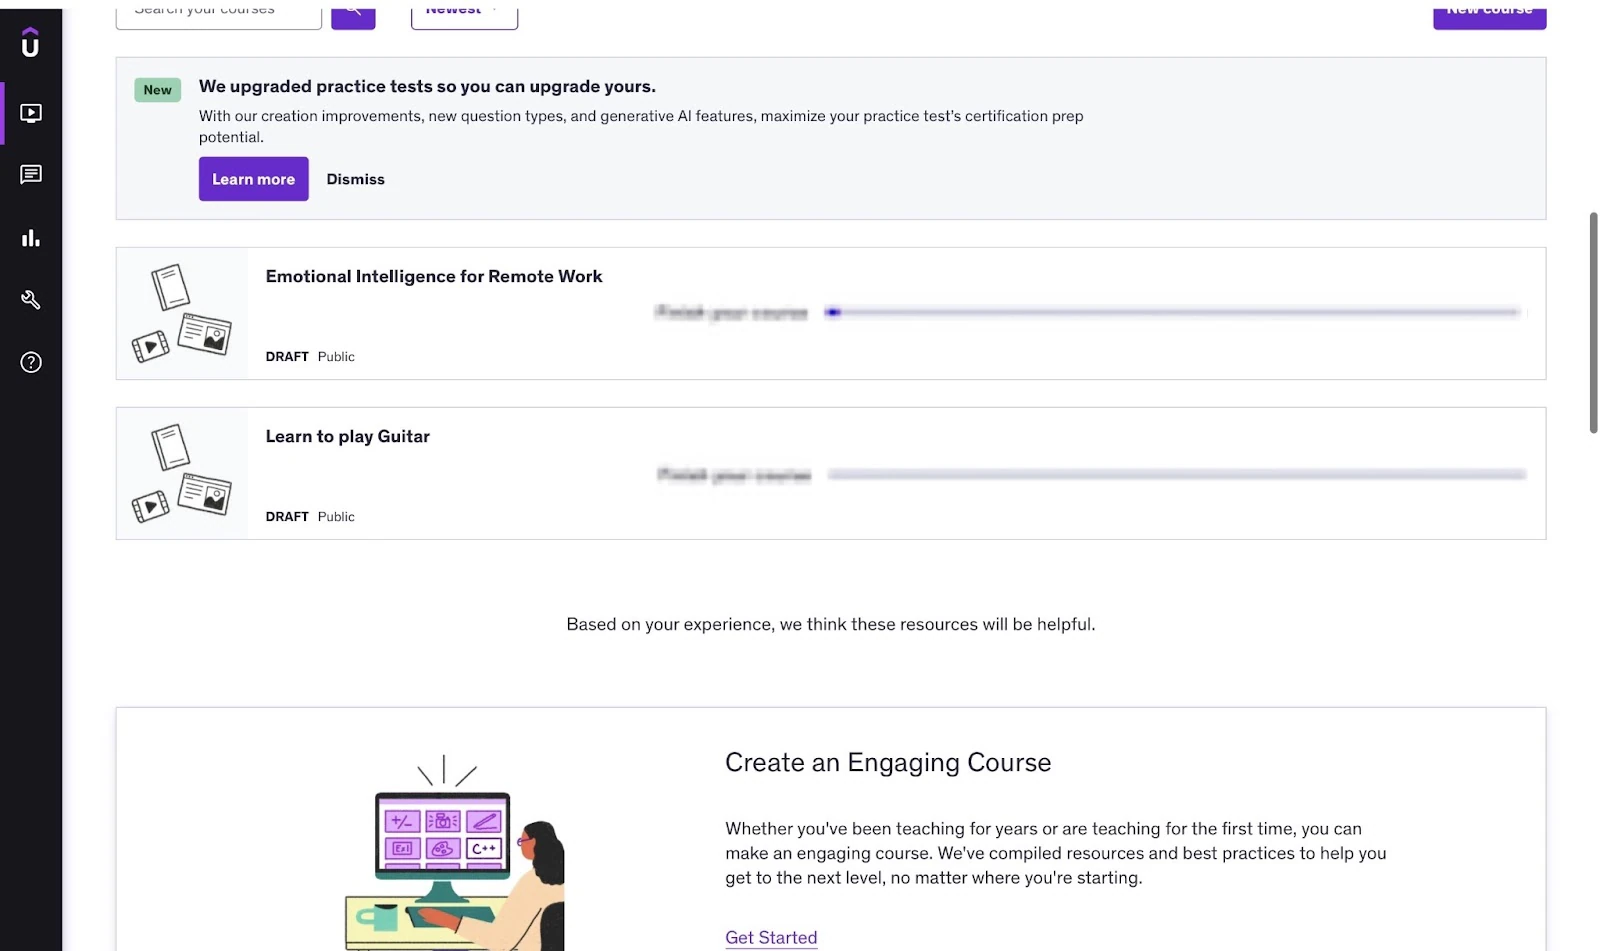
To create your first course on Udemy, go to “Courses” in the sidebar. Then select “New course” at the bottom right of the window.
After that, select the type of course you’d like to create from the two provided alternatives and click “Continue.”
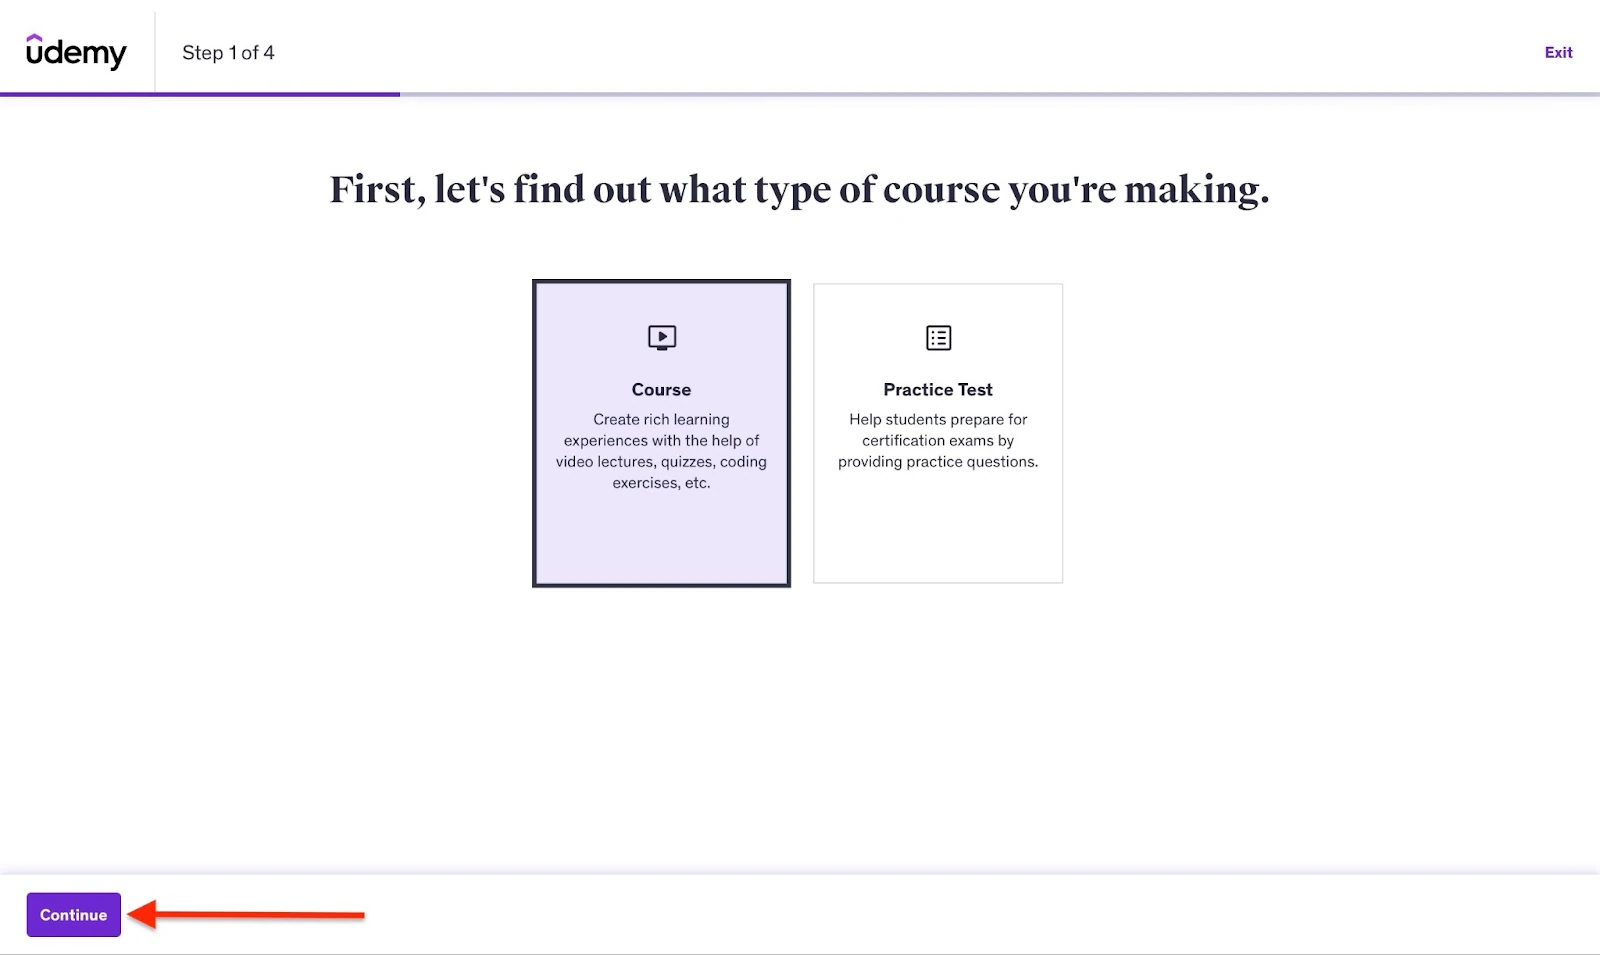
Next, add a title in the field provided and click “Continue.”

Now, select the course category and hit the “Continue” button.
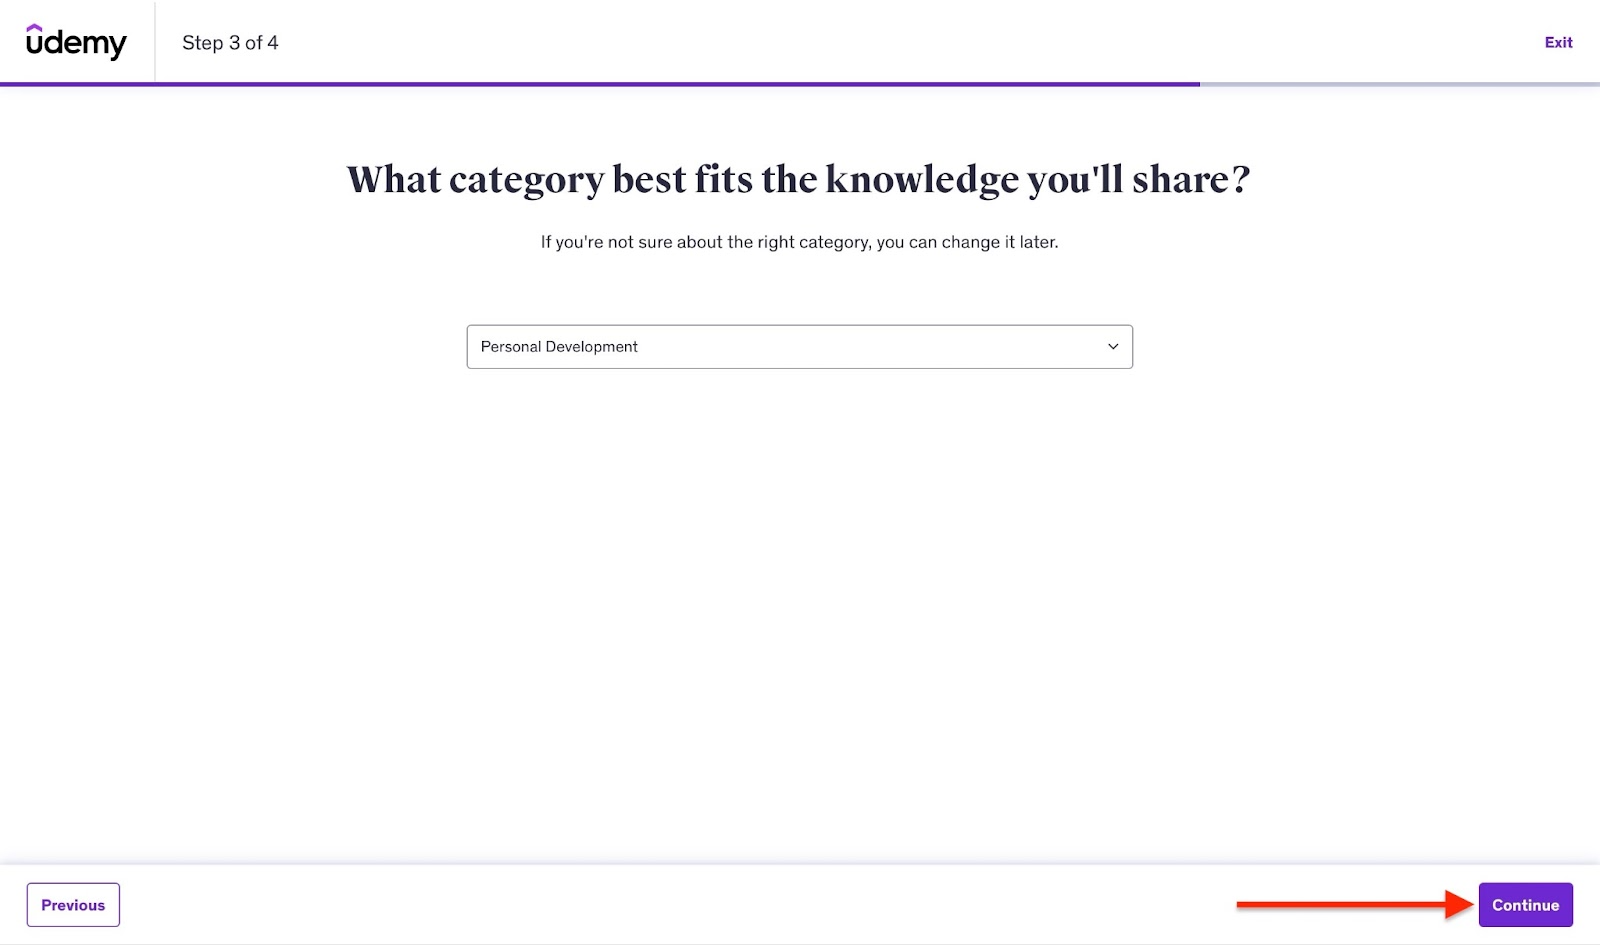
Then, select a time frame you’ll spend creating your course per week and click “Create course.”

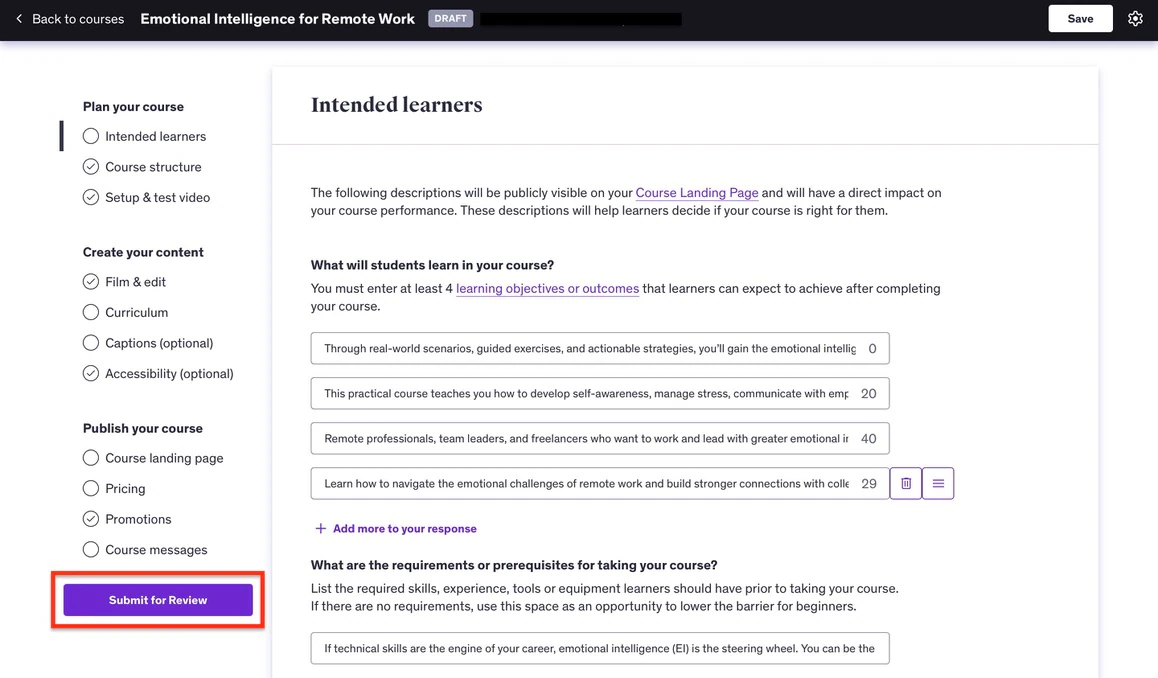
On the next window, fill out the fields provided with the necessary information.
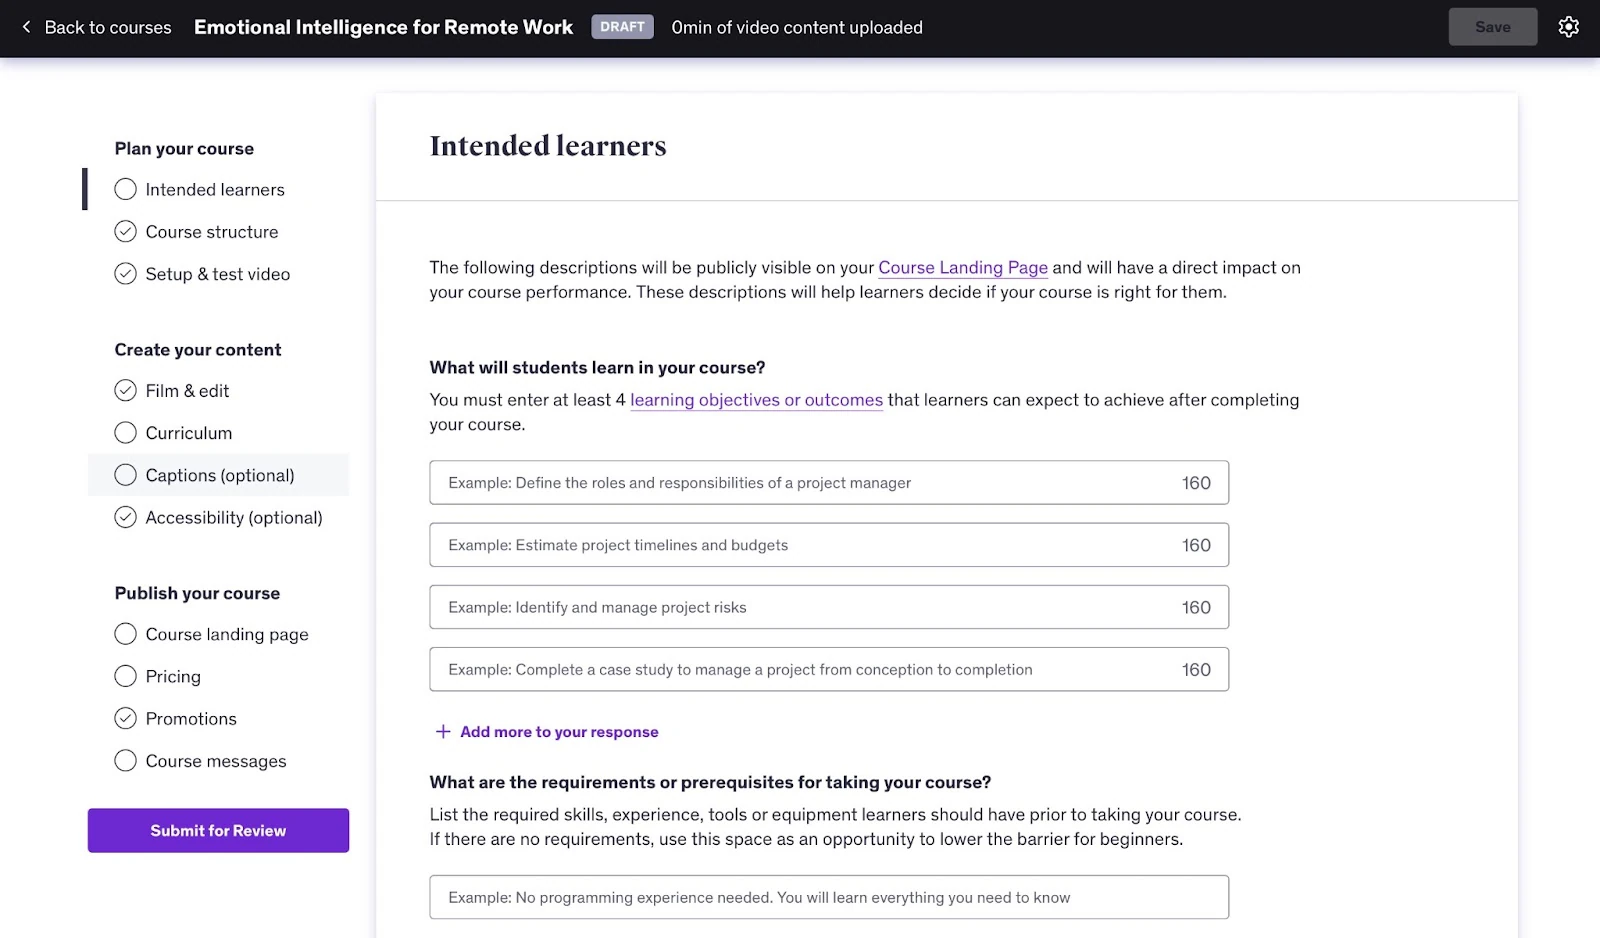
To submit your course for review, you need a minimum requirement of 30 minutes of high-quality video content, five separate lectures, and an appropriate cover image.
Your course must also comply with their copyright and community guidelines.
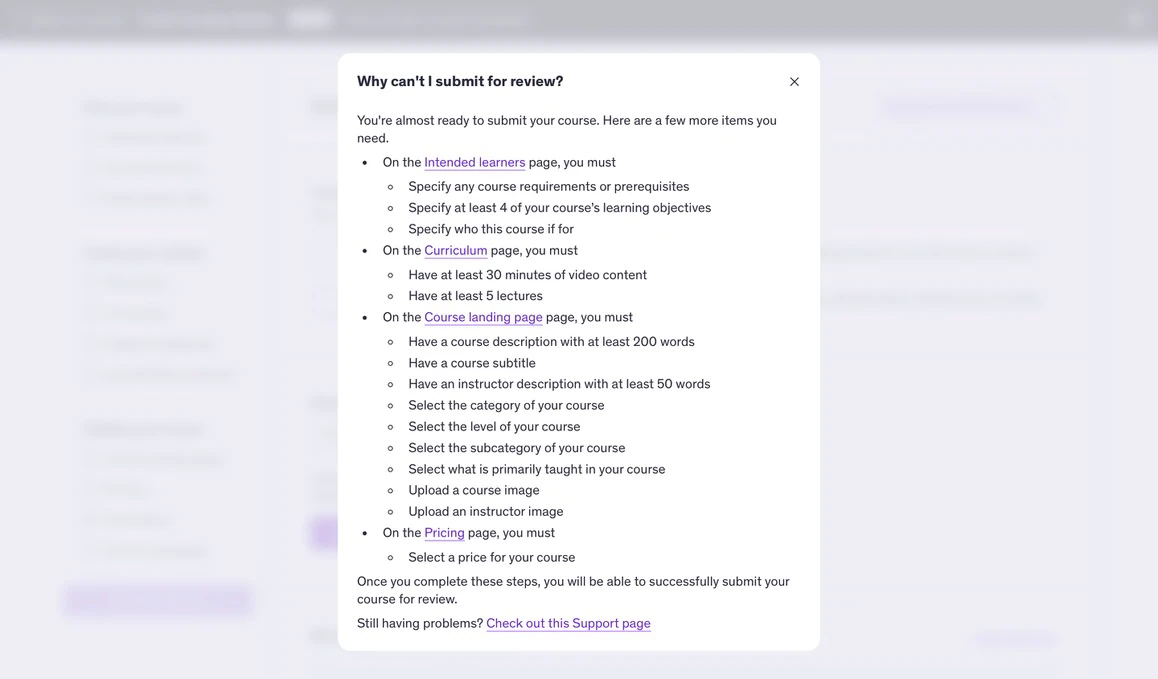
If your course meets all these criteria, click “Submit for Review”.
Udemy will review your new course within two business days. If it’s approved, your course will be available for students to purchase or enroll in.
Key features
1. Performance
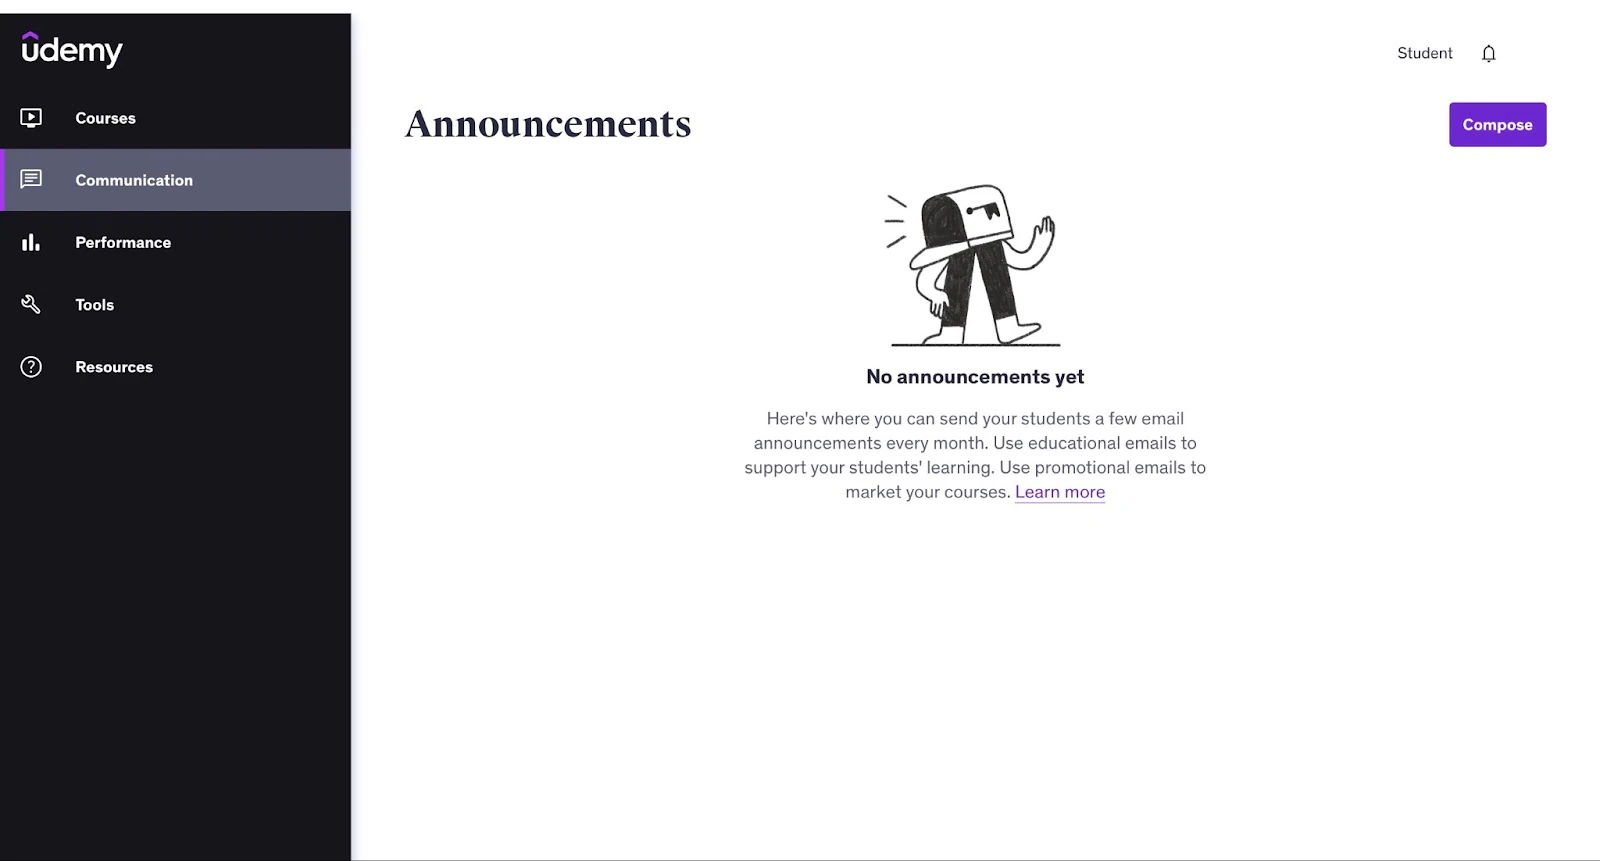
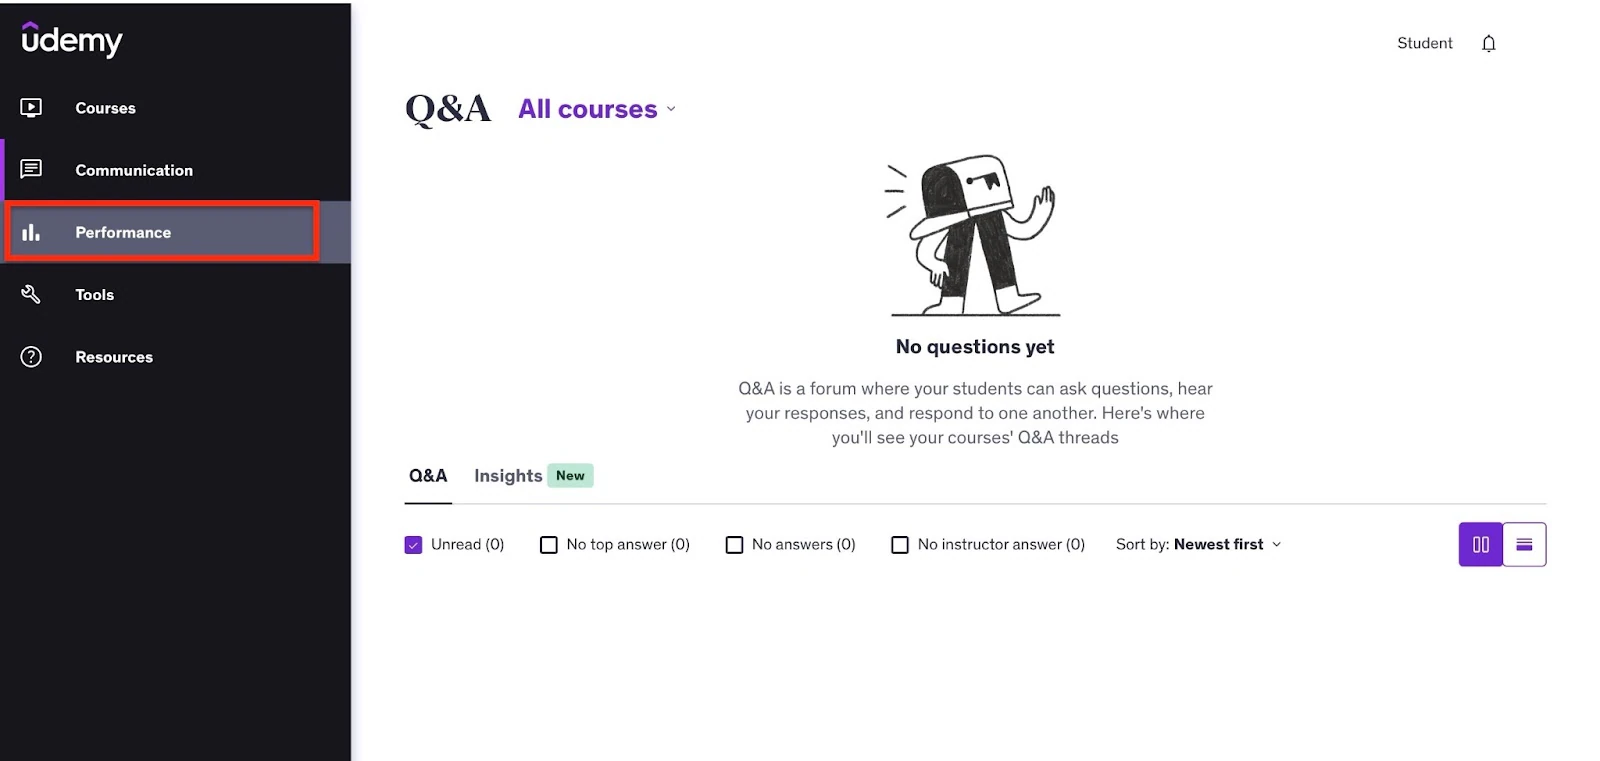
The performance feature lets you send messages, attend to assignments, send announcements, and create a Q&A forum. Here’s how you can compose and send your first announcement.
First, locate and select “Performance” from the sidebar.
Then select “Announcement” and click “Compose.”
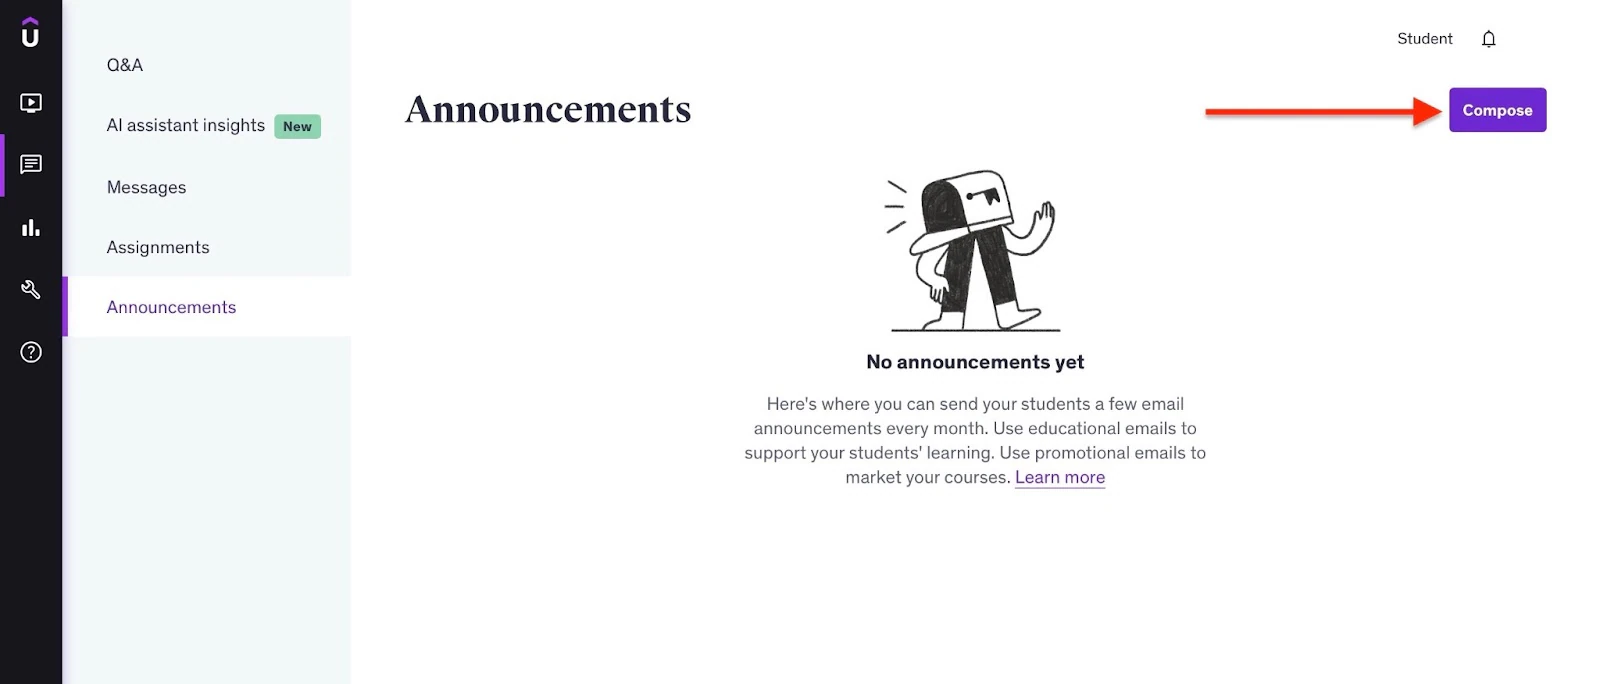
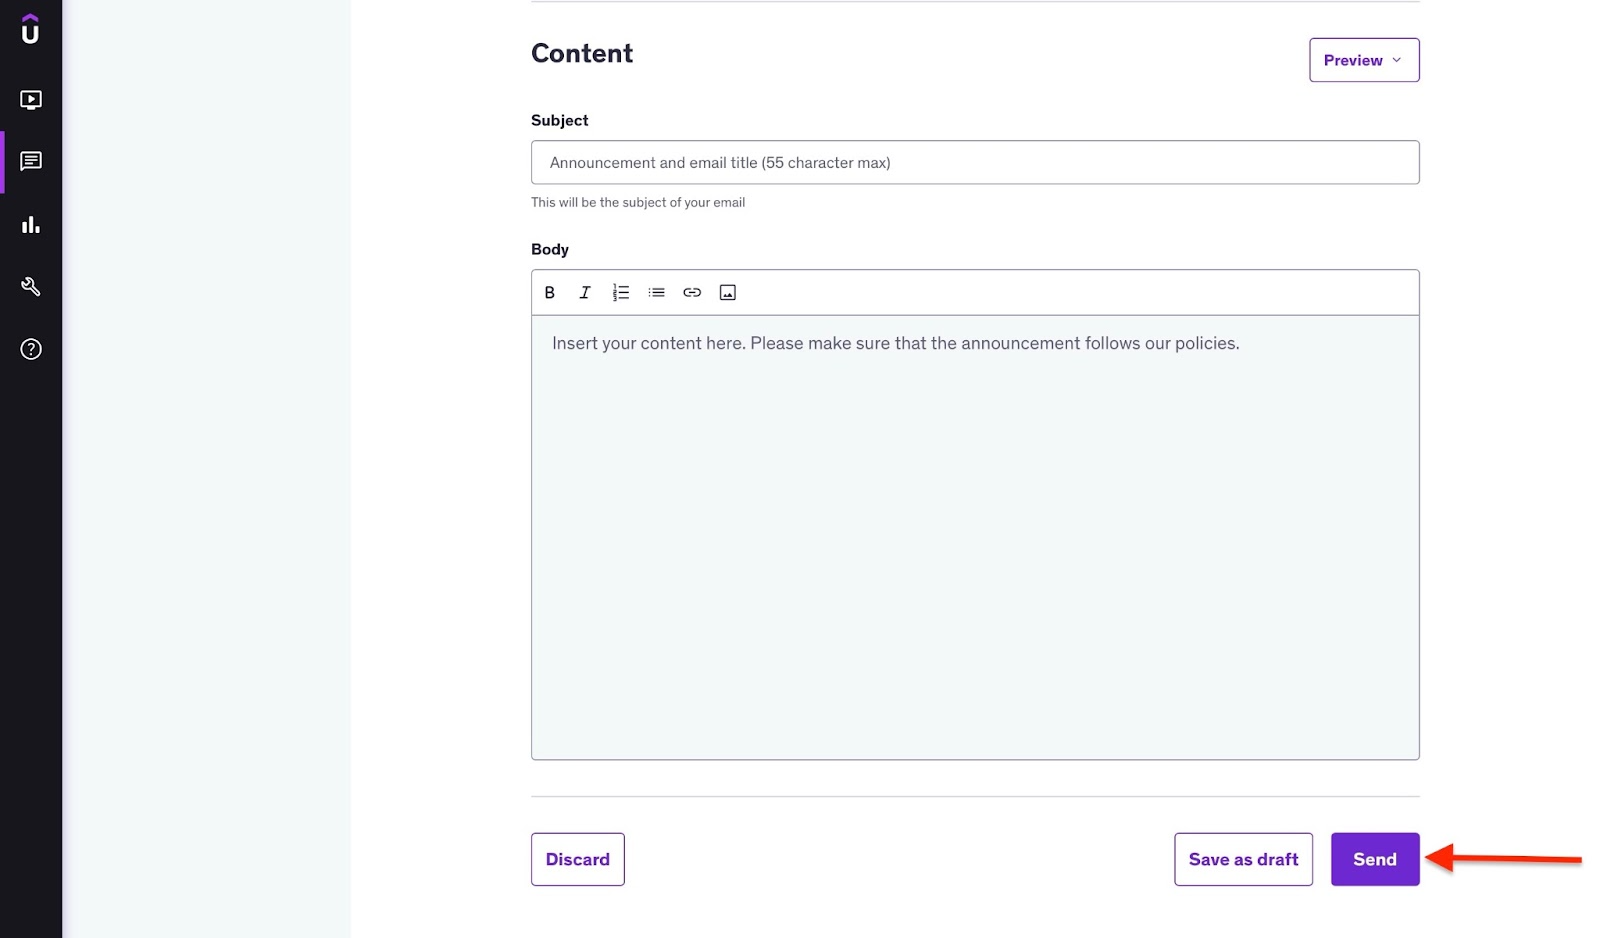
Now, choose between an educational announcement or a promotional email.
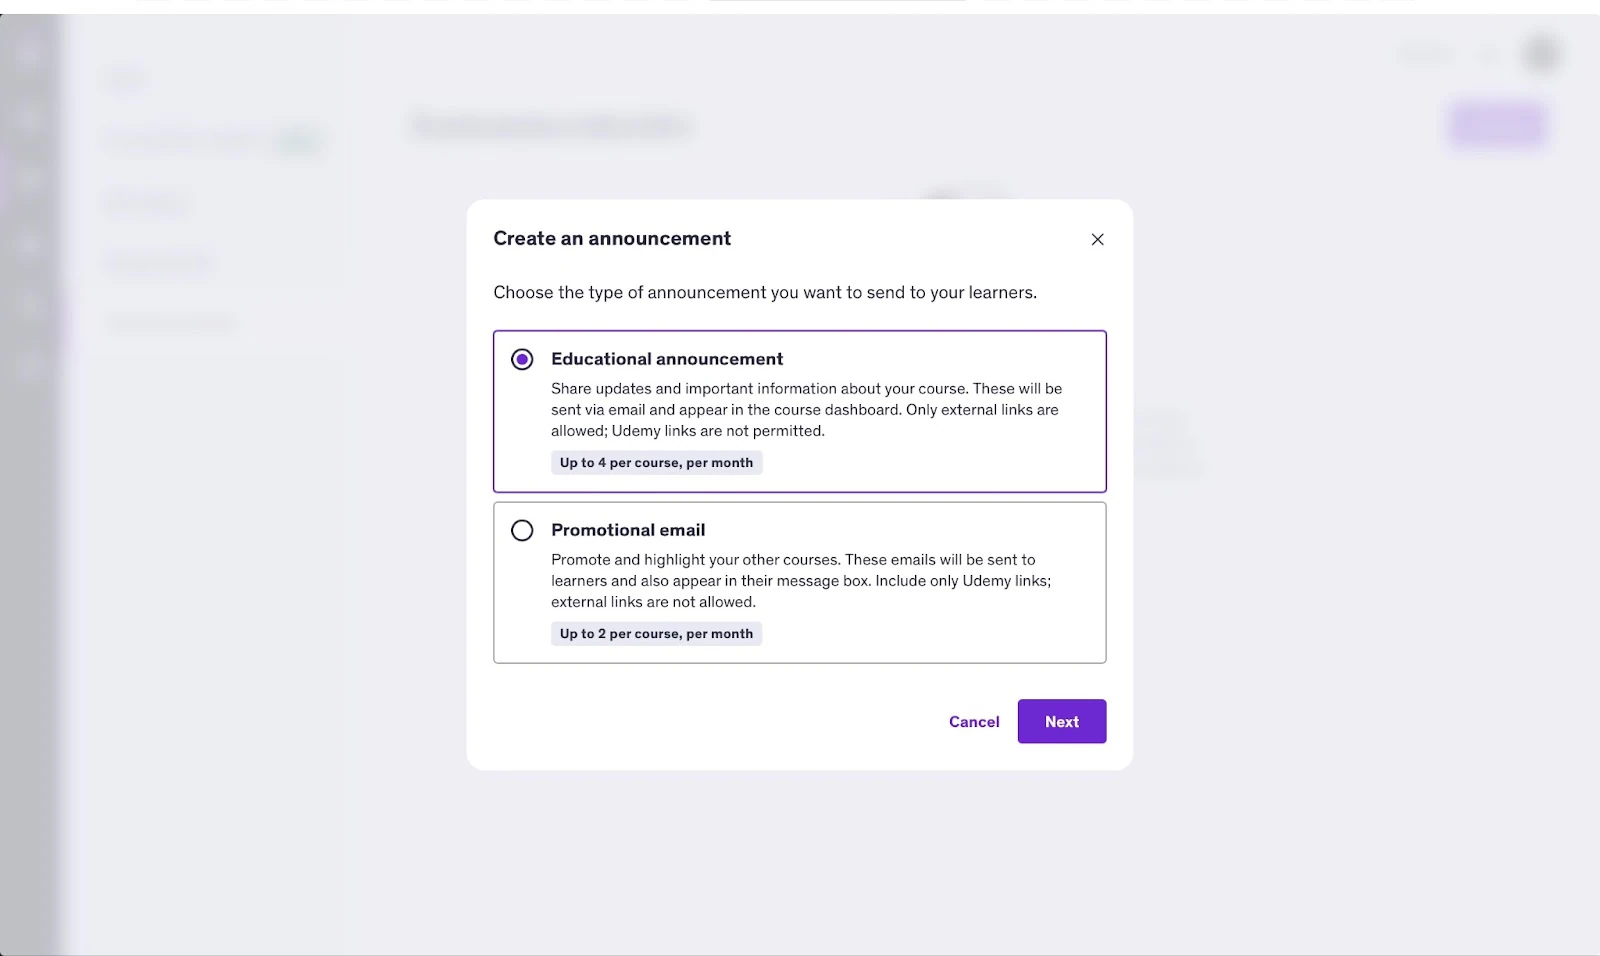
In the next window, select the course to define the recipient of the message you’re creating. Next, add the subject and content and click “Send” to finish.
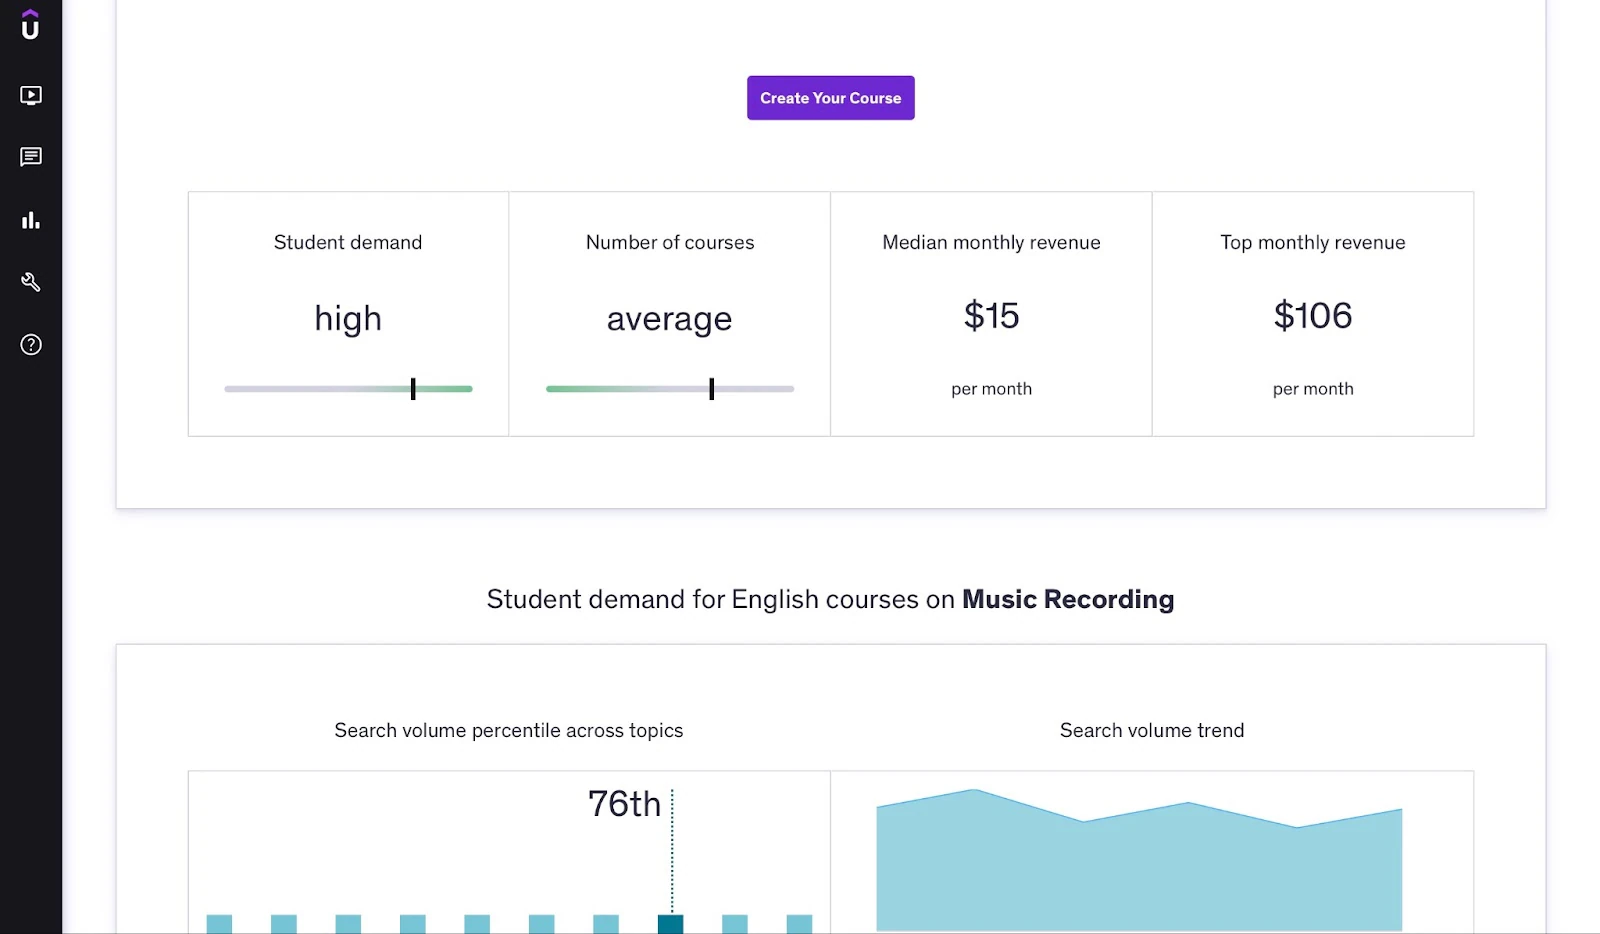
2. Marketplace insights
Udemy’s marketplace insights offer the real performance of courses on the platform. This feature helps you create successful courses by indicating profitable topics.
Having selected “Tools” on the sidebar, click “Marketplace Insights.”

Go through the two educational pop-up windows by clicking “Next.” Then select “Get Started” in the last window to begin.
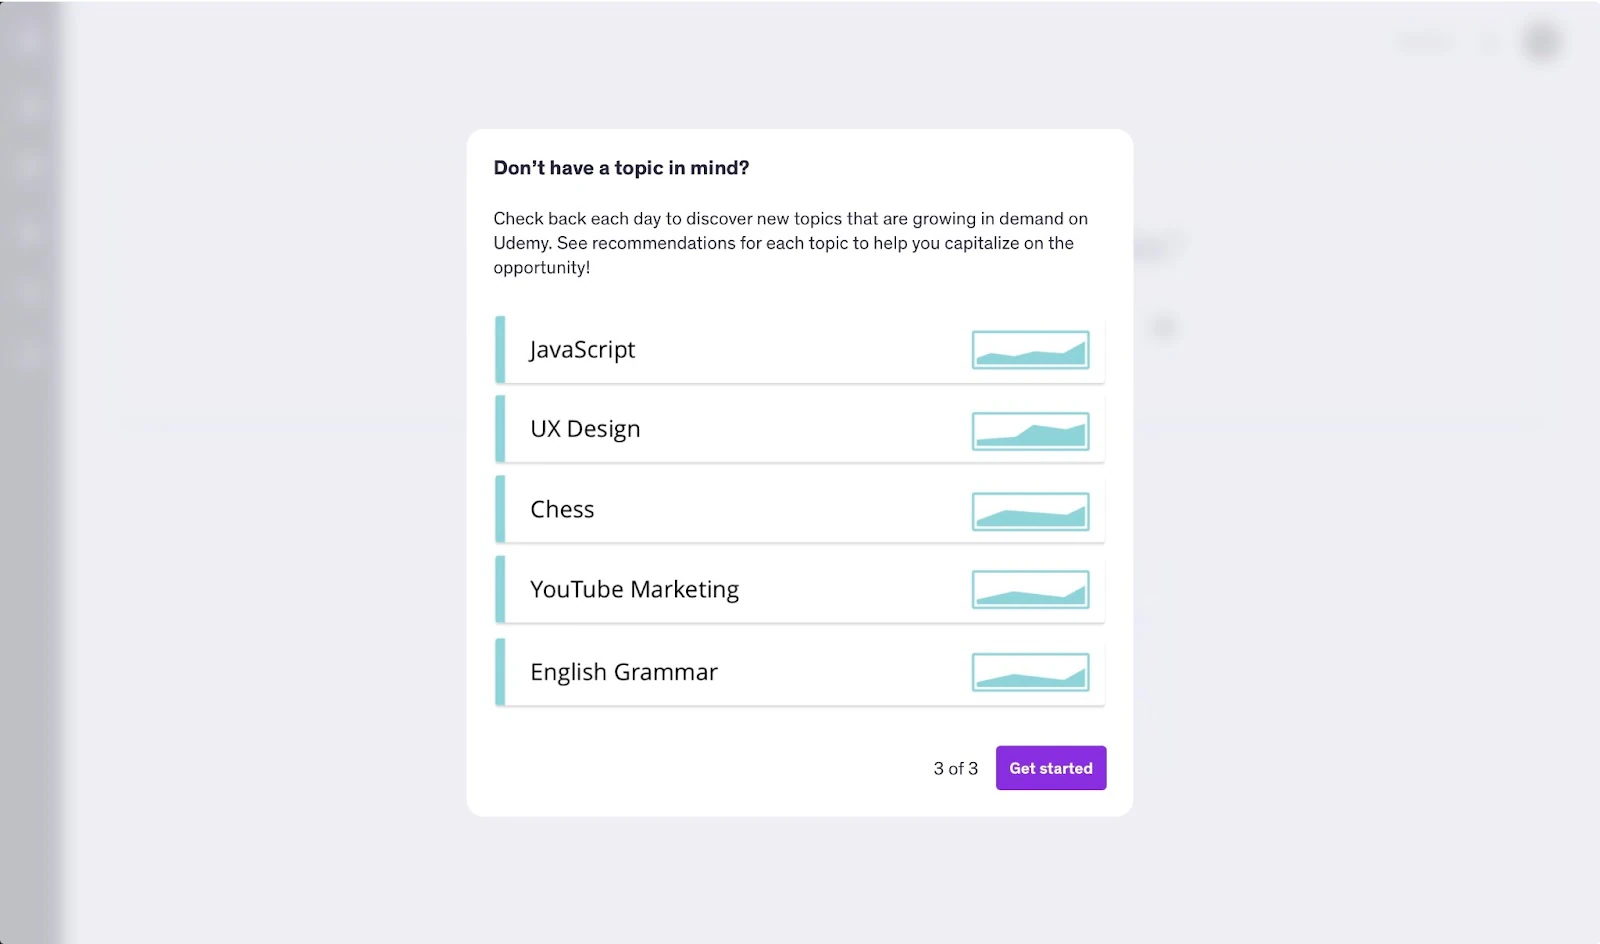
Now, type the course you’re interested in teaching, and Udemy will provide the data for that.
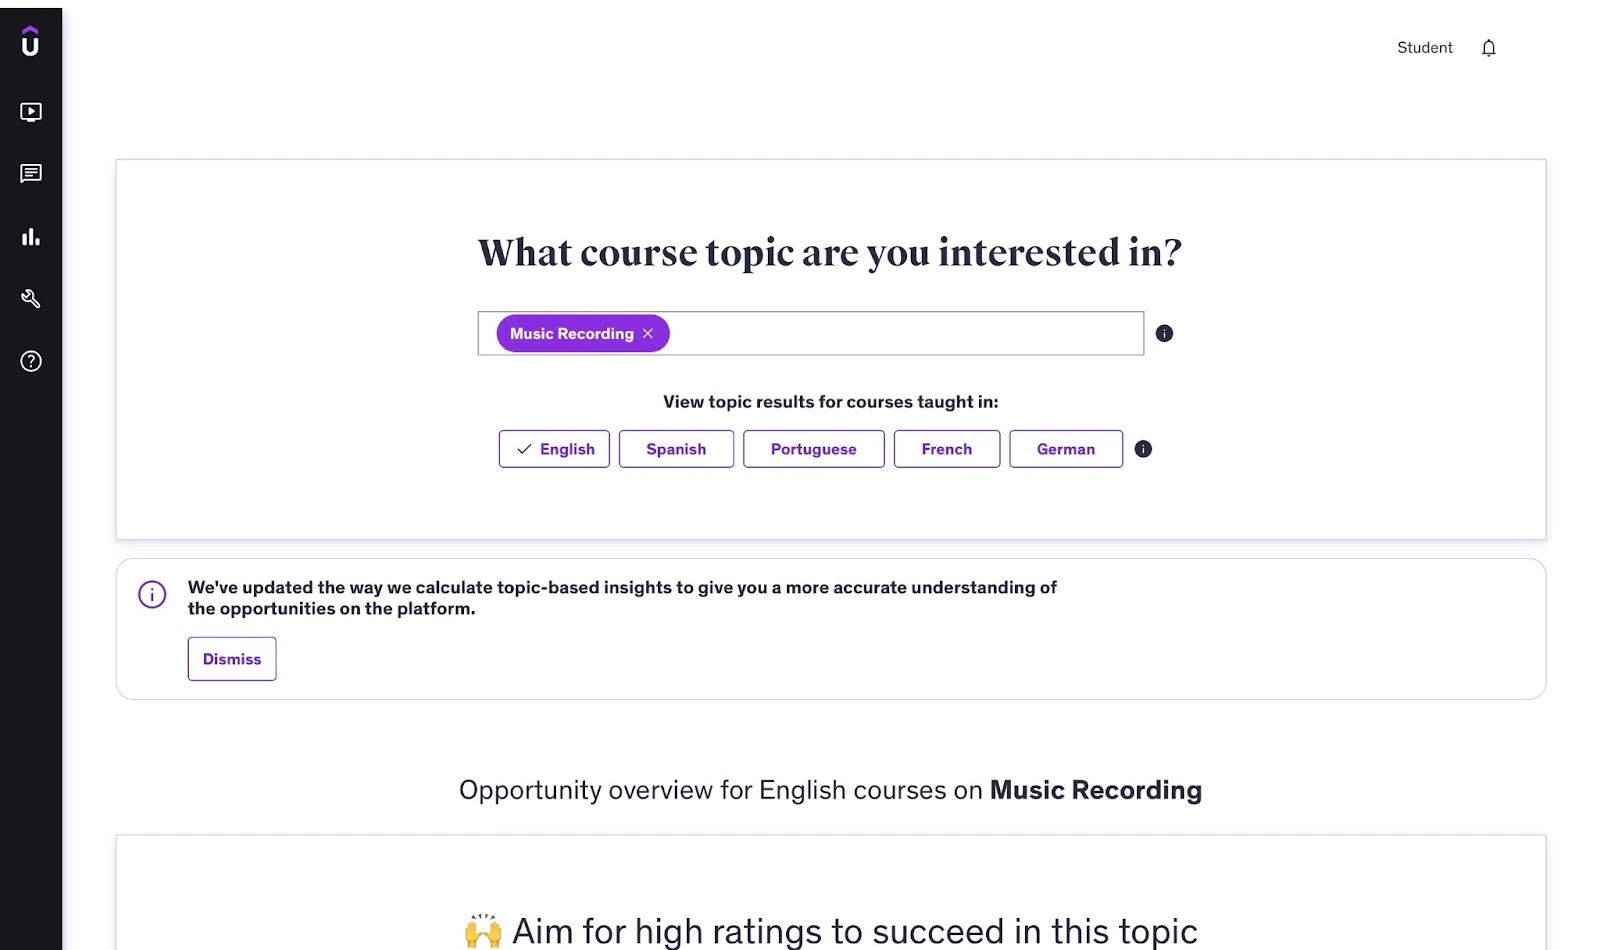
If you’re satisfied with the data, you can click “Create Your Course” right from that window to start working on a new course.
Best for
- Professionals and instructors needing an open online learning marketplace with a built-in global audience.
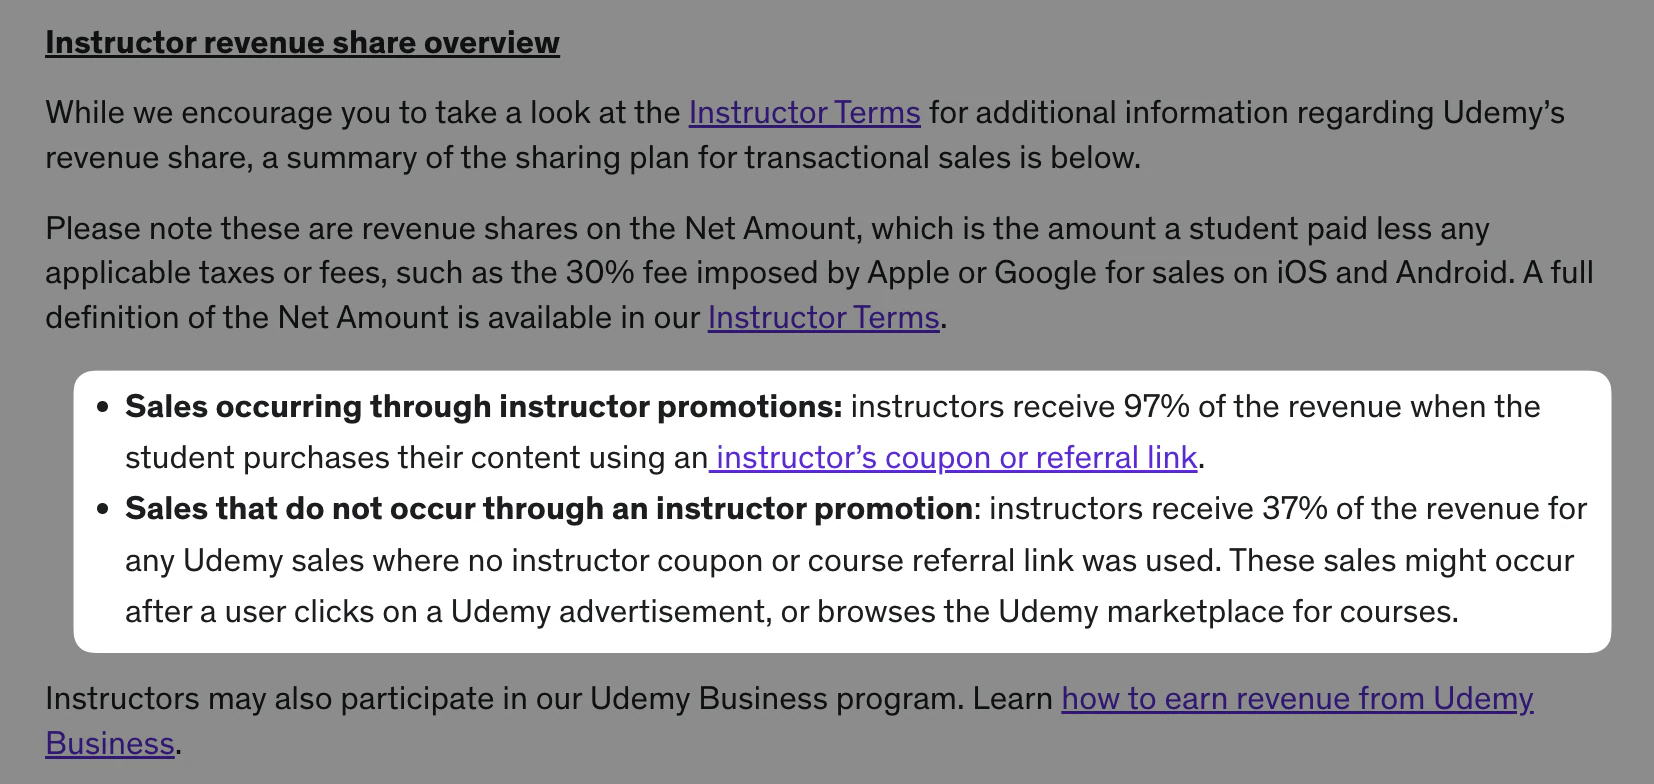
Pricing
- $0 + 3% processing fee
- $0 + 37% processing fee If student purchases the course through Udemy’s marketplace or promotion
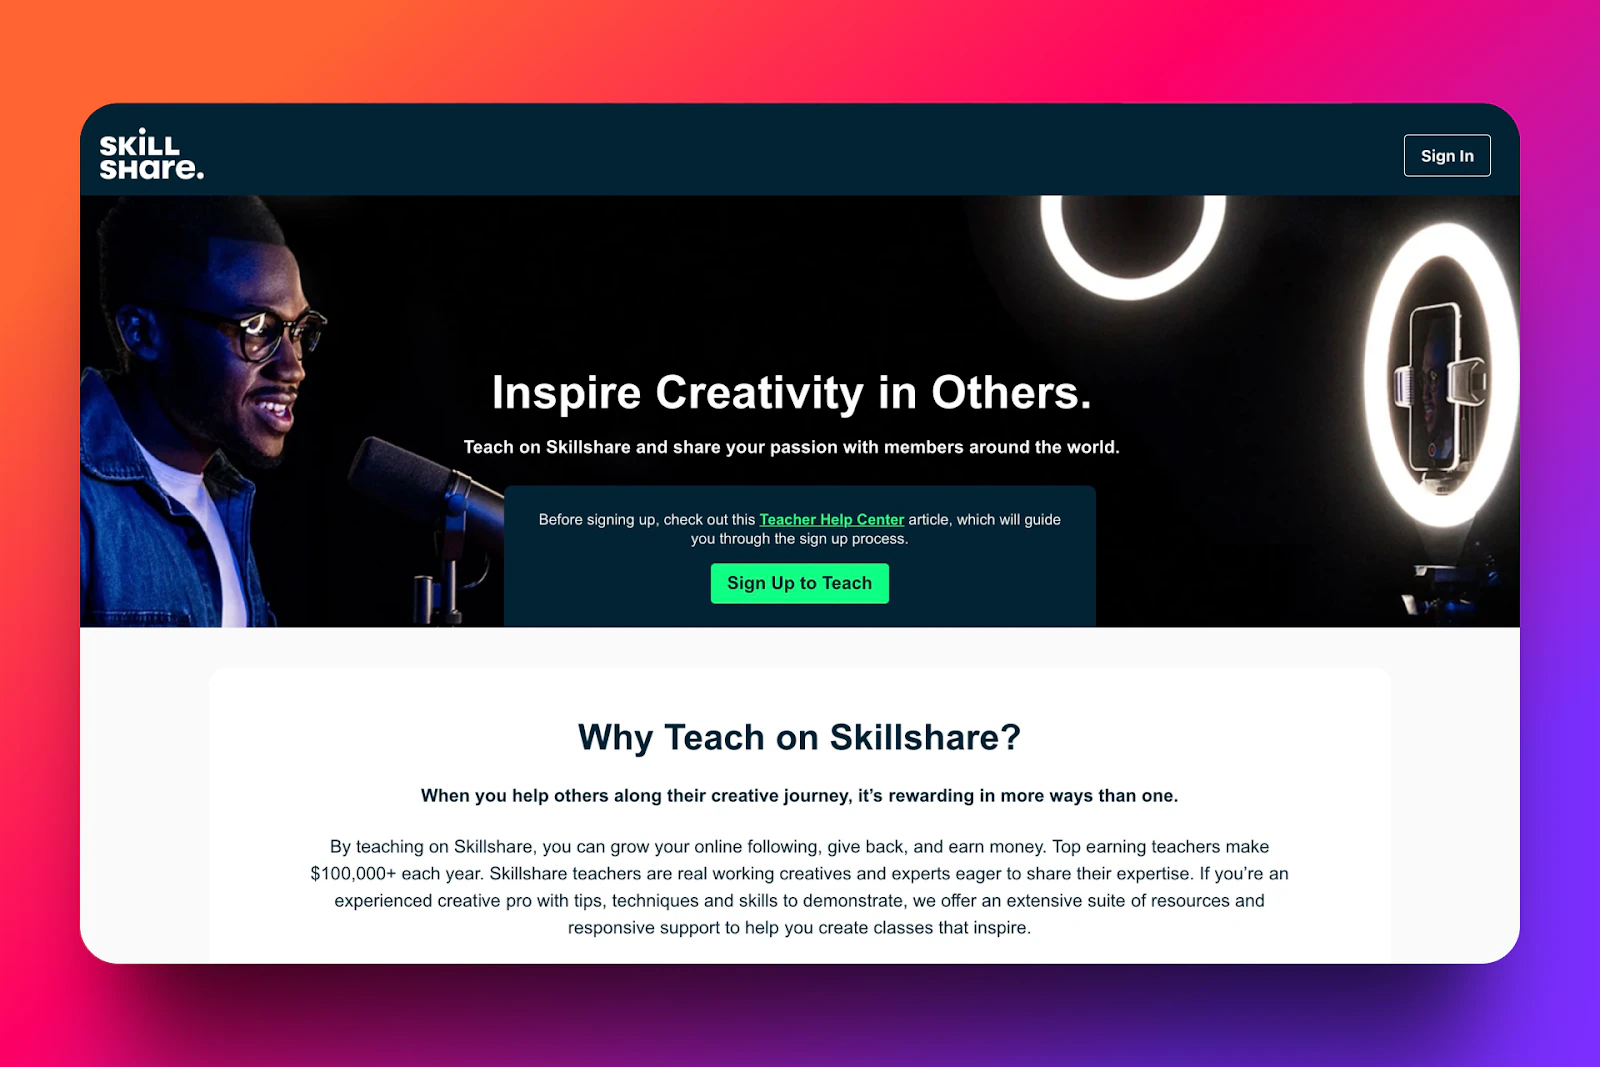
5. Skillshare
Coming in at number five on this list of the best online course platforms is Skillshare, an online learning community.
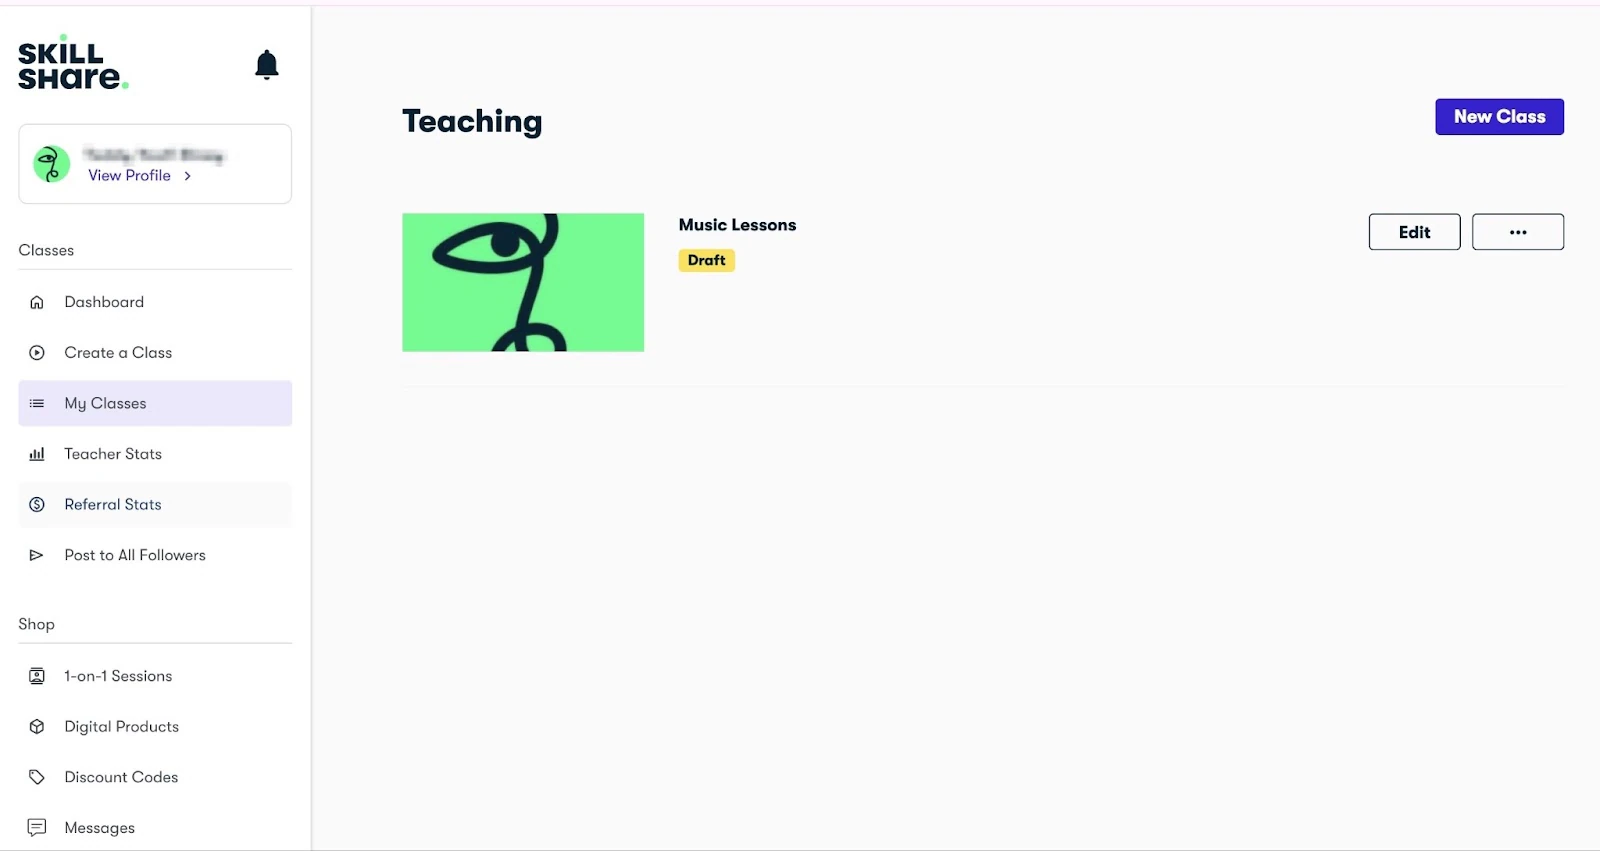
My classes feature on Skillshare lists all the courses/classes you’ve added. You can edit, delete, or start creating a new class from that window.
Skillshare’s create a class feature lets you create classes, add video lessons, and key details. The feature also allows you to indicate which professional software and materials students will need for the class.
Furthermore, you can create discount codes with Skillshare’s discount code feature. There are options to edit, copy, delete, and duplicate the code after you have created it.
With the digital products feature, you have the option to add ebooks, PDFs, EPUBs, videos, audios, images, etc. You can add a price, cover images, a product title, and a description.
Having discussed a few features from Skillshare, let’s see how to create a course on the platform.
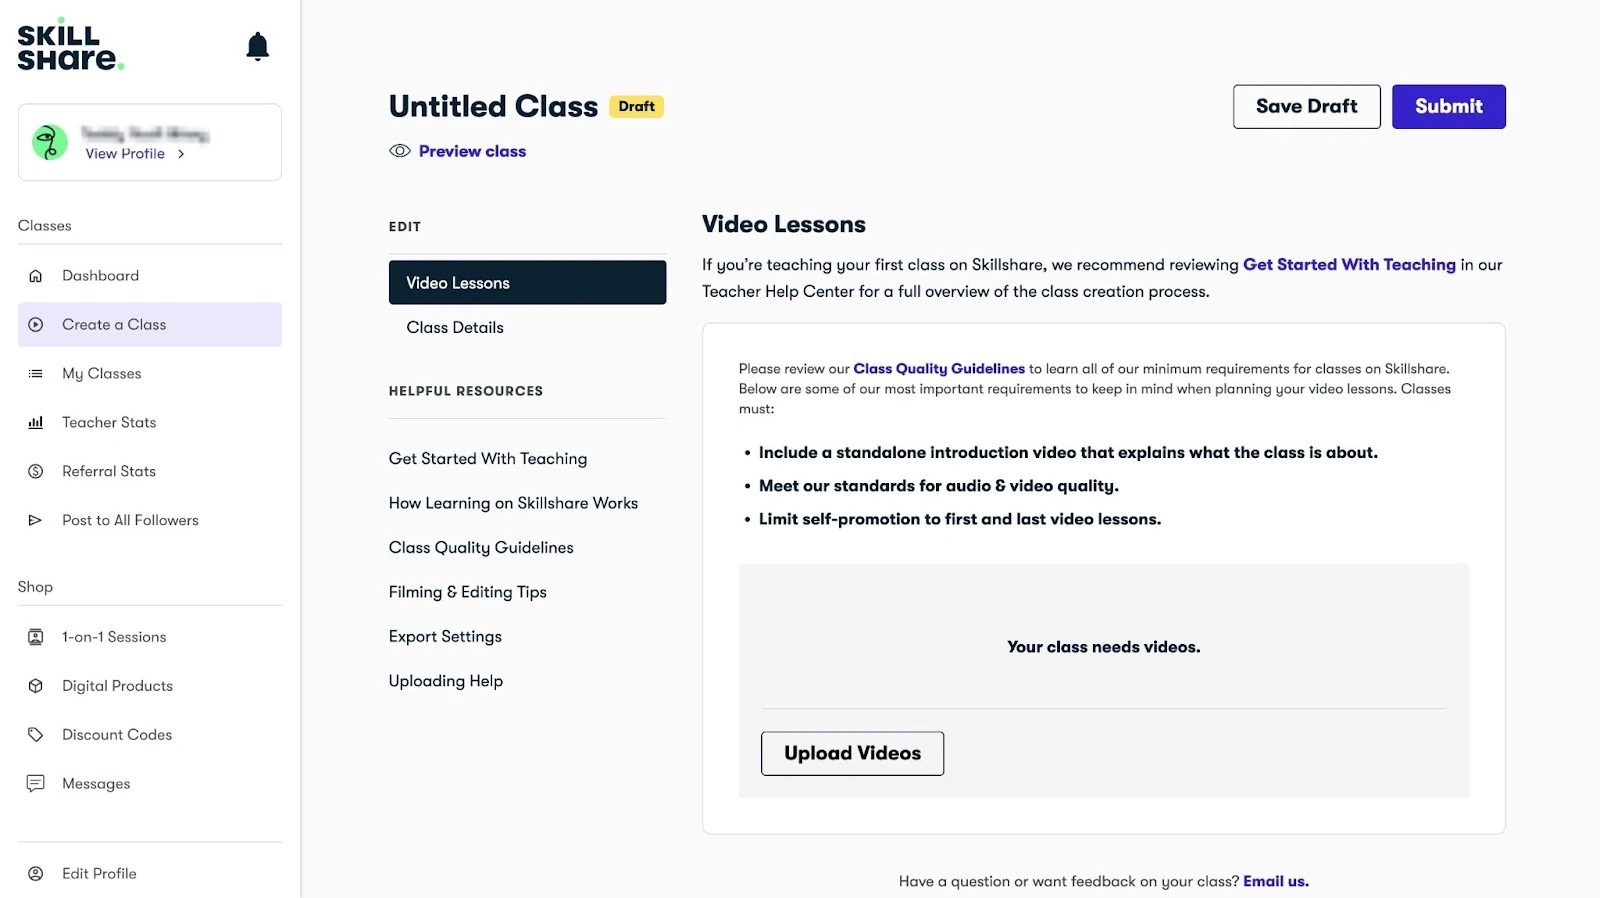
First, go to the menu and click “Create a class”.
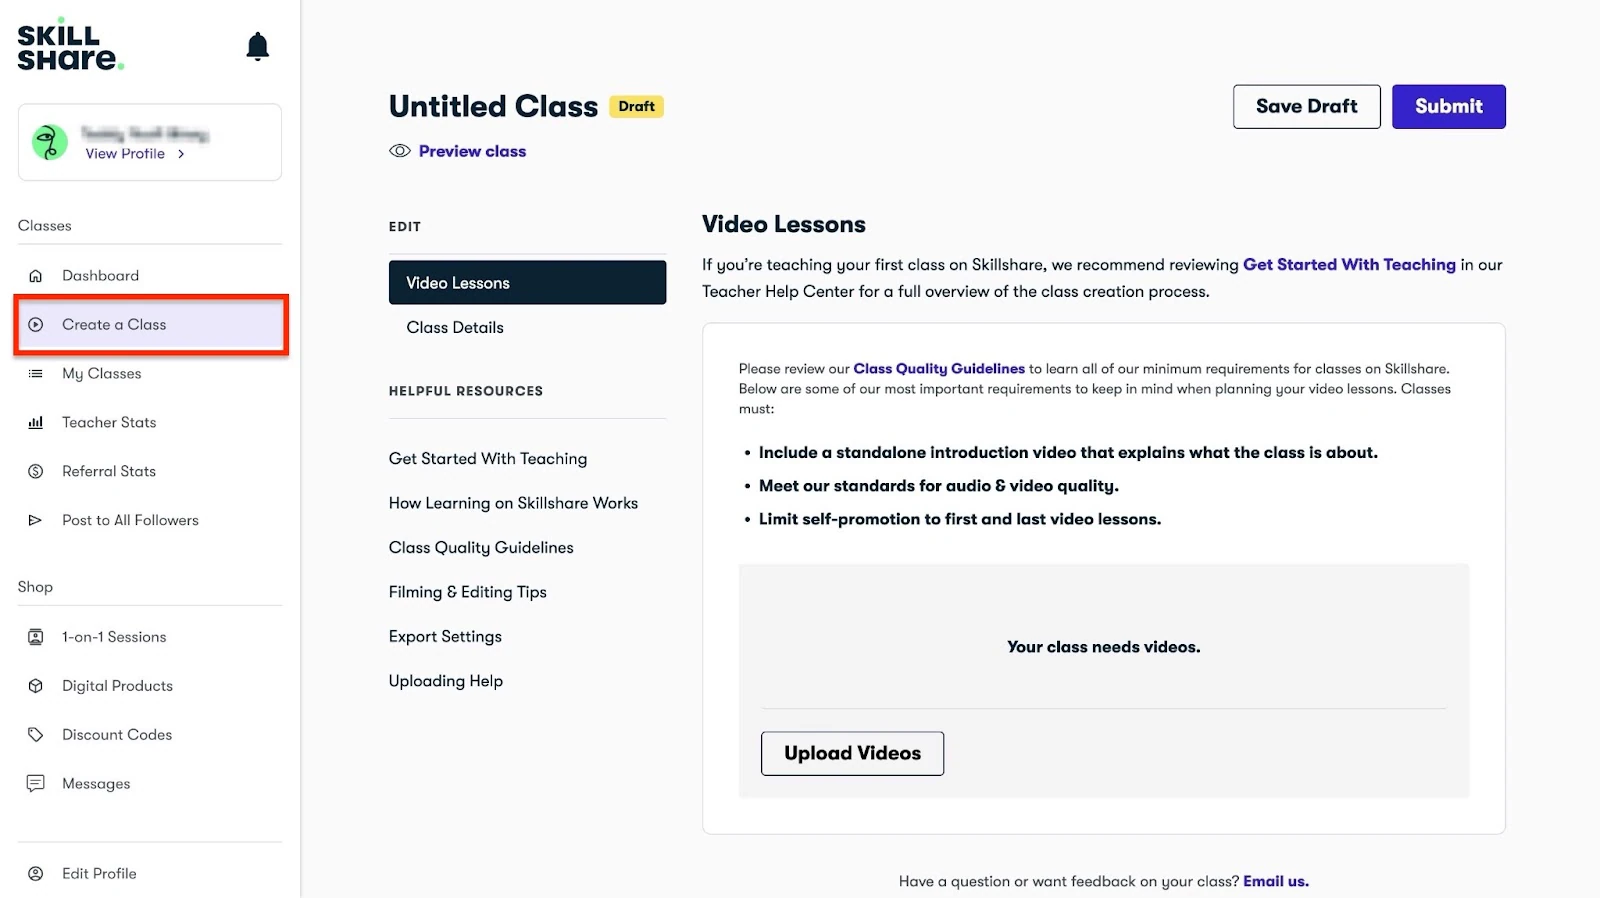
Next, select “Video Lessons” and upload a video from your device. Ideally, it should be at least two minutes long. You can upload more than one video.
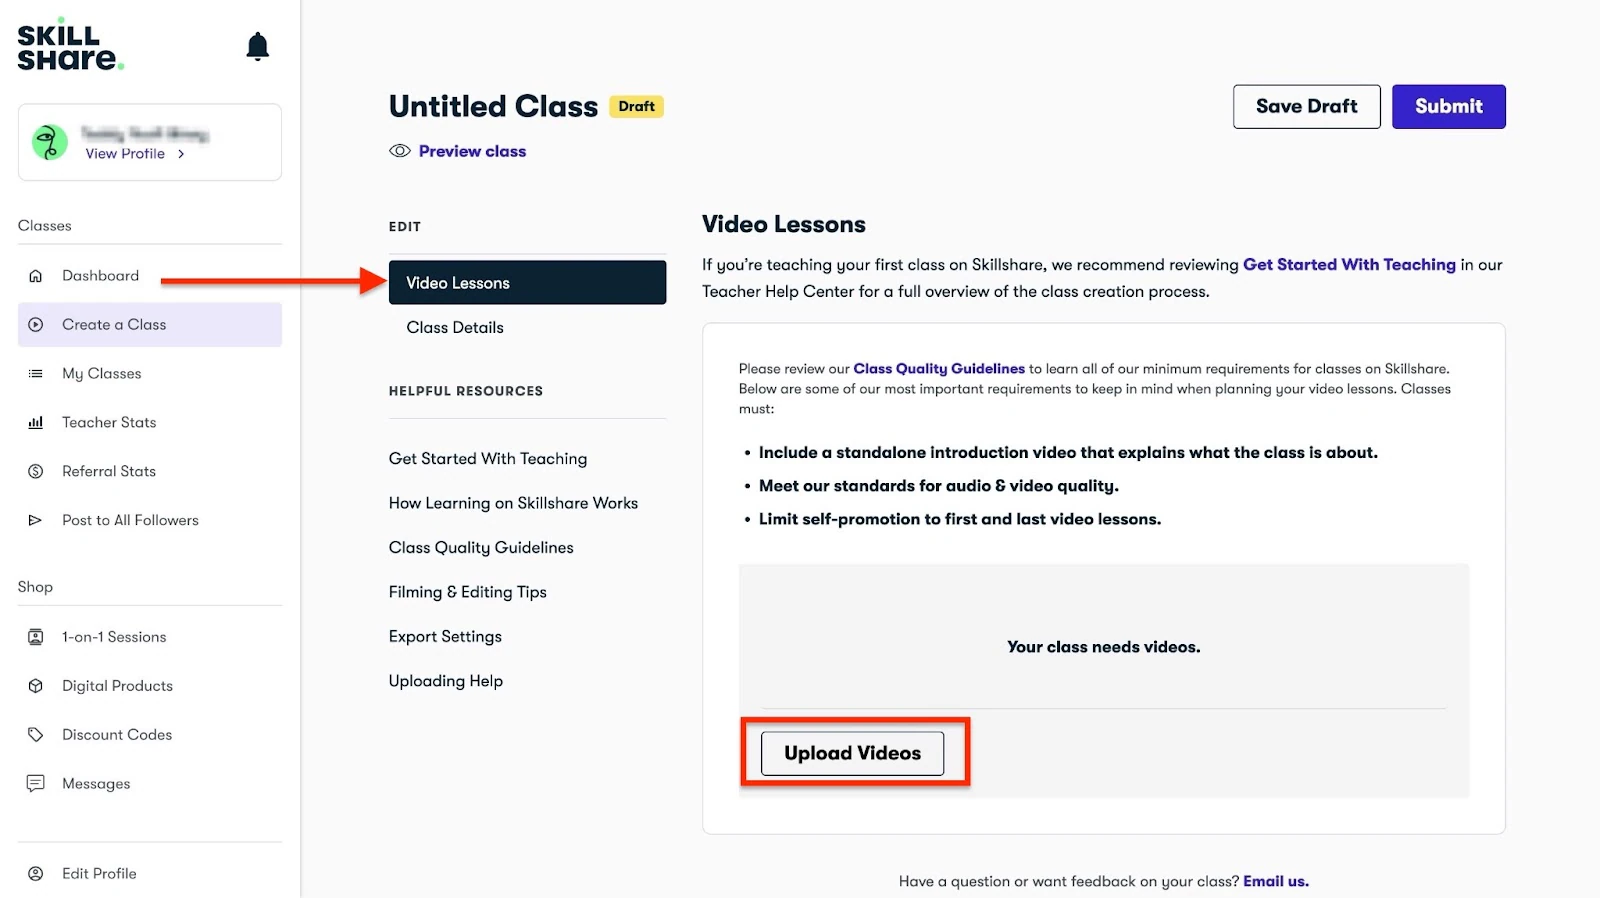
After uploading your video, save your draft. Next, select “Class Details.”
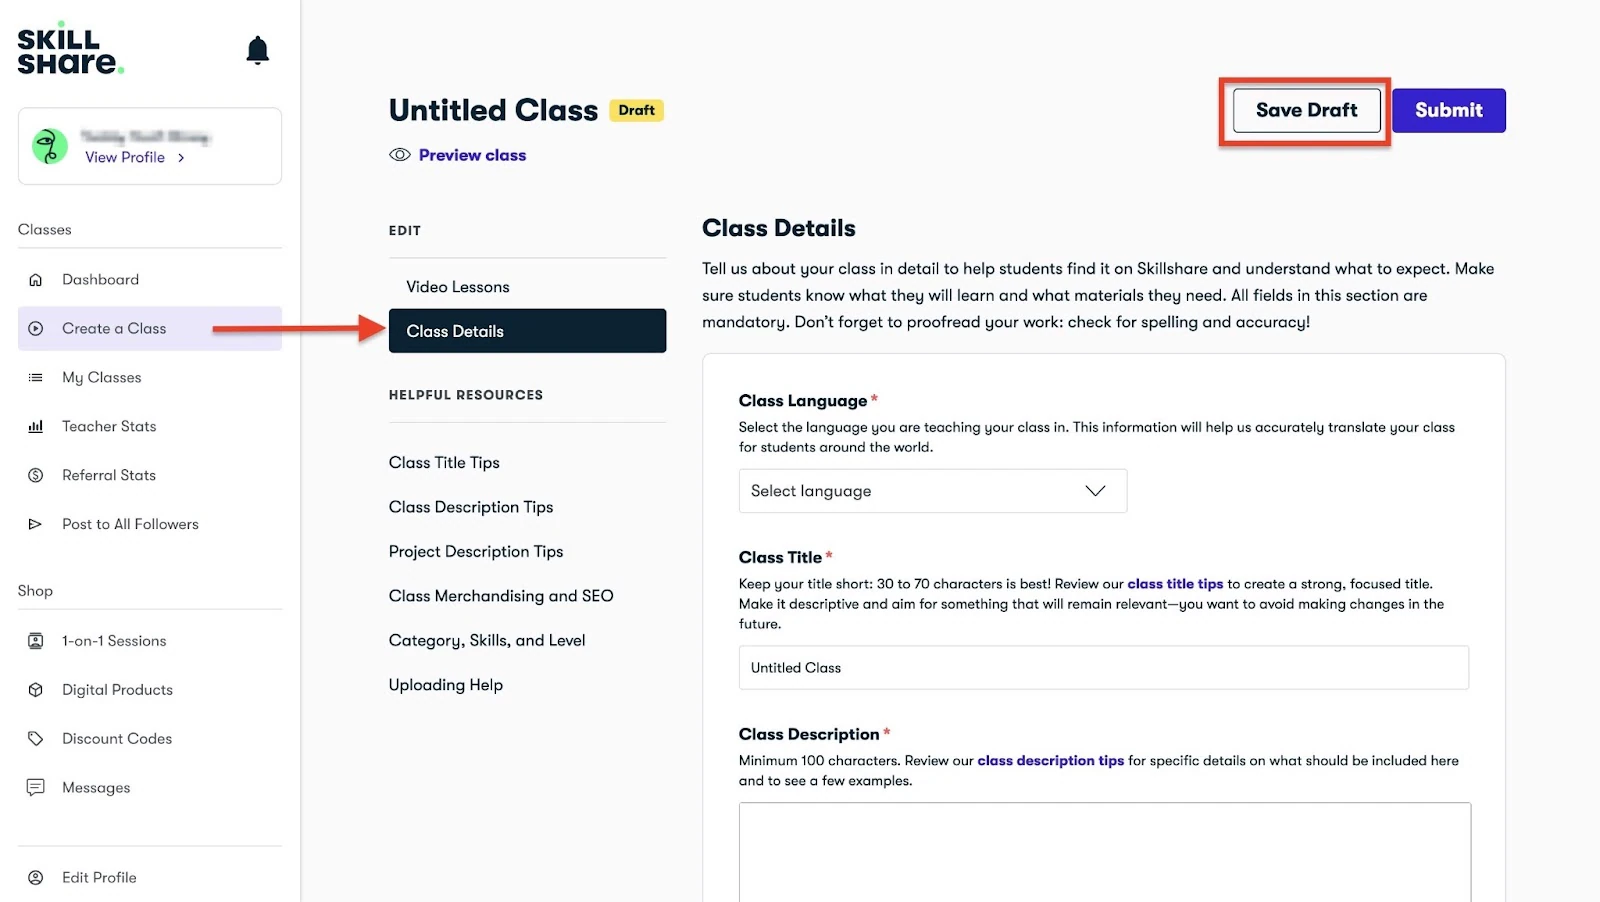
You can add details such as the language of the course, title, class, and product description. Make sure to review Skillshare’s tips on these additions to get it right.
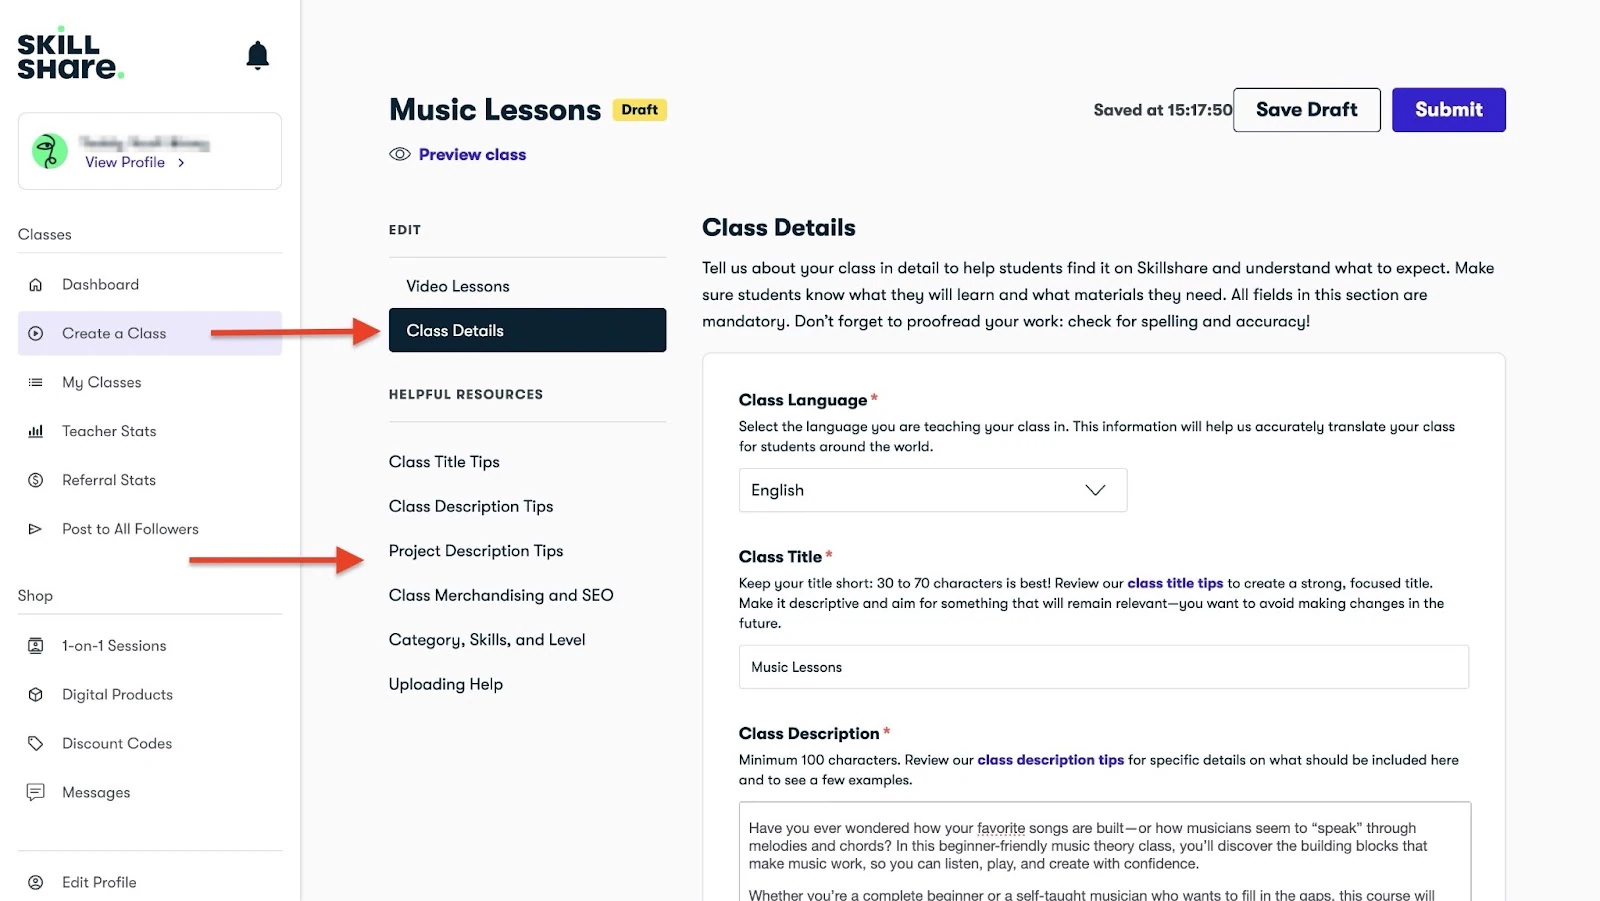
After that, select the required fields in the product “Discoverability & Findability” section.
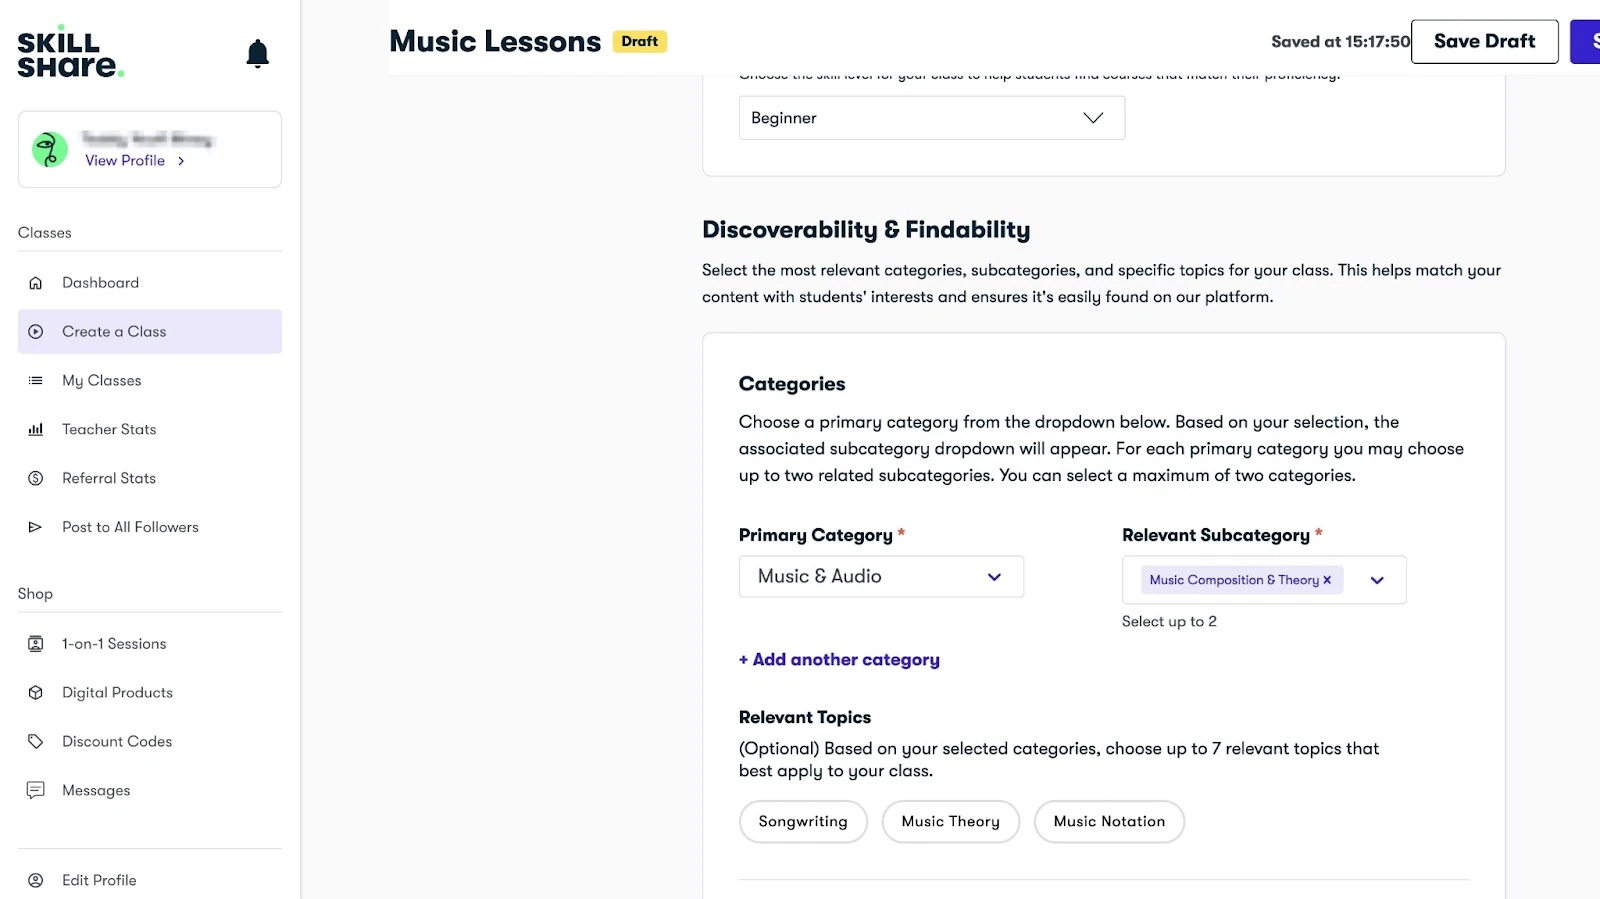
When you’re done filling out these important details, click “Save Draft.”

Click “Preview” to view how students will see your course on the Skillshare online learning platform.
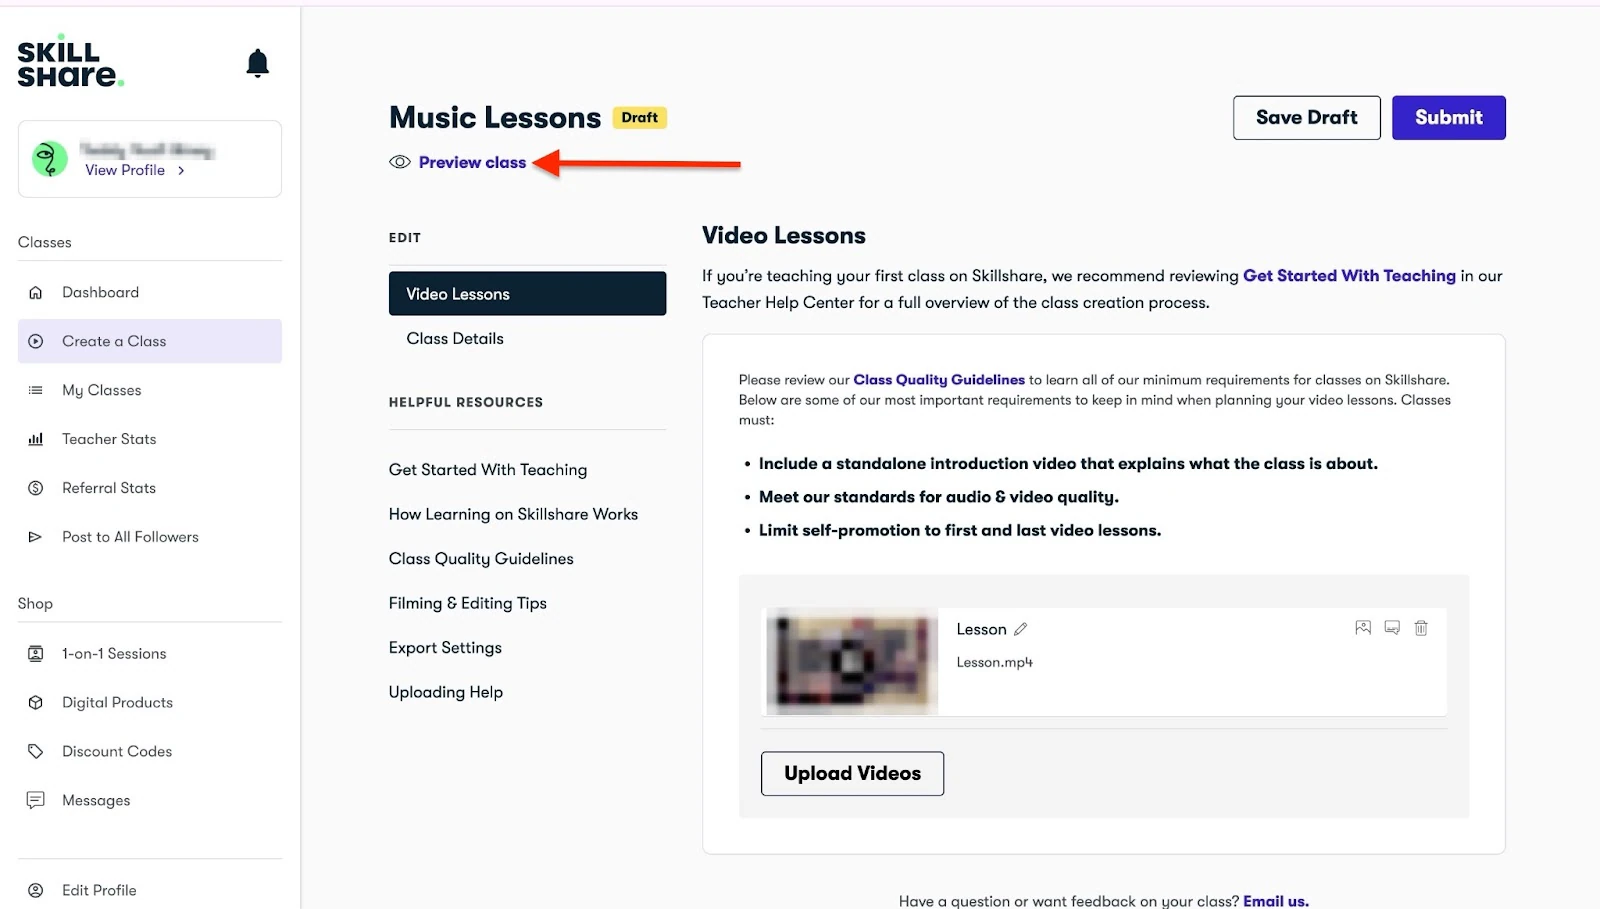
You’ll see the video you just uploaded and the information you added.

You can click “My classes” to view this submitted draft, and edit, add, or change any information or details.

If it’s your first time creating on the platform, Skillshare’s content and community team will review your class/course. The review may take a few business days.
Key features
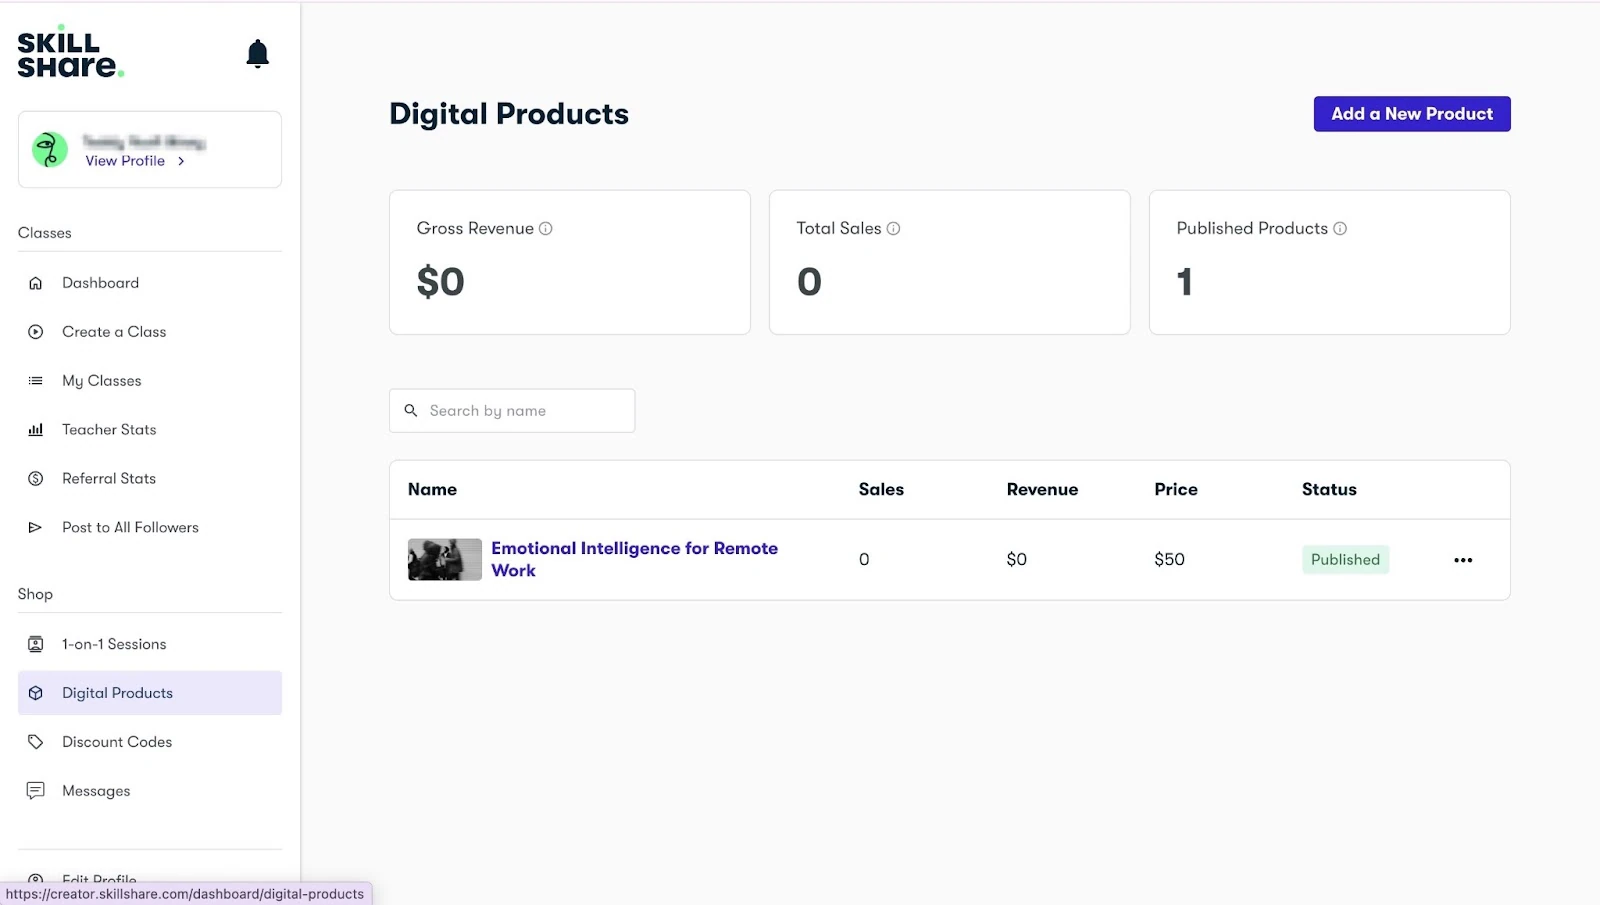
1. Digital Products
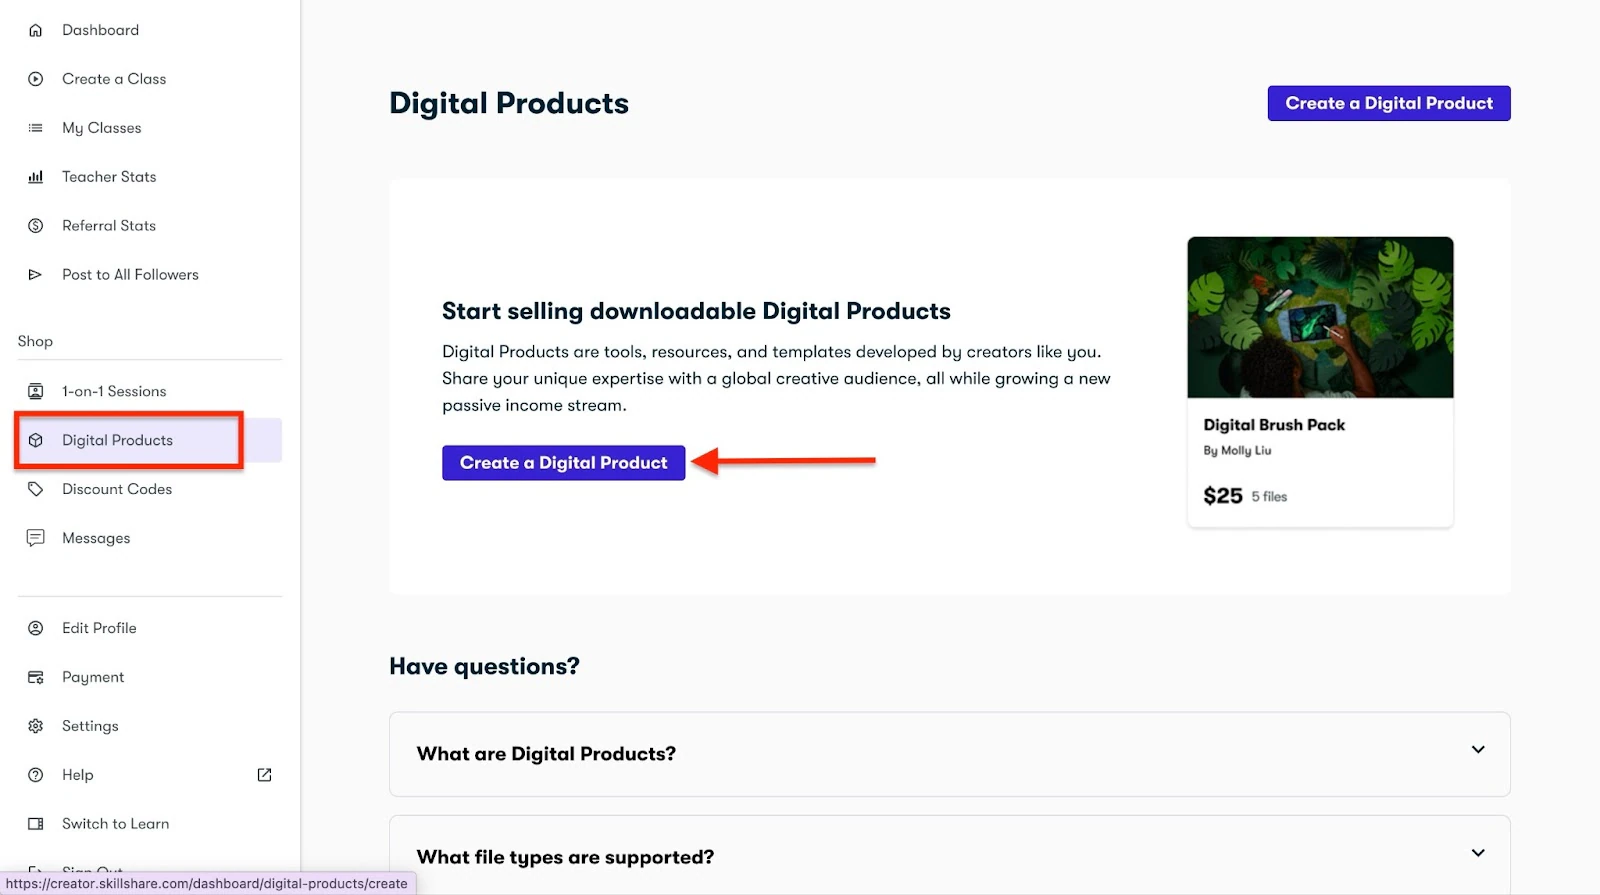
While your course is under review, you can still start earning on Skillshare by creating a digital product.
First, click “Digital Products” in the sidebar and select “Create a Digital Product.”
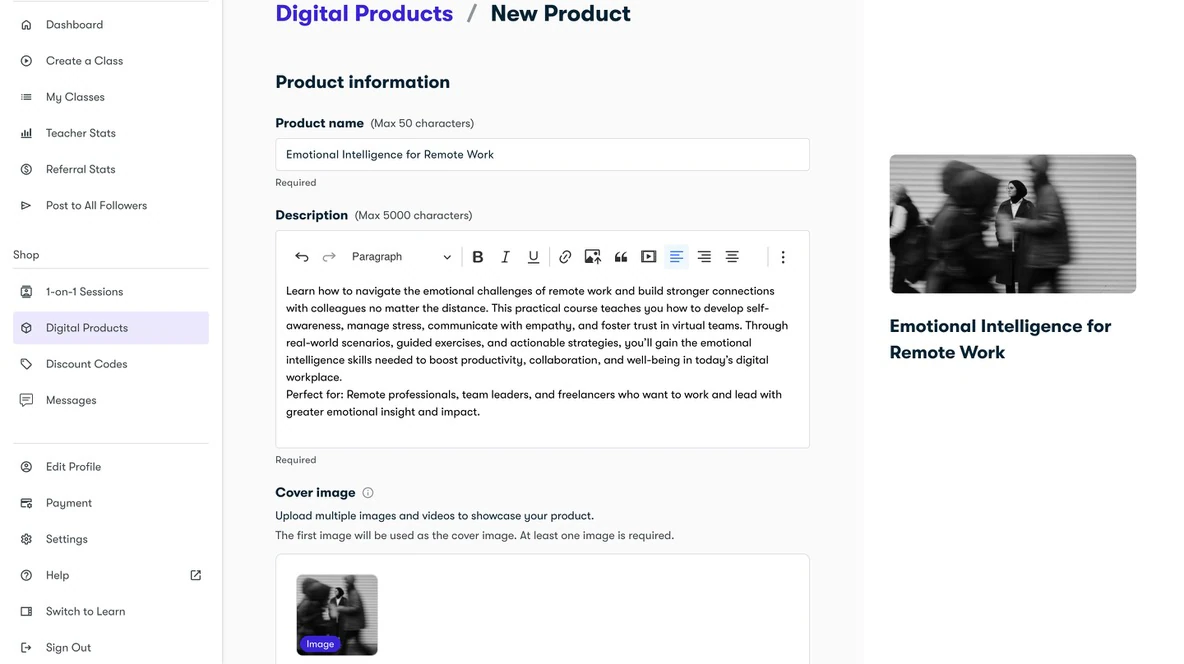
Next, enter the product name and description, and add a cover image.
Then add the price and upload one or more files in formats such as PDF, EPUB, video, audio, etc.
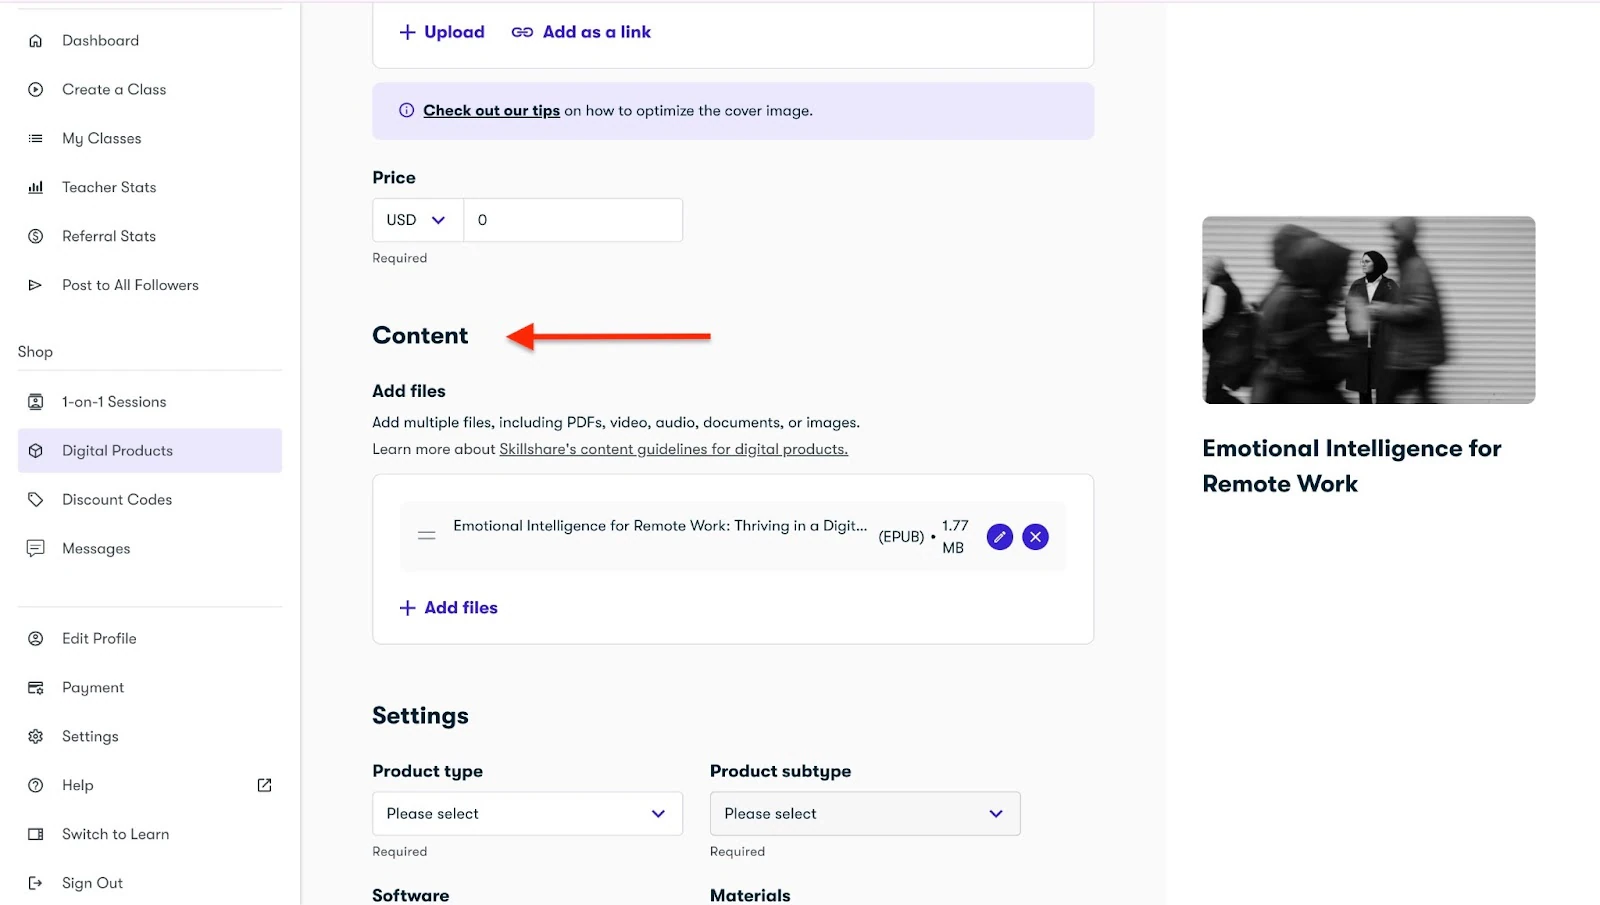
Select the product type and subtype, among other important options, and click “Publish.”
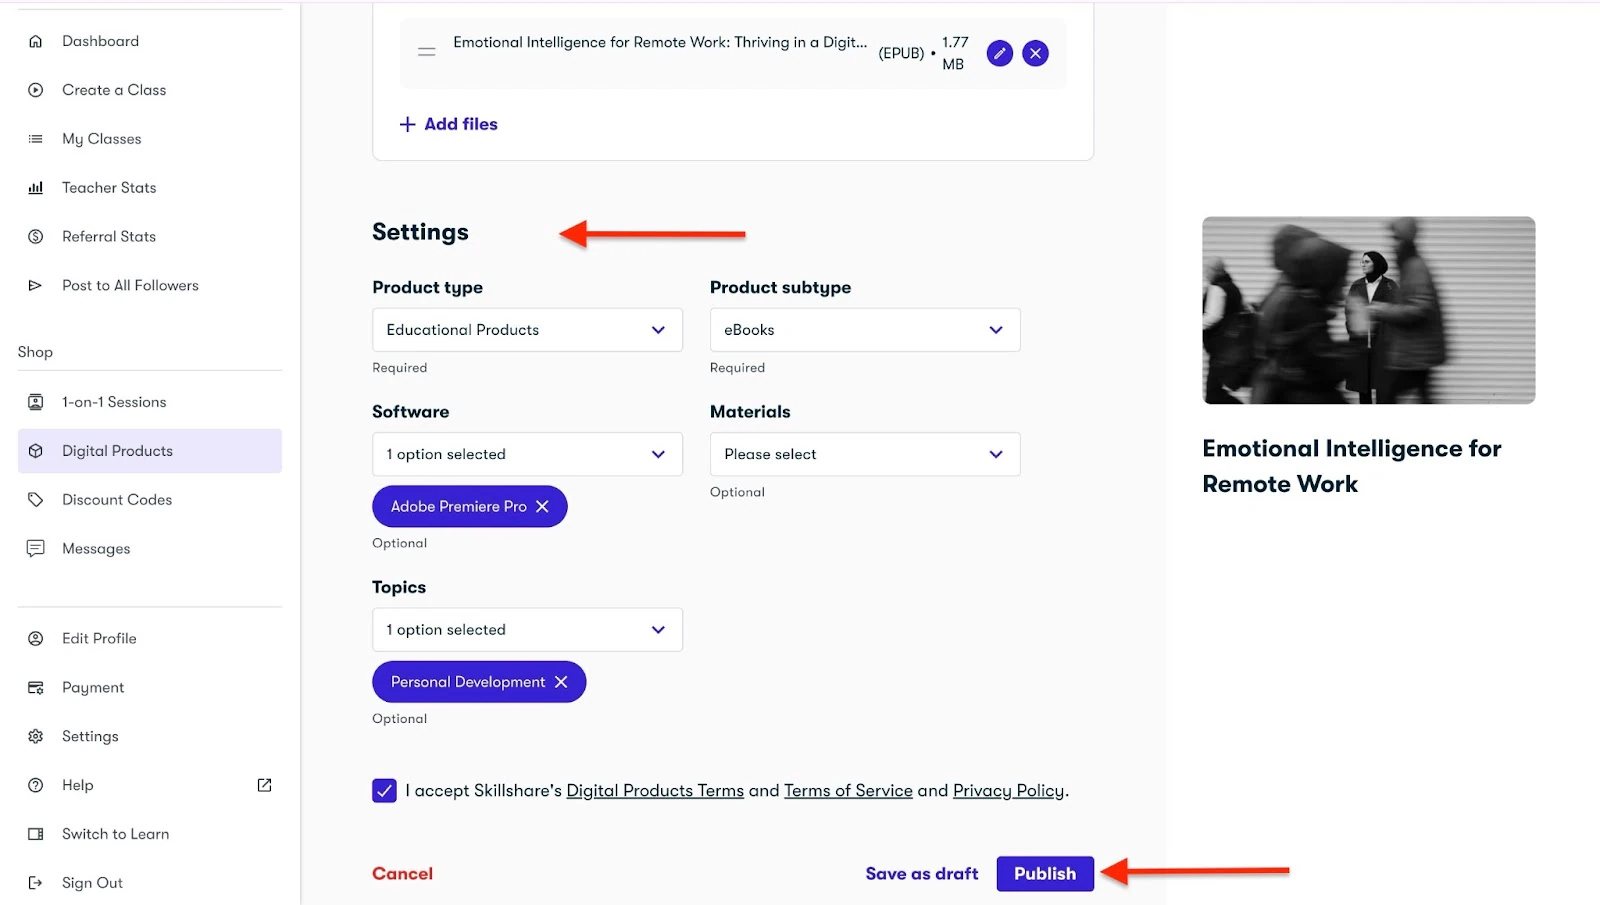
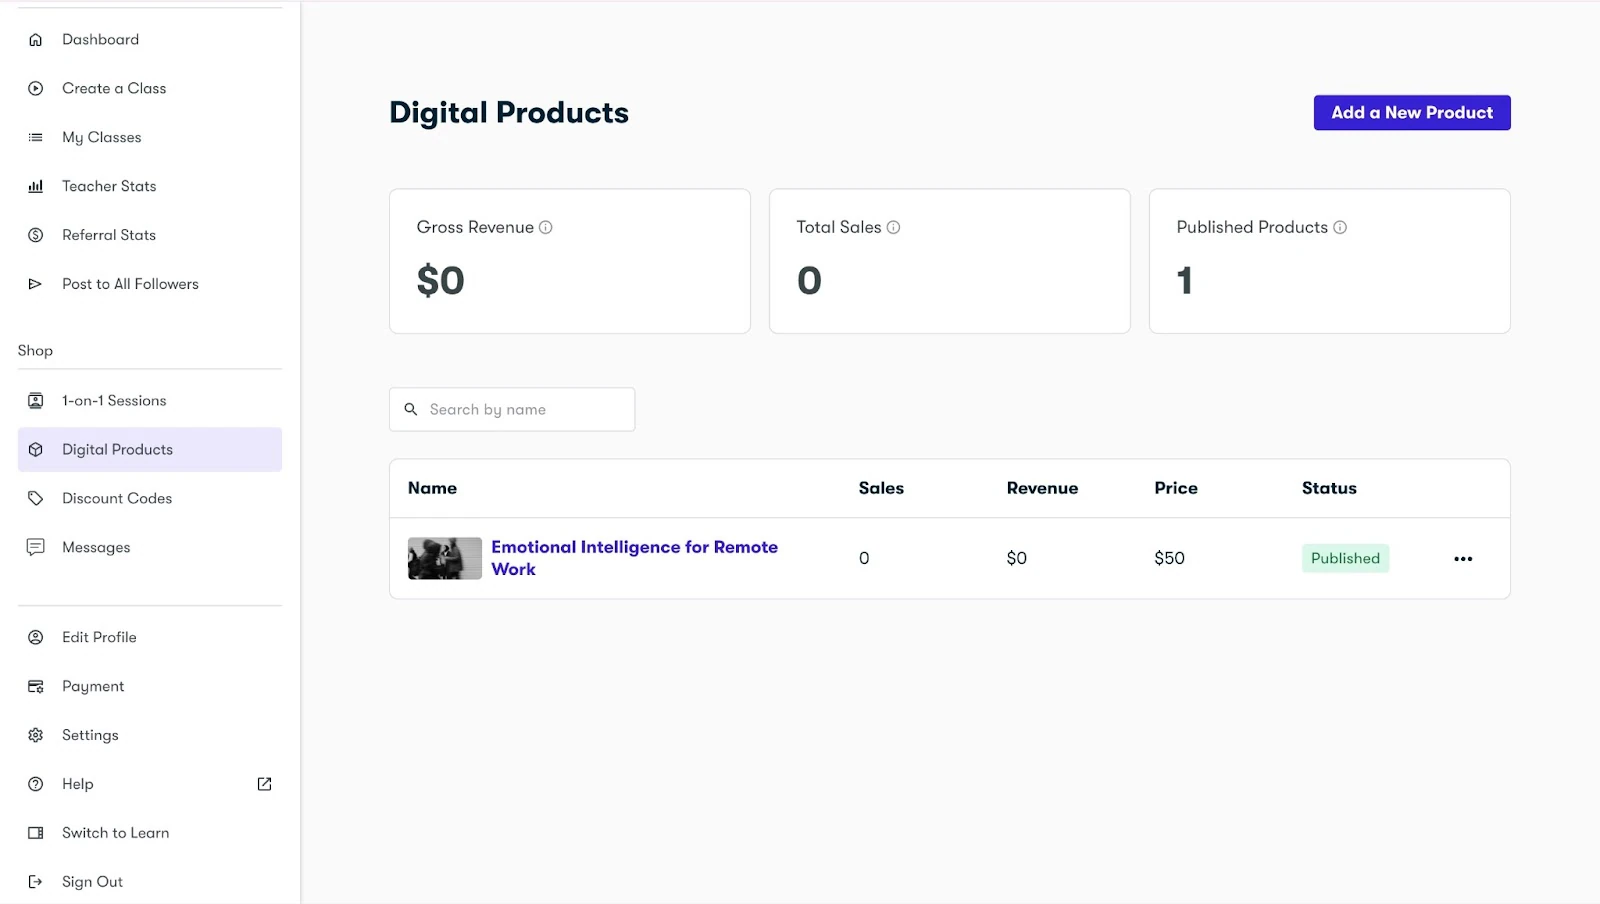
Your digital product will now show on the Digital Products window.
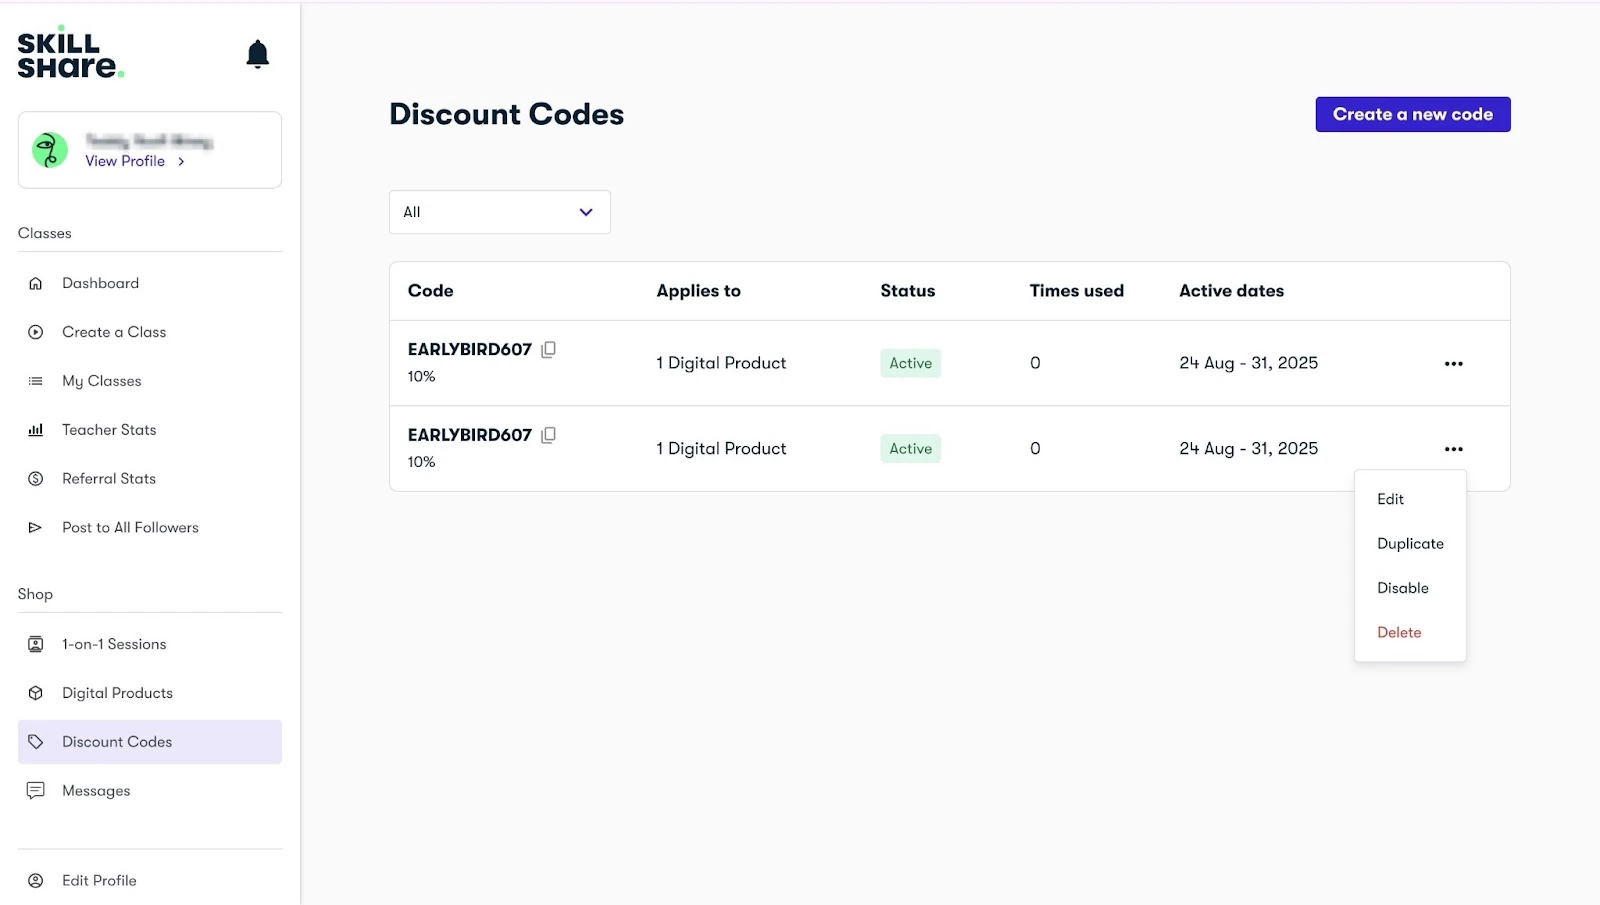
2. Discount Codes
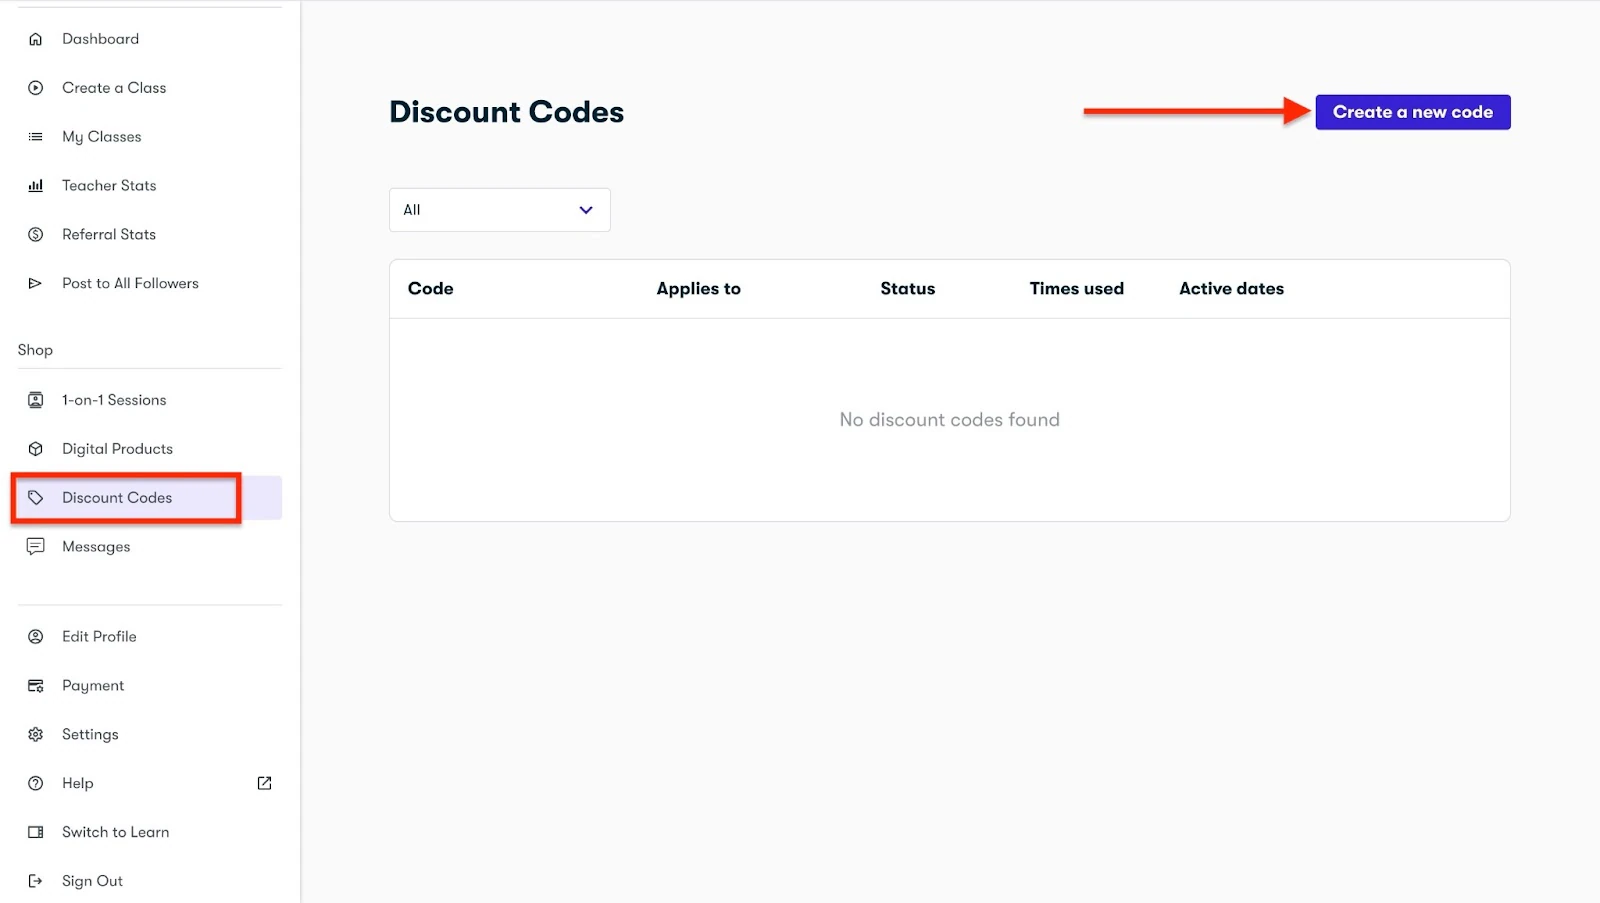
After creating, for instance, your first ebook on Skillshare, you can use the discount code feature to create discounts to attract more students.
To do this, click “Discount Codes” in the sidebar and select “Create a new code.”
Fill out the form provided, select the applicable product, and click “Create.”
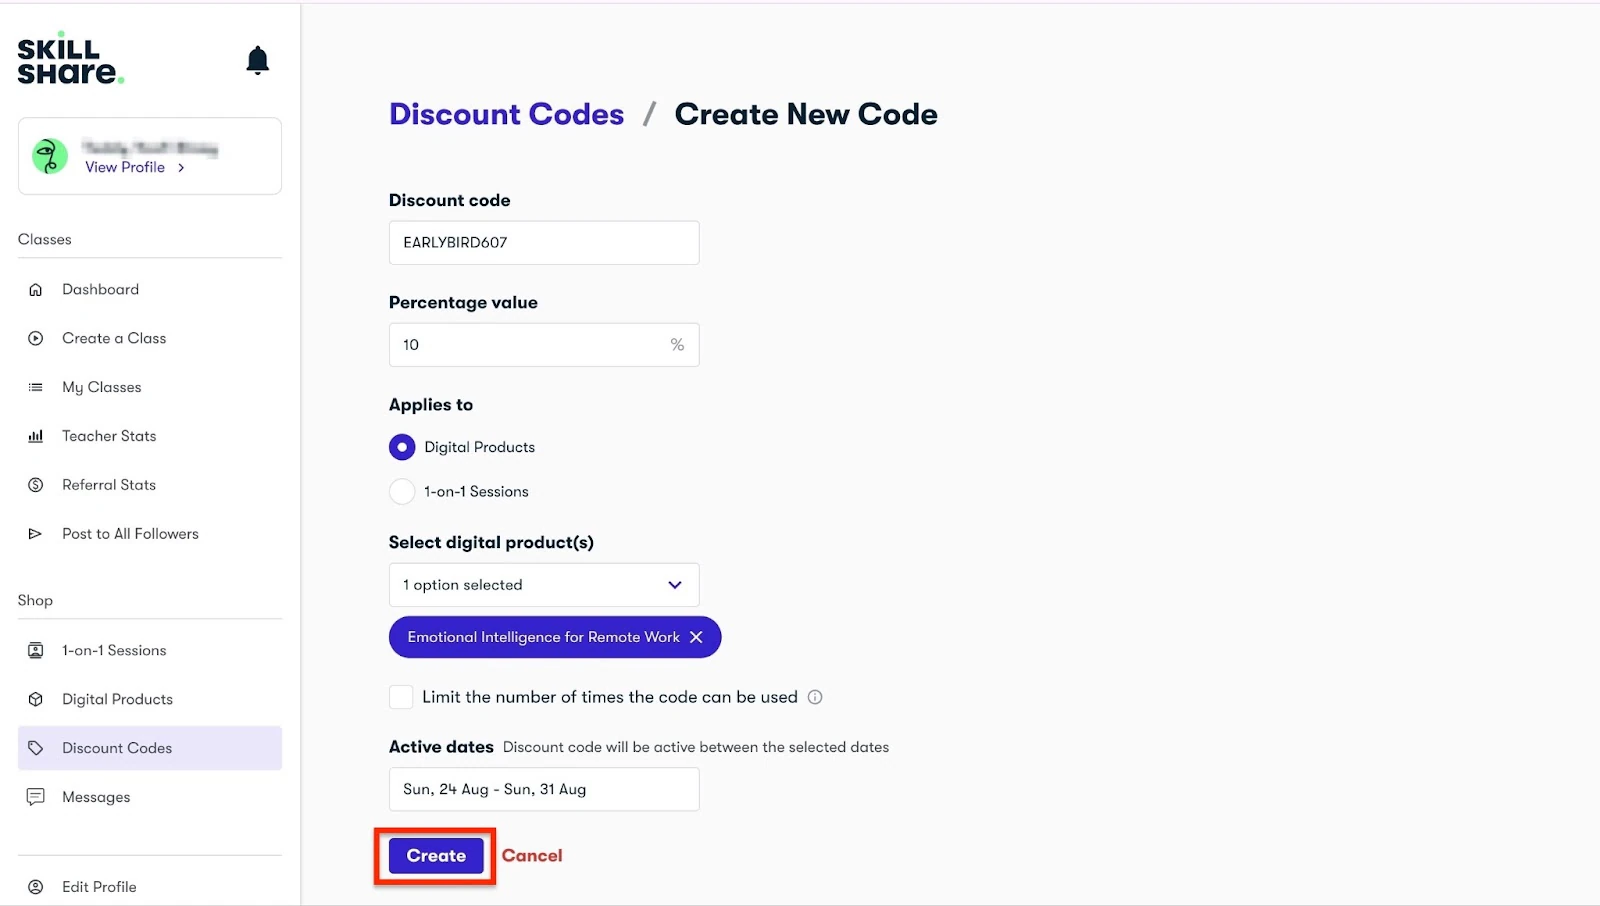
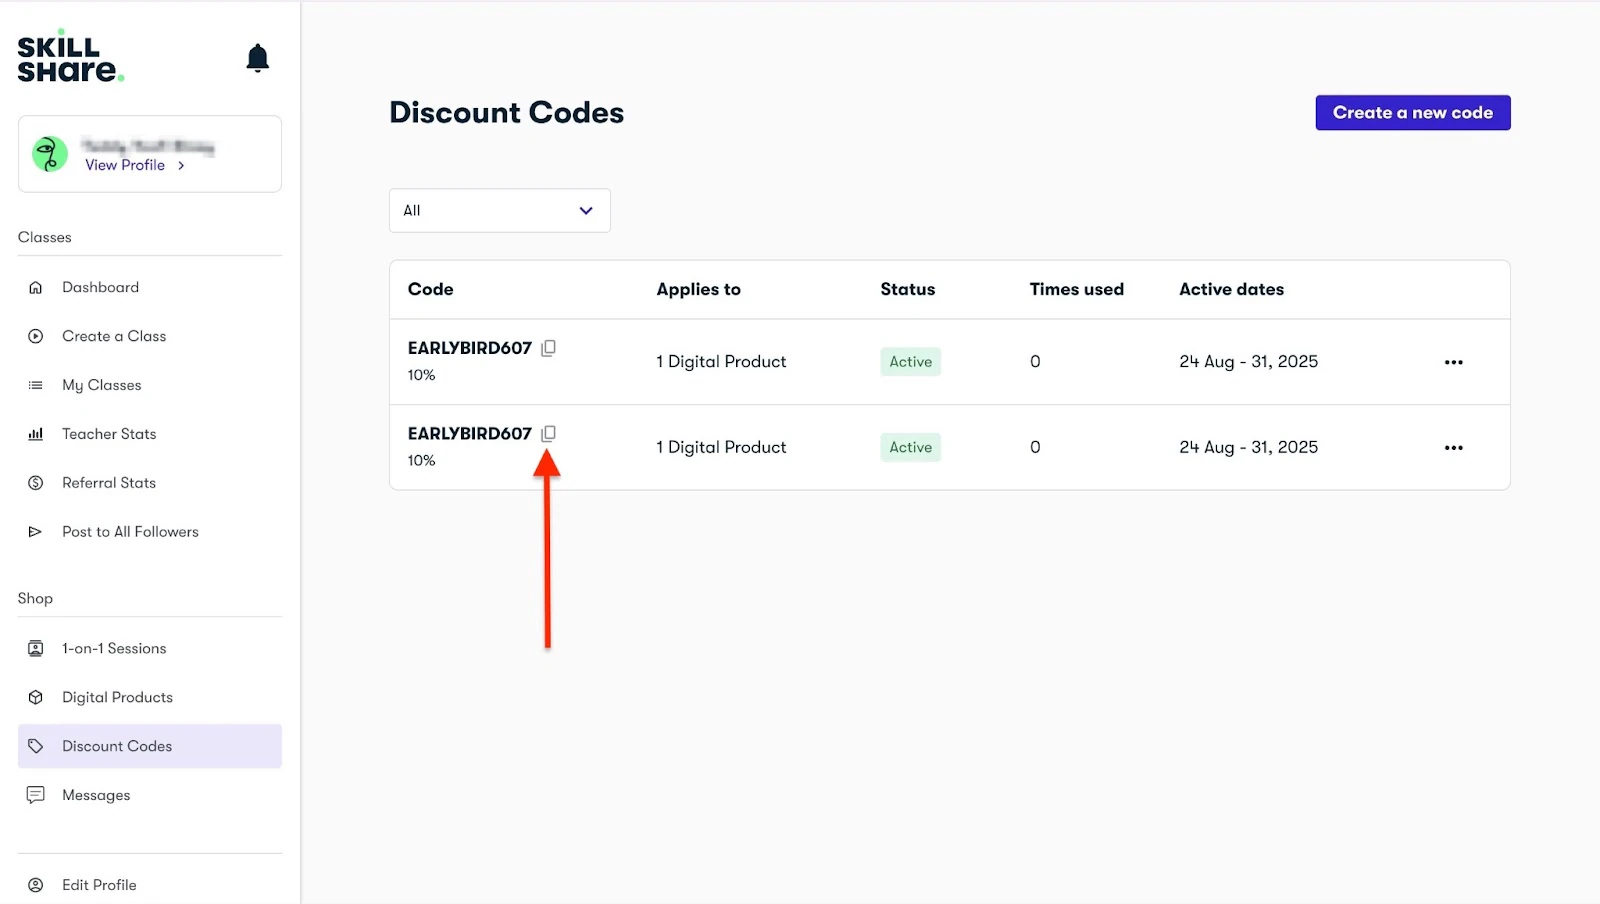
The new code will be listed in the discount code feature window.
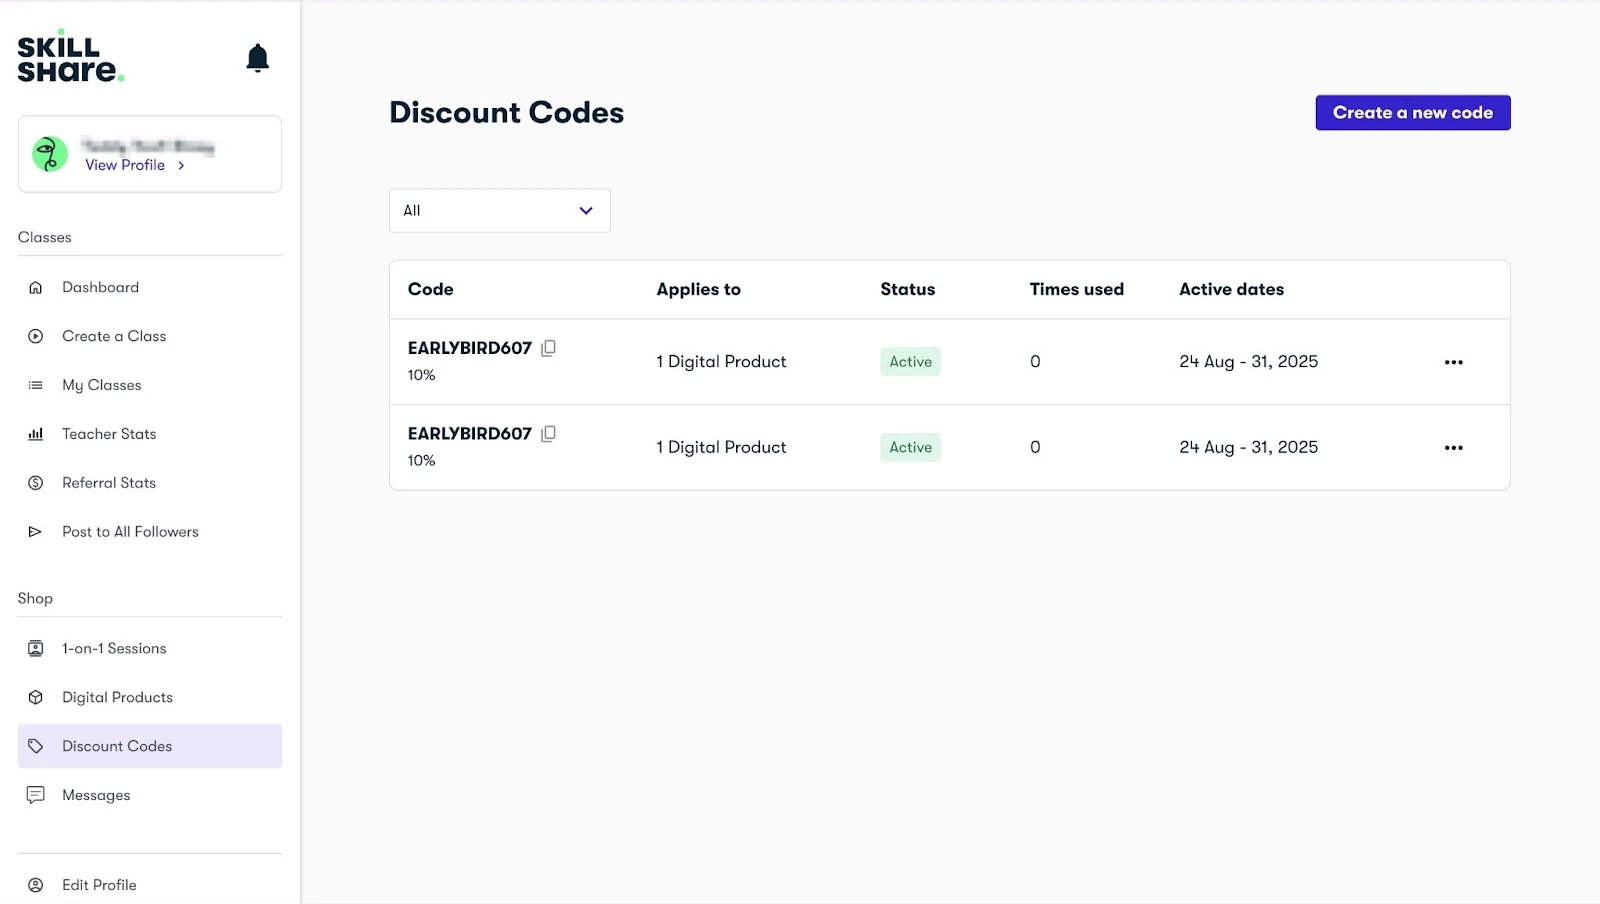
Finally, copy the code and share it with others.
Best for
- Instructors and coaches who want to earn royalties from video lessons and also sell digital products to an online learning community.
Pricing
- Free: $0
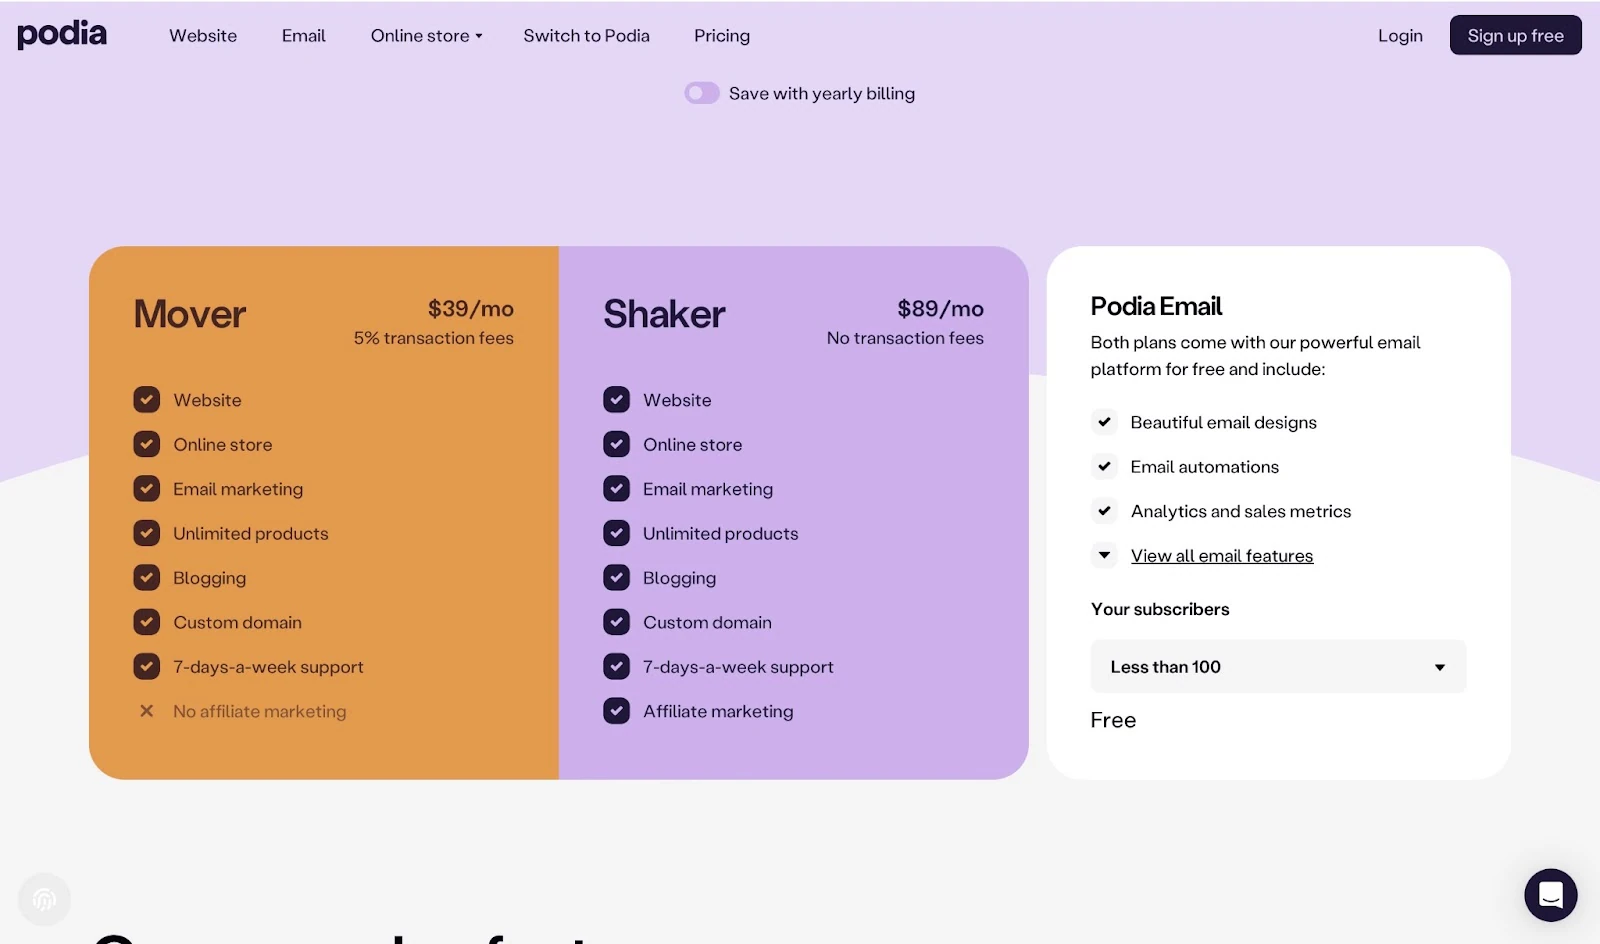
6. Podia
Sixth on my list of the best ten online course platforms is Podia. It’s an all-in-one platform that lets you host and sell online courses and other digital products.
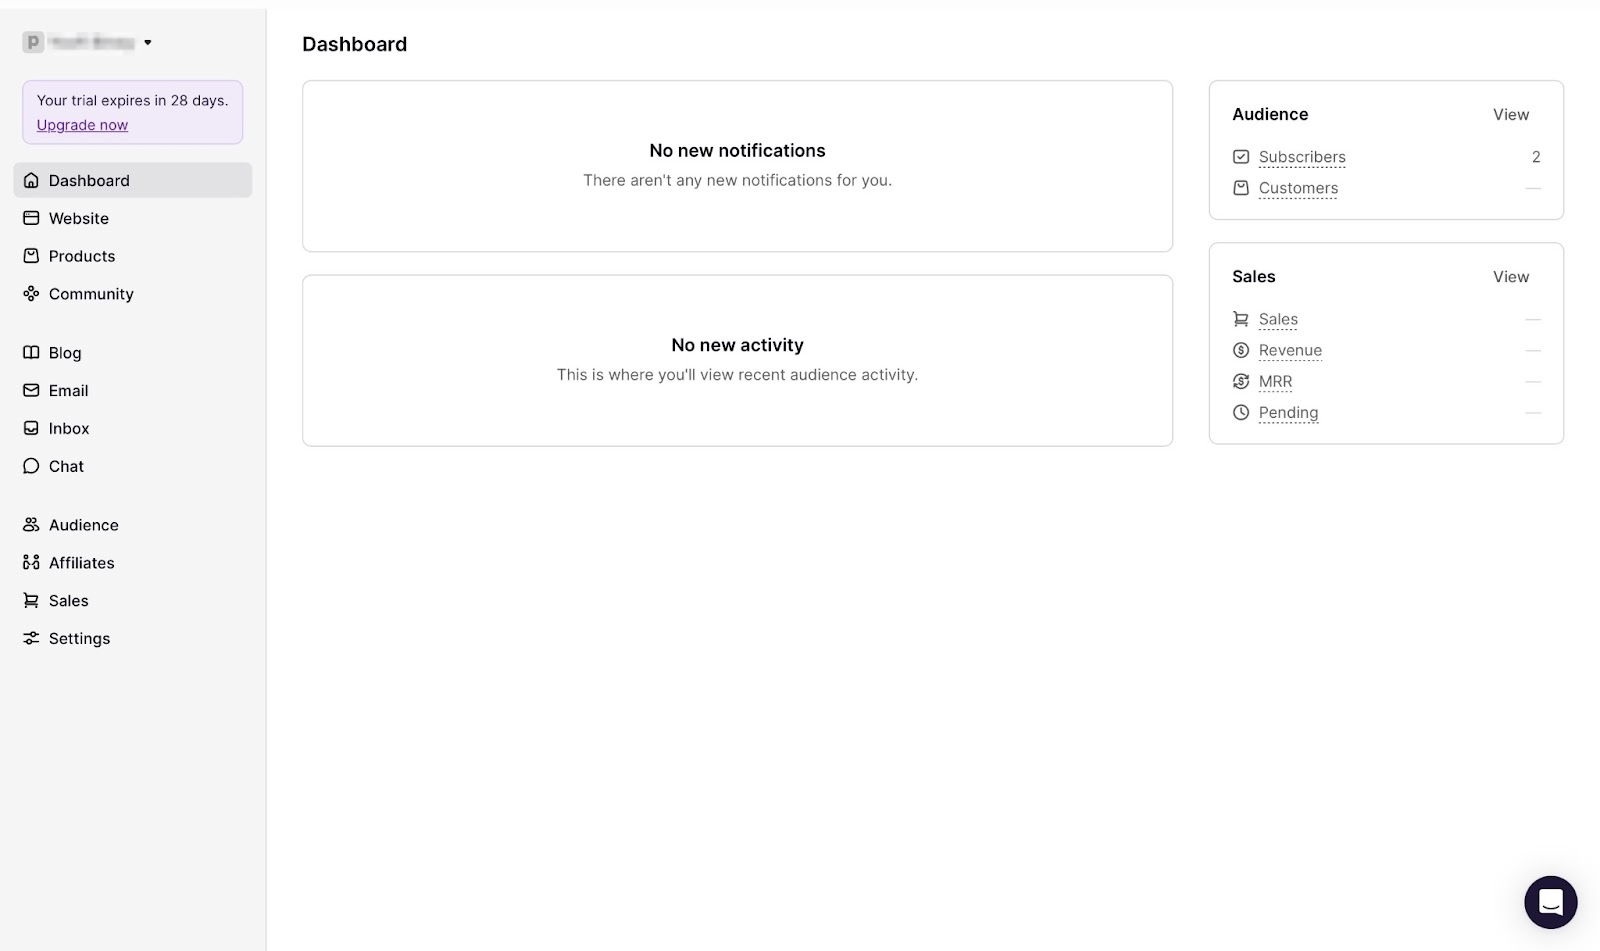
Podia’s dashboard feature allows you to view the total number of subscribers and customers. It also allows you to see sales, revenue, monthly recurring revenue (MRR), and pending transactions.
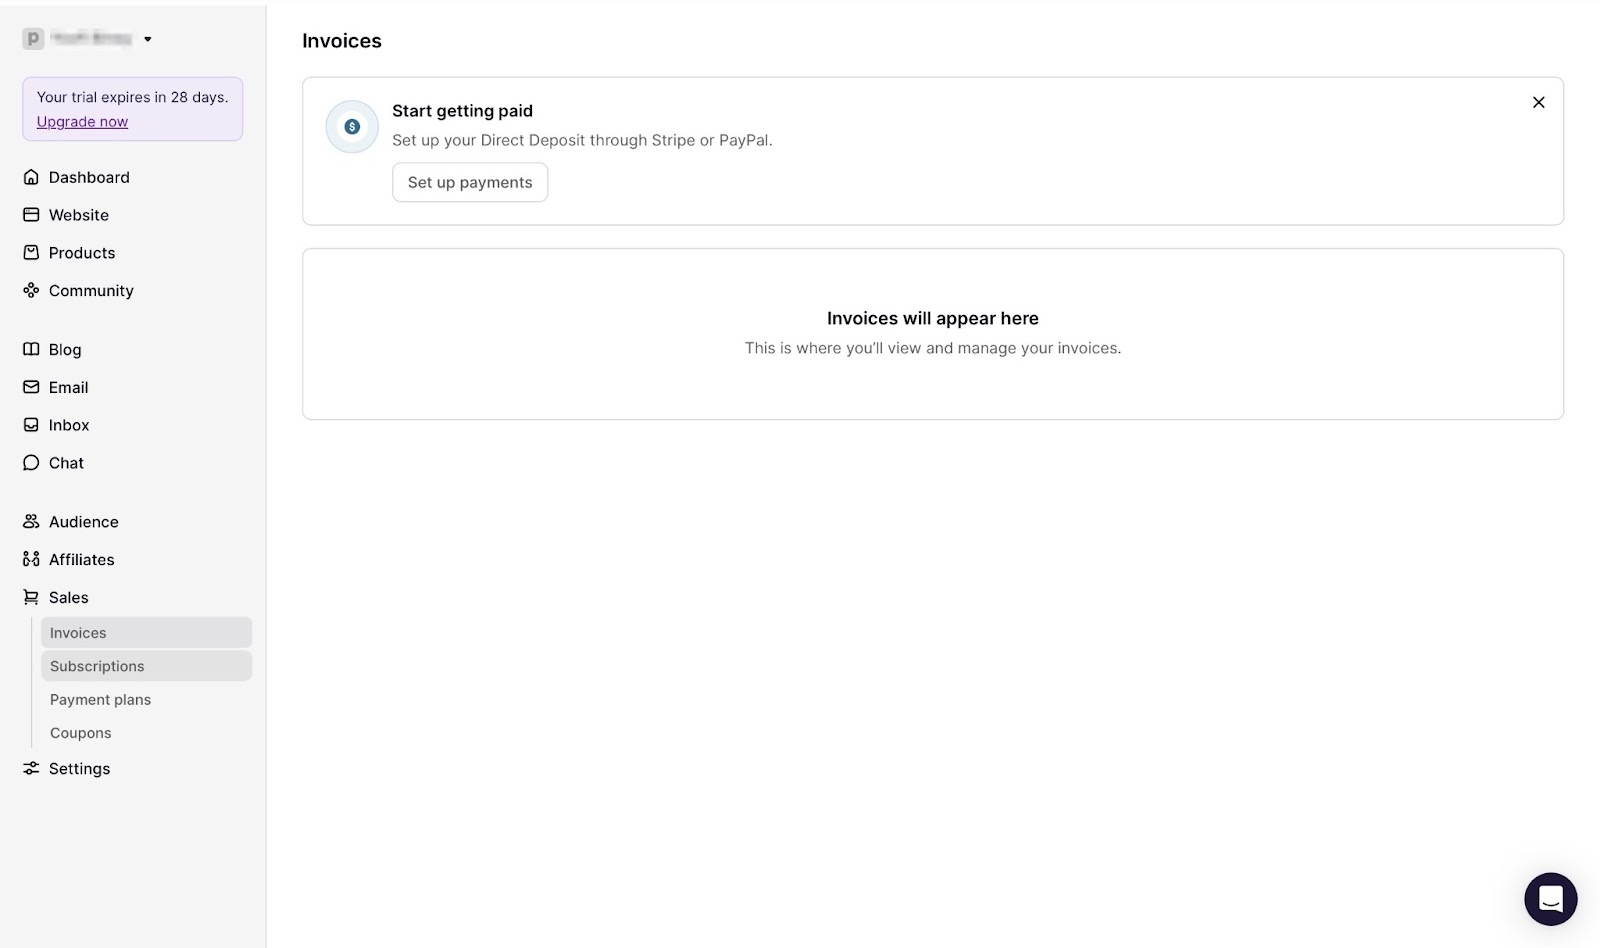
With its sales feature, you can view the invoices, subscriptions, payment plans, and coupons you have created.
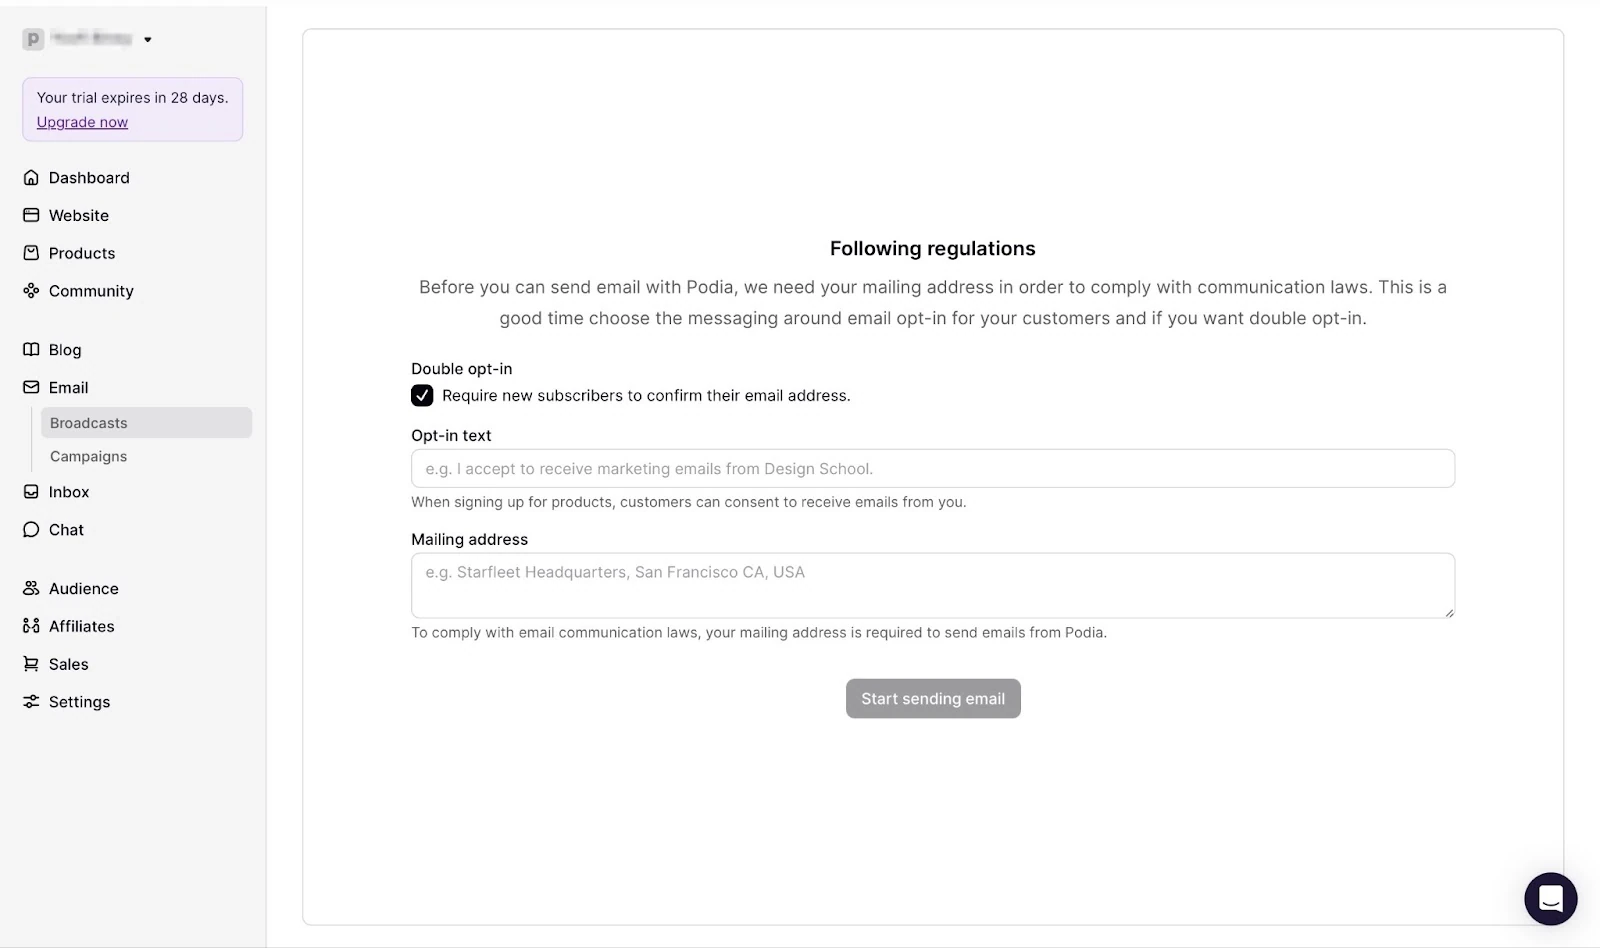
Moreover, the email feature on Podia enables you to send emails to your customers. It also lets you customize the opt-in message and even add a double opt-in.
Using its products feature, you can create and add new digital products and courses. You can view and edit all the products you have added.

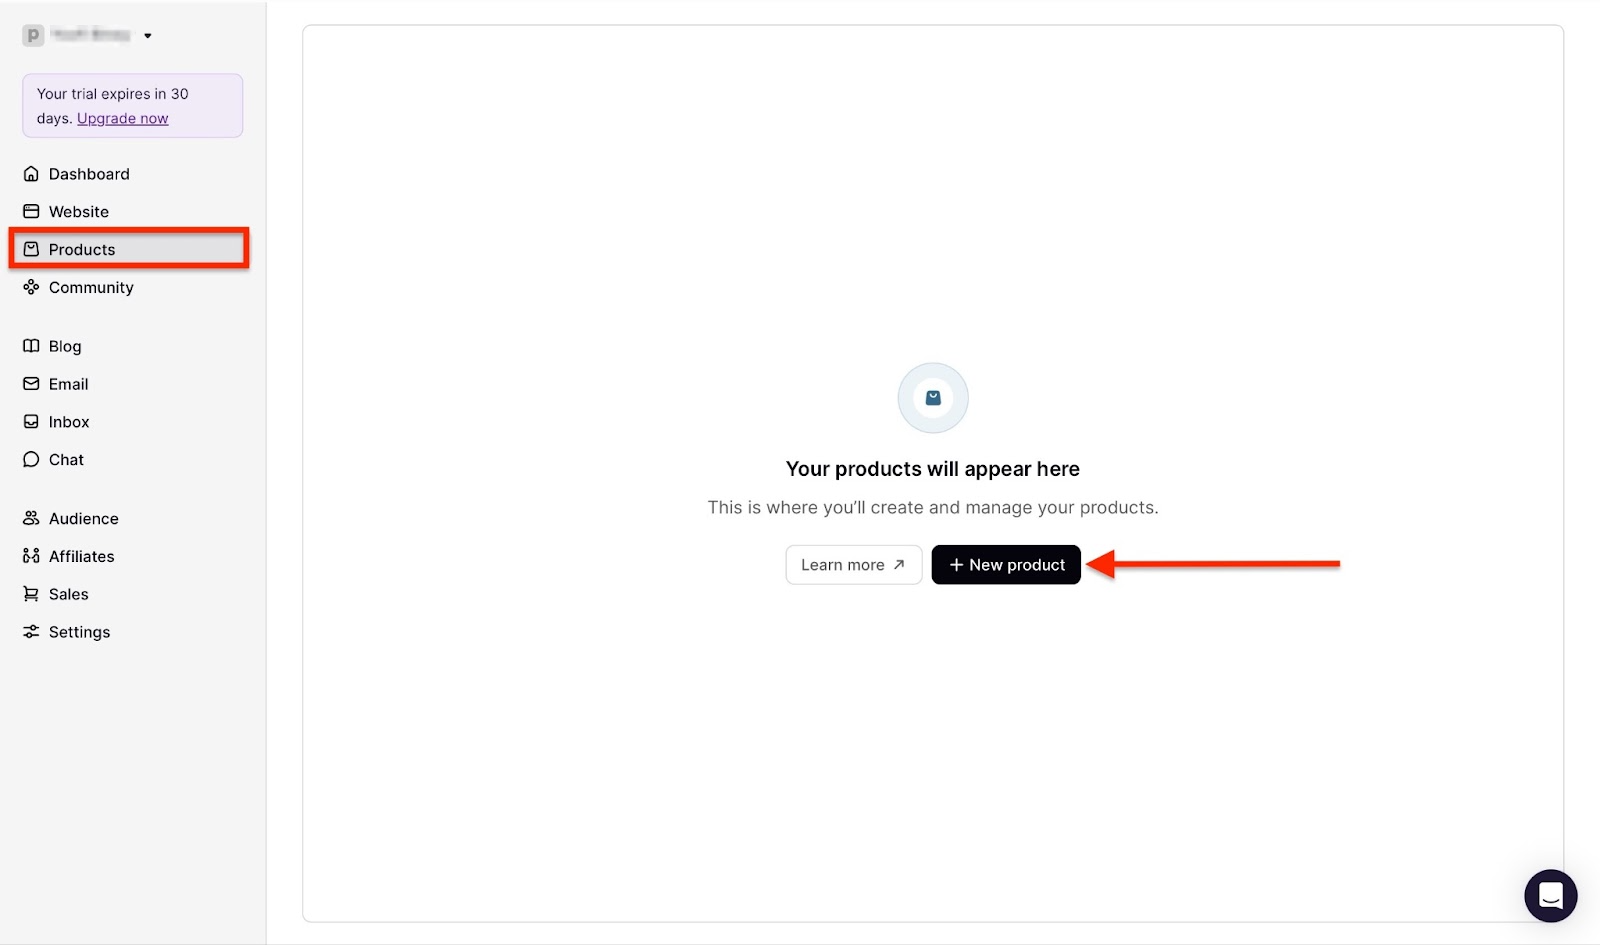
To create a course on Podia, first click “Products” in the sidebar and select “+ New product.”
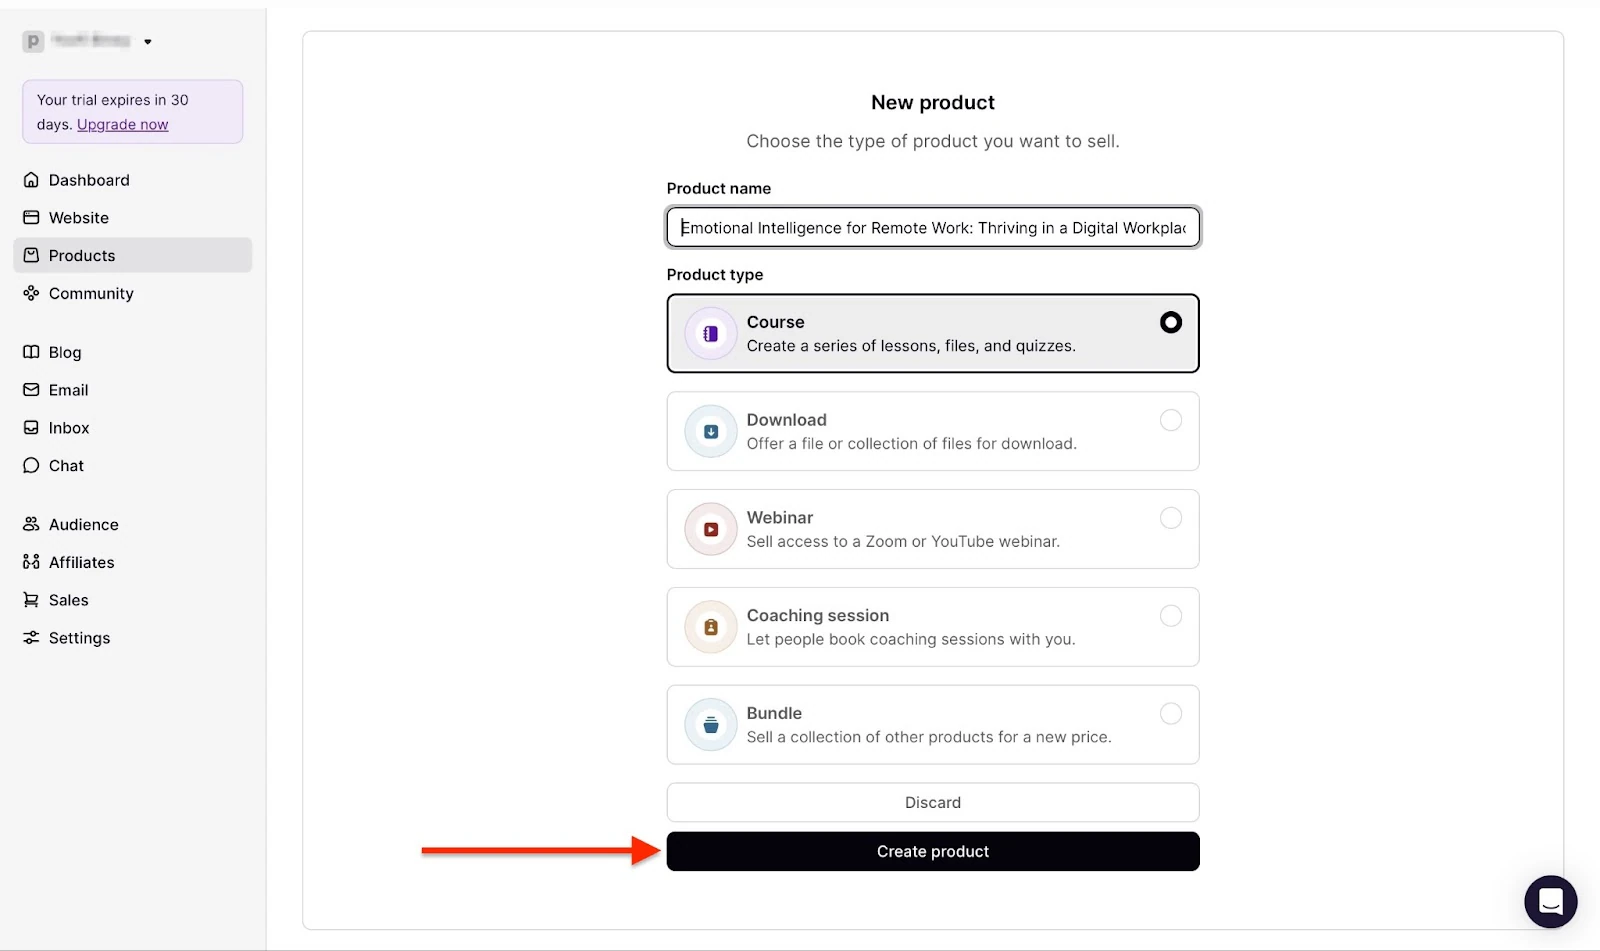
Next, enter the name of your new course in the field provided. Then select the product type, which in our case is “Course.” Now, click “Create product.”
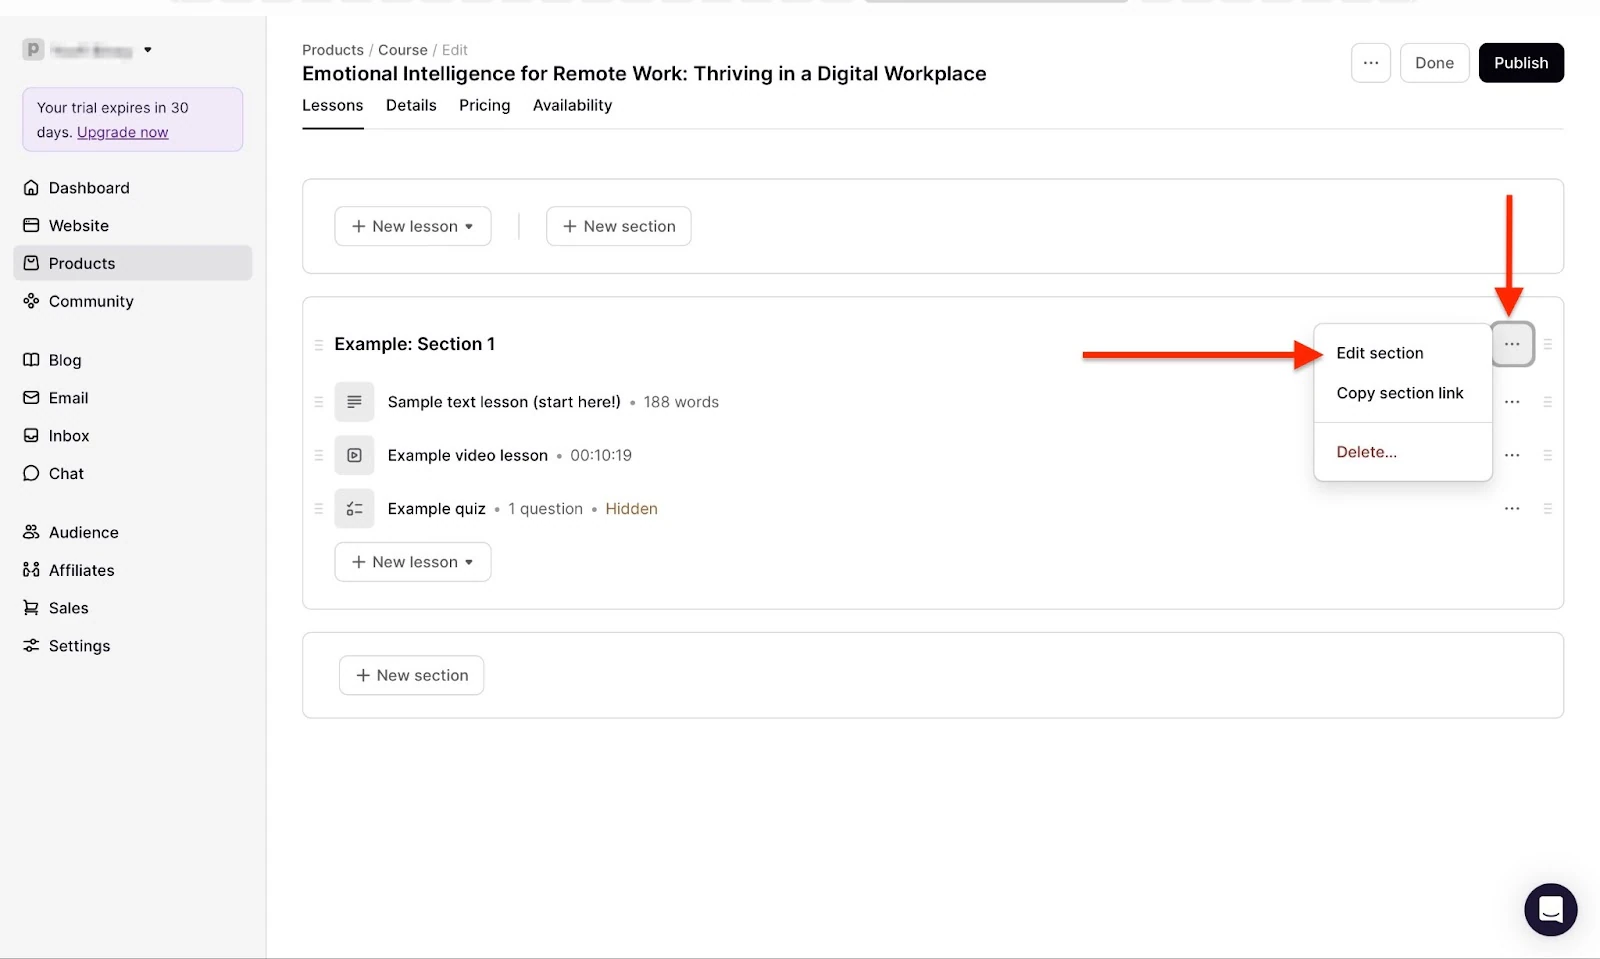
In the new window, go to the template lesson provided. Then, click the first three dots to open the dropdown menu. From the menu, select “Edit section.”
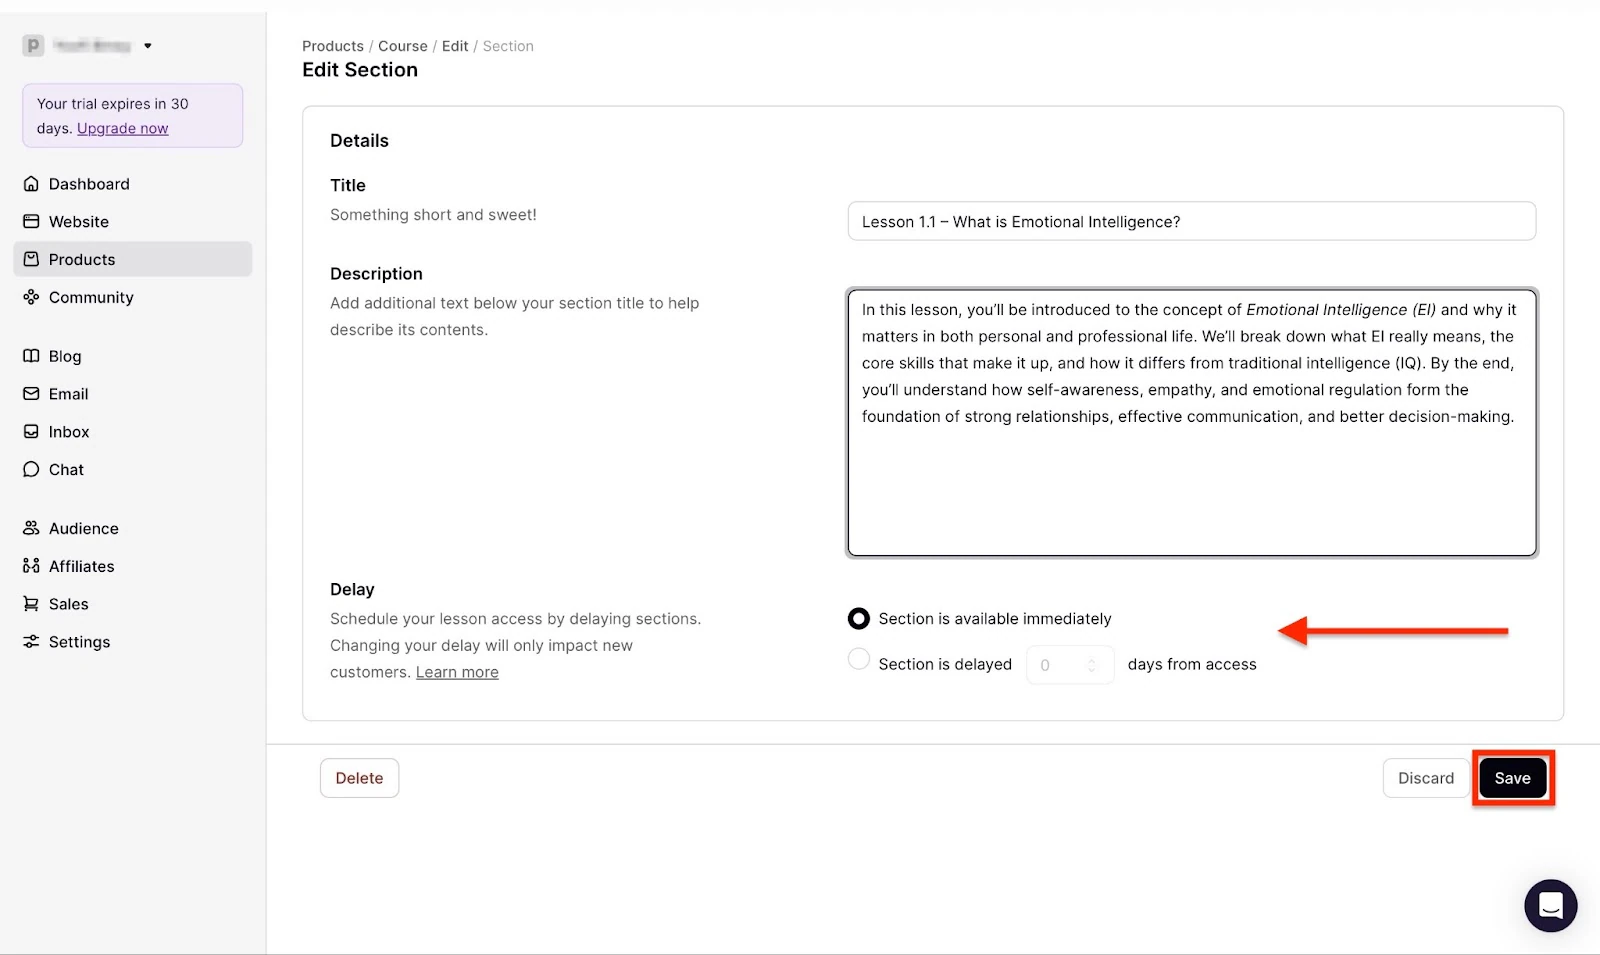
In the “Edit Section” window, add the title and description of the section. You can also select either “Section is available immediately” or “Section is delayed” to decide on the availability of the section to your customers. After that, click “Save.”
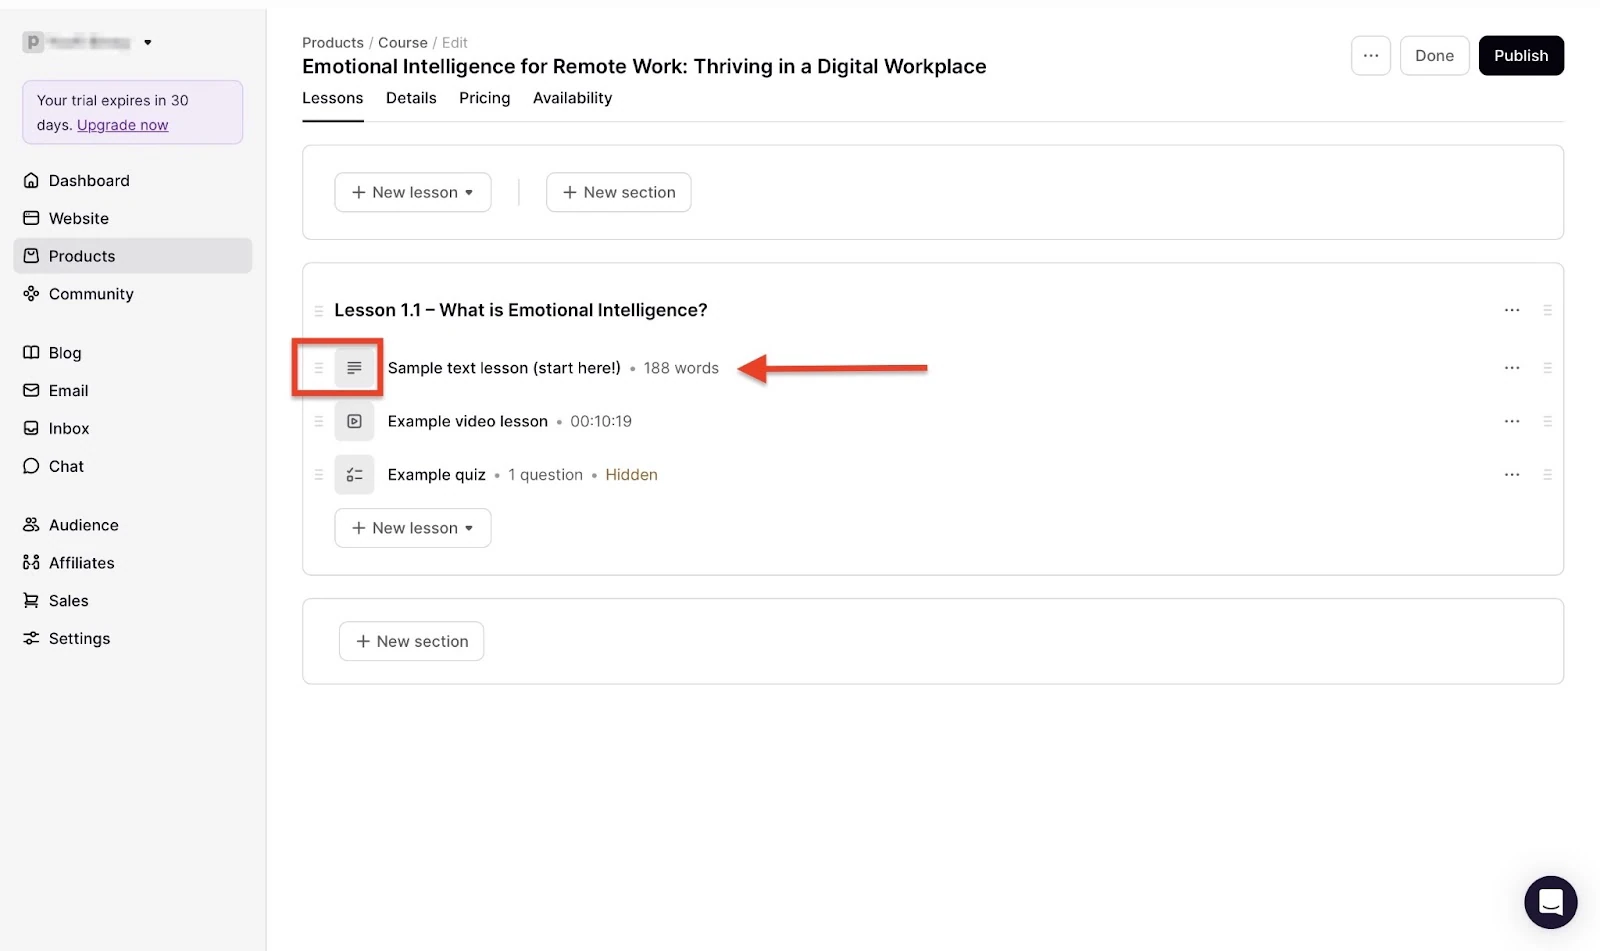
To add a sample text lesson, click the hamburger button on the left side of the “Sample text lesson.”
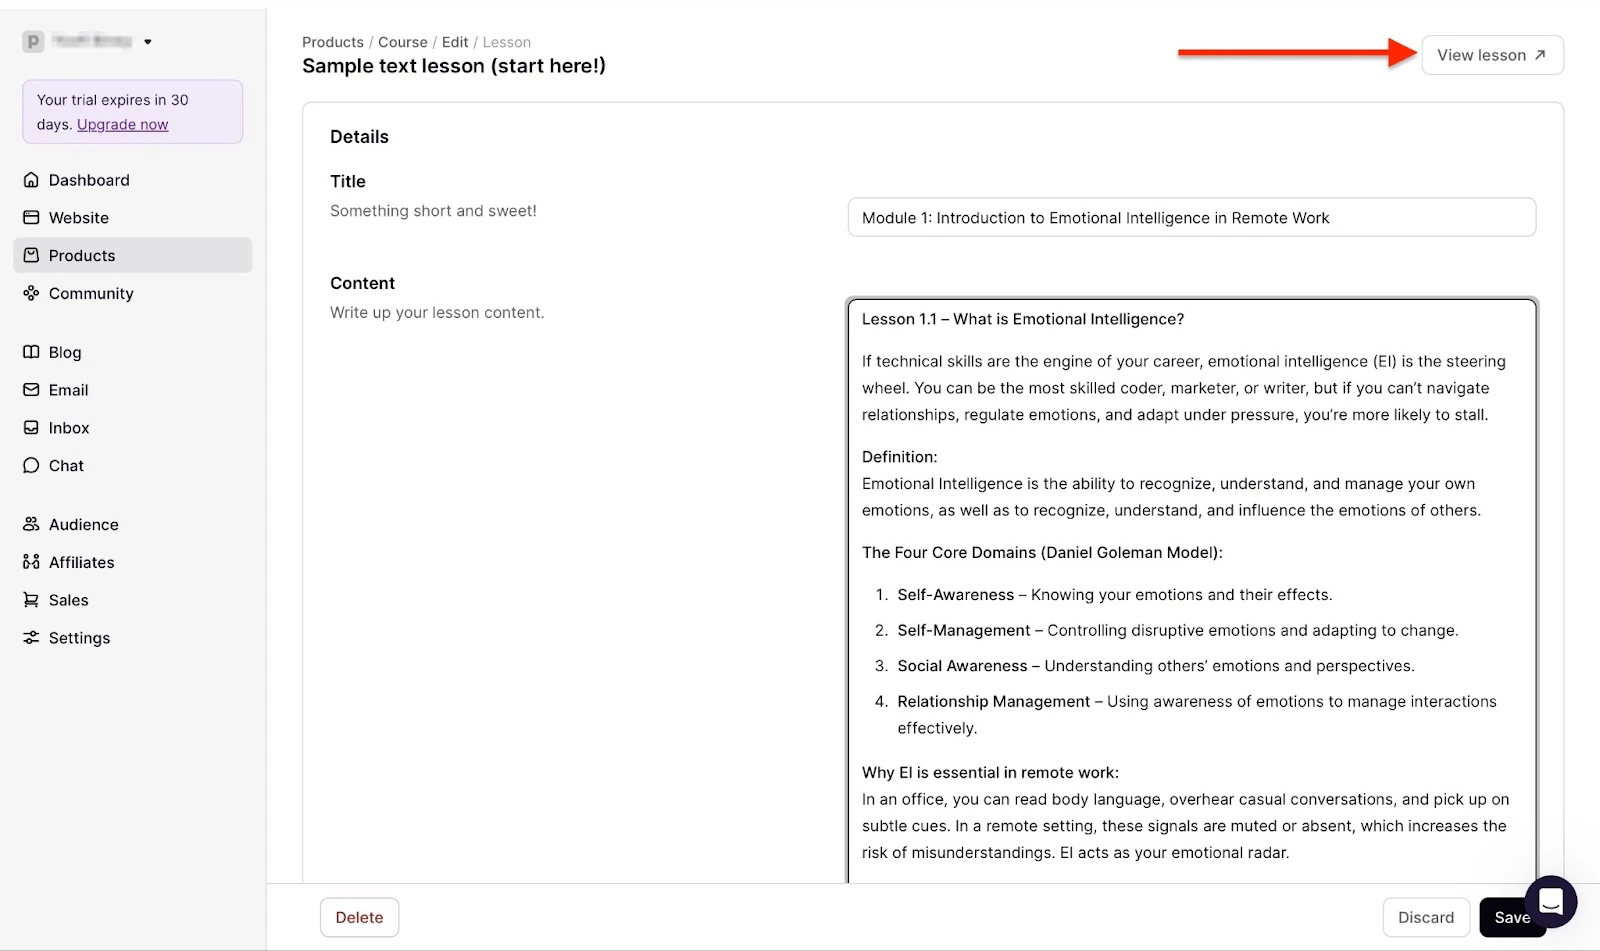
Now, add the title and content of the text lesson. You can click “View lesson” at the top right corner of the window to preview your lesson.
Afterward, scroll further down to select course visibility and preview options. Then, click “Save.”
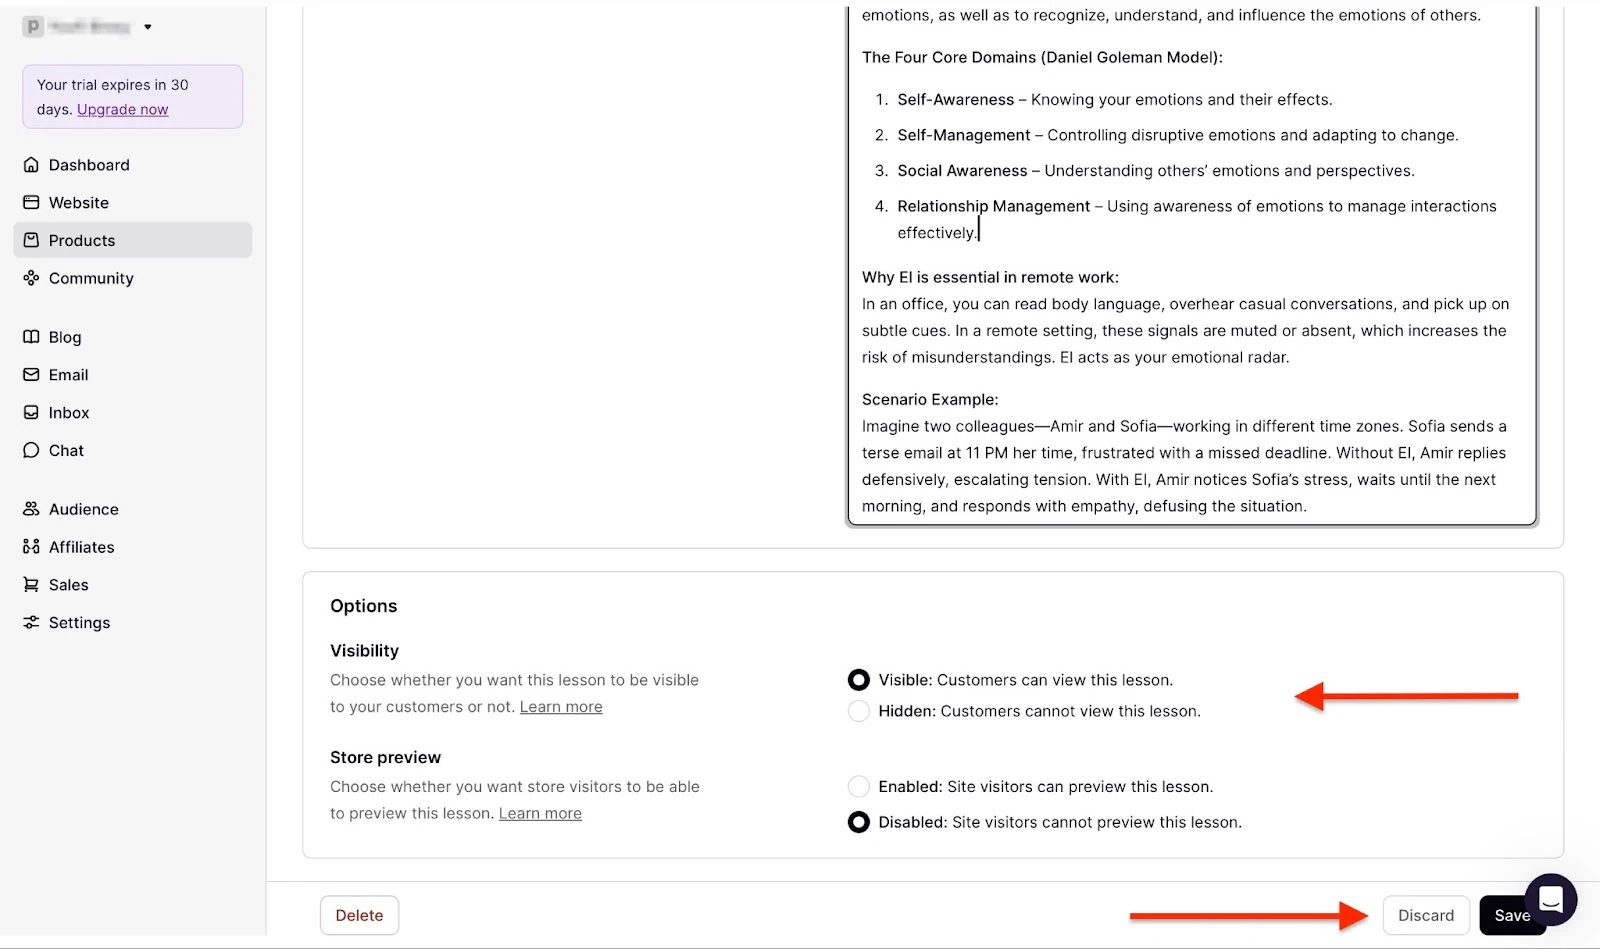
Under the “Lessons” tab, follow the same steps to add video lessons and quizzes to your course.
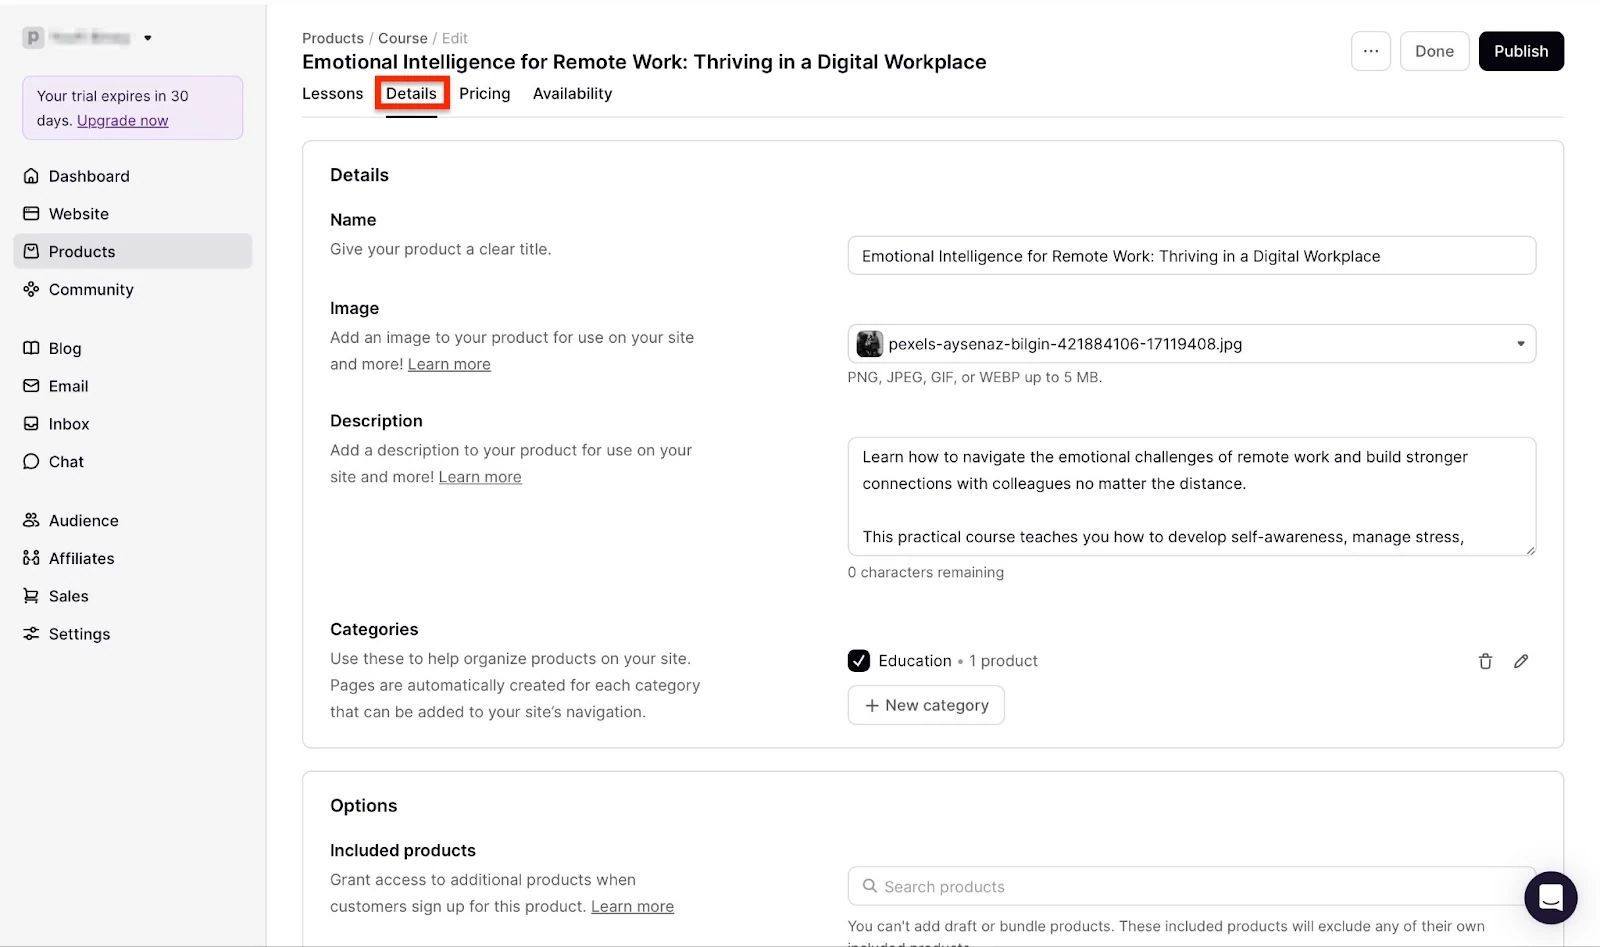
After that, click the “Details” tab to add, change, or edit the course name, image, description, category, and supplementary products. You can also add a certificate, as well as customers’ comments and discussions.
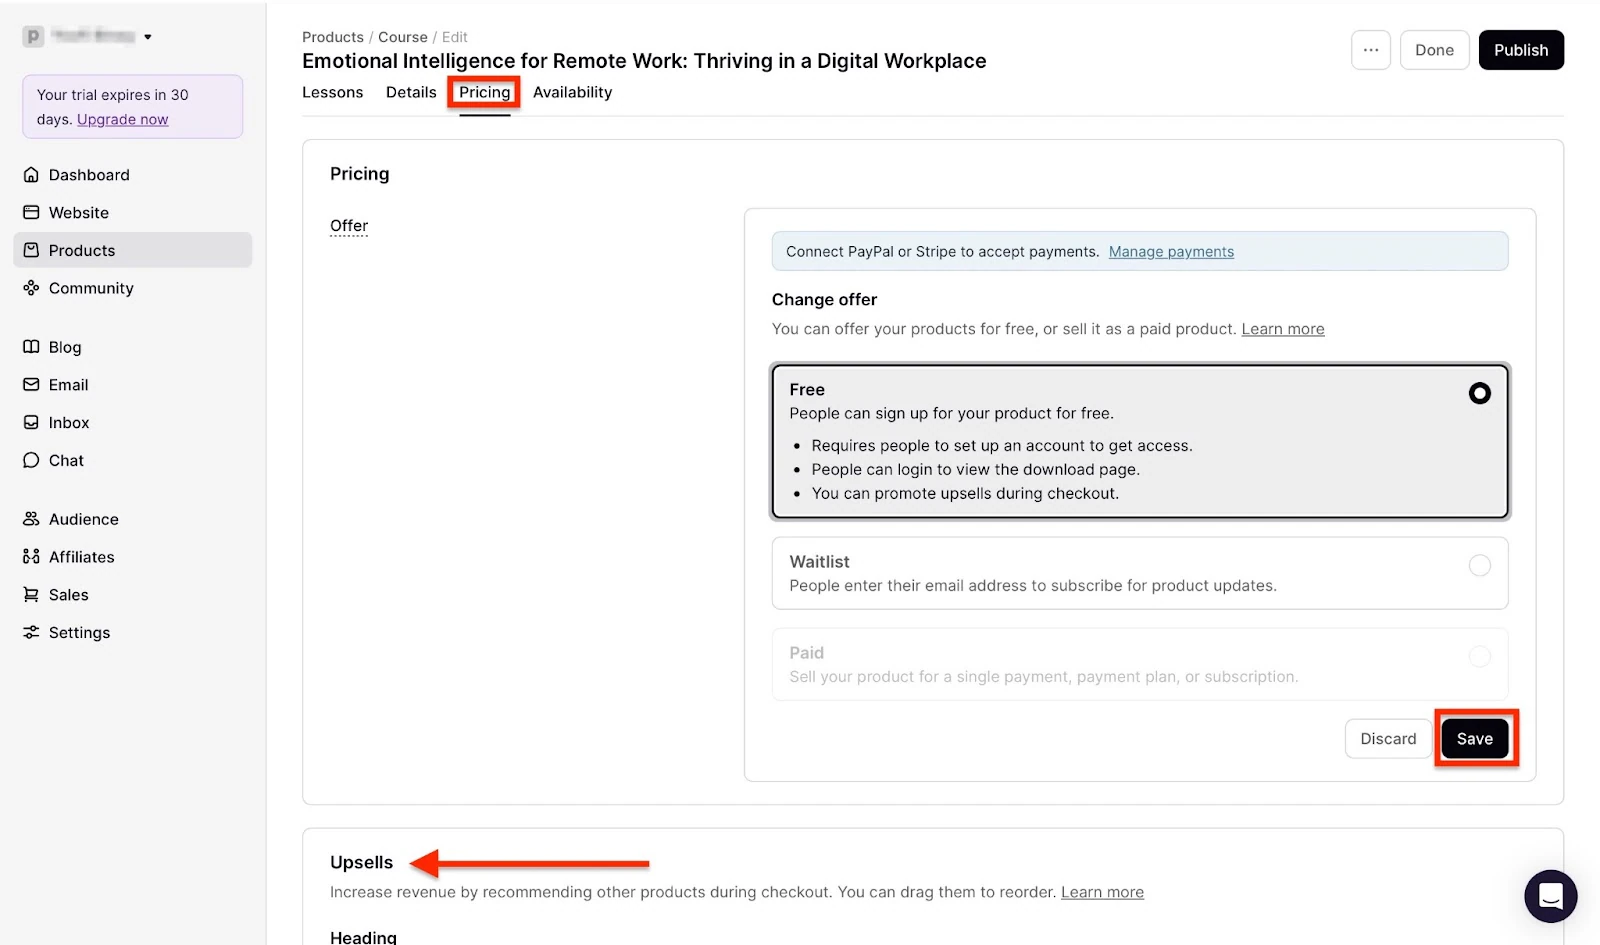
Now, click the “Pricing” tab to set the price of your course and connect your account to a payment method. Then, click “Save.” You can also add upsells.
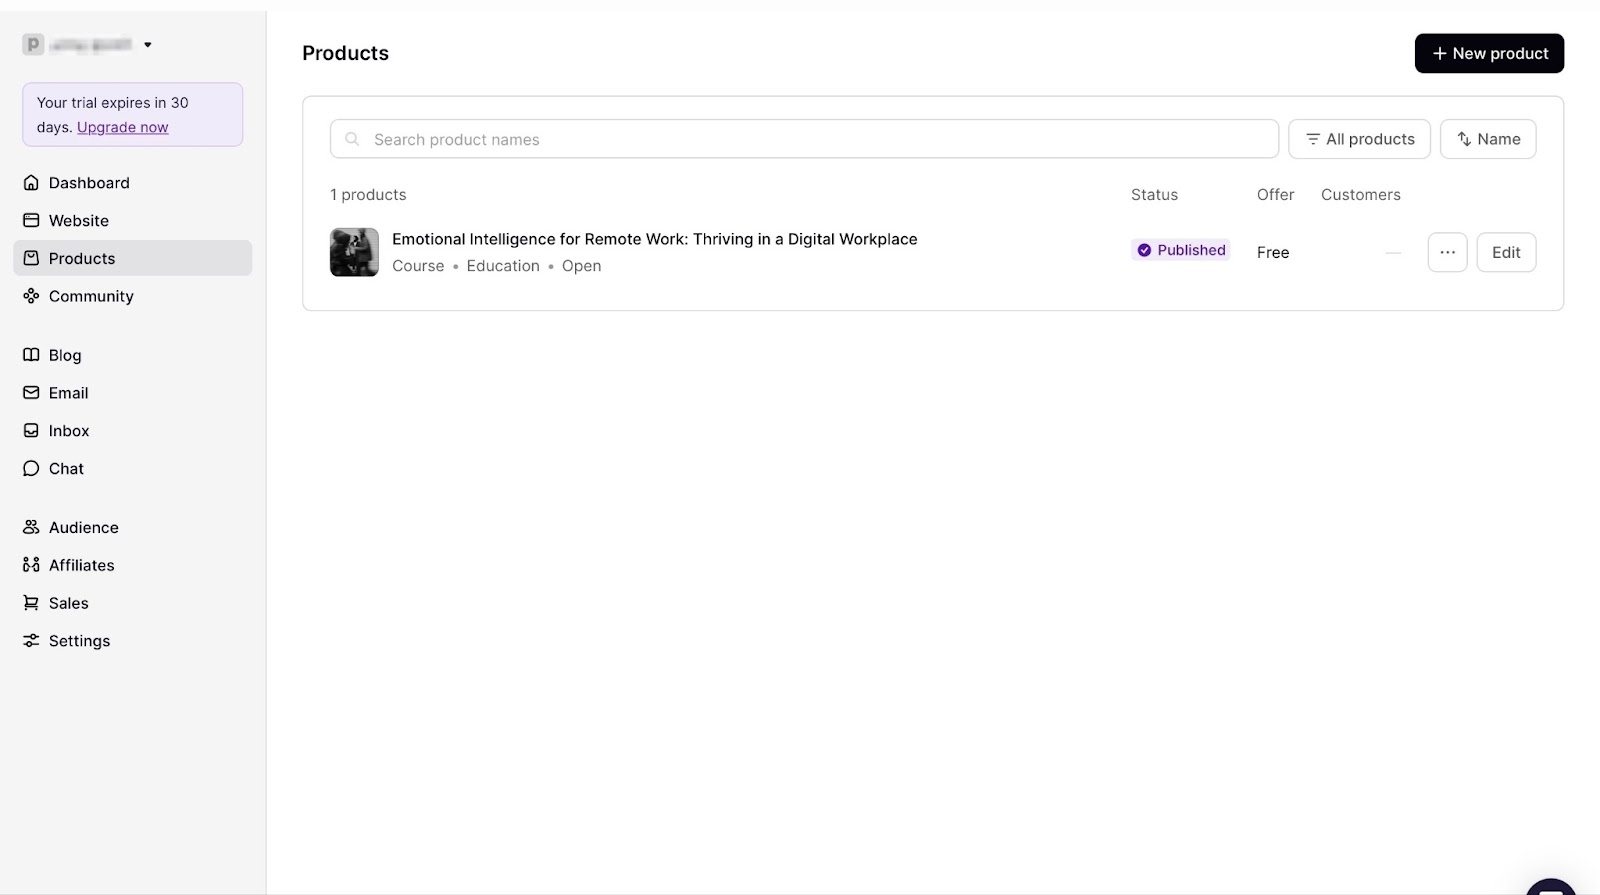
Finally, click the “Availability” tab and select “Edit” to choose your preferred options. Finish by clicking “Publish.”

Your course will be available in the products window.
Key features
1. Affiliates
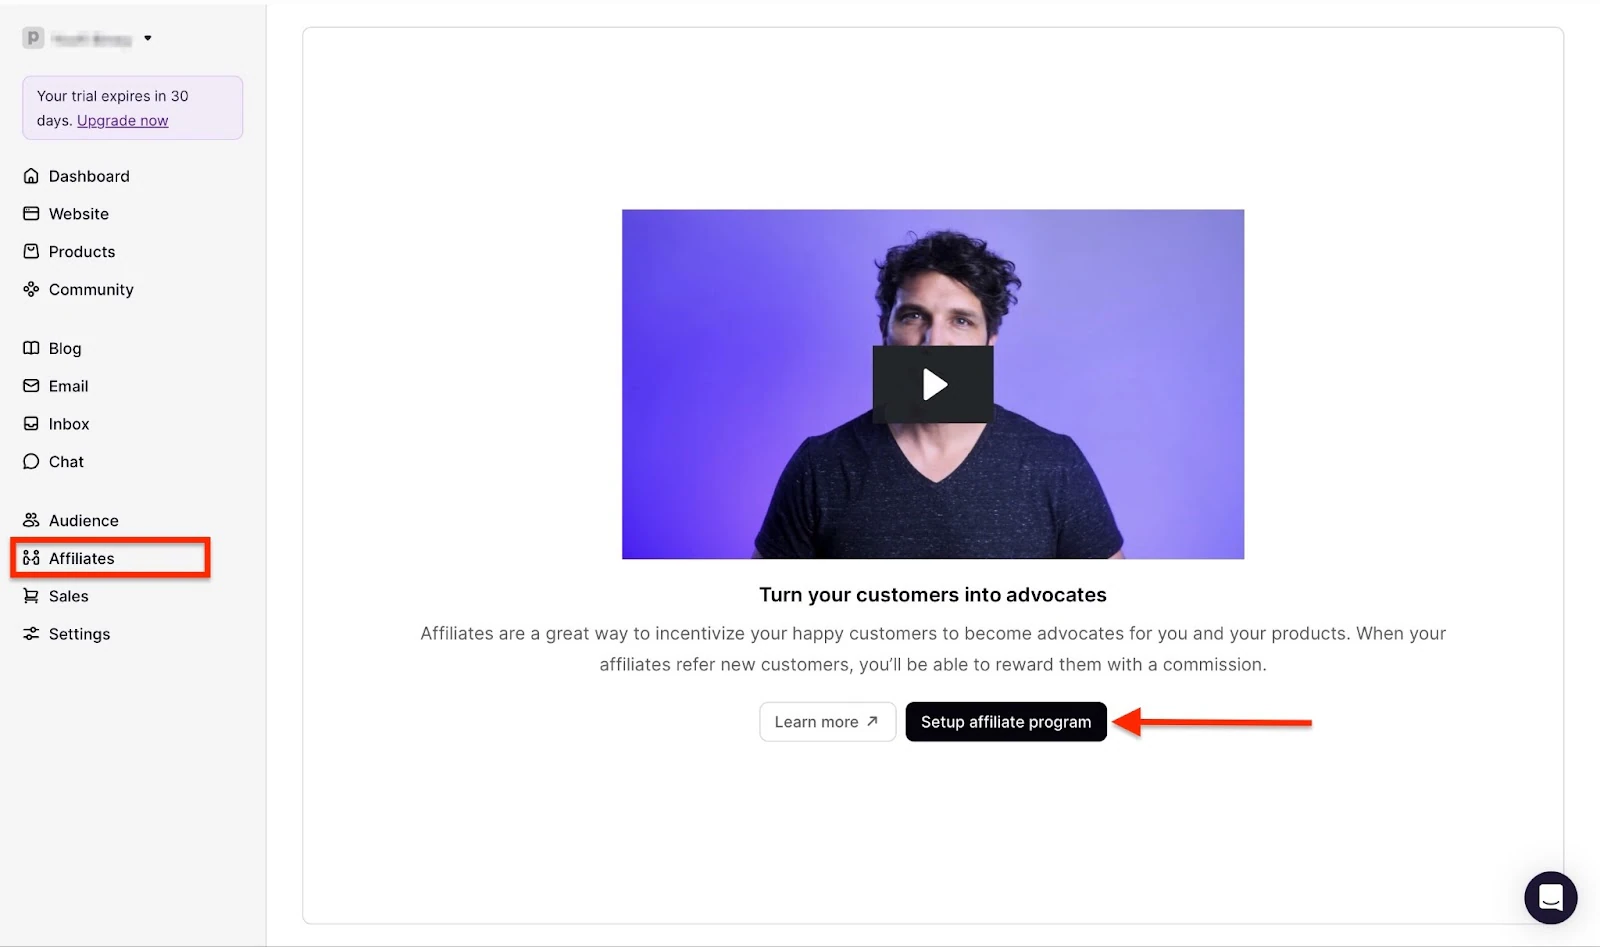
With Podia’s affiliate feature, you can get others to help sell your courses. Let me show you how to set it up.
Start by clicking on “Affiliates” in the sidebar and selecting “Set up affiliate program.”
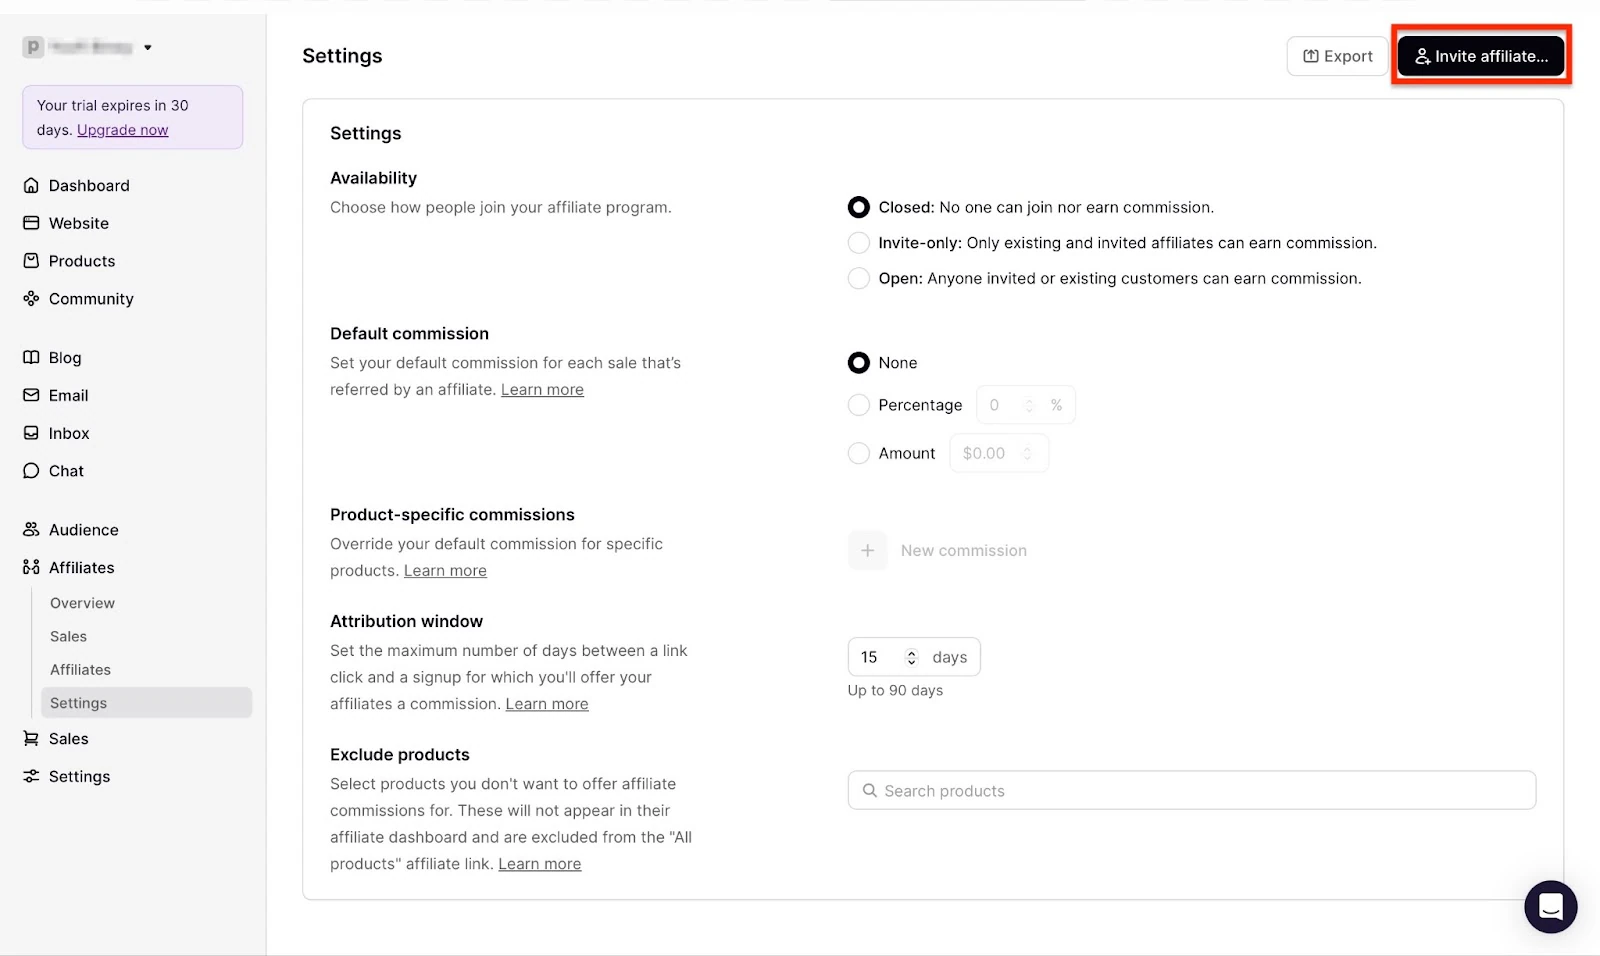
Next, select your preferred options and click “Invite affiliate.”
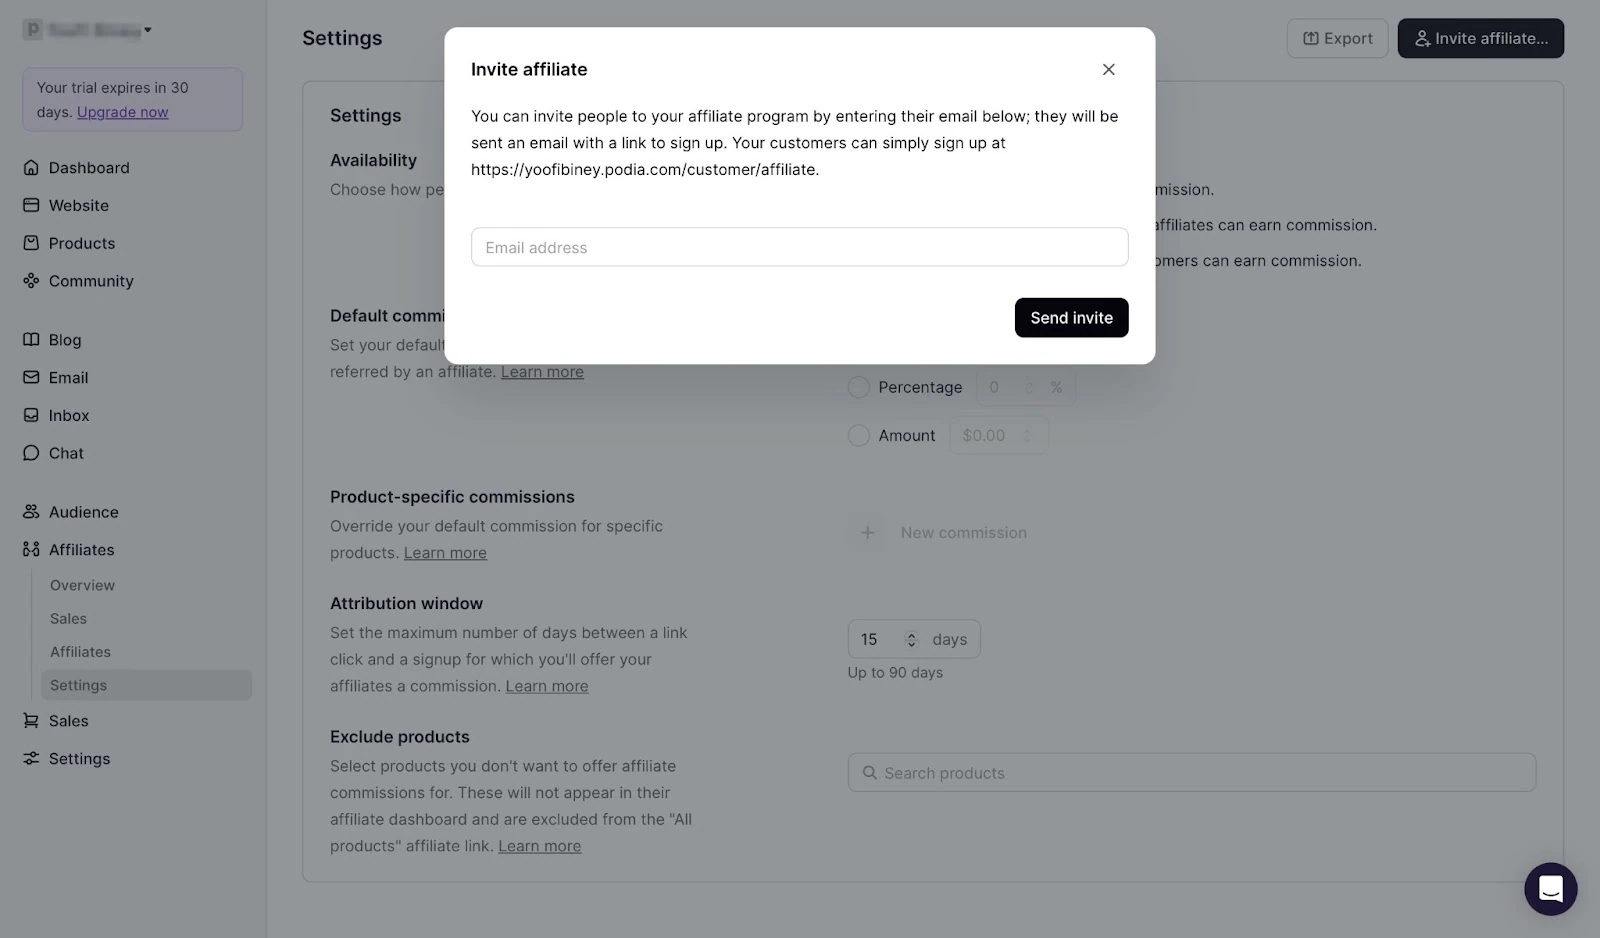
In the mini pop-up window, add an email address and click “Send invite.”
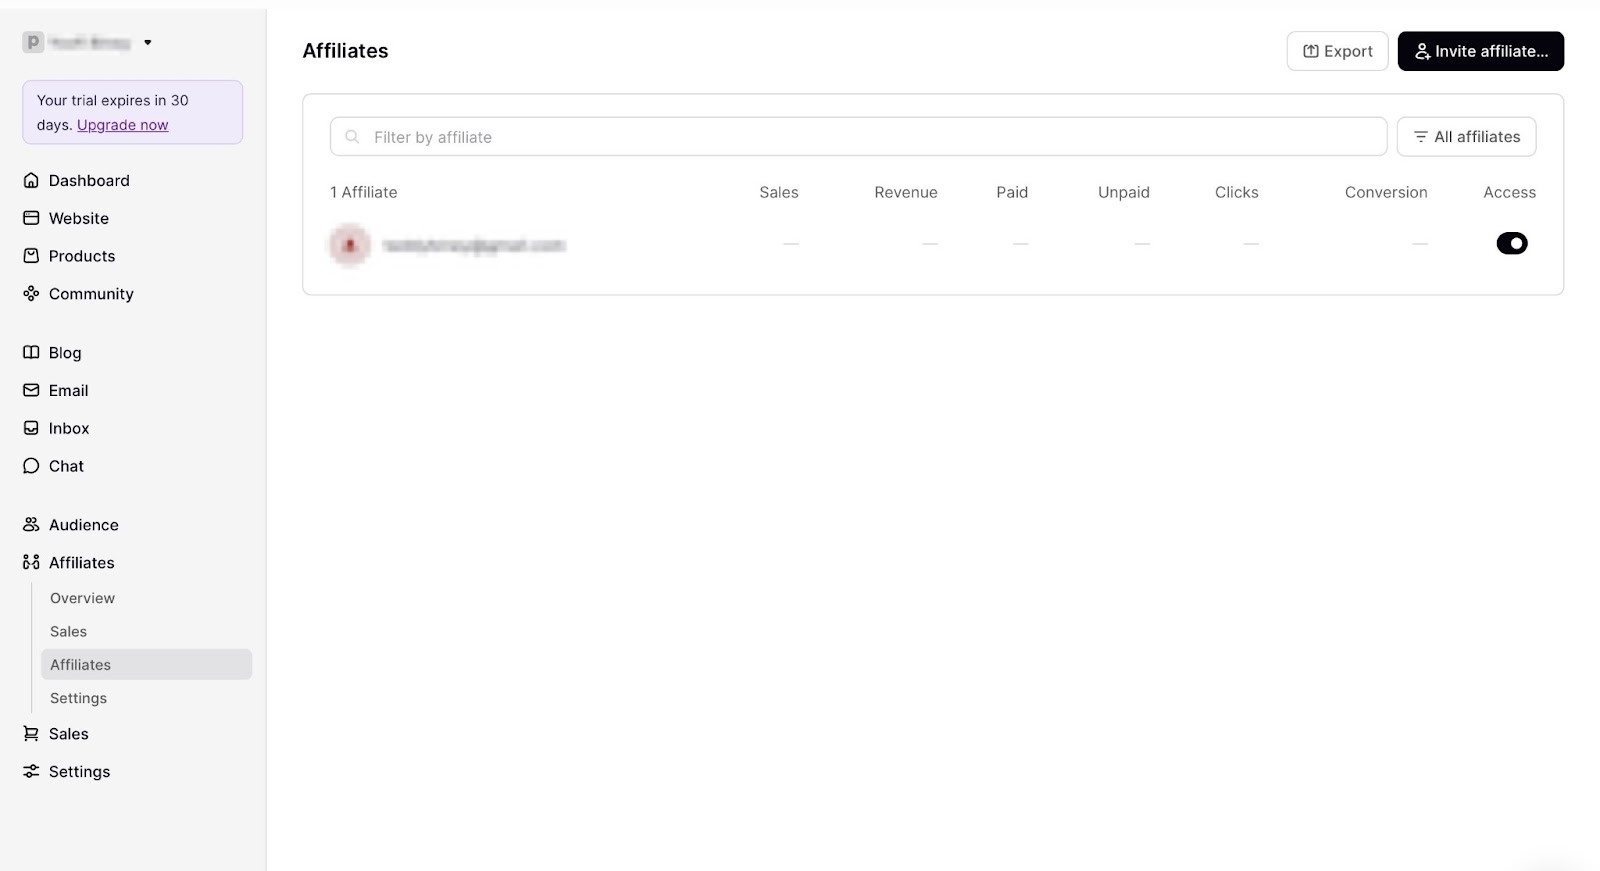
Podia will send an invite to the recipient. You’ll find the new affiliate in the affiliate feature window. Click “Invite affiliate” whenever you would like to add more.
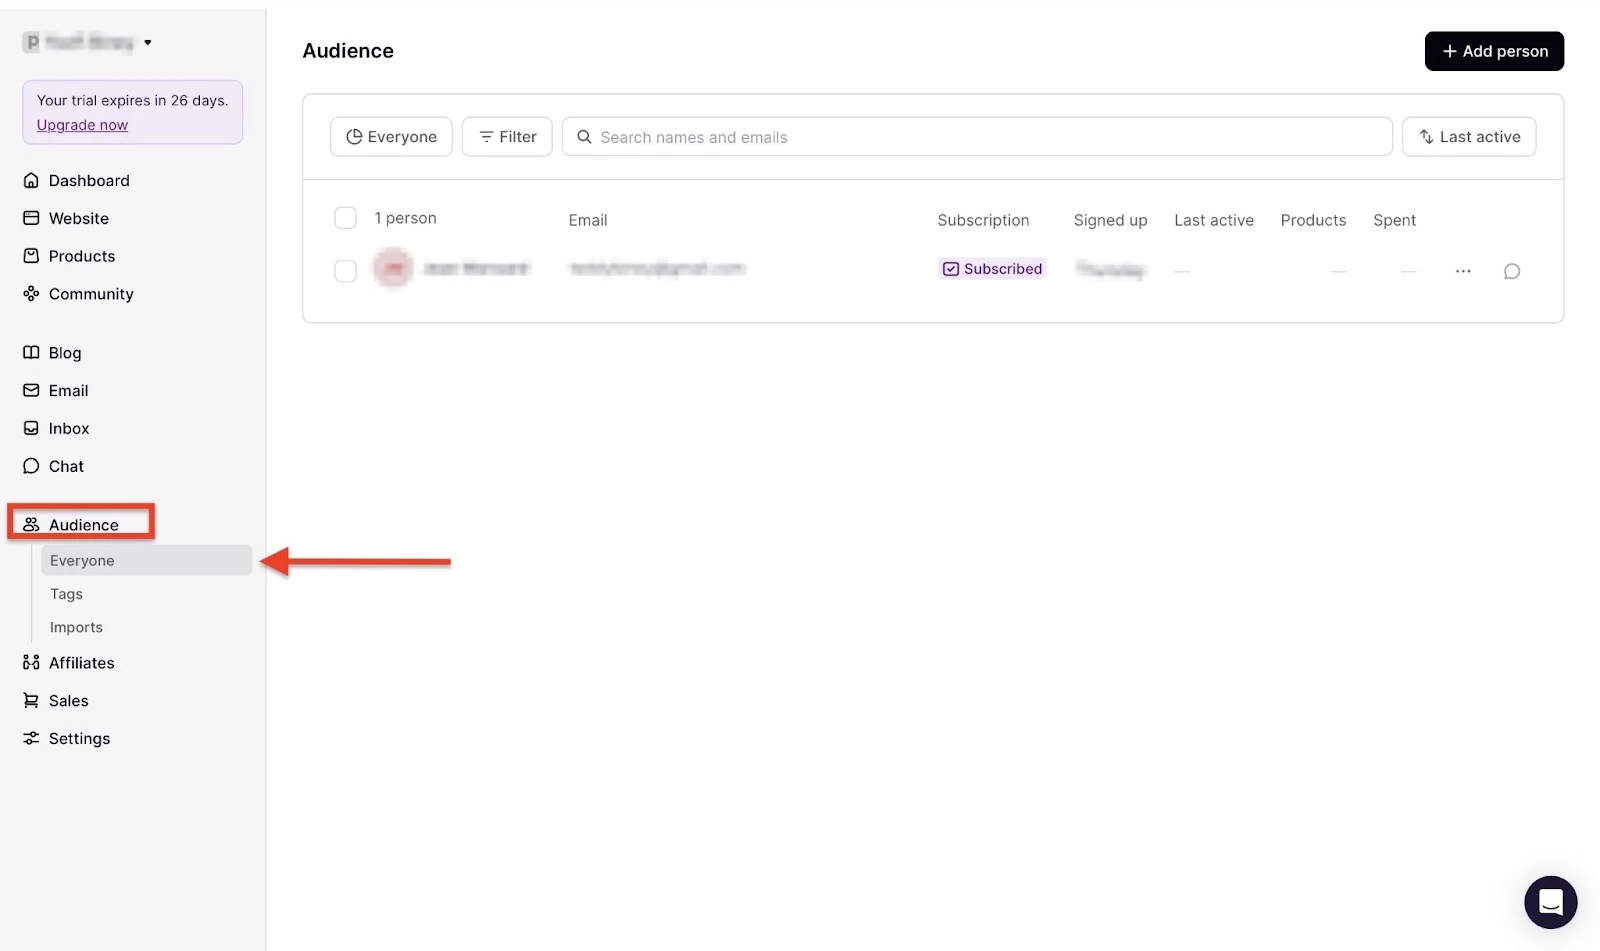
2. Audience
Begin by selecting “Audience” from the sidebar.
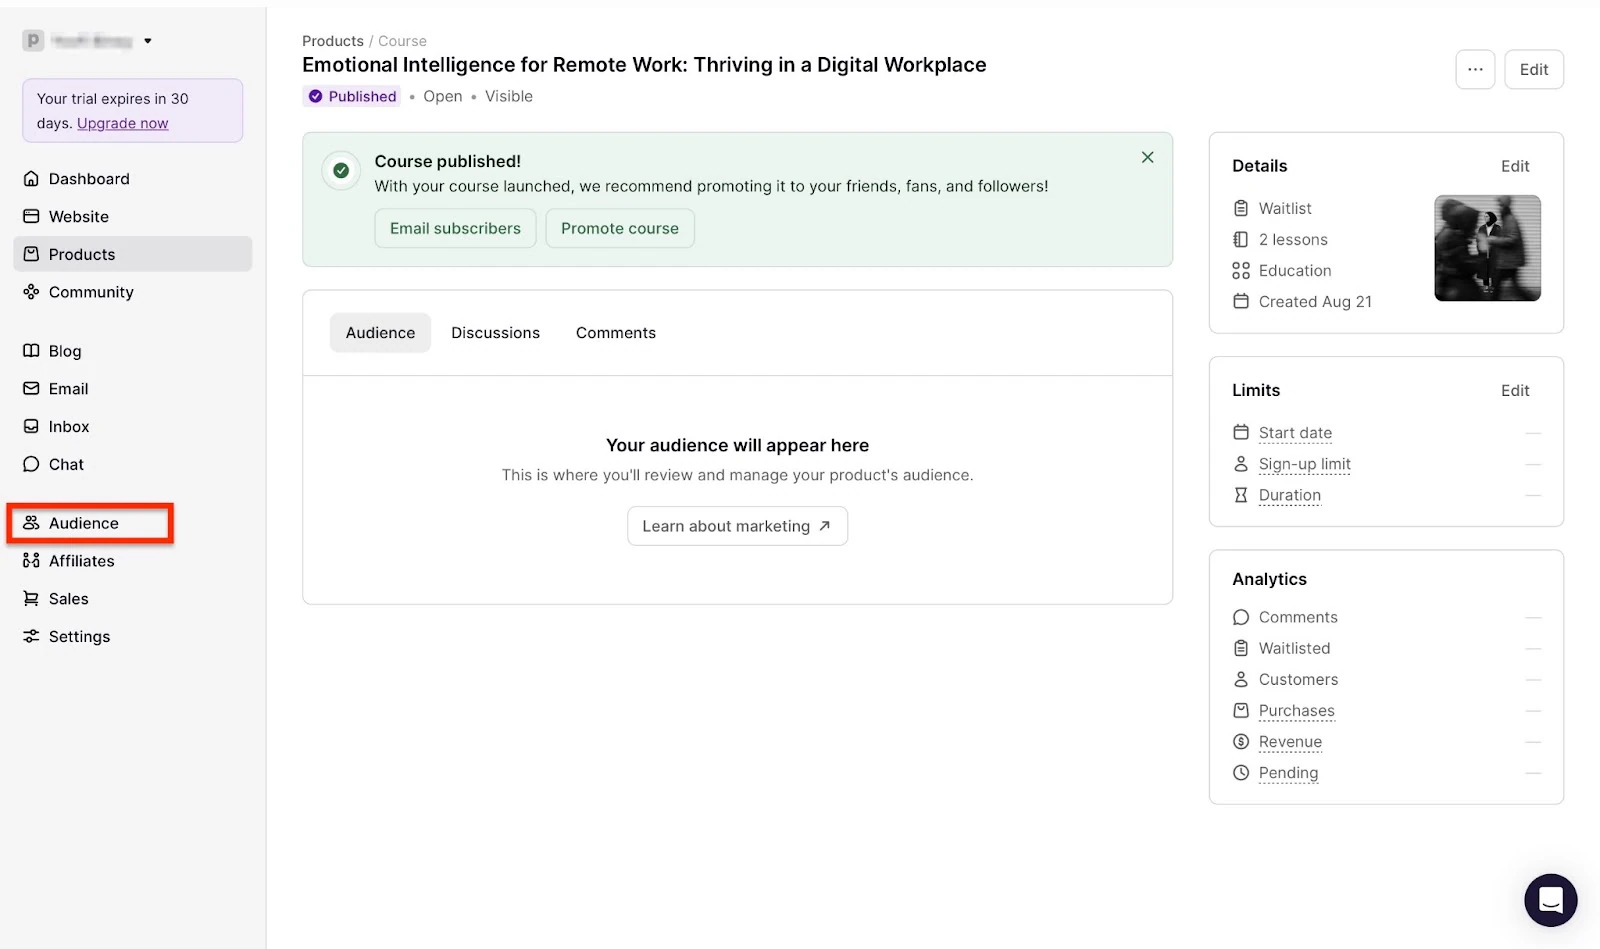
This automatically opens the “Everyone” section under the audience menu in the sidebar.
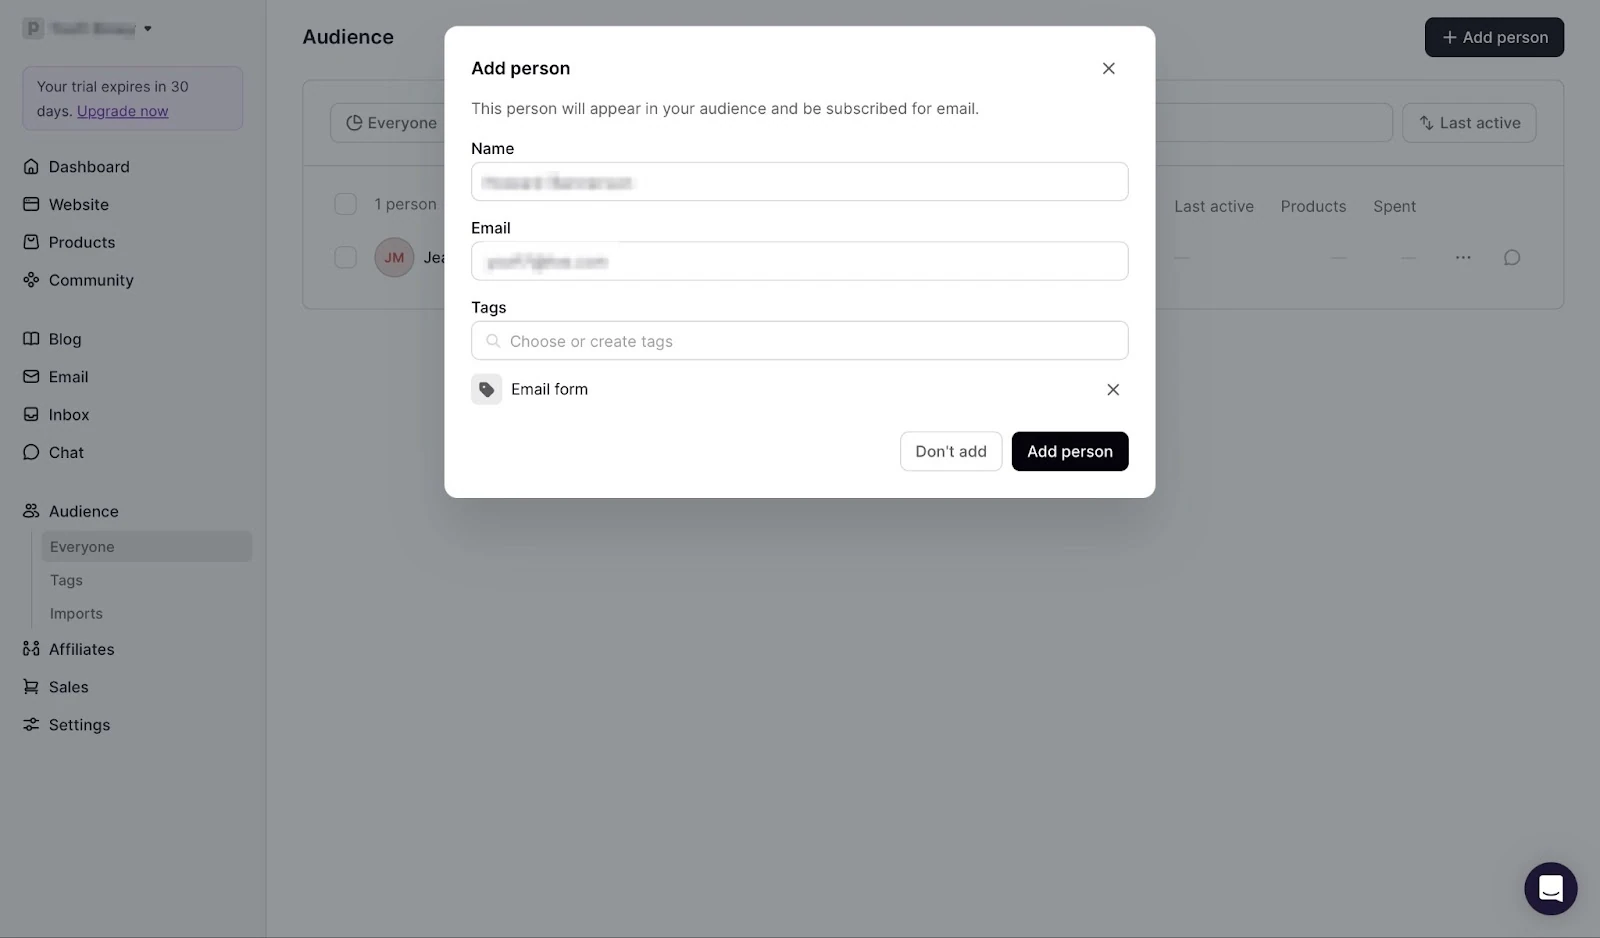
Fill the pop-up window with the necessary details and click “Add person.”
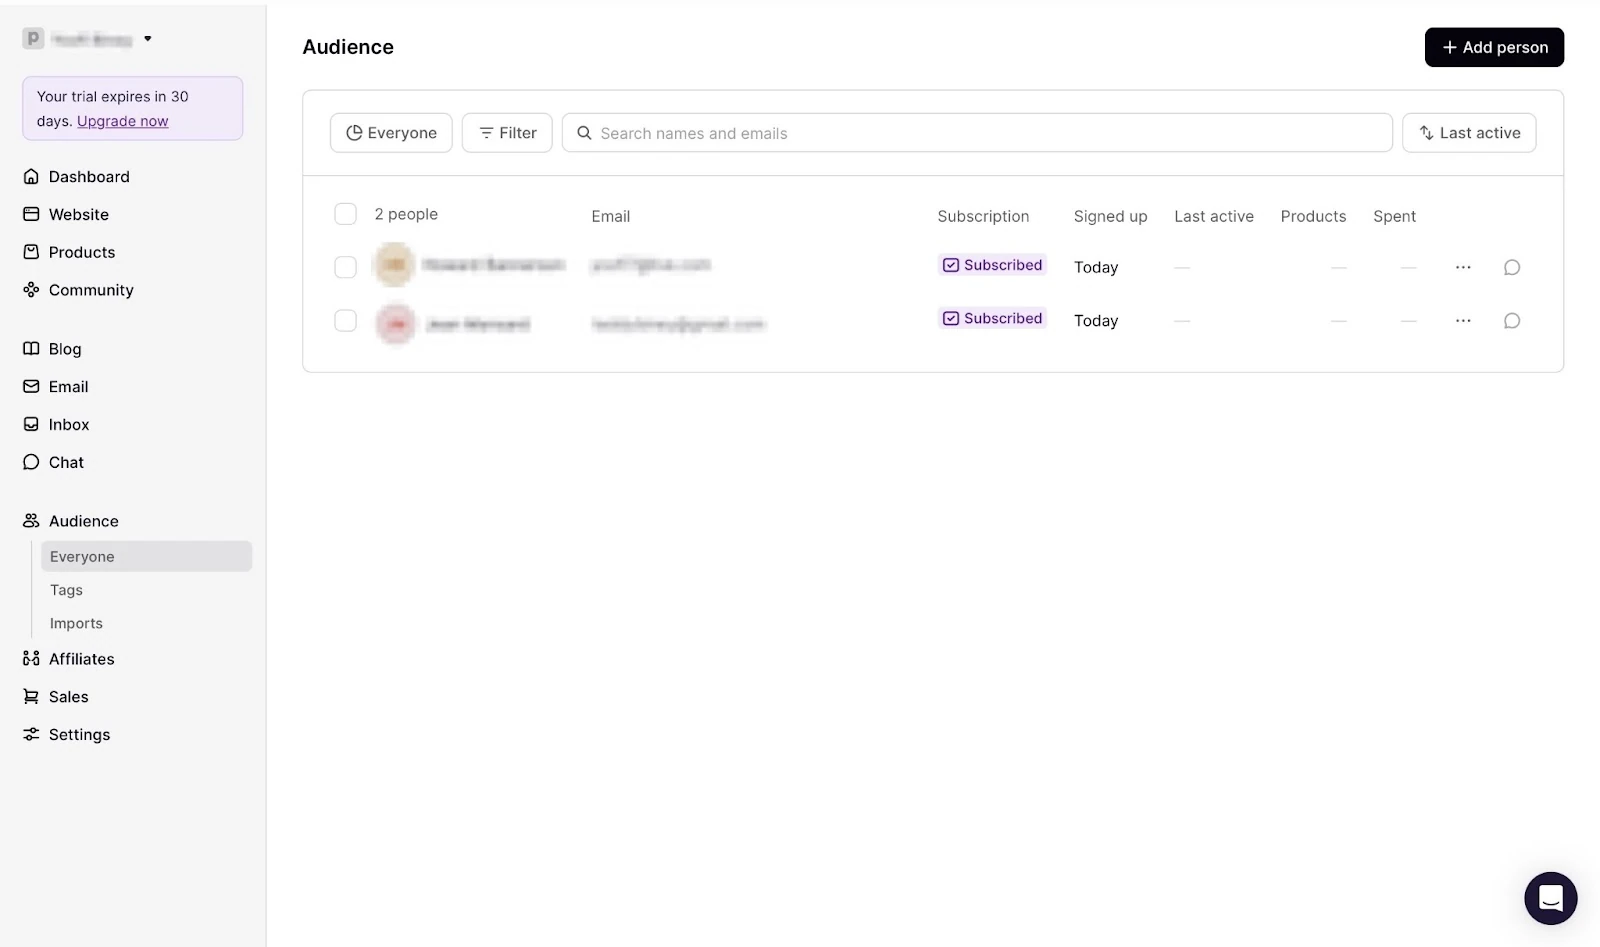
The name, email, and subscription status will display in the audience feature window.
Best for
- Entrepreneurs, creators, and those requiring an all-in-one online course platform to create, market, and sell courses, memberships, and coaching services.
Pricing
- Mover: $39/month
- Shaker: 89/month
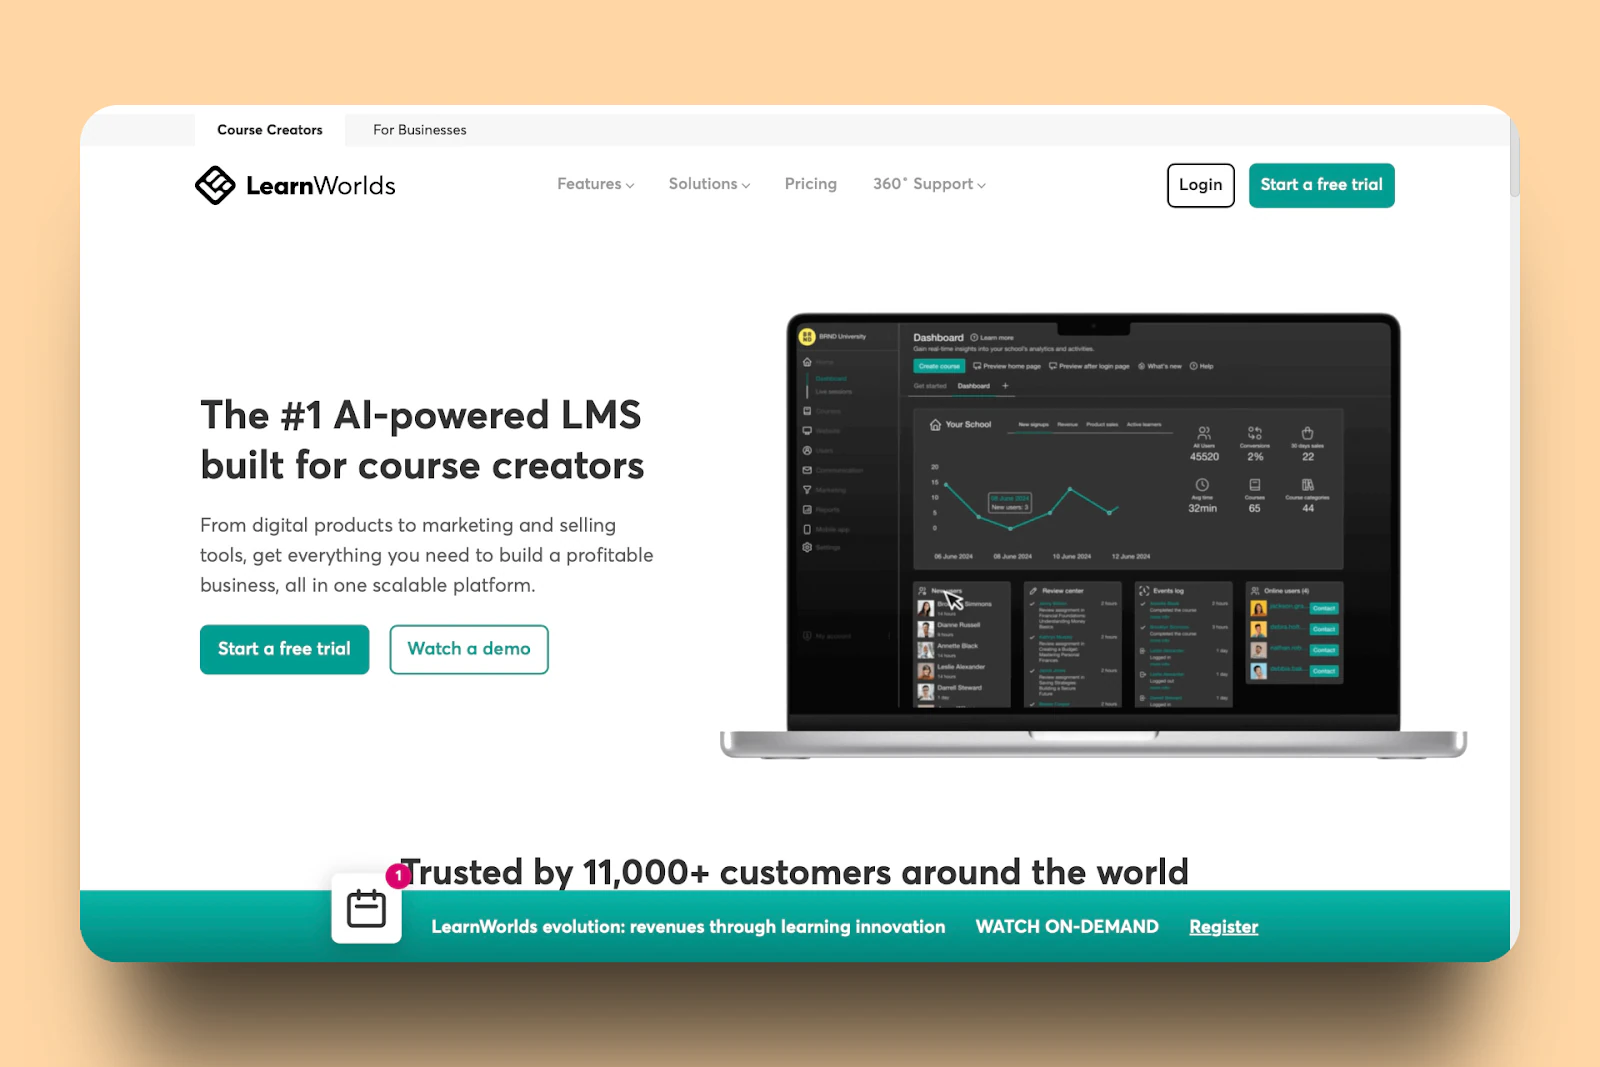
7. LearnWorlds
At number eight of the best online course platforms is LearnWorlds. It’s an AI-powered platform where creators and educators can build, market, and sell online courses, as well as other digital products.
LearnWorlds has a marketing feature that lets you check affiliate programs, marketing forms, qualification forms, and net promoter score (NPS).
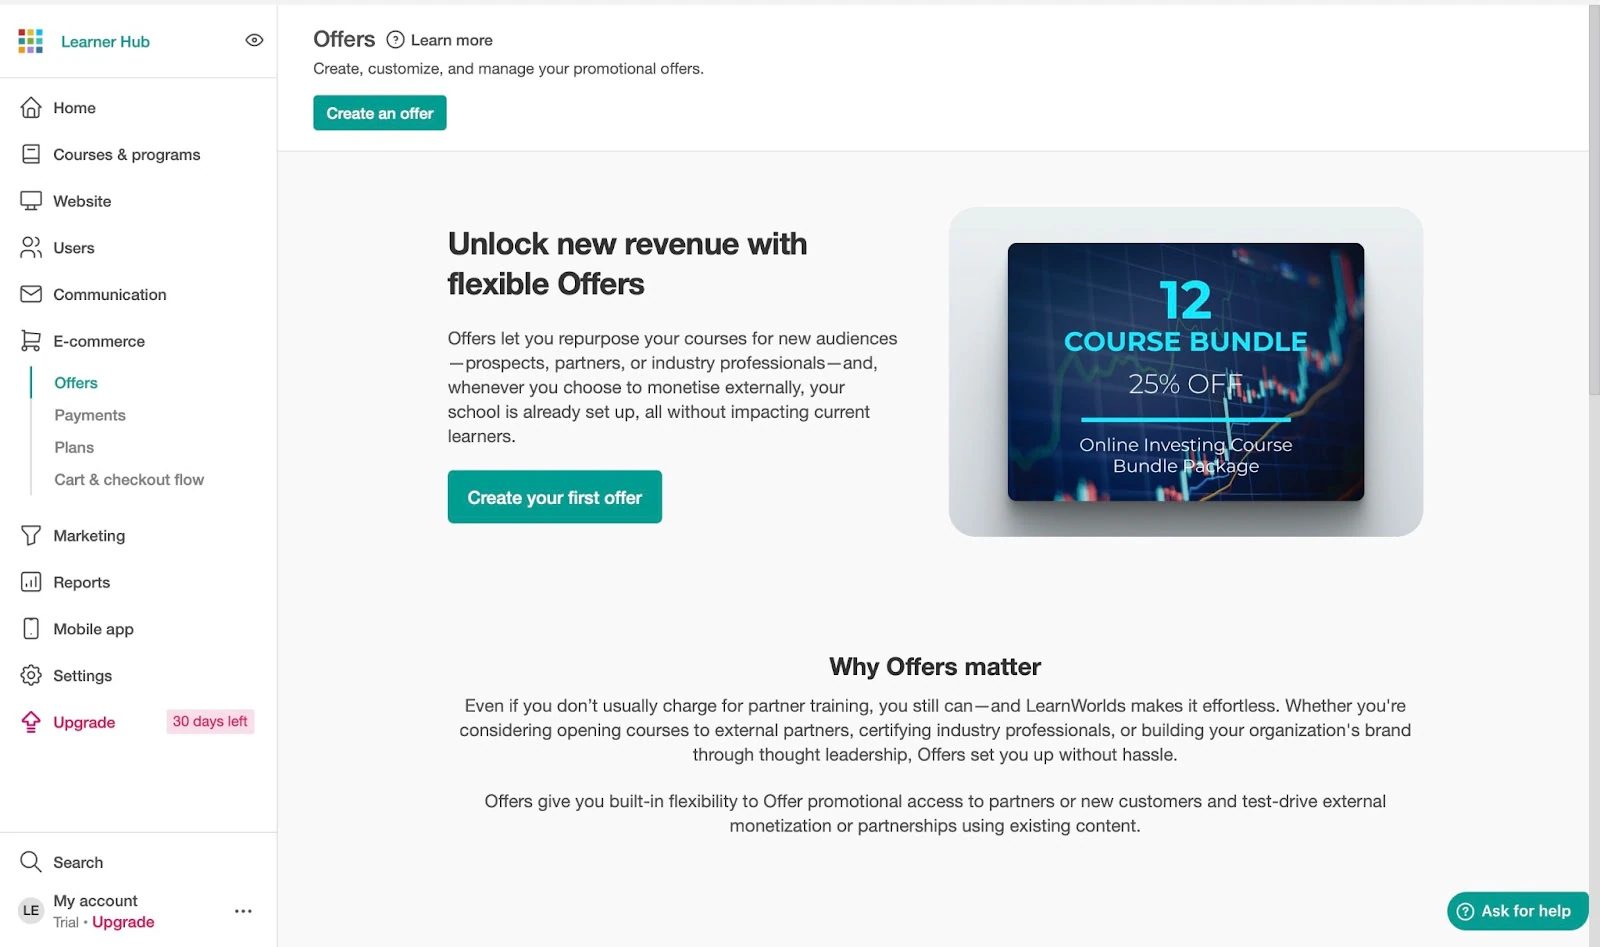
Its e-commerce feature allows you to create, customize, and manage offers. You can also track and export payment data, monitor all plan purchases, and set up checkouts.
That’s not all. With LearnWorlds’ users feature, you can add users’ as well as customers’ information. The feature also allows you to export user data in CSV or XLS file formats.
Using the courses & programs feature, you can create or import courses. There’s also the option to add course forms, gradebooks, certificates, and question banks to your courses.
To create your first course on LearnWorlds, click “Create school” after you sign up.
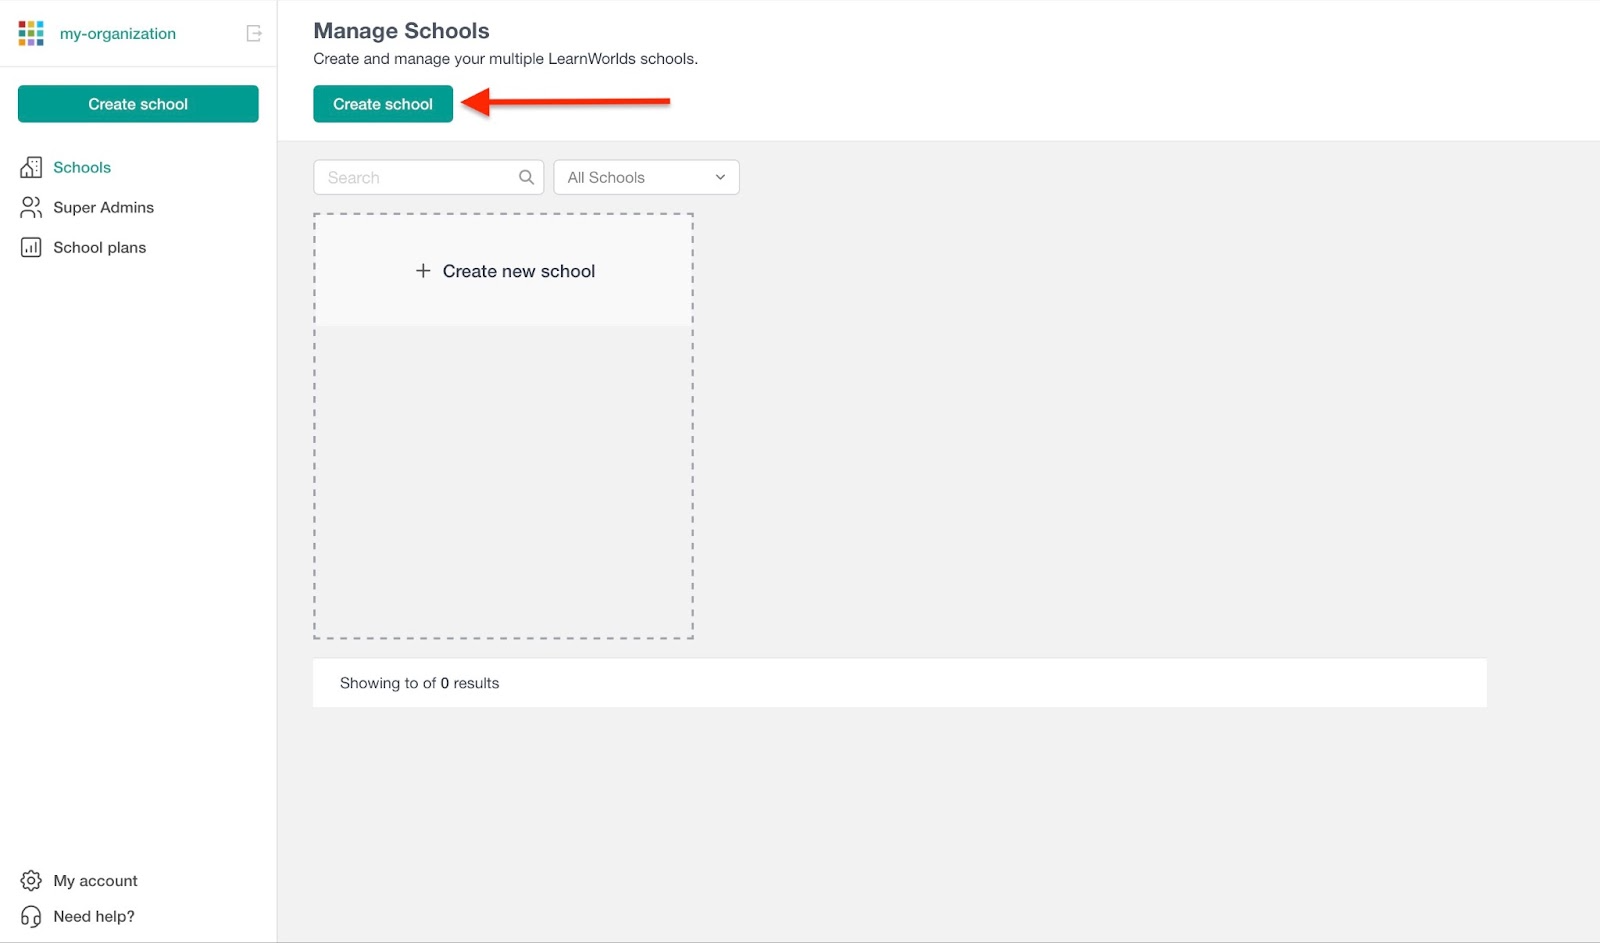
Next, enter the school name and domain address. Then click “Create school.”

In the pop-up window, select a template and “Select & Continue.”
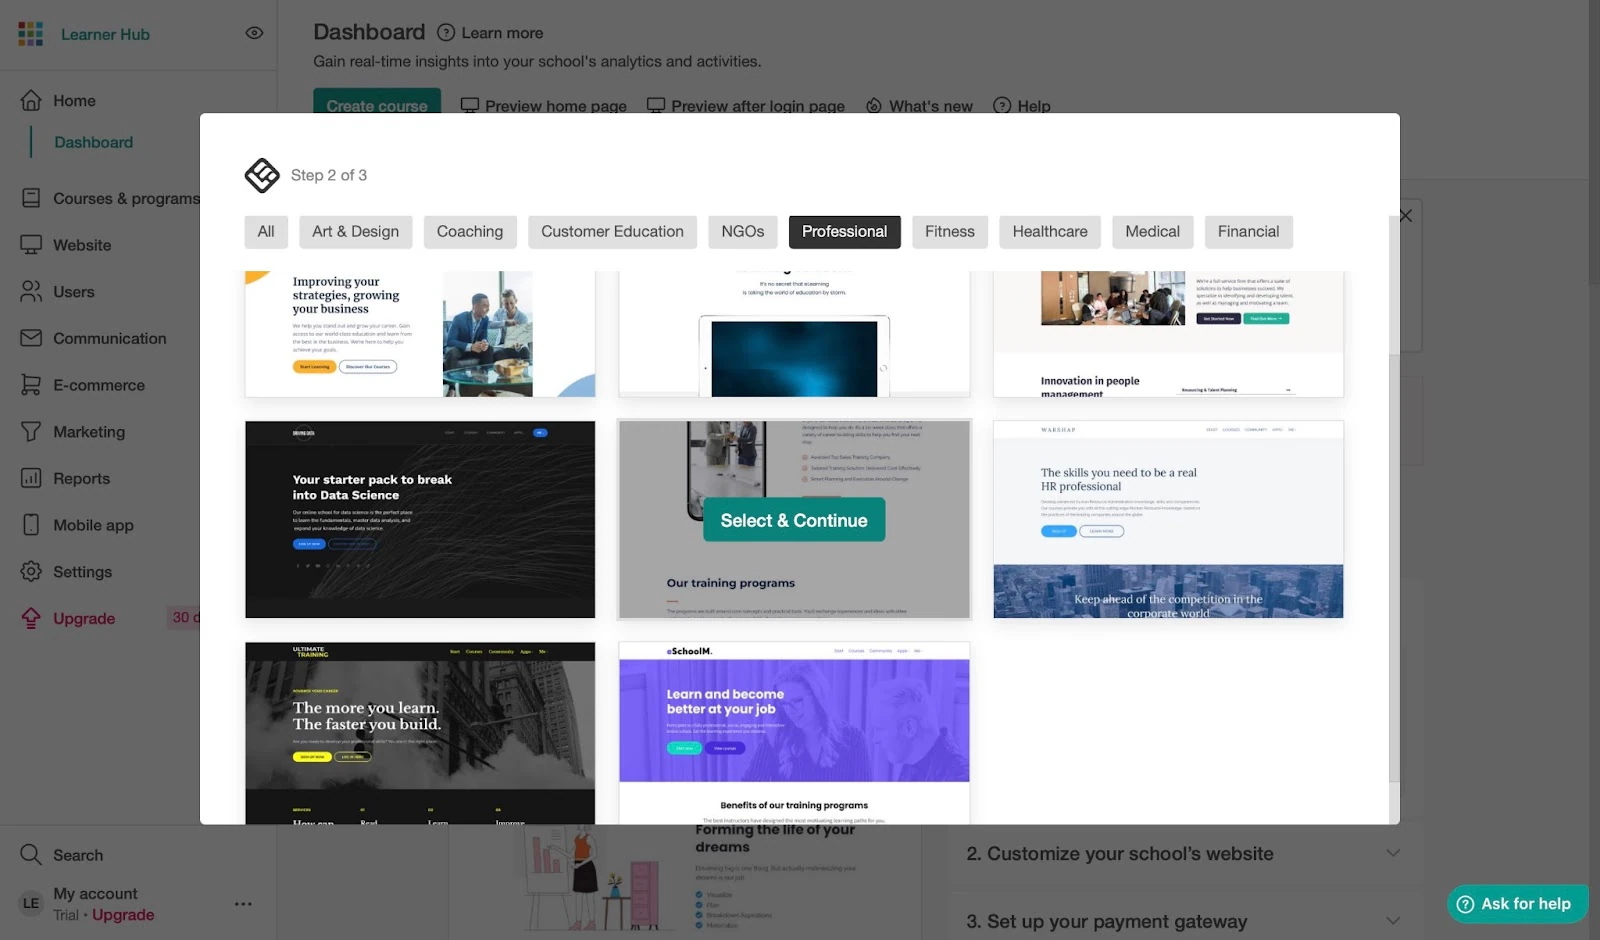
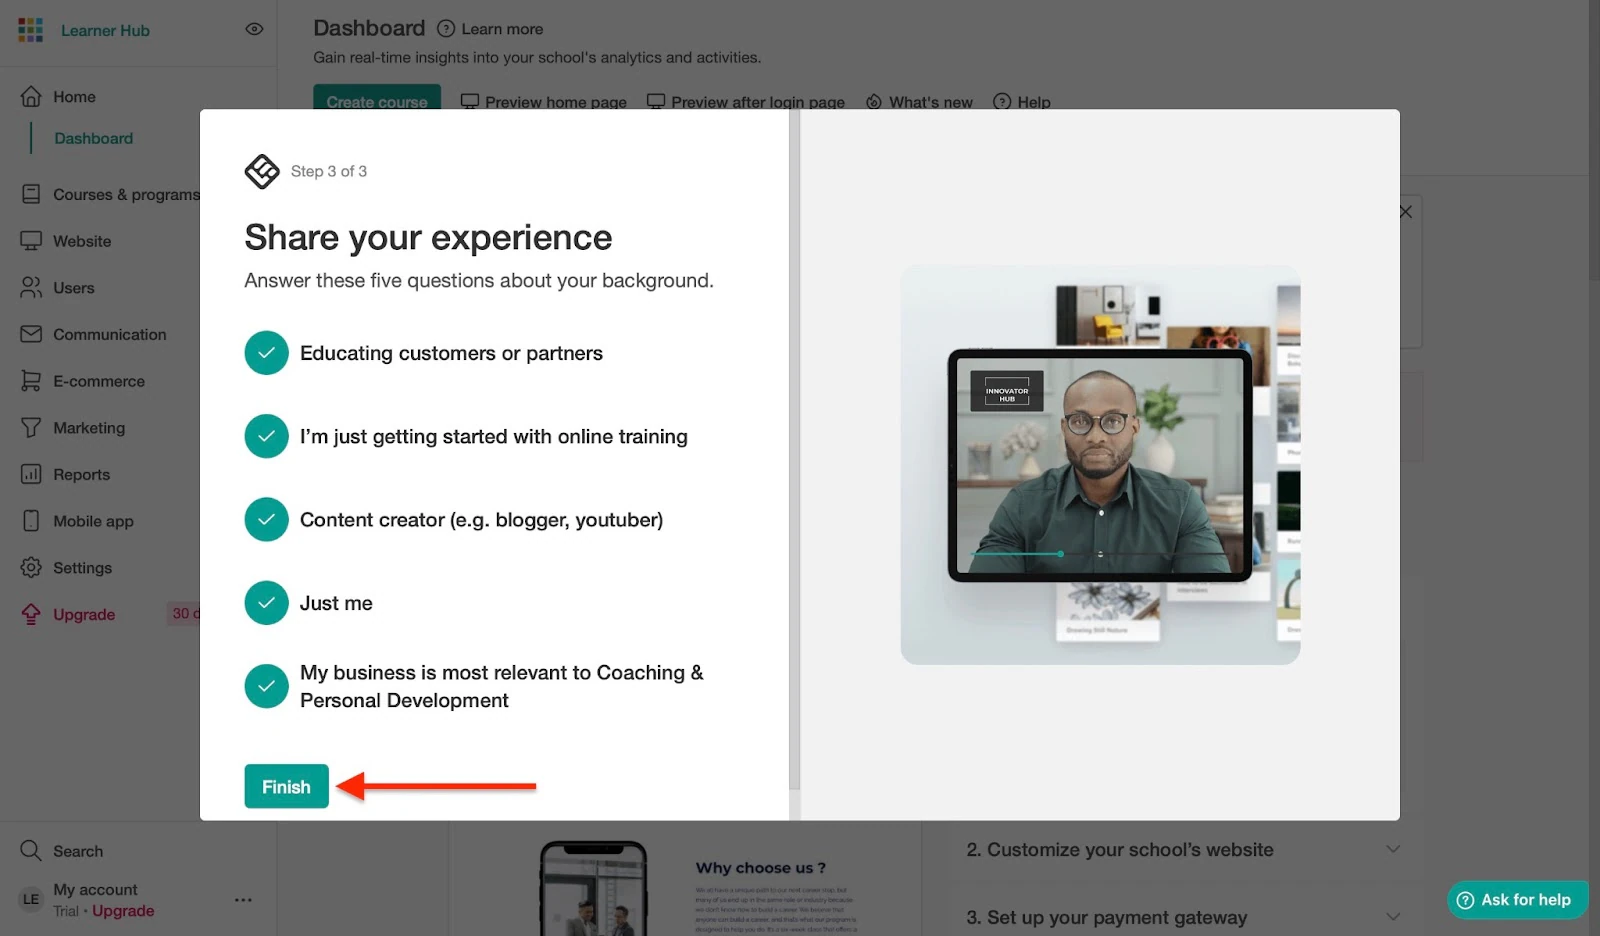
In the pop-up window, answer about five questions about your background and click “Finish.”
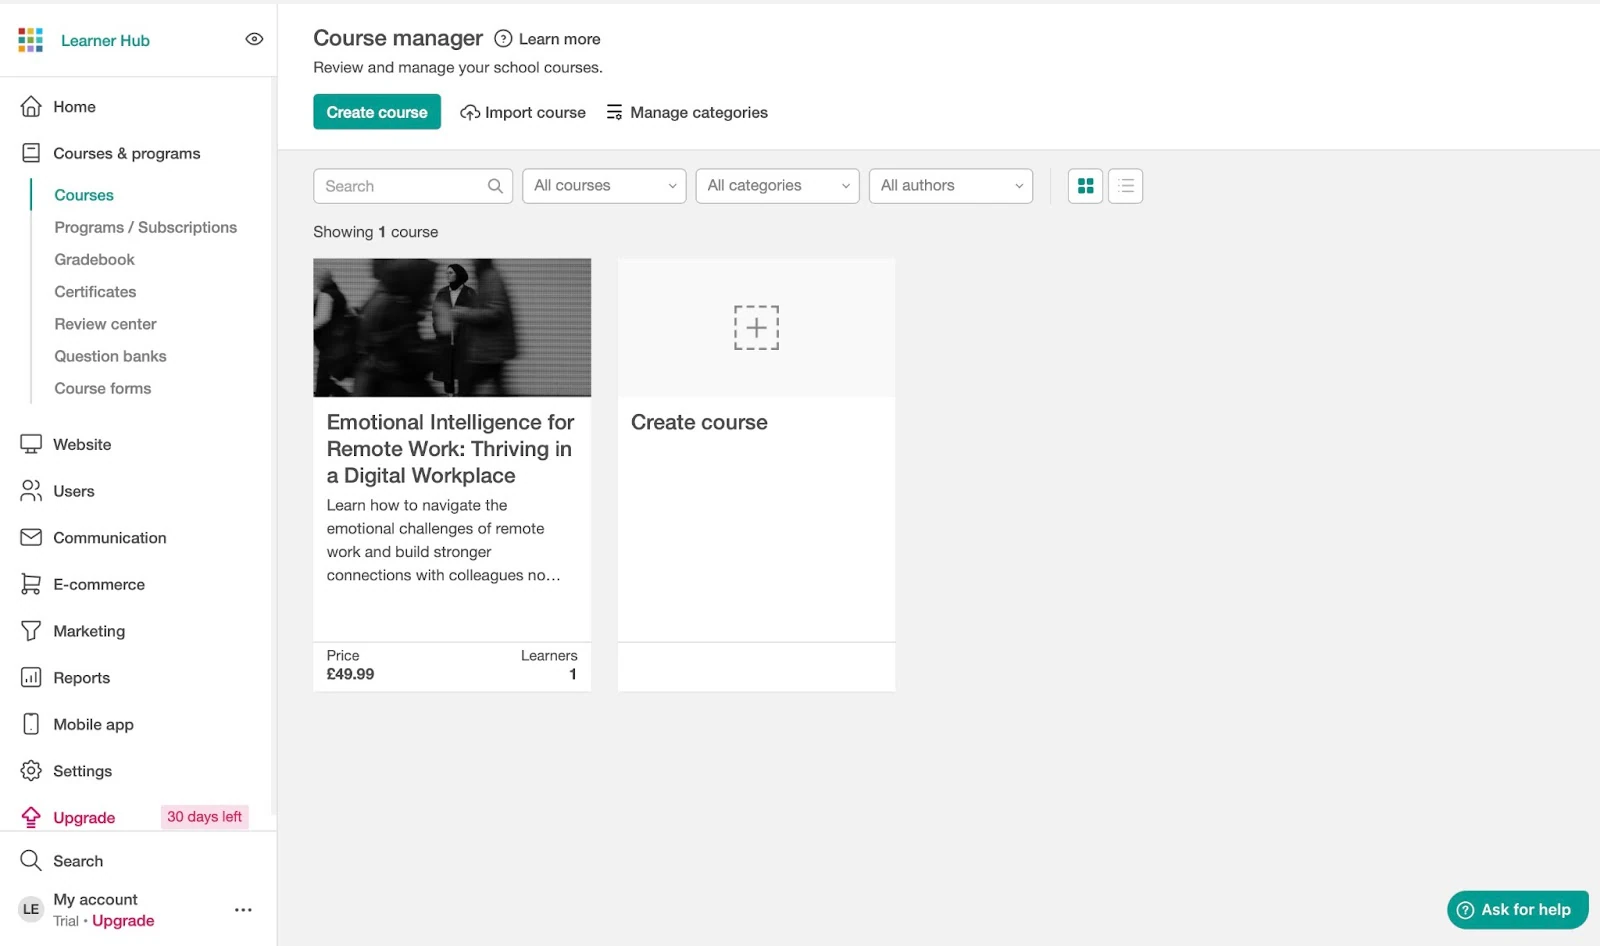
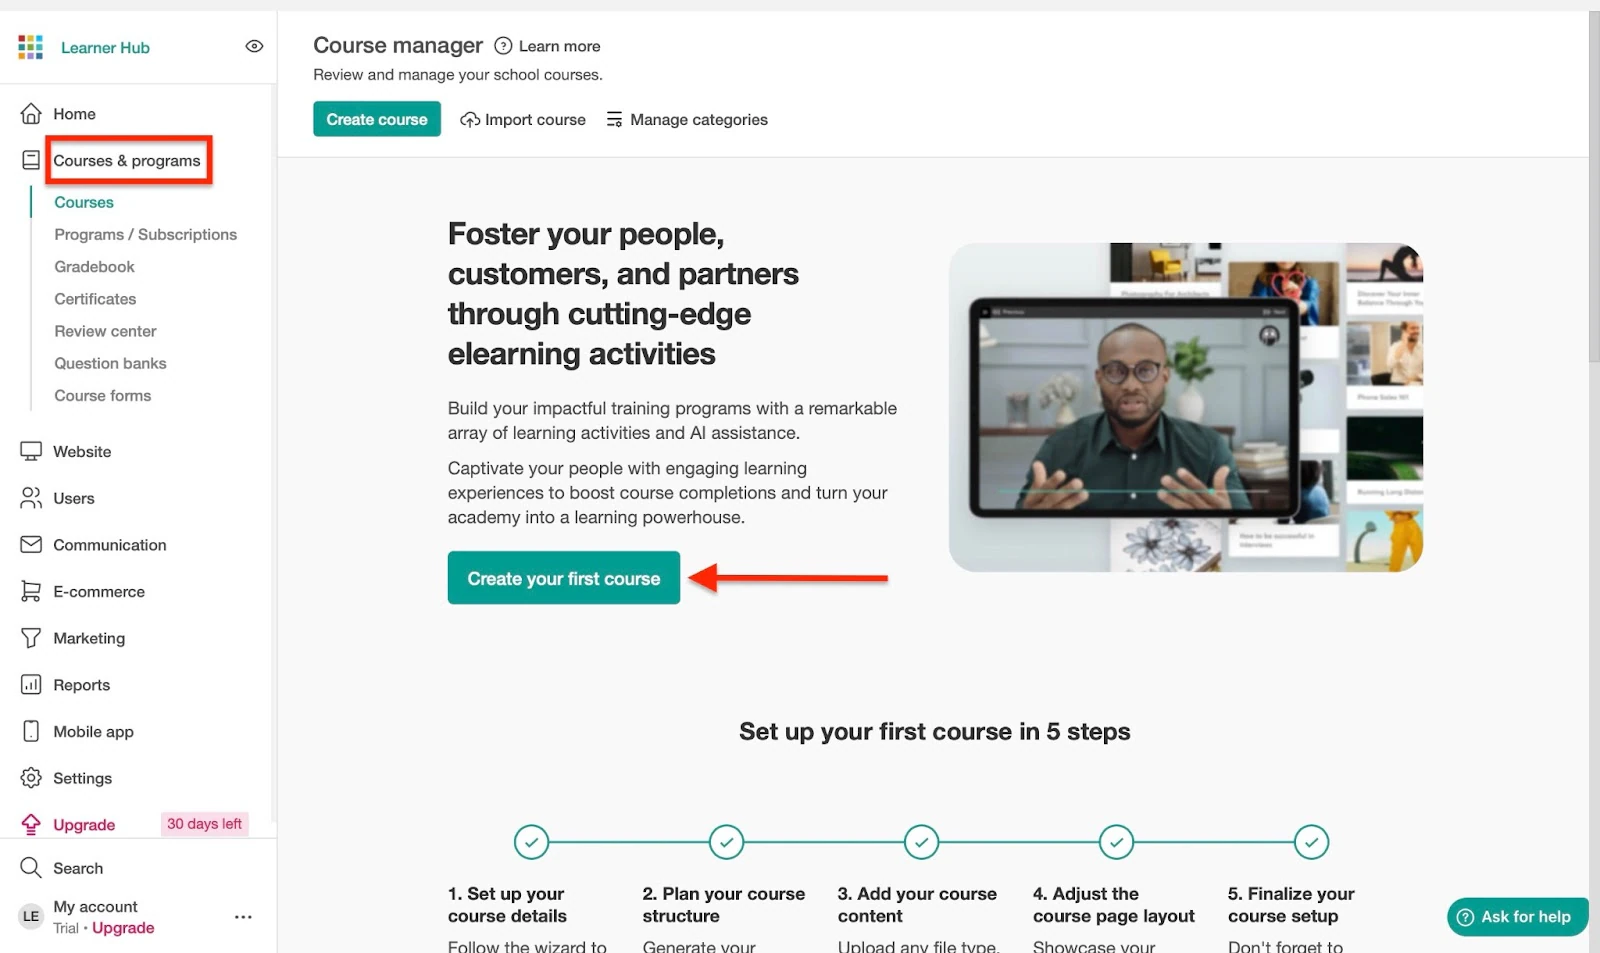
After you’ve set up your school, click “Courses and programs.” Now click “Create your first course.”
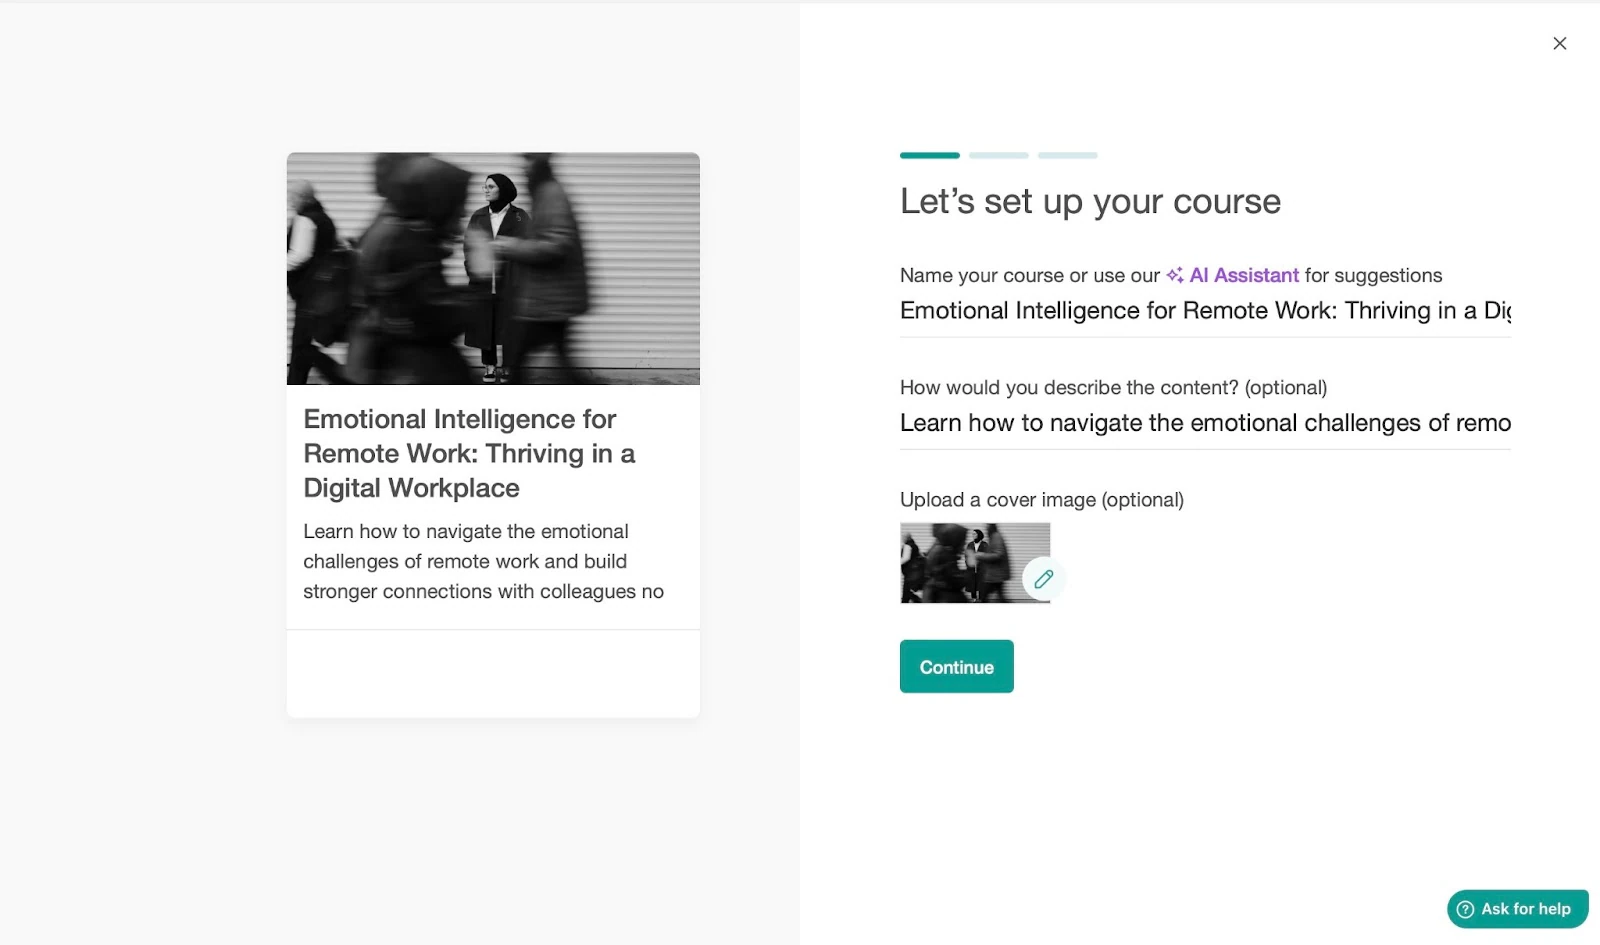
Next, enter the course name and description, and upload a cover image. Then click “Continue.”
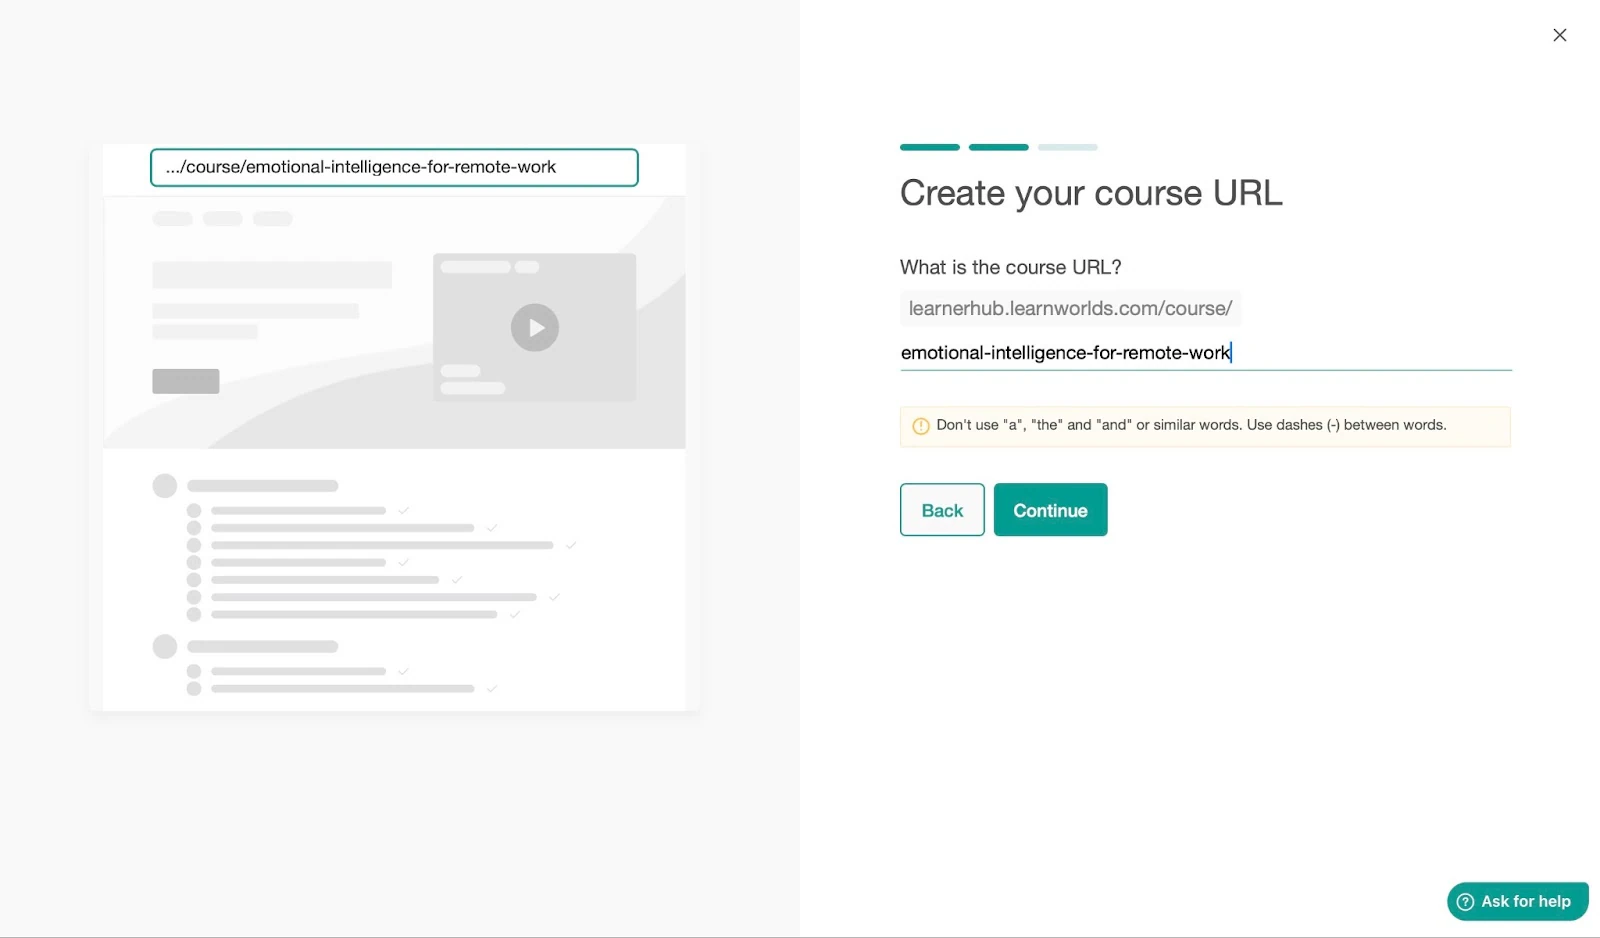
After that, create your course URL and proceed to the next step.
Choose your course access settings. For example, make it free, paid, or available only to specific members, and click “Continue.”
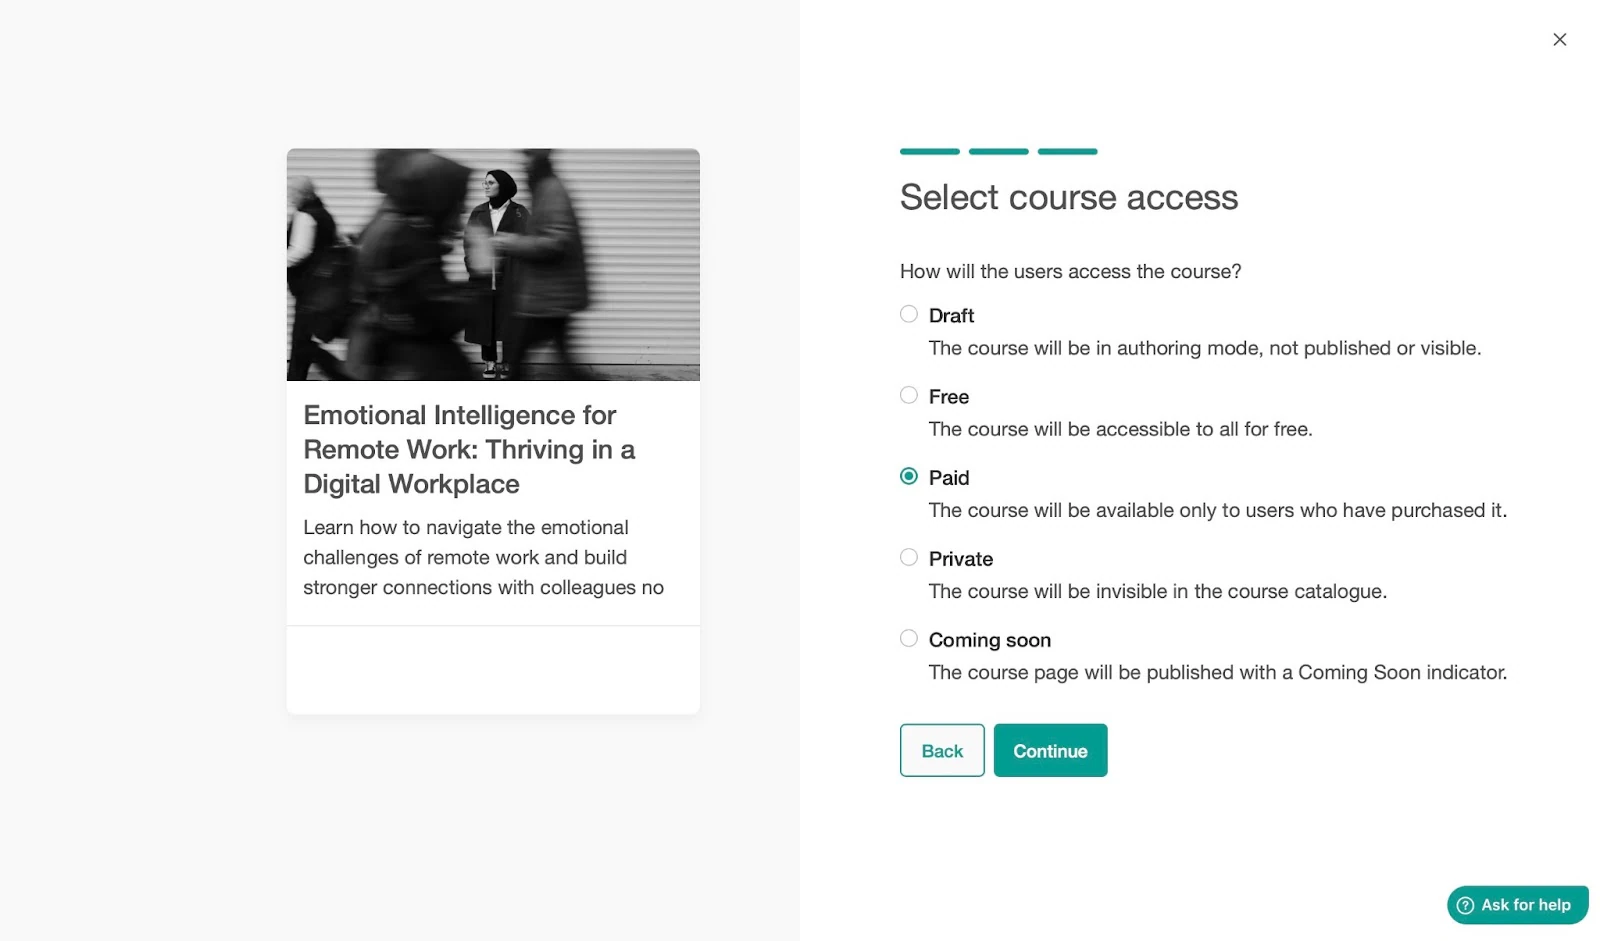
In the next window, set the price and click “Finish.”

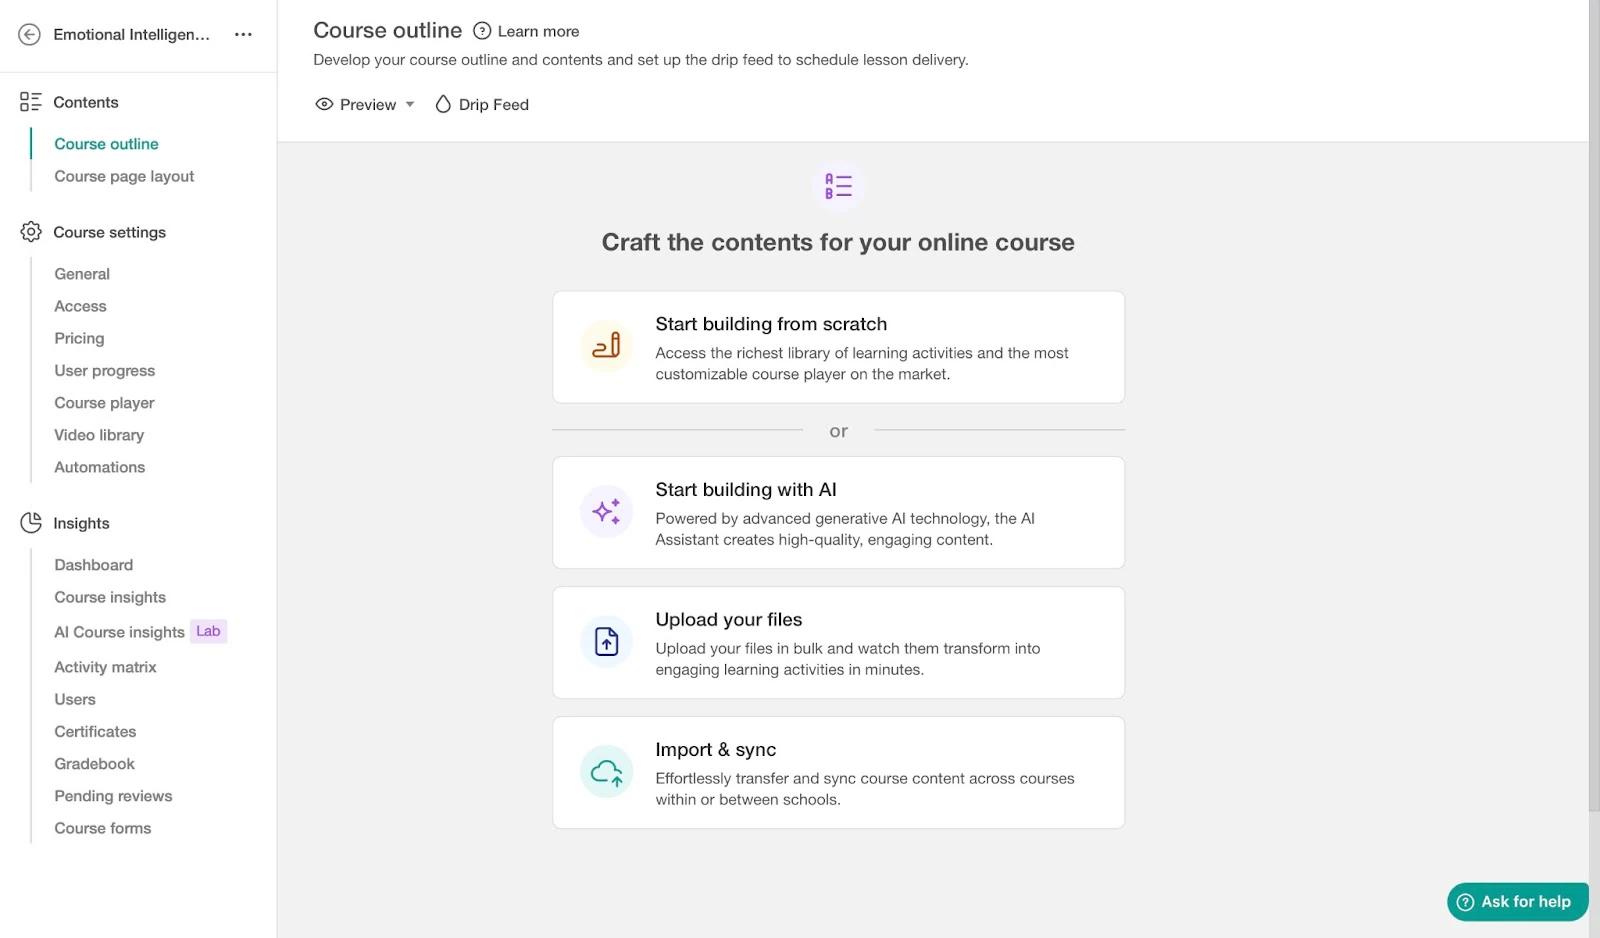
You have now created your course, and in the course outline window, you can add more details.
Key features
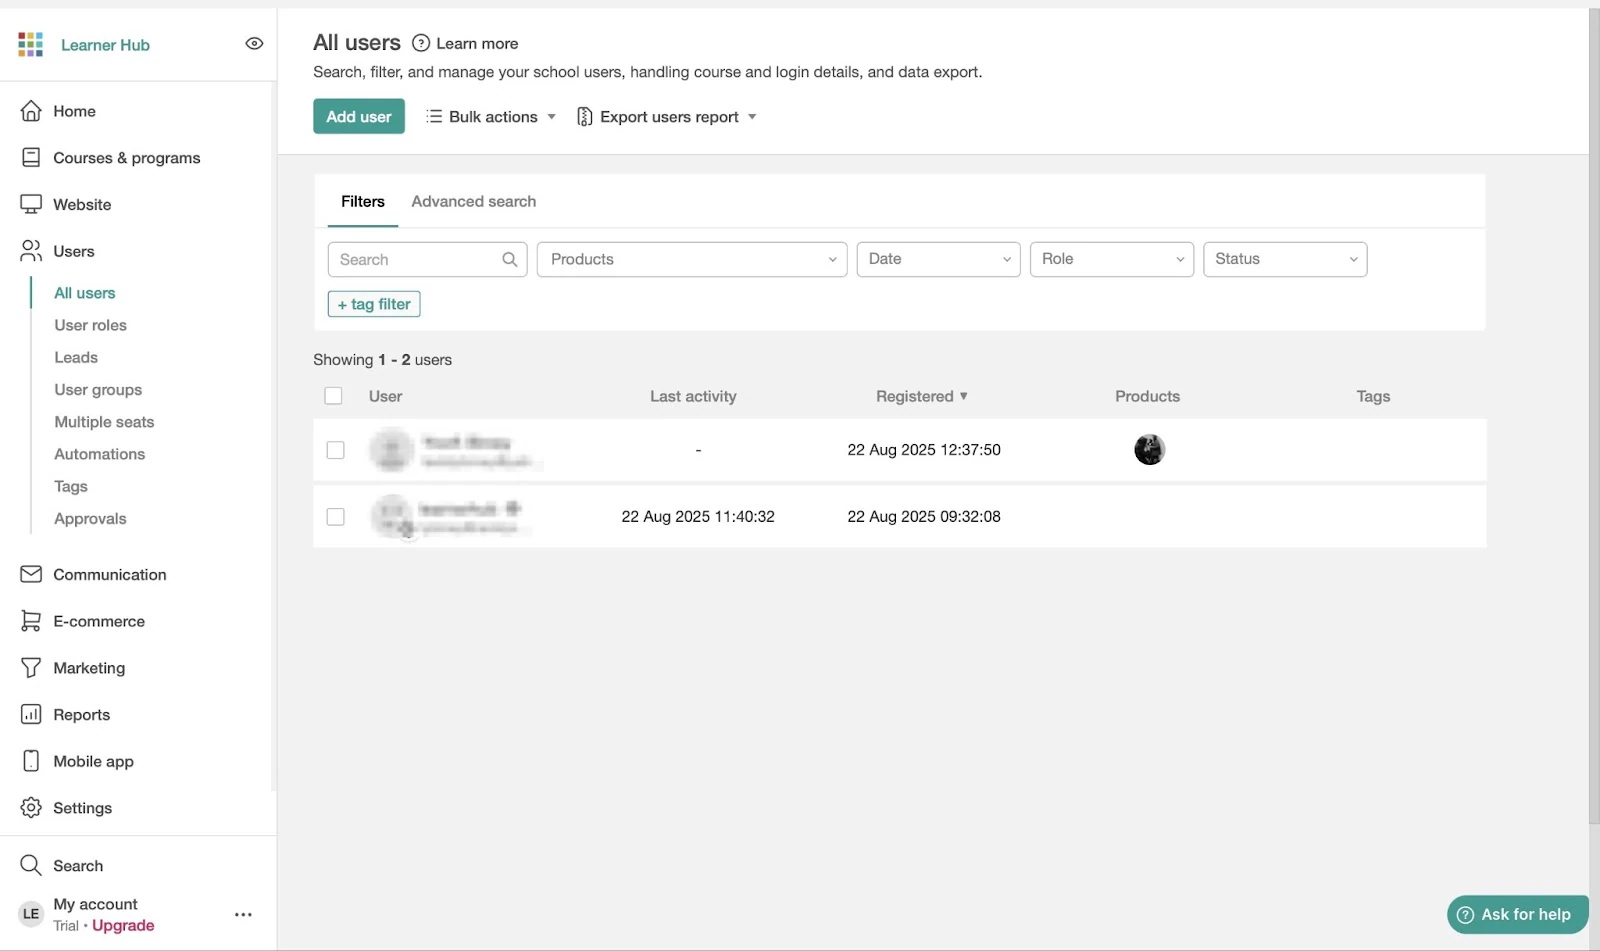
1. Users
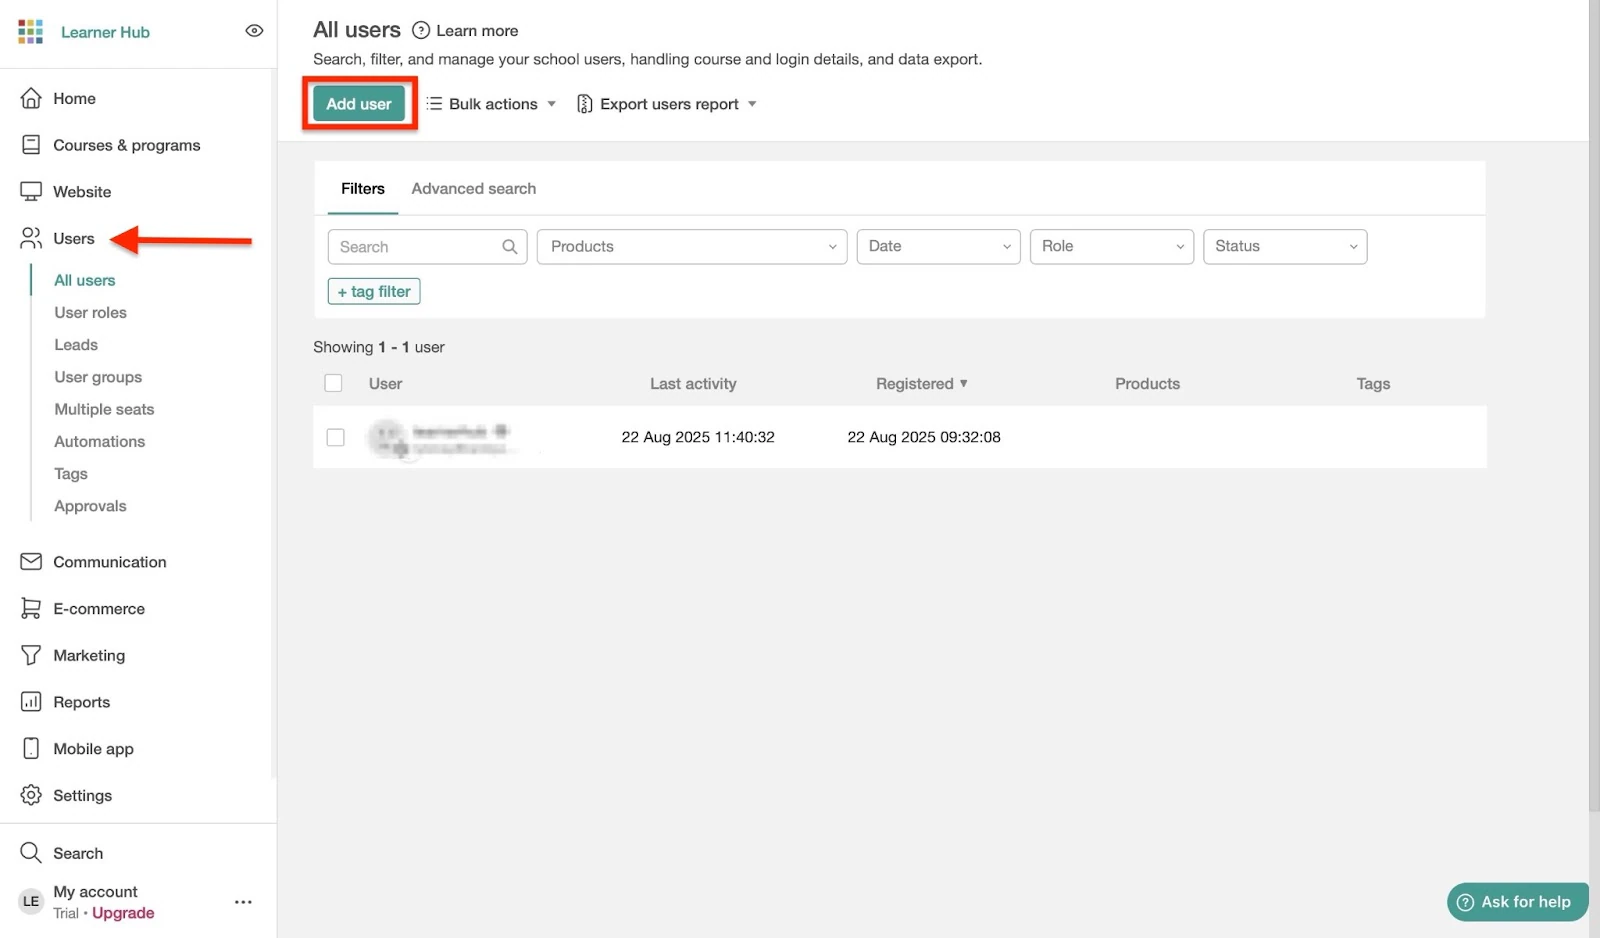
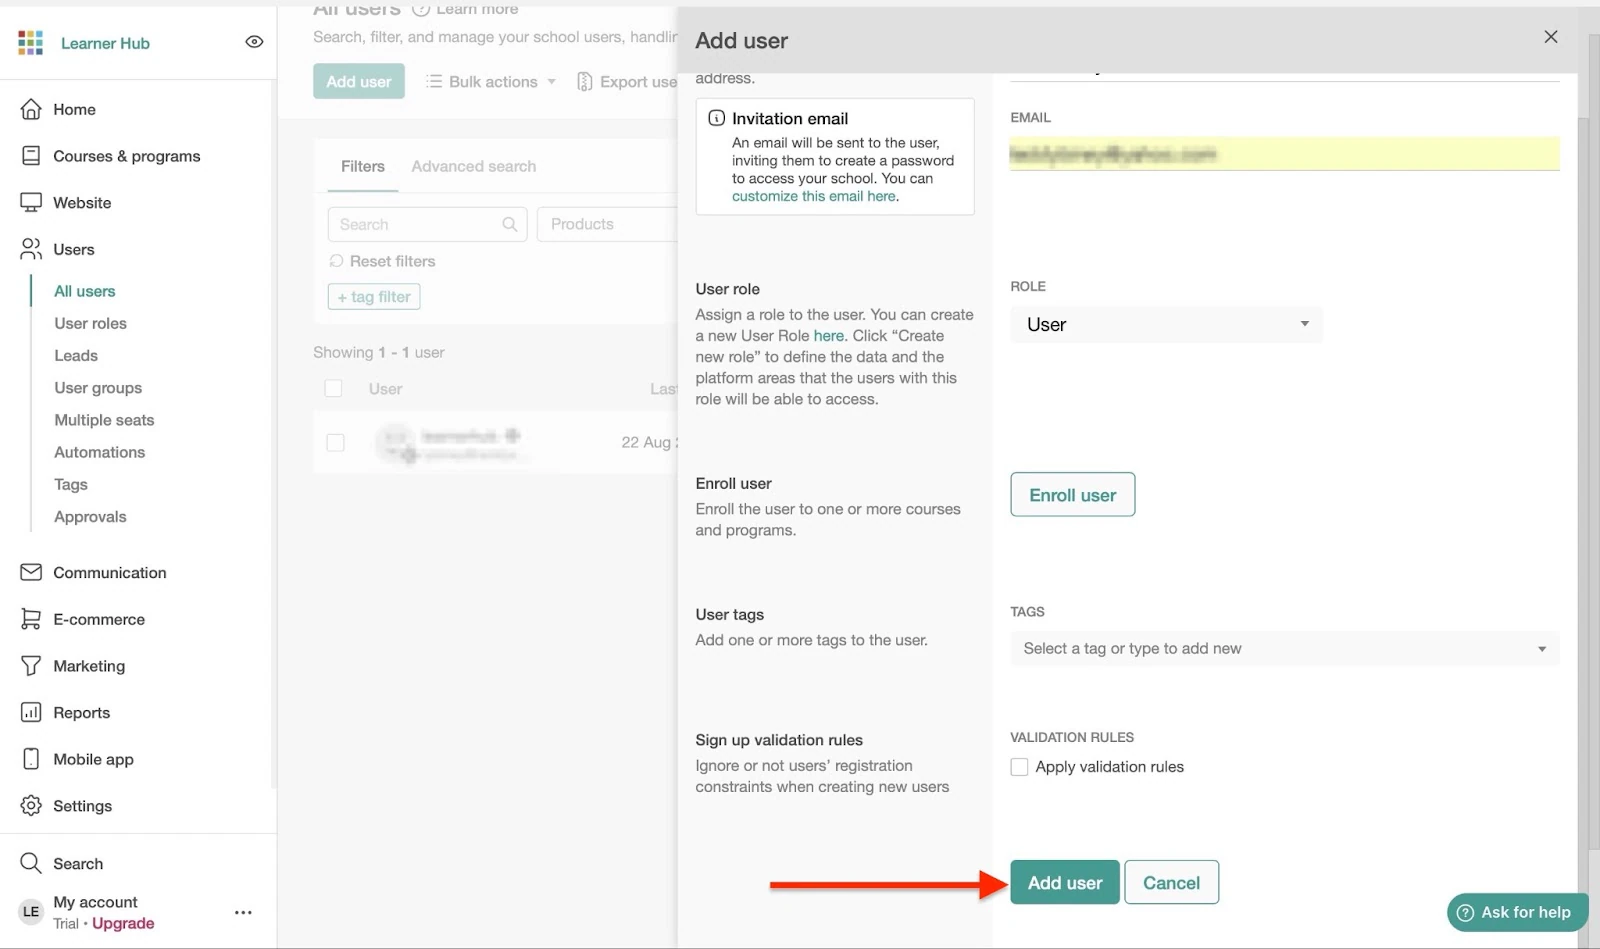
Now that you’ve created a course, let me show you how to add users. Begin by clicking “Users” in the sidebar and selecting “Add user.”
Enter the user details, such as username and email, in the user details tab.
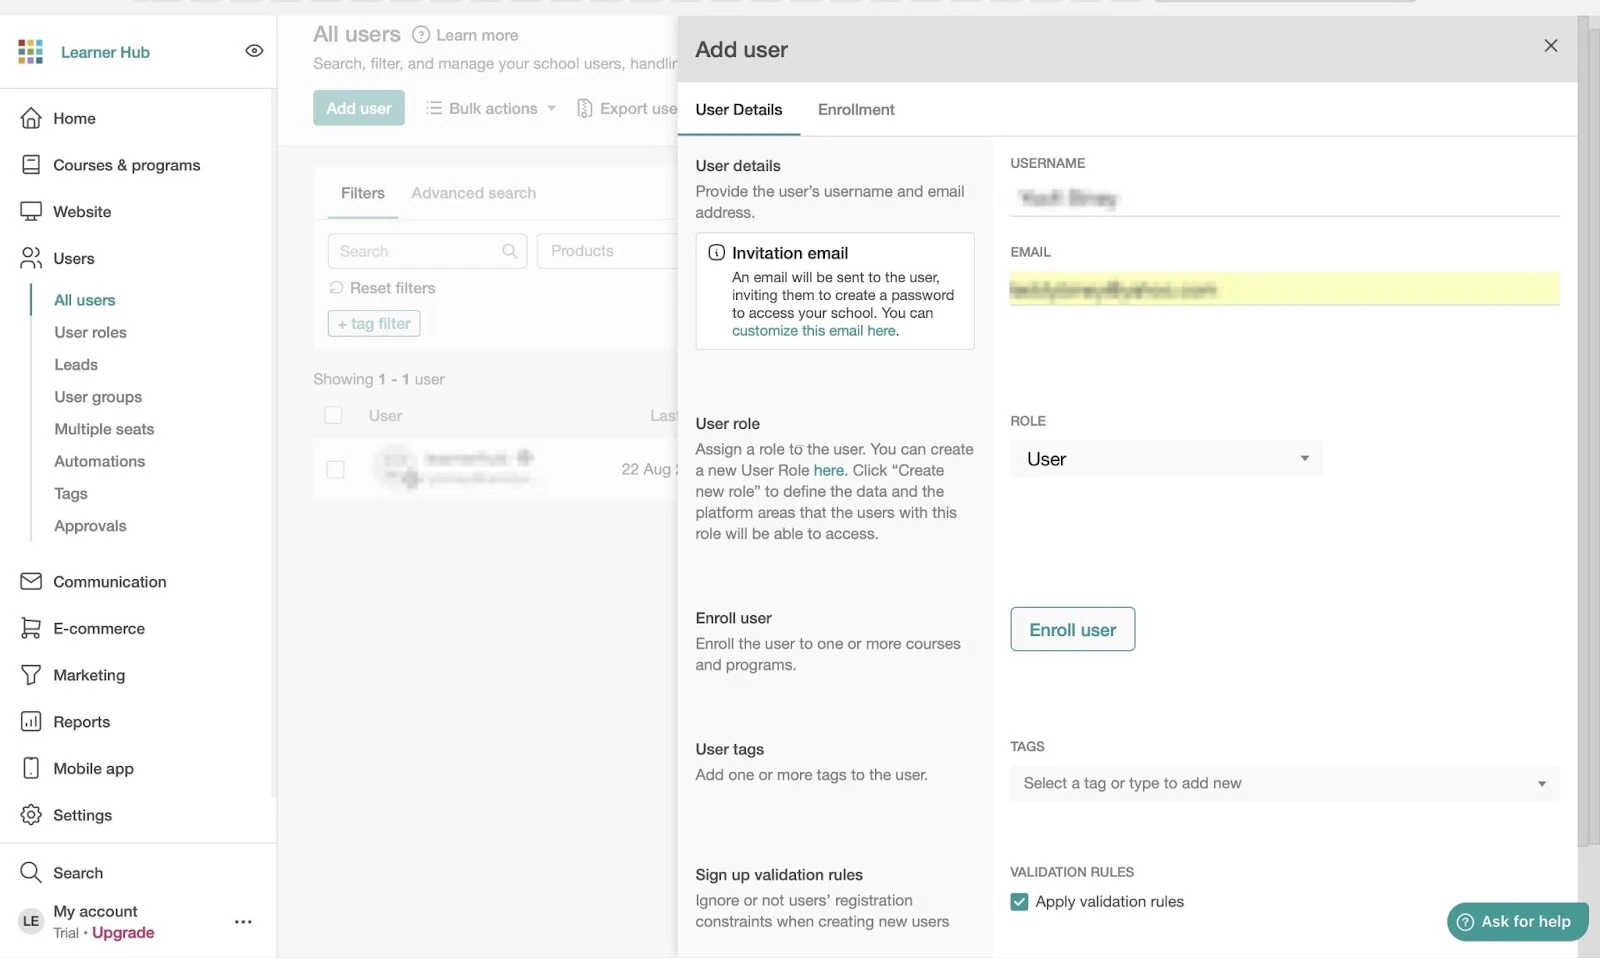
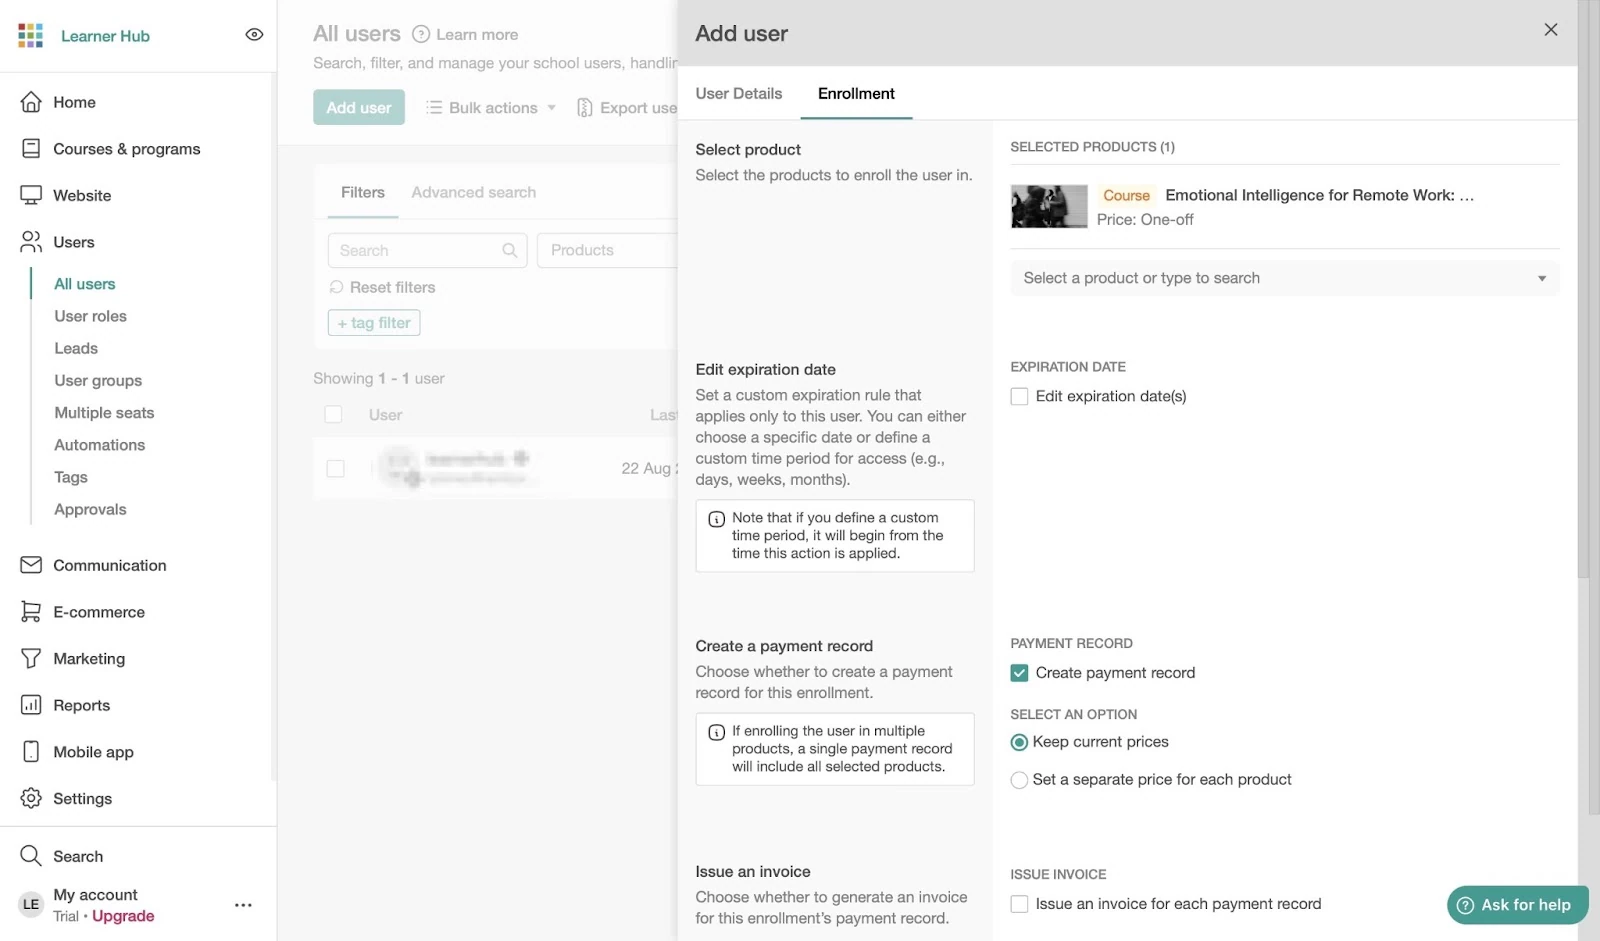
Next, click the Enrollment tab, choose the product you want to use for user enrollment, and adjust your preferred settings.
After that, click “Add user” to finish.
After adding this new user, you will find them listed in the all users window.
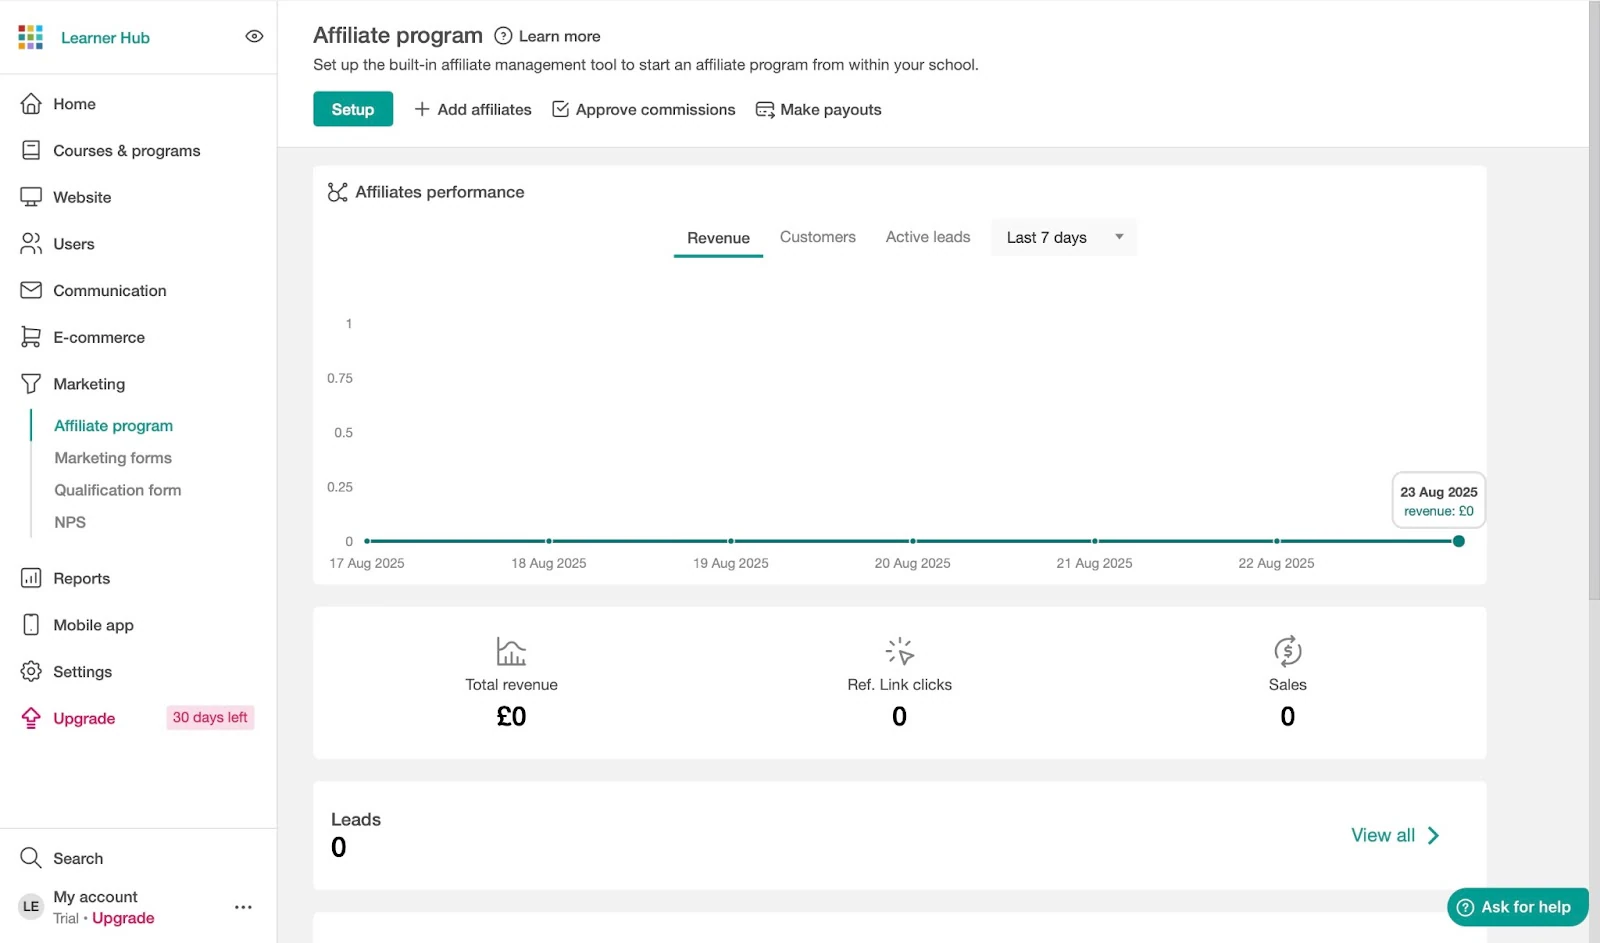
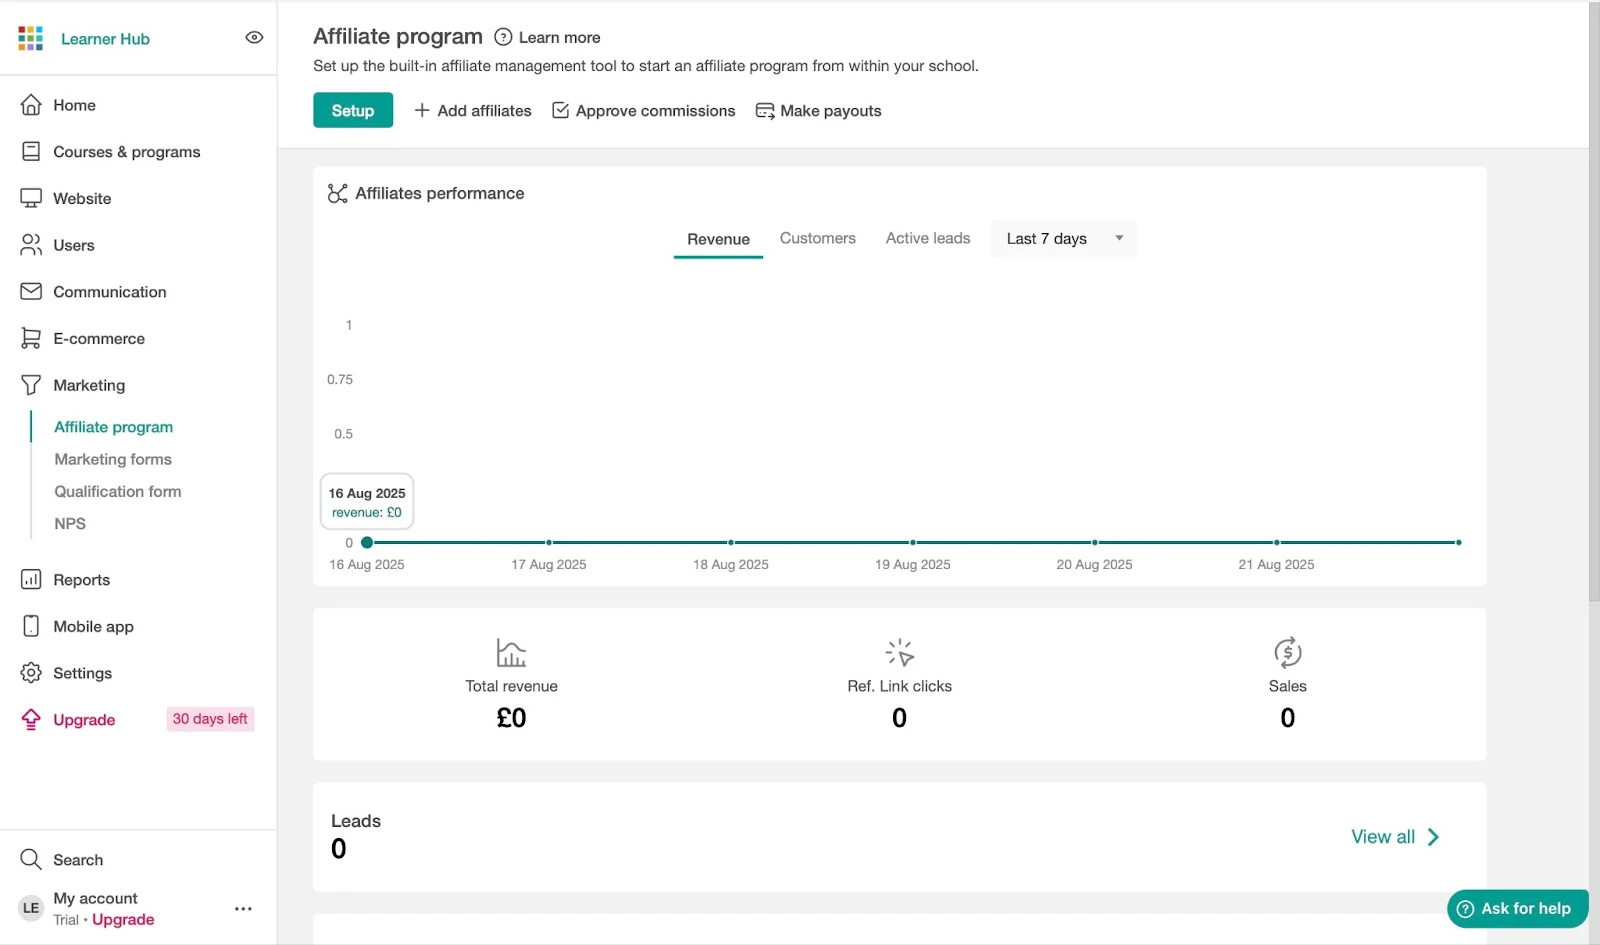
2. Affiliate program
LearnWorlds’ affiliate program feature is a good way to get more sales for your courses.
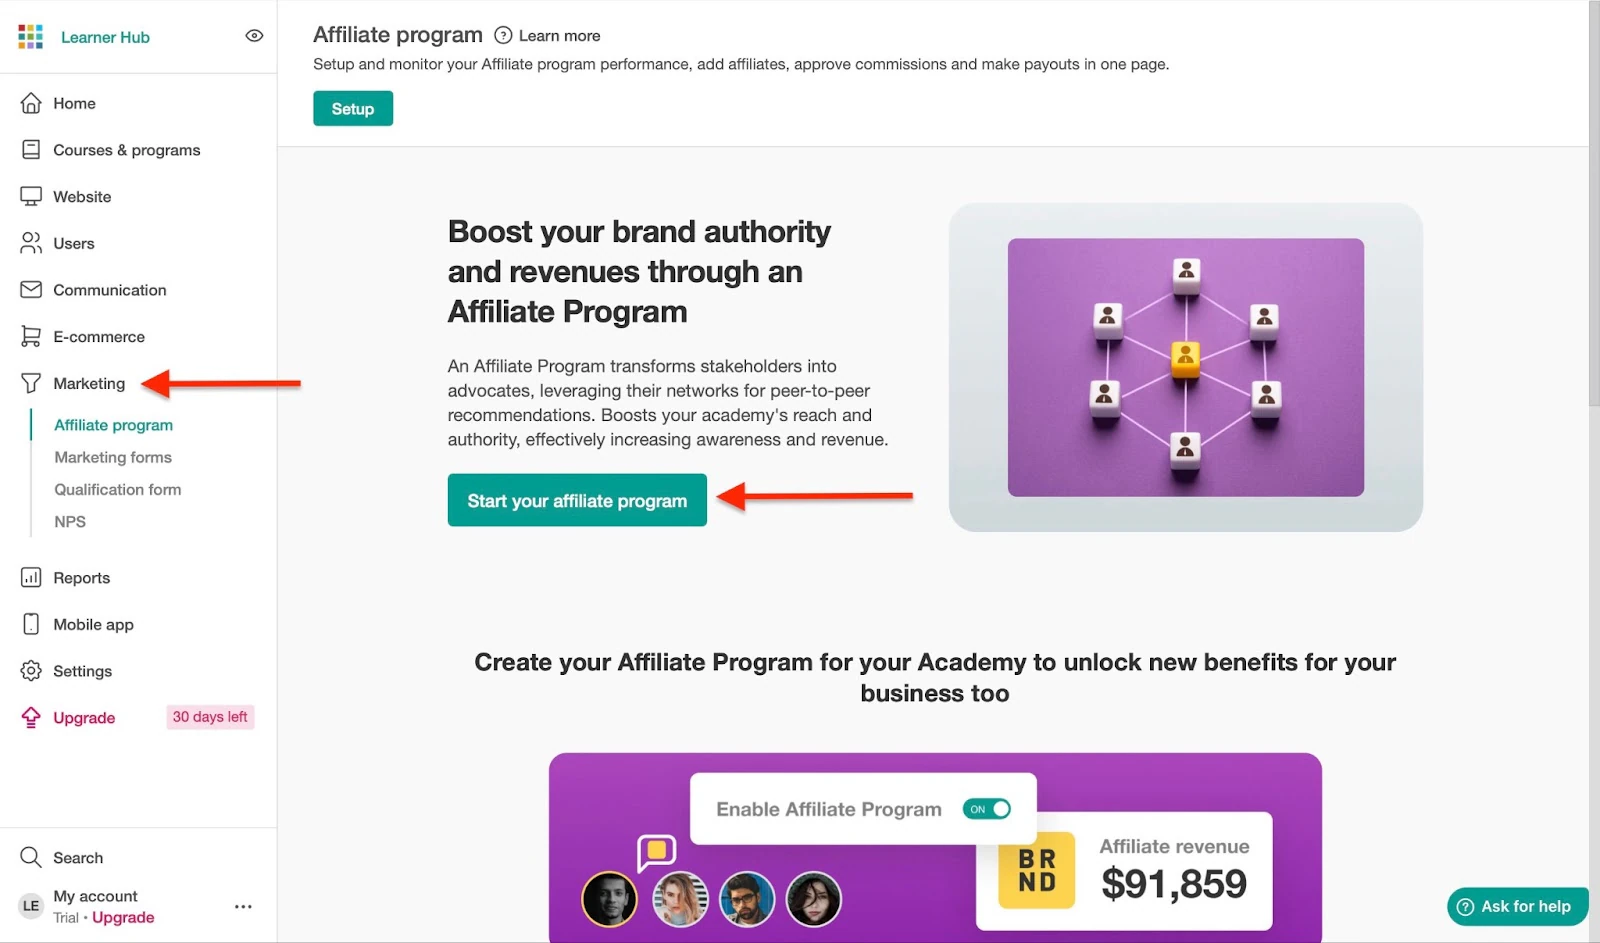
To set up an affiliate program on LearnWorld, first select “Marketing” from the menu. Then click “Start your affiliate program.”
Toggle on the “Enable Affiliate Program” option. Then, select the affiliate product and configure your preferred options. Finally, click “Save” at the top of the window.
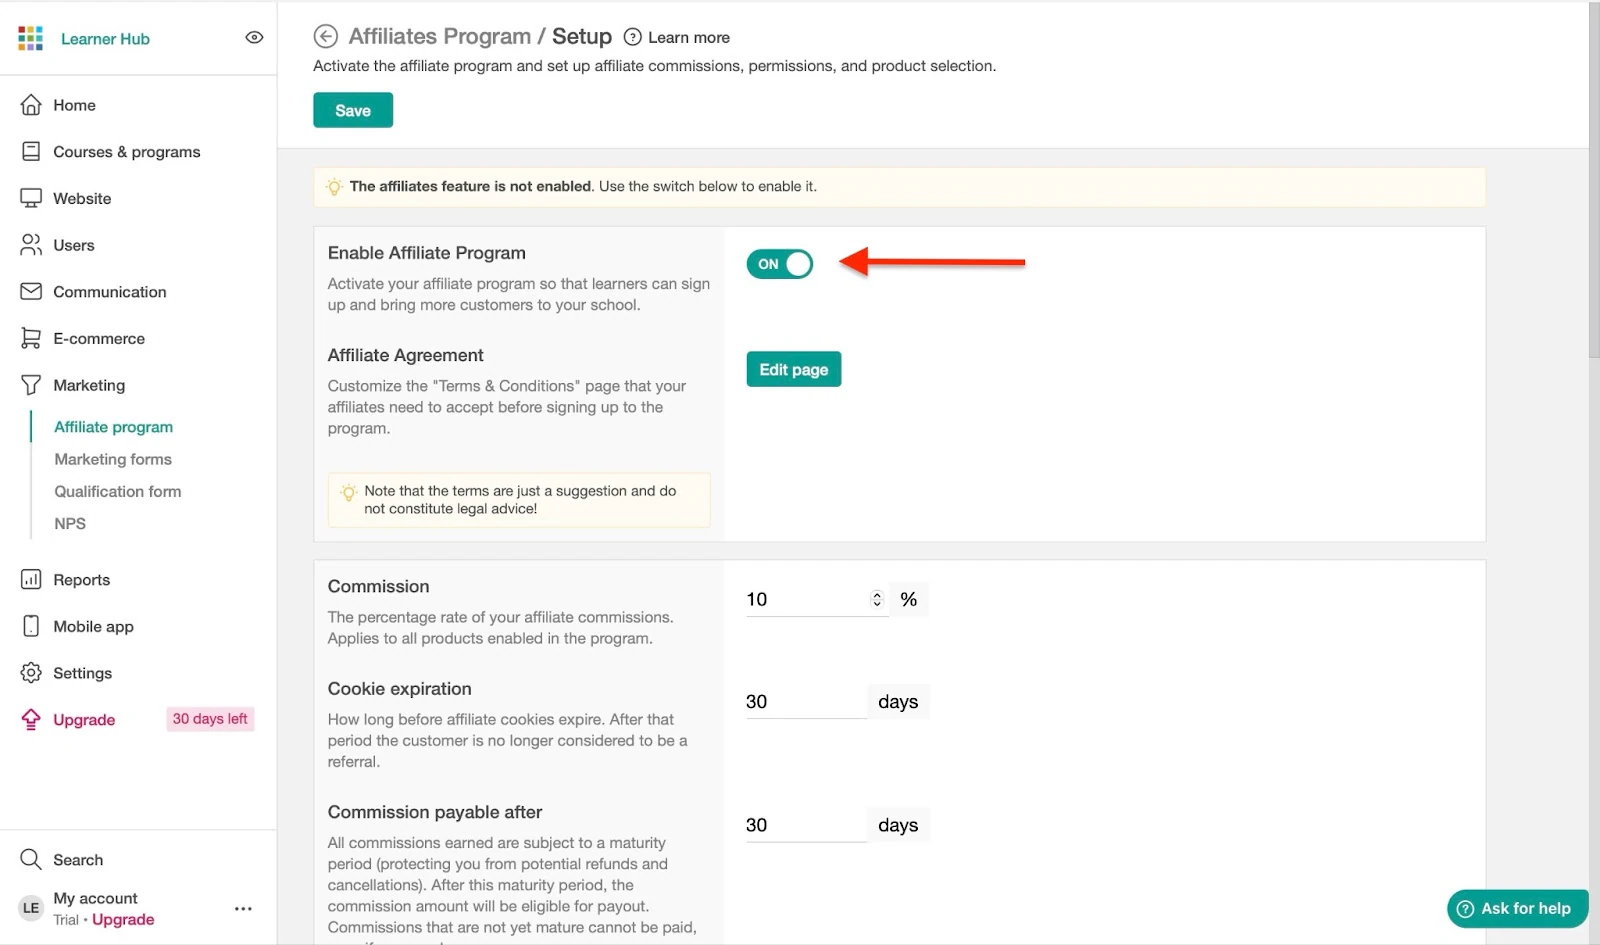
The performance analytics of your affiliate program will then show in the Affiliate Program window.
Best for
- Educators, training companies, and institutions needing highly customizable, interactive course platforms with advanced learning tools.
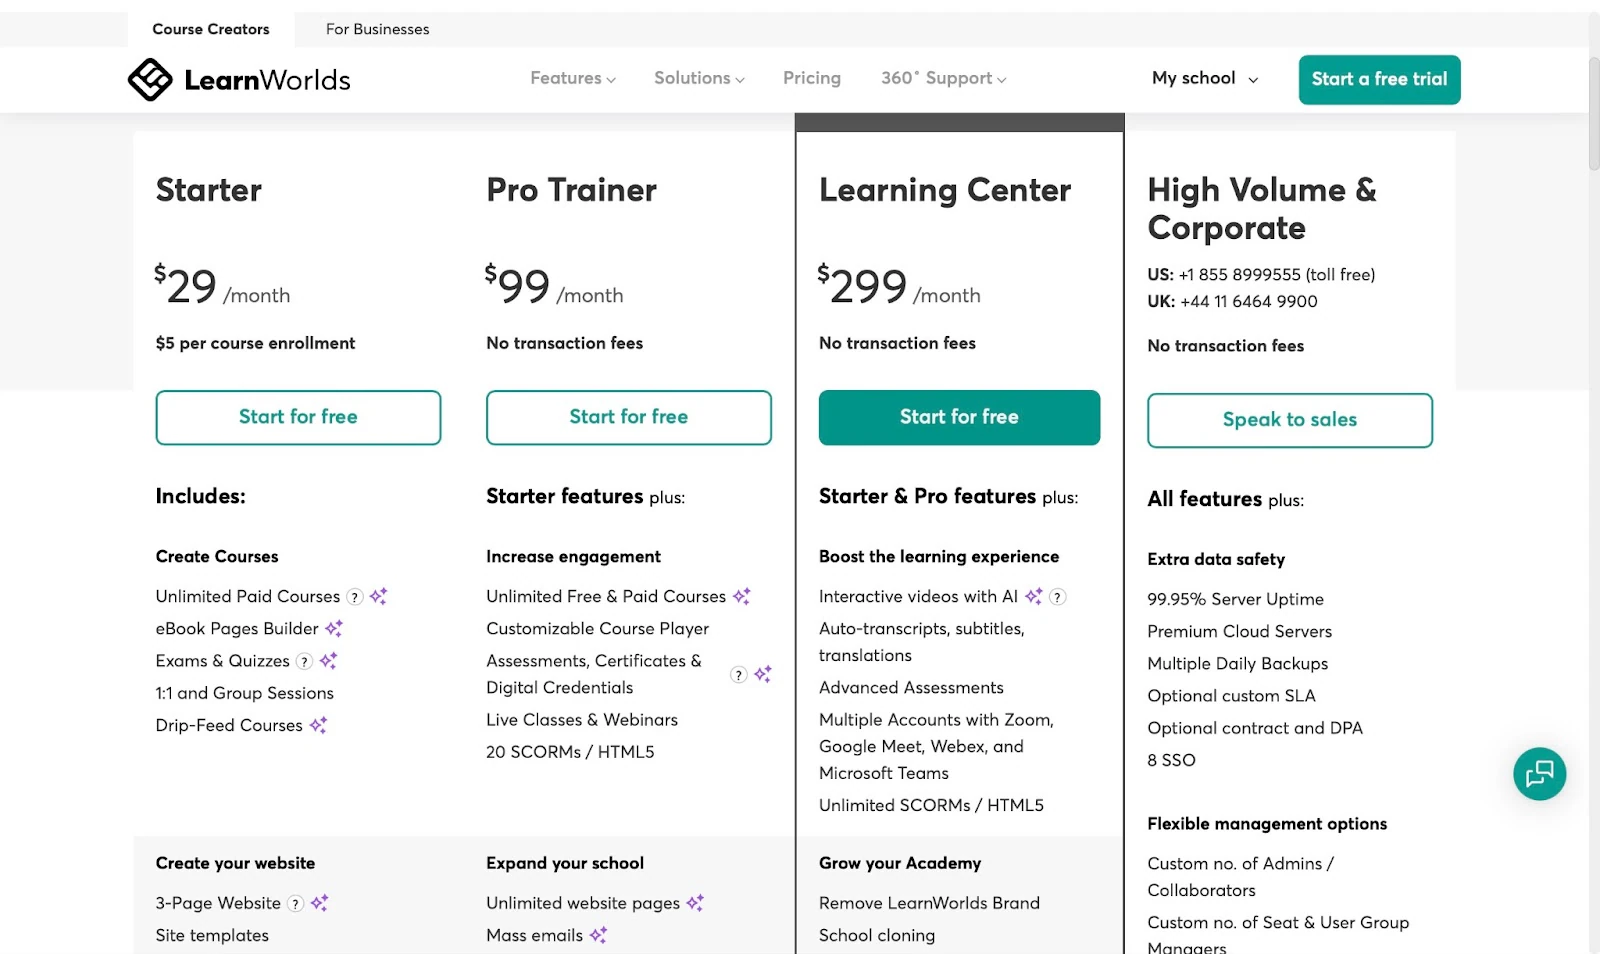
Pricing
- Starter: $29/month
- Pro Trainer: $99/month
- Learning Center: $299/month
- High Volume & Corporate: Contact for pricing
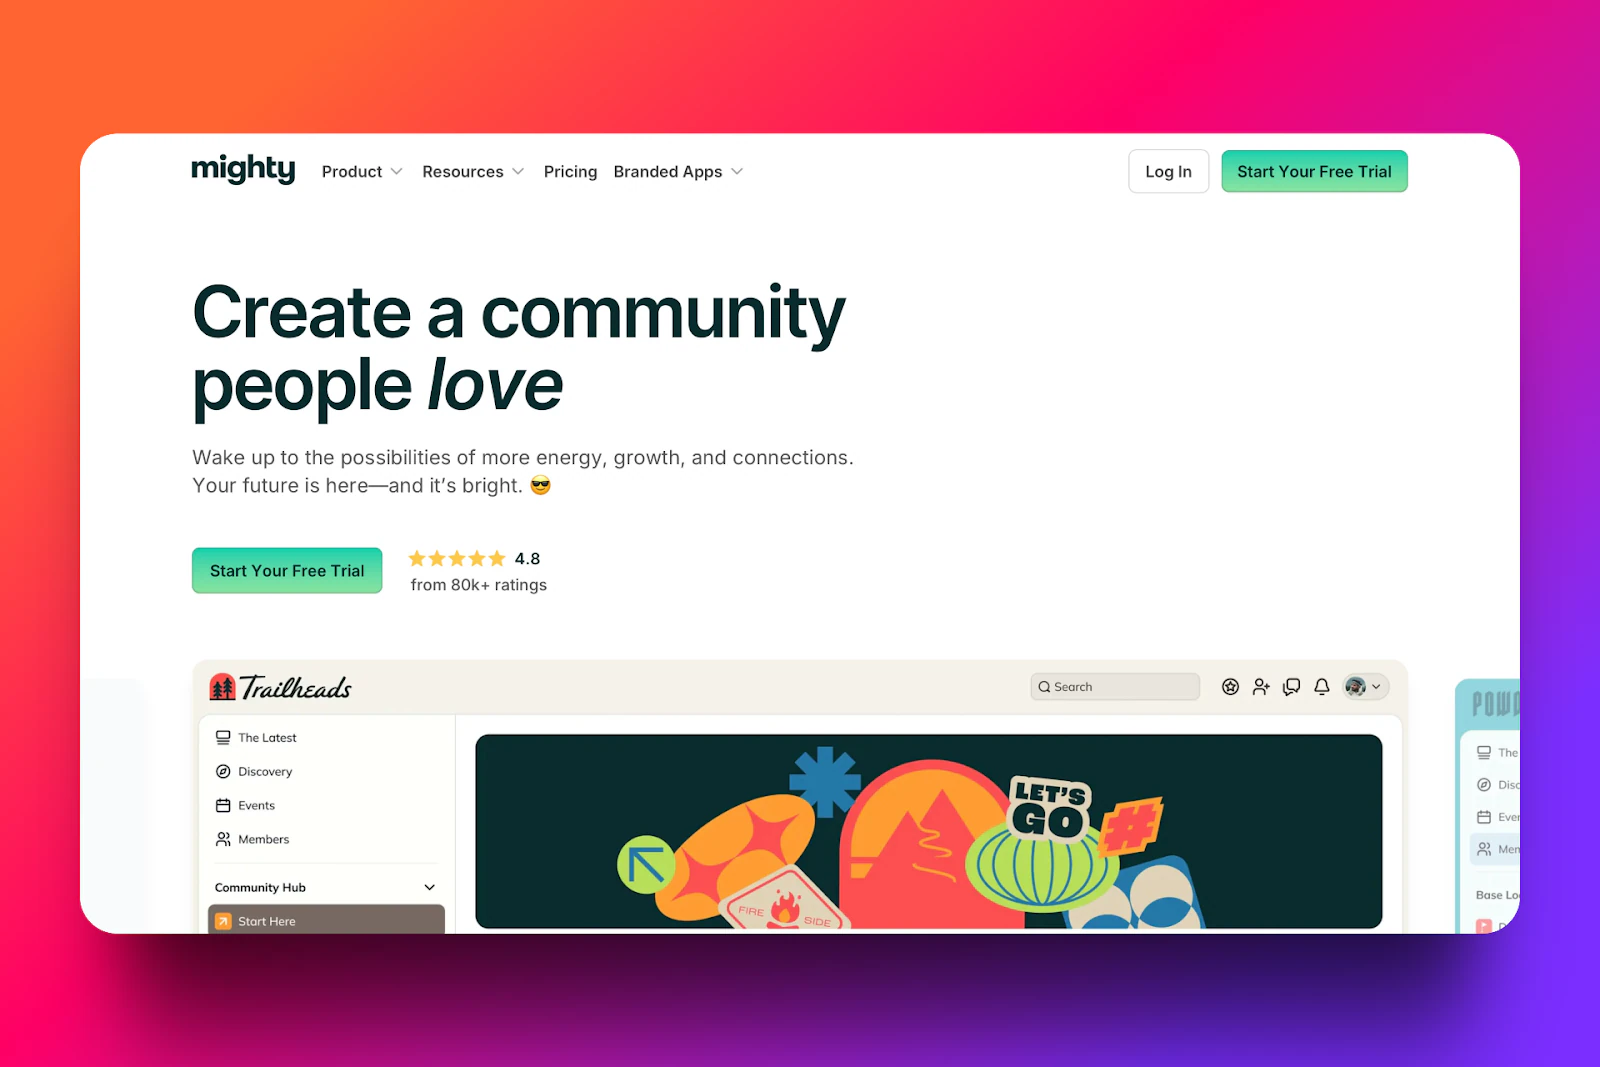
8. Mighty Networks
This list of the best platforms to sell online courses wouldn’t be complete without mentioning Mighty Networks. It’s a community-first platform for building courses, memberships, and communities.
Mighty Networks’ members feature lets you add customers to your online community by sharing a URL link. You can also add more customers directly through an invite.
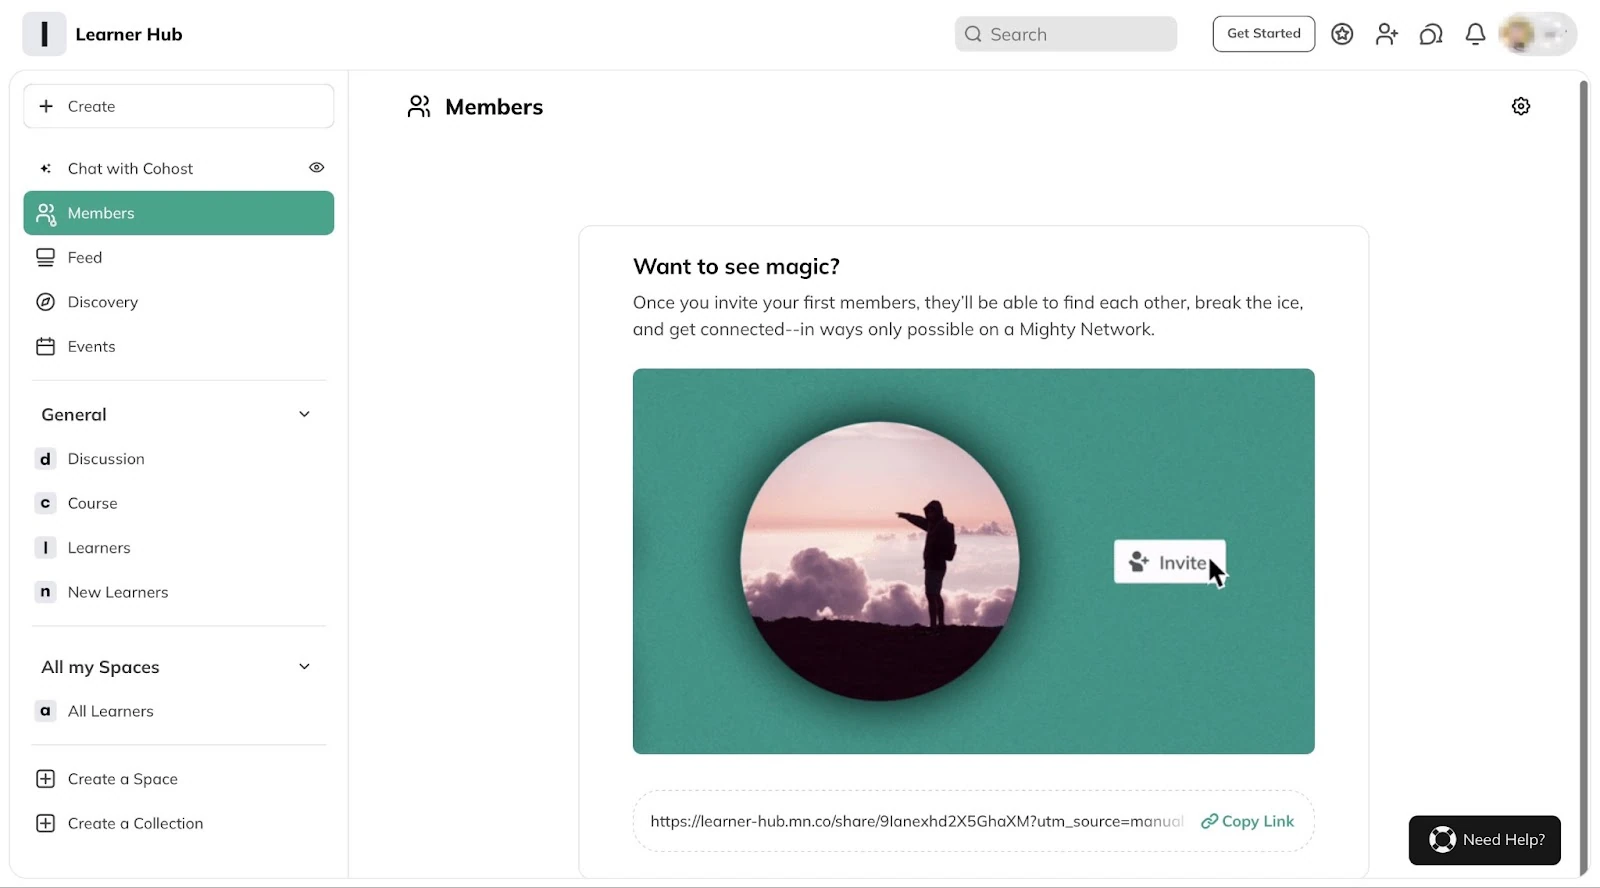
Its feed feature lets you view all interactions in your community. Furthermore, it’s possible to sort those discussions by time and popularity.
You can use it to create a space feature to add areas for chats, challenges, events, etc. It also lets you invite particular members to join that space.
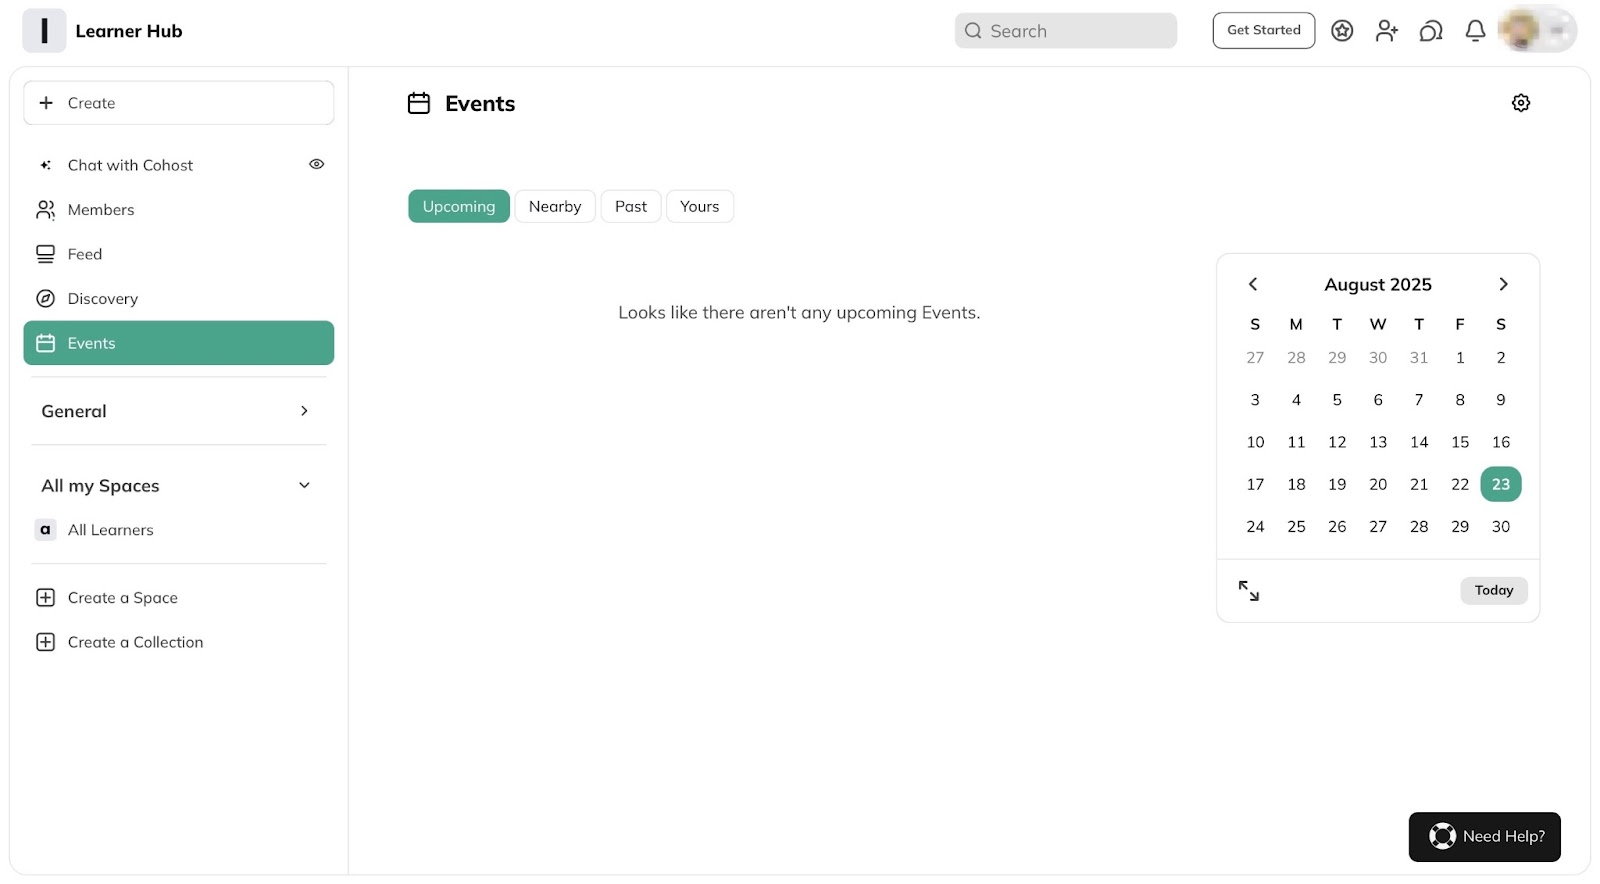
With the event feature, you can create, schedule, edit, and delete events. Moreover, the feature allows you to invite members to an event you created.
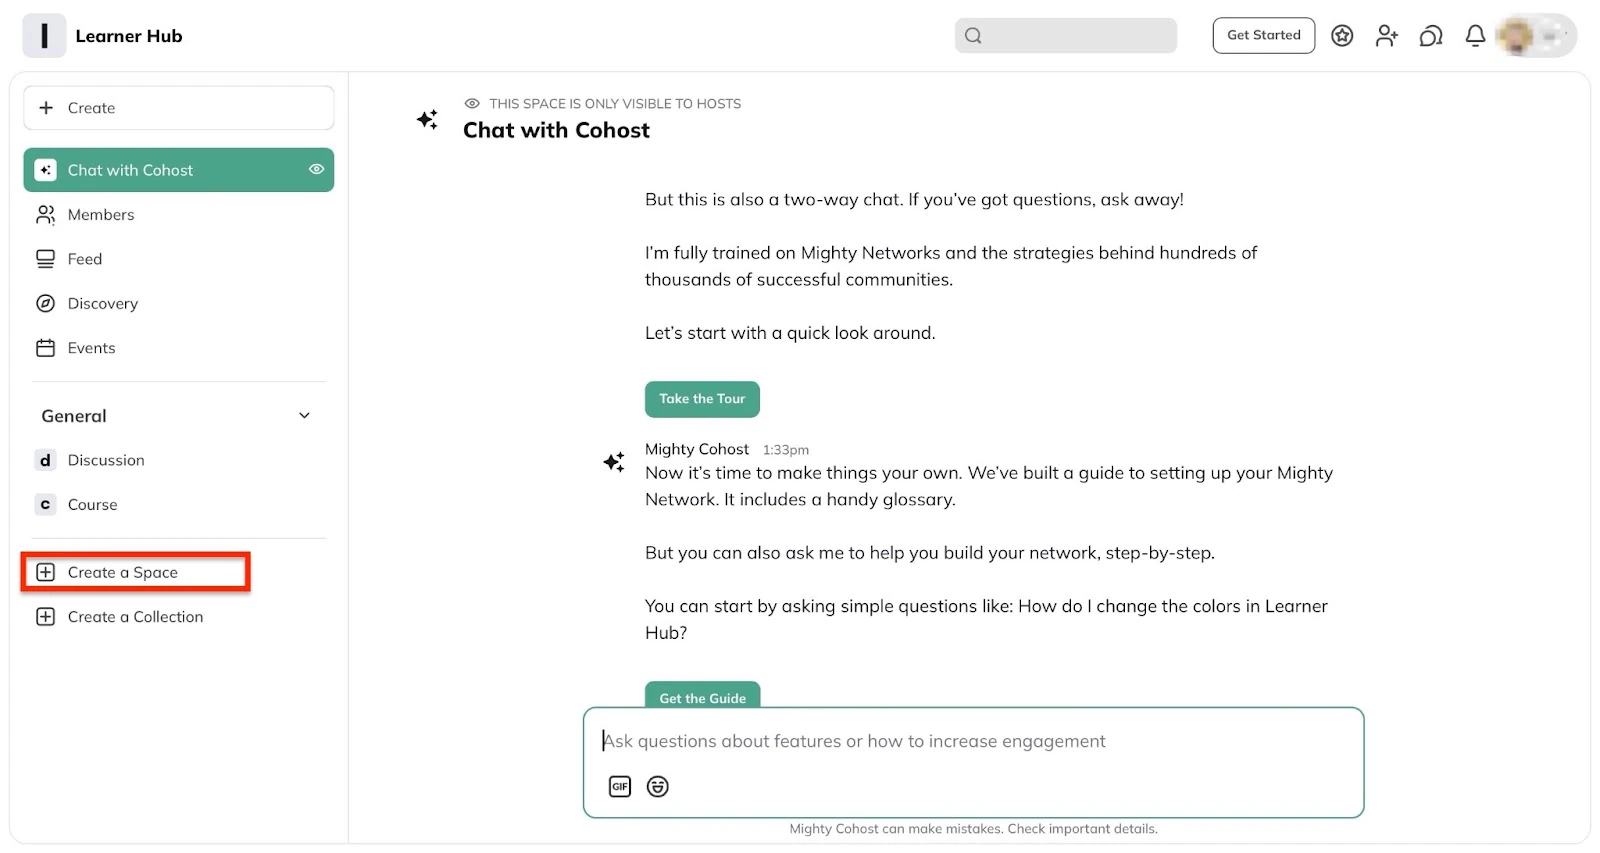
Having seen a few of Mighty’s features, I’ll show you how to build a course on the platform in a few simple steps.
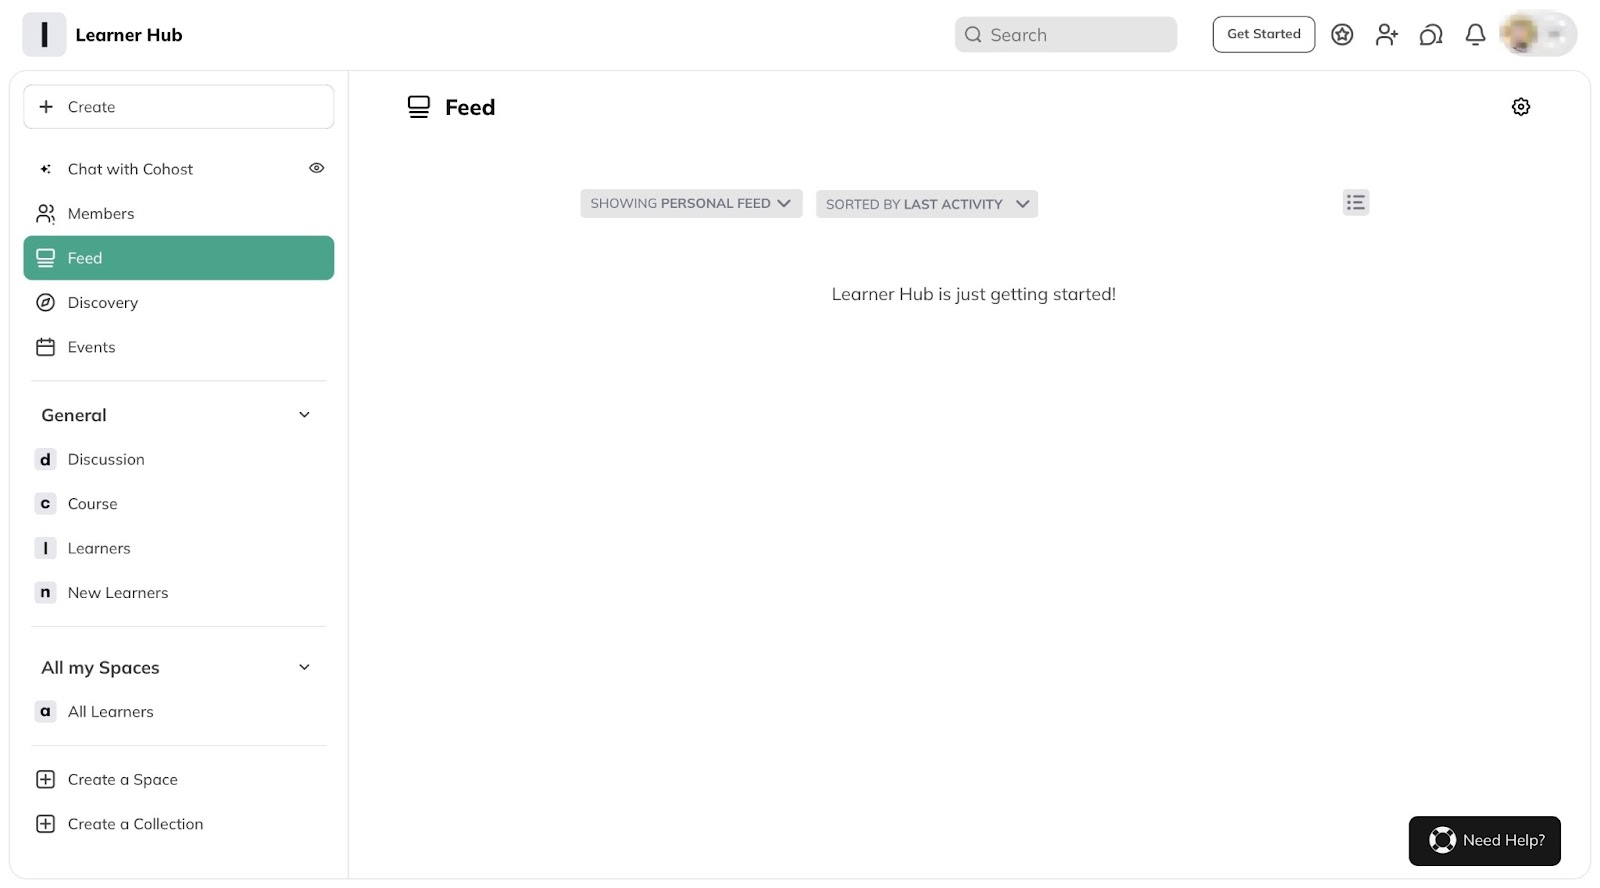
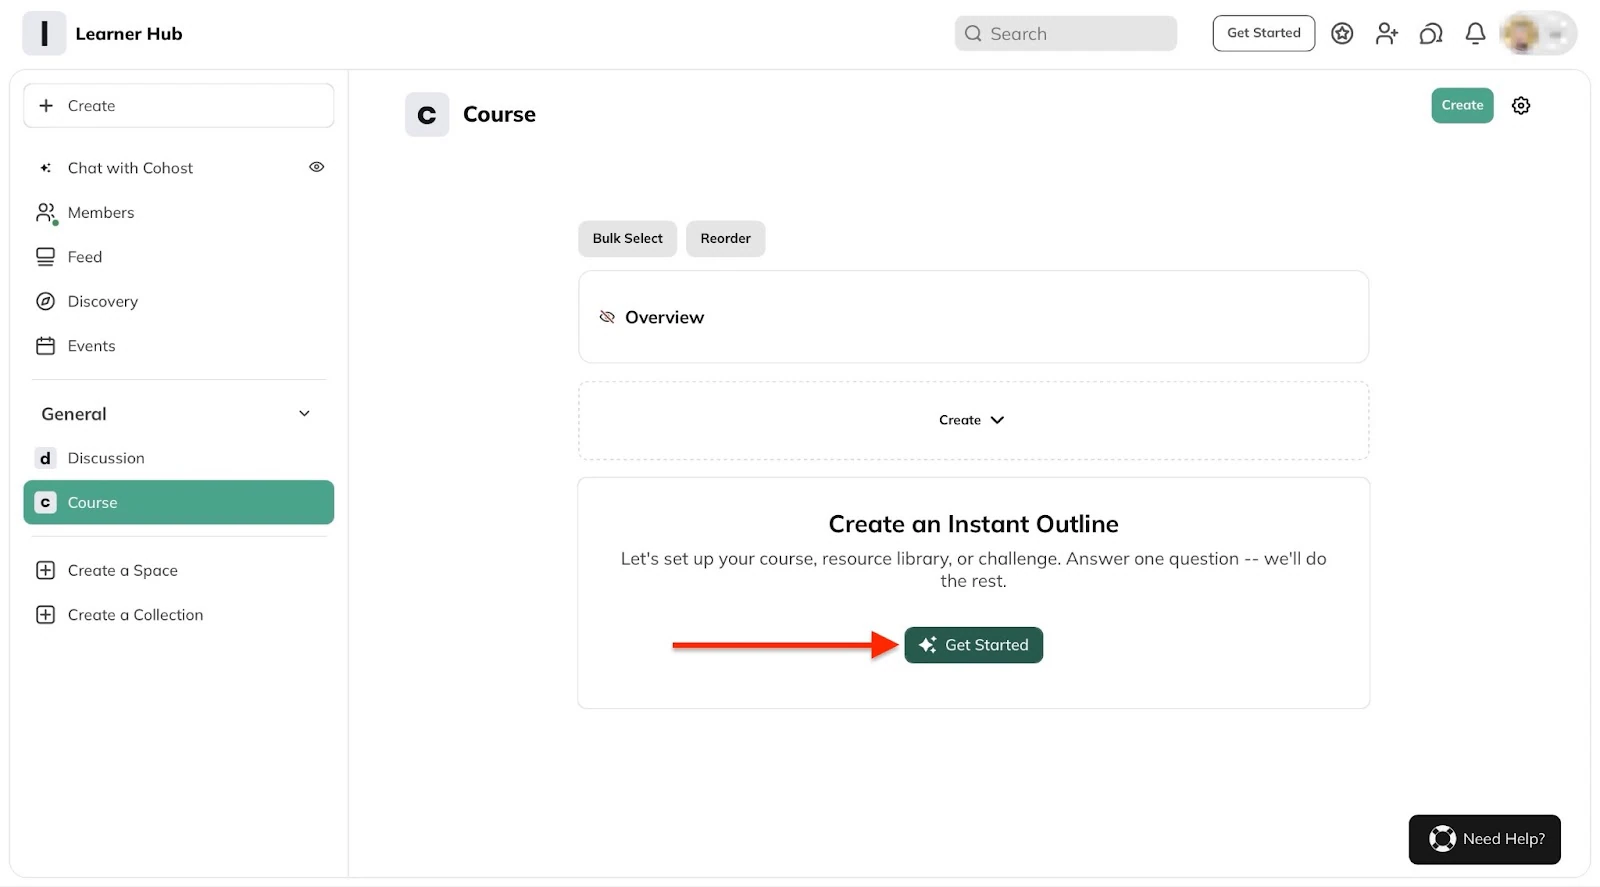
First, locate “General” in the sidebar and click “Course.”
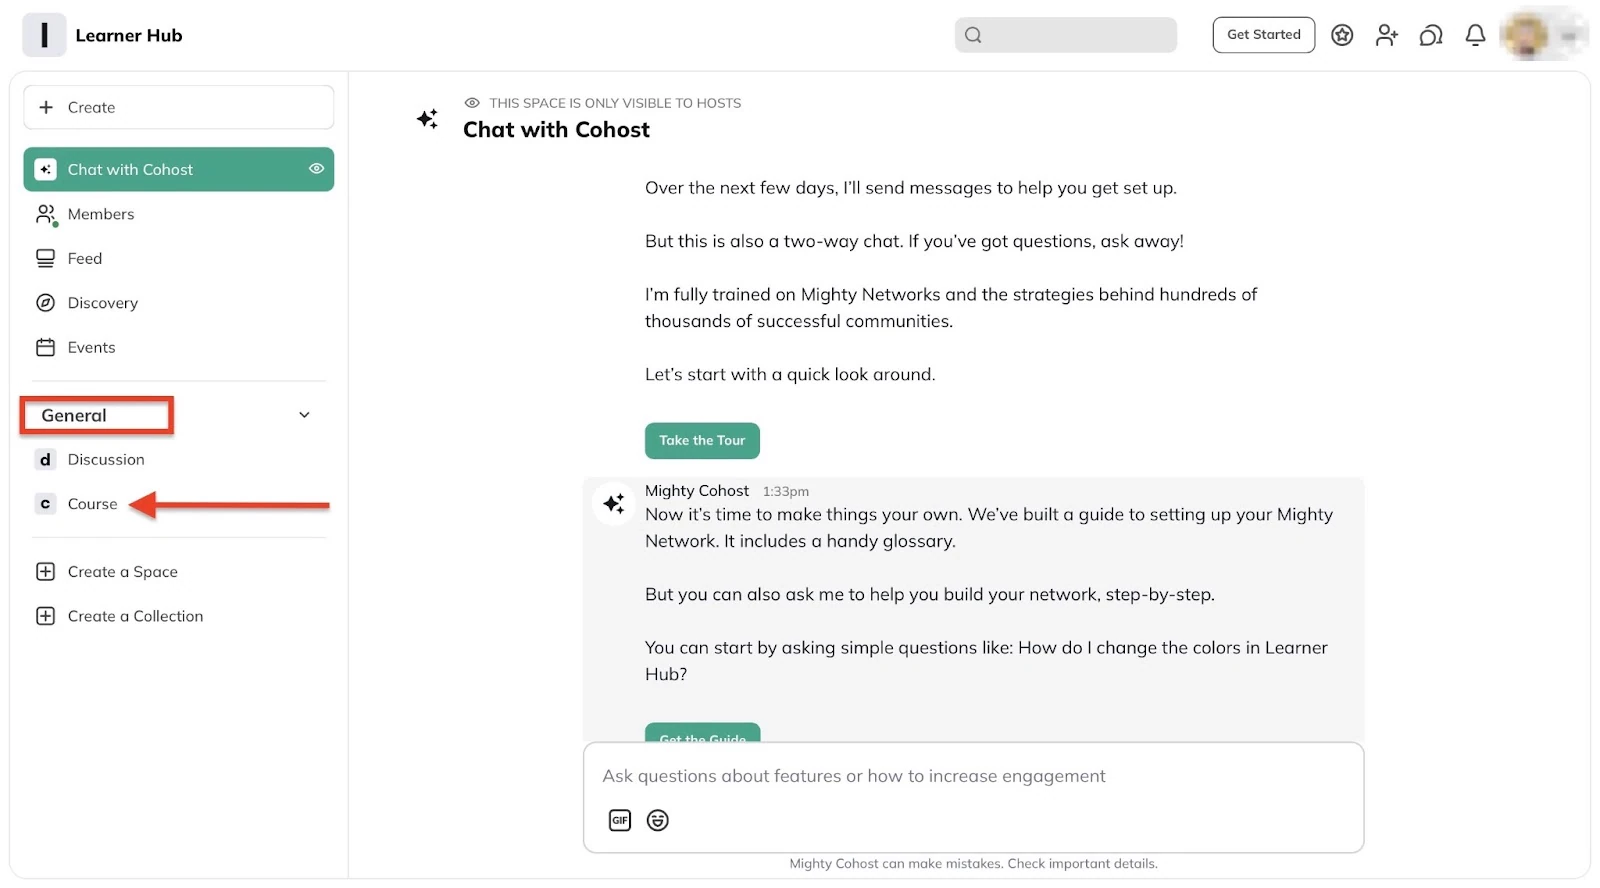
In the course window, click “Get started.” That will let Mighty Networks AI (Co-Host) generate a course outline for you.
In the next window, add your course idea and click “Suggest outline.”
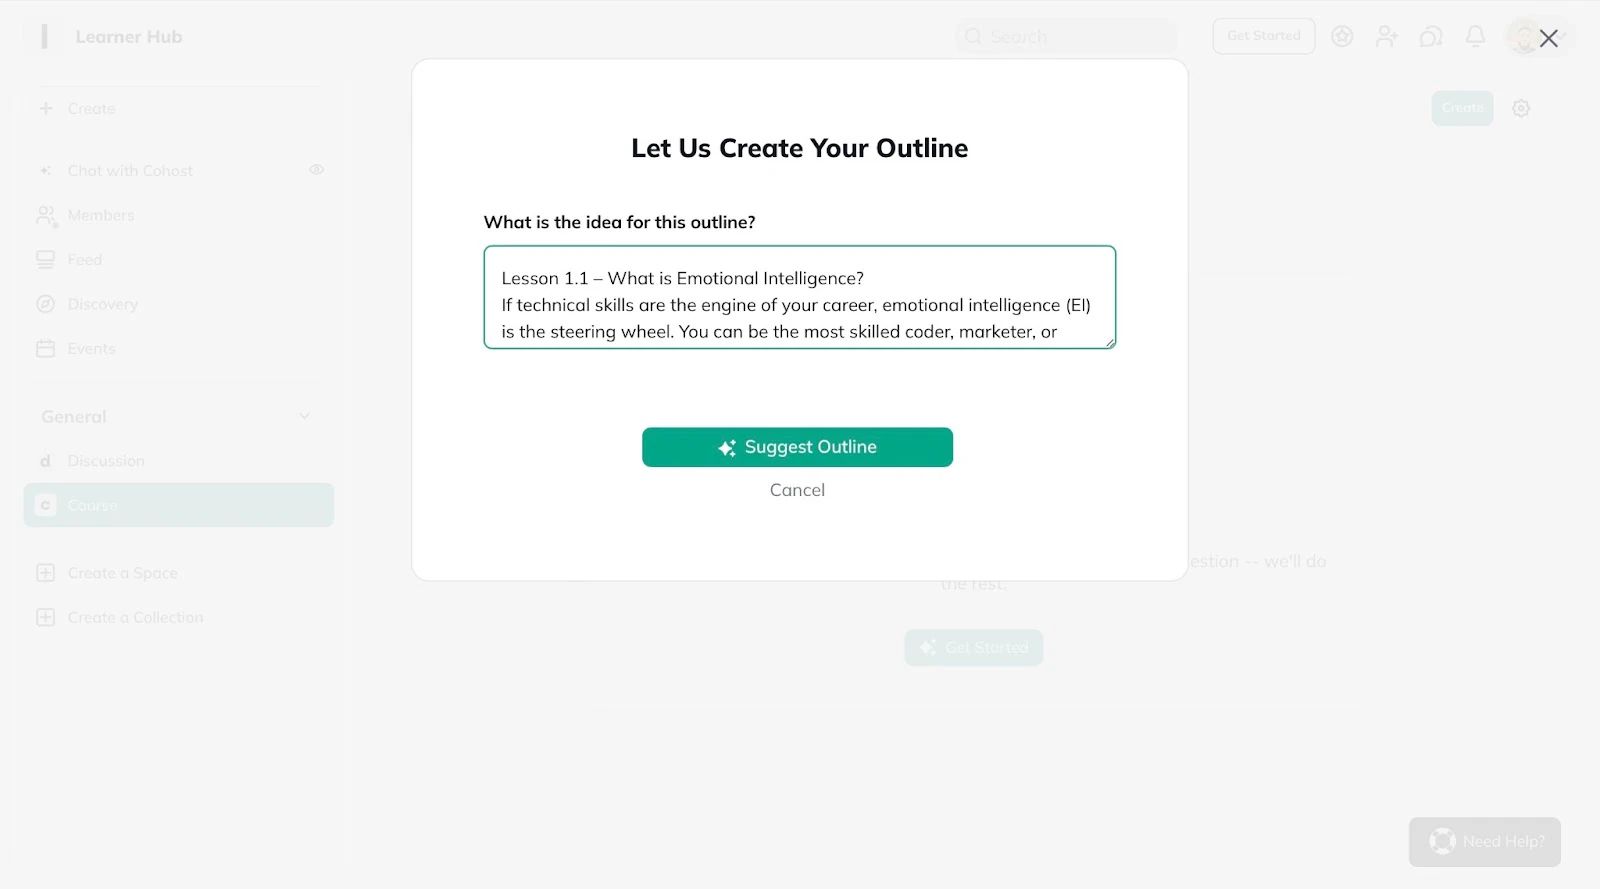
Your outline will be displayed in the course window.
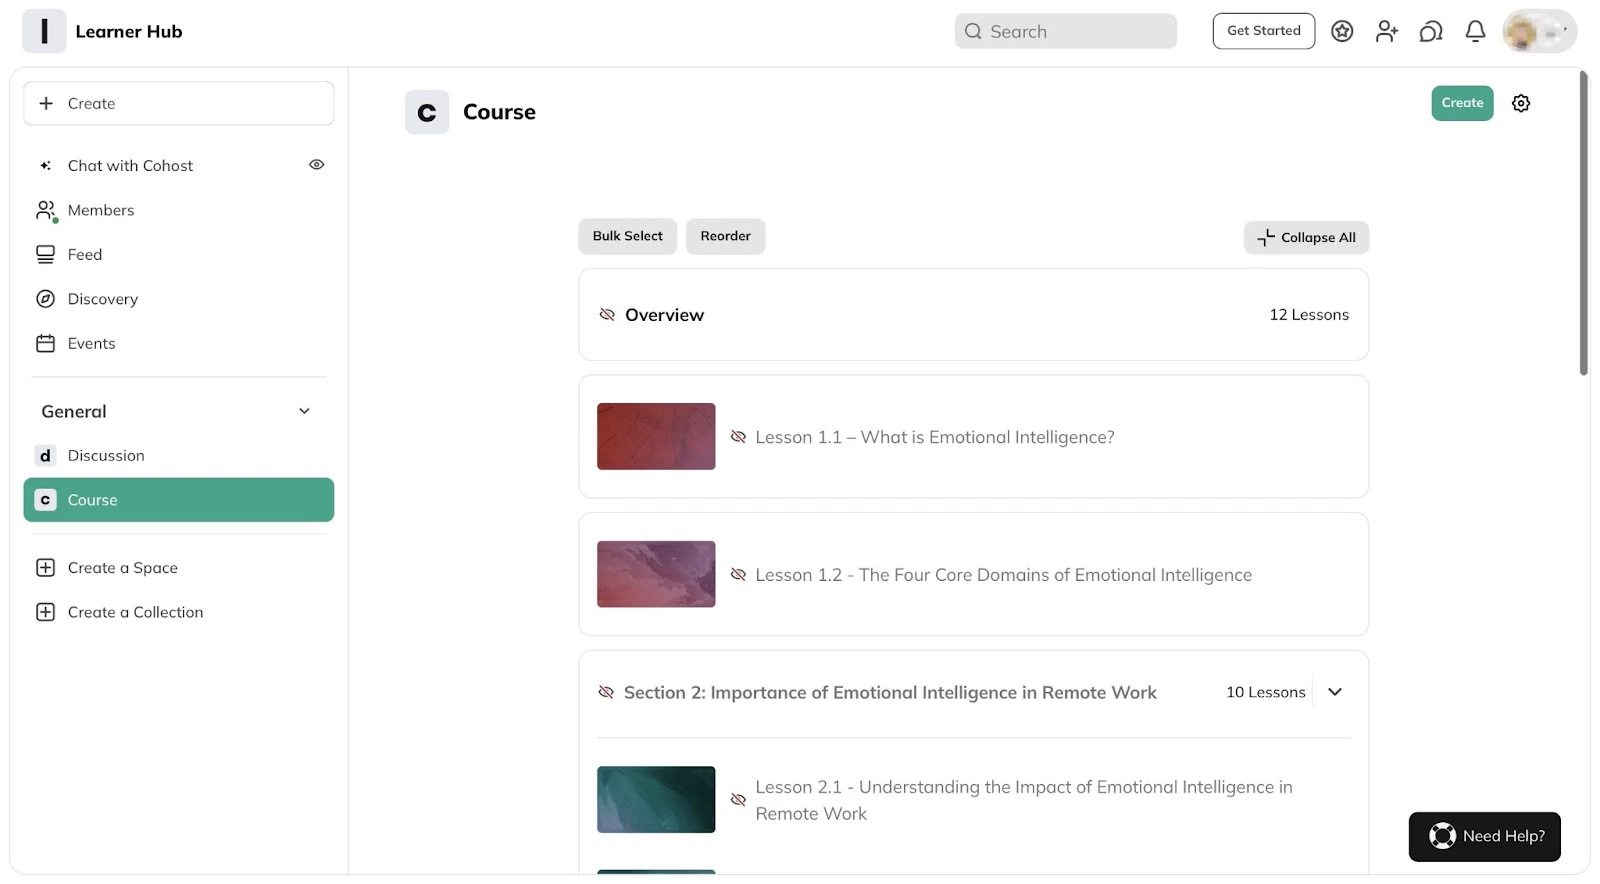
To add lessons to the generated course outline, click on a specific item (on the outline).
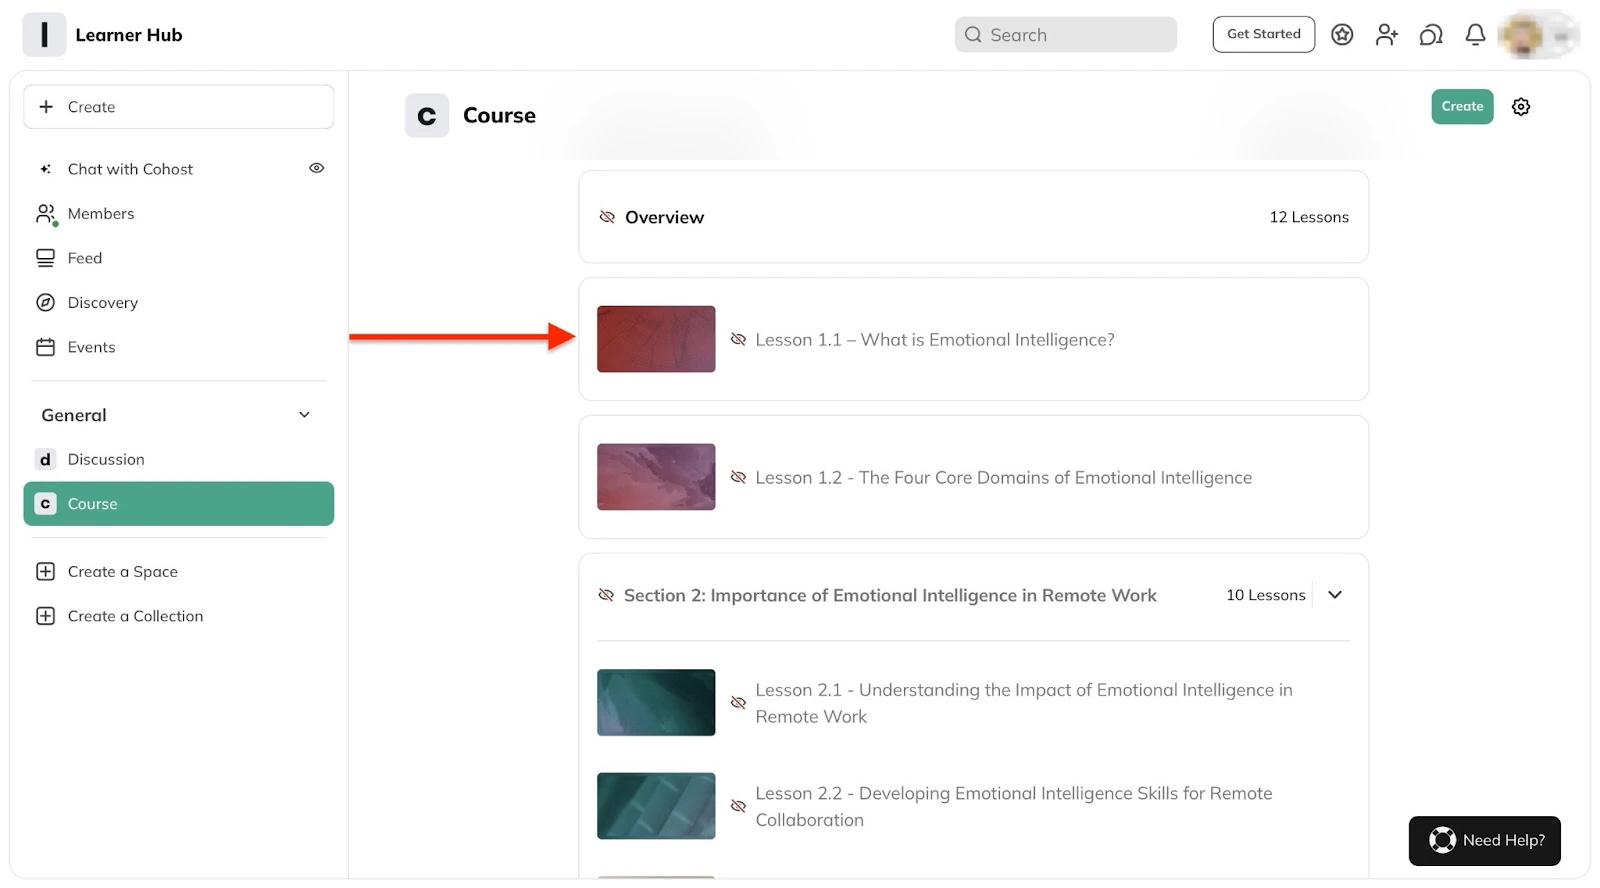
In the pop-up window, click “Edit” to add course content and configure lesson settings.
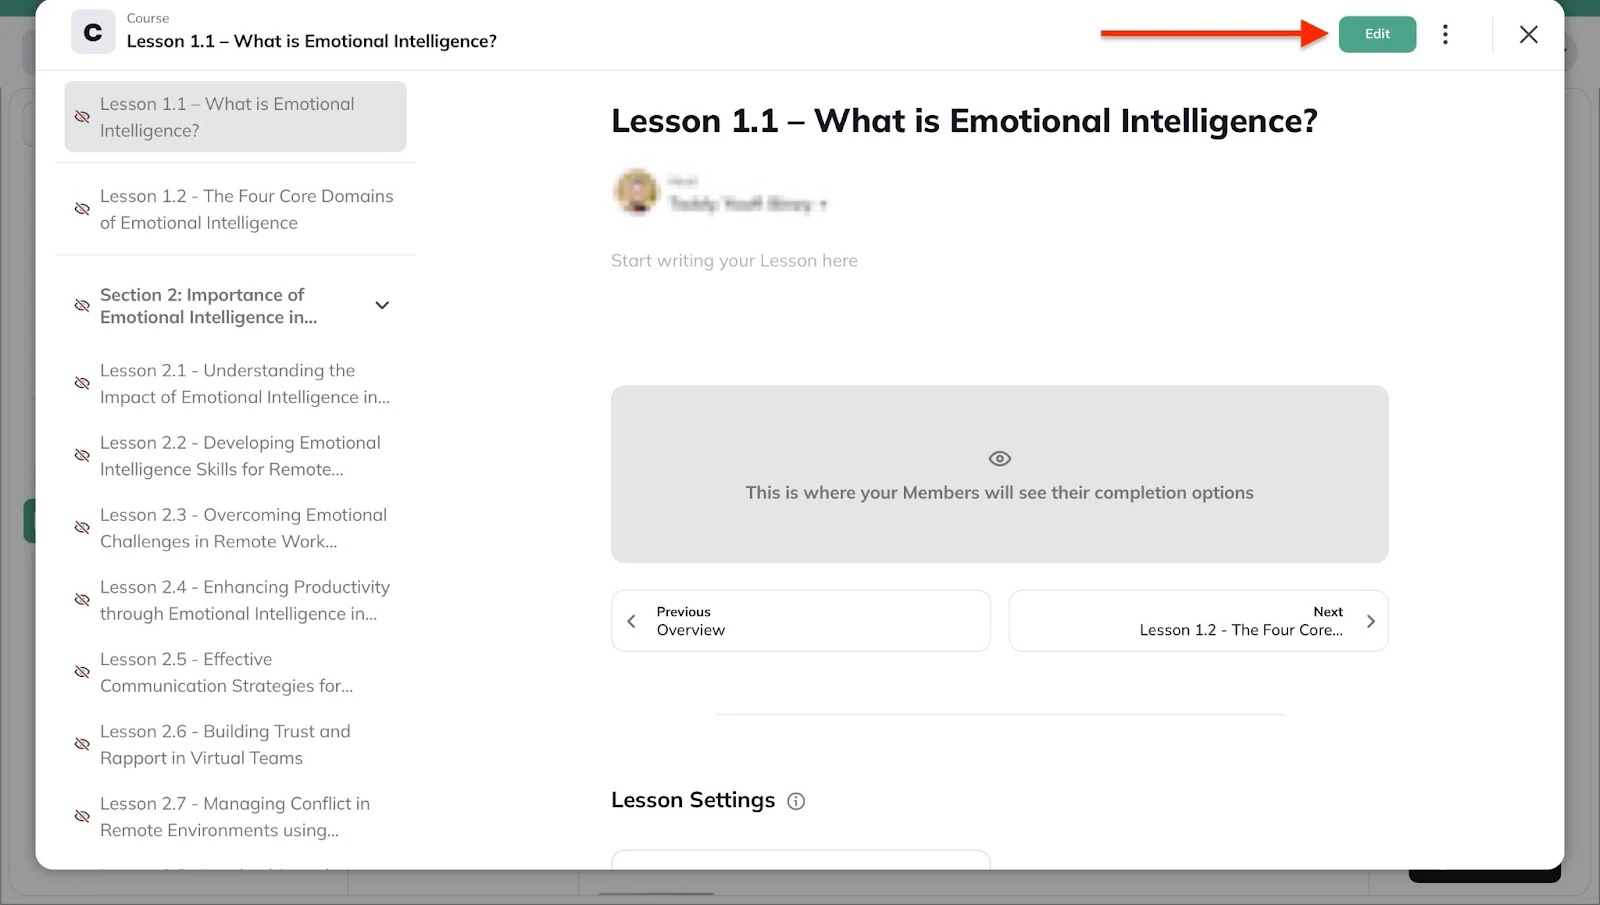
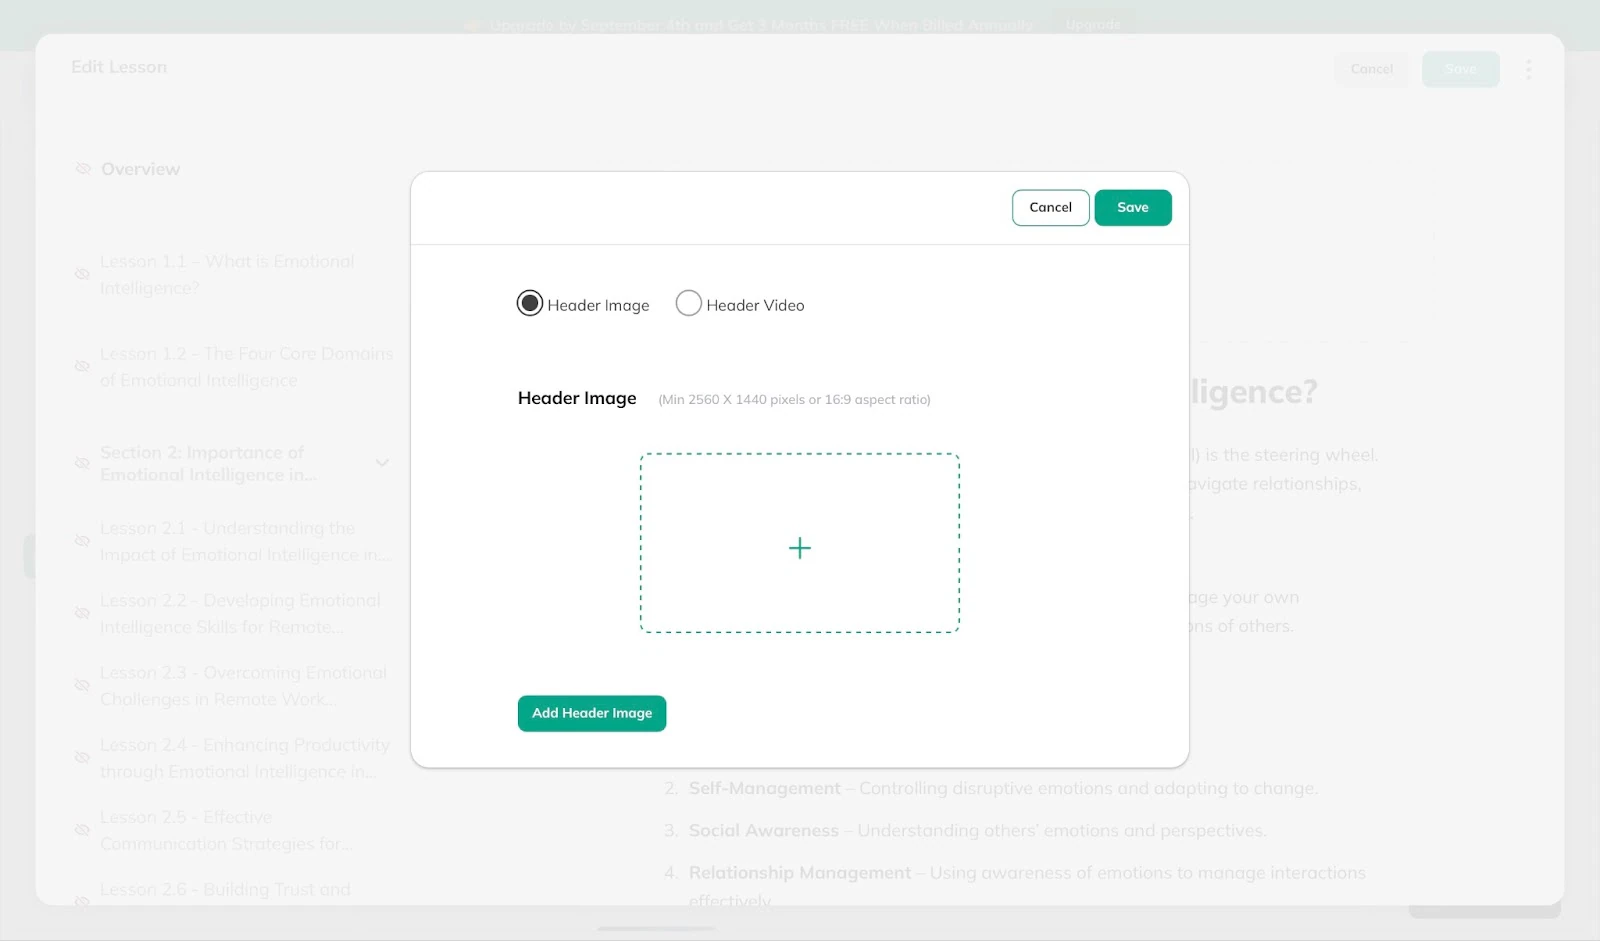
Now, add course contents for that section. Next, add a header video or image and click “Save.”
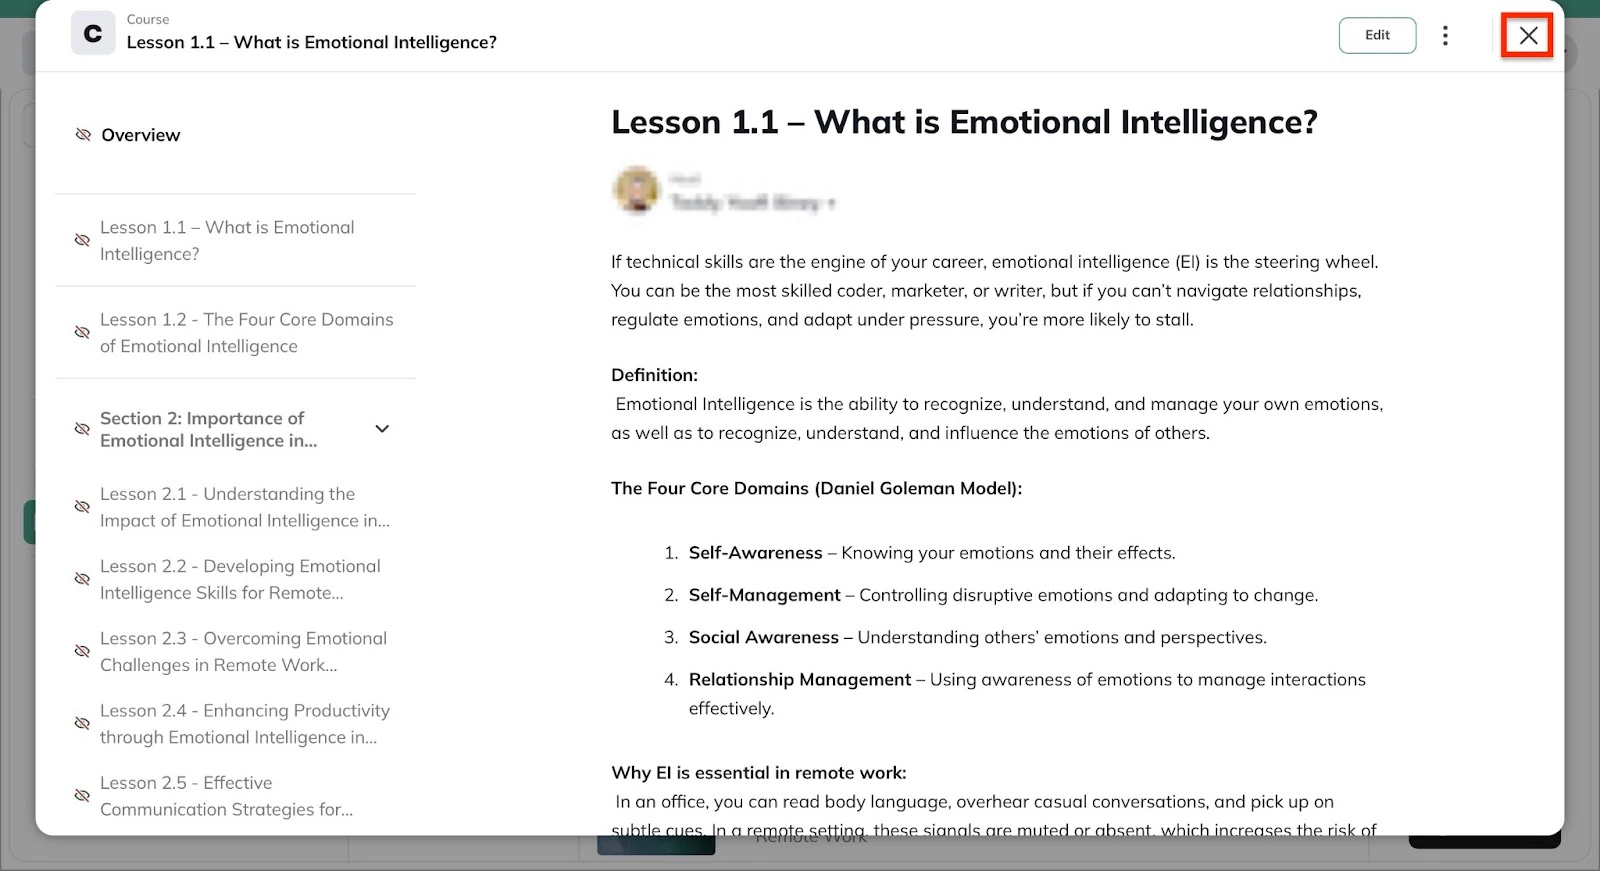
Your course will have new changes. Click the close icon on the pop-up window to return to the courses window.
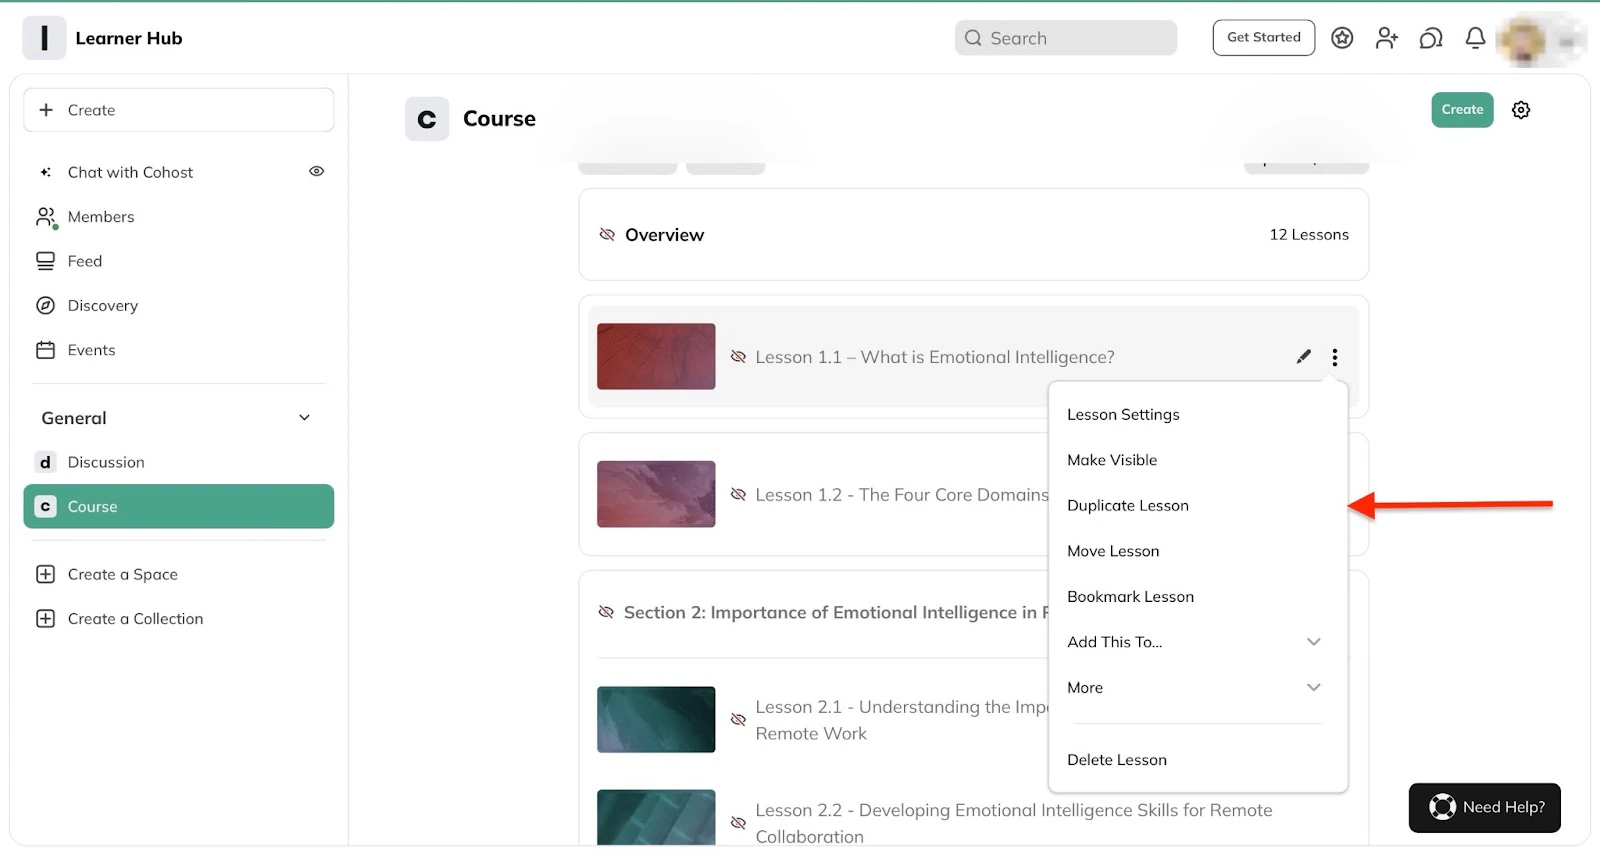
Do the same thing for each item on the course outline. You can click the context menu or edit icon and pick a preferred action.
Key features
1. Create a space
Mighty Networks’ create a space feature allows you to create a new functional area within your network. It showcases the community-first nature of Mighty Networks.
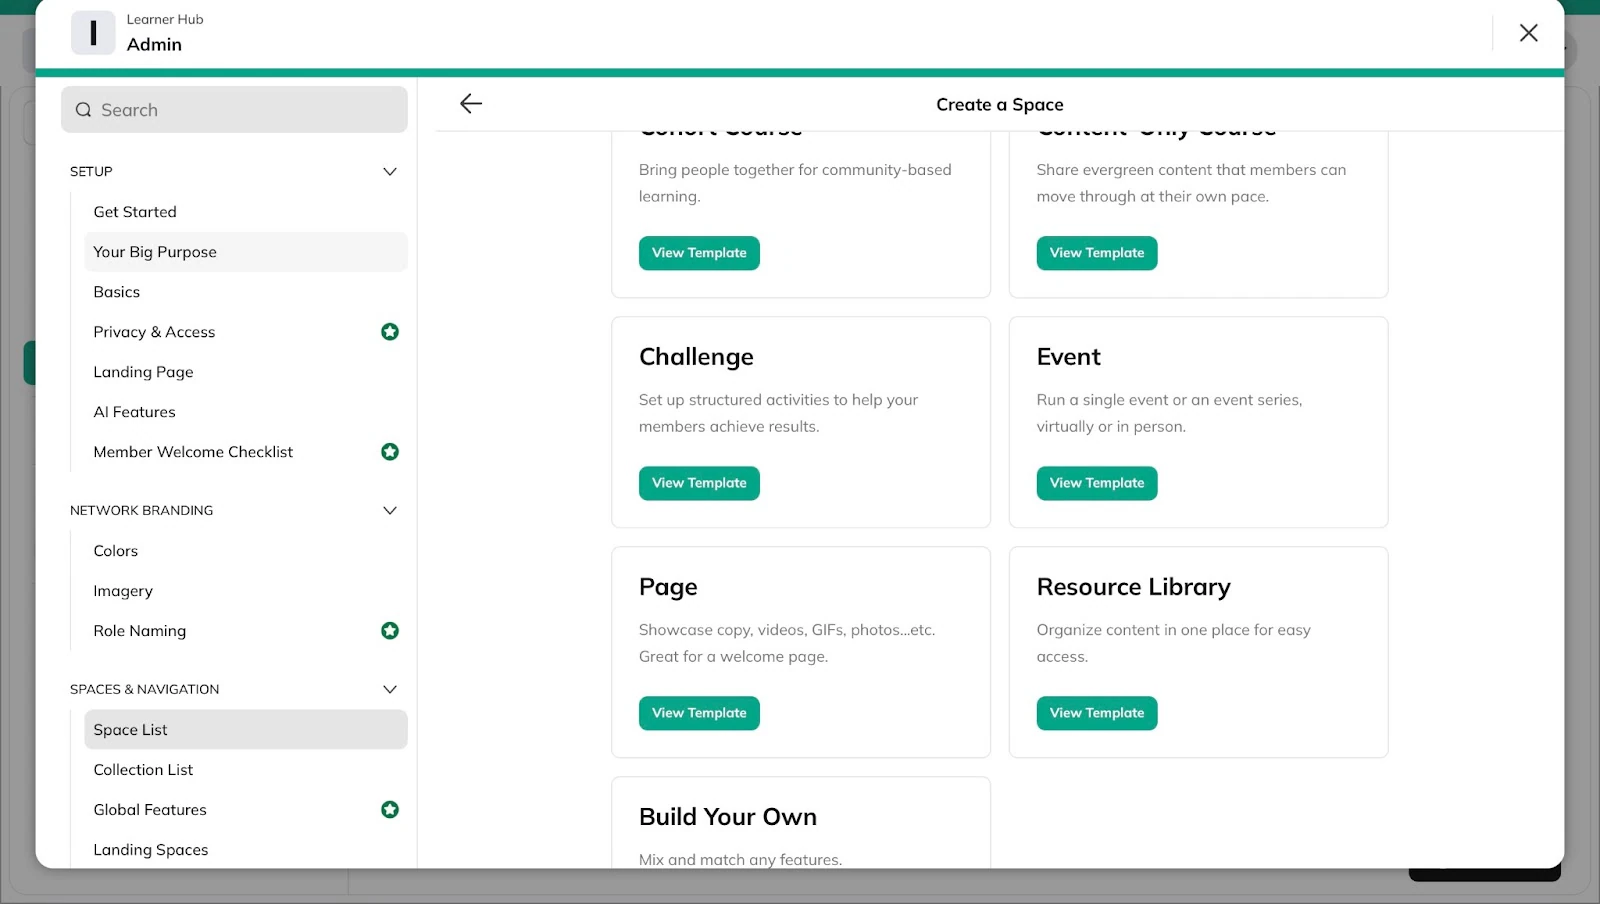
Start by clicking “Create a space” in the sidebar.
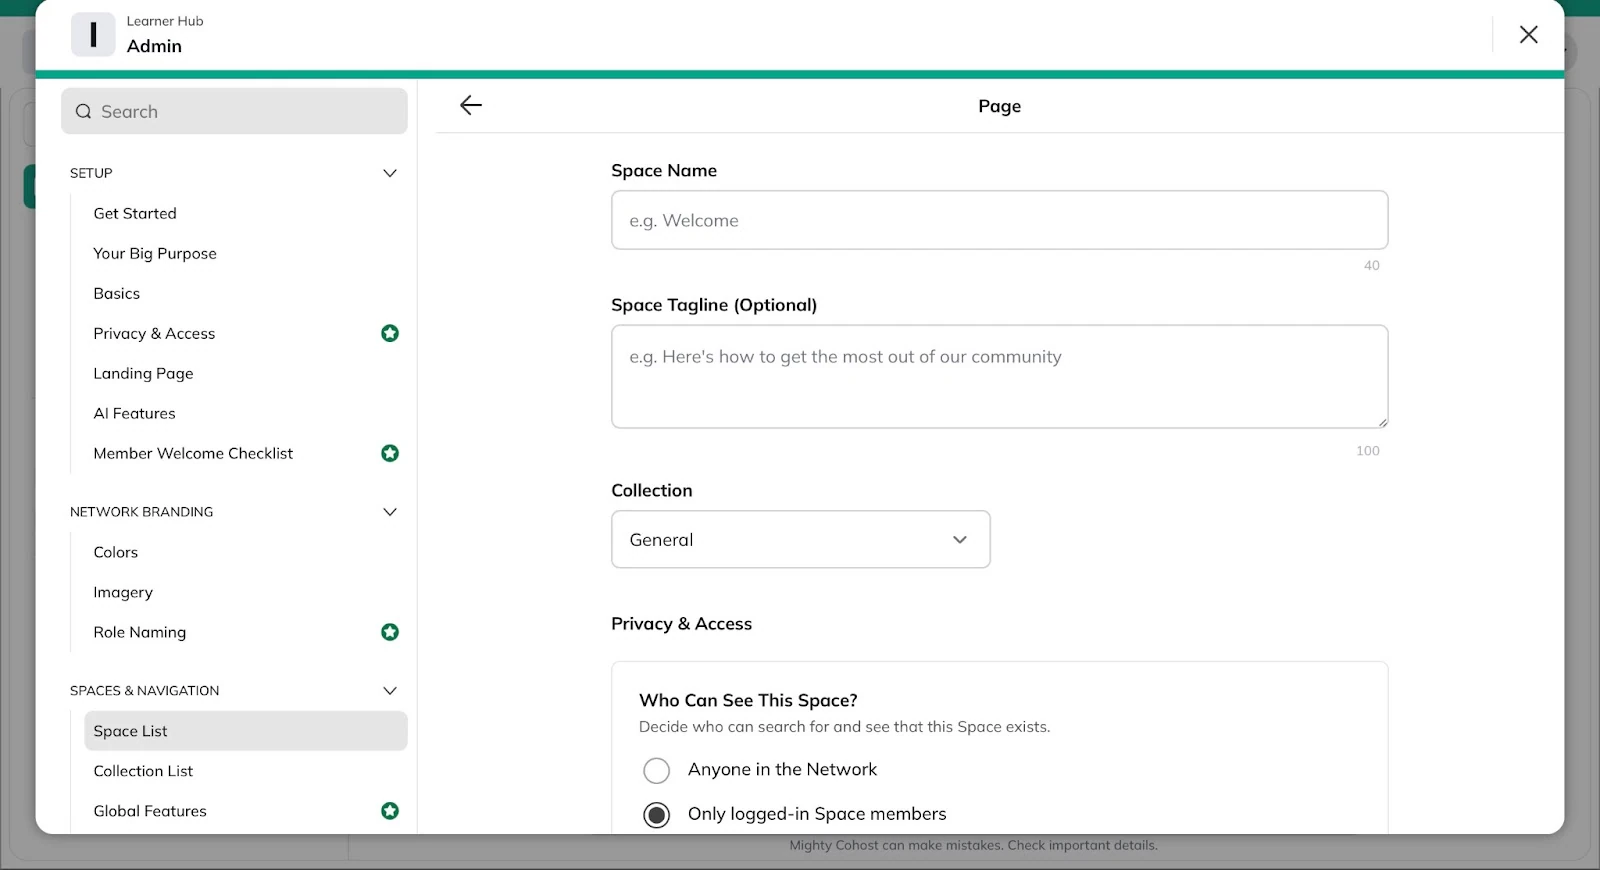
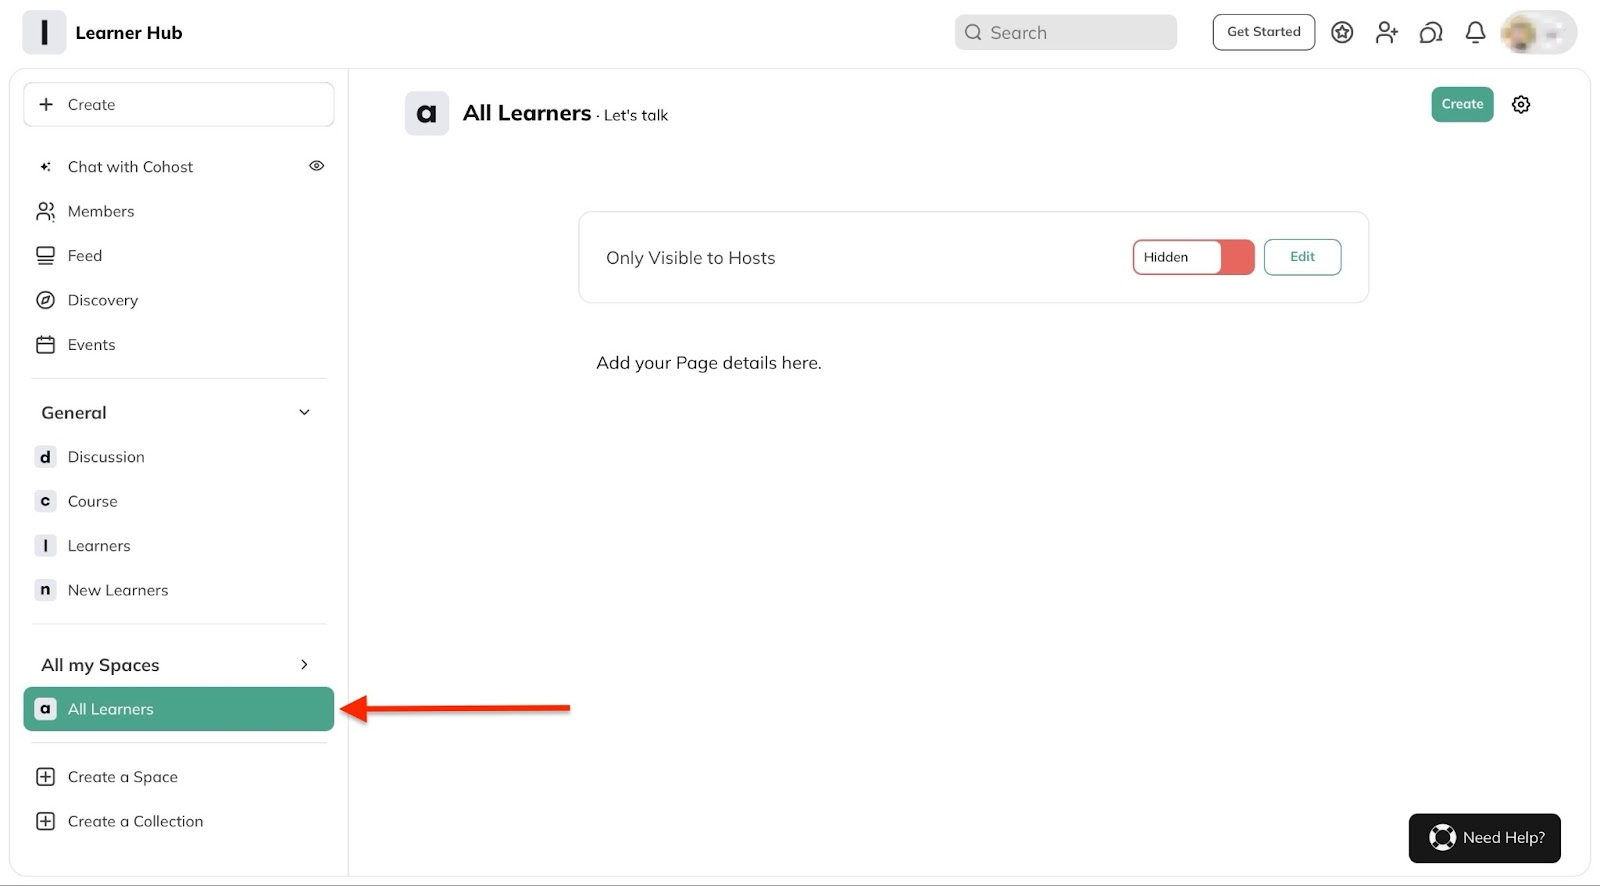
Next, select whether to create space for chat, feed, event, content-only course, etc. Let’s choose the “Page” template.

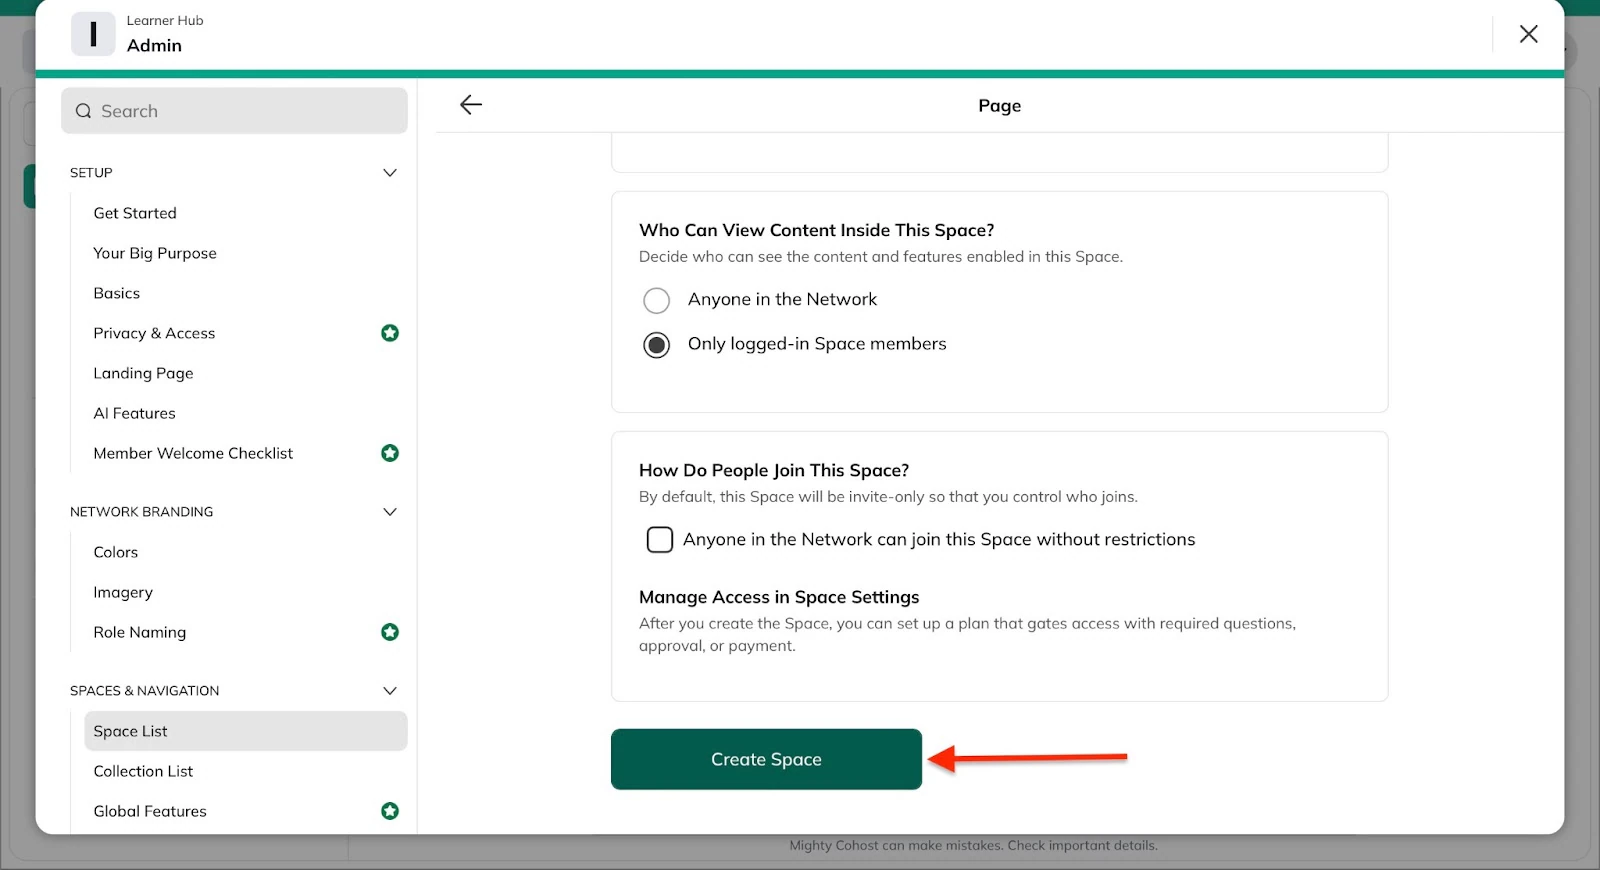
Now, add a name and fill out the necessary fields.
Next, click “Create Space” to finish.
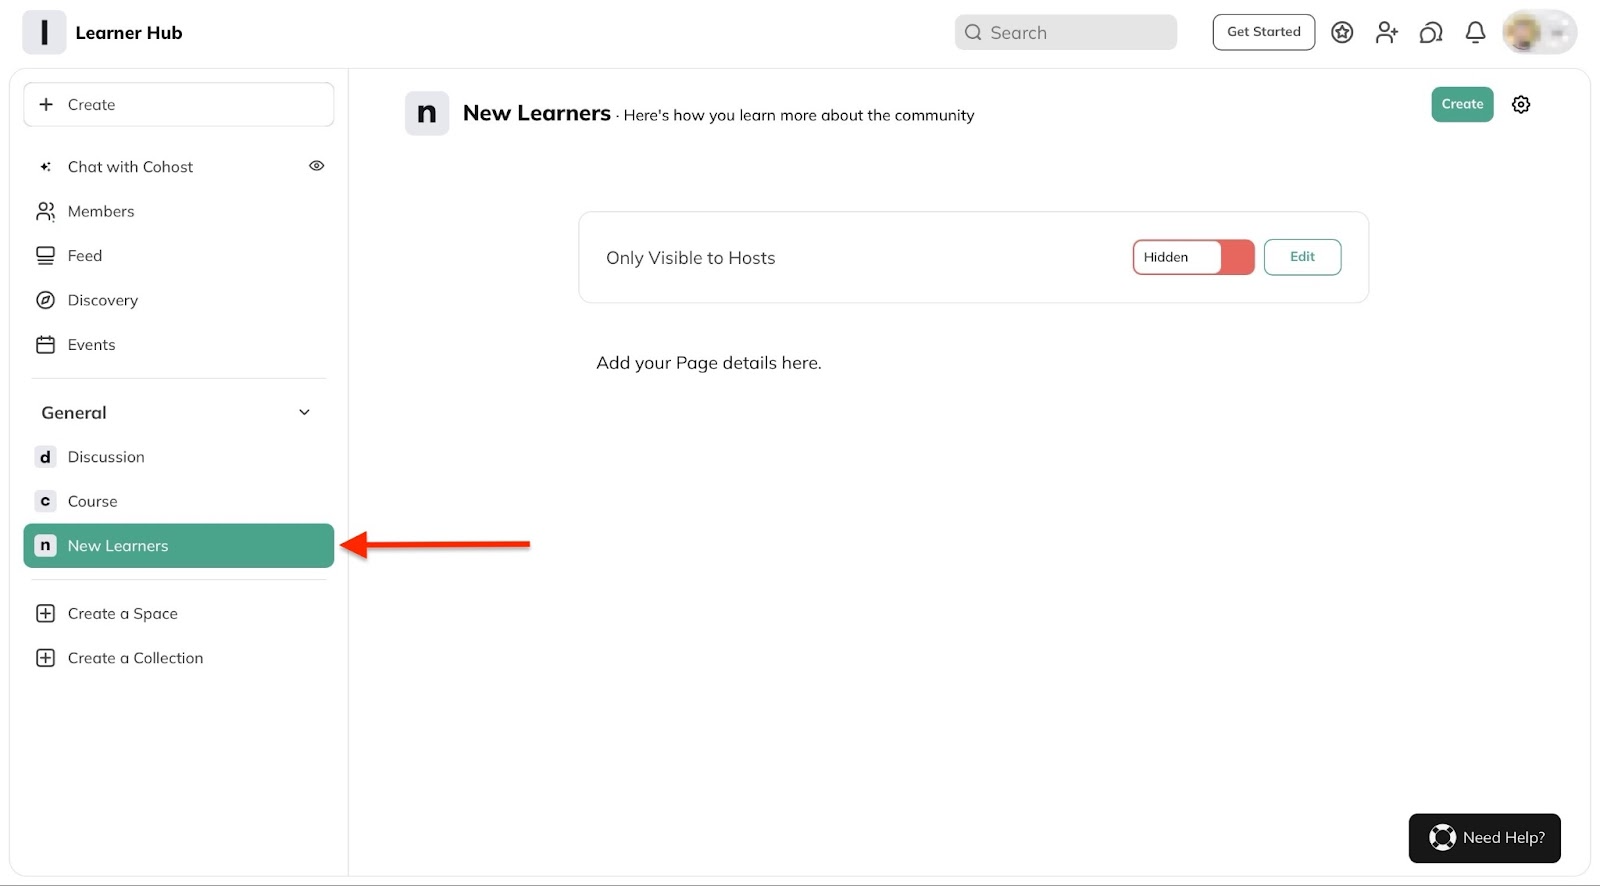
Your new page will be listed under the general section in the sidebar.
2. Create a collection
The create a collection feature lets you group spaces together into a unit.
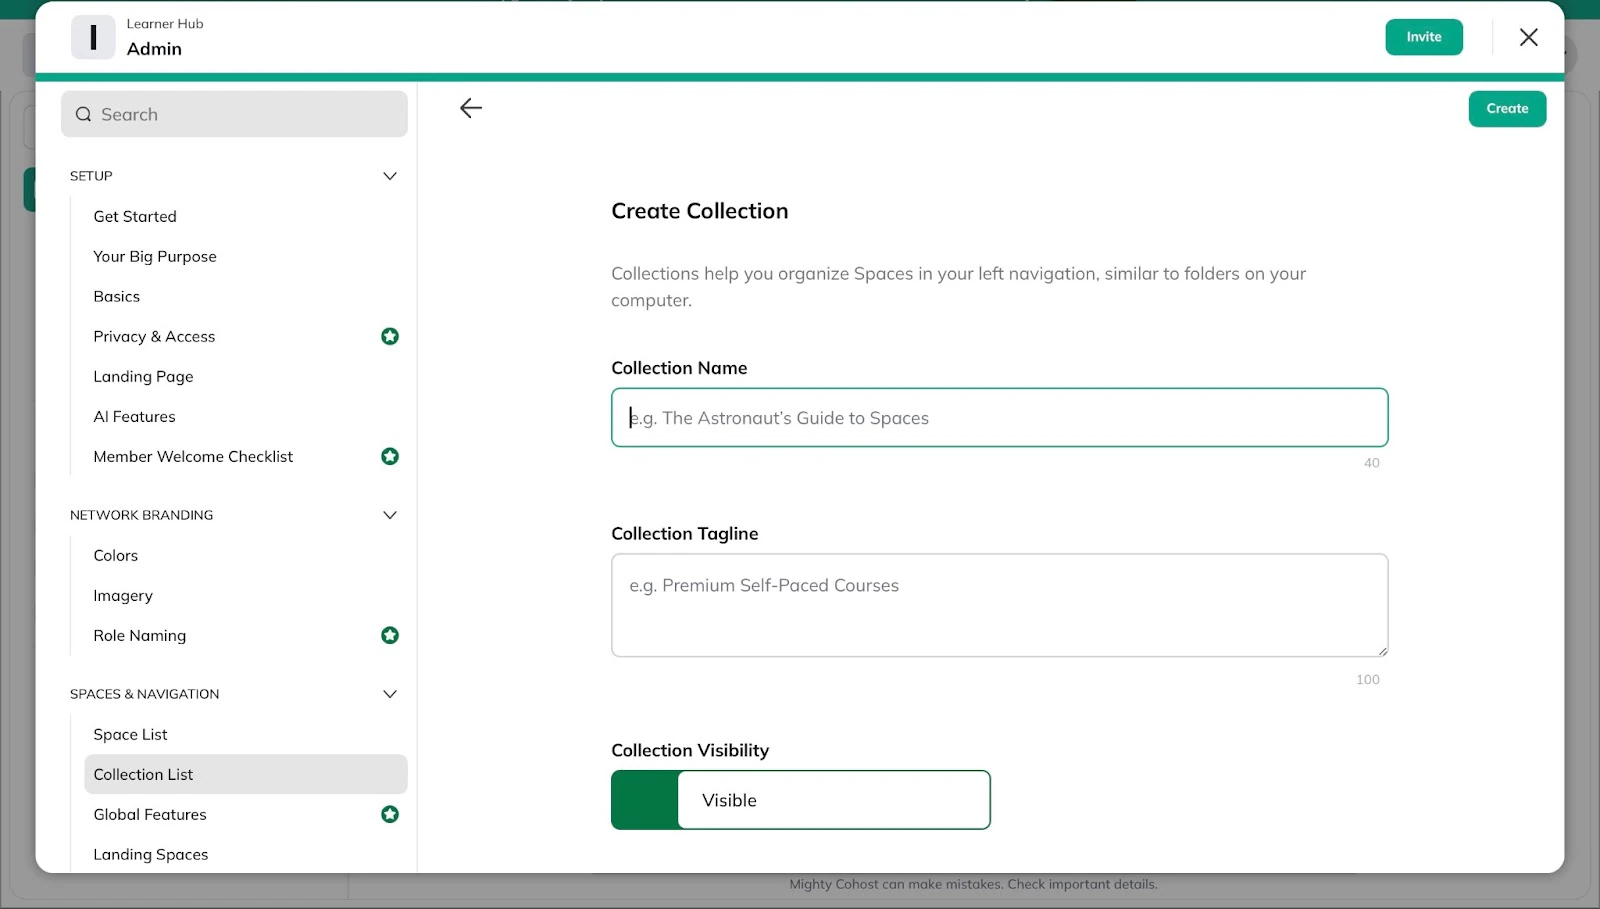
To do this, click “Create a collection” in the sidebar.
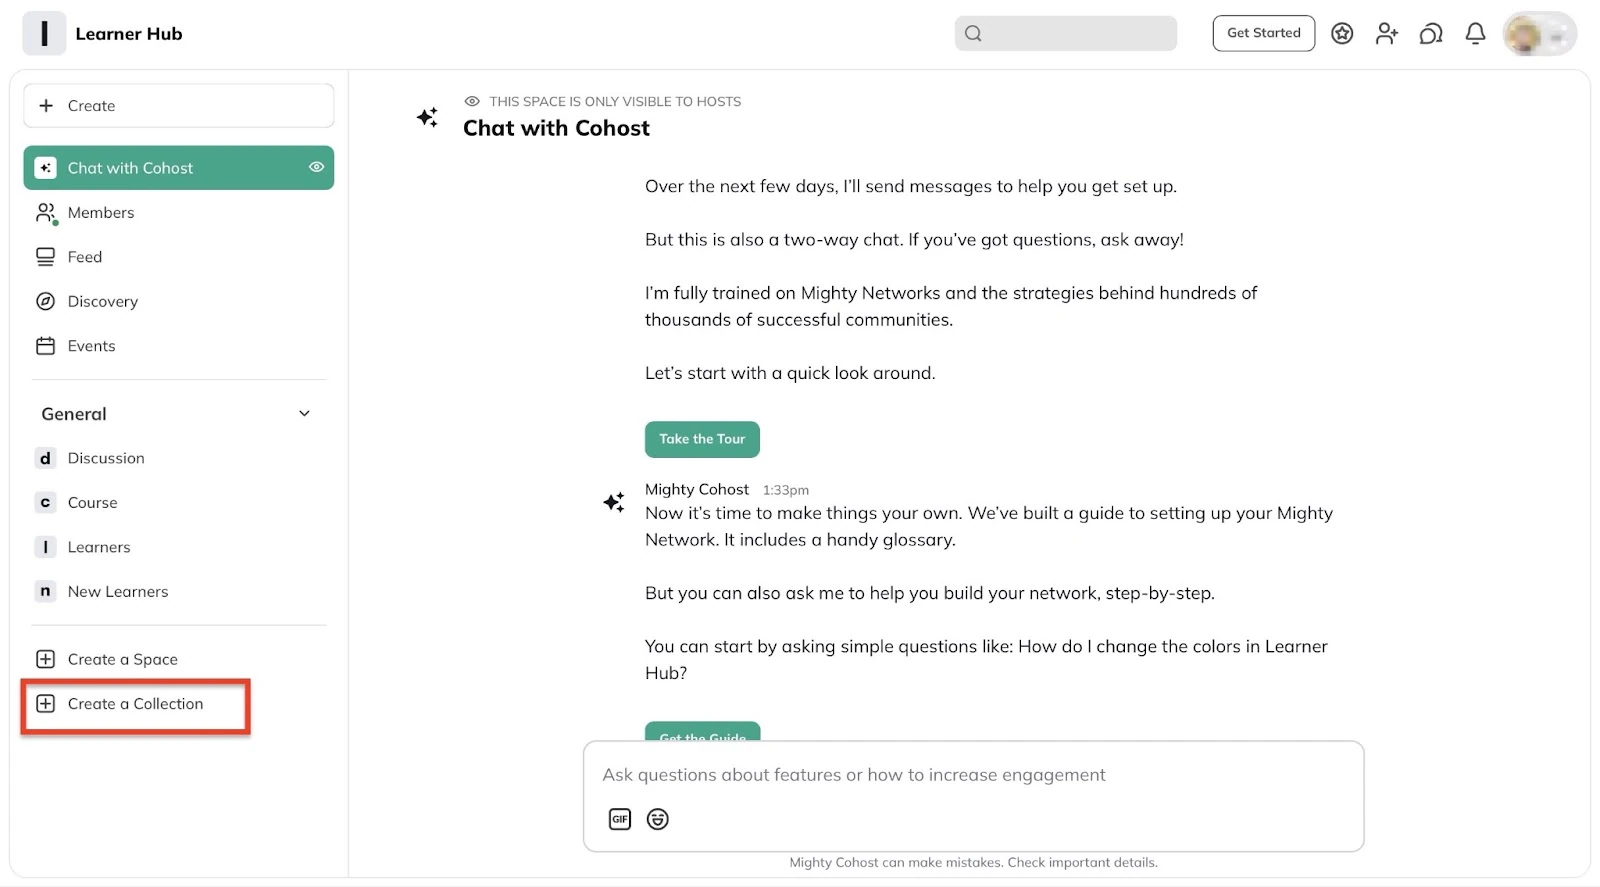
Then, enter the name and tagline of the collection.
Scroll further down and click the “Create a Space here” link.
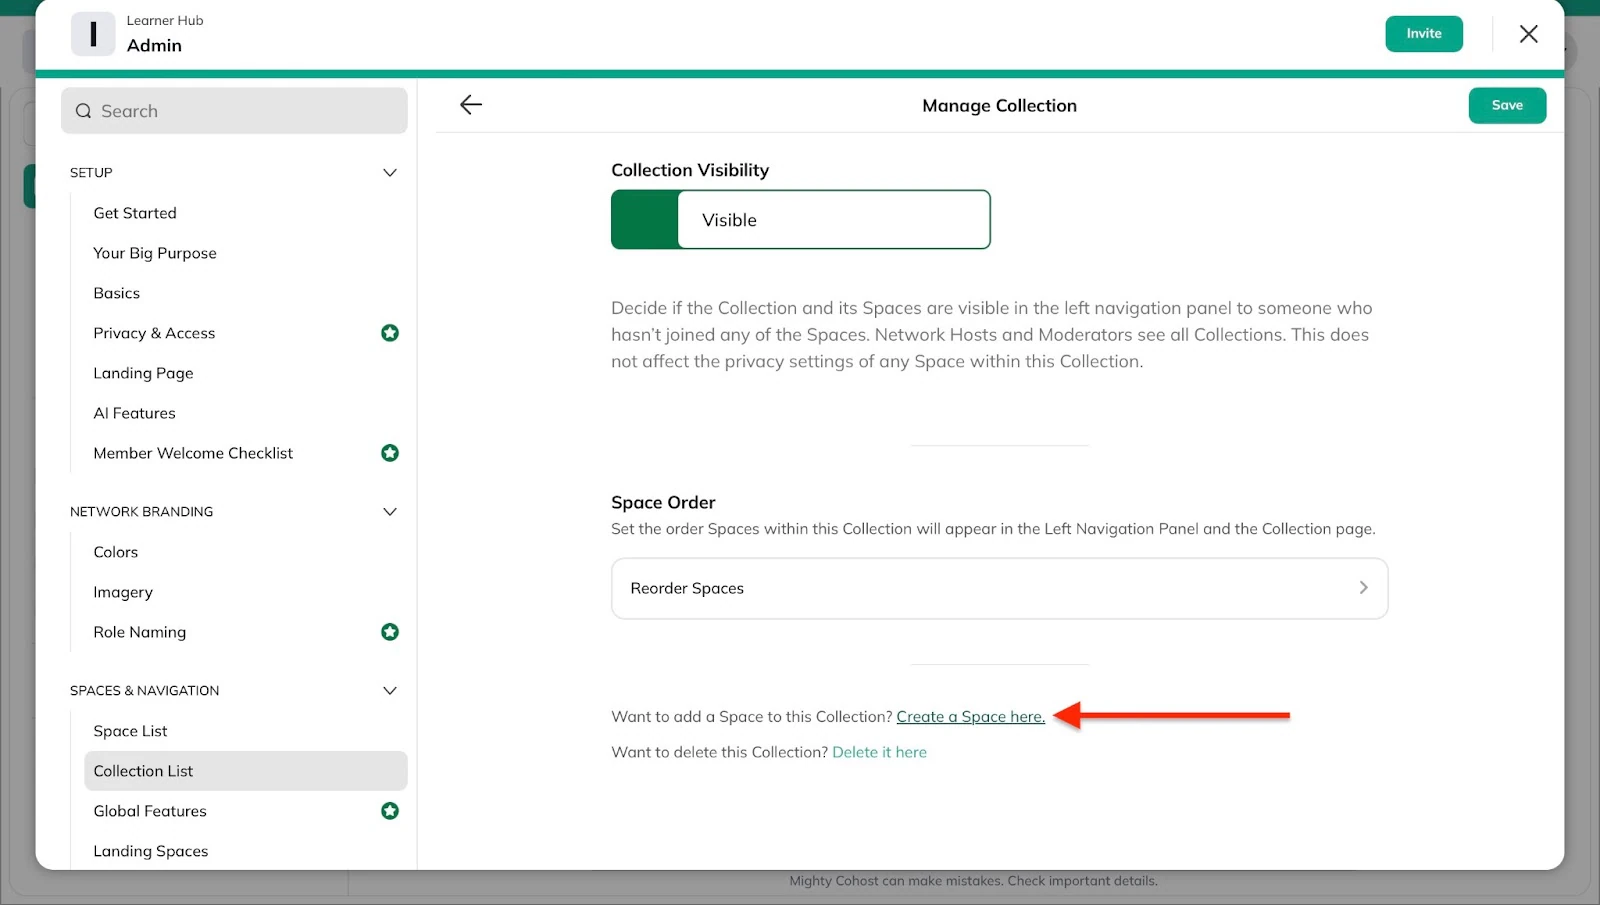
After that, close the window to return to the “Create a collection” feature window.
Best for
- Course creators, coaches, and communities wanting to combine online courses with a strong community and membership experience.
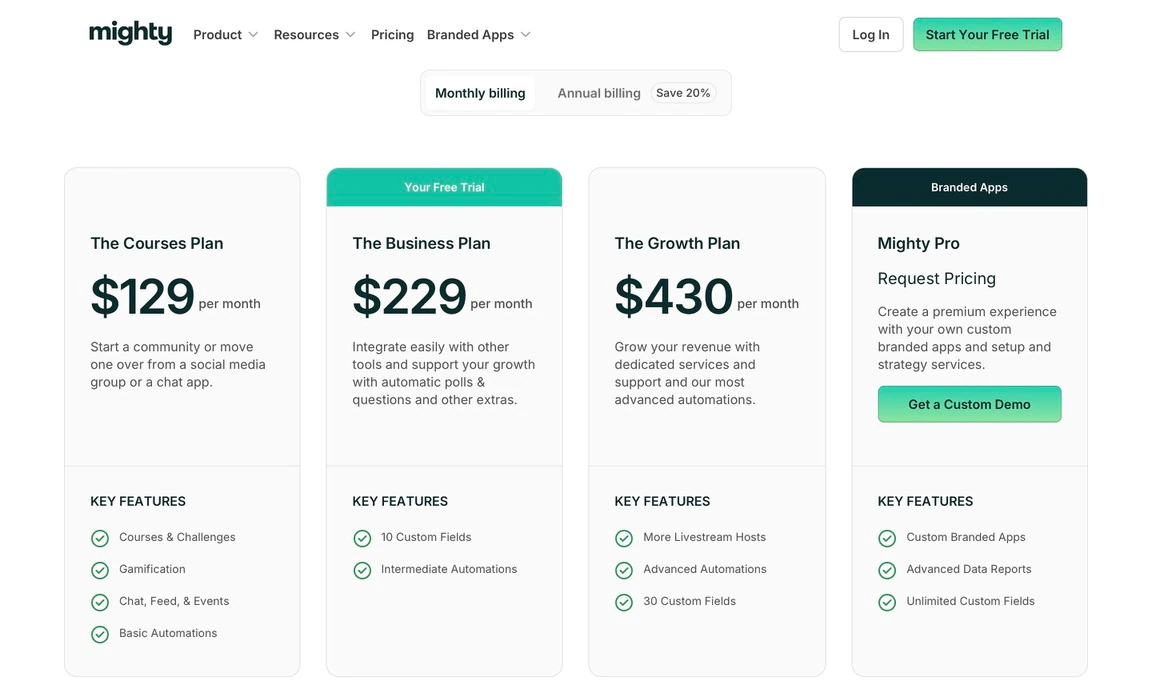
Pricing
-
The Community Plan: $49/month
-
The Courses Plan: $129/month
-
The Business Plan: $229/month
-
The Growth Plan: $430/month
-
Mighty Pro: Contact for pricing
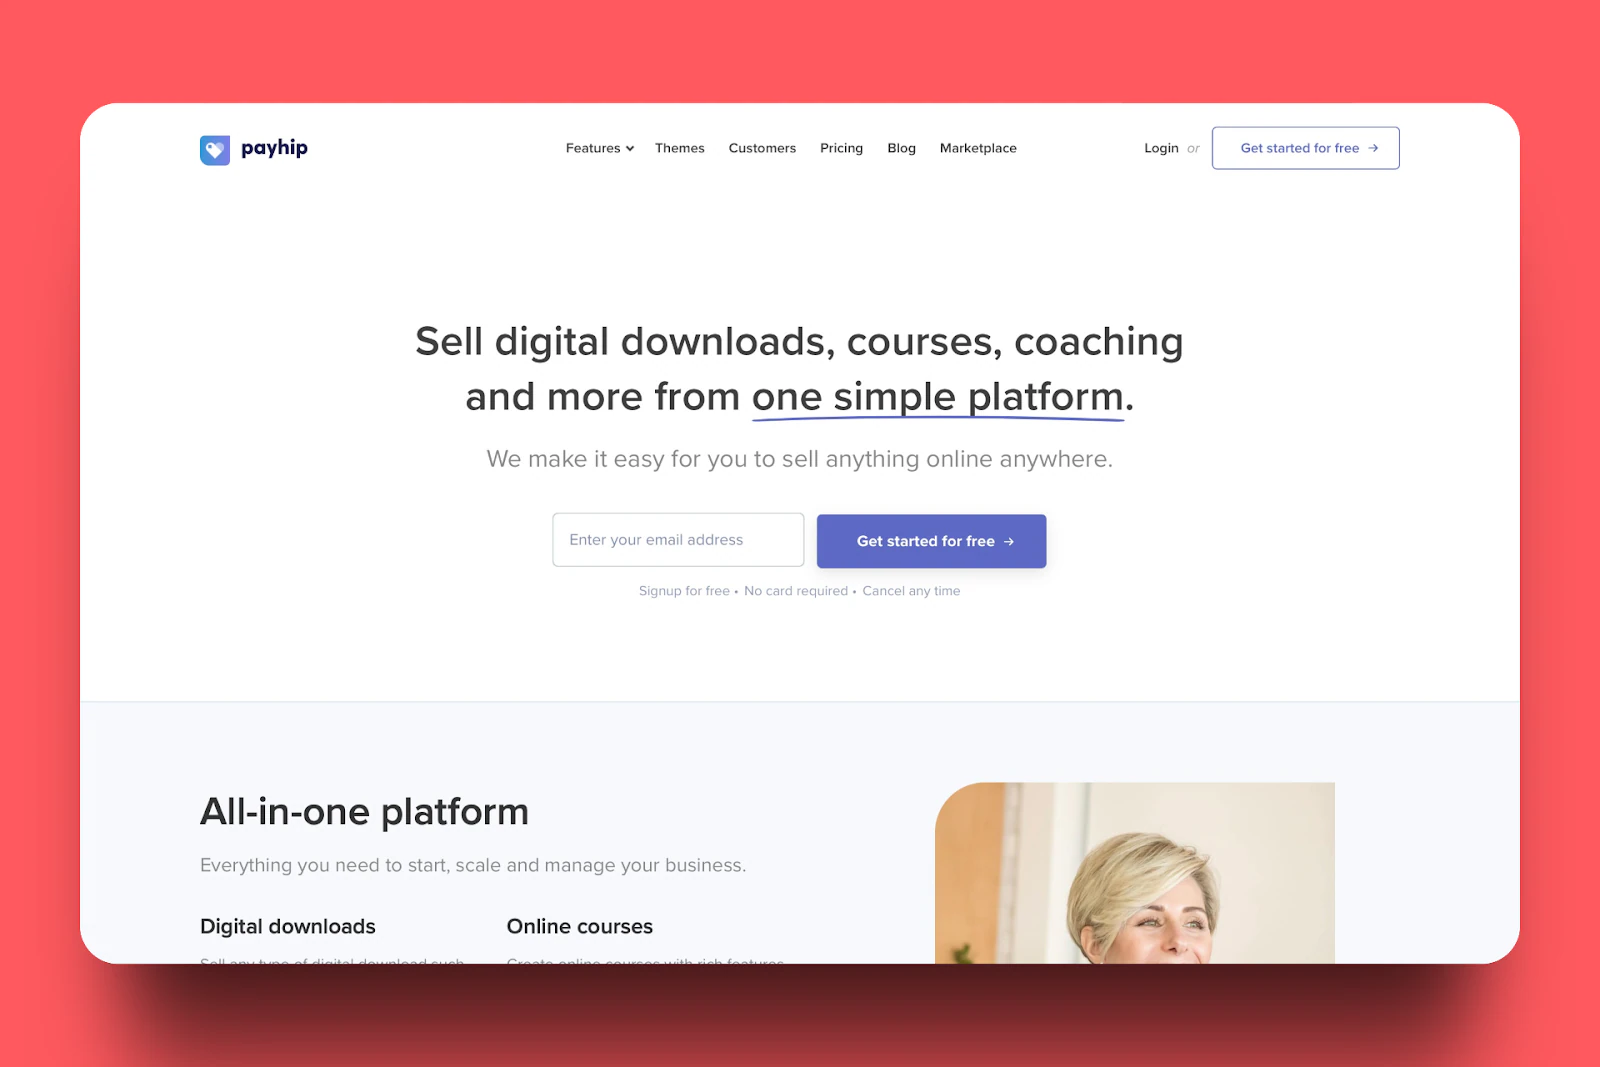
9. Payhip
The final best online course platform on this list is Payhip. This is an online course platform for selling memberships, courses, coaching services, and digital products.
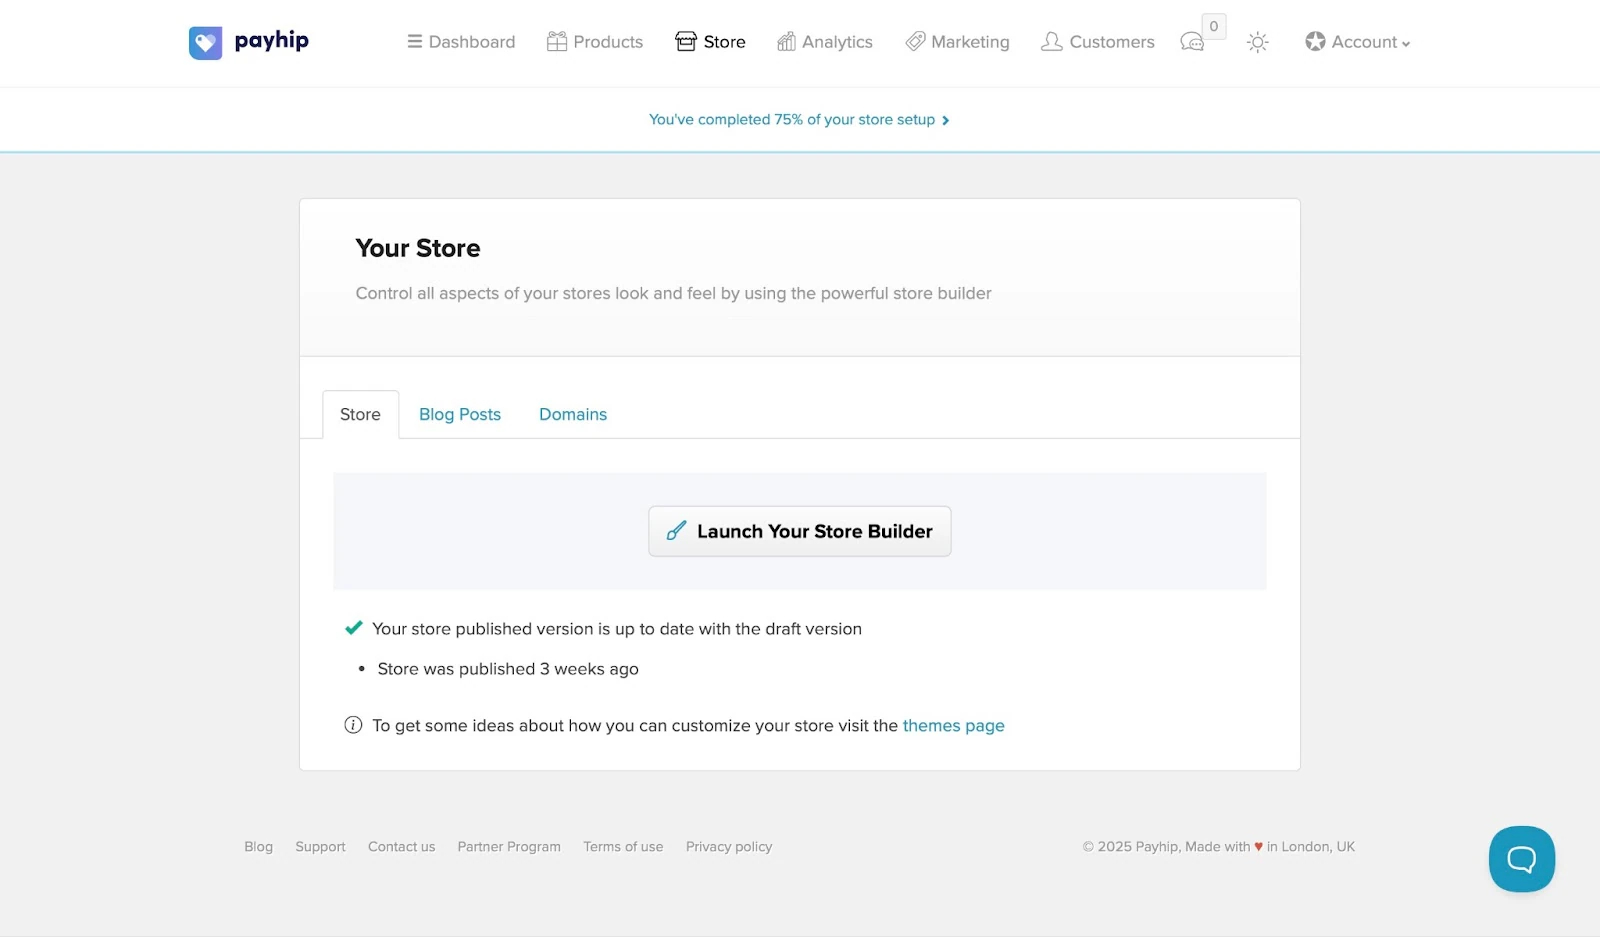
With Payhip’s store feature, you have the option to create a storefront, add blog posts, and connect your existing website domains.
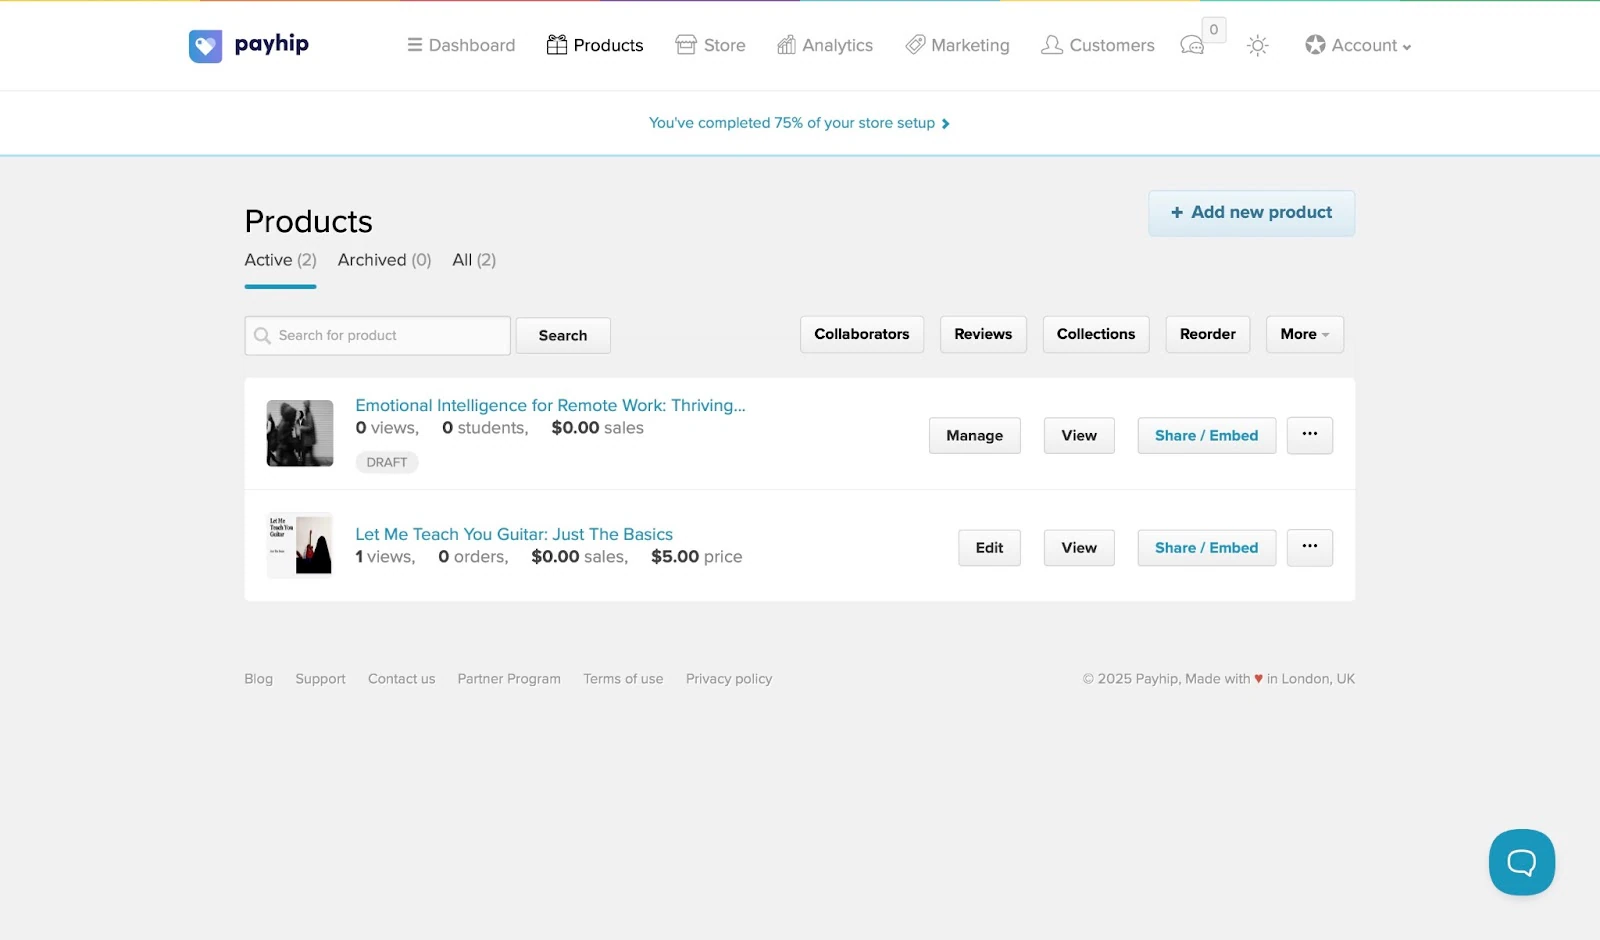
Payhip’s products feature makes it possible to add new courses, memberships, digital and physical products, as well as coaching services. Moreover, you can view, edit, manage, and share your listed digital products.
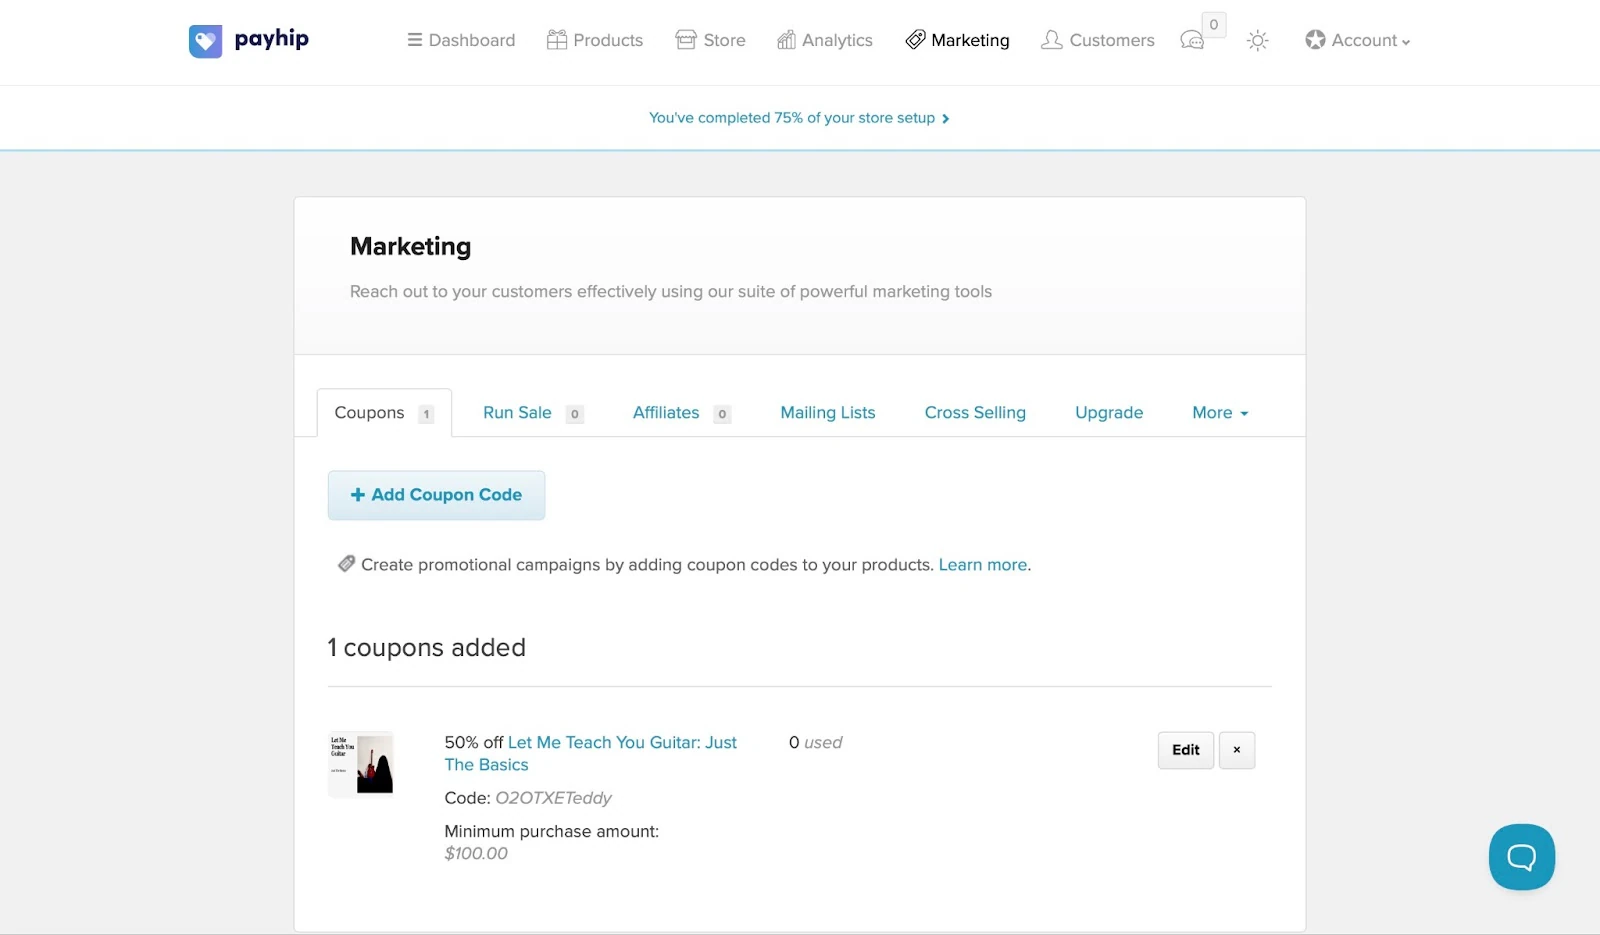
With its marketing feature, Payhip lets you create coupons, sign up affiliates, set up a mailing list, cross-sell, and implement other marketing strategies.
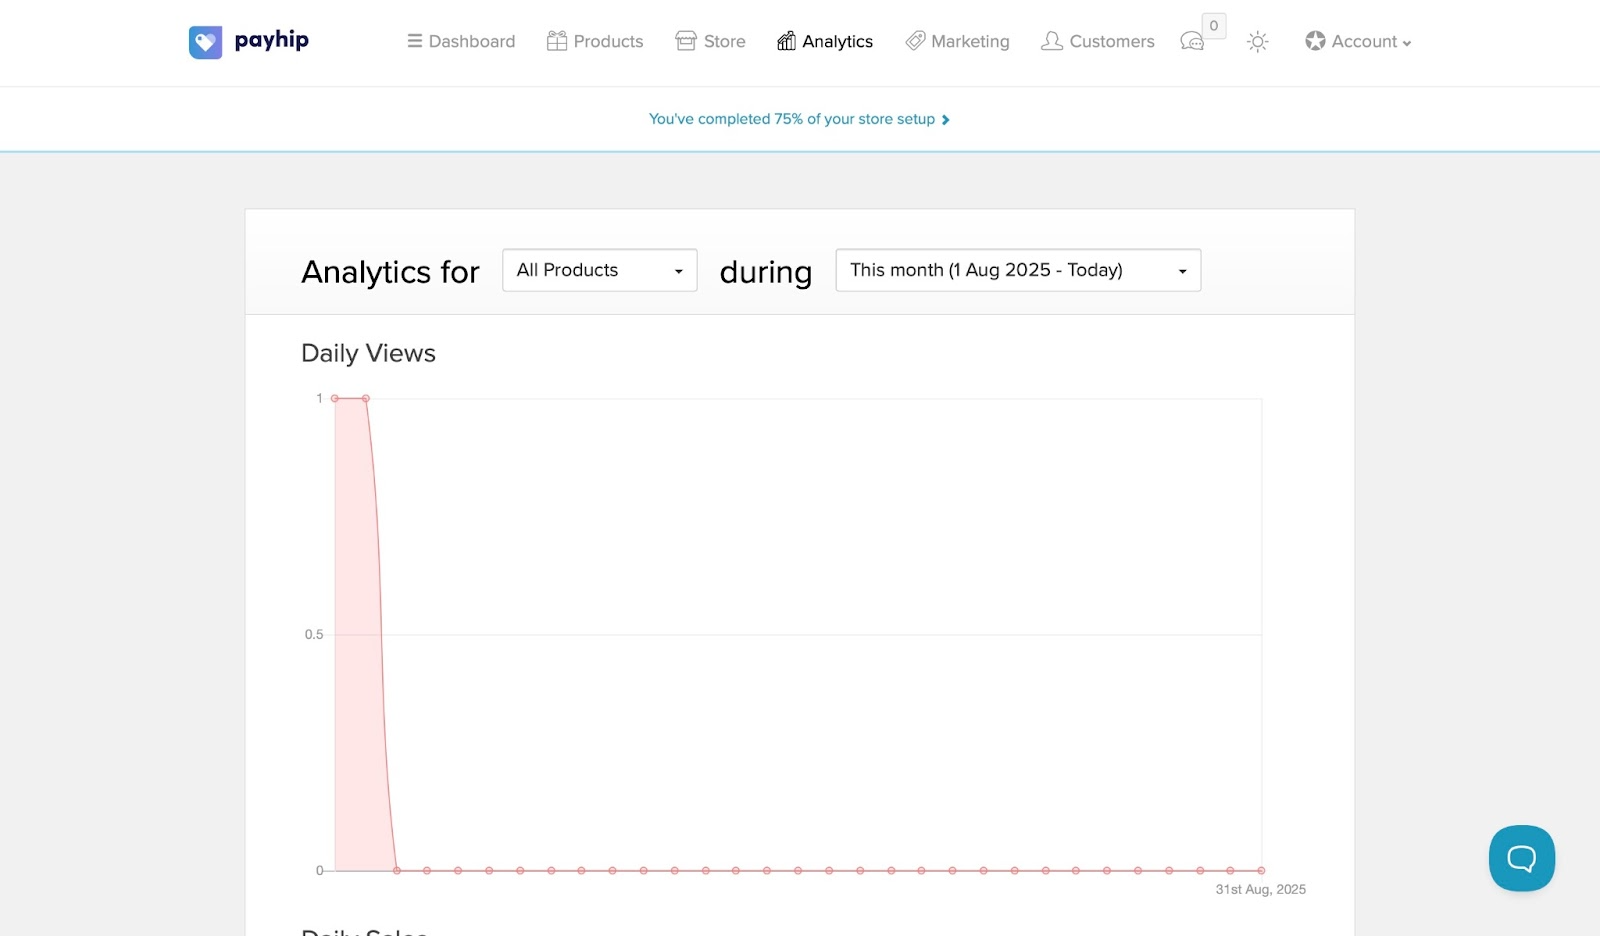
There is more. The analytics feature allows you to track views and sales performance. You can also view sales breakdown, conversion rate, and visitor maps.
In the next few steps, I’ll show you how to create a course on Payhip.
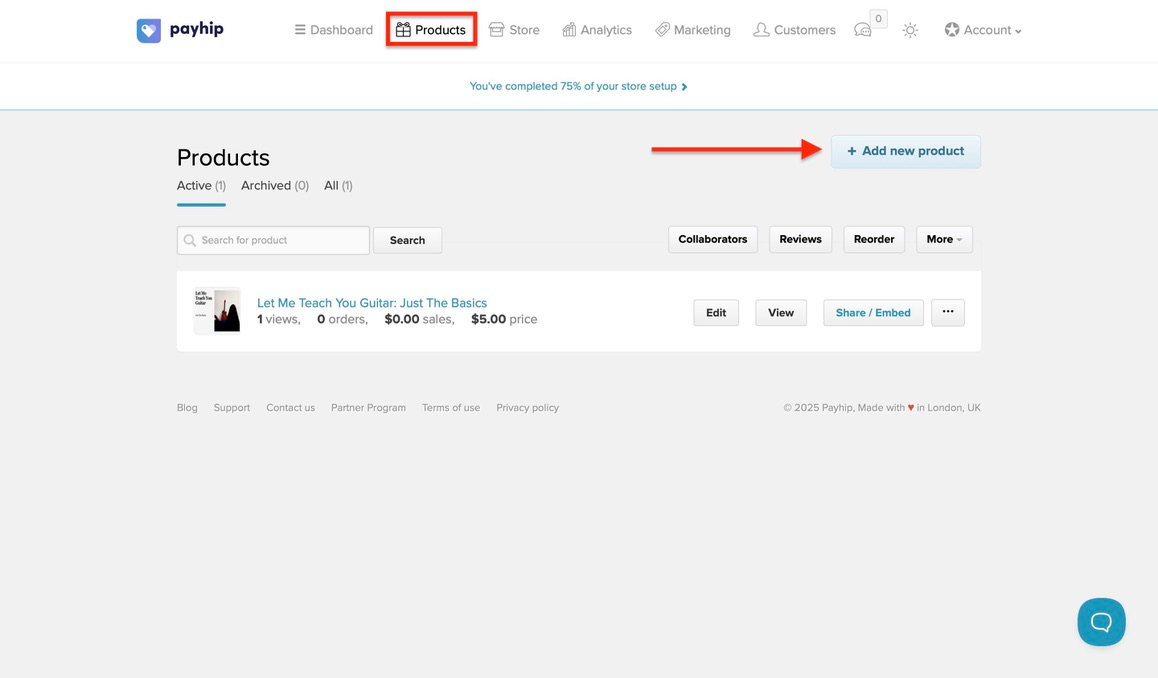
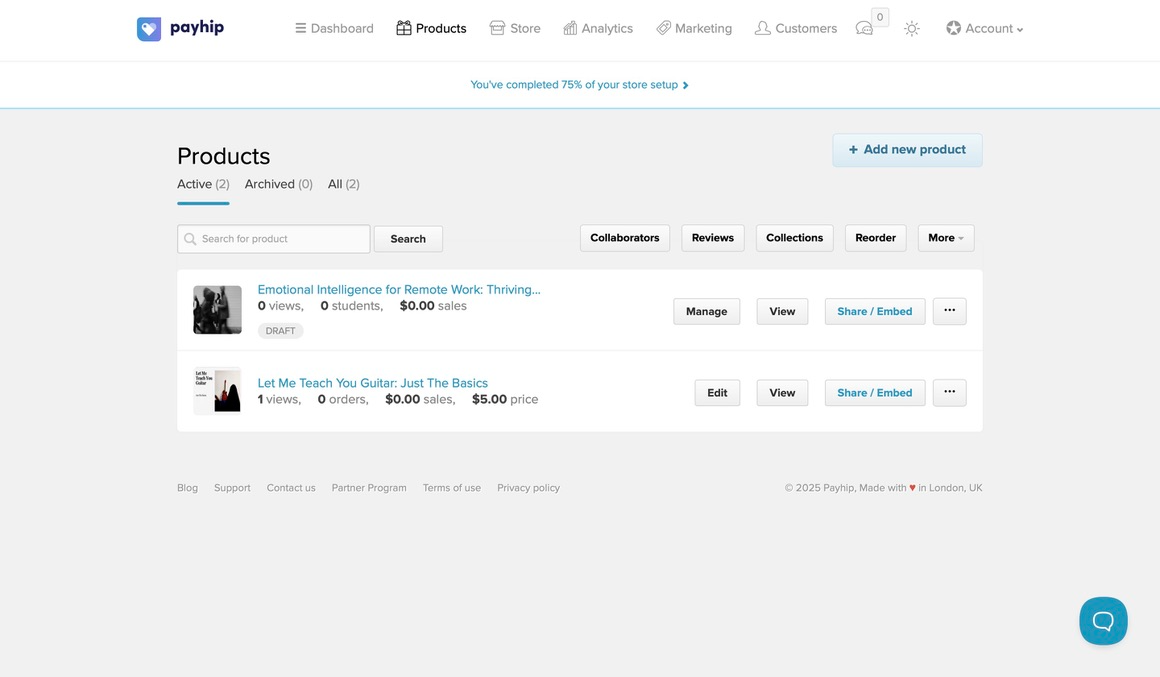
First, click the Products tab and select “+ Add new product.”
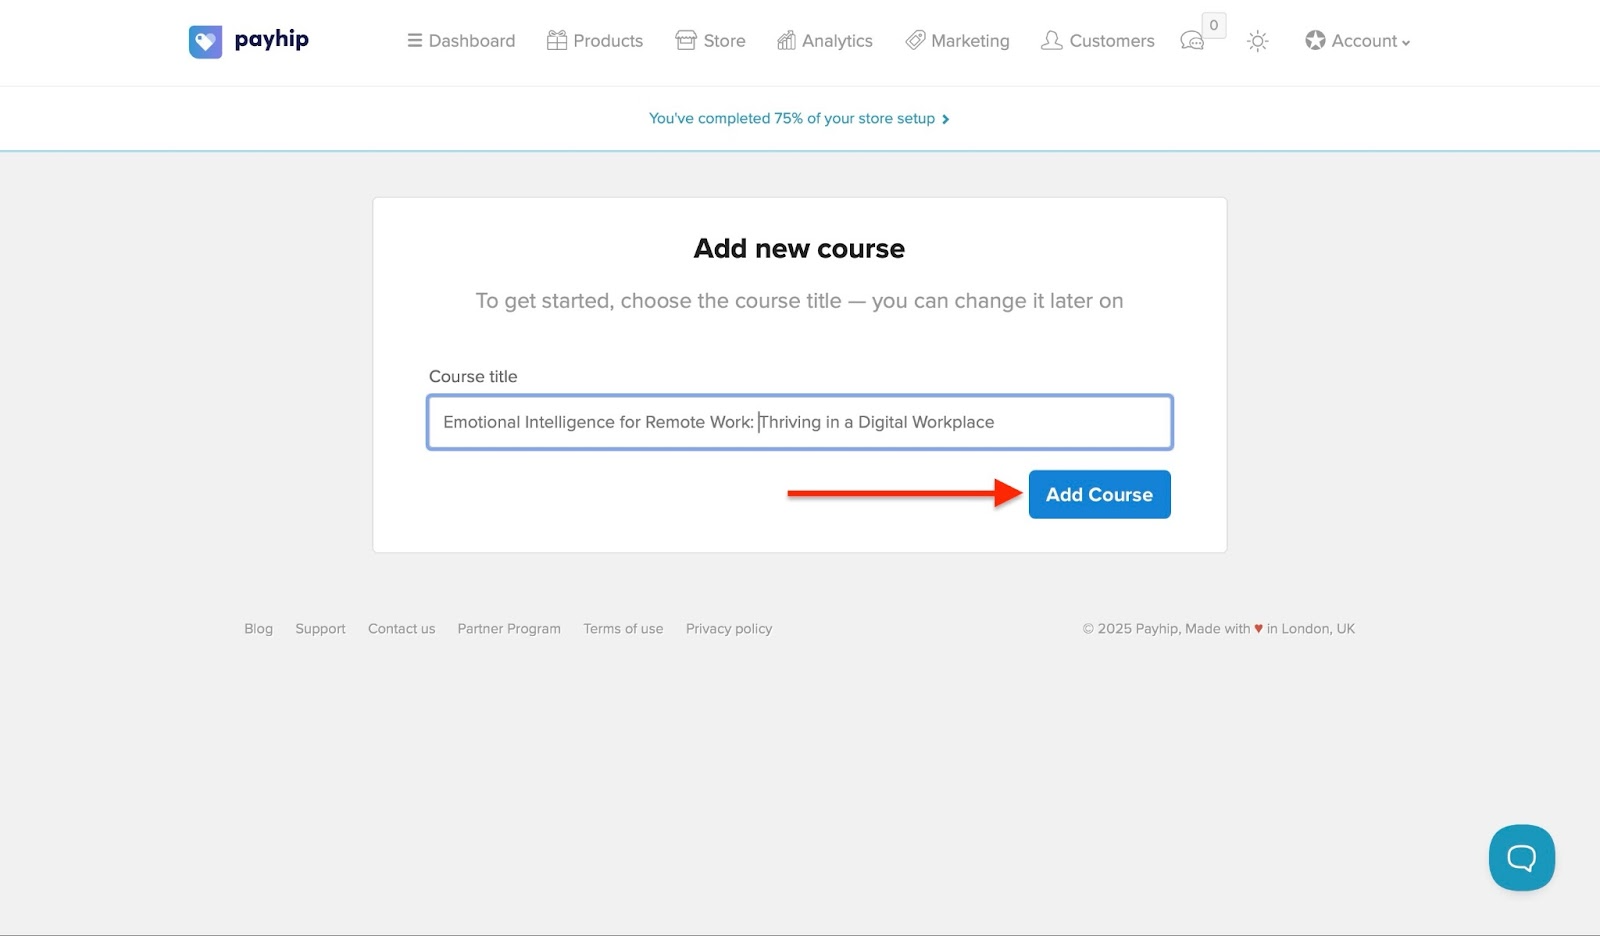
Now, select “Course” to proceed.

Add the title of the course in the space provided and click “Add Course.”
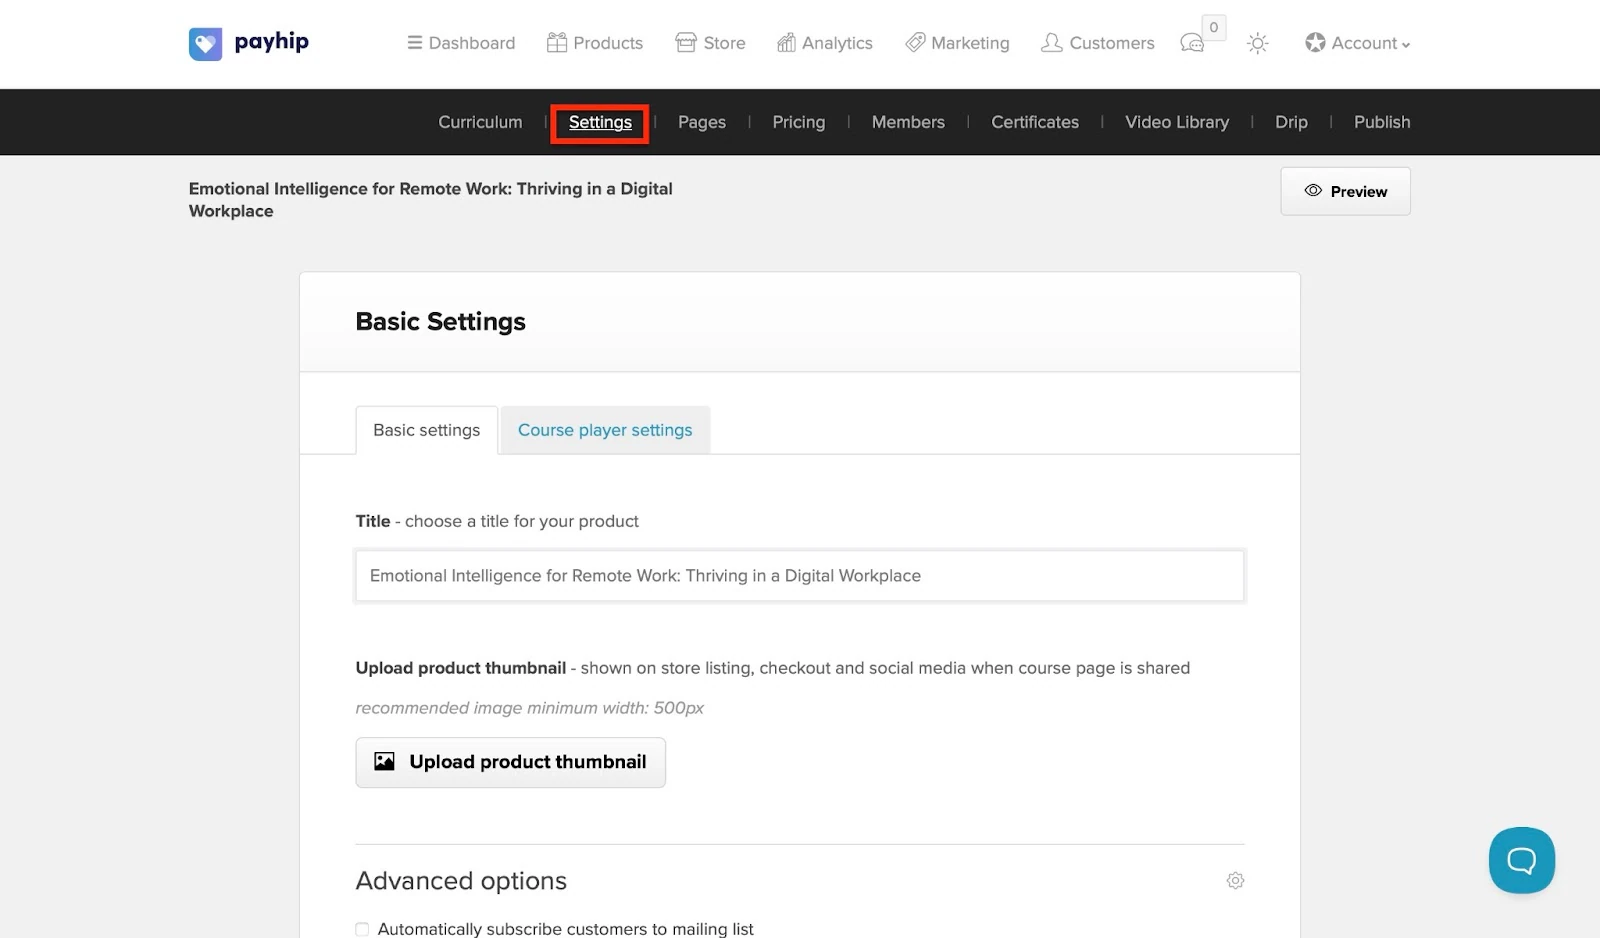
In the next window, click the settings tab to add basic and course player settings.
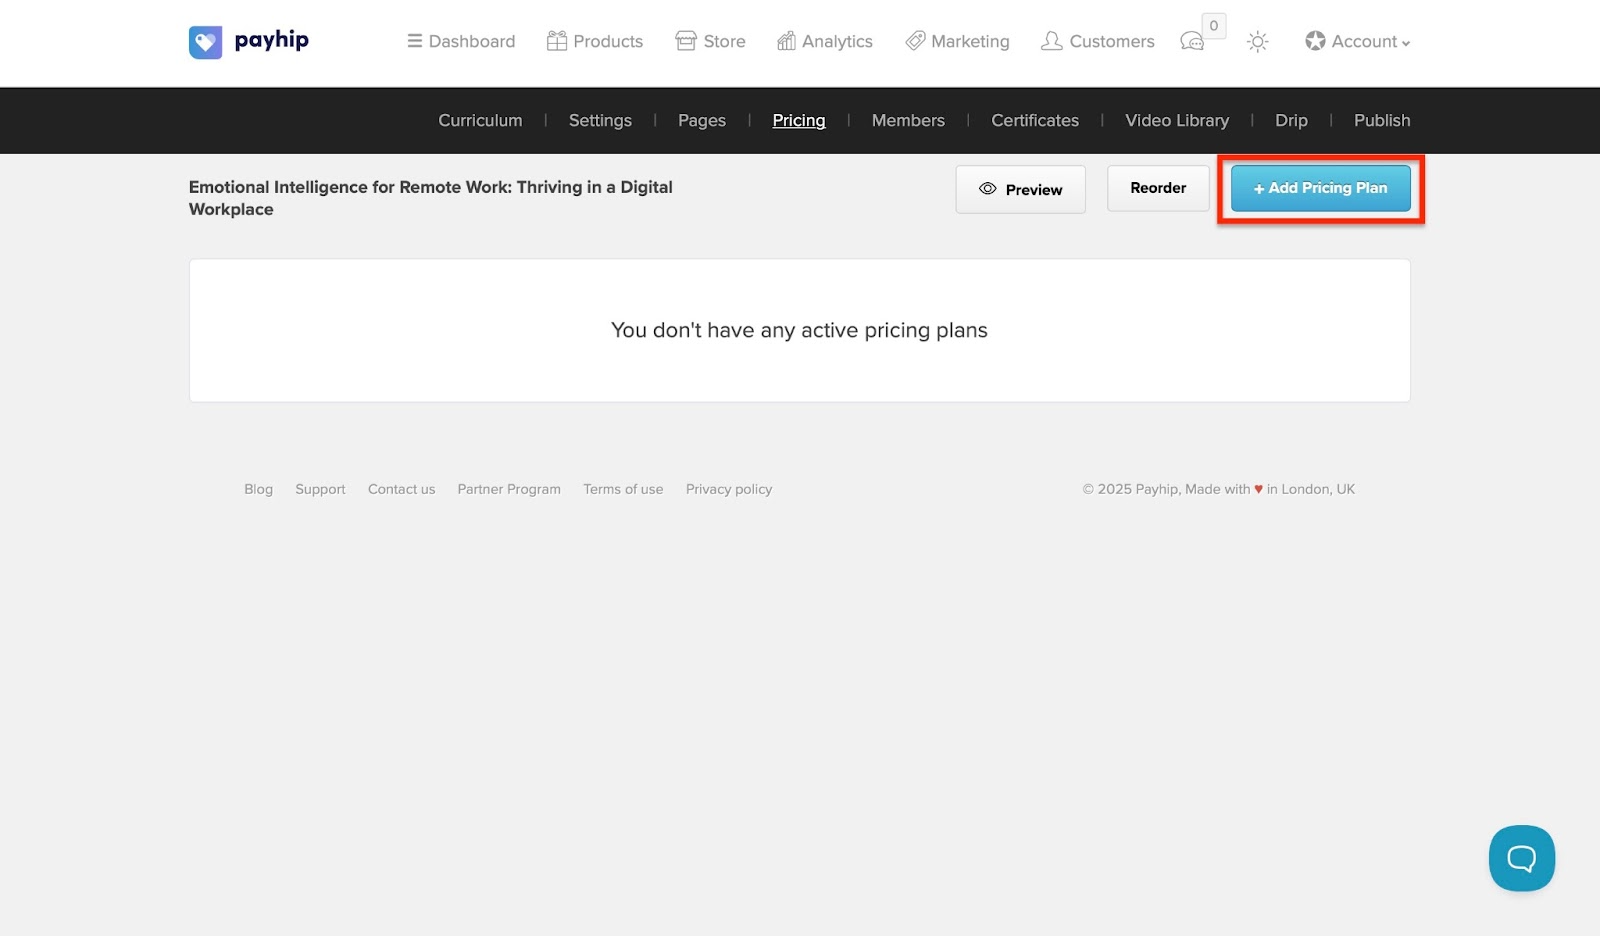
Then click the pricing tab and select “+ Add Pricing Plan.”
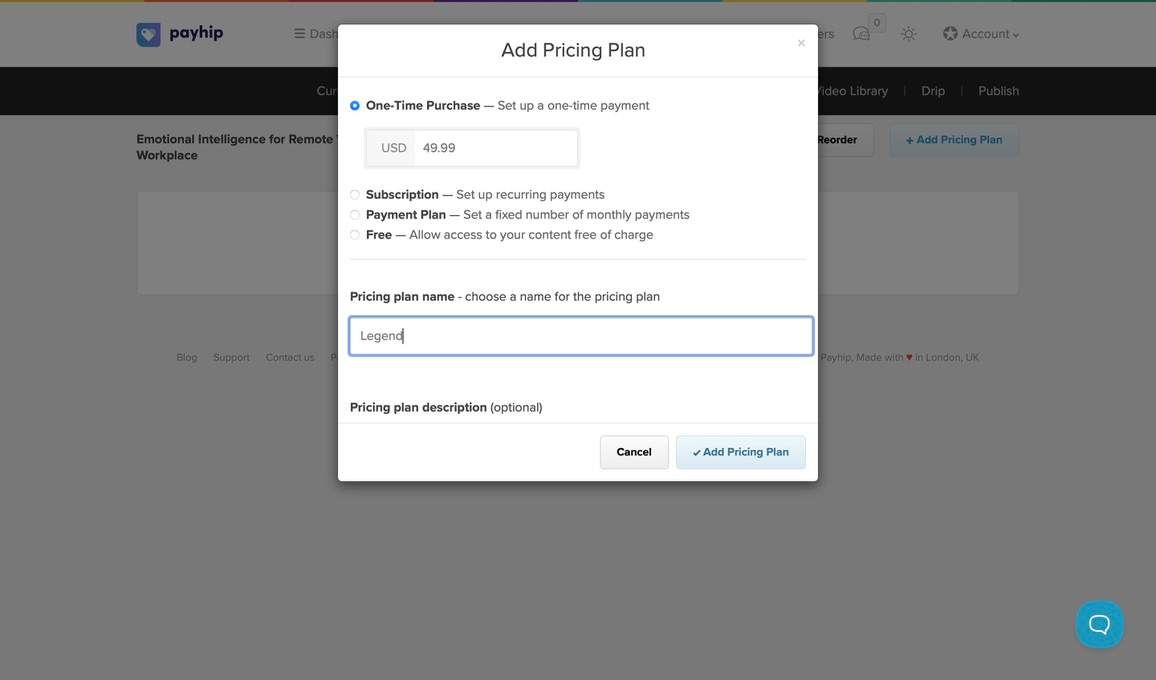
In the pop-up window, enter the pricing name and plan, and add it.
You can click on the members, certificates, and video library tabs to manage students, certificates, and videos. Clicking the Drip tab reveals where you can schedule course content availability. You can create your drip schedule from this window.

Next, tick your preferred option and click “Save Changes.”

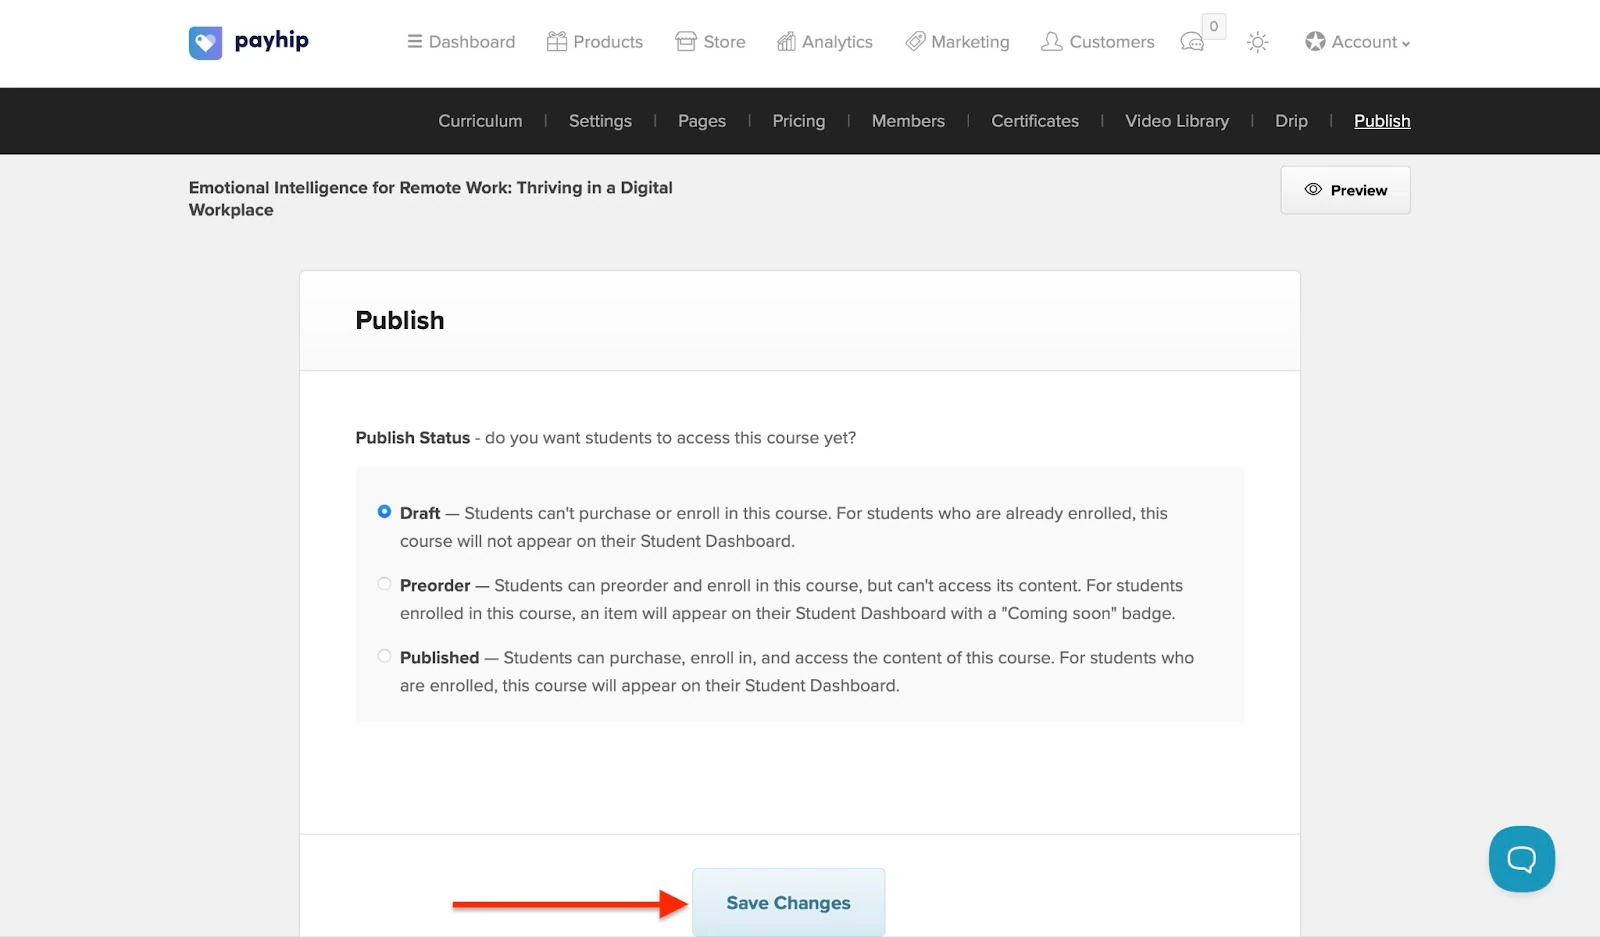
Finally, go to the “Publish” tab. Select your preferred option using the radio buttons, then click “Save Changes.”
Your course will be displayed in the products feature window.
Key features
1. Marketing
With Payhip’s marketing feature, you can cross-sell your products and services to customers. I will show you how in four steps.
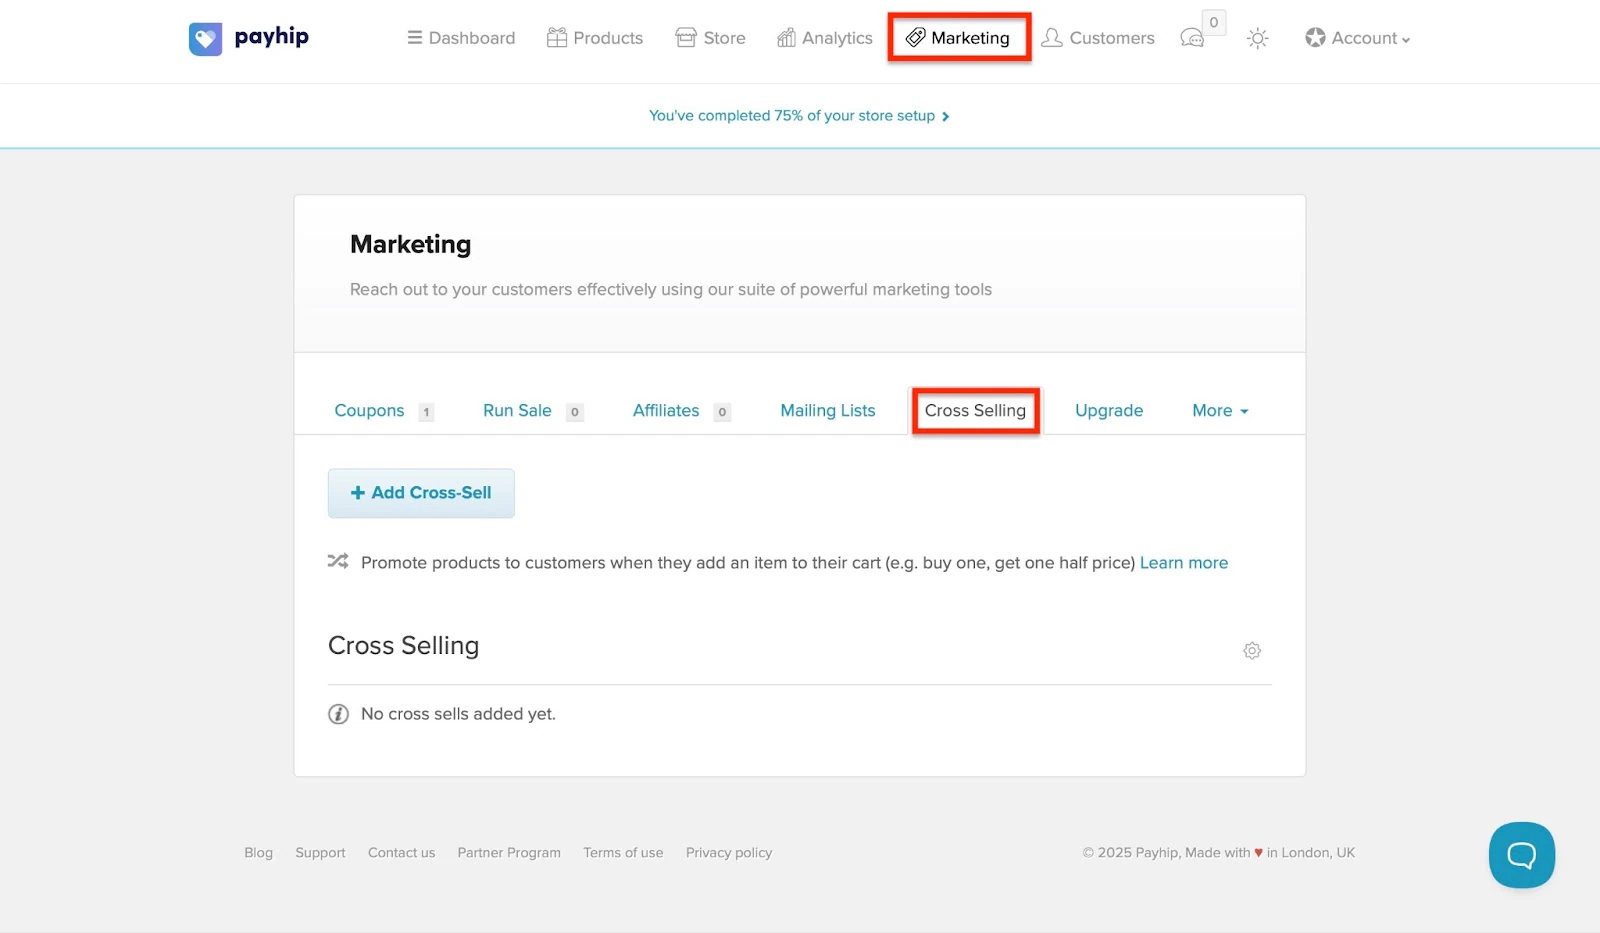
First, click the Marketing tab and select “Cross Selling.”
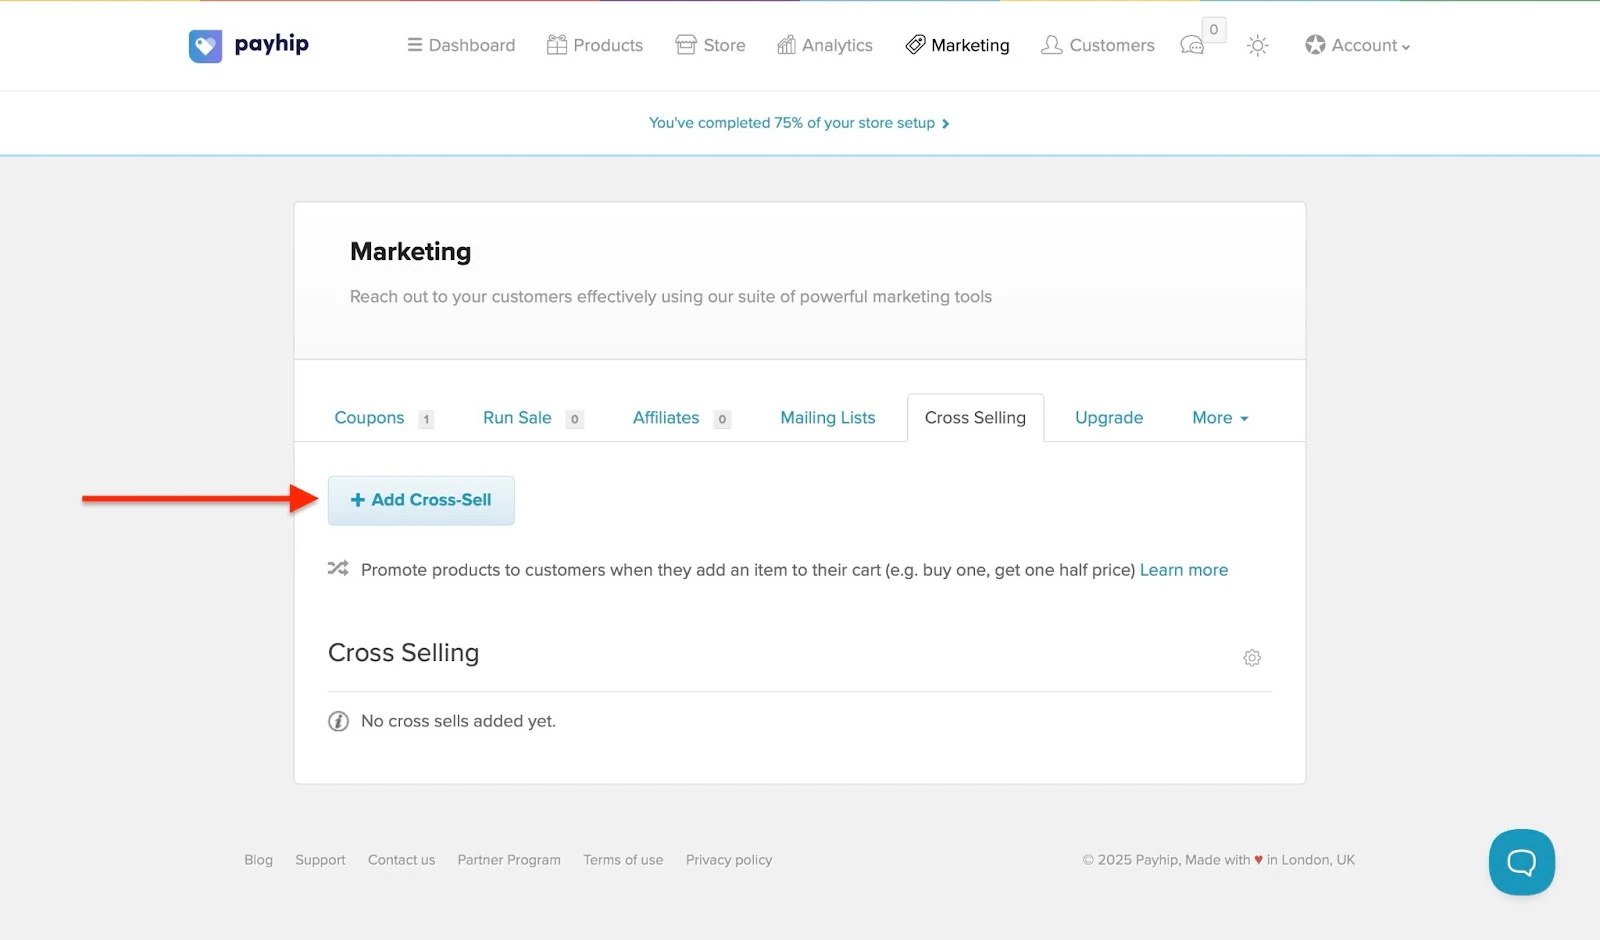
Next, click “+ Add Cross-Sell.”
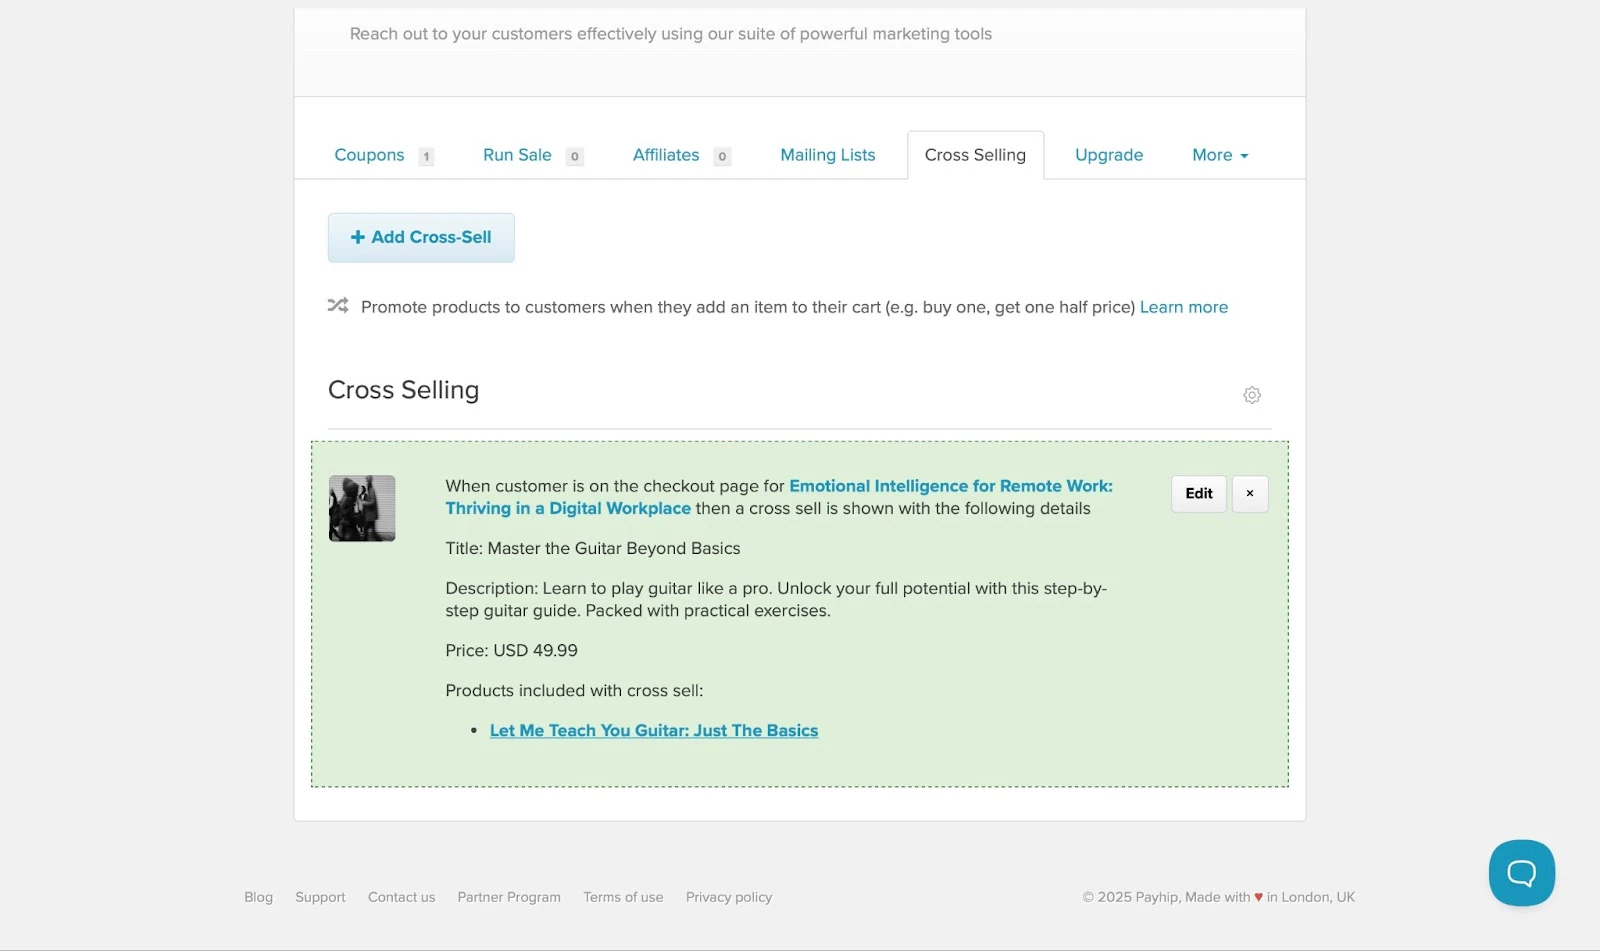
Now, select the product you would like to be displayed. Then, scroll down to fill out more details and add a price. After that, click “Add Cross-Sell.”

The products for cross-selling will show in the marketing feature window.
2. Customers
The customers feature on Payhip lets you track purchases, understand customers, and keep them informed.
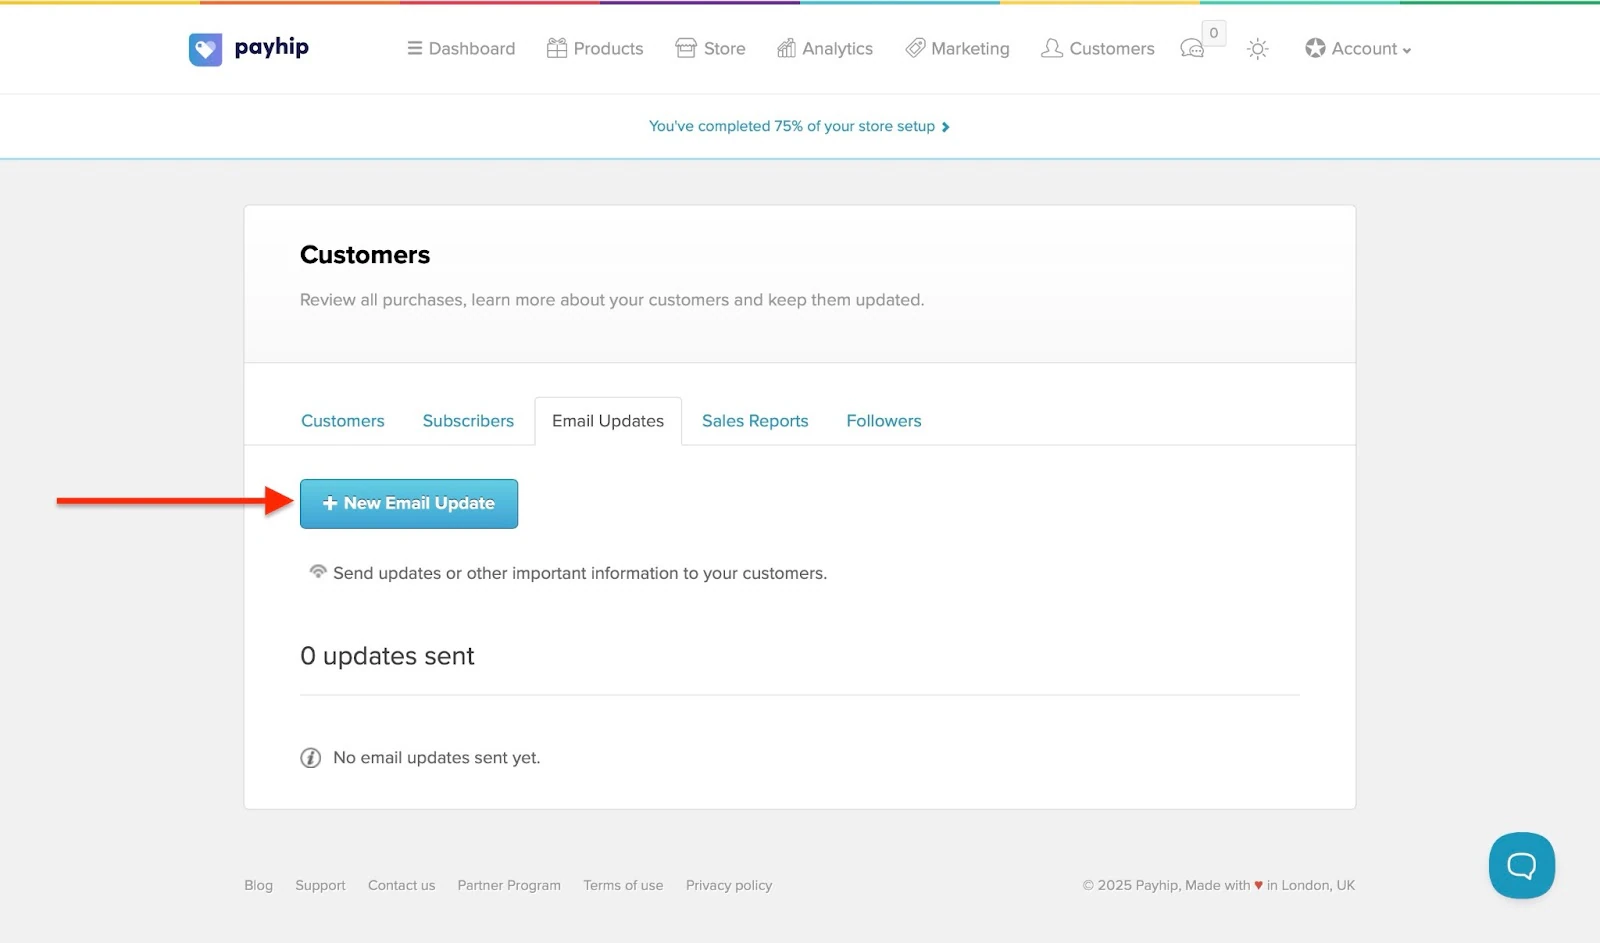
To send email updates, for instance, click the Customers tab and select “Email Updates.”
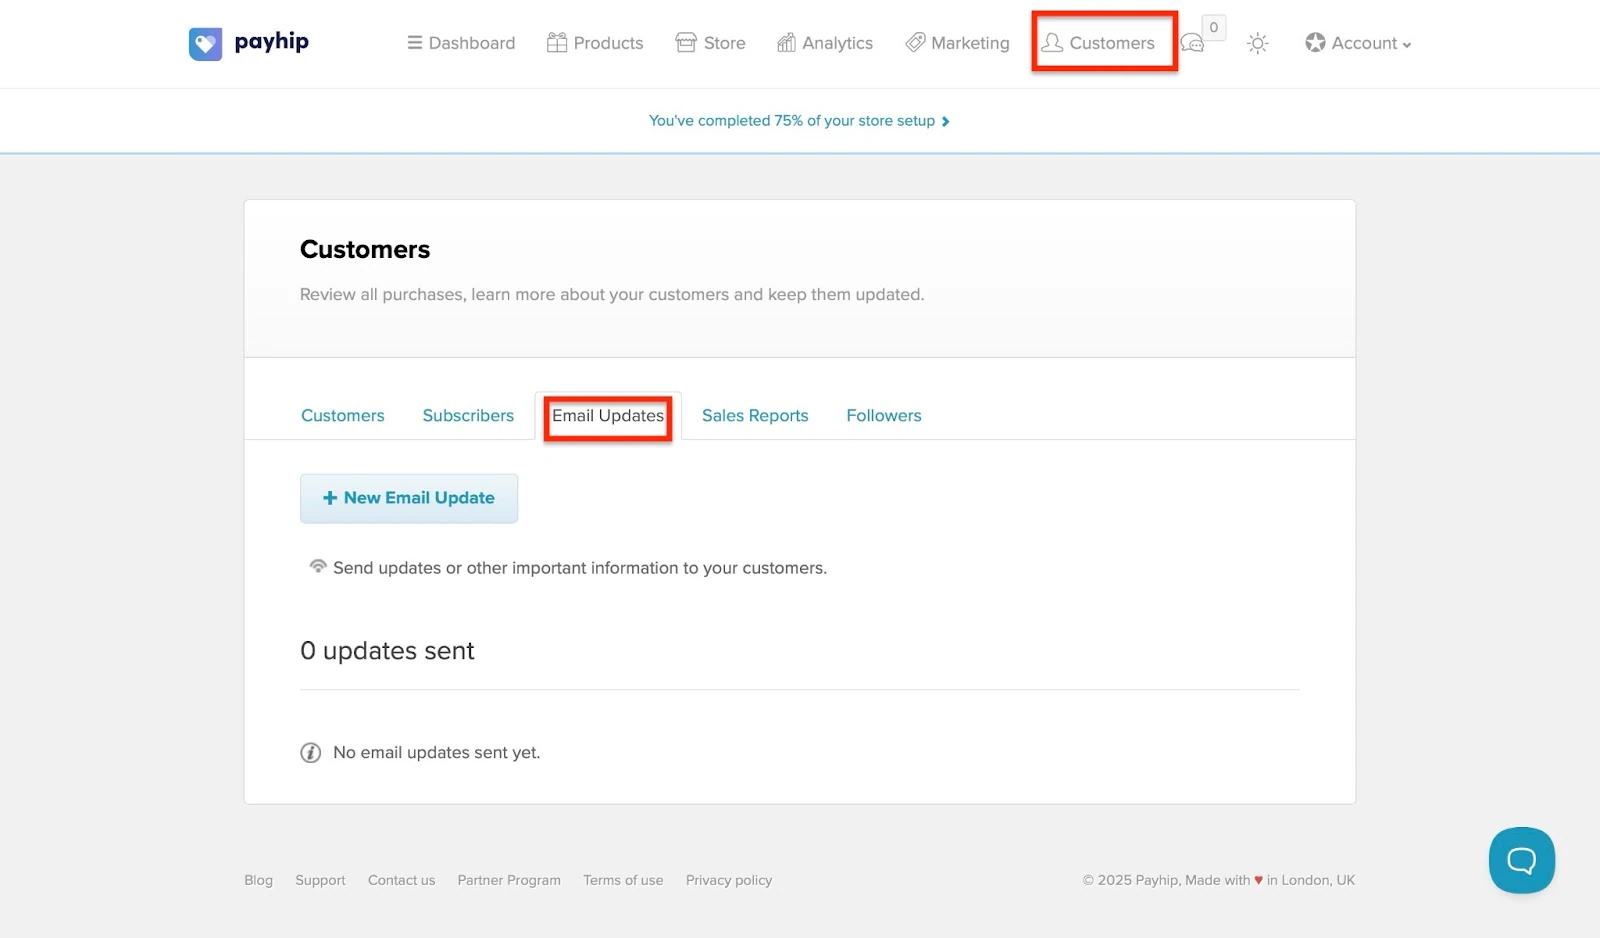
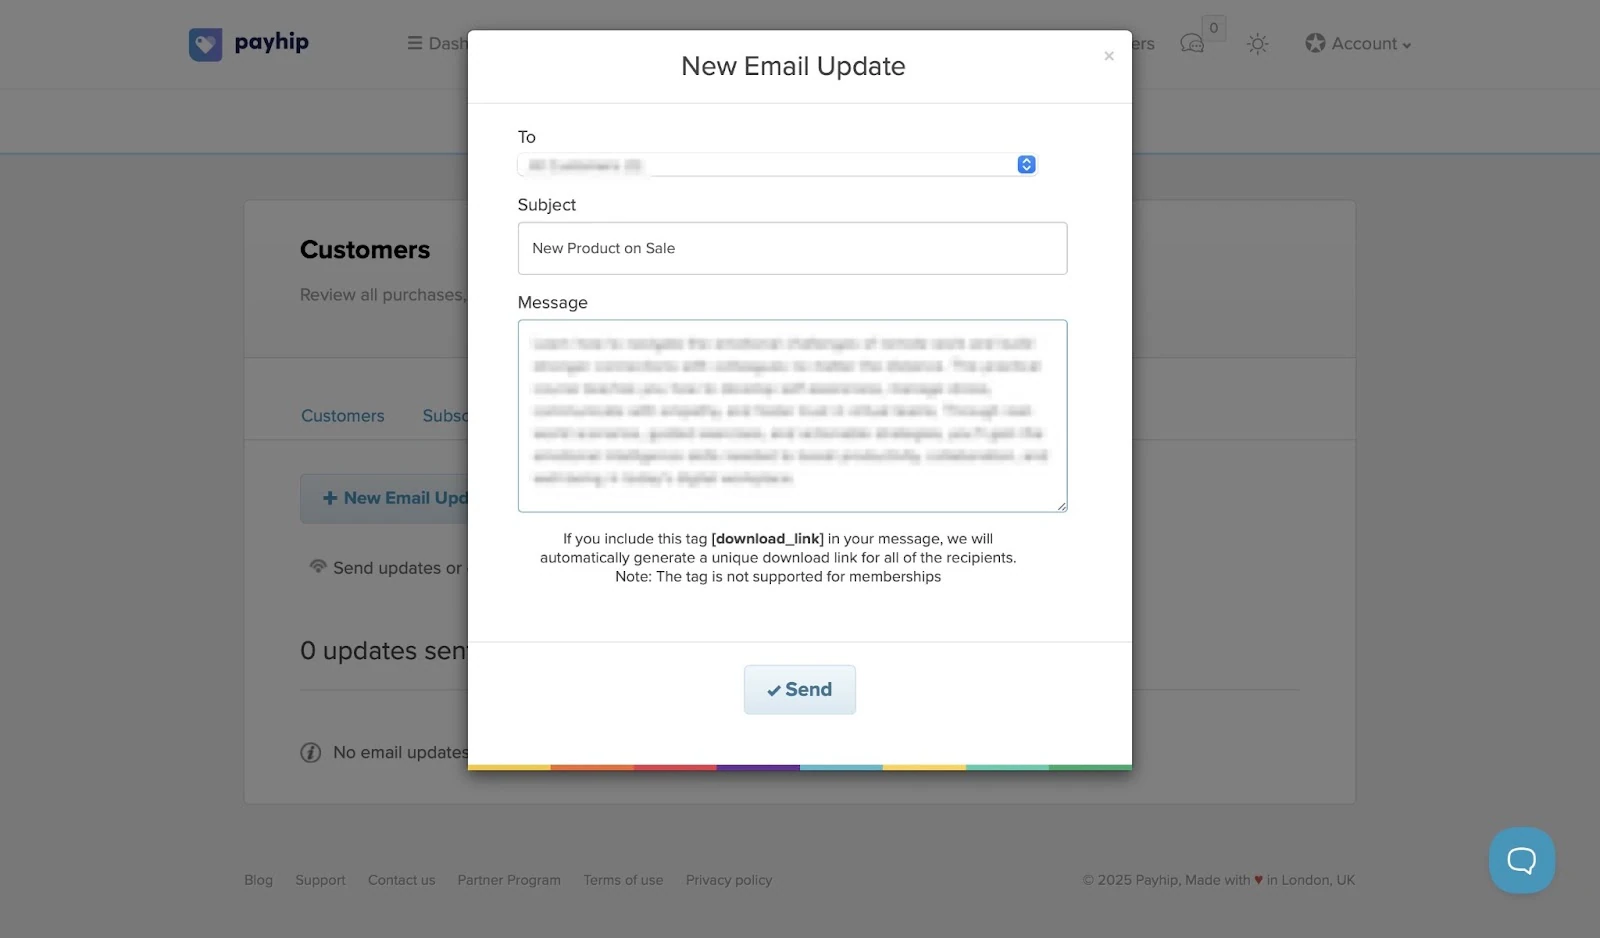
Then click “+ New Email Updates.”
Now, add the customers’ email, subject, and message. Finally, click “Send.”
Best for
- Indie creators and educators looking for a way to sell online courses, digital downloads, and memberships with flexible pricing.
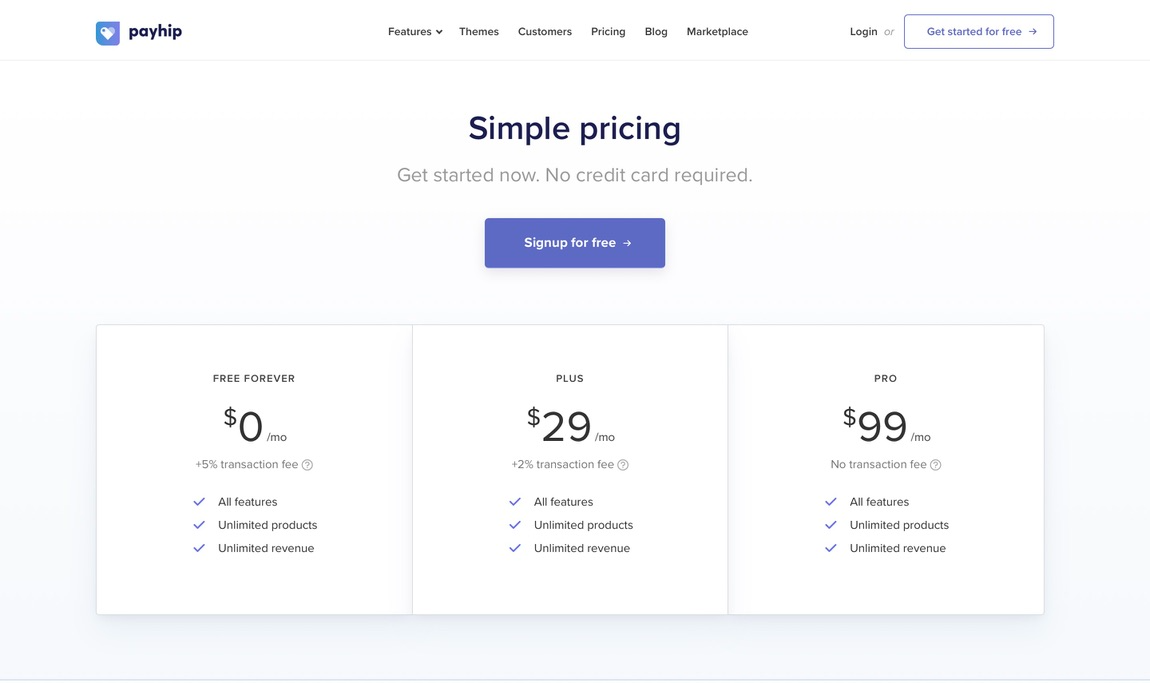
Pricing
- Free Forever: $0
- Plus: $29/month
- Pro: $99/month
How to choose the right online course platform
It’s tough to choose the right platform for online courses. It can be overwhelming and hard to choose with so many options available.
Believe me, I have been in your shoes. The good news is you don’t have to go through that same learning curve. In this section, I’ll walk you through ten key factors you should look at when making your choice.
Here are the factors:
- Consider content format supported on the platform
- Pick features you can’t do without
- Check student data ownership and control
- Access customization options
- Review monetization and payment options
- Analyze marketing capacities
- Check community features
- Consider budget (subscription versus revenue share)
- Assess integration with existing tools
- Check security and compliance
Now, let me explain these factors in detail.
1. Consider content format supported
The content format supported is one deciding factor when choosing the right online course platform.
Does the platform allow you to share video content in the most popular file formats? Can you share ebooks in PDFs, EPUBs, etc.?
The reason is that different learners absorb information in different ways. Educational Voice, for instance, reports that between 65% and 80% of students are visual learners.
Also, research shows that infographics, flashcards, labeled diagrams, short videos, or slideshows improve learning by at least 17%.
Easytools, for example, allows you to create a player for online courses. So you can upload video-based lessons to its courses feature.
If you have supplementary resources like PDFs, ebooks, templates, and audio files, you can add them with Easytools’ products feature.
So, make sure to check if the platform supports all these formats. This ensures your students have the best ways to learn, which ultimately drives the success of your online course business.
2. Pick features you can’t compromise on
When choosing the right online course platform, don’t compromise on the features that are important to you.
Do you want a platform where you can start creating a course in a few easy steps? Or platforms that offer marketing features like upsells, analytics, affiliate, and email marketing?
Every platform has unique features it provides to instructors. Some features will positively impact your course creation process, learner experience, retention, and your ROI.
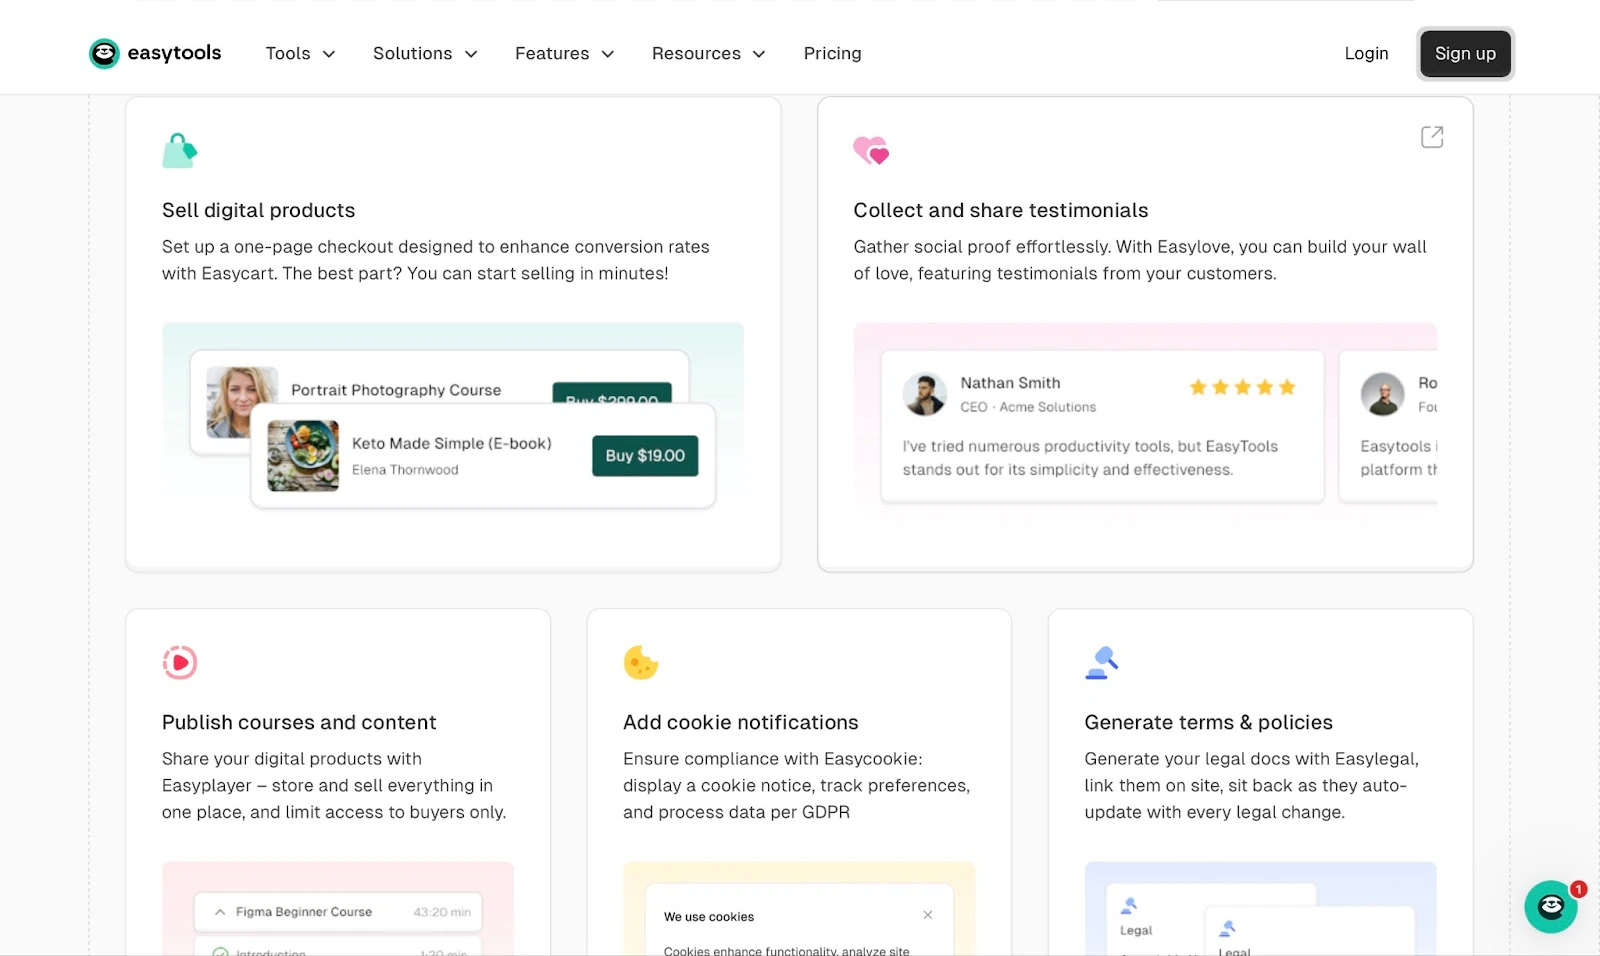
Easytools, for instance, has unique features such as:
Easycart: A one-page checkout with a conversion rate of almost 47%. In other words, the feature is optimized so well that nearly one out of every two interested customers completes their purchase.
Easypage: AI based website and landing page builder
Easylove: Also known as “wall of love.” This feature displays testimonials from your customers.
Easyplayer: An in-built player with multimedia support for playback of your course content.
Easycookie: For displaying GDPR cookie notifications, ensuring compliance, tracking consent, and maintaining logins.
Easylegal: For generating updated legal complaint privacy policies, terms, and disclaimers.
So, prioritize features that help you create, add, and sell courses, as well as retain customers. Don’t just choose an online course platform because it’s popular.
A good move will be to make a list of the features you can’t compromise on and let that be your guide. When you have a clear idea of the features you can’t do without, picking a platform will be easy.
3. Check student data ownership and control
In my experience, this factor is often overlooked when choosing an online course platform. It’s one of the reasons why I added it to this guide.
Some platforms, especially those with massive online course marketplaces (like Udemy and Skillshare), limit your ownership and control of student information.
In contrast, Easytools allows you to collect and export your customers’ email addresses and purchase history.
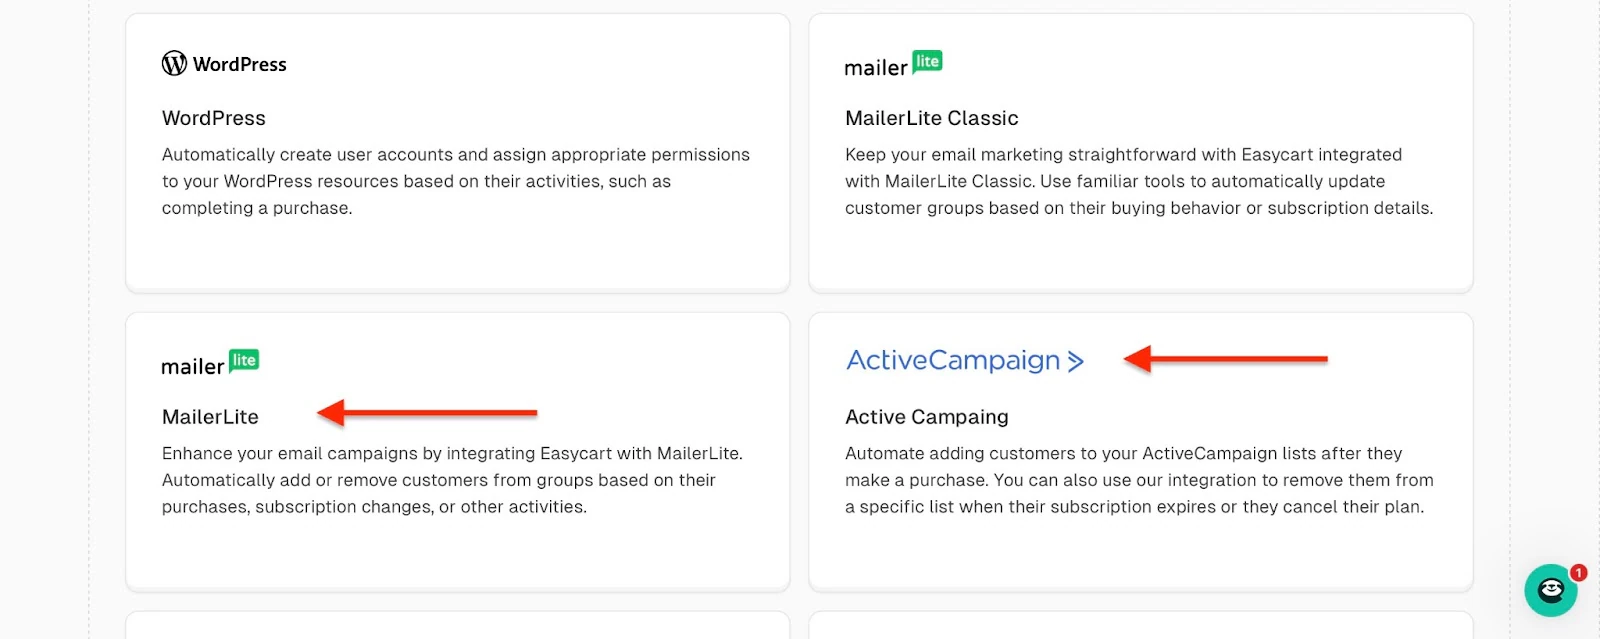
This information then automatically syncs with tools like Mailchimp, HubSpot, ActiveCampaign, MailerLite, Pipedrive, and more.
This allows you to nurture a business relationship with them and build a mailing list for email campaigns.
All I’m saying is, check for student data ownership and decide accordingly.
4. Assess customization options
In case you’re wondering if customisation matters, there’s research to back it up.
Brandon Hall Group’s “2021 State of Learning Practices Study” reported a similar stance. It found that 93% of companies “strongly” believe branding (and for that matter, customization) improves overall online learning performance.

That means instructors deliver better, and students engage more positively. When students are less frustrated about how to navigate through a course, they are more confident, and it’s easier to retain them.
Among my list of the ten best online course platforms, Easytools offers far more advanced customisation features.
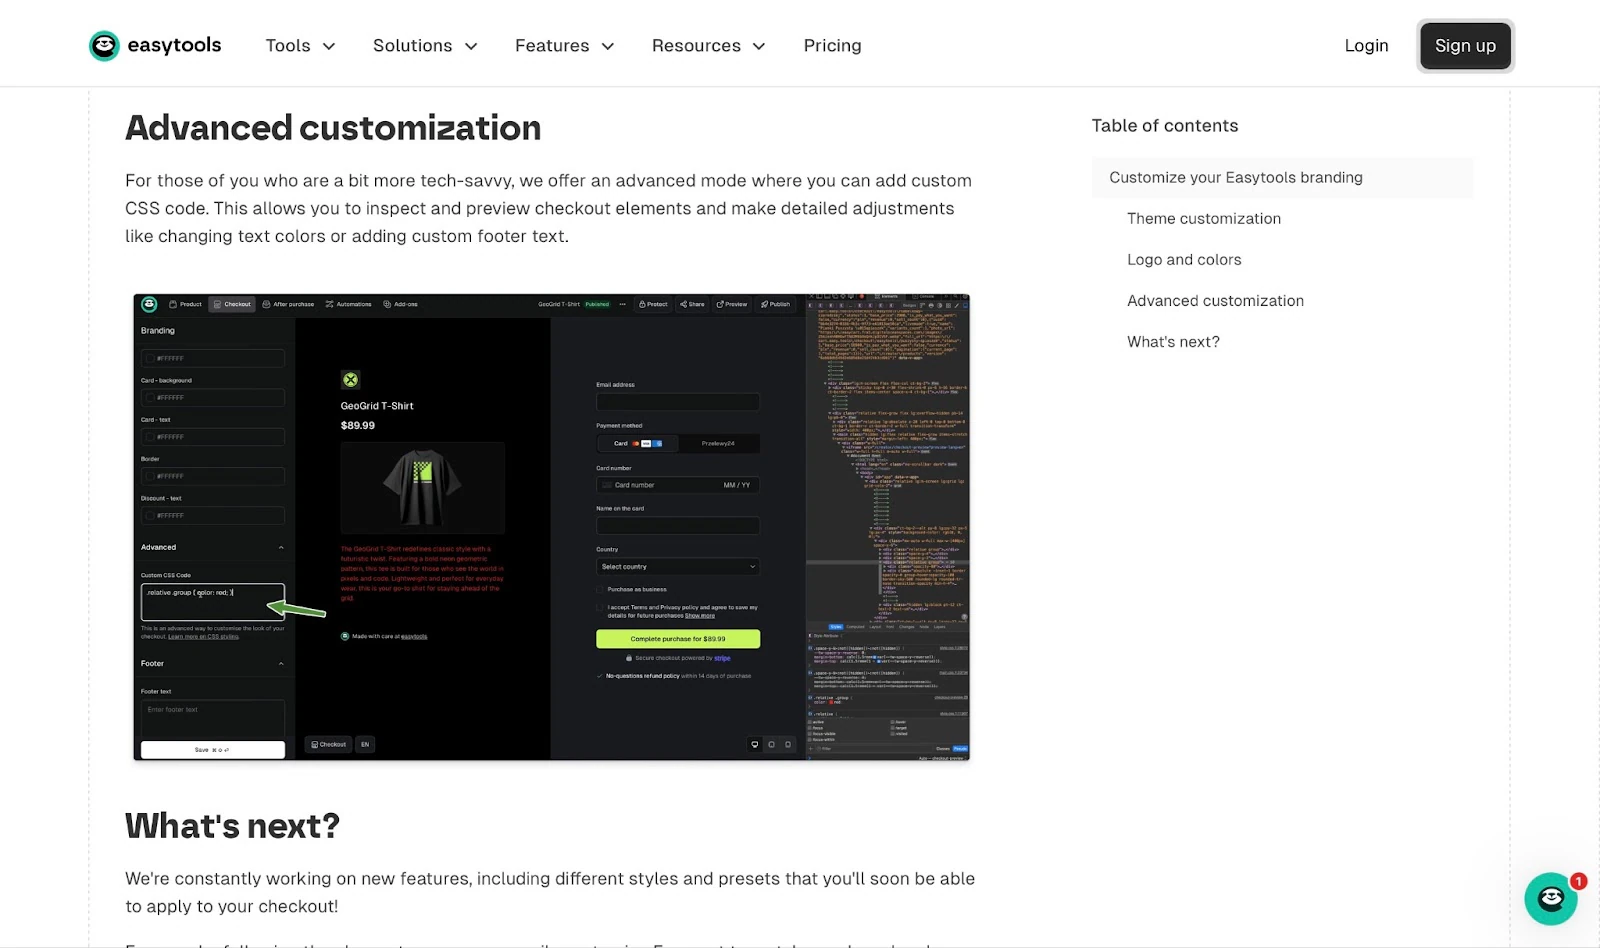
You can customize checkout pages, your customer portal, digital product pages, email notifications (through any email provider), and even use your website domain.
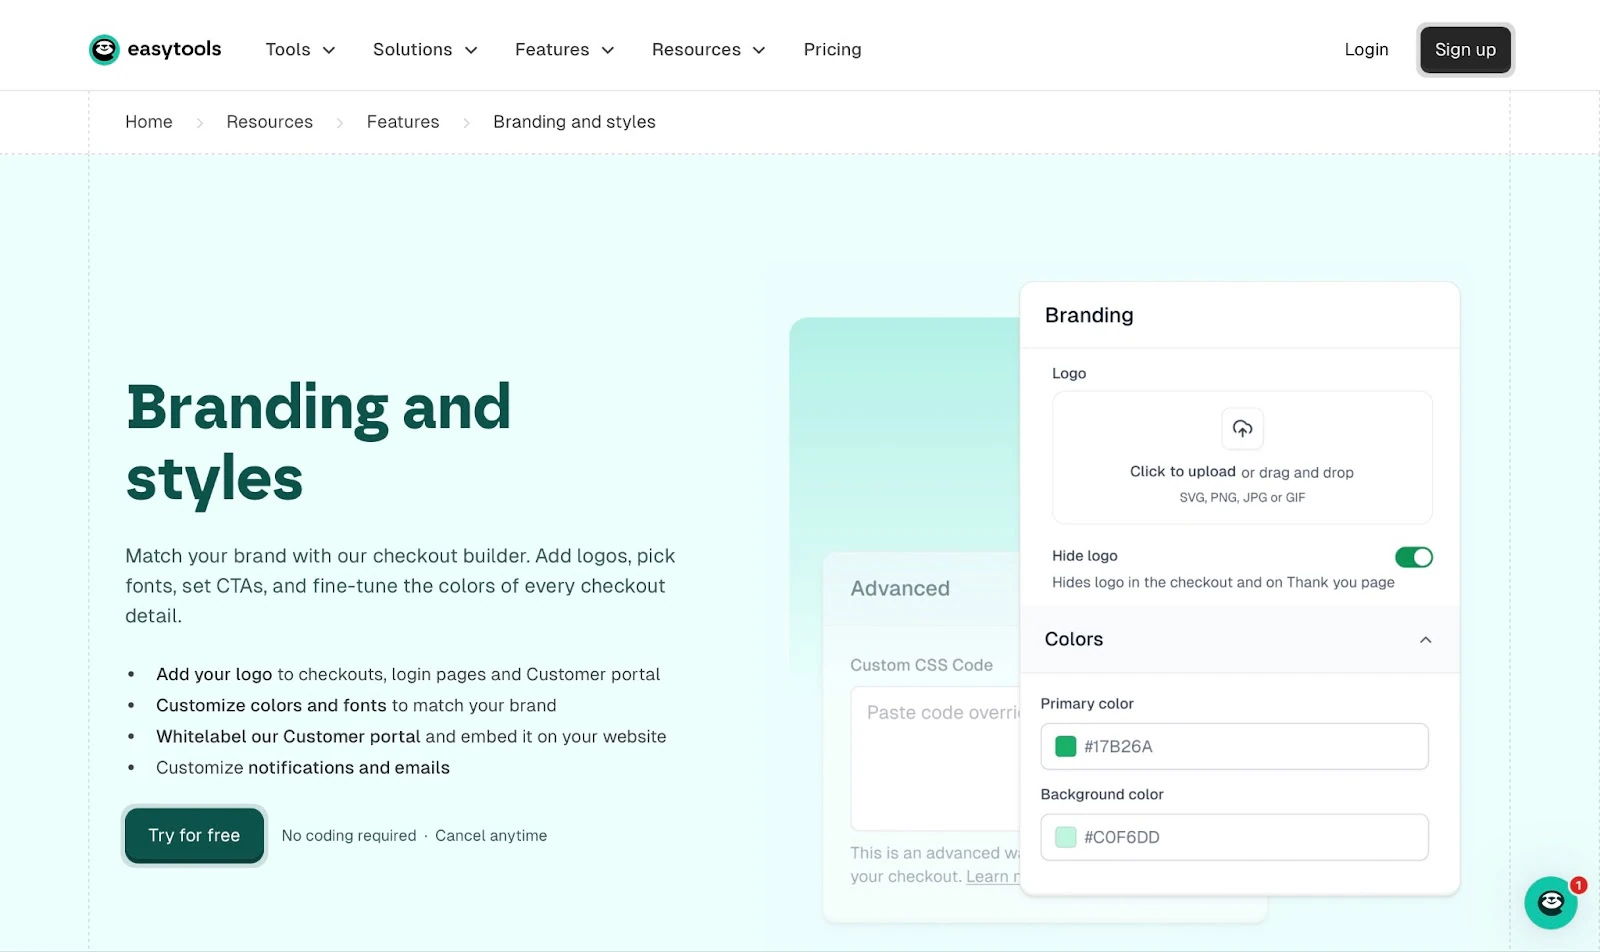
Easyplayer, for instance, lets you build a fully branded player that supports many media formats, including video, audio, PDFs, Google Docs, embedded URLs, images, text, and more.
If you want your online teaching business to thrive, choose an online platform that offers full control with customisation options just like Easytools.
5. Review monetization and payment options
Reviewing the platform’s monetization and payment options before choosing it is non-negotiable.
You should also ask whether it makes it easy for your customers to pay you. Also, you must consider whether it supports popular payment methods like credit cards, Stripe, PayPal, Apple Pay, etc.
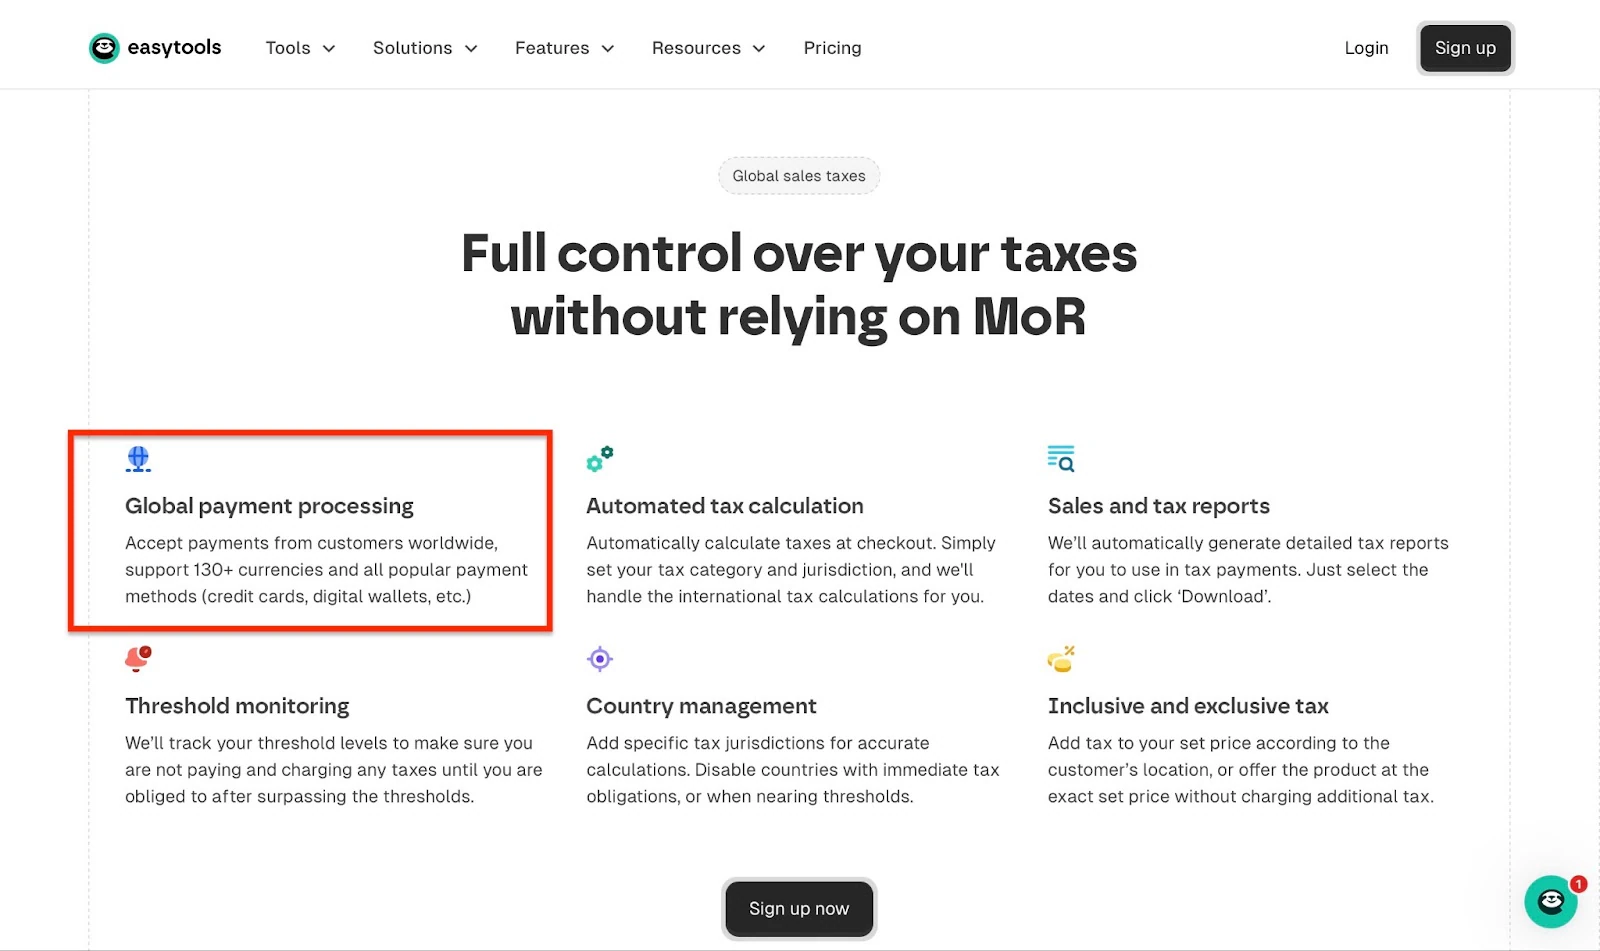
Depending on where you are, the currencies you trade in, and your business nature, a platform that supports multi-currency payouts could be your ideal tool.
Payment methods are important because they are a key reason for cart abandonment.
A study by Baymard Institute found that 18% of customers abandoned carts because they were too long and complicated.

They also reported that 10% of customers didn’t go through with the purchase because “there weren’t enough payment methods.”
As such, a simple checkout may translate to the completion of payment. Furthermore, offering numerous payment methods also influences purchase.
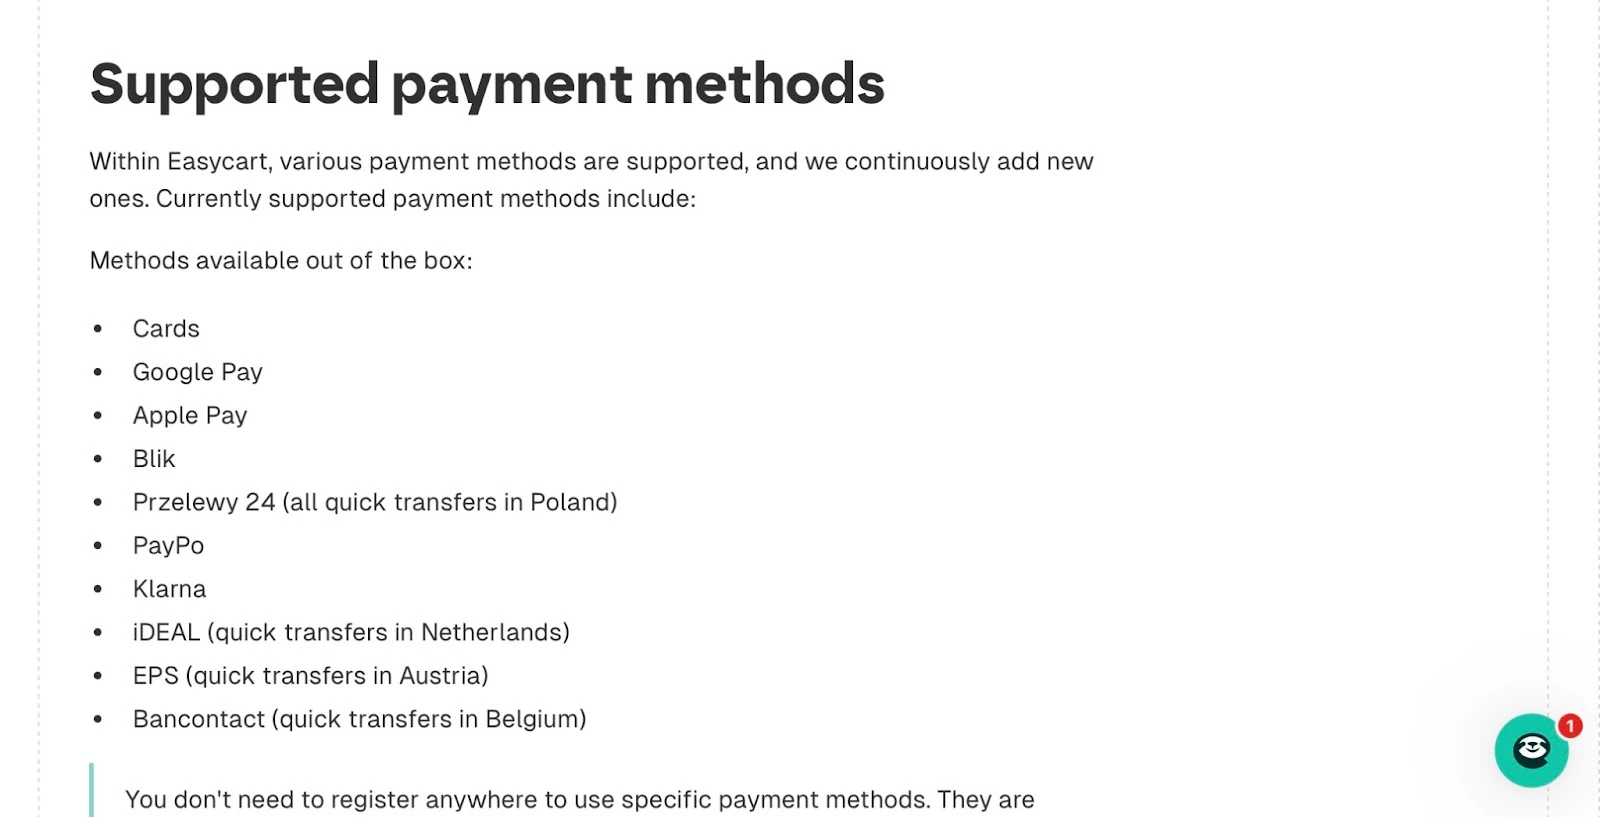
Among the online course platforms, Easytools is unique for its payment methods, too. It supports cards (Visa and Mastercard), wallets (Google Pay and Apple Pay), and Buy Now, Pay Later (BNPL) options like Klarna and PayPo.
Apart from this, Easytools does not hold your funds. Moreover, it offers global payment support, which is helpful for instructors and business owners with international customers.
Easytools also offers instructors and business owners its proprietary checkout tool: Easycart.
Think of it like Stripe Checkout on steroids.
Easycart is not just designed to handle transactions but to boost conversions with features like upsells and cross-sells, coupons, affiliate links, etc.

6. Analyze marketing capabilities
Regarding marketing capabilities, some important marketing capabilities to look out for include:
- email marketing automation
- sales funnels and landing pages
- affiliate management
- ad and tool integration
- coupons, discounts, and upsells
These elements are key because without the right marketing tools, reaching and converting customers or students will be very challenging.
Take email marketing automation, for example. According to HubSpot’s “2023 State of Marketing Report,” marketers using automation have a 46% likelihood of having an effective marketing strategy.

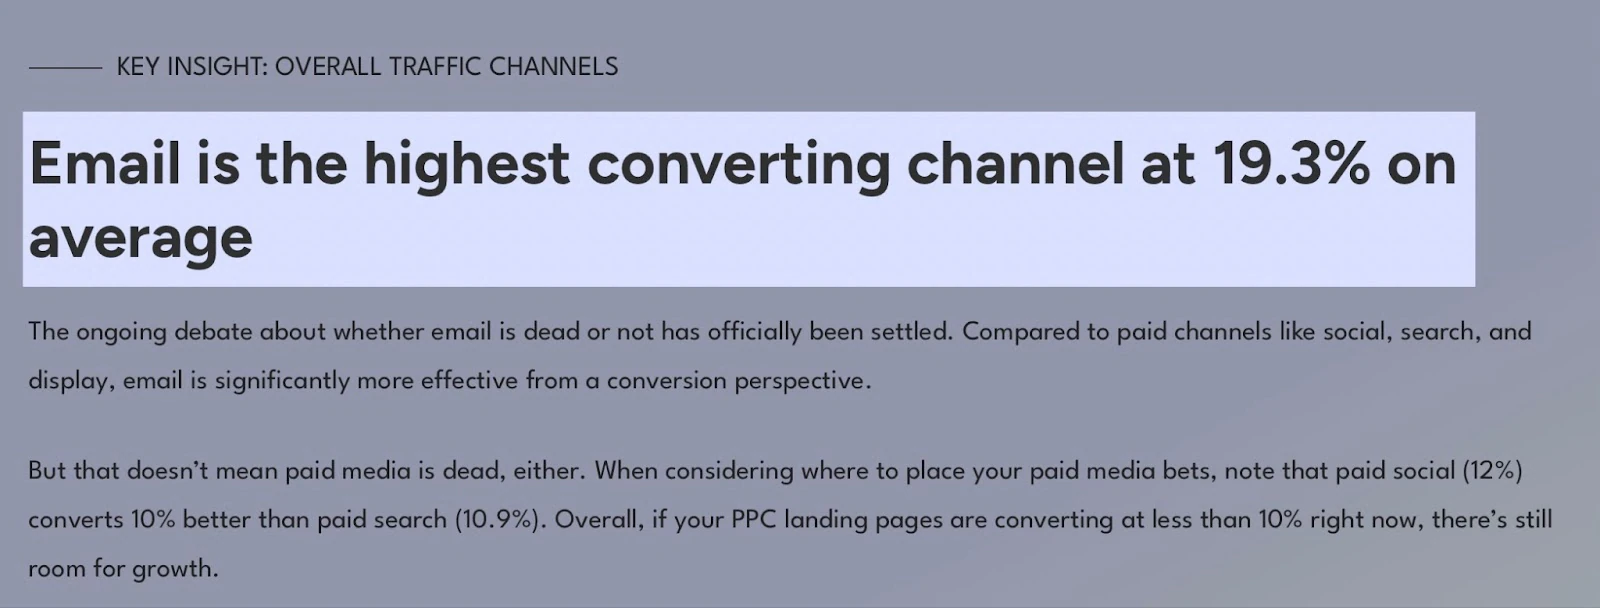
Moreover, Unbounce’s Conversion Benchmark Report found that email marketing has the “highest converting channel at 19.9% on average.”
All I’m saying is that the marketing capabilities of the platform could make or break your online course. If you can’t reach your target market, it doesn’t matter if you build the best courses in your niche; they will not sell.
So the online course platform’s marketing capabilities are worth looking into if you want to make the right choice.
7. Check community features
Another feature you have to consider when choosing the best online course platform is the available community feature.
Does the platform offer discussion boards? How about live chats or social features that keep students engaged?
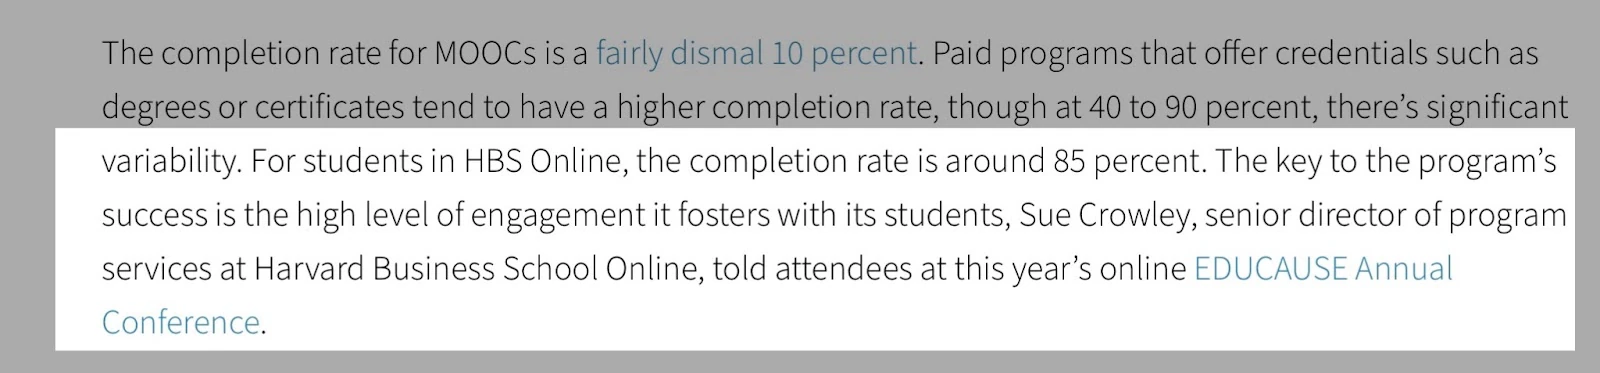
A case of Harvard Business School (HBS) Online shows that students’ completion of online courses is high if they interact with peers.
According to journalist and editor Lauren Glenn Manfuso of EdTech, Sue Crowley, senior director of program services at HBS Online, said “the high level of student engagement” was responsible for HBS Online’s completion rate of 85%.
This shows how useful a community platform in your online course tool can be.
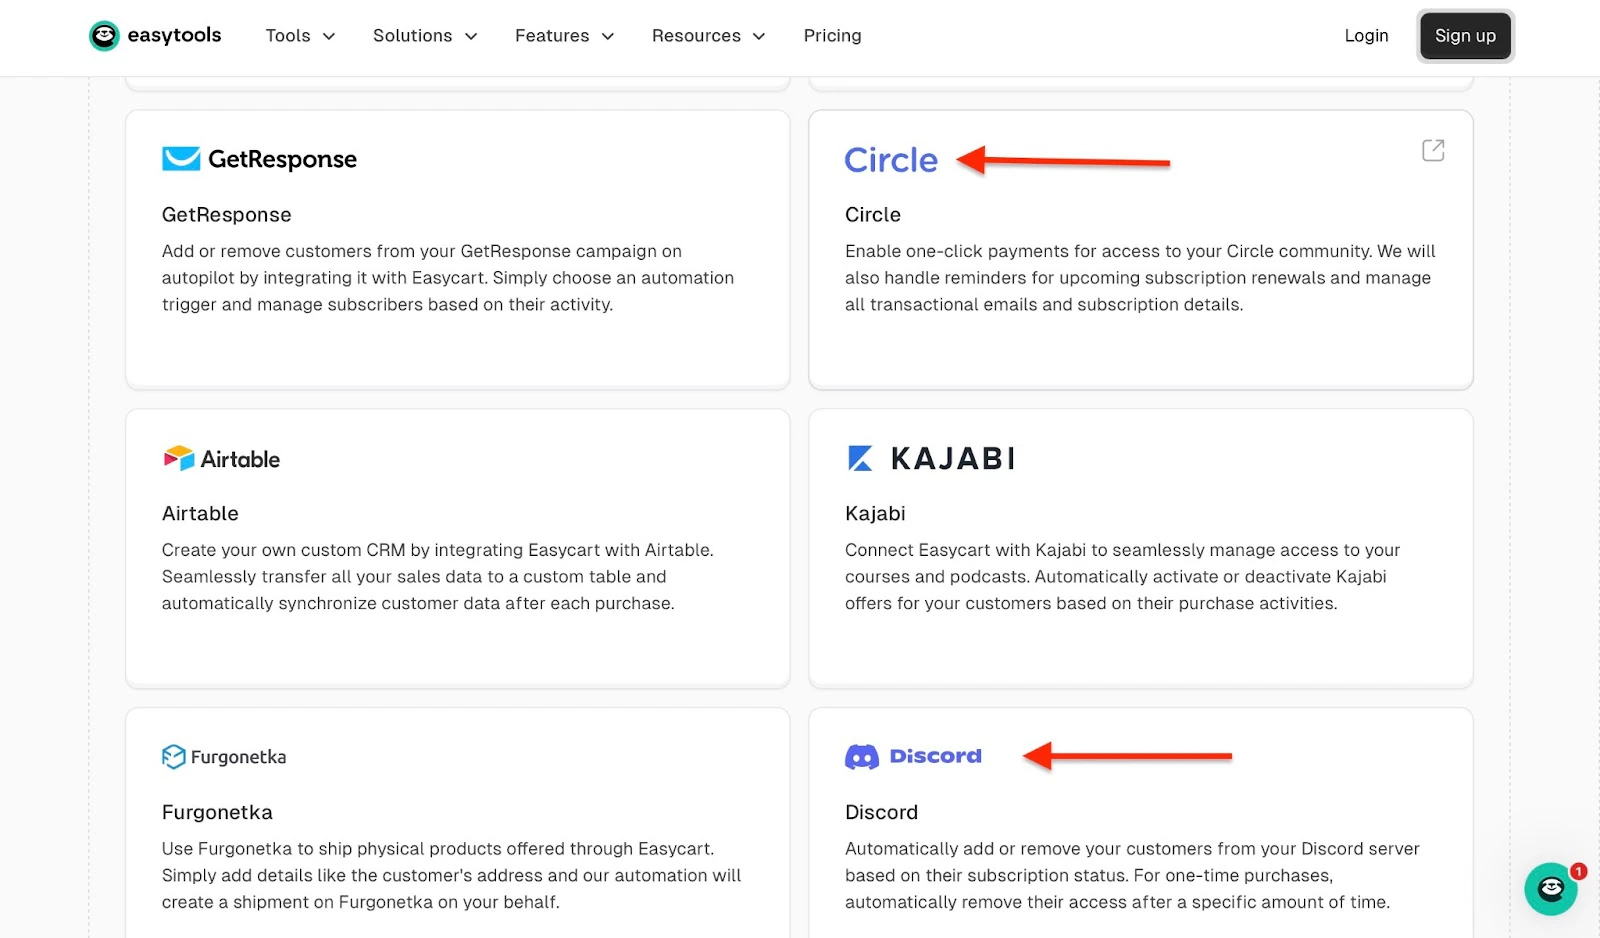
Let’s consider Easytools, for instance. It integrates with Circle and Discord so you can build student communities alongside your courses.
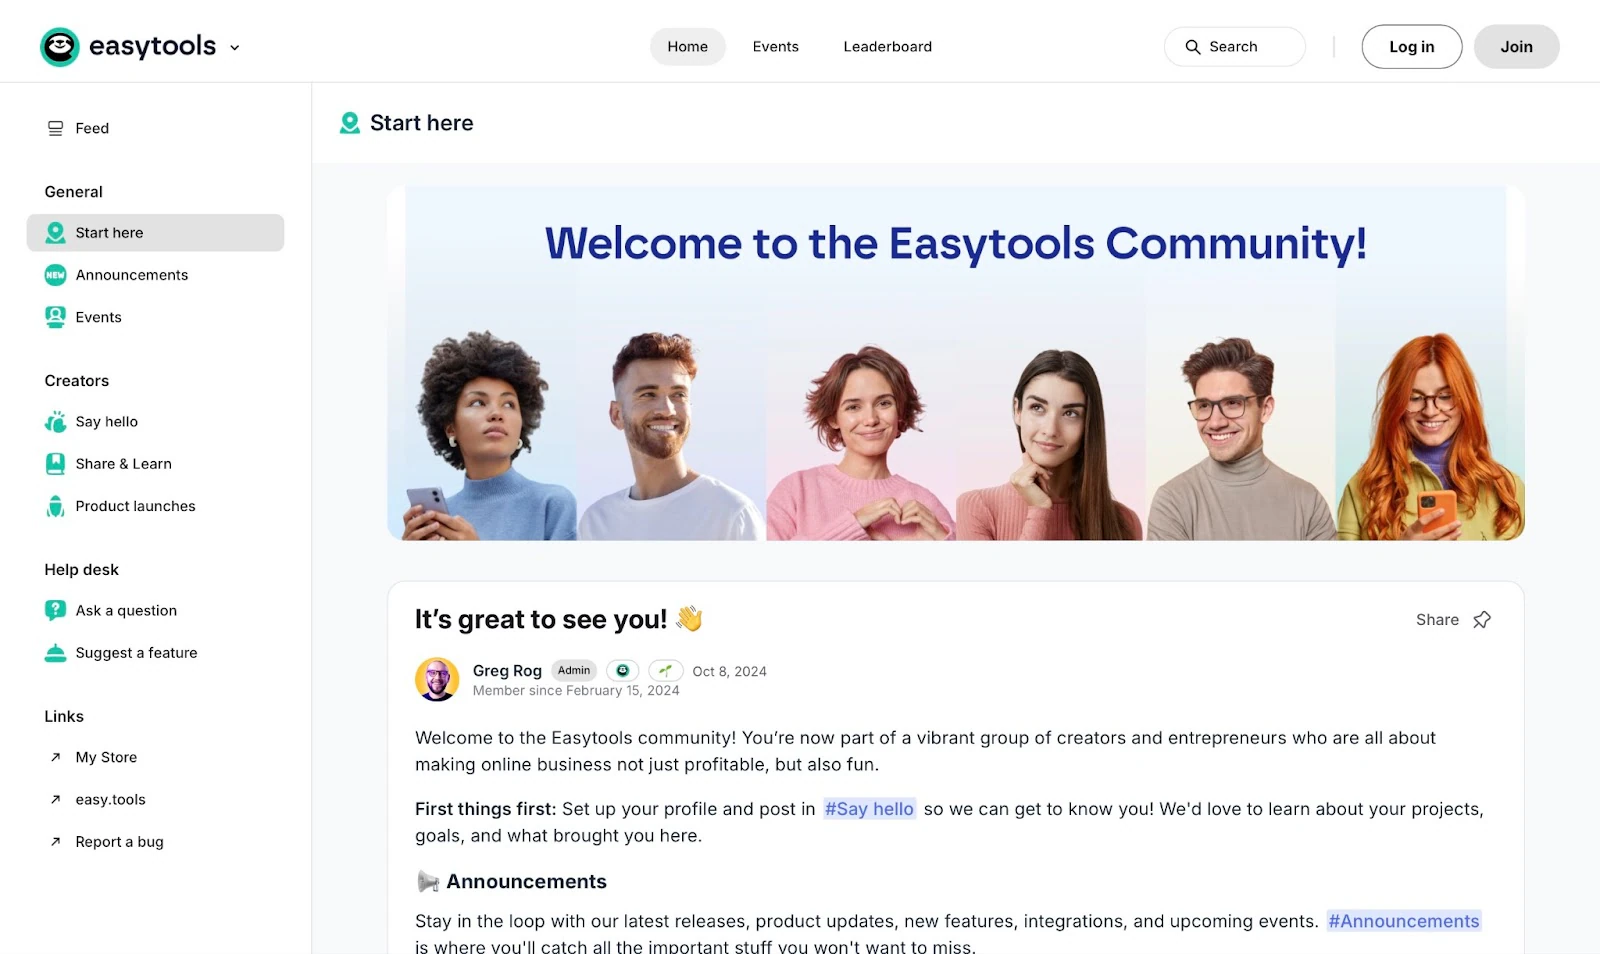
Moreover, there’s also the Easytools Community for instructors, creators, and business owners who sell on the platform to connect and share insights.
8. Consider budget
When choosing an online course platform, having a budget can help you gauge the tools that are good options. You may desire a particular platform because it has some outstanding features.
Unfortunately, if it’s way too expensive for your business size, it is no longer ideal.
Moreover, can you afford to build, create, or host on a platform that’s subscription-based or commission-based (revenue share)?
With a subscription-based model, you pay a monthly or annual fee. Some subscription platforms also charge a small transaction fee depending on your plan.
Easytools, for instance, charges a 2% transaction fee for its Creator plan.
With a pure revenue-share model, the platform takes a percentage of each sale your course makes. For example, if there’s a 10% commission and $5,000 in sales, that means they’ll take $500/month.
So depending on your earnings, the choice is often between a no-subscription tool with higher transaction fees, or a paid tool that takes less of your income.
9. Assess integration with existing tools
If you’re a course creator who uses other online tools in your line of work, consider assessing how well an online course platform integrates with existing tools.
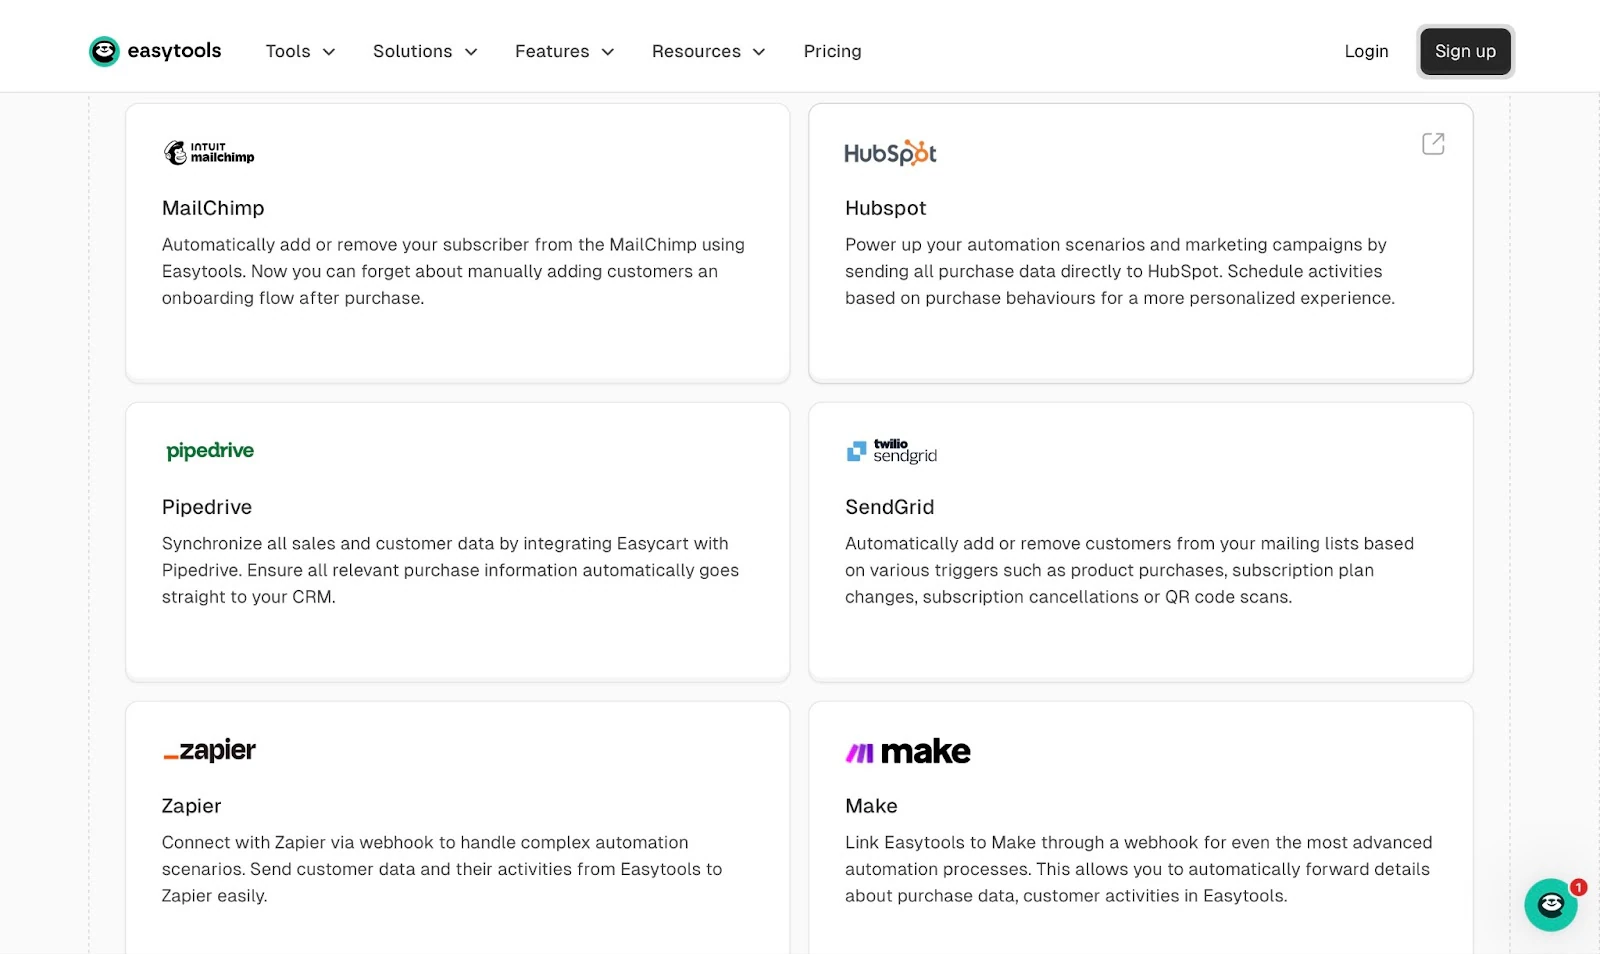
There are several industry-leading tools, such as MailChimp, HubSpot, Pipedrive, and Zapier, that you may be using in your current workflow.
Introducing a new online platform shouldn’t make your workflow much more difficult.
With the right tools, you can integrate your workflows for a smooth and seamless experience. In fact, that’s the goal when it comes to integrations, and Easytools makes it possible.
You don’t have to open countless windows just to send marketing emails.
For example, integrating with tools like MailChimp, ActiveCampaign, and MailerLite helps support your marketing efforts. They can help to send automated emails to leads and nurture those who have abandoned their cart.
Another example is Zencal. It’s a tool that helps business owners and instructors book and manage calls with potential students and customers.
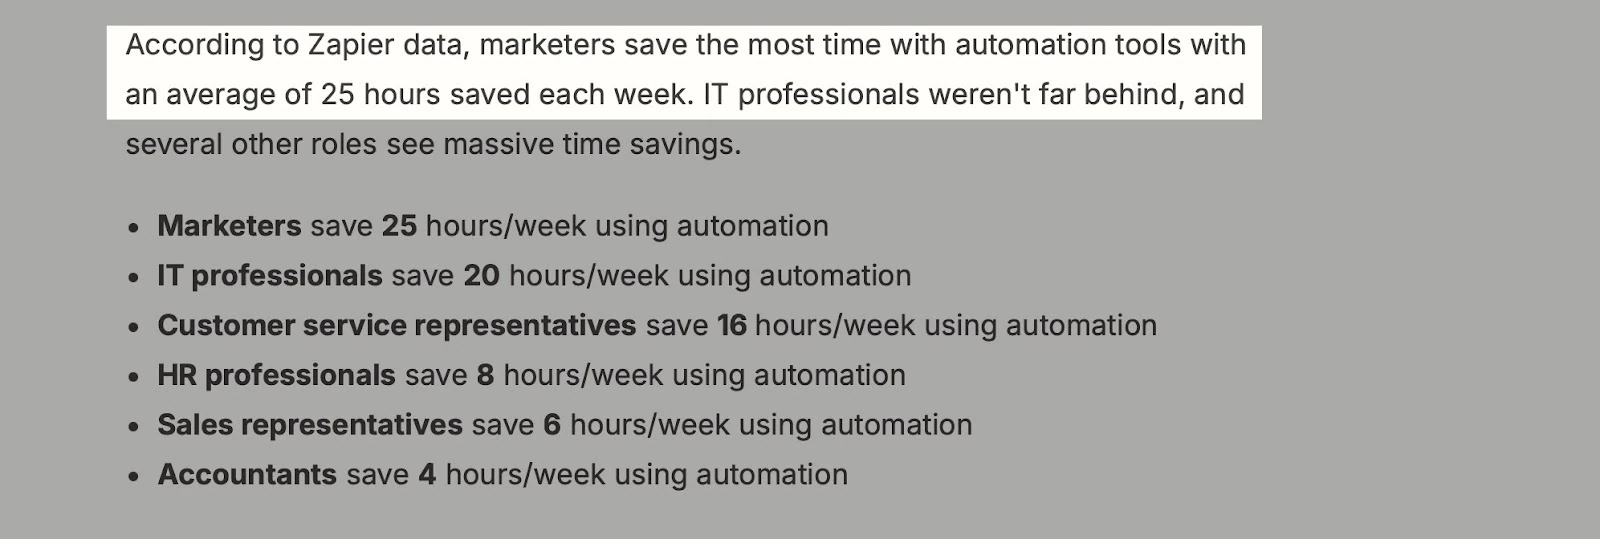
Tools like Zencal are time-savers. Zapier, for instance, reports that marketers saved an average of 25 hours each week with automated tools.
All these tools play a crucial role in the sale and marketing of your online courses. They are essential to the success of your online course.
10. Check security and compliance
To crown it all, you should check security and compliance levels when choosing the right online course platform.
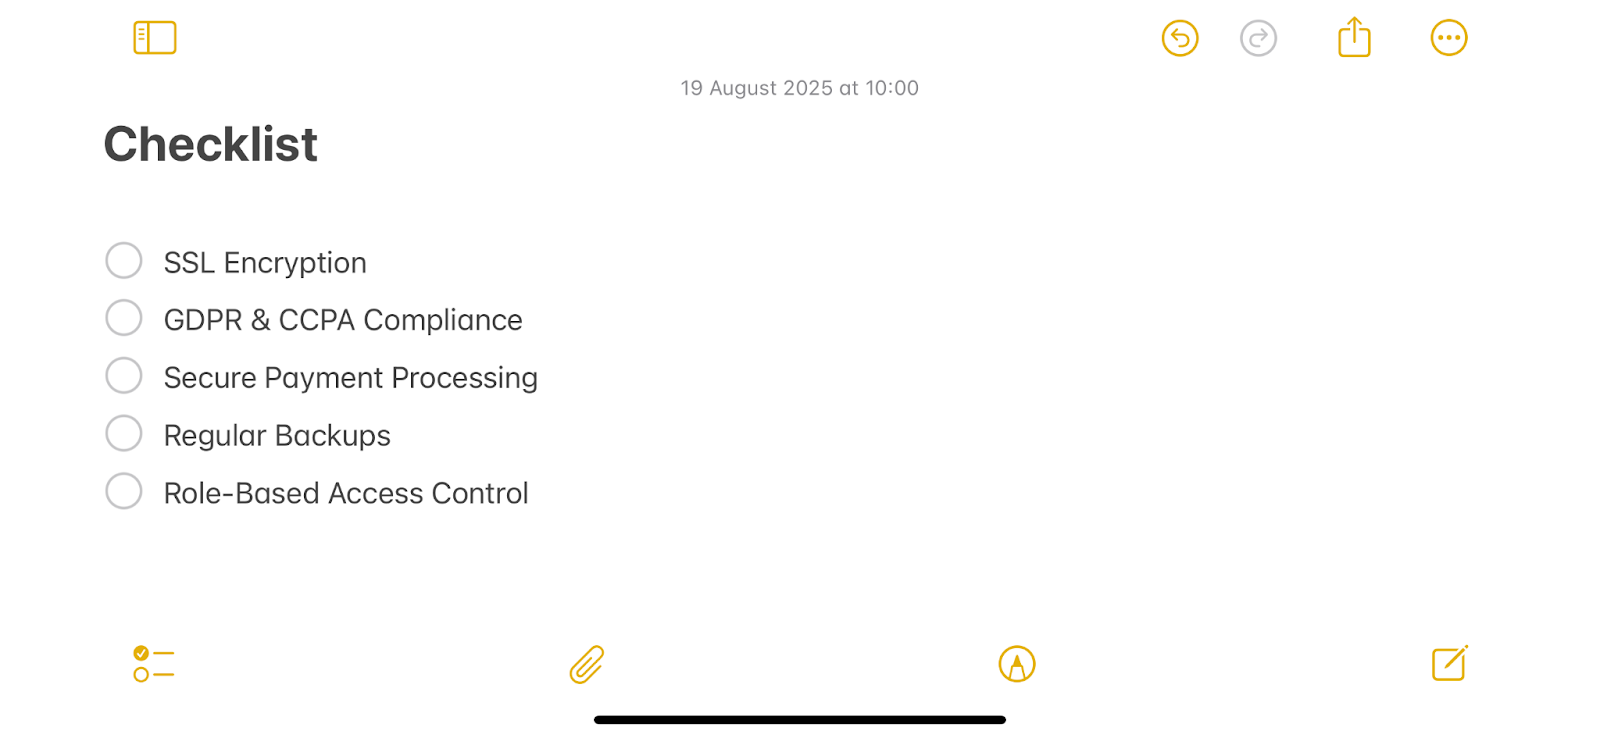
Key aspects you have to look into include a Secure Sockets Layer (SSL) encryption to ensure that all data transfers and chats between you and your students are encrypted.
Secondly, compliance with the General Data Protection Regulation (GDPR) and California Consumer Privacy Act (CCPA) is a plus. These regulations are mainly for business owners and instructors in the European Union (EU) or California.
In addition, secure payment processing for Payment Card Data Security Standard (PCI DSS) is a must-have. Compliance with credit card transaction handling is a sign of a platform’s credibility.
There should also be Role-Based Access Control (RBAC) to ensure that sensitive areas of your website are only accessible to authorized users.
Examples of such areas can be student information, course libraries, dashboards, administrator settings, and payment records.
This is important because a platform that will store your course materials, payment details, and information about students and customers must be secure. That’s non-negotiable.
According to a 2019 Ping Identity survey, 81% of respondents “would stop engaging with a brand online following a data breach.”
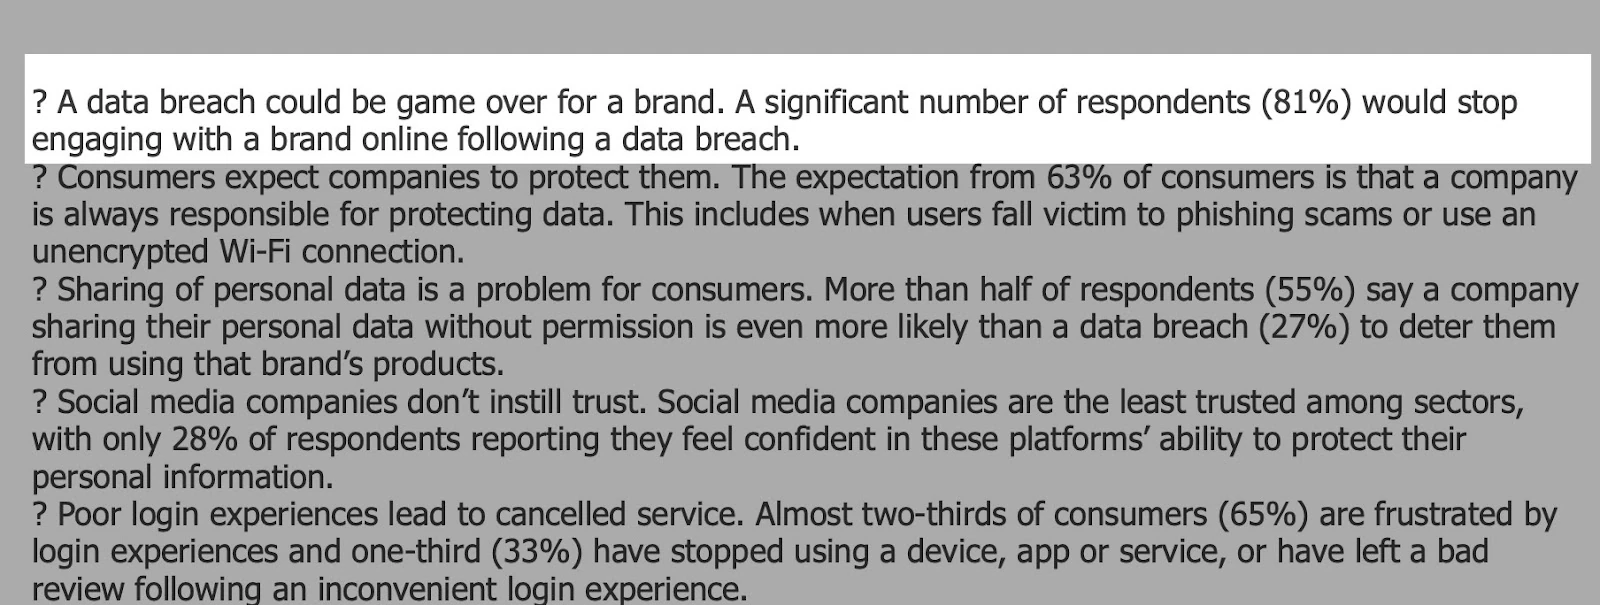
That could be 81% of your customers or students if you overlook security and compliance. So this is a point you wouldn’t want to compromise on.
Choose the best online course platform
In this guide, I reviewed my best online course software: Easytools, Teachable, Gumroad, Udemy, Skillshare, Podia, LearnWorlds, Mighty Networks, and Payhip.
I also discussed how to choose the right online course platform. Among the key aspects you need to check are the platform’s features, data control, monetization, community, budget, and security.
Easytools stands out among my ten best for its ease of use, simple interface, advanced customization options, powerful built-in tools, and more.
It’s also the most beginner-friendly and cost-effective platform.
With Easytools, you can begin creating and selling your courses as soon as possible. It offers every tool you need to create, launch, and market them online. All of that without a steep learning curve and unnecessary or hidden costs.
FAQs
What is the best online course platform?
The best online course platform is Easytools because of its cost-effectiveness and beginner-friendly setup.
What are the best online course platforms with certificates?
The best online course platforms with certificates are Easytools, Teachable, and LearnWorlds. Easytools especially makes the list because of how easily you can issue certificates automatically through Easyplayer.
What are the best online course platforms for students?
The best online course platforms for students are Easytools, Udemy, and Skillshare because they can provide access to thousands of affordable courses across different topics.
What’s the difference between a course marketplace and a course platform?
The difference between a course marketplace and a course platform is that a marketplace like Udemy sells your courses alongside others, while a platform like Easytools lets you sell on your own branded site with full control.
Which online course platform is best if I want full control over my student data?
The best online course platform for full control over your student data is Easytools because it gives you direct ownership of your audience and their information.
Do I need technical skills to set up a course platform?
You don’t need technical skills to set up a course platform on Easytools because everything is built with a simple, no-code setup and ready-to-use templates.
Can I host live classes in addition to pre-recorded content on online course platforms?
Yes, you can host live classes in addition to pre-recorded content on online course platforms like Easytools, Podia, and LearnWorlds because they support live video integrations.