Selling online
25 min read
10 Best platforms to sell digital products in 2026! (Tested all of them)
Choosing the right platform to sell digital products can save you headaches and boost your earnings. I tested 10 platforms to help you find the best fit for your needs.

Written by
Marta JagoszReviewed by
Greg Rog
Updated on
February 8, 2026
Published on
August 21, 2025

Digital products created more than $2.5 trillion in annual value as of 2025.
This huge number clearly shows that the demand is massive and still growing.
Creating digital products like e-books, online courses, or even memberships is not really the problem. The real issue is how and where to sell them.
You don't want to spend weeks creating an amazing digital product only to struggle with a complex platform. Worse, the platform is so terrible that you fail to generate income
Hence, you need to choose the right platform to sell your digital products.
I spent the last six weeks testing many platforms. I created stores, landing pages, and checkout pages. I bought my own products to see how each platform handles transactions. Now, I'm ready to share my experience.
Here are my top 10 best platforms to sell digital products, including how to choose the best one.
Keep reading!
[fs-toc-omit] Key takeways:
- The best platforms to sell digital products are:
- 1. Easytools
- 2. Gumroad
- 3. Podia
- 4. Sellfy
- 5. Payhip
- 6. Beacons AI
- 7. Teachable
- 8. Samcart
- 9. Send Owl
- 10. Stan Store
- The best free platforms to sell digital products are 1. Easytools, 2. Gumroad, 3. Etsy, 4. Payhip, 5. Teachable, and 6. Creative Market.
- To choose a site to sell digital products, check transaction fees, ease of use, payment processing, file hosting and delivery, built-in marketing tools, and integration with other tools.
- A digital selling platform lets you create a page where you can sell your digital products. It also stores your files (such as PDFs and videos) and delivers them to customers after they buy your product.
- The most profitable digital products to sell online are online courses, e-books, templates, software and mobile apps, membership programs, and subscriptions.
Best platforms to sell digital products compared
10 Best platforms to sell digital products
1. Easytools
At the top of our list of the best platforms to sell digital products is Easytools.
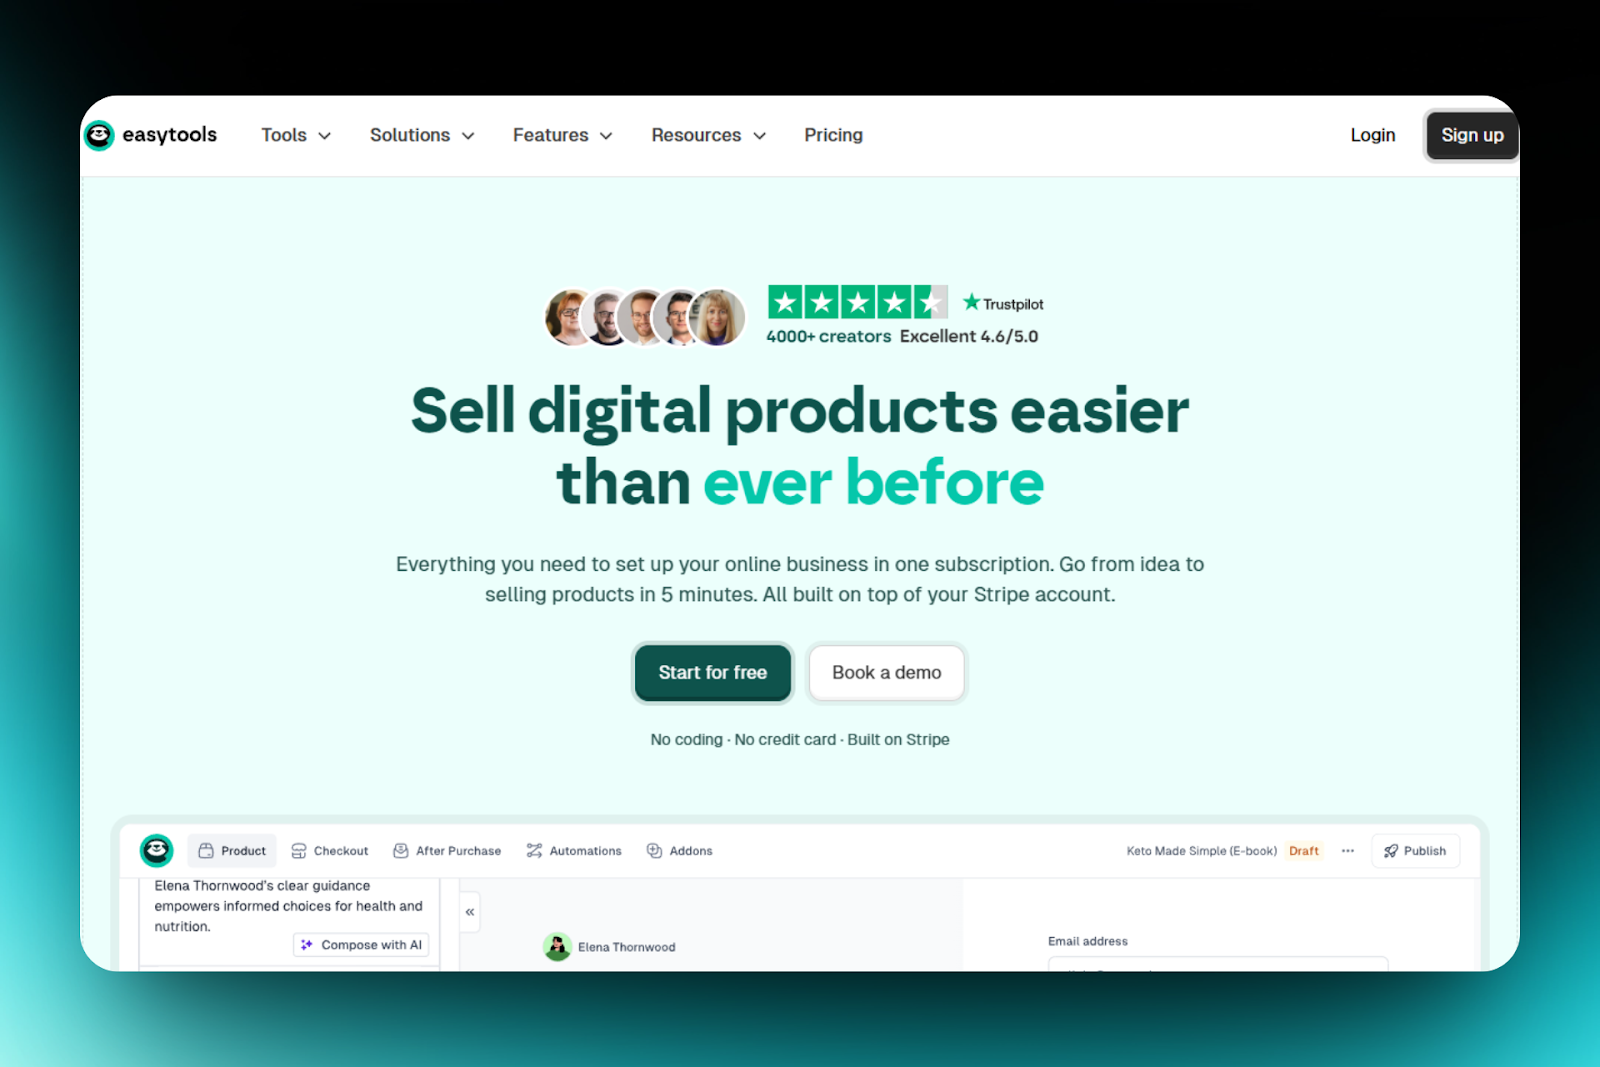
It allows you to create an online store and sell digital products like e-books, courses, memberships, etc. Simply upload your files, add descriptions, prices, and more.
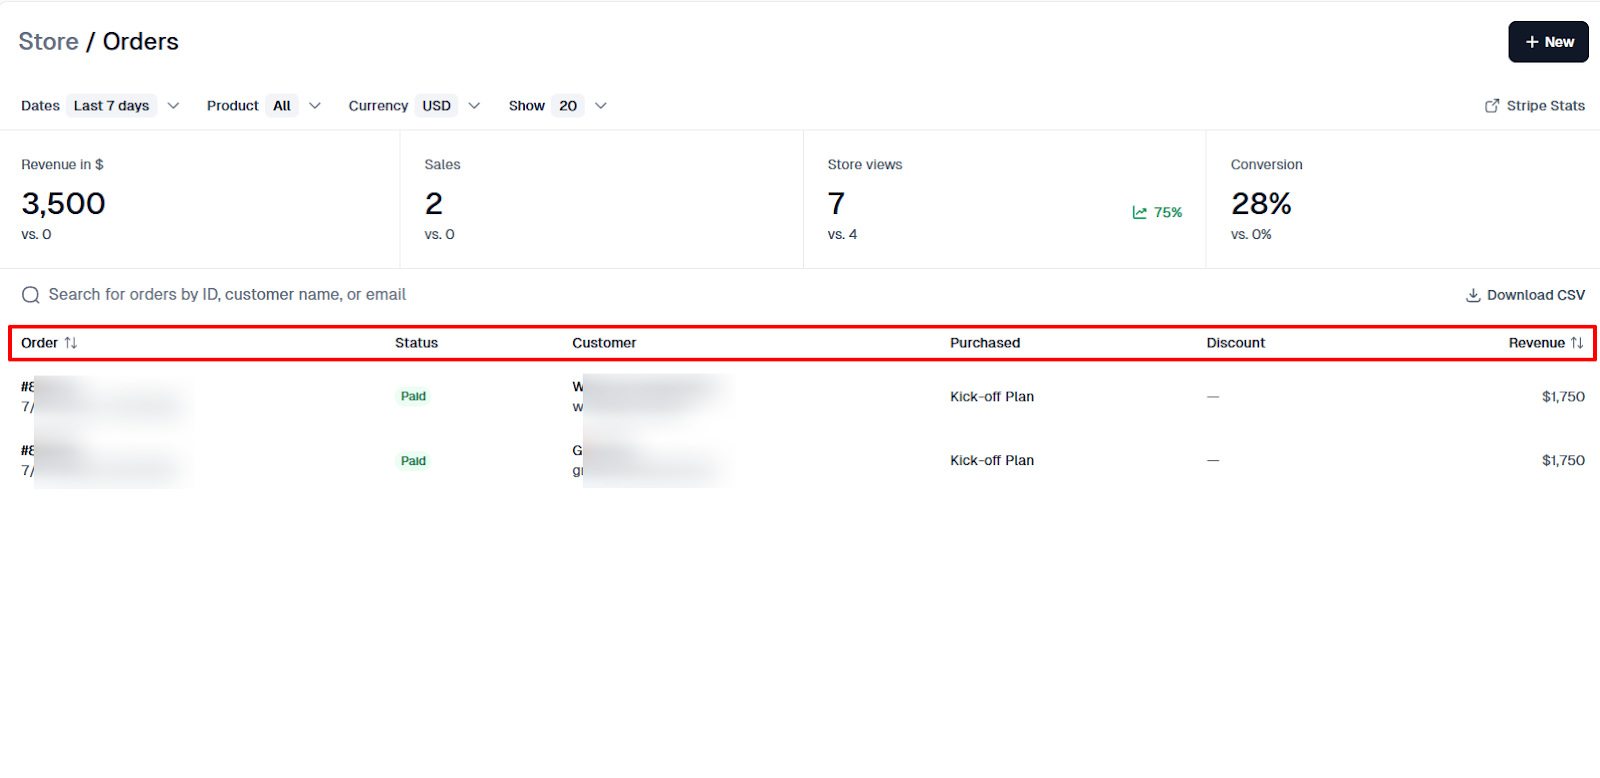
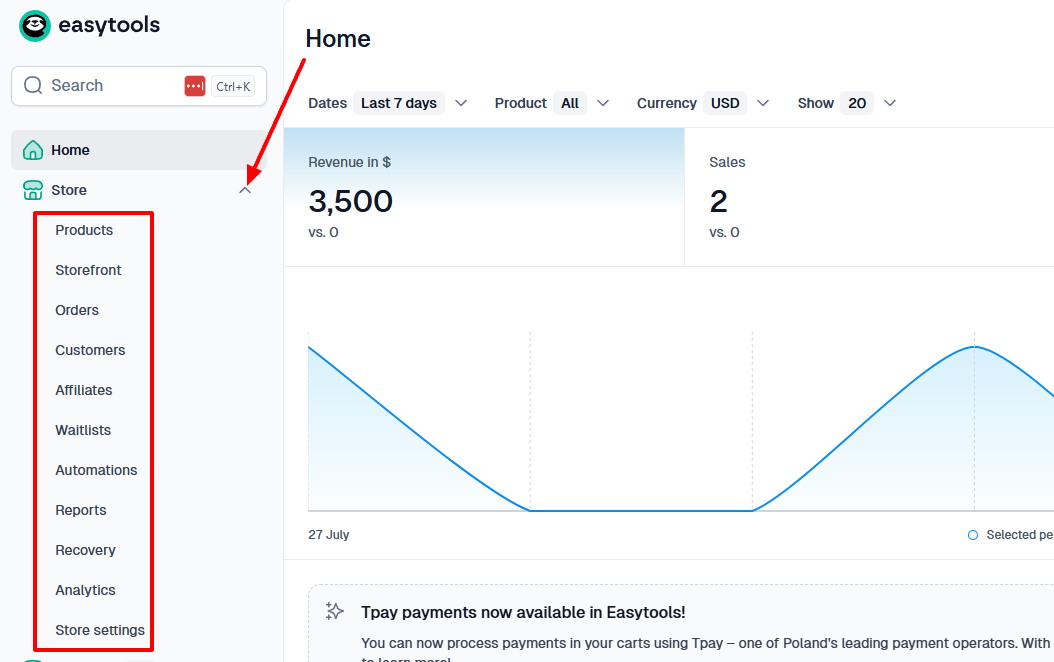
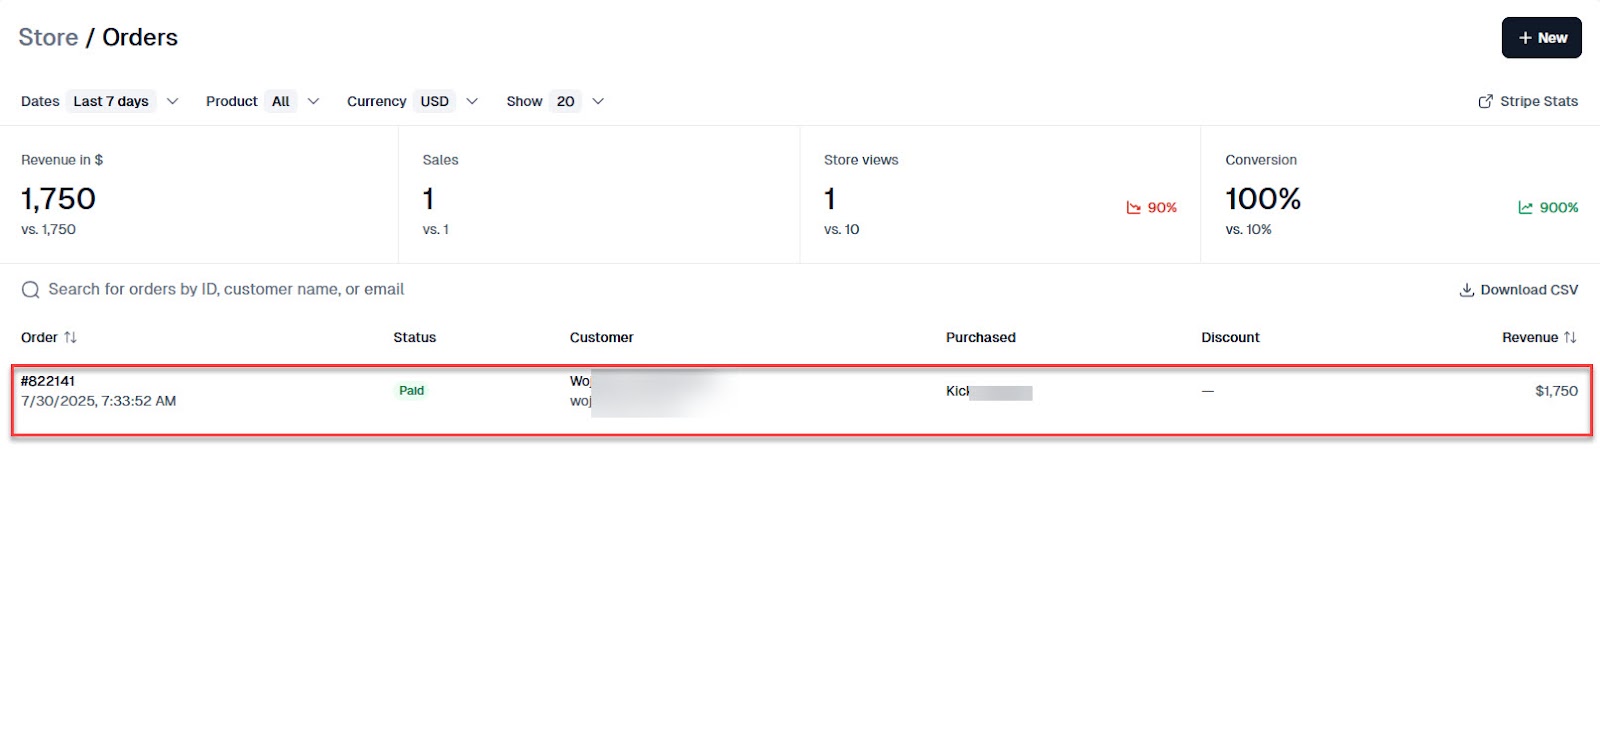
Moreover, Easytools comes with a home dashboard that displays your revenue, the number of sales, and new customers.

You can also access your orders along with their statuses, customers, and purchased items.
But I love the testimonials feature.
It lets you collect reviews from customers and display them on a testimonial page.
I can simply name my wall and choose a design. Afterwards, I can request the reviews from customers or import them from Google.
Last but not least, we have the course feature. We made this specifically for course creators.
I can create a new course when I name the project, add a file type, file source, and link. I can also choose the course duration, add a description, and specify the file release date.
The process to sell your digital product on Easytools is simple. Let me walk you through it.
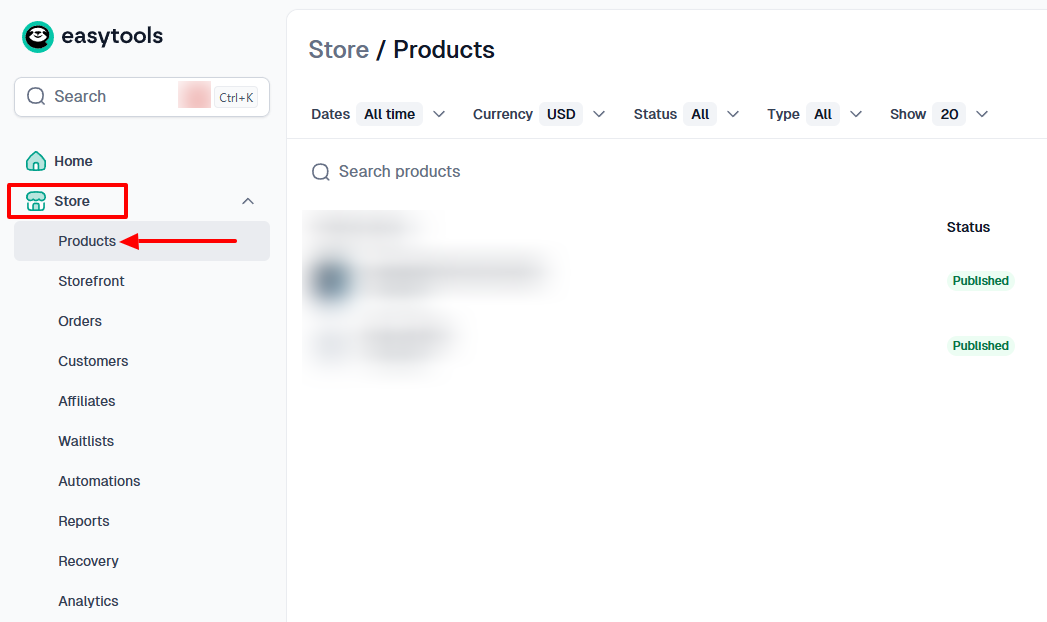
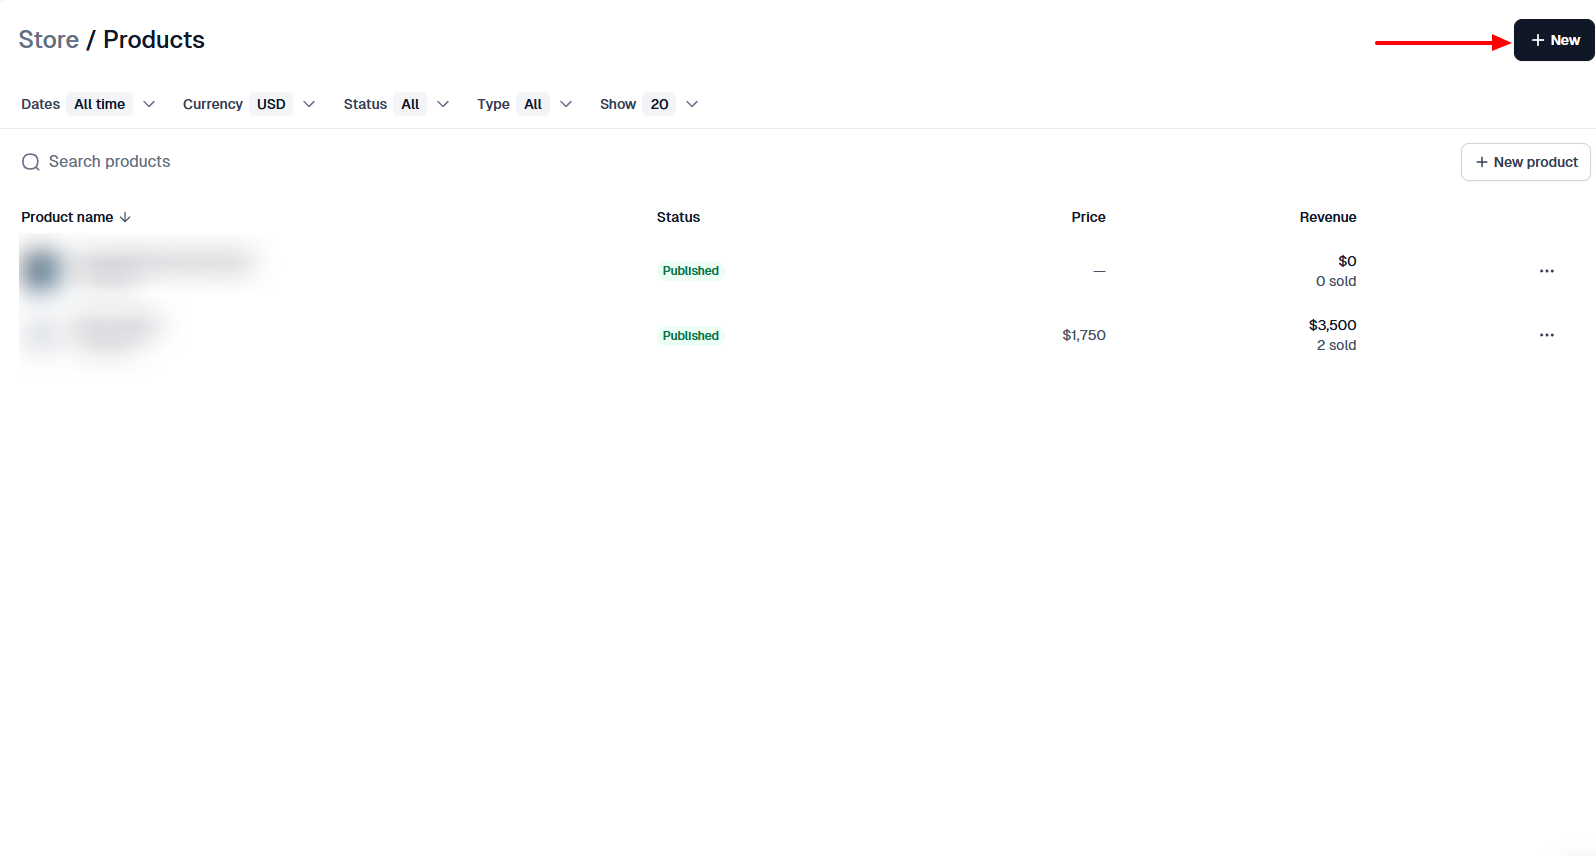
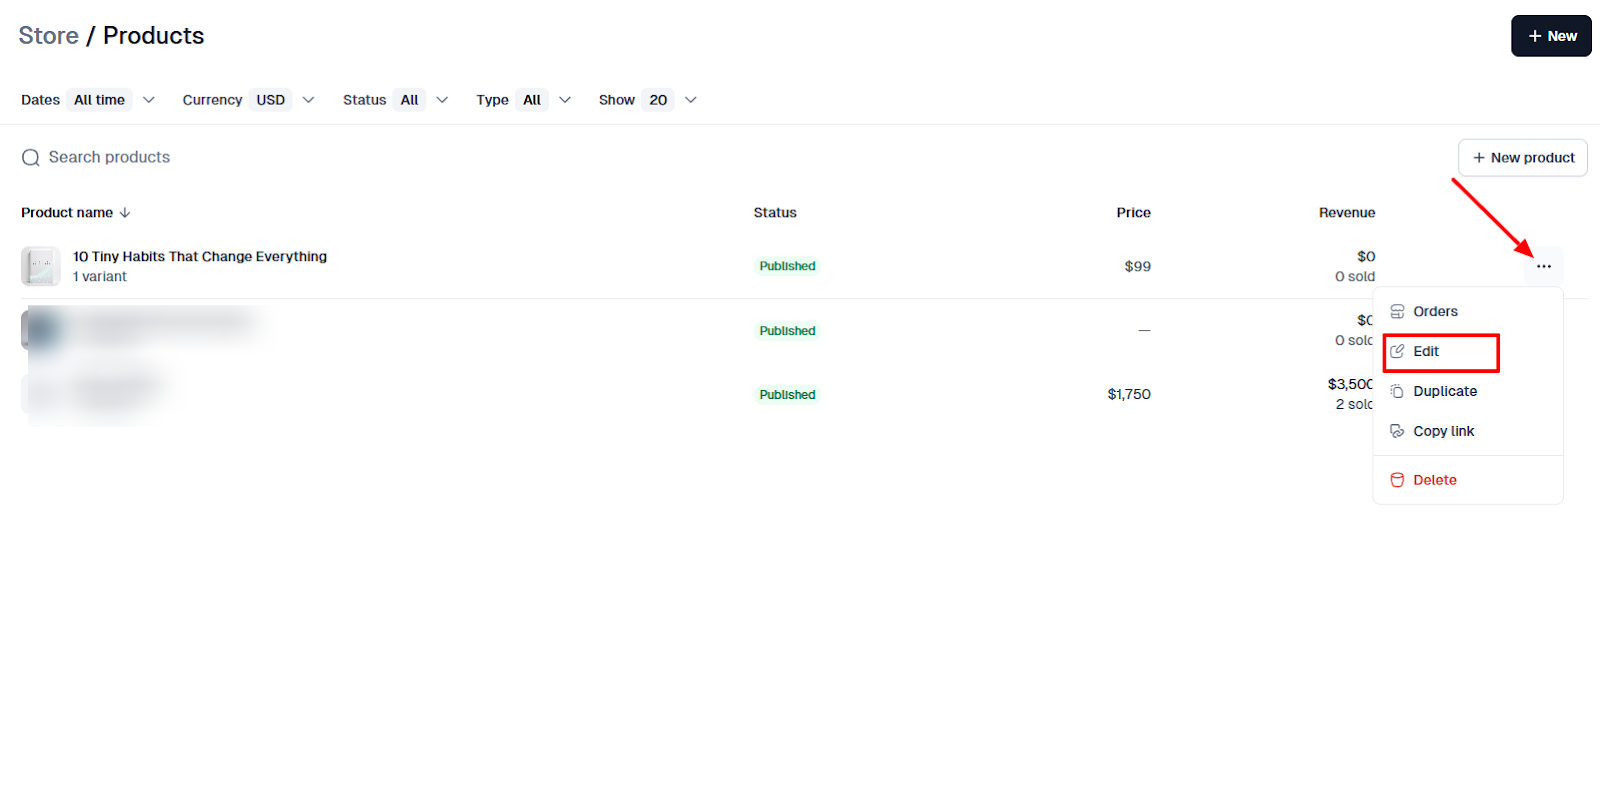
On the sidebar menu, go to “Store”, then click “Product”.
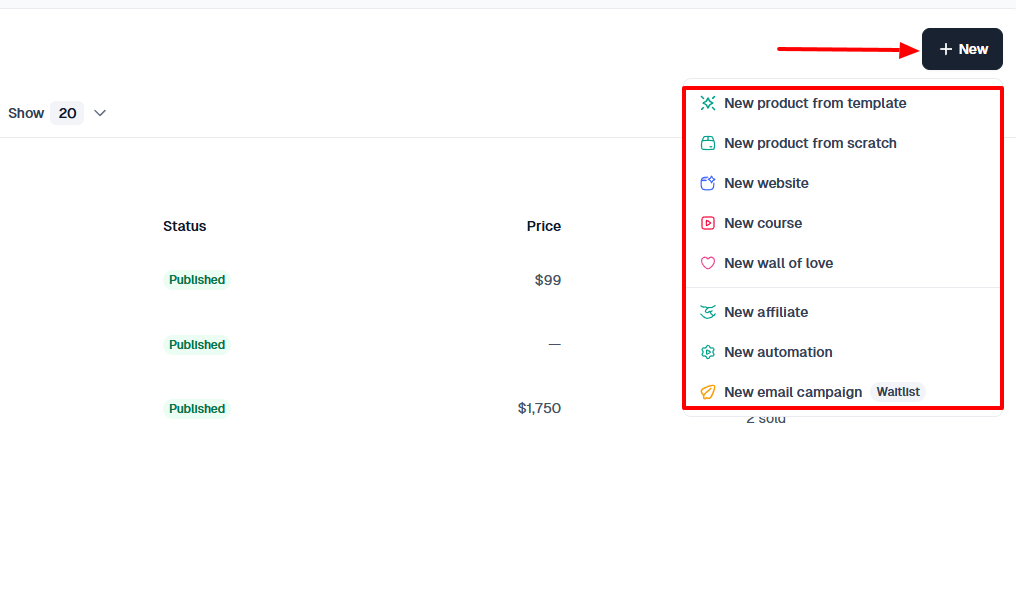
On the far left of the interface, click “New”.
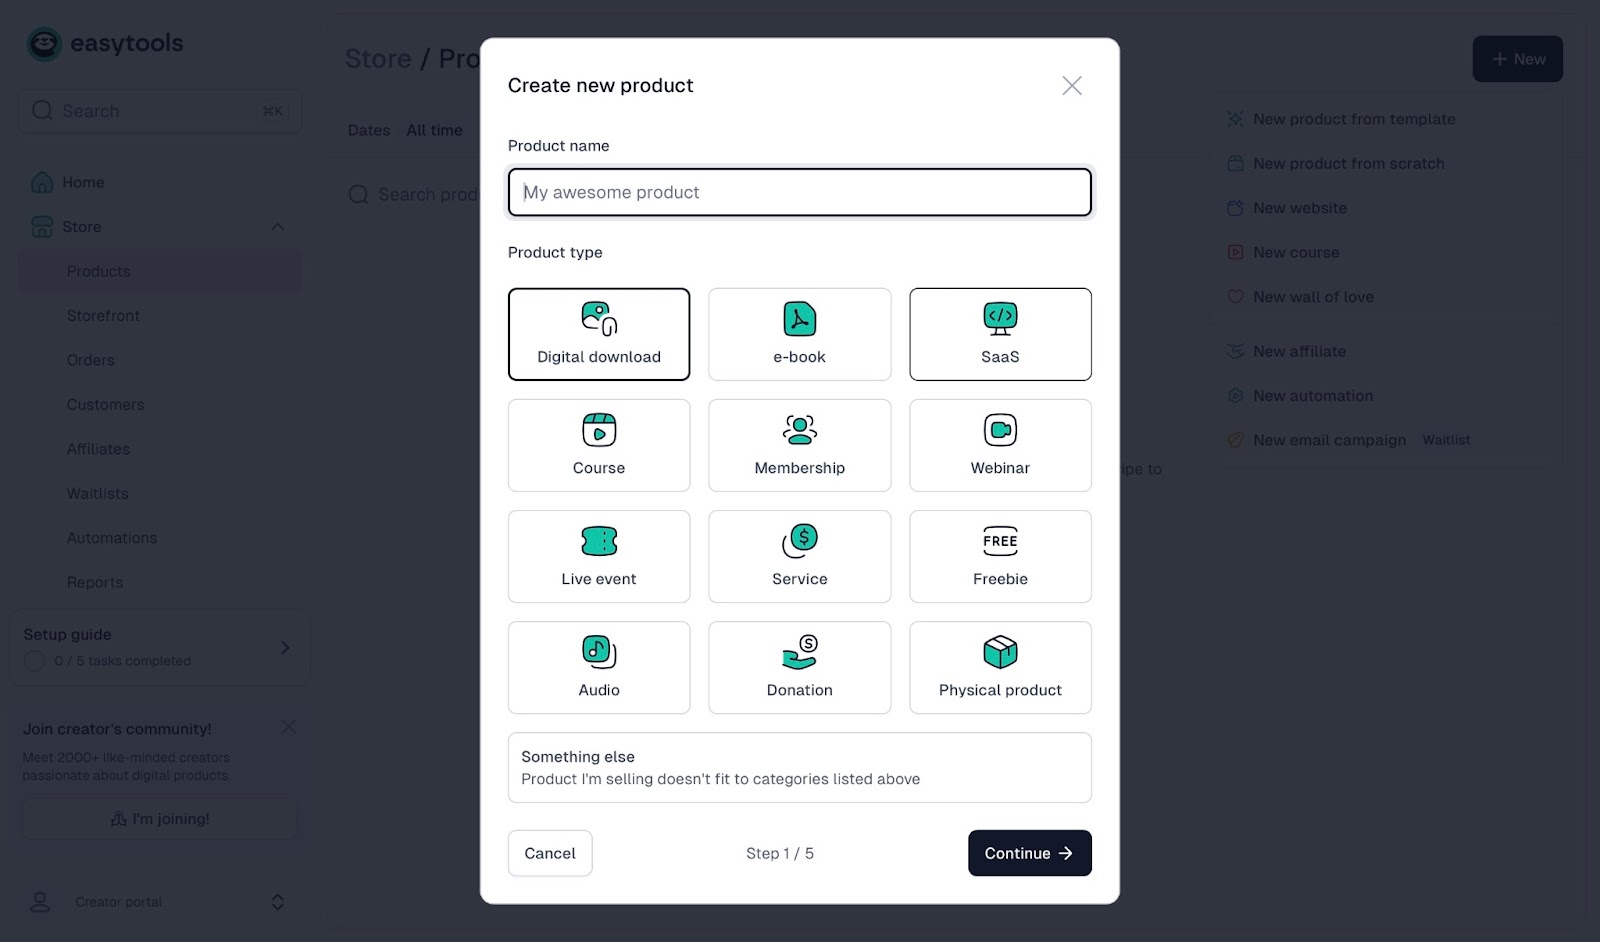
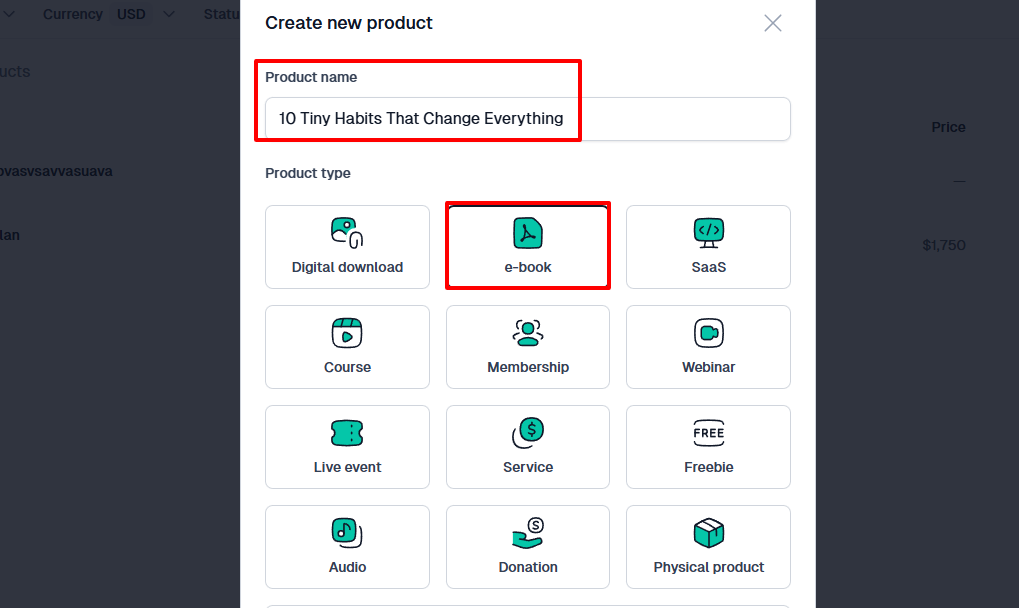
You can start a new course, website, automation, or product from scratch. If you don’t want to start from scratch, there are templates available. Let’s use a template to save us time in this tutorial.

Next, add your product name and choose a product type. To illustrate, I’ll create a self-development e-book titled “10 Tiny Habits That Change Everything”.
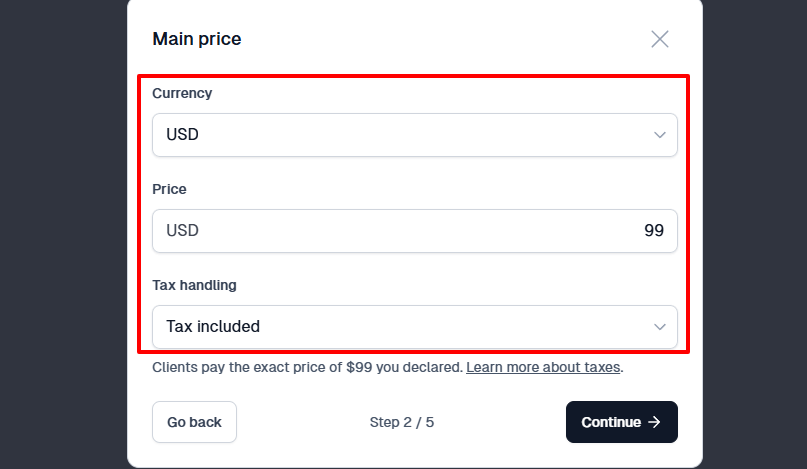
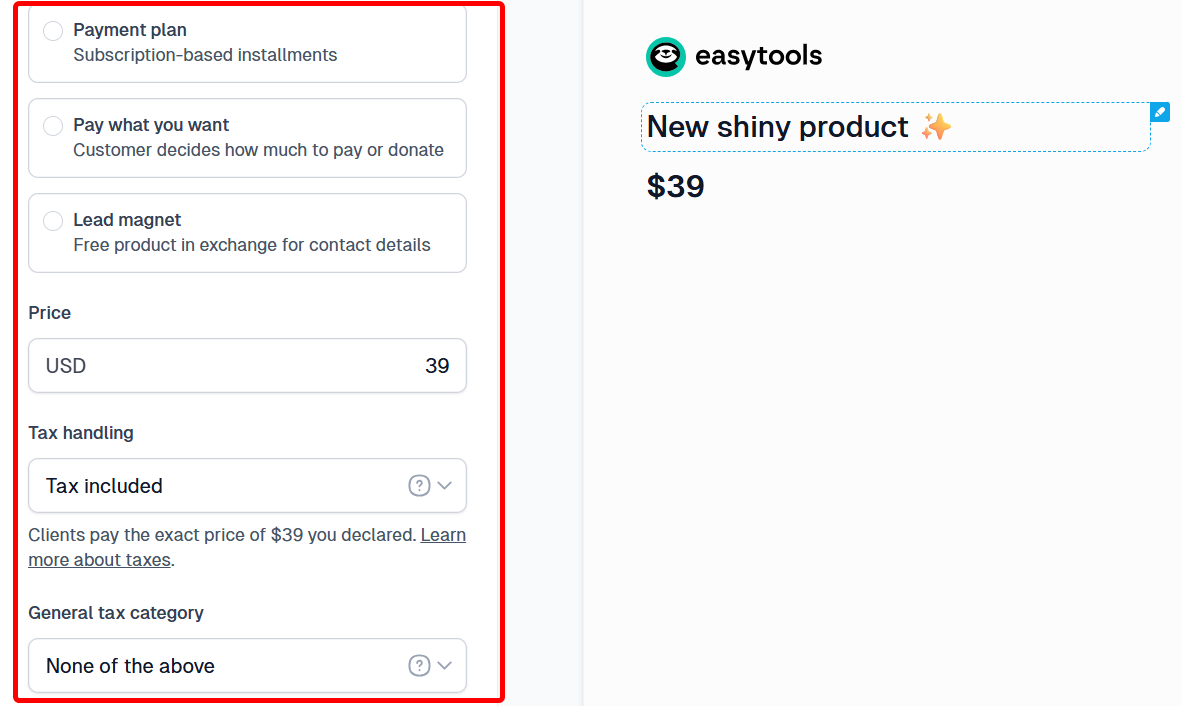
Then, I’ll add my price, select the currency, and specify how to handle tax.
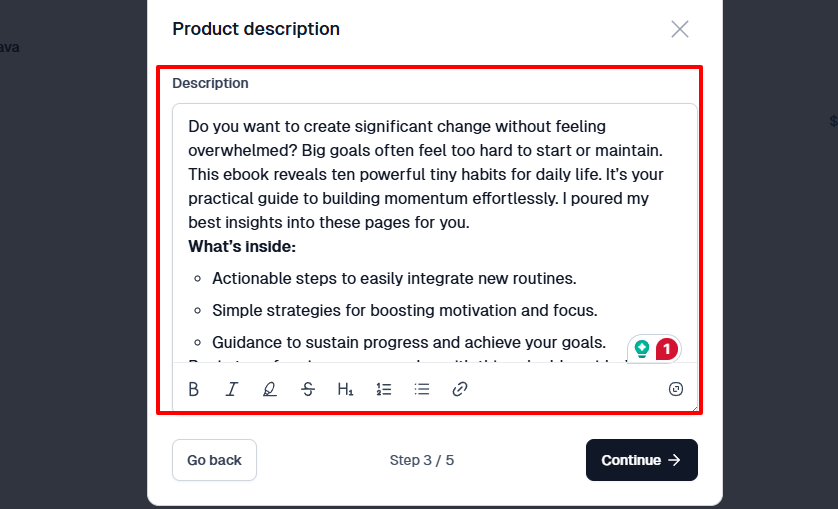
On the next page, add a description of your product that buyers will see on the checkout page.
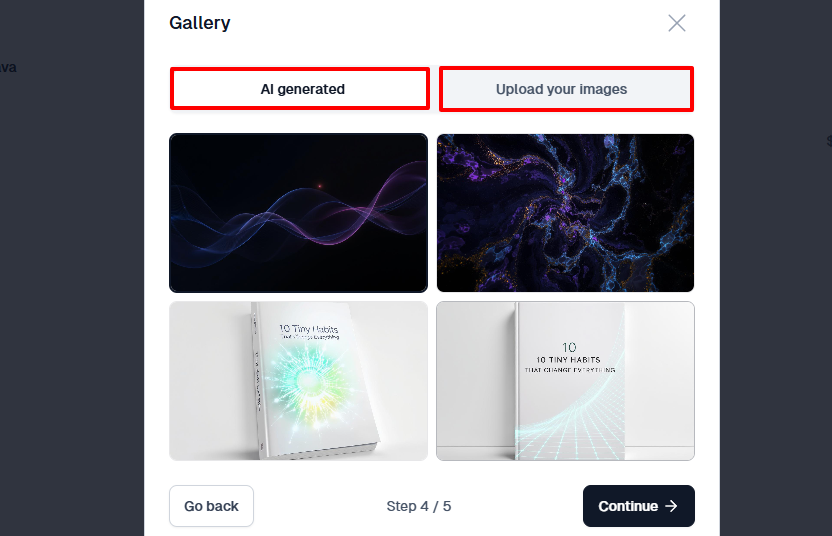
Now it’s time to add some images or visuals. You can always upload your images or let Easytools generate AI cover images for your e-book.
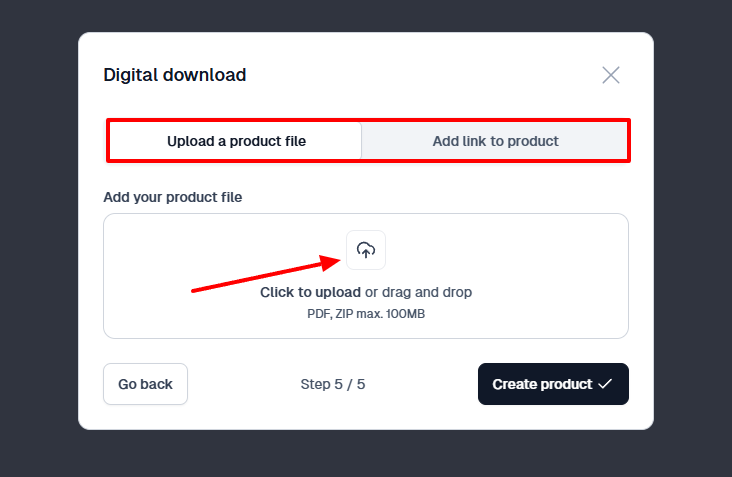
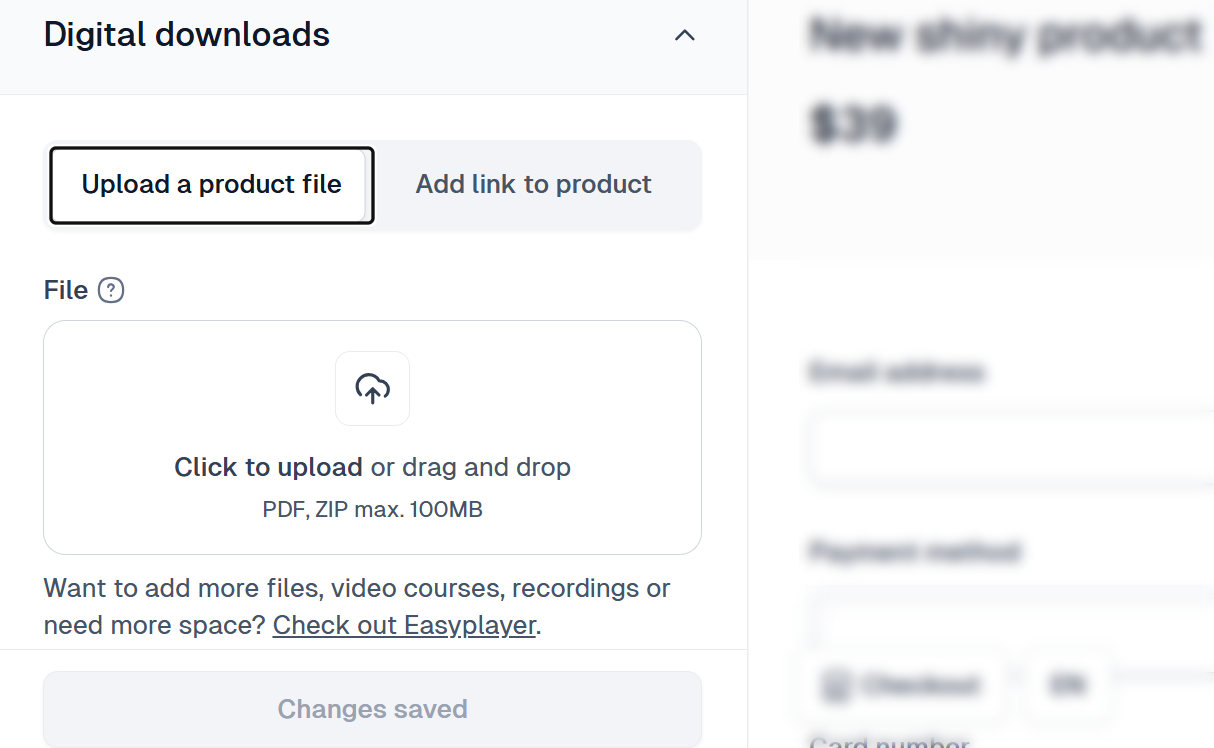
It’s time to upload your product file or add a link to the product.
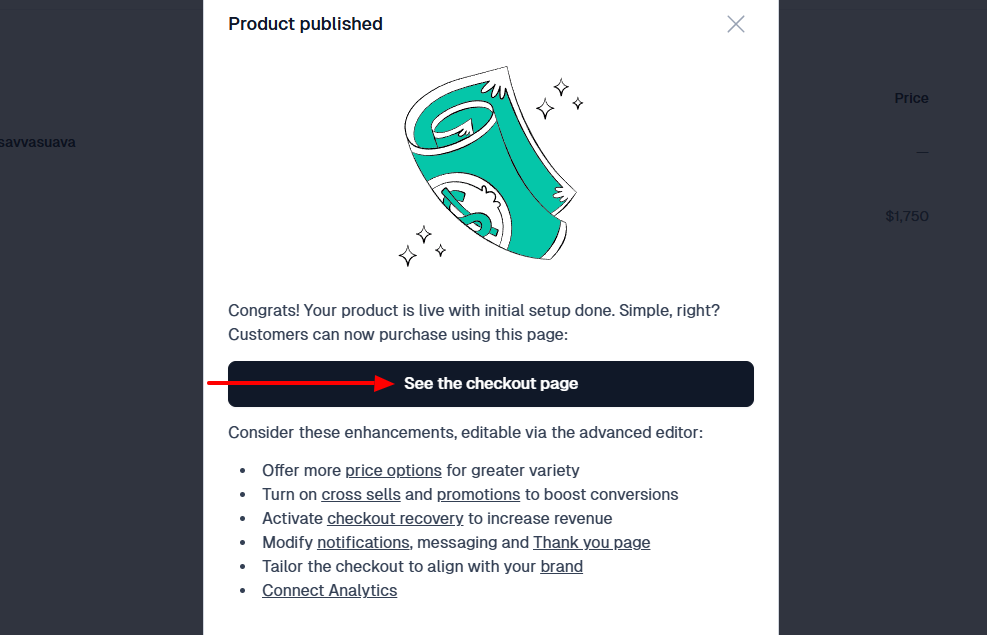
That’s it! Your e-book has been published! You can view the checkout page now.
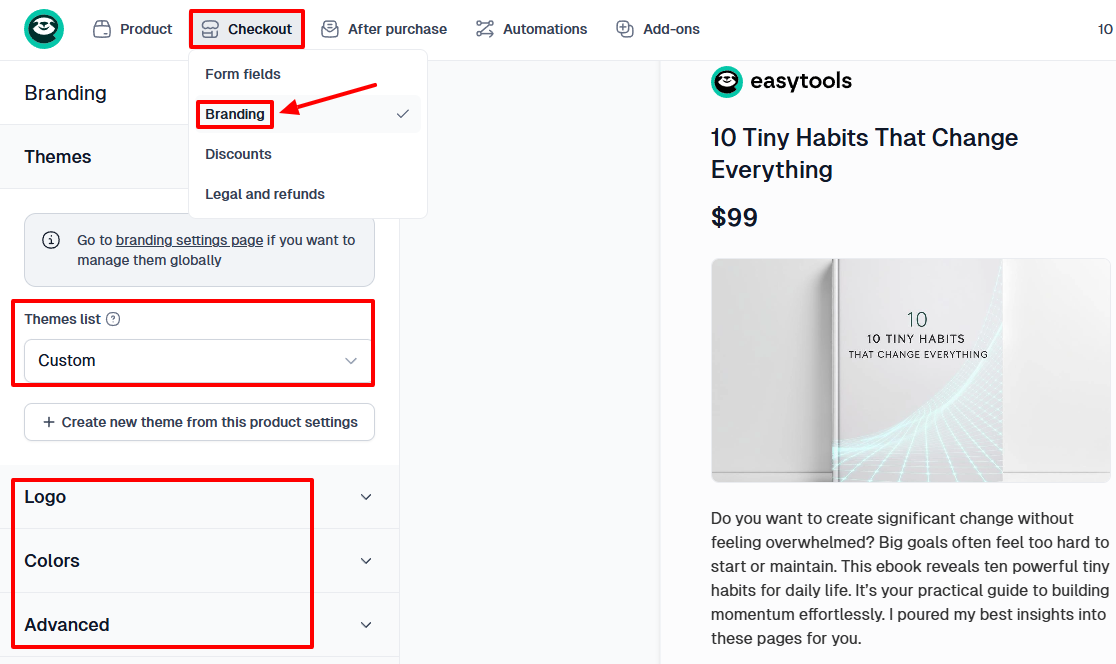
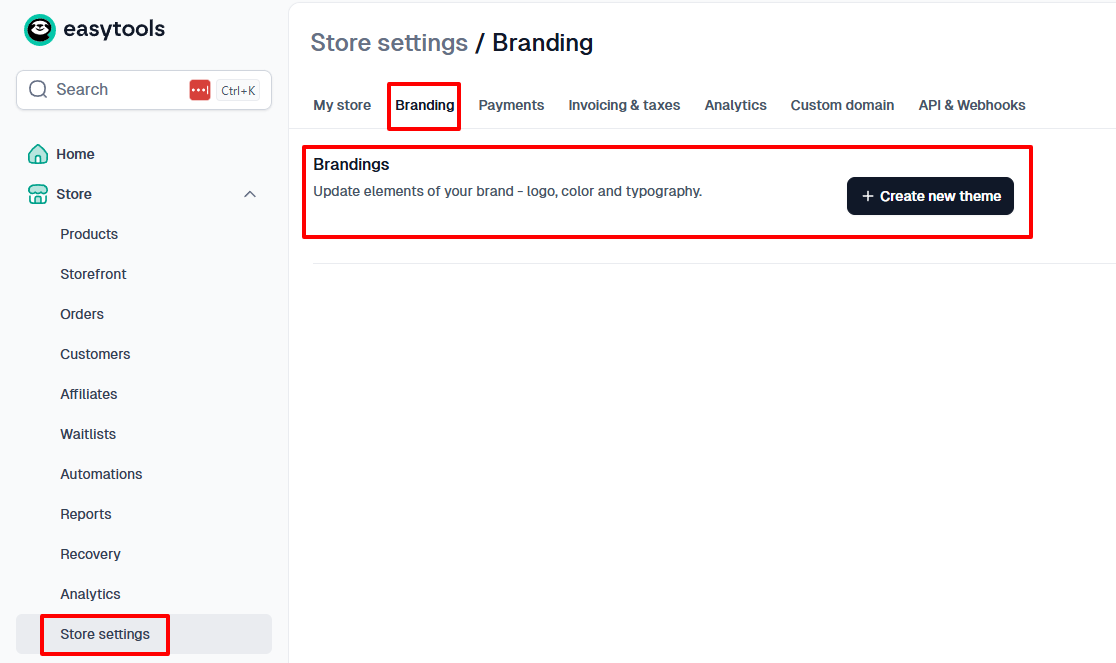
Under “Checkout”, you will find “Branding”. This section allows you to select a theme, add your logo, match your branding colors, and do a lot more with advanced options.
Now that your product is already published, you can share it with the whole world.
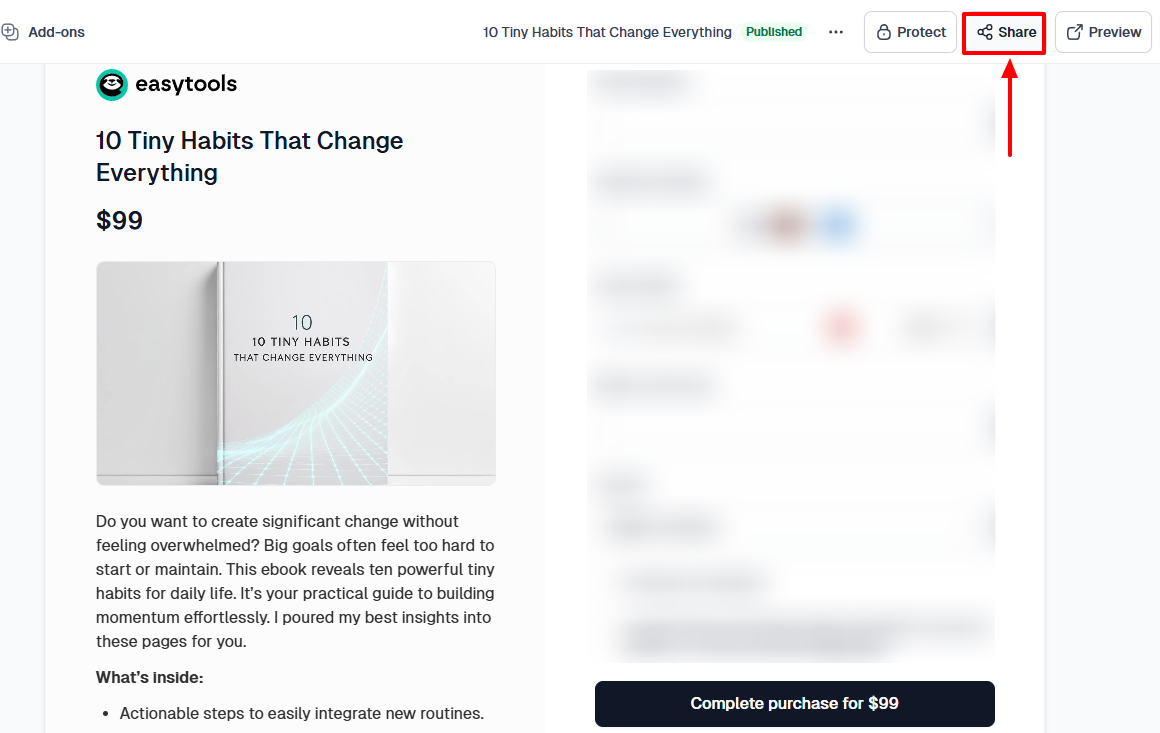
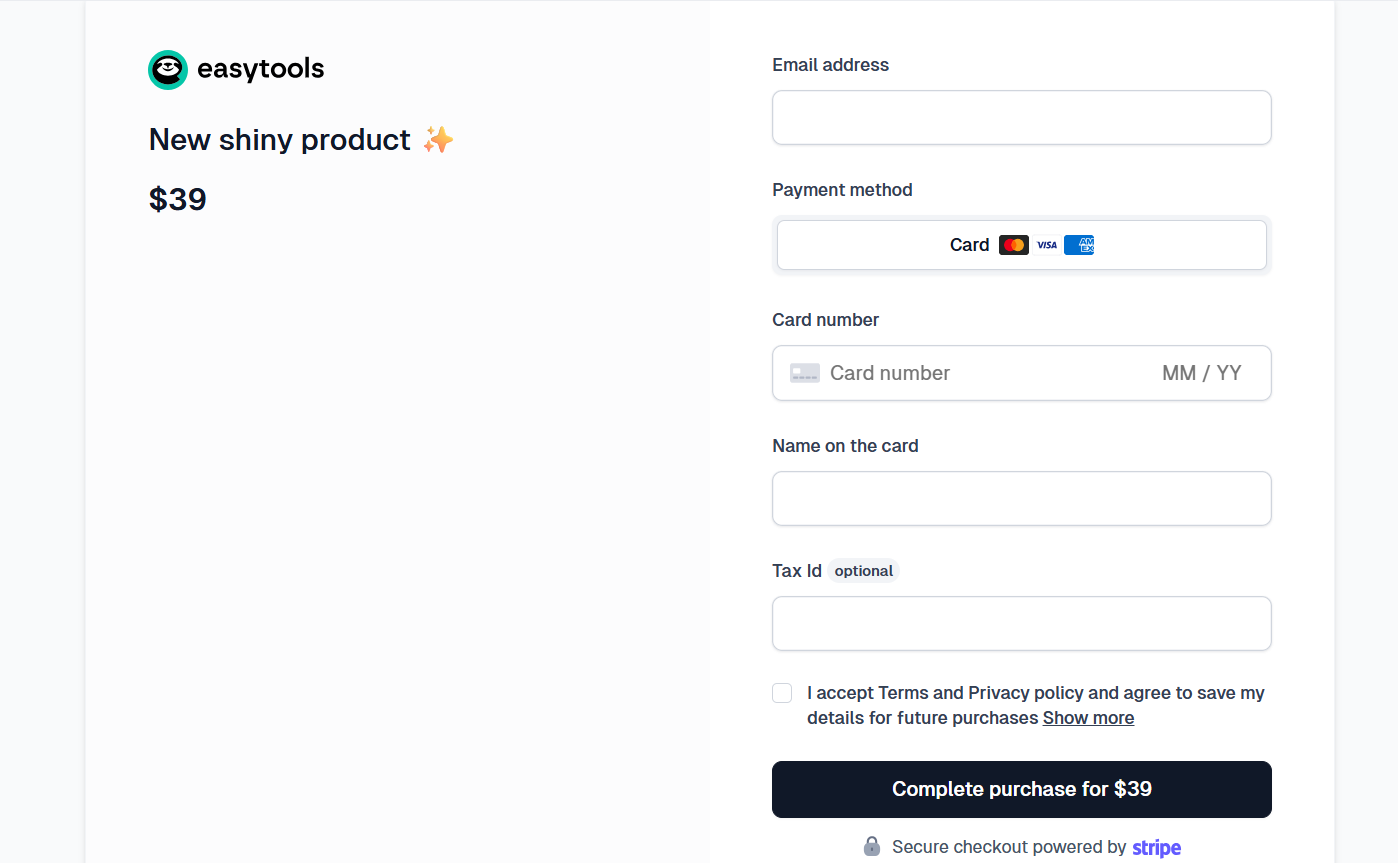
And this is what potential customers will see when in the process of purchasing your e-book.
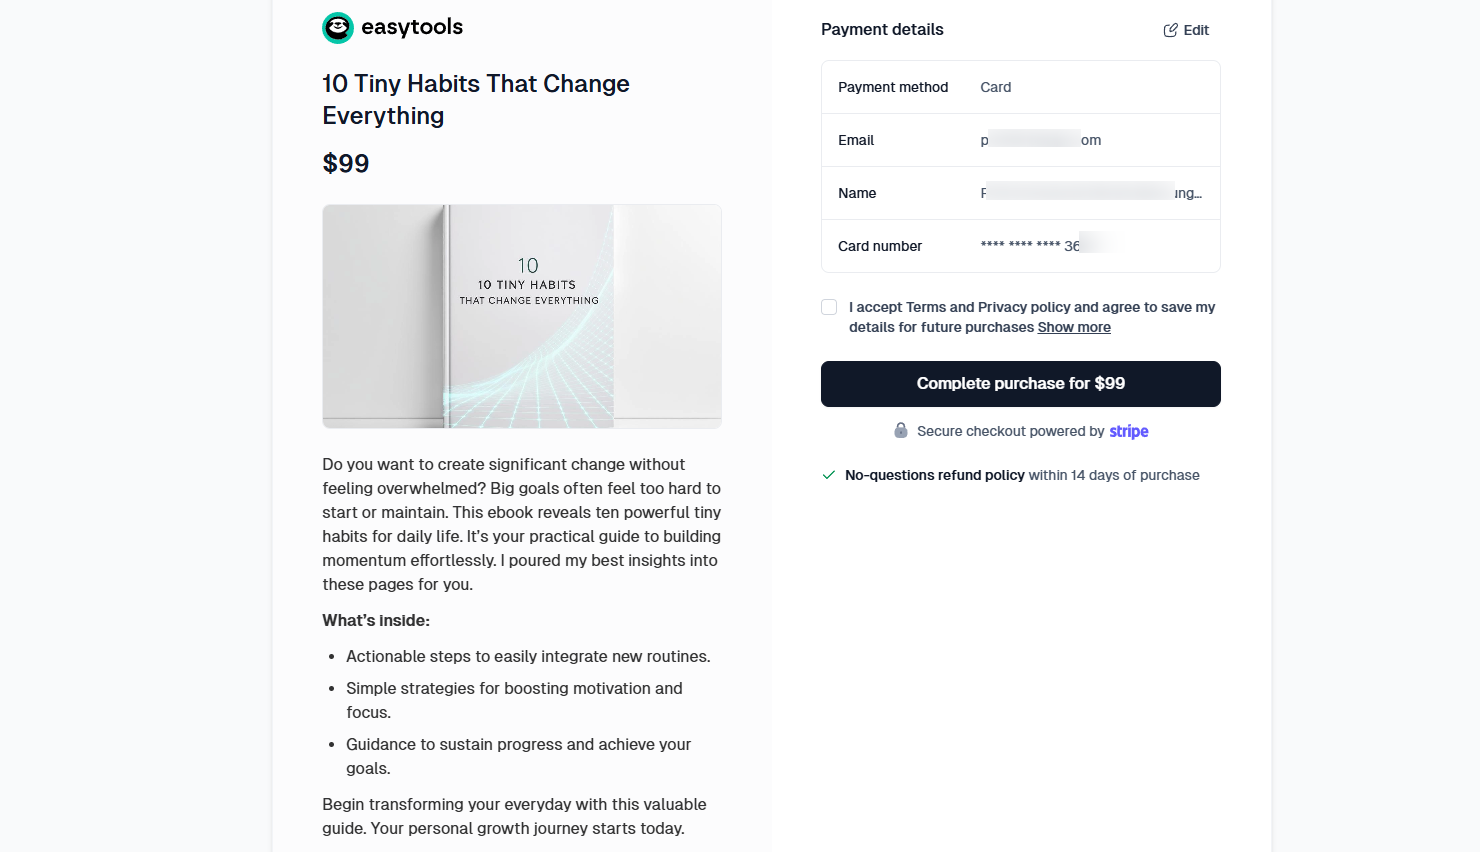
Easytools makes it so easy to create, or upload and sell your digital product, whether you want to start from scratch or with amazing pre-built templates.
But it also comes with other great features. Let’s discuss a few.
[fs-toc-omit]Key features
1 . Home
This is the first interface you see when you sign in to Easytools. The home dashboard gives you an overview of your digital product performance.
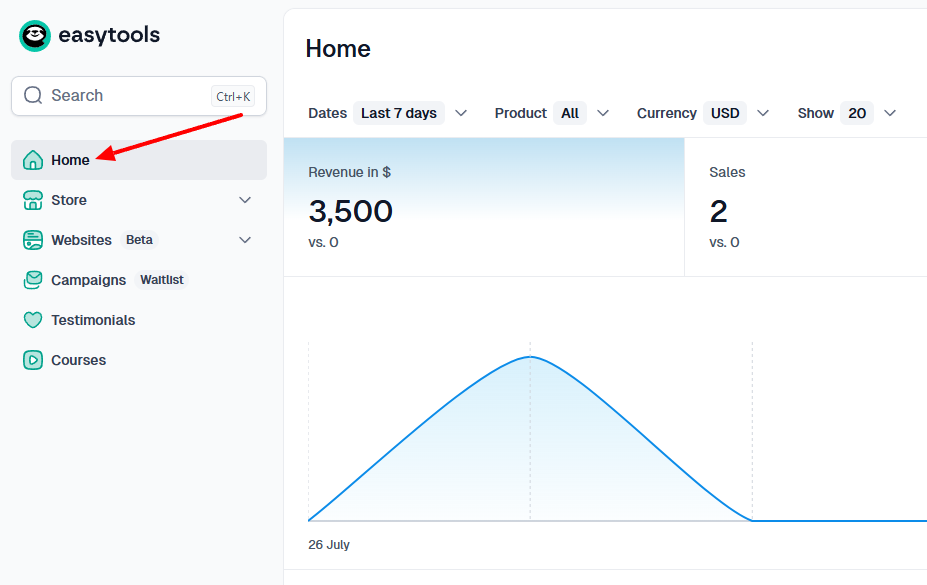
Depending on the selected period, you can see your revenue, the number of sales, new customers, and checkout sessions.
It also allows you to access your orders right from there.
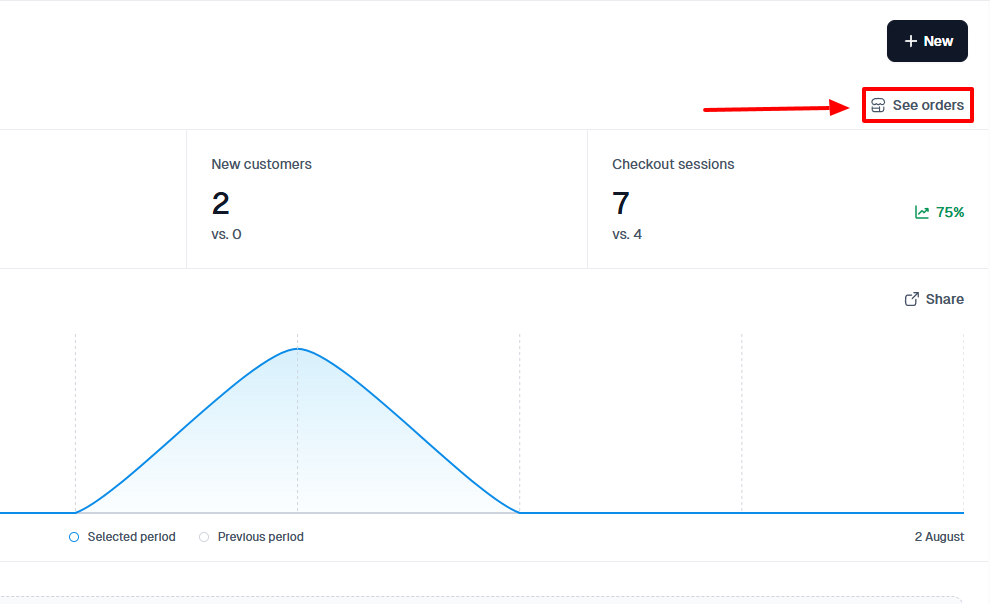
You can see every order, its status, customer, and the purchased item. You can also see the revenue and discount.
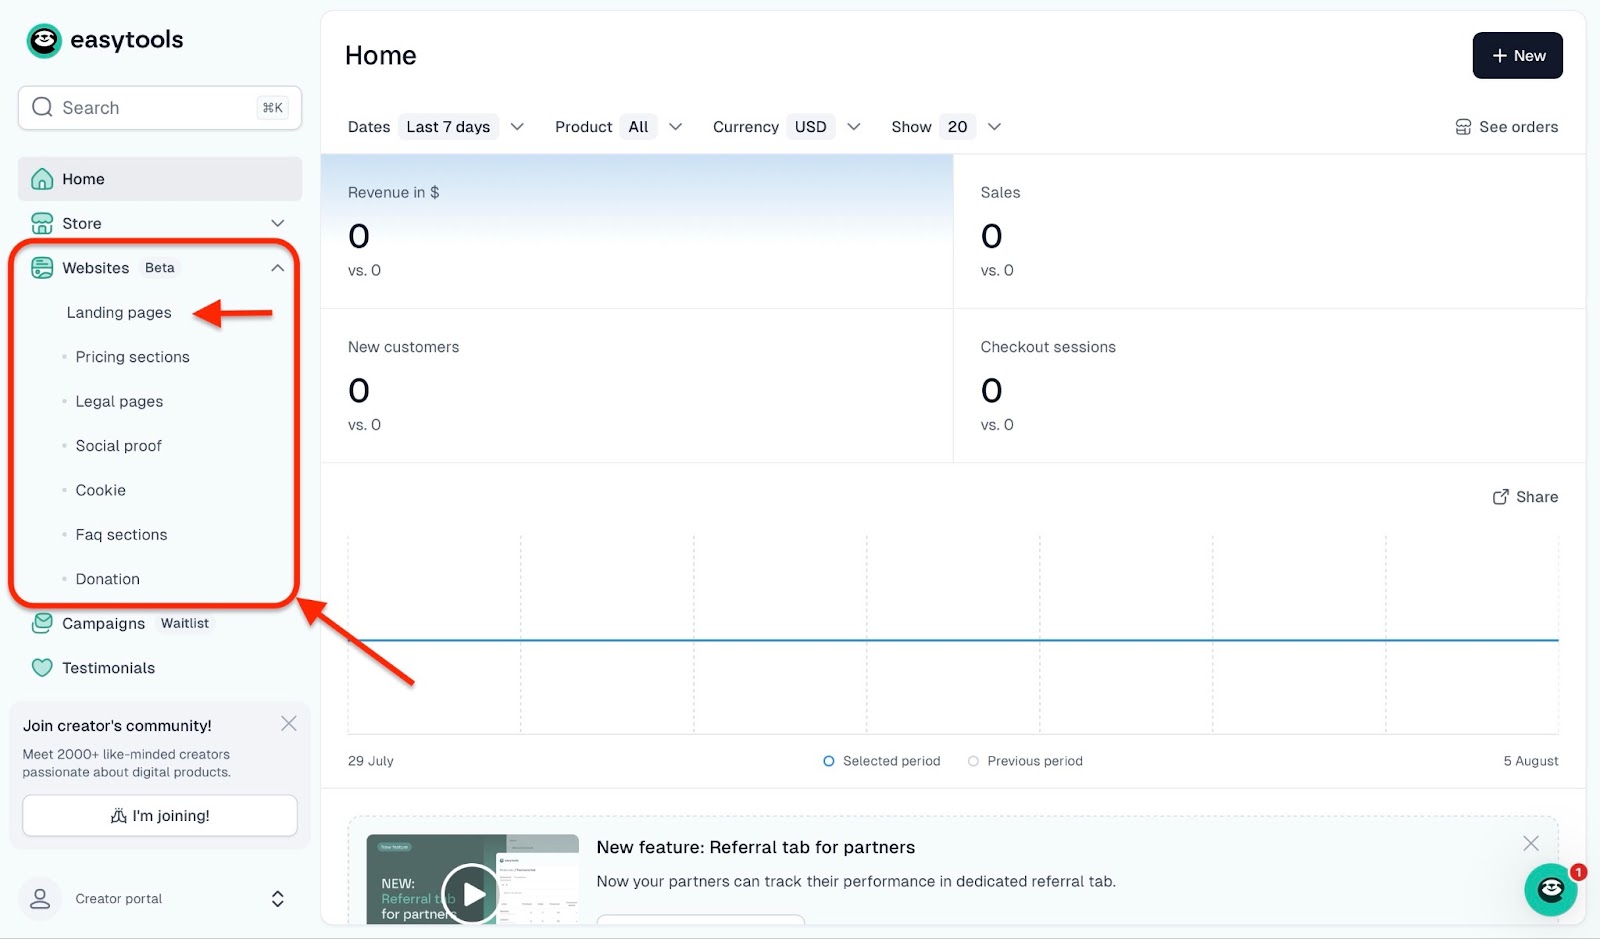
2. Websites
Easytools' website feature allows you to create complete landing pages with legal disclaimers, FAQs, social proof, and even a donation section to maximise your earnings.
Given how important landing pages are, let me show you how you can create a good landing page using the Websites feature on Easytools.
First, while on Easytools' homepage, click “Websites” on the sidebar. It’s right between the Store and Campaigns features. Then select “Landing pages.”
Then, in the landing pages window, click “New landing page”.
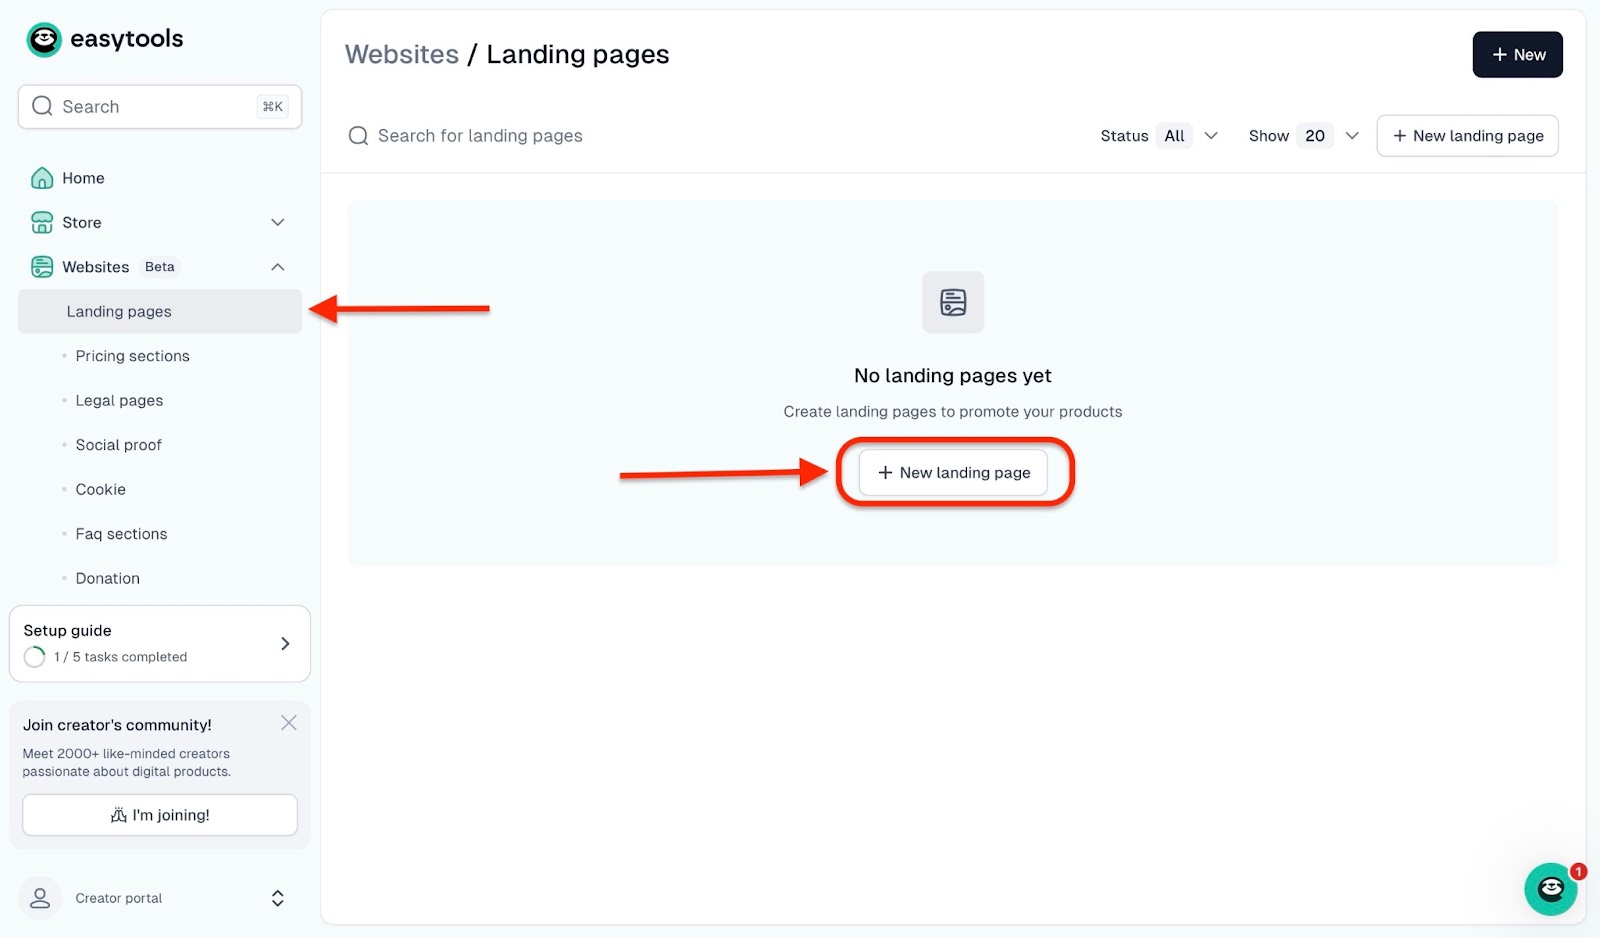
A pop-up window will ask you to add a project name. After you’ve done that, click “Create” to set up your landing page.
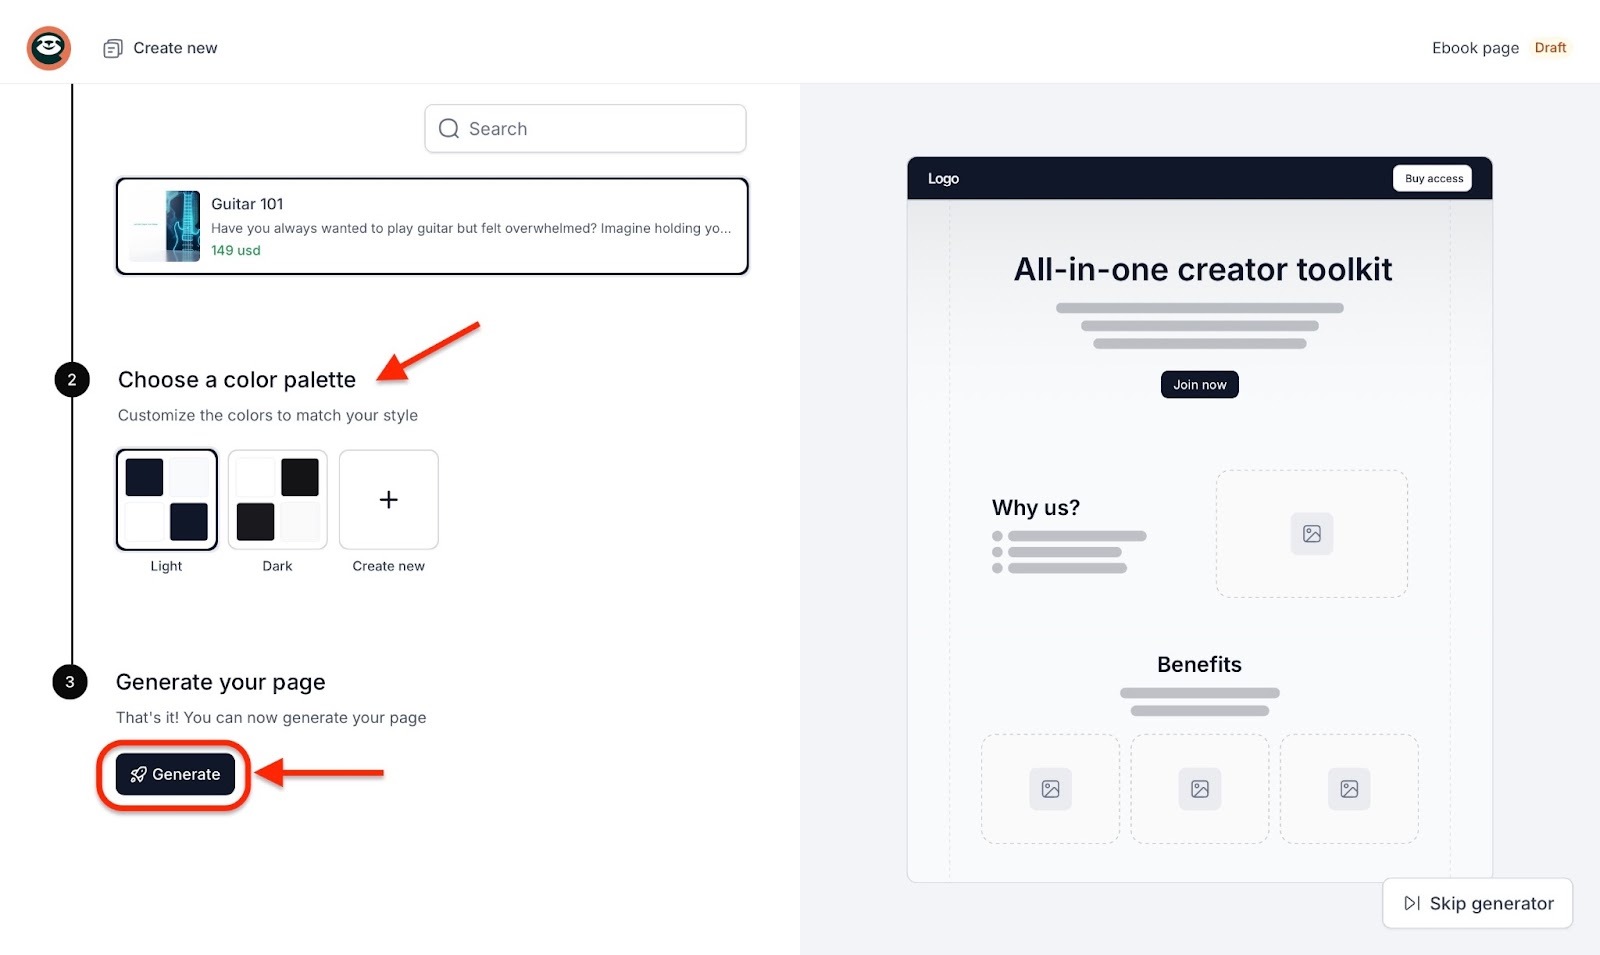
Now you can use the wizard where you select the product for which you want to create the page, or describe the desired output. This way, you will get the landing page draft prepared by AI.
(You can also choose to skip the wizard and go straight to the drag-and-drop website builder.)
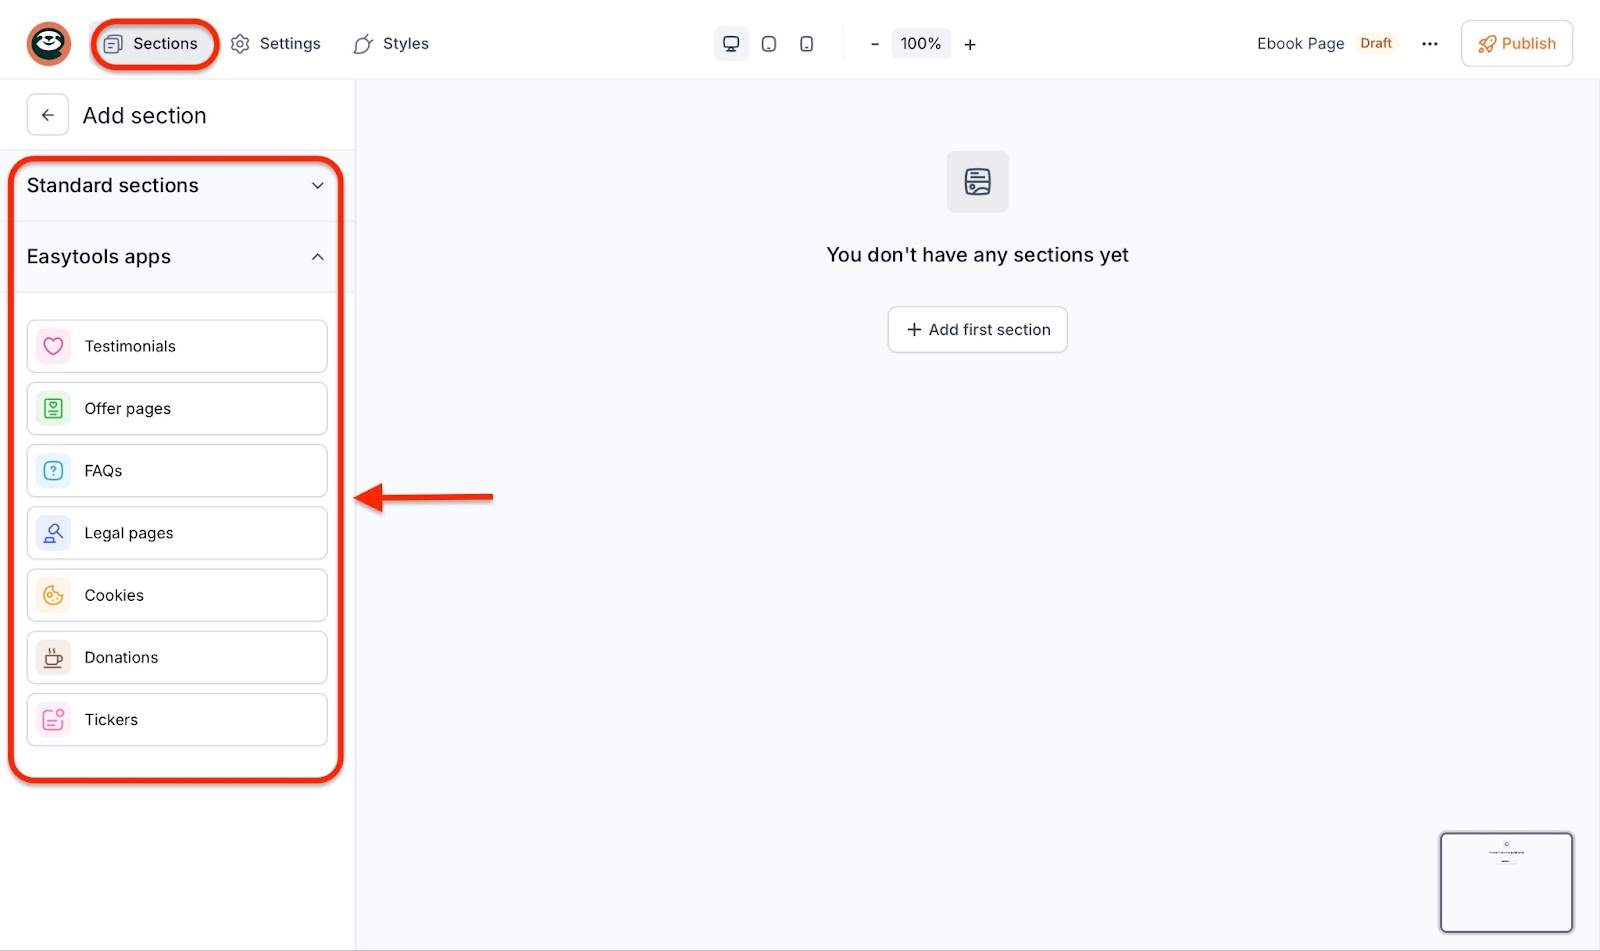
Above the sidebar on the next page, you'll see three tabs: Section, Settings, and Styles. By clicking “+ New Section,” you'll be able to add standard sections like contact, call to action (CTA), features, and hero pages.
You can also add Easytools apps like testimonials, offer pages, FAQs, legal pages, cookies, donations, and tickers.
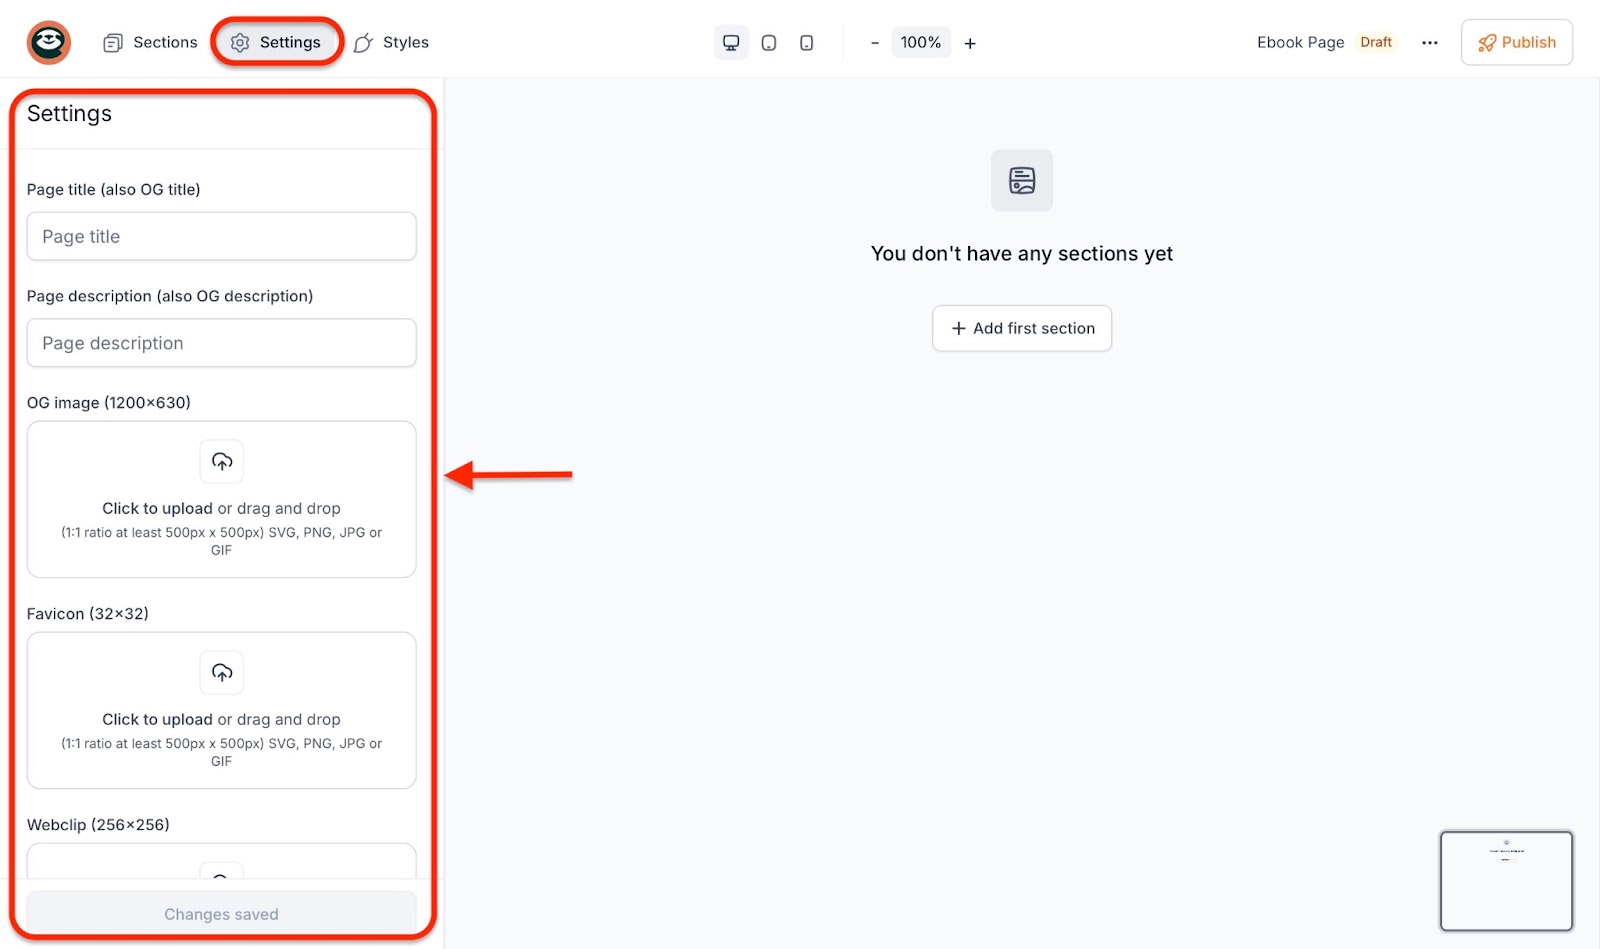
Click the settings tab to add a landing page title, description, OG image, favicon, webclip, and custom domains.
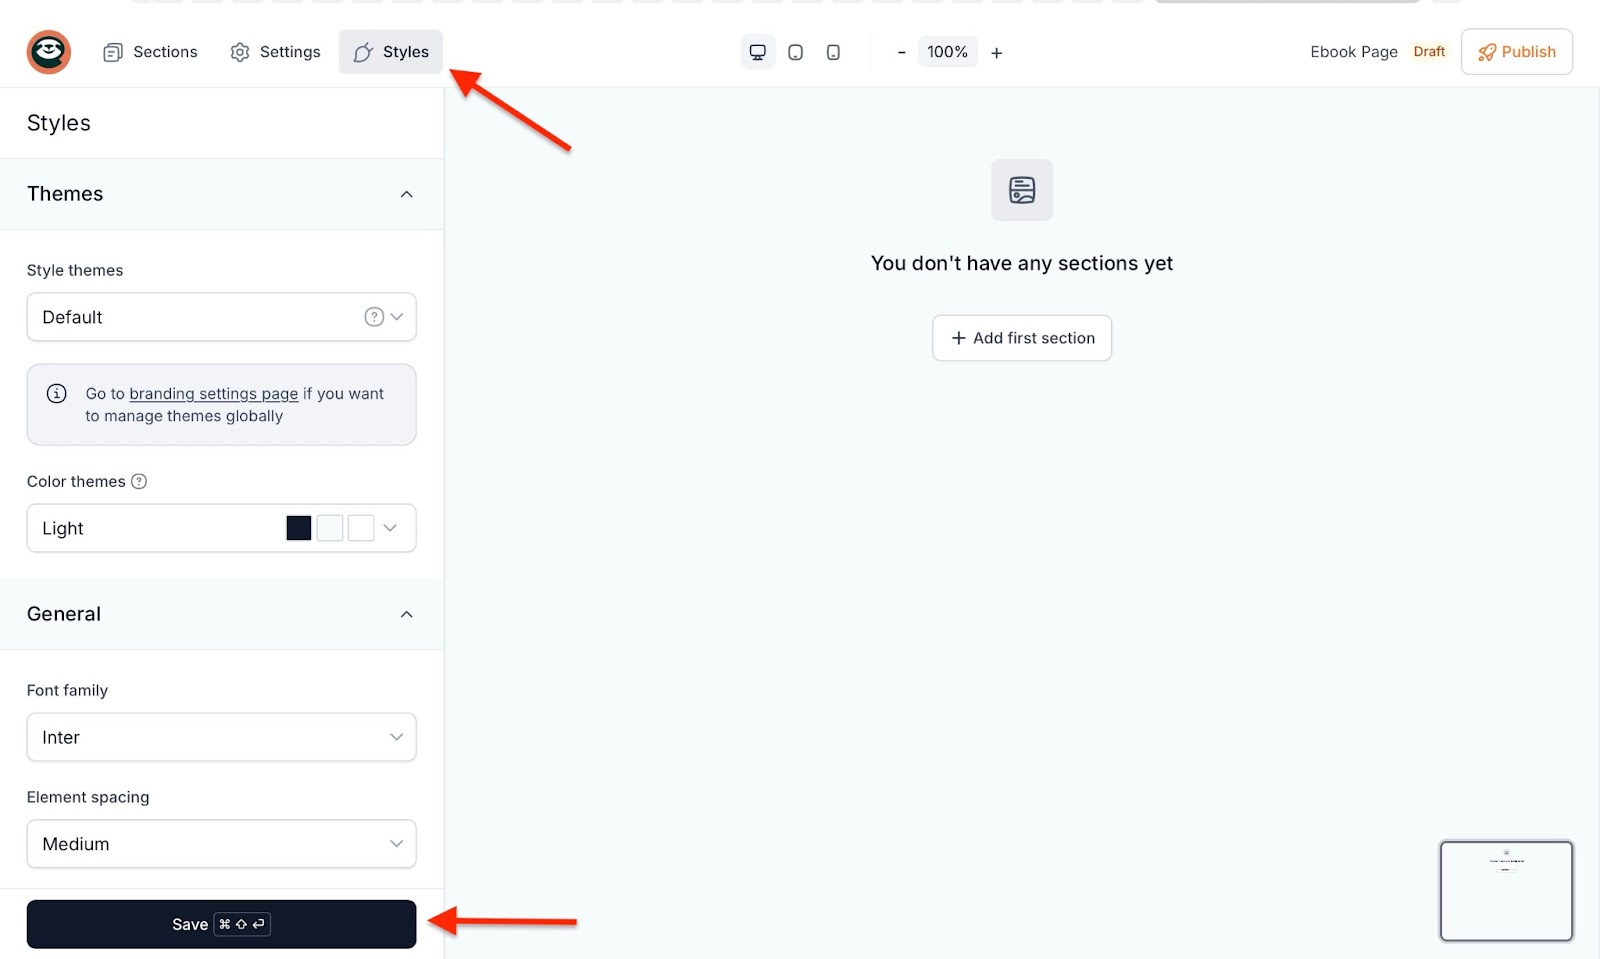
Finally, click the styles tab to select themes and font types and customize the look of your landing page. When you’ve done all this, click save and publish.
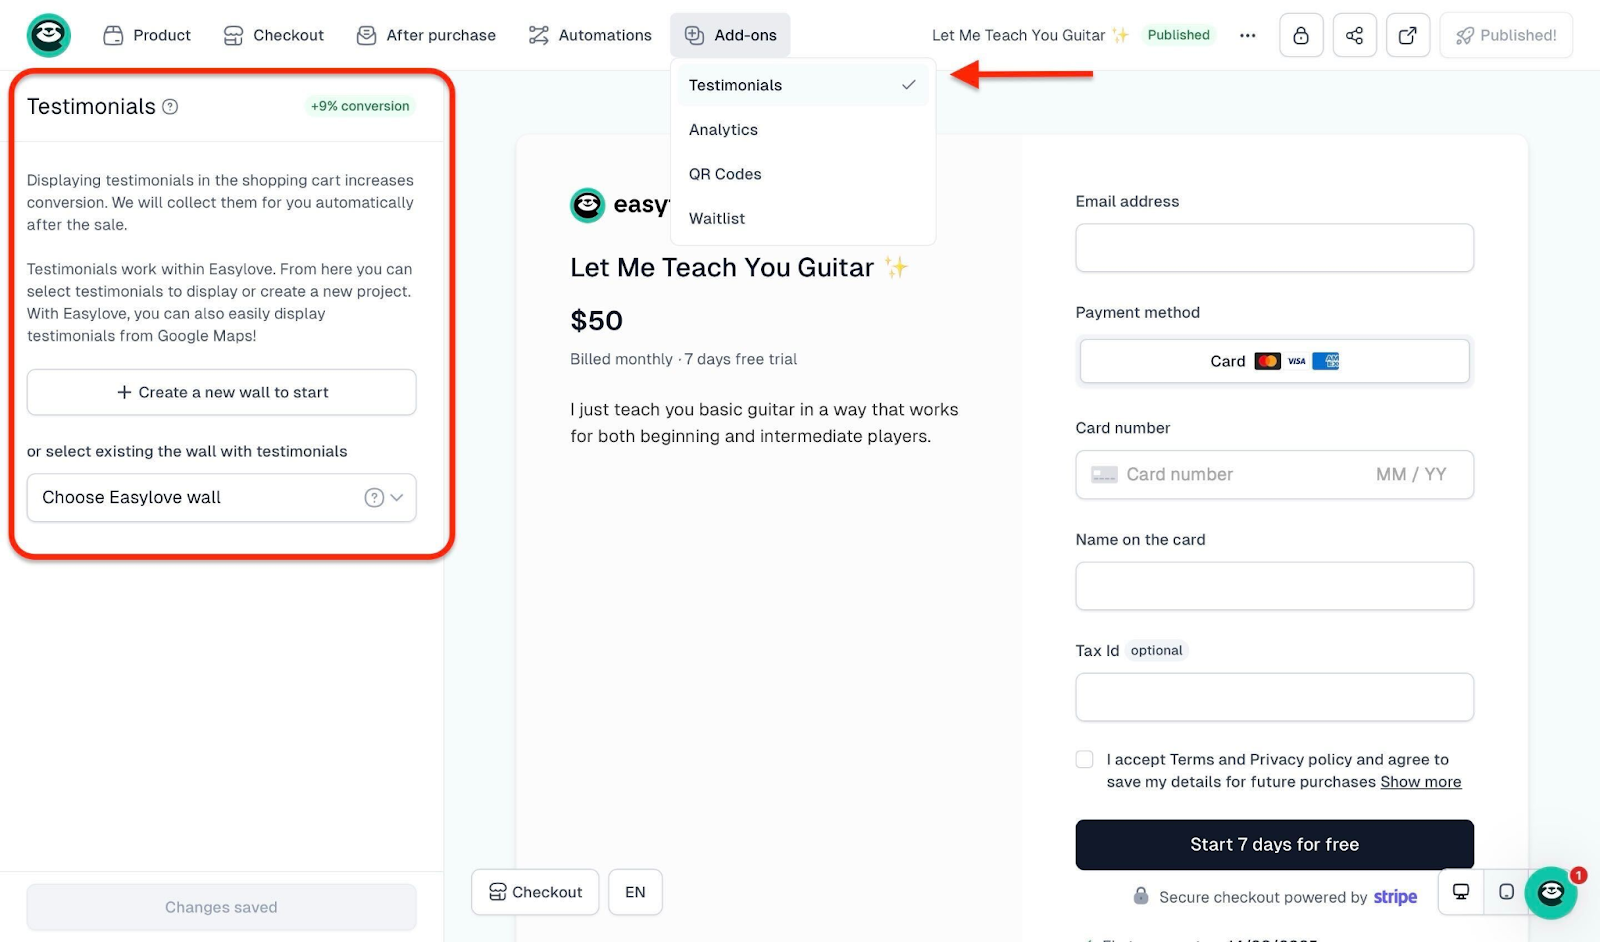
3. Testimonials
Easytools is an all-in-one platform. Apart from simplifying your process of selling digital products, it also helps you collect and display testimonials to build trust with present and future customers.
This is one of the major ways to boost sales and increase conversions.
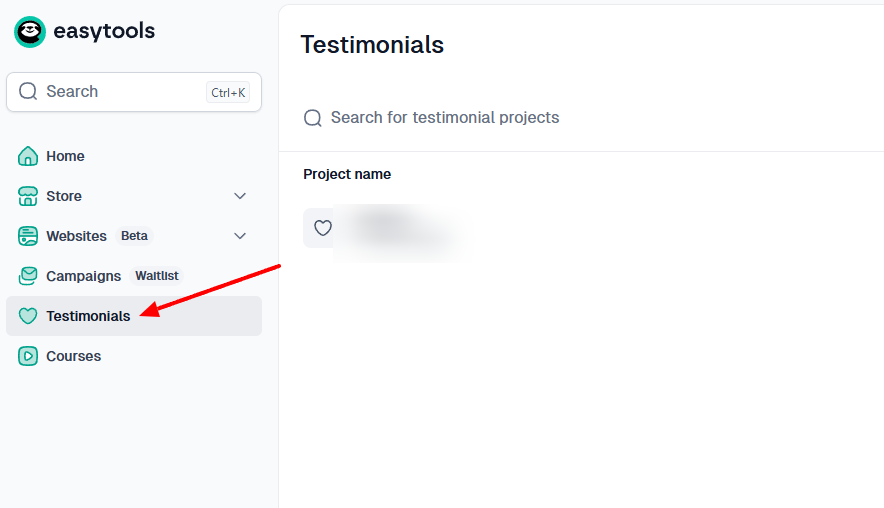
To use this feature, click “New wall of love”.
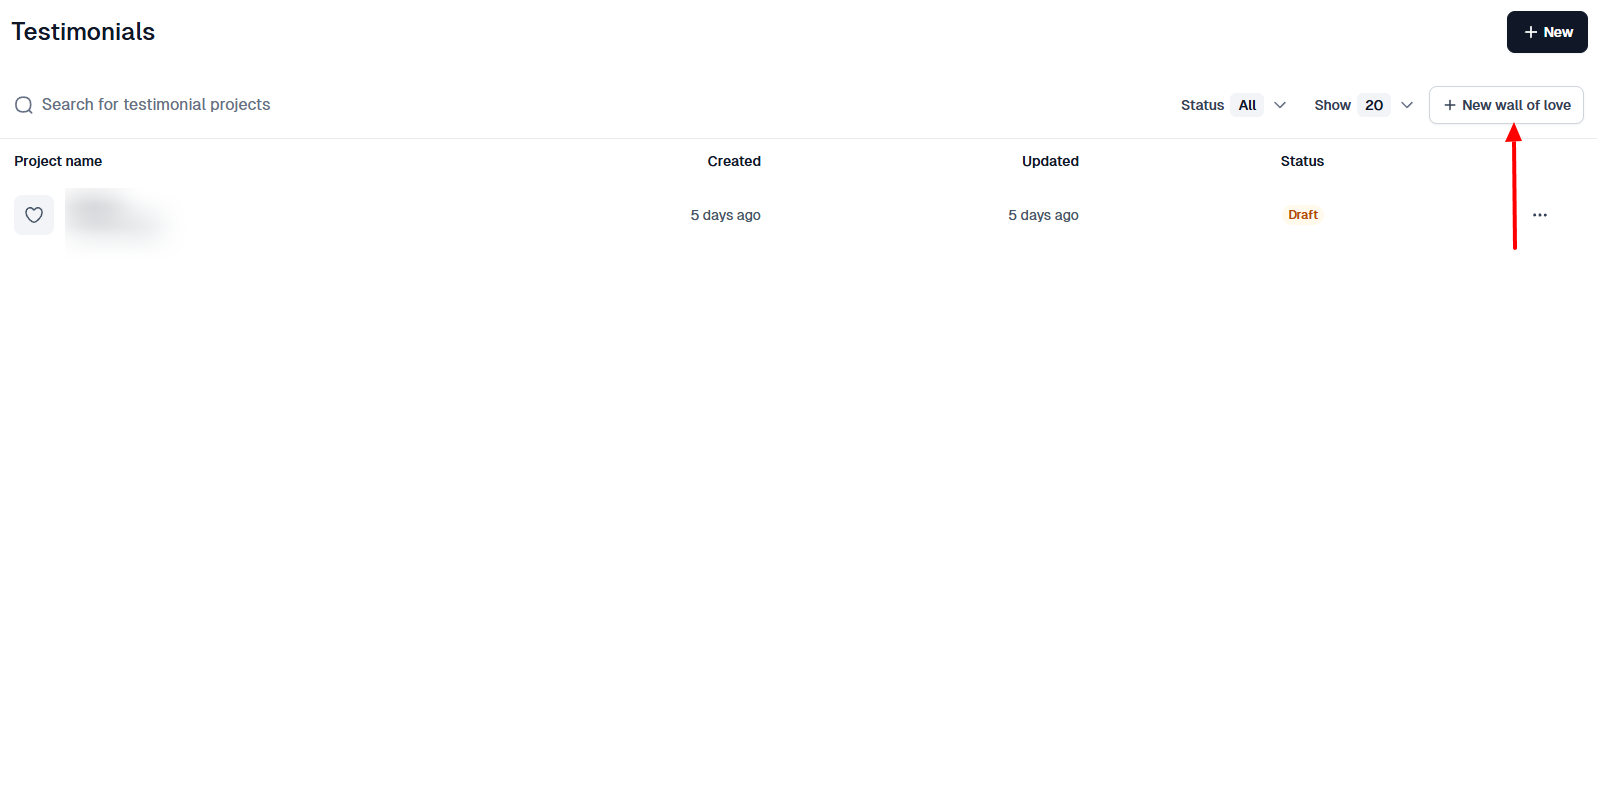
In the pop-up window, name your project.
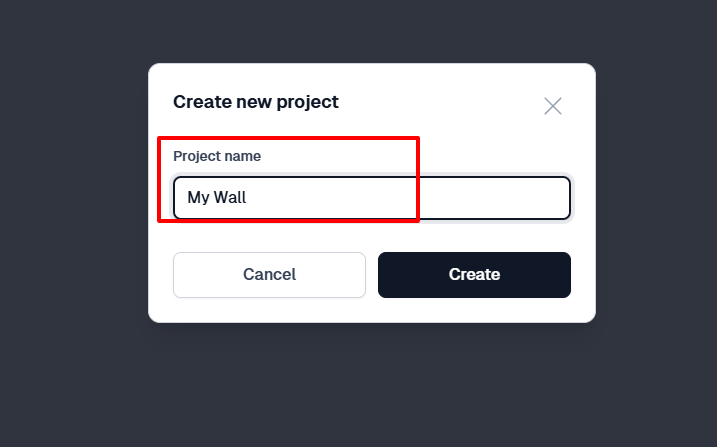
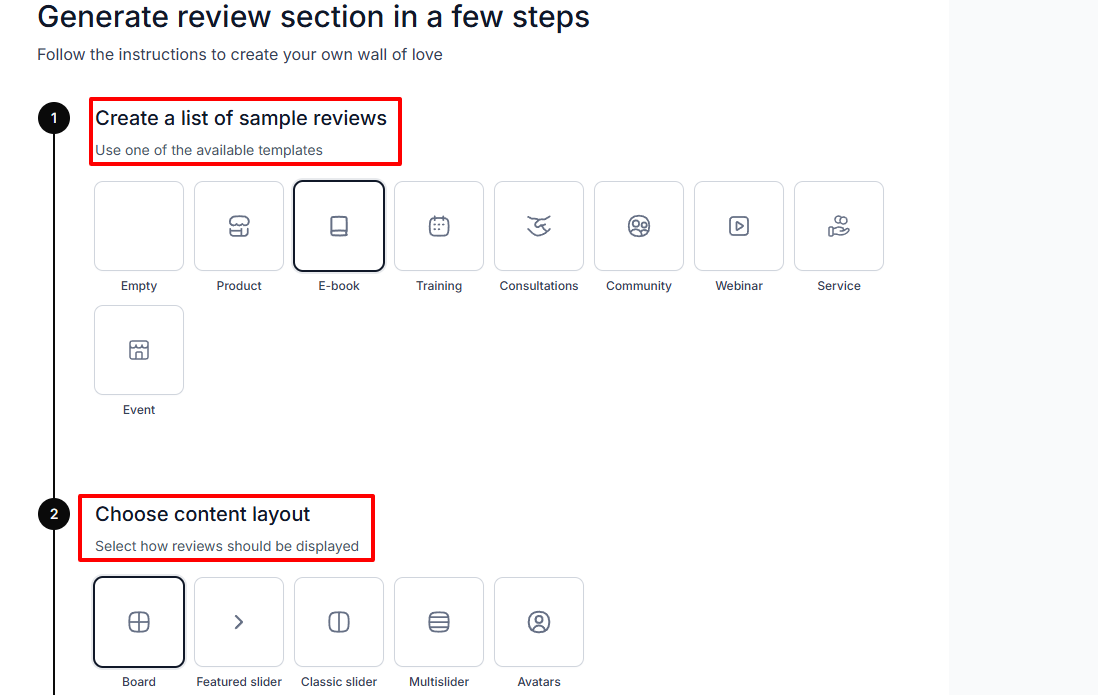
As part of the settings, you can choose a product template and select how your reviews should display.
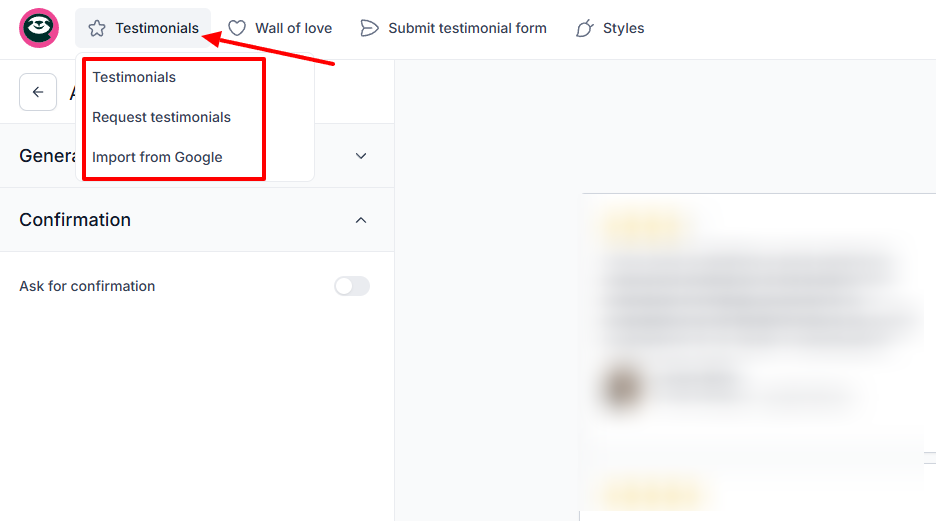
Next, click “Testimonials”. You can add them manually, request them, or simply import from Google in case you already have a couple of them.
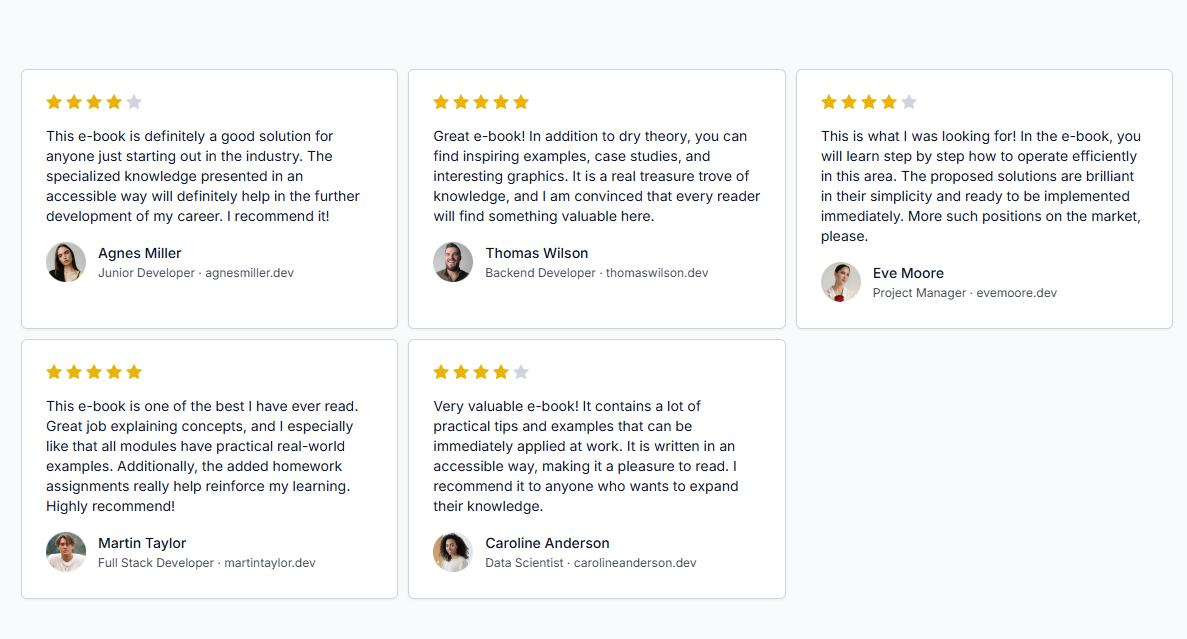
Below is an example of how your wall of love can look:
People love to see reviews. It builds trust and can eventually boost your sales. What’s more interesting is that with Easytools, you can add your reviews to your checkout page in a single click.
This works very well for your conversions.
[fs-toc-omit]Best for
- Busy digital creators, founders, and solopreneurs who want an all-in-one creator toolbox to sell digital products.
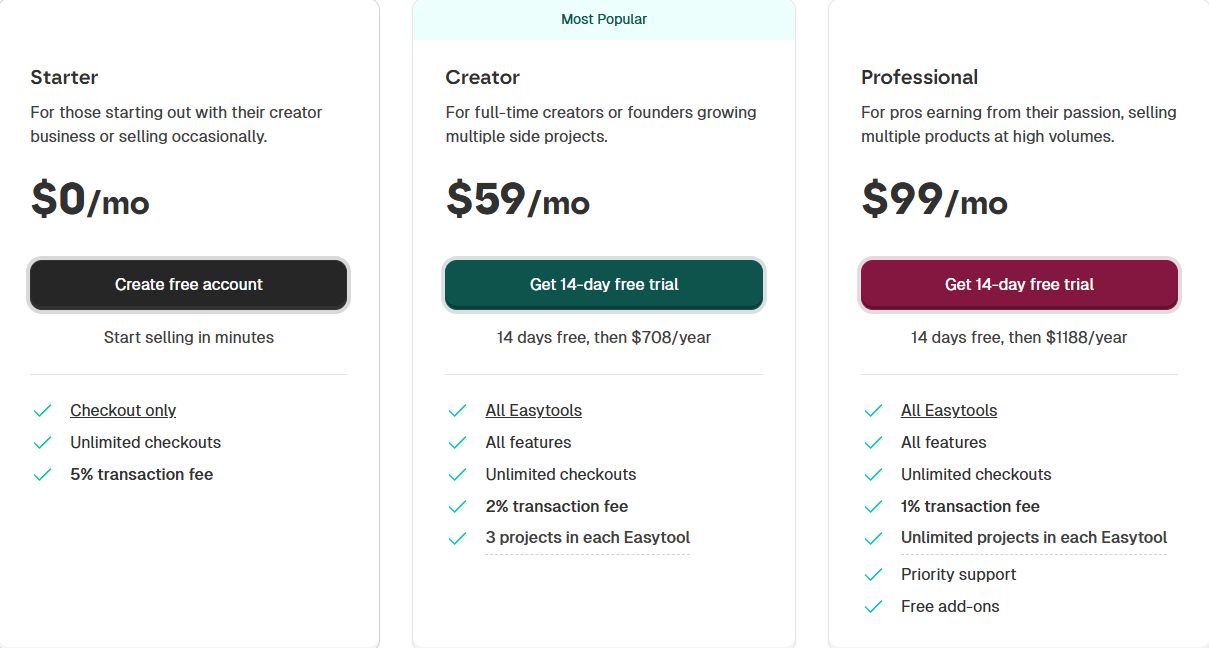
[fs-toc-omit]Pricing
- Starter: $0/month + 5% transaction fee
- Creator: $59/month + 2% transaction fee
- Professional: $99/month + 1% transaction fee
2. Gumroad
Gumroad is second on our list of the best platforms to sell digital products.

To sell your digital product on Gumroad, you need to name and choose the product type and add a price. In addition, you can add a description, upload your cover, product file, and a Call-To-Action (CTA).
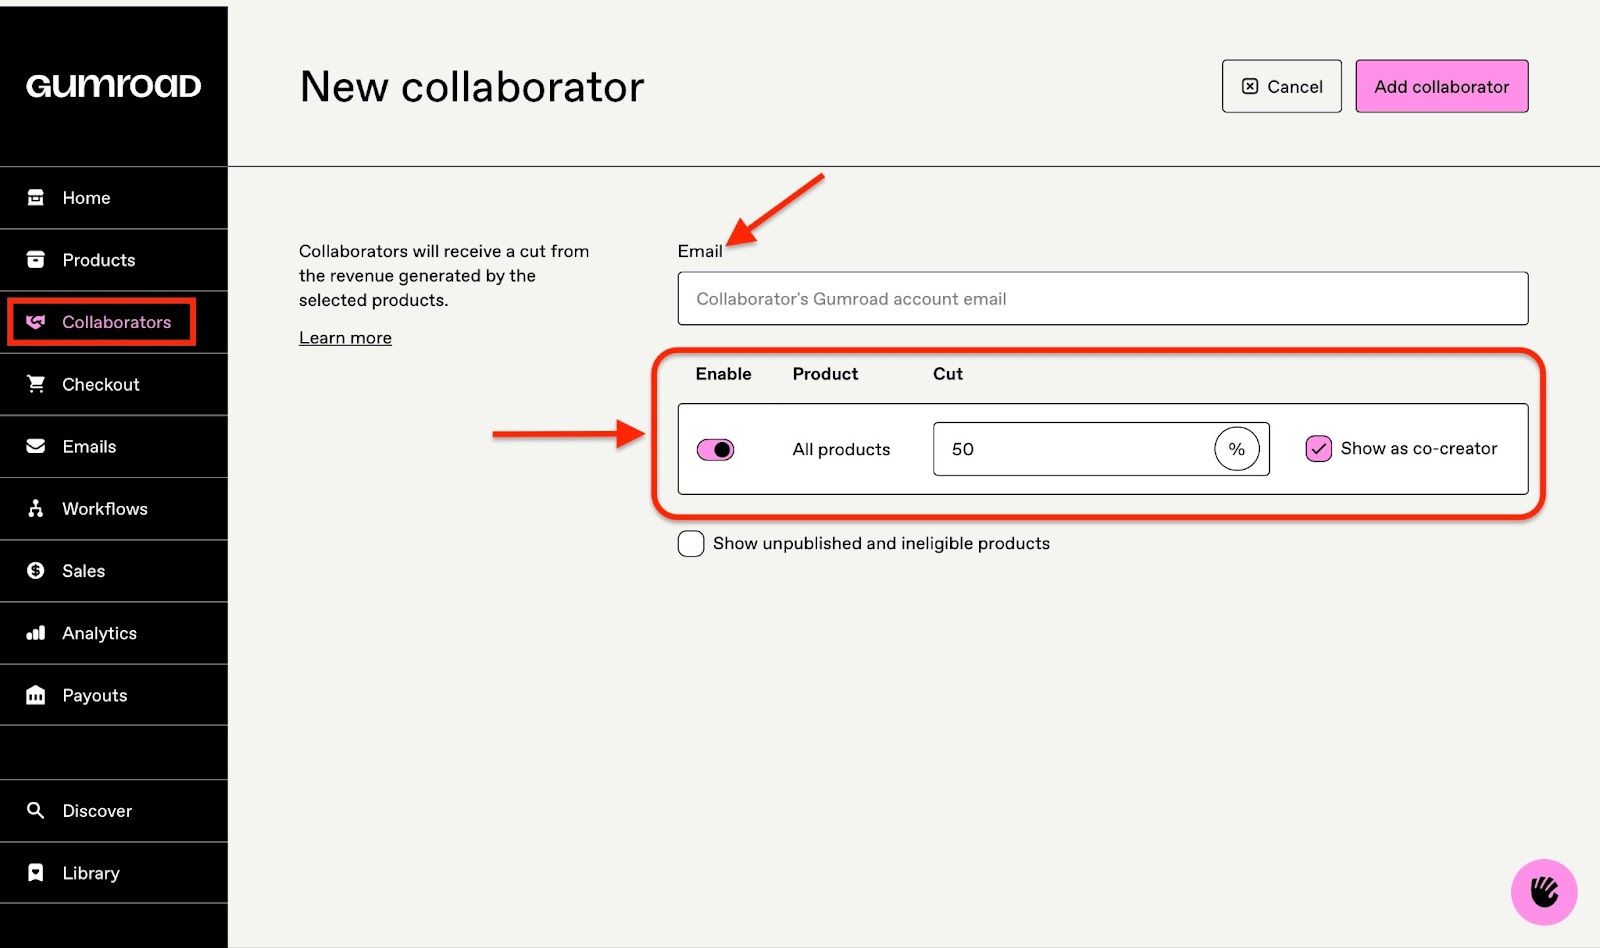
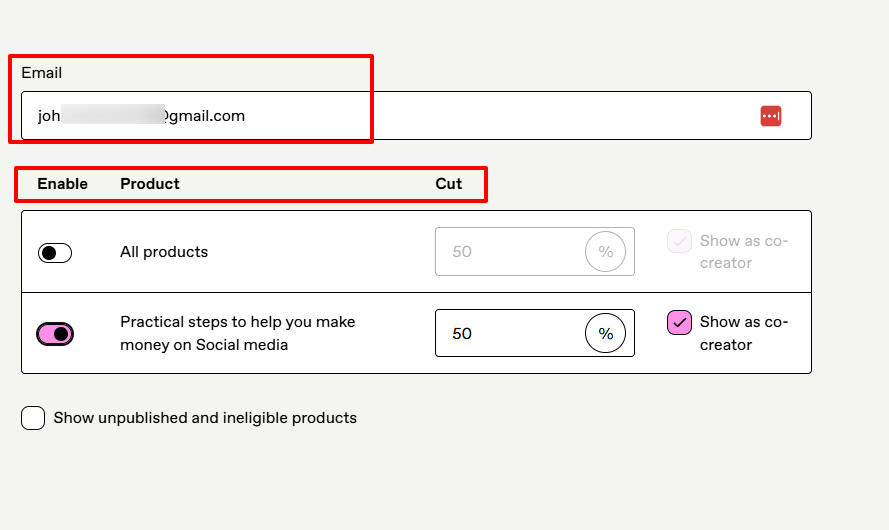
With Gumroad’s collaborator feature, I can enter my collaborator’s email address and select the product(s) I want the revenue to be shared on. I can also choose the collaborator’s cut and decide whether or not to show them as a co-creator.
That’s not all.
Writing emails directly to my customers is straightforward. All I need to do is add a subject line and a body. More so, I can attach files, choose the audience, channel, and decide whether or not to allow comments.

Gumroad also offers analytics. It gives you an overview of your product performance, showing your number of sales, views, and total over a period.
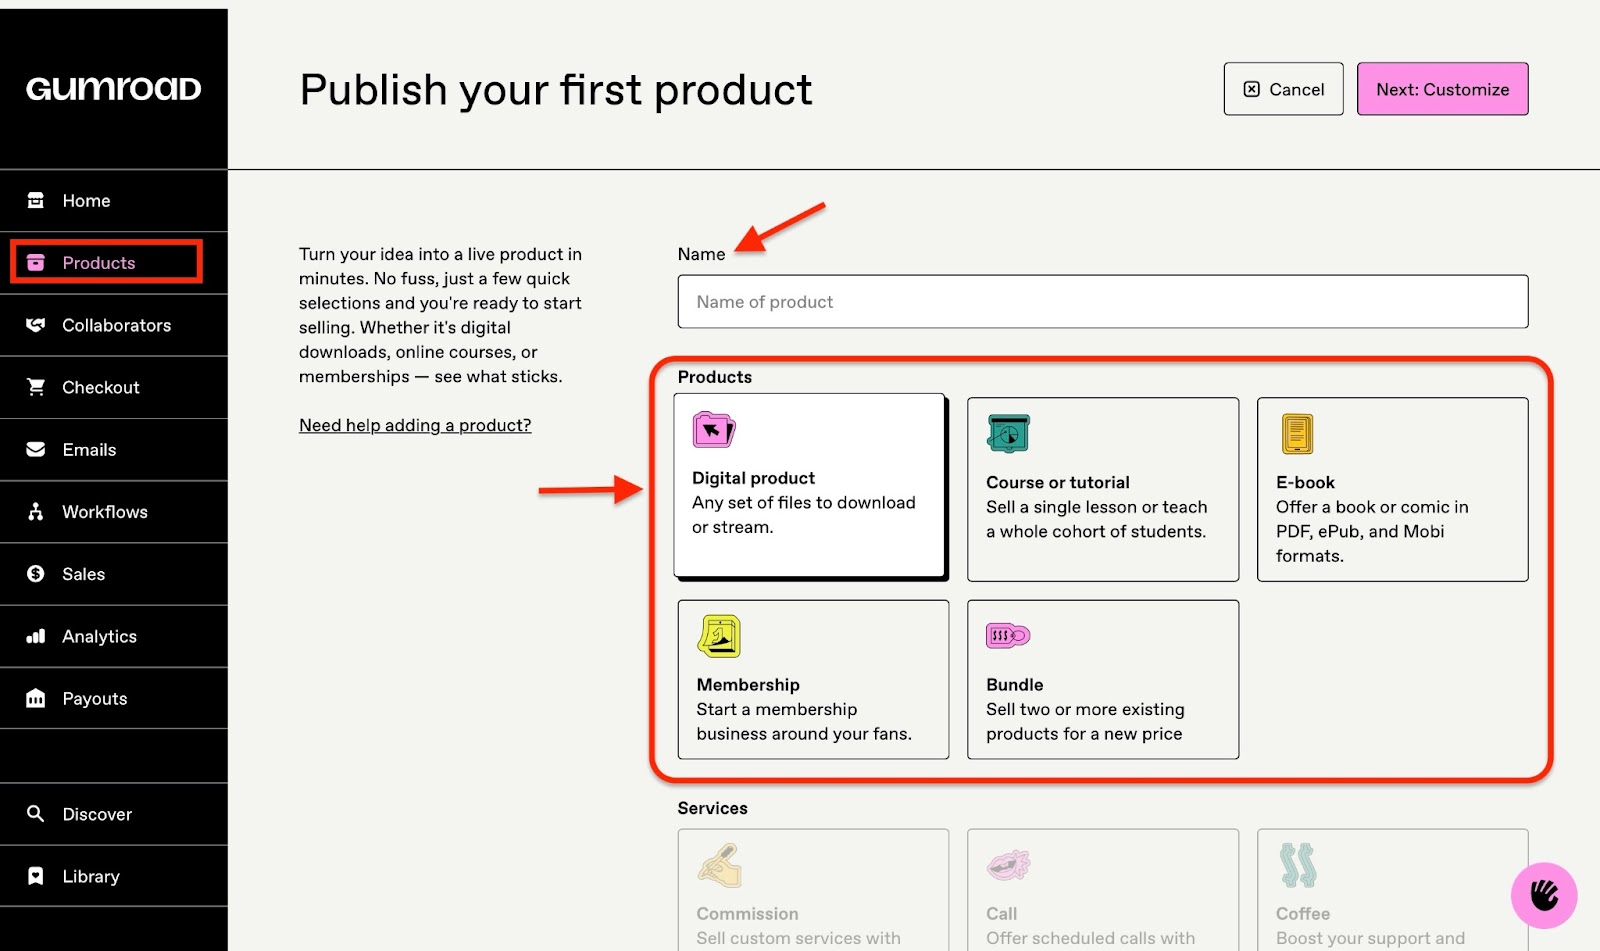
Without wasting time, let’s quickly review the products feature.
First, head to “Product” on the sidebar and click “New product”.
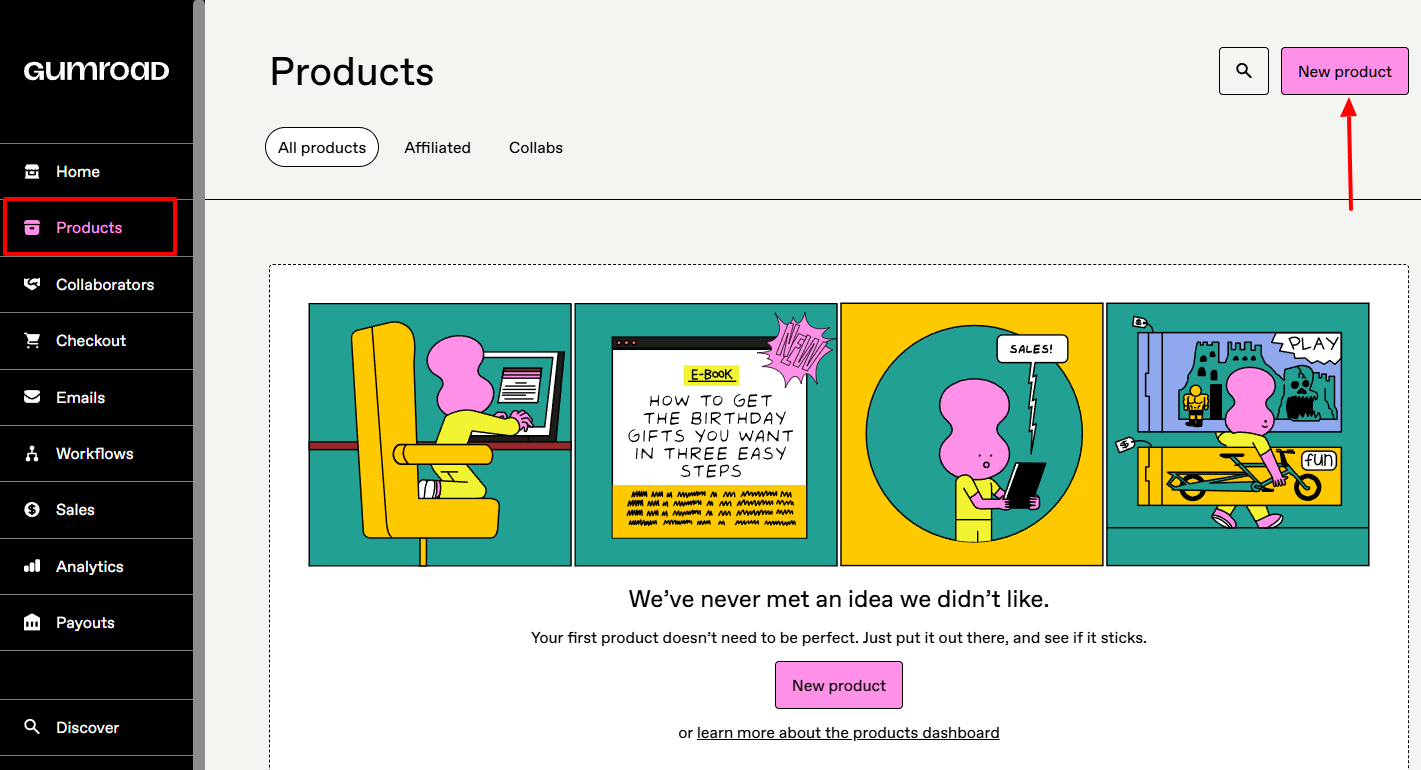
Provide a name for your product, select the product type, and add a price below. In this example, I’ll be selling a course on how to make money on social media.
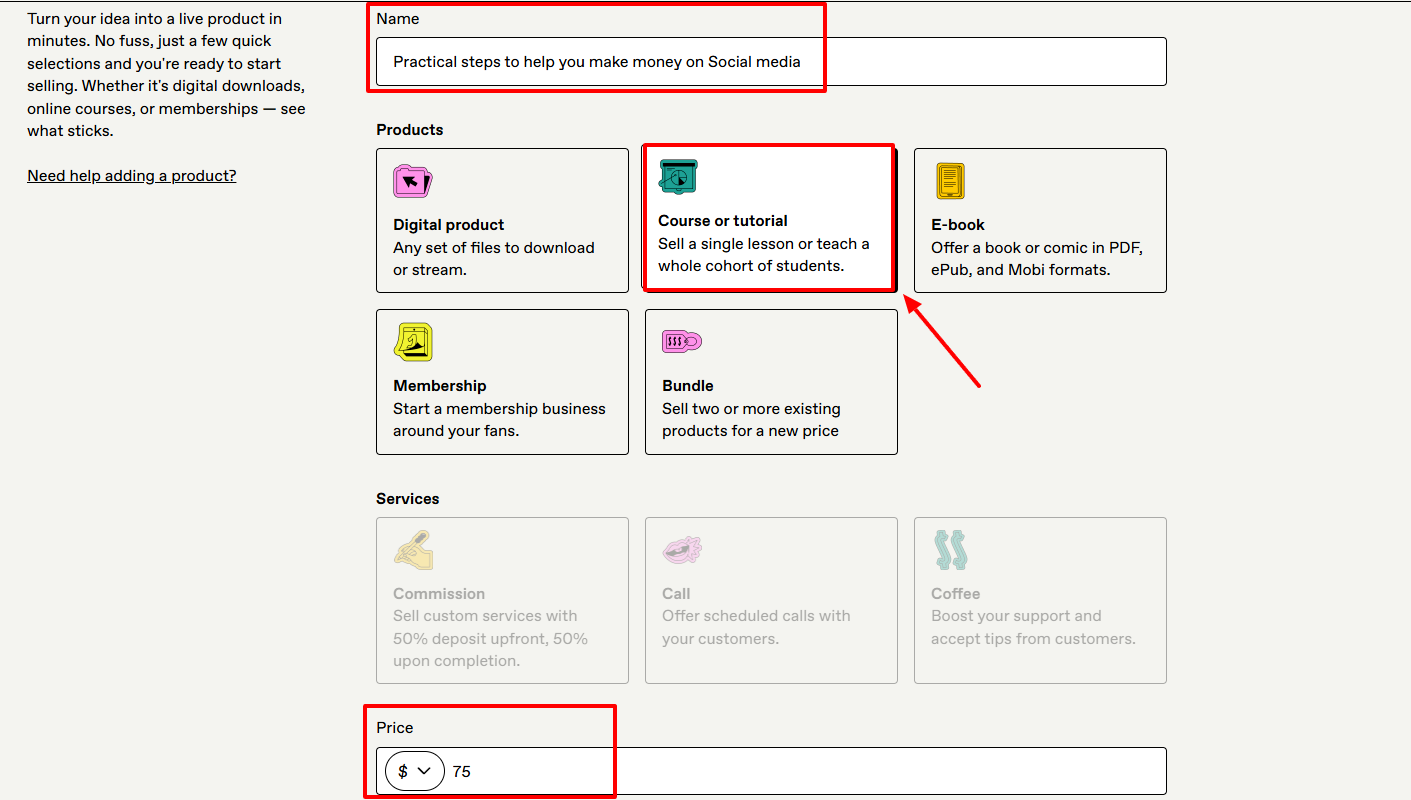
After naming the product, add a description of your choice.
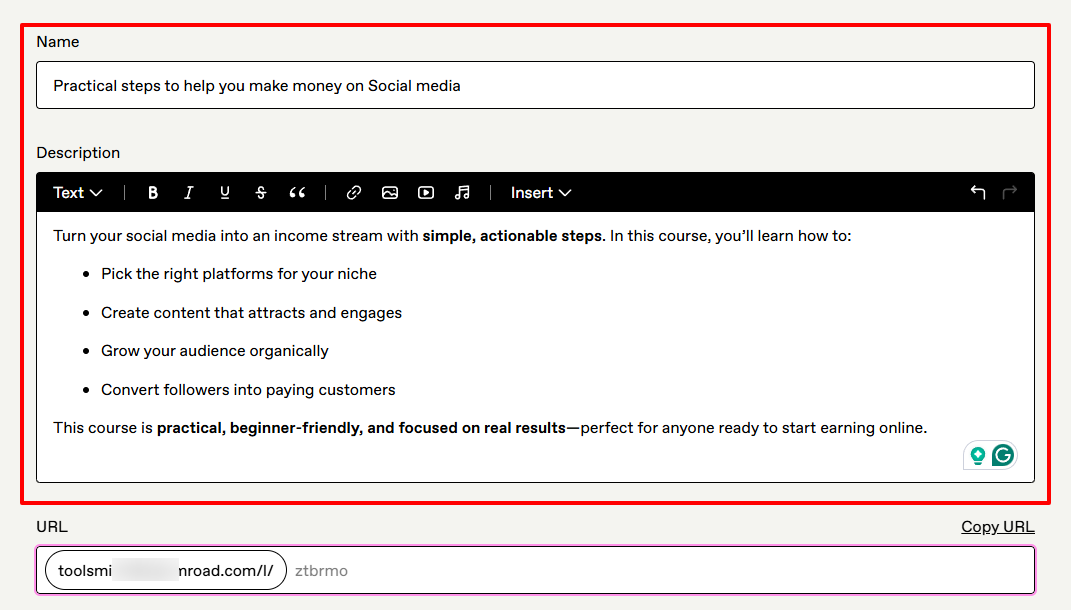
Next, upload your product’s cover.

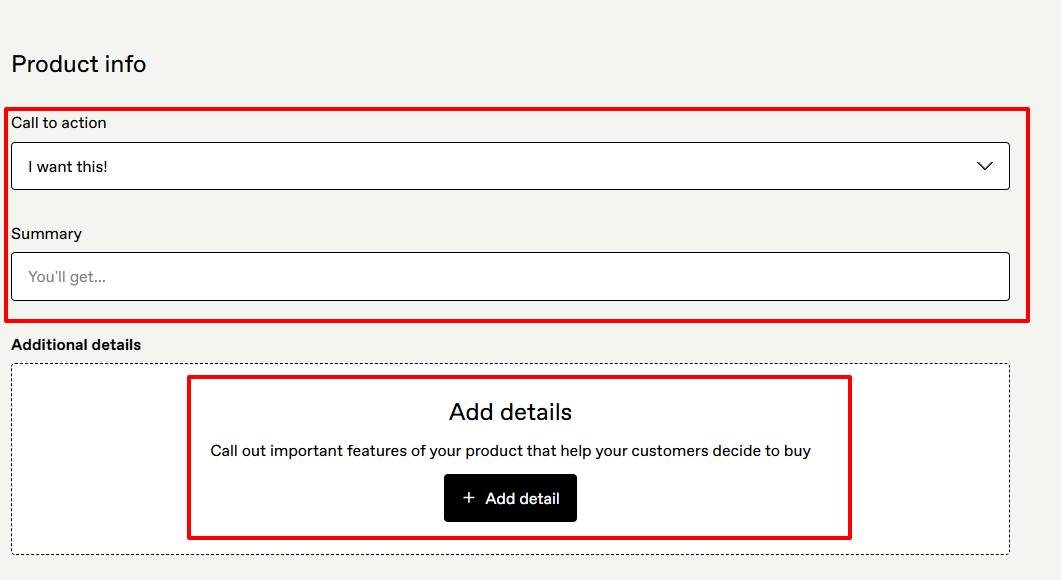
Under Product info, I can choose my Call-To-Action (CTA), add a summary alongside additional details about the course.
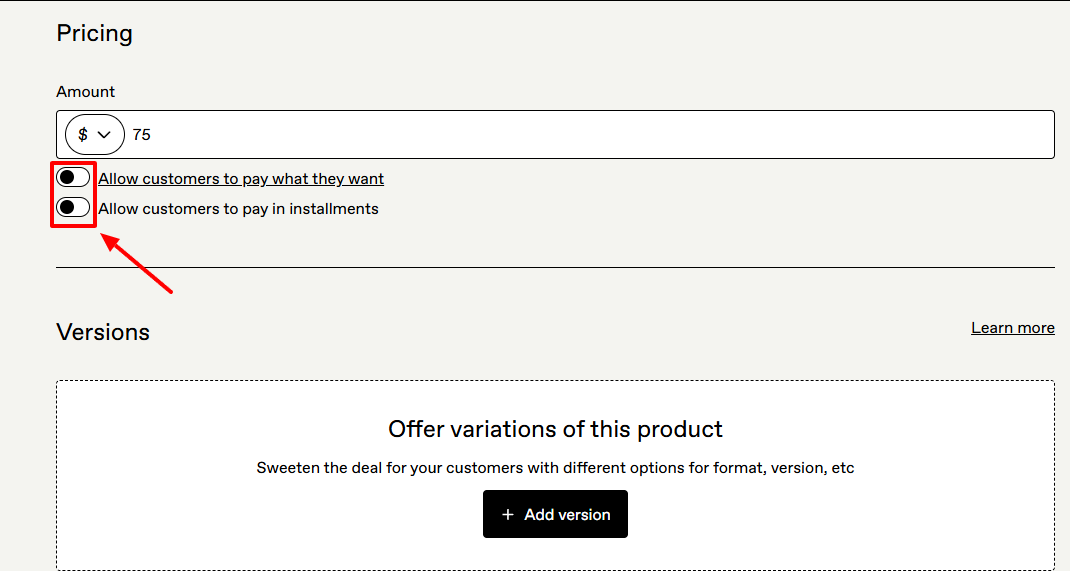
Gumroad lets you adjust your pricing settings. You can, for example, allow customers to pay what they want or in installments.
The next page is where you can upload your product content. Here, I’ll upload my course content.
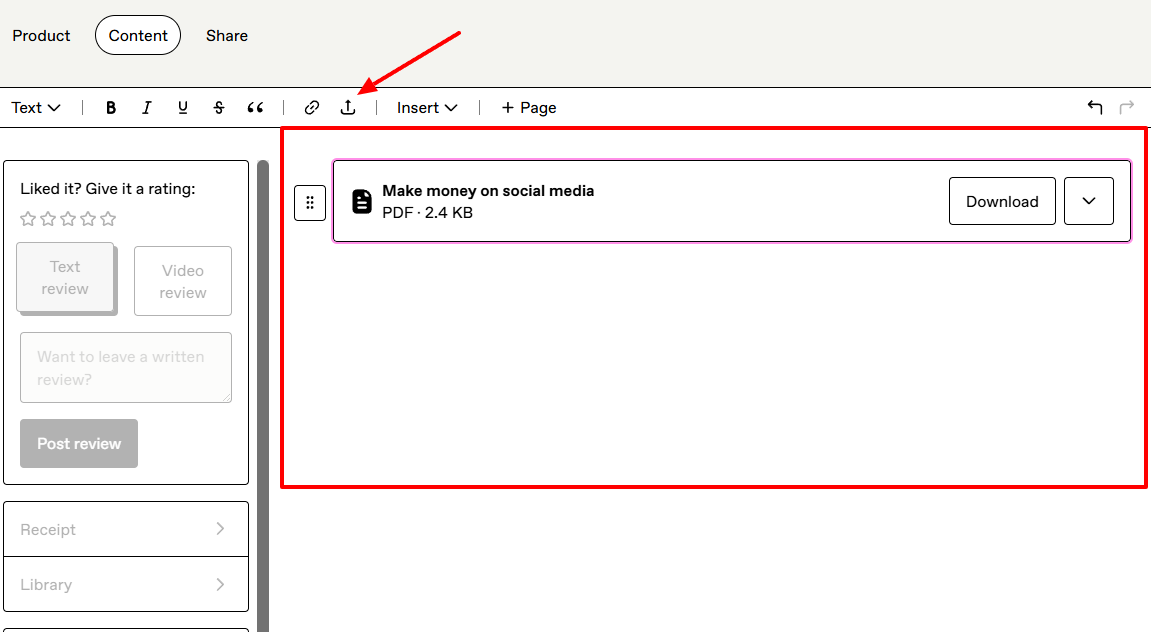
Once it is uploaded, click “Publish and continue”.

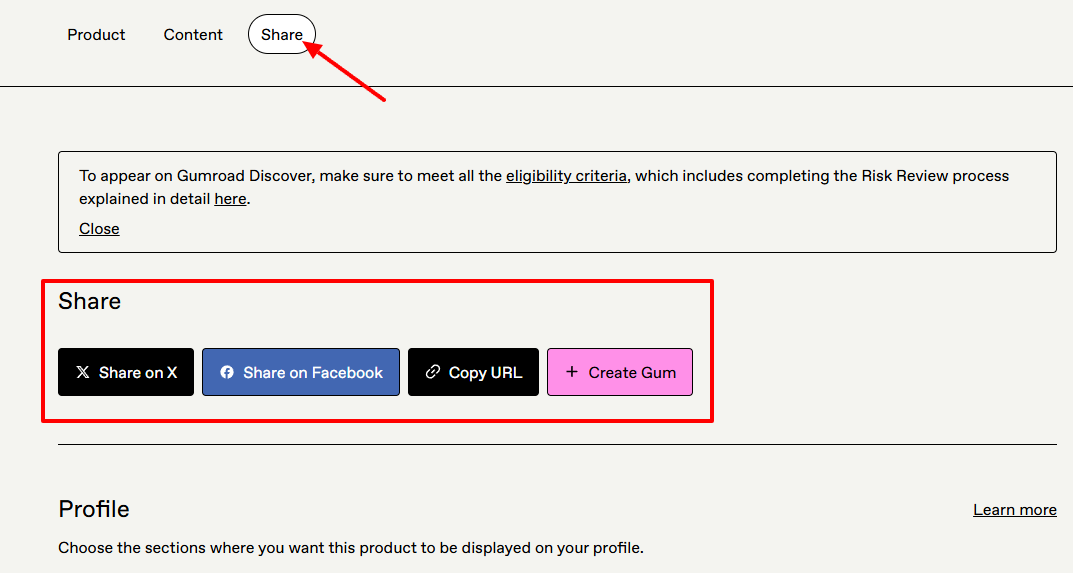
Now, you can share your ready product on X and Facebook, or copy the URL.
This is what the checkout page will look like:

[fs-toc-omit]Key features
1 . Collaborators
Gumroad offers Collaborators as a feature. It simply lets you share your revenue with the people who helped you create your products.
To use it, click “Add collaborator”.
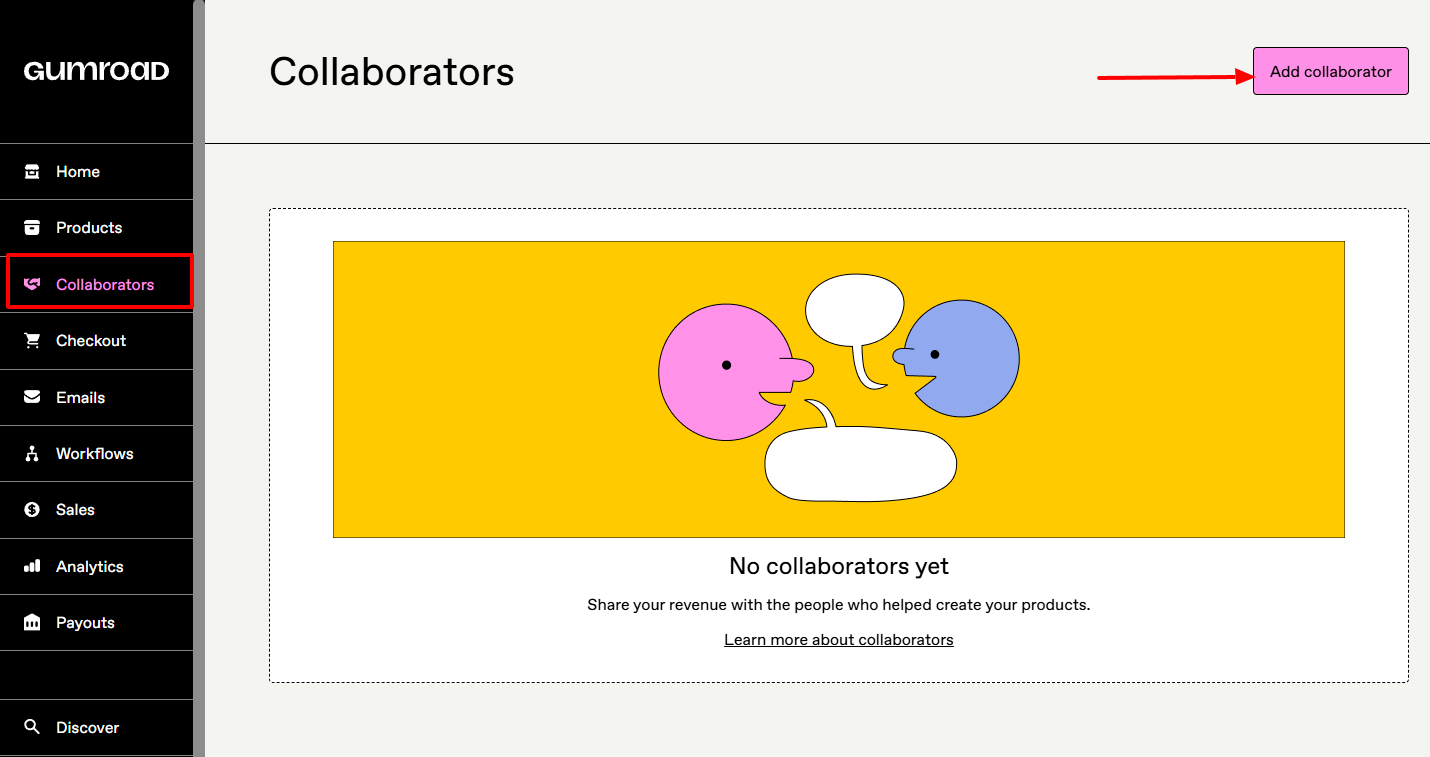
Enter their email address and select the product(s) from which you want the revenue to be split. Then choose the collaborator’s cut, and decide whether or not to show them as a co-creator.
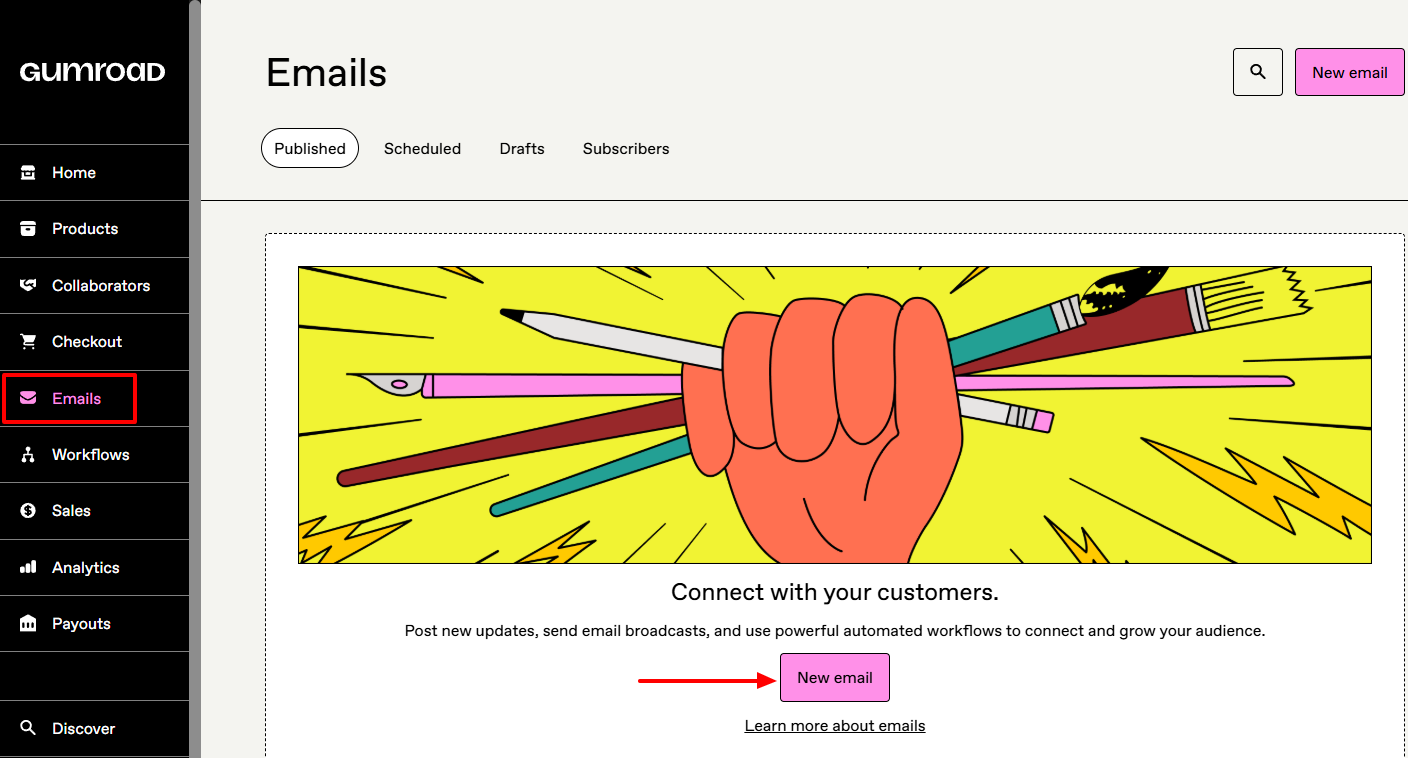
2 . Emails
The Emails feature on Gumroad is also another way to connect with customers. You can post new updates or even send email broadcasts.
Let’s try it!
On the left side of your screen, choose the audience and channel, and decide whether or not to allow comments. On the right side, you can add the email’s subject and body, and even attach files.
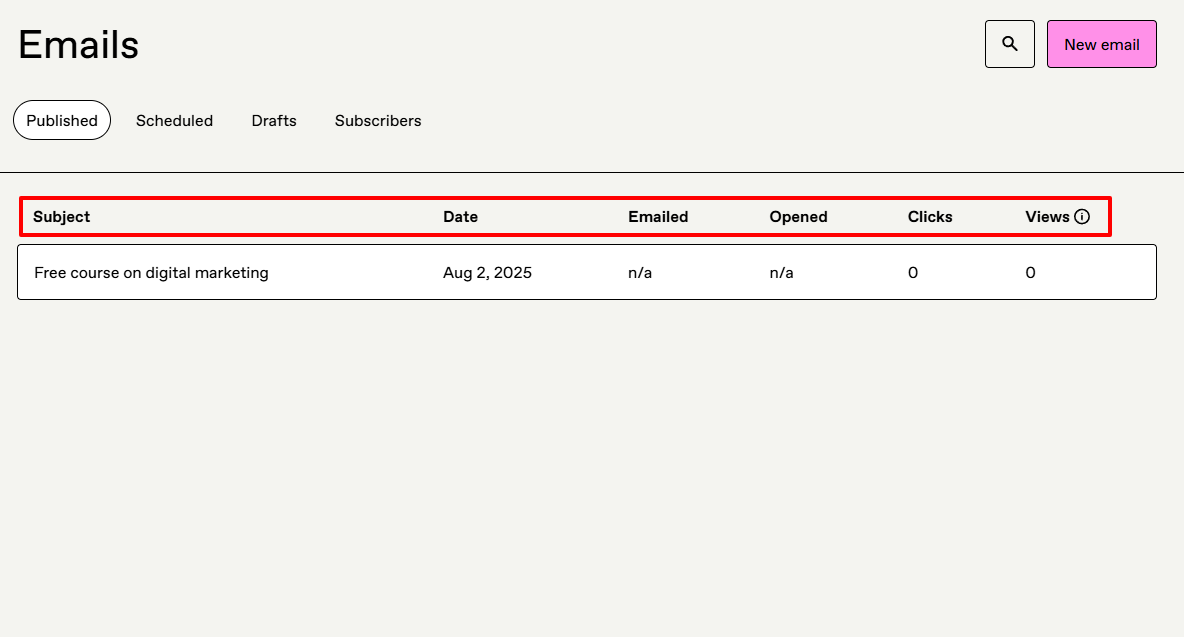
Your email is ready! Once you send an email, you can view the subject, date, if it was opened, the number of clicks, and views.
This is what the email looks like after you have sent it. Customers can leave comments below.

[fs-toc-omit]Best for
- Creators looking for a platform to sell digital products directly to their audience and collaborate with other creators.
[fs-toc-omit]Pricing
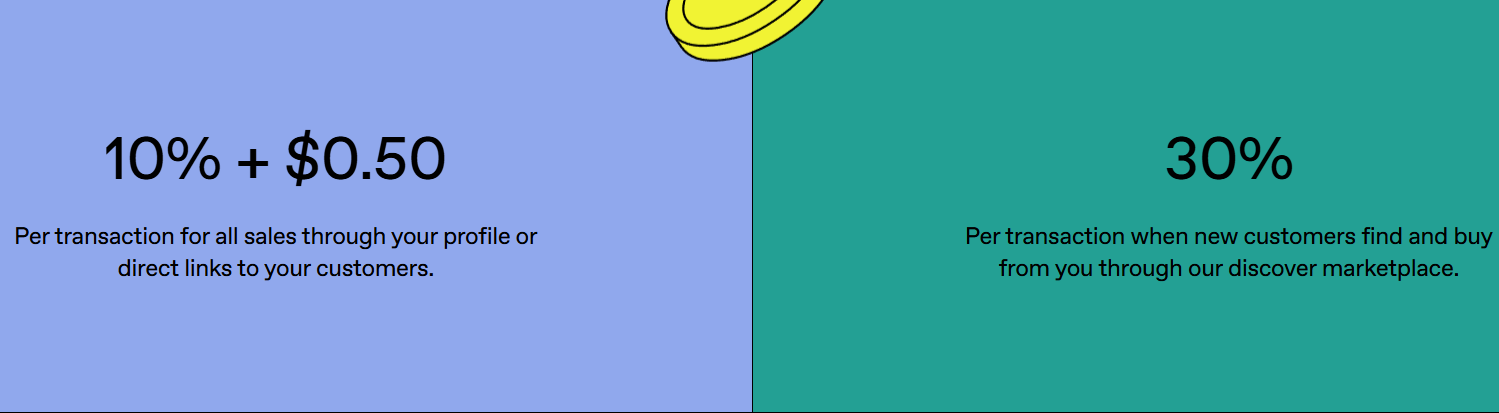
- 10% + $0.50: Per transaction for all sales through your profile or direct links to your customers.
- 30%: Per transaction, when new customers find and buy from you through the Discover Marketplace.

3. Podia
Next on our list is Podia, another digital storefront where you can sell your digital products by creating a page, uploading files, and setting the price before publishing it.

Just like with other digital product platforms, upload your product files, add the titles and descriptions, and set the price options.
Moreover, Podia has a website feature that allows you to build and launch your branded site.
To build one, you select a layout, add sections like the “About Us”, edit the page content, upload images, and then link your custom domain.
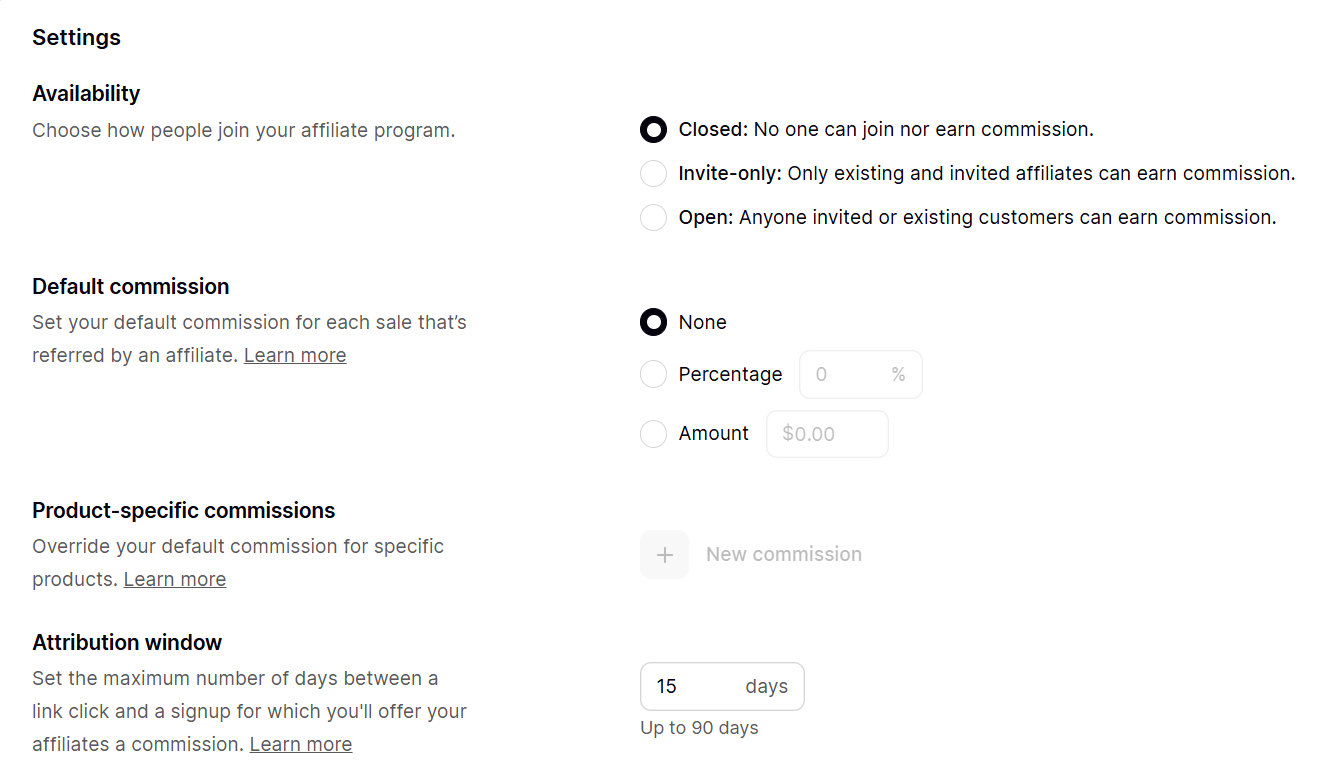
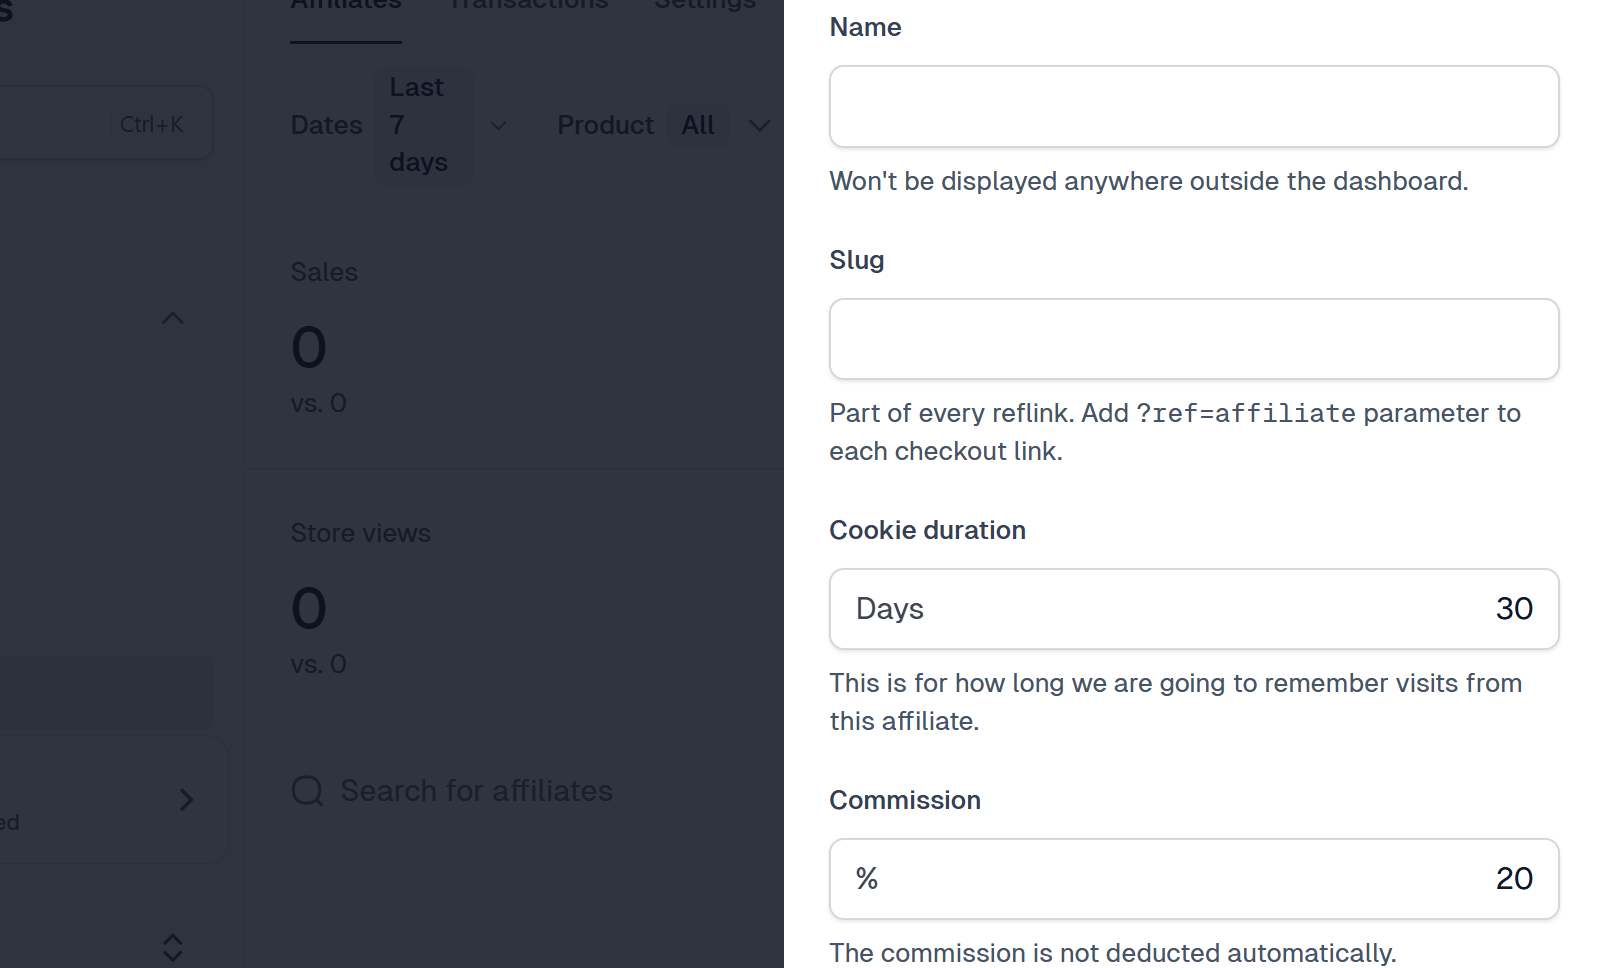
What’s more, you can manage partners with the affiliate feature. It allows you to set the commission rates, approve new signups, generate unique links, and track your partner's activity directly in the dashboard.
Podia also allows you to categorize your visitors when you tag their contacts based on signups, purchases, or actions. This helps you send them targeted messages or offers within the audience feature.
Let's create a sample digital product, like an e-book, that customers can download after they subscribe.
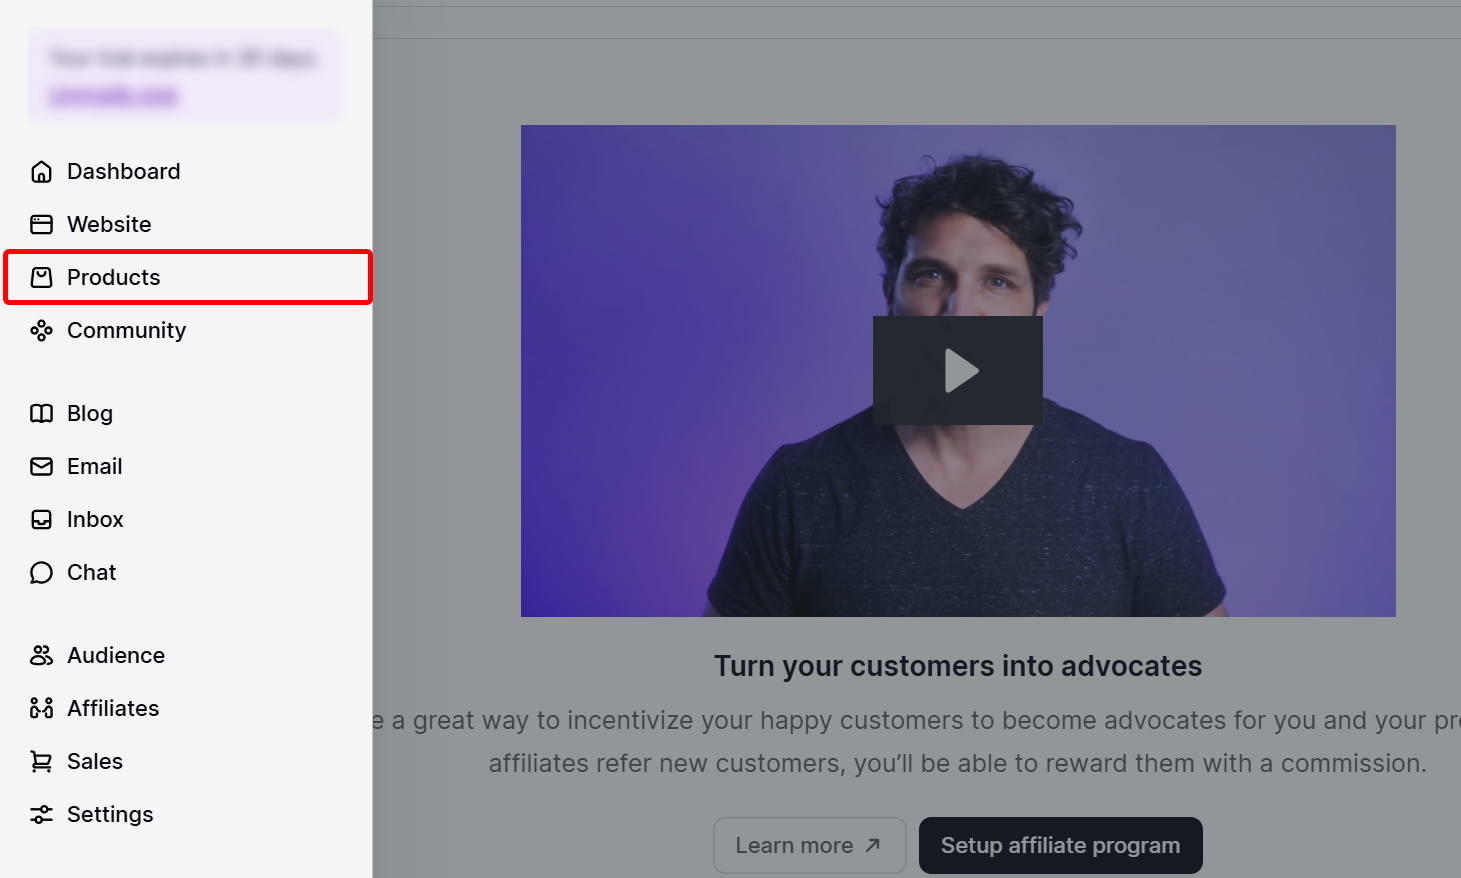
First, locate and select “Products” from the menu.
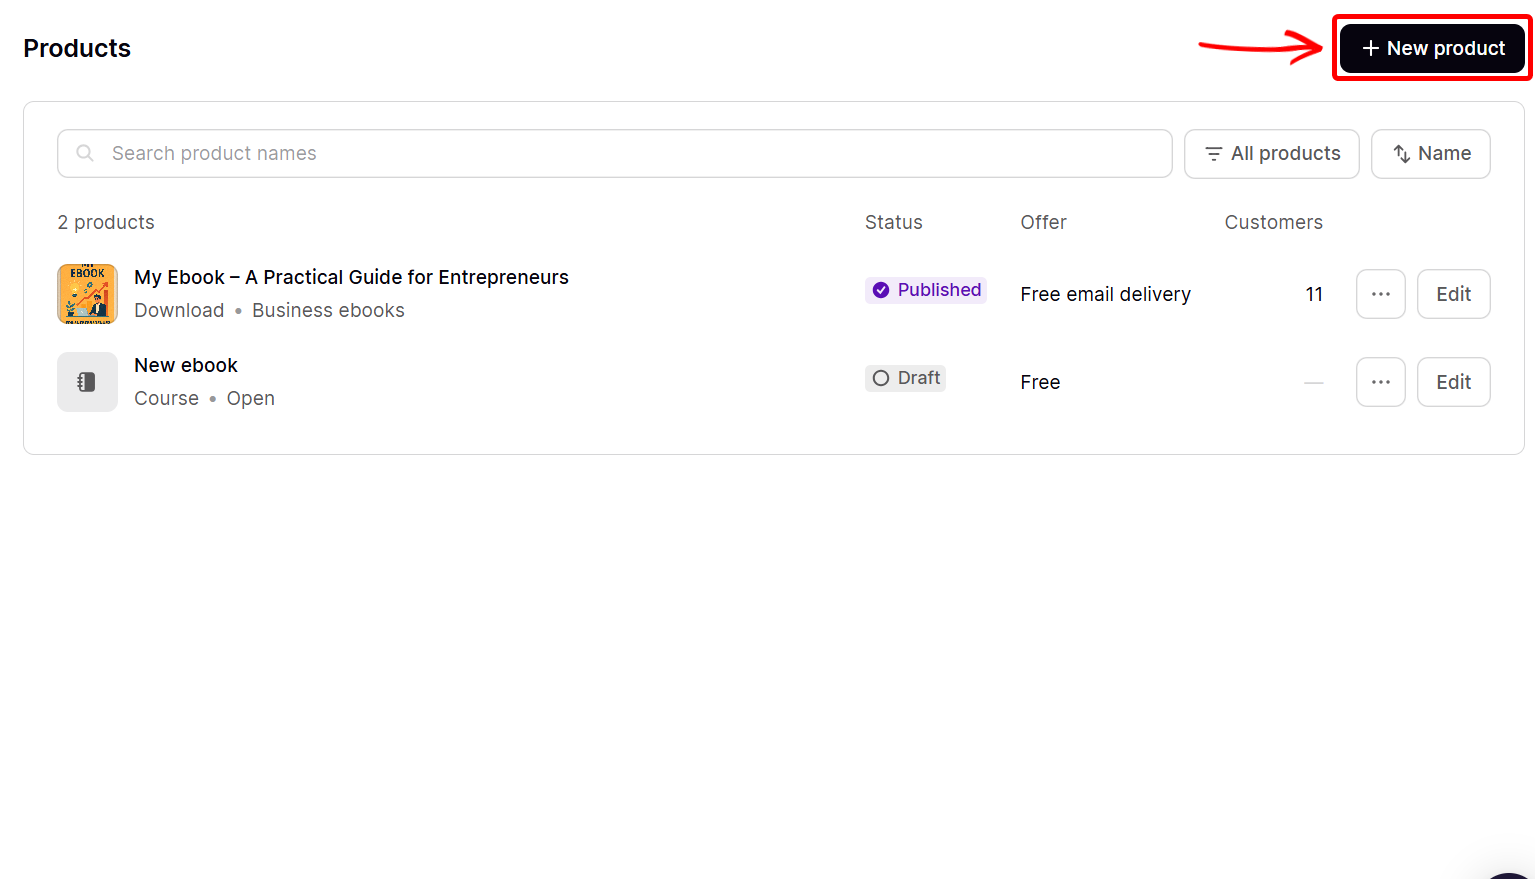
Next, select 'New Product' to create a new one.
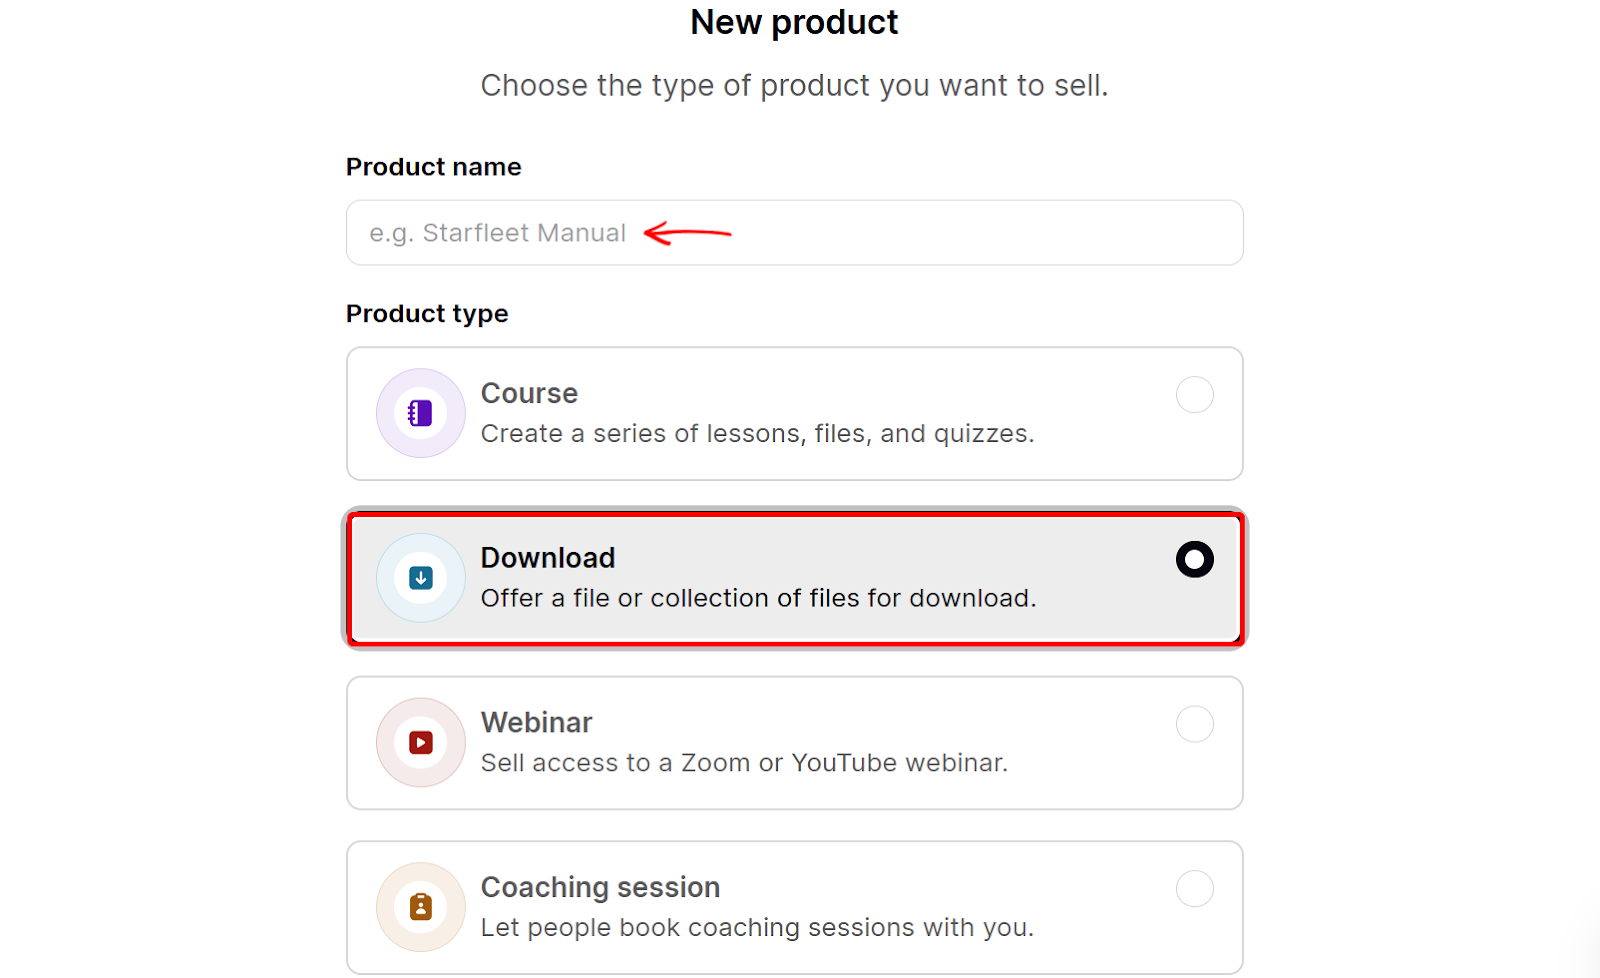
Next, indicate the type of product you want to sell, such as a course, webinar, or bundle, and name the product. Since it's an e-book, let's select the download type.
This takes you to the product setup page. First, switch to the files tab and select ‘Choose files’ to upload your e-book file.
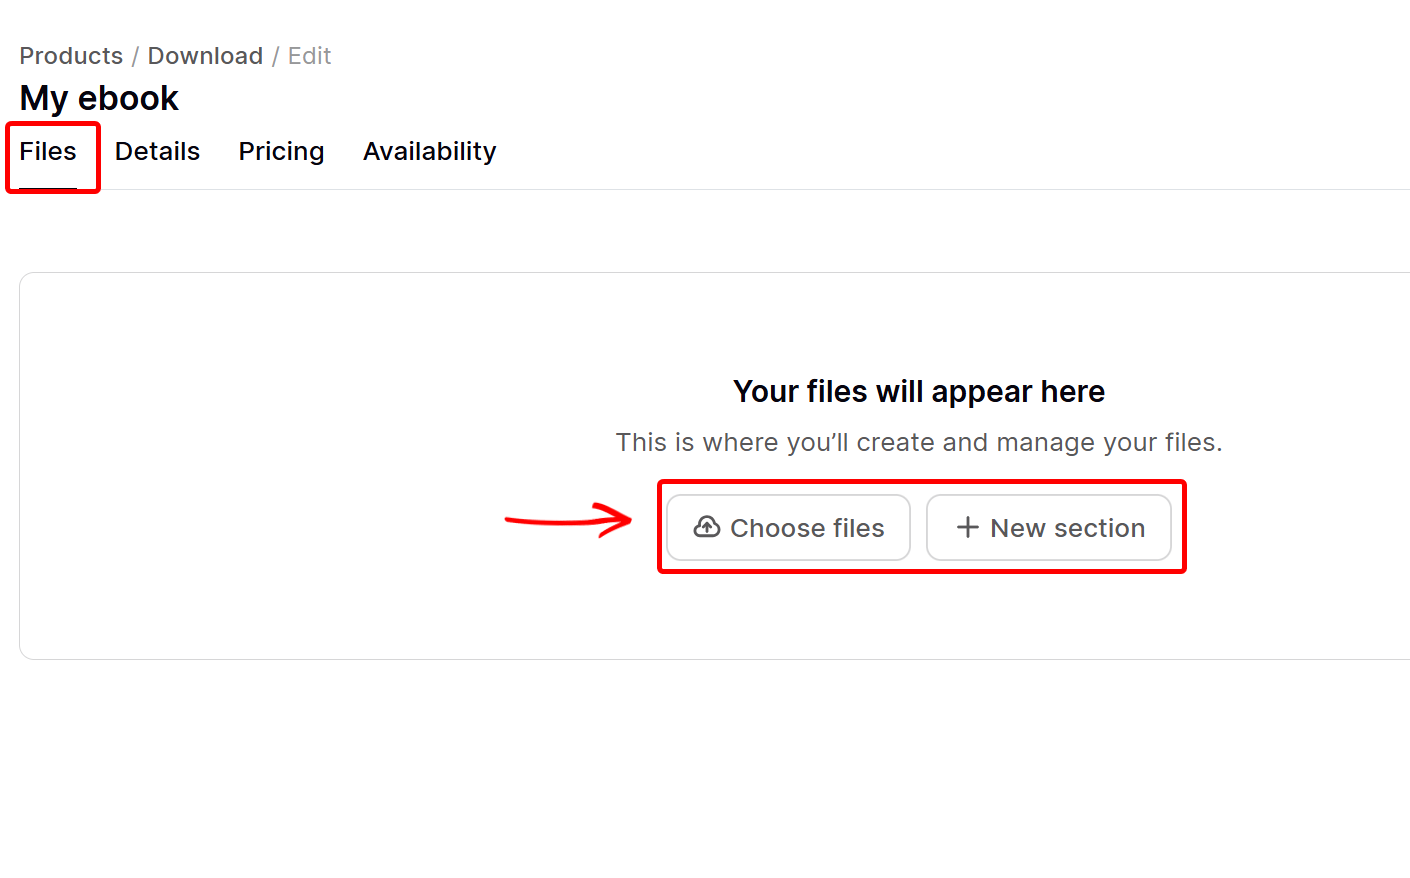
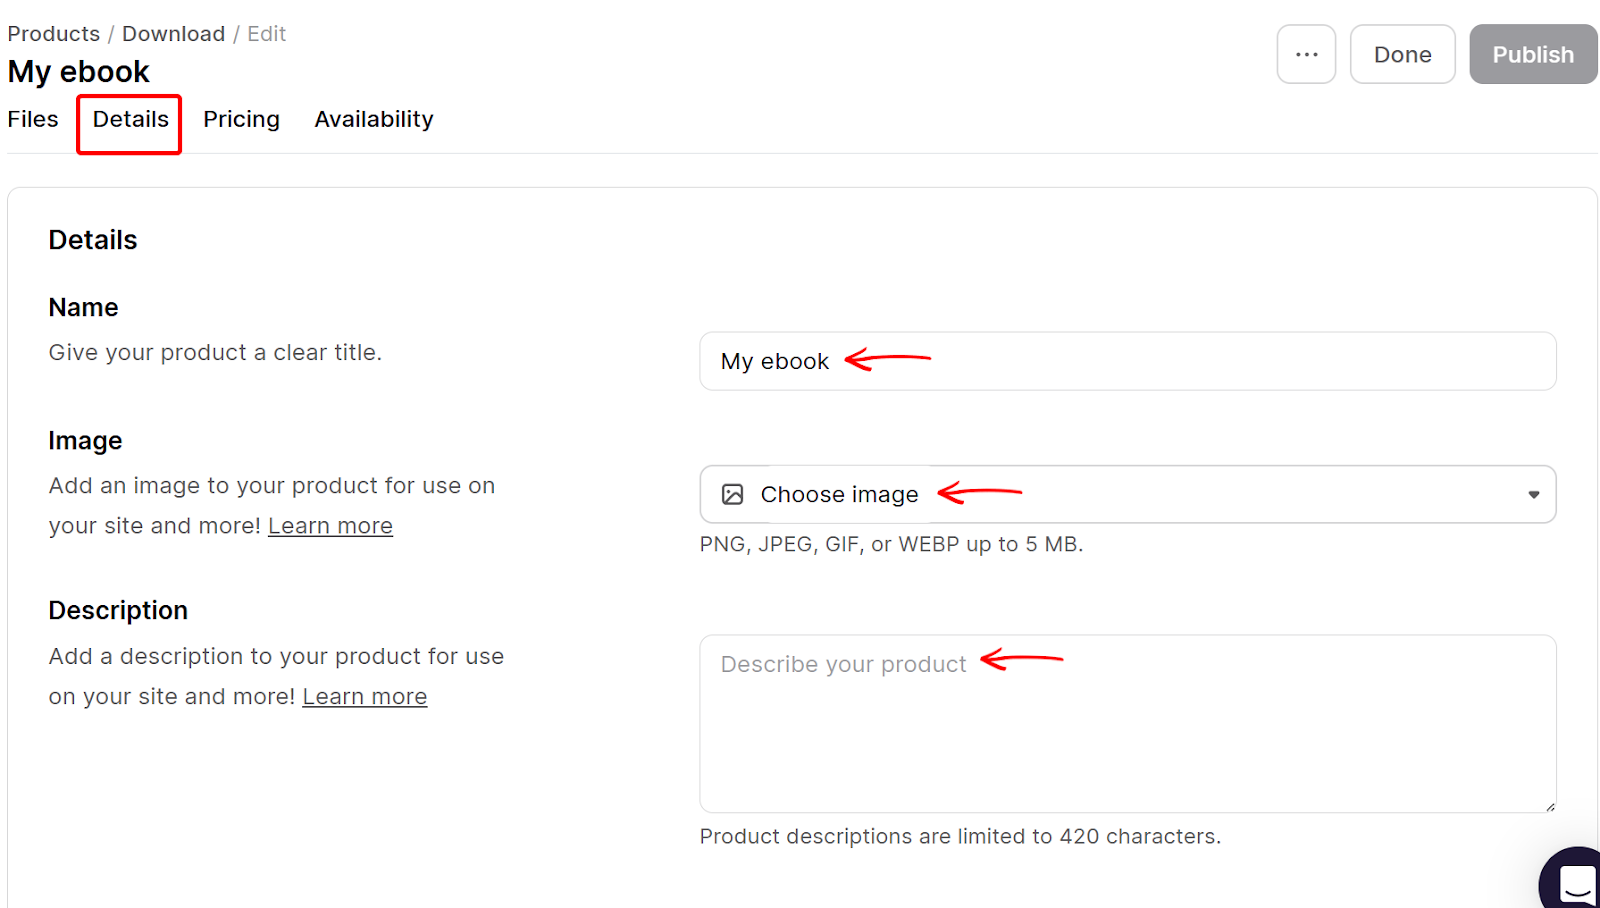
After uploading your e-book file, select the details tab to define how you want it to appear on the store.
Here, you name the e-book, upload its image, and describe it.
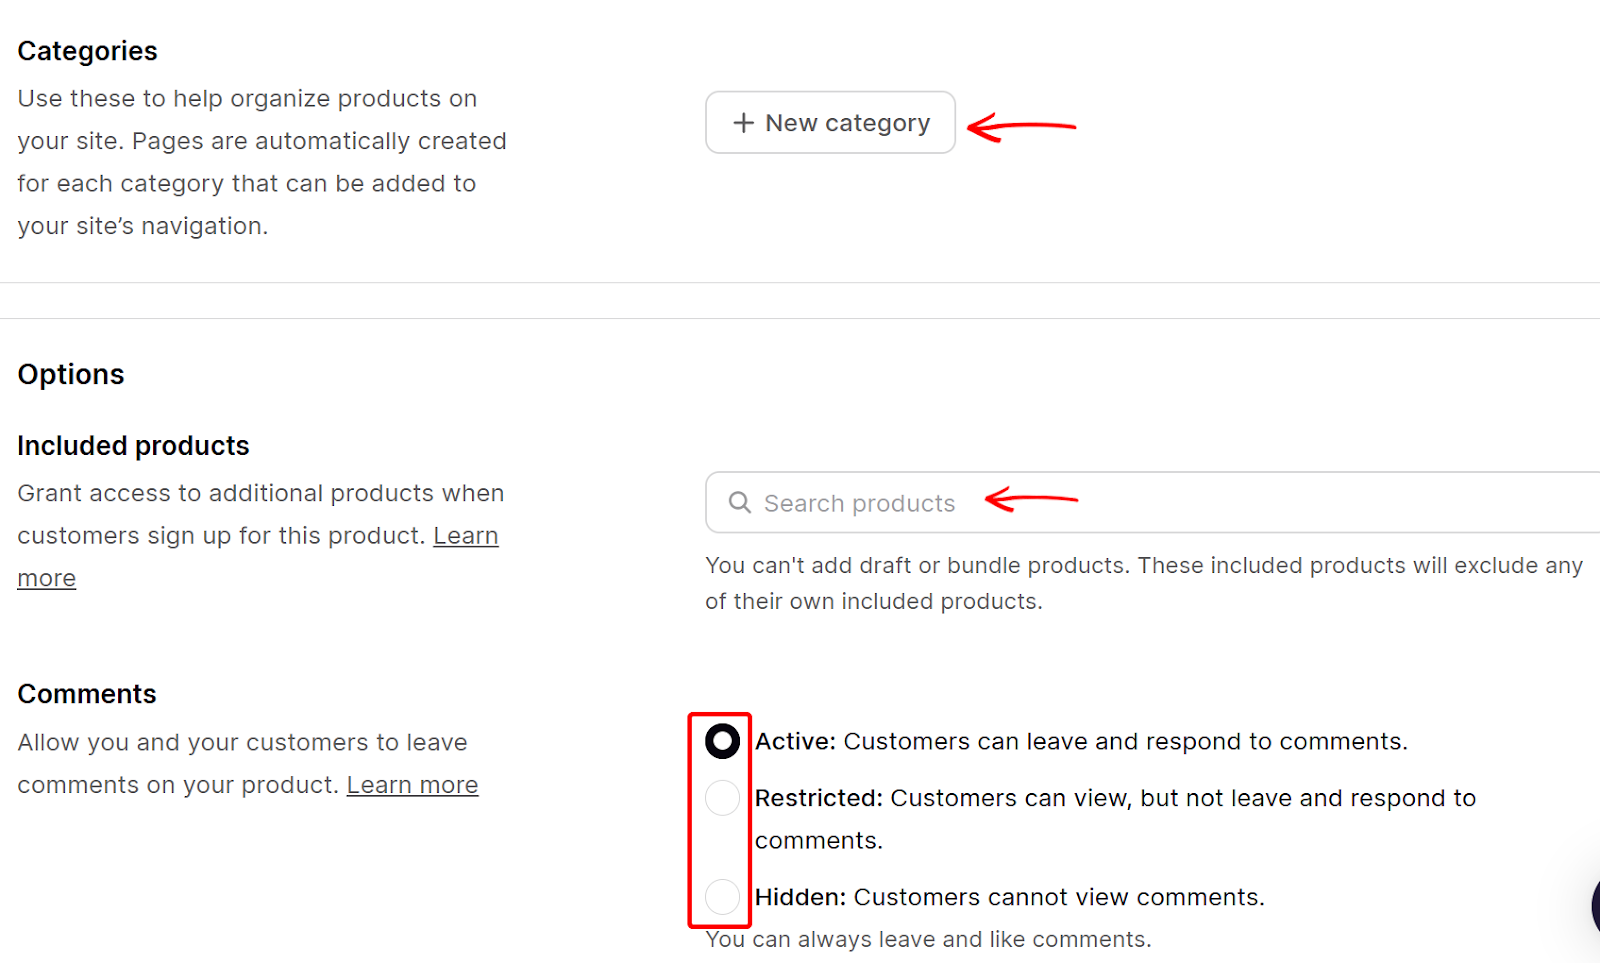
Also, you can put the e-book into a category and include additional products. You can also activate, restrict, or hide comments on the product.
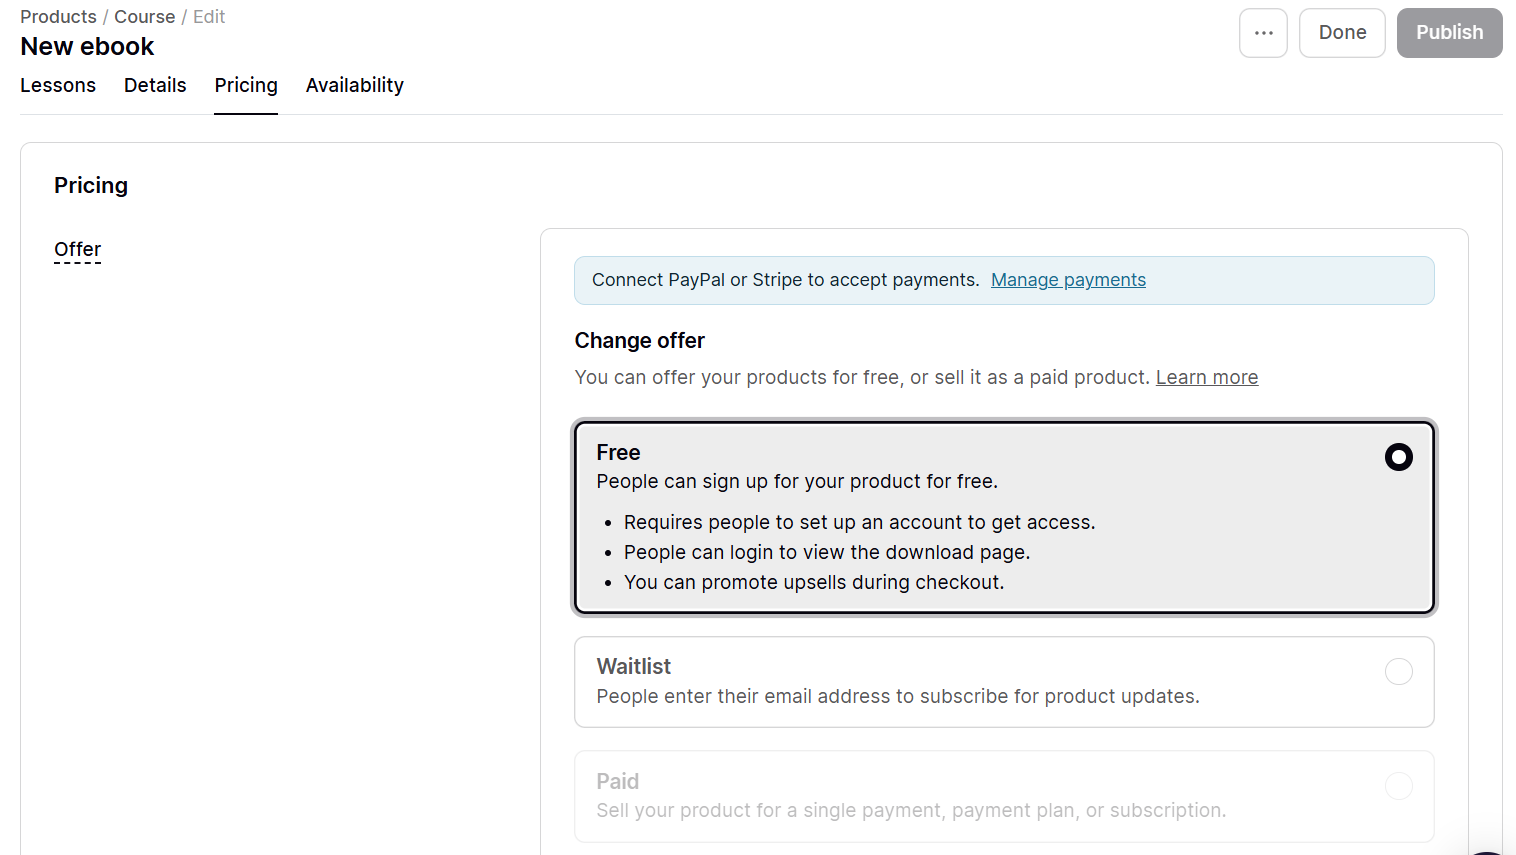
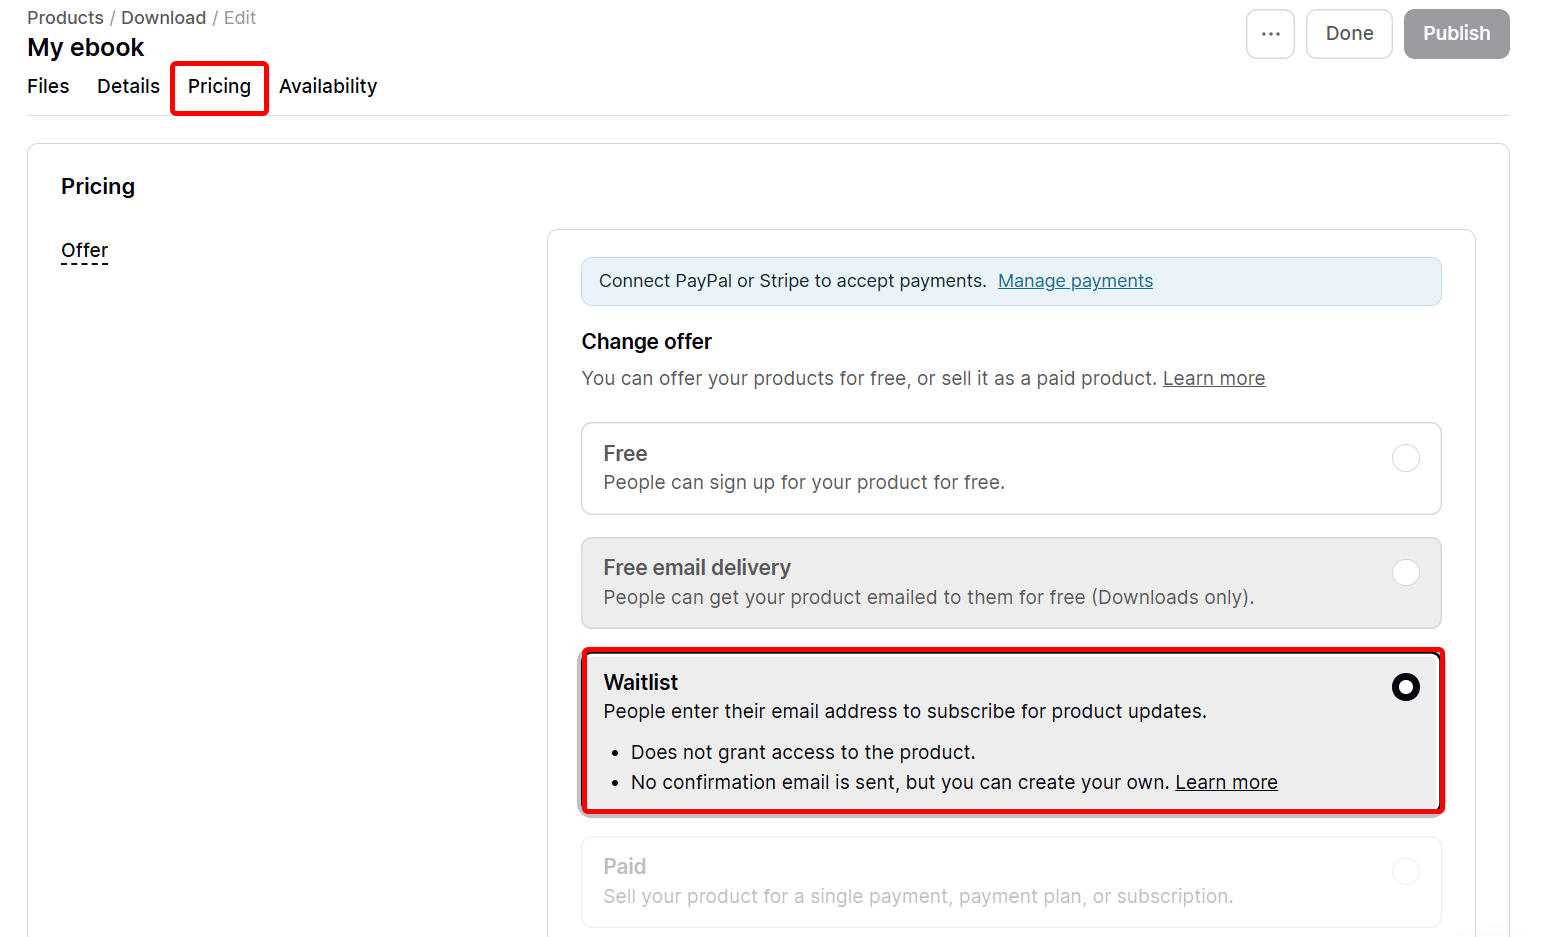
Next, switch to the pricing tabs to set pricing options. You can make a product free, paid, free on email delivery, or waitlisted.
Let's select the waitlist to demand subscriptions from customers before they download.
Scroll down the pricing tabs to set additional options, like adding a title and subtitle to the e-book’s upsells page.
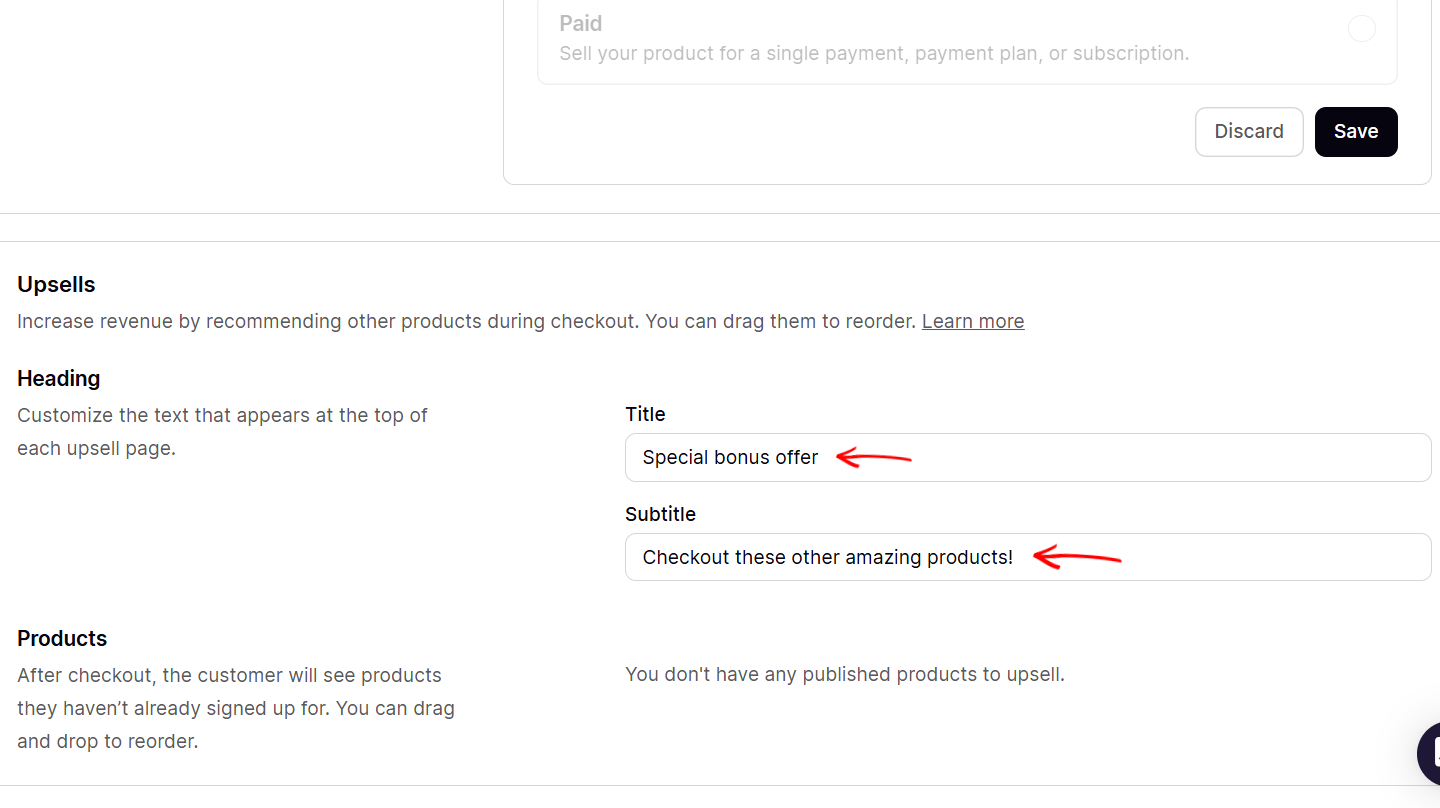
Finally, switch to the availability tab to set the e-book's availability and limit on the store. Here, indicate its start date, sign-up limit, duration, and make it visible or accessible on the store.

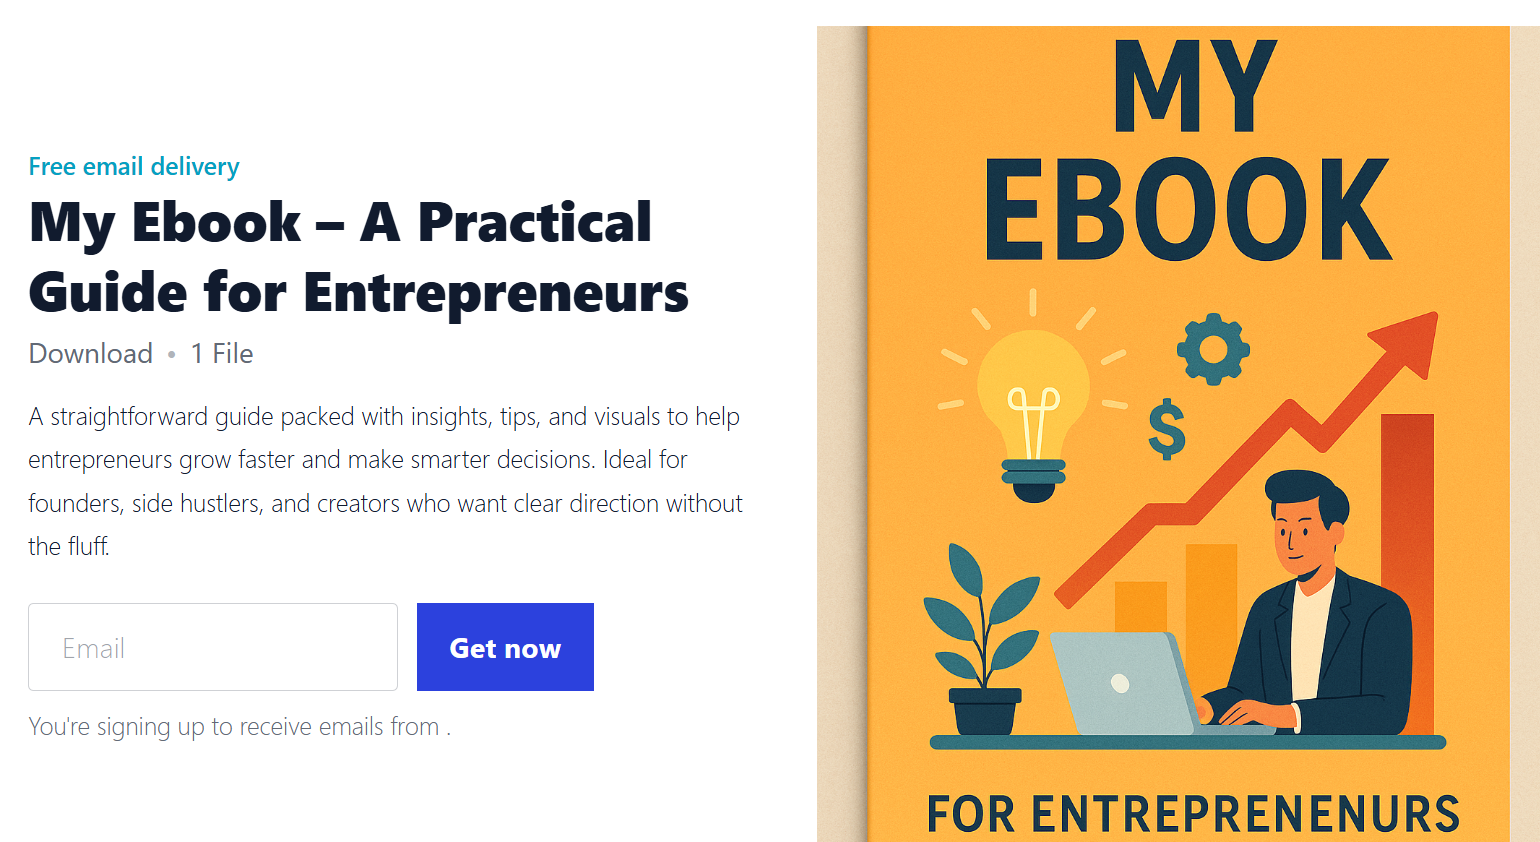
When you publish your product, the customers can see the details, images, and pricing options.
For instance, this e-book is offered for the waitlist, asking for customers’ subscriptions.
[fs-toc-omit]Key Features
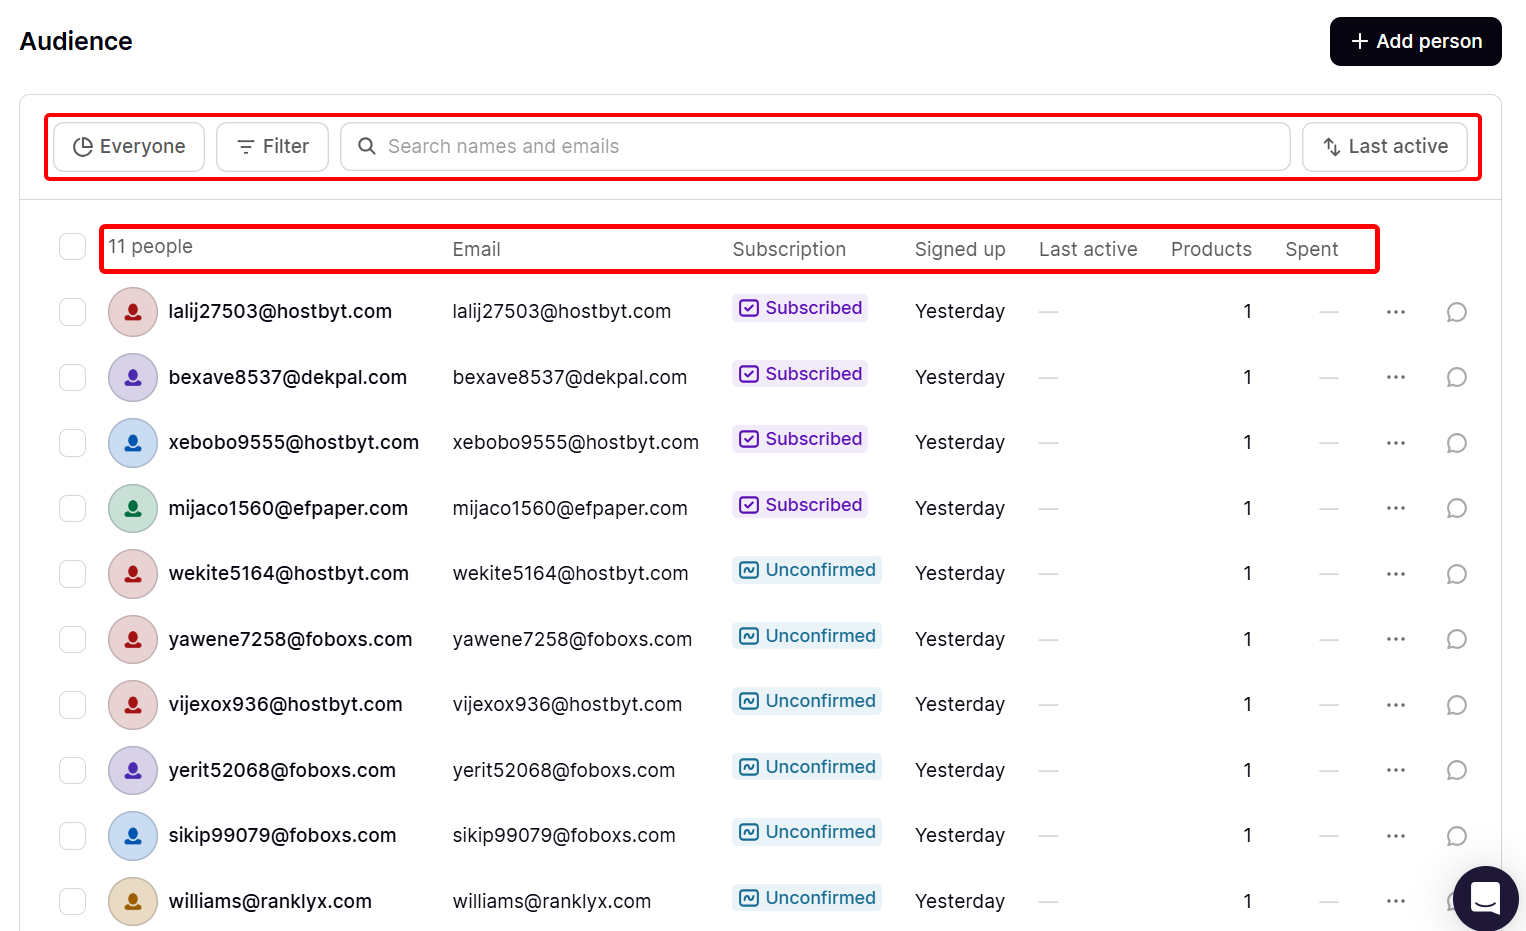
1. Audience
Whenever a customer purchases, downloads, or subscribes to your product, Podia saves their details, like email and purchase history, in the audience section.
This section lets you track, manage, and categorise your customers by behaviour or product, then send them targeted messages or offers.
Apply a filter and category to query matching customers, and view their details, such as email, money spent, and subscription.
When you select the three-dot options of a customer, you can edit their details and tags, reset their password, unsubscribe them, and send them an email set up.
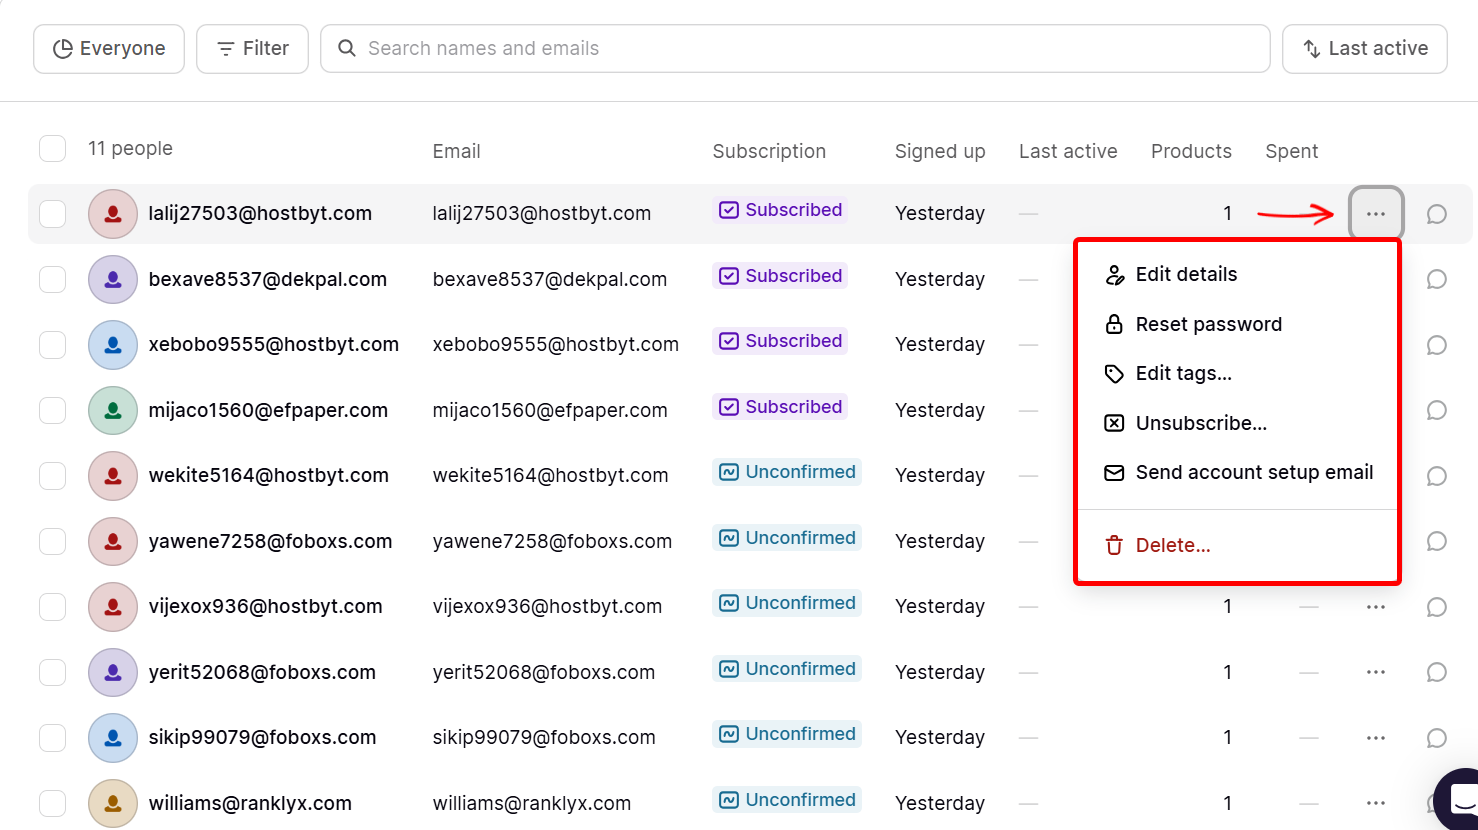
Furthermore, when you select a customer, you can view the products they purchased in your store. This info includes details like the amount spent, progress, and expiry. There is also an invoice section.

The invoice shows more information on the customer, like their subscription and email, their tags, and analytics.

2. Website
You can use the website feature to build a branded storefront. It allows you to select a layout and add pages.
You use this feature when you want to create a home for your products, offers, and content without using code or setting up a separate domain.
Using this feature, you can build your website from scratch, create a link page, or an email landing page after selecting your theme color.
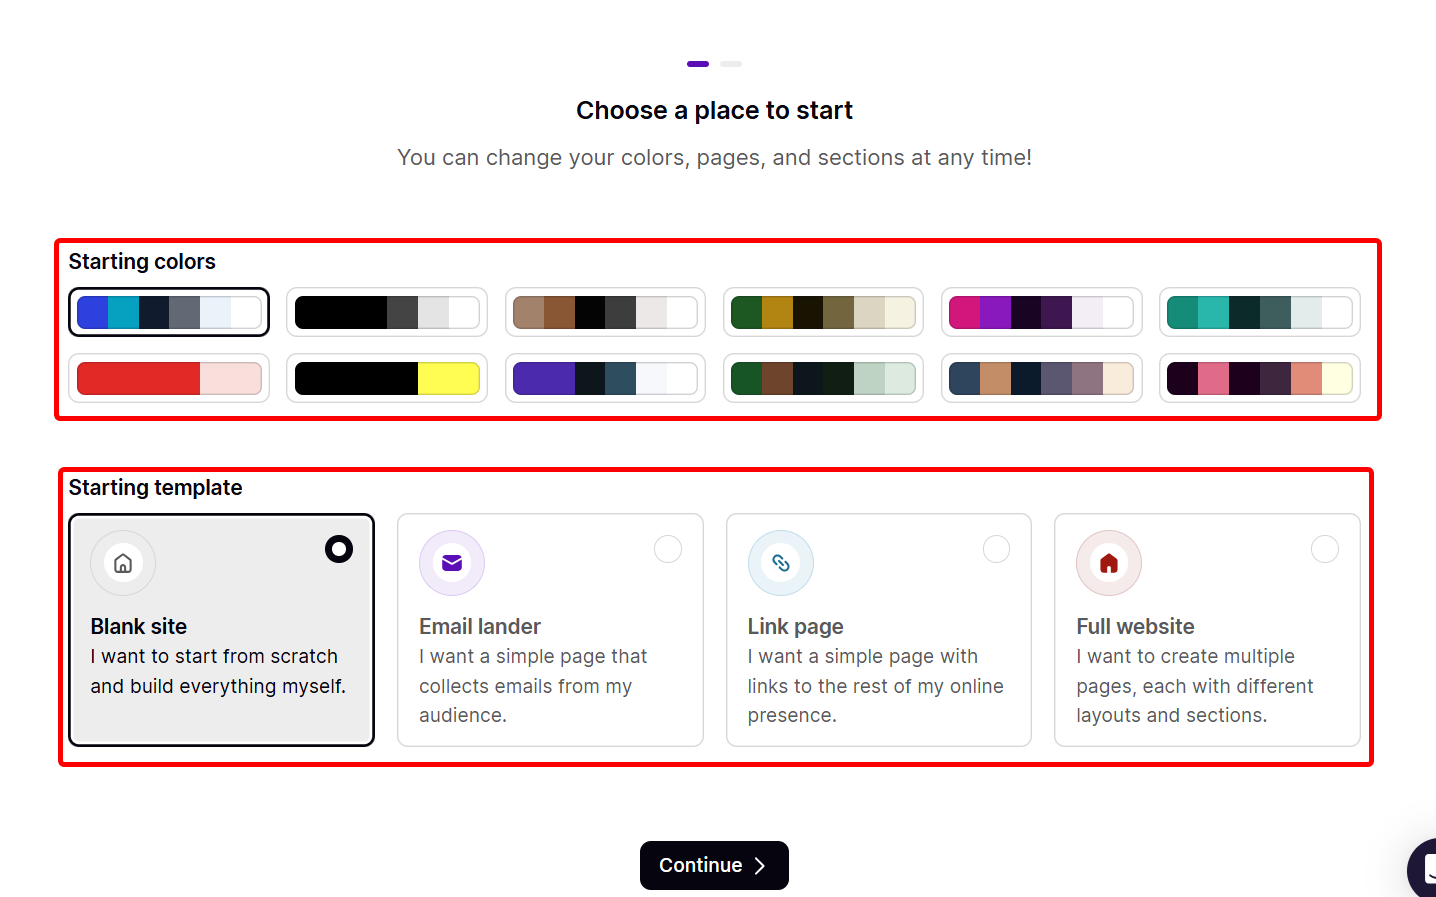
There is a website builder page where you can design your homepage, make customisations to already existing content, and more.
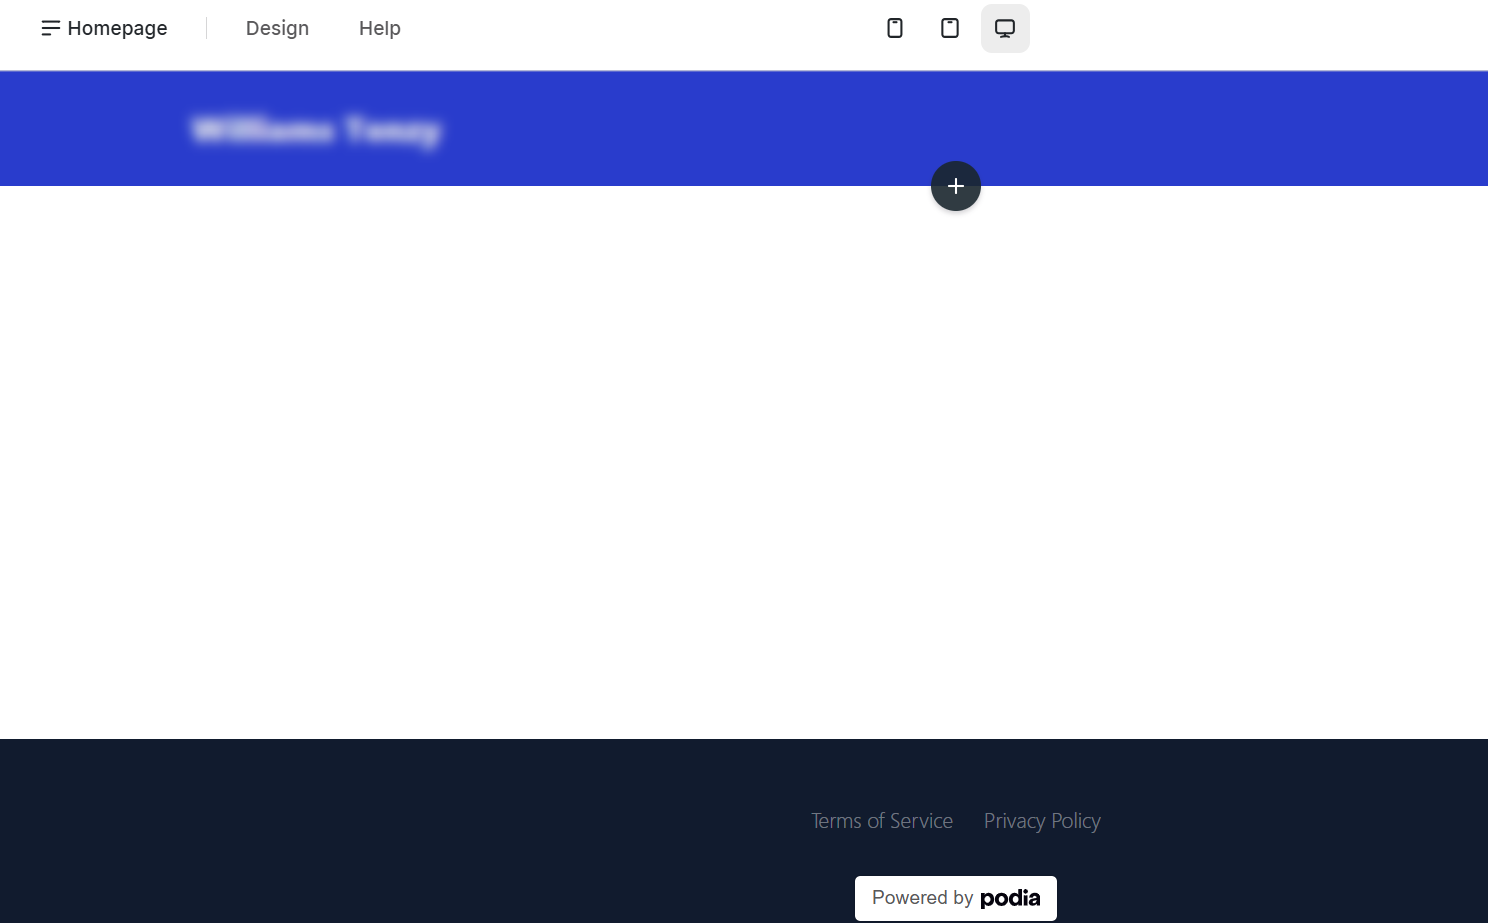
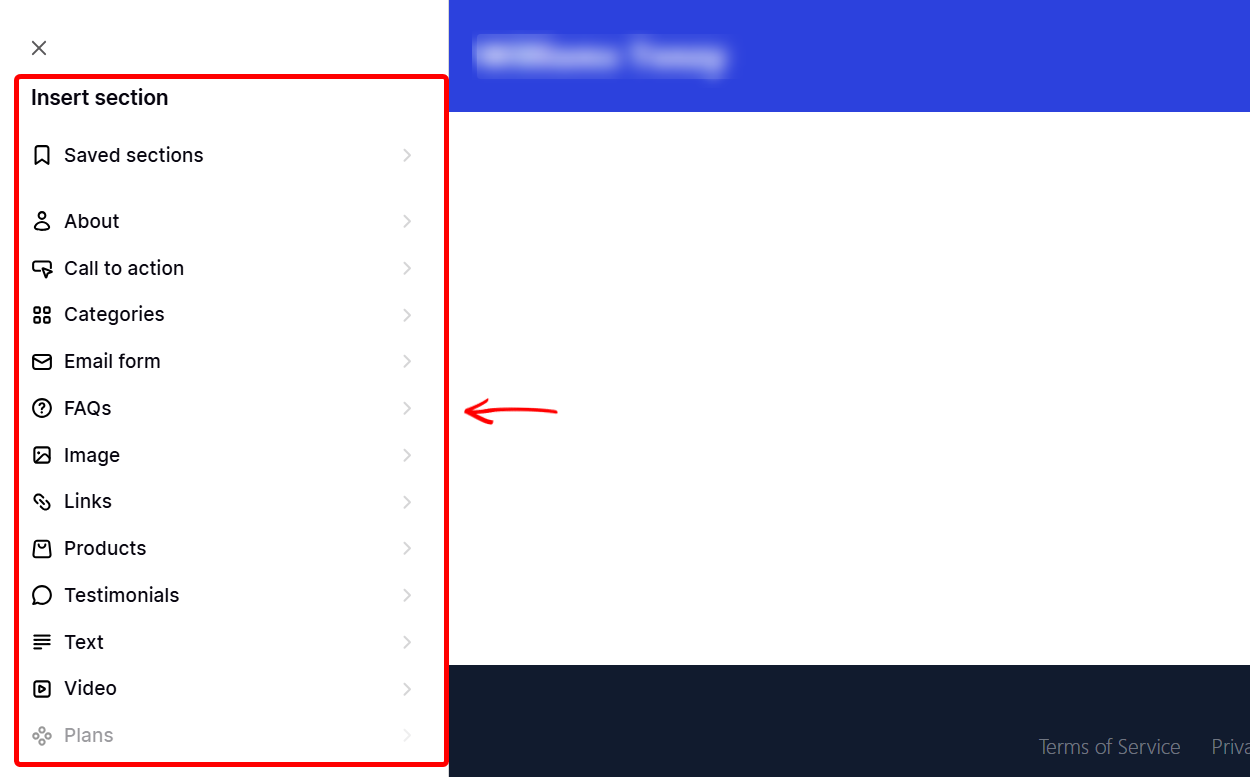
Additionally, you can add objects and elements like images, links, products, text videos, and call-to-action to build the website.
[fs-toc-omit]Best For
- Non-technical creators who seek to sell and deliver digital products from a single storefront.
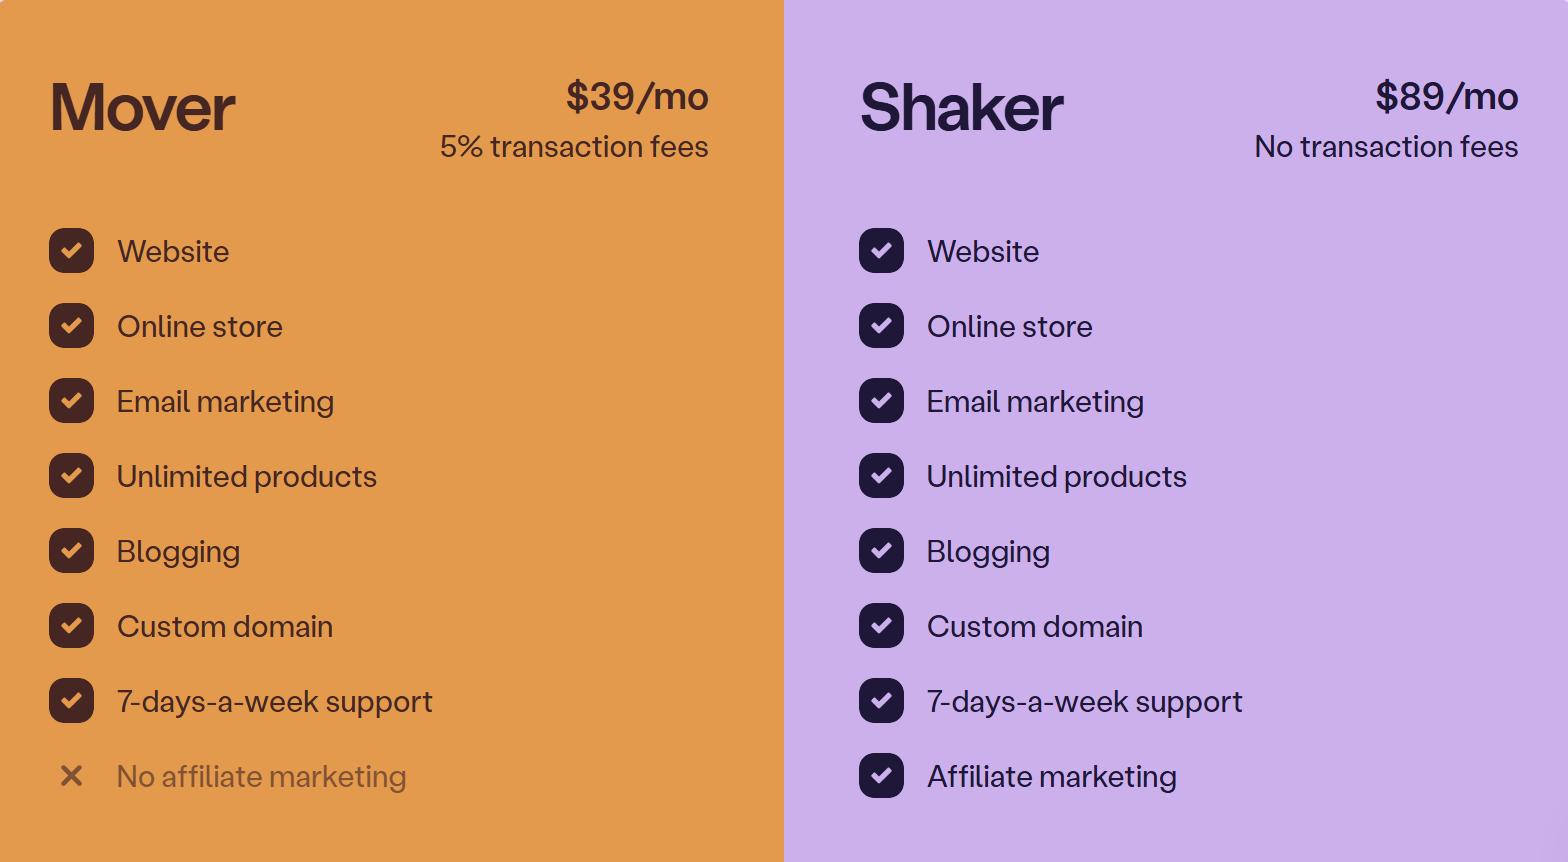
[fs-toc-omit]Pricing
- Mover - $39/ month + 5% transaction fee
- Shaker - $89/ month
4. Sellfy
Sellfy is next on our list of the best sites to sell digital products.
This digital selling platform allows you to upload your digital files or courses, set the prices, and publish them for sale on your store page. All of this is possible thanks to the products feature.
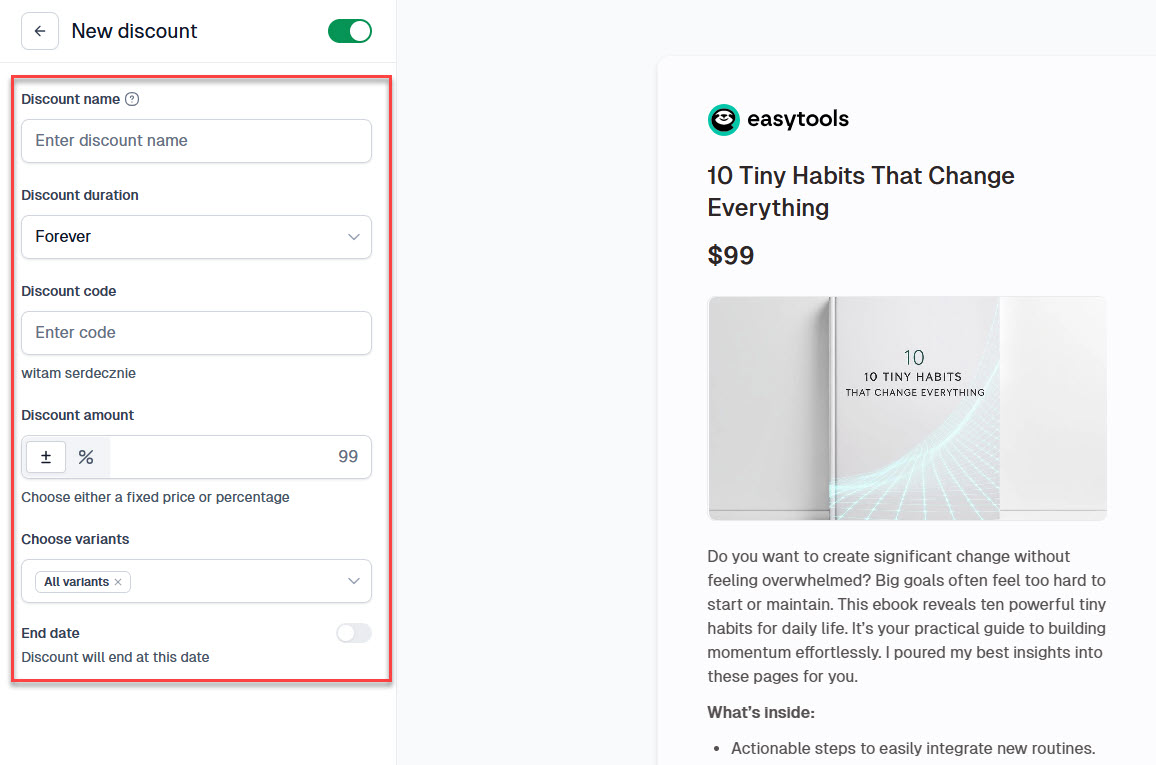
You can also create time-limited promotions. Using the discount feature, you can choose the discount type, enter the amount, define the product scope, and set start and end dates.
Sellfy's customers tab lets you track buyer activity by viewing their names, emails, purchase history, and refund status.
In addition, the digital product site has an email marketing tool you can use to reach out to customers.
To set one up, select the recipients from filters, write the subject and content, and send the email marketing campaign.
Now, let’s focus on Sellfy’s product feature and explore what it’s made up of.
Let’s say you’re a non-technical creator or entrepreneur looking to build and sell a course. Use this feature to create a digital course sample with its pricing.
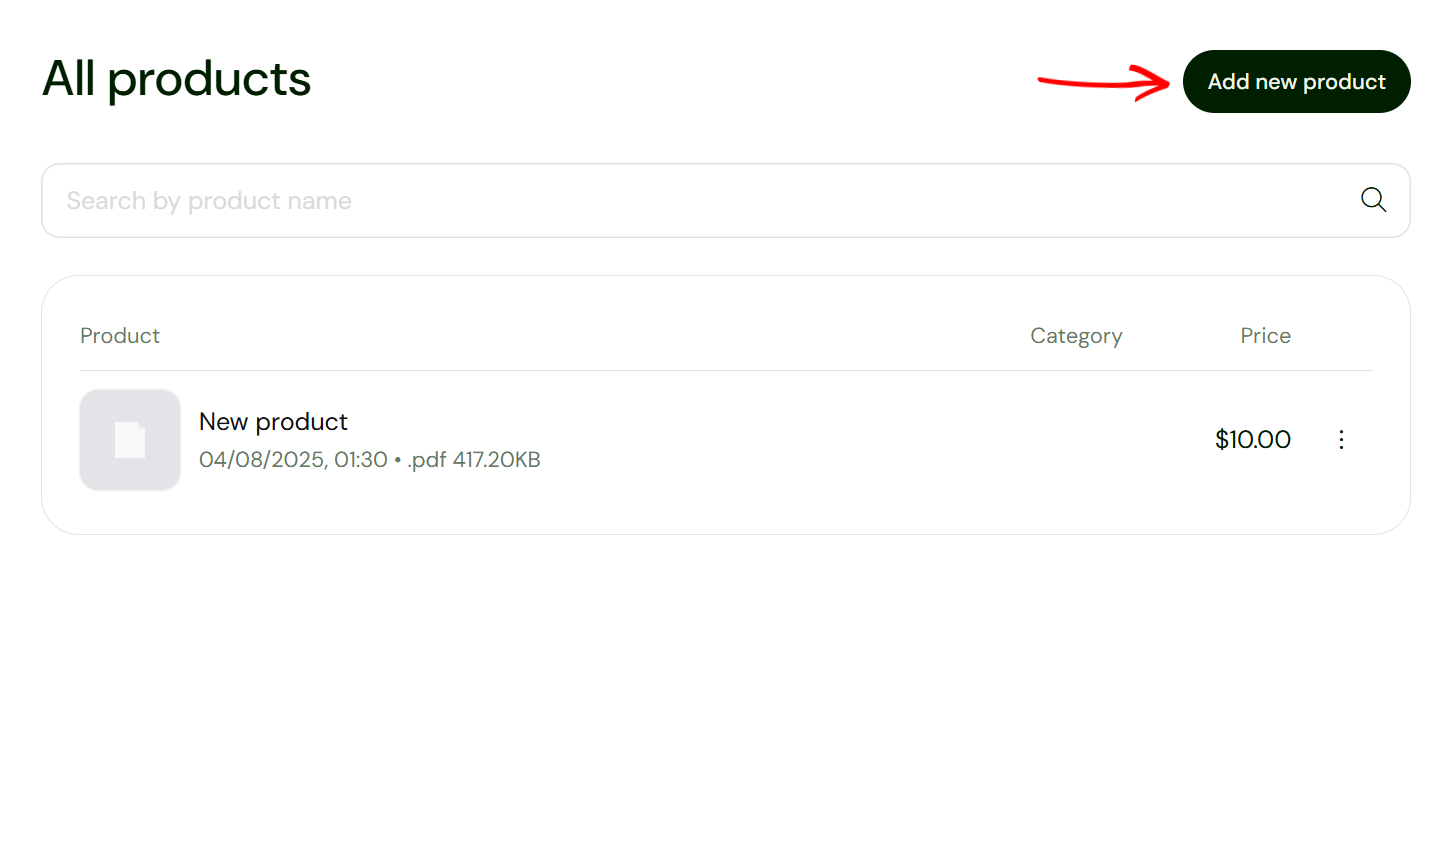
To begin, head over to the products section on your main menu.

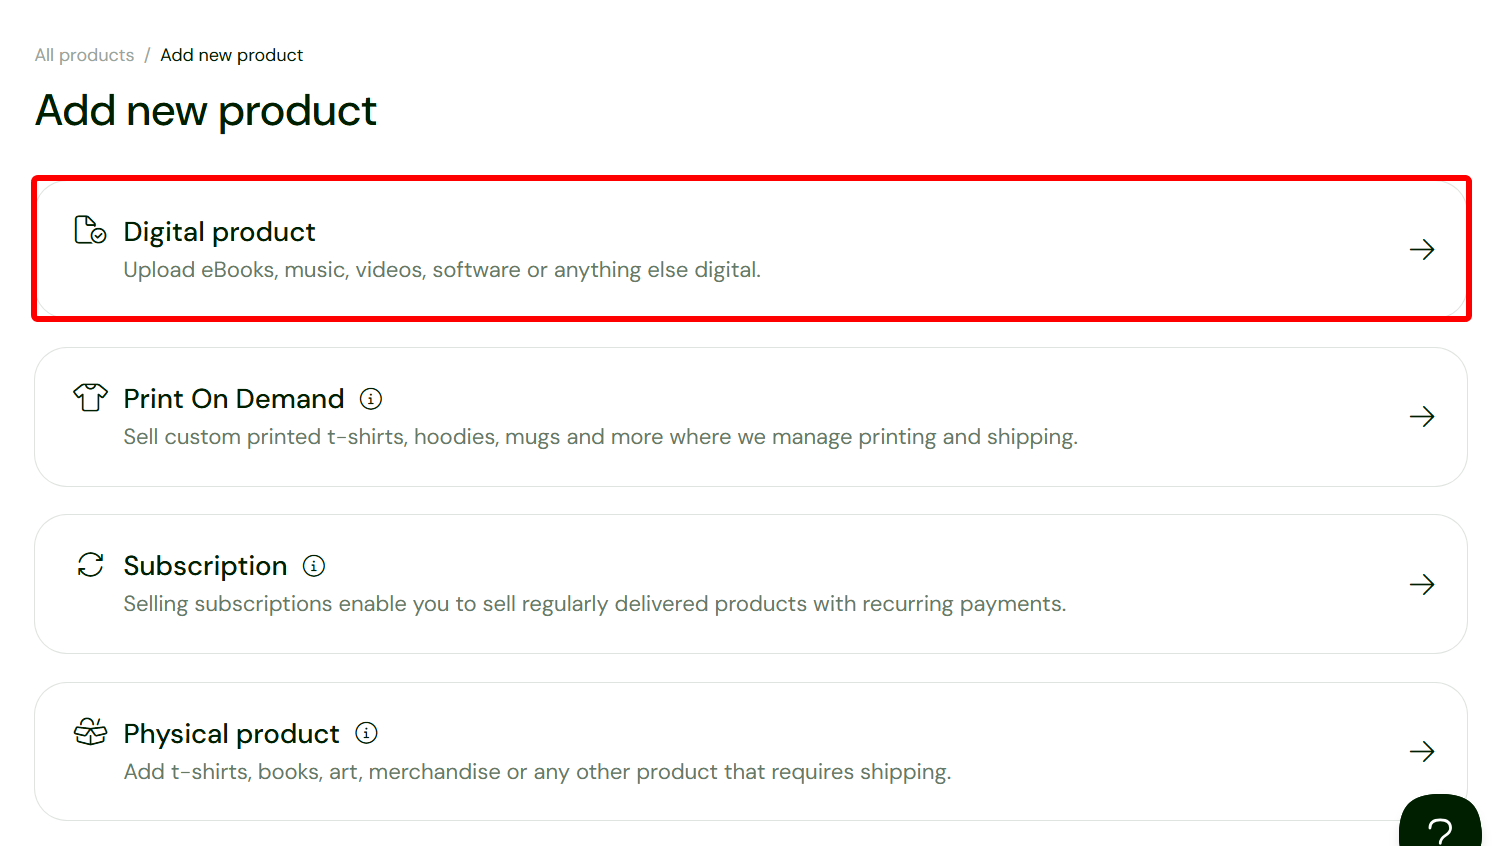
If you are an existing user, the product section may contain your already existing products, which you can manage. Select “Add new product” to create your new product. In this case, the digital course.
Next, indicate the type of product you offer. These can be subscriptions and customised products. We are creating a course product, so select the digital product type.
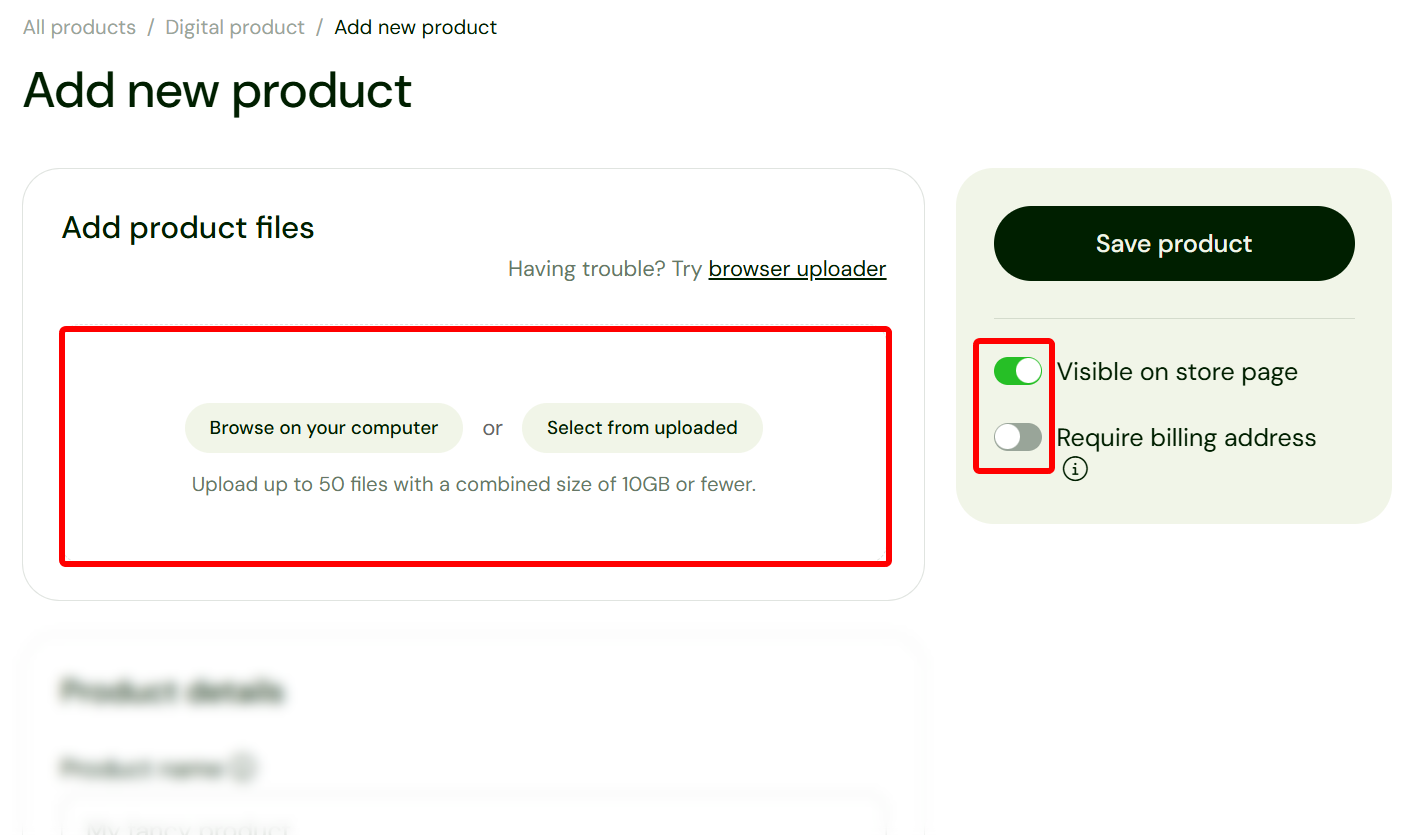
Next, upload the course file(s) from your computer or select already uploaded ones.
Make the product visible and indicate if you want it to demand a billing address from buyers.
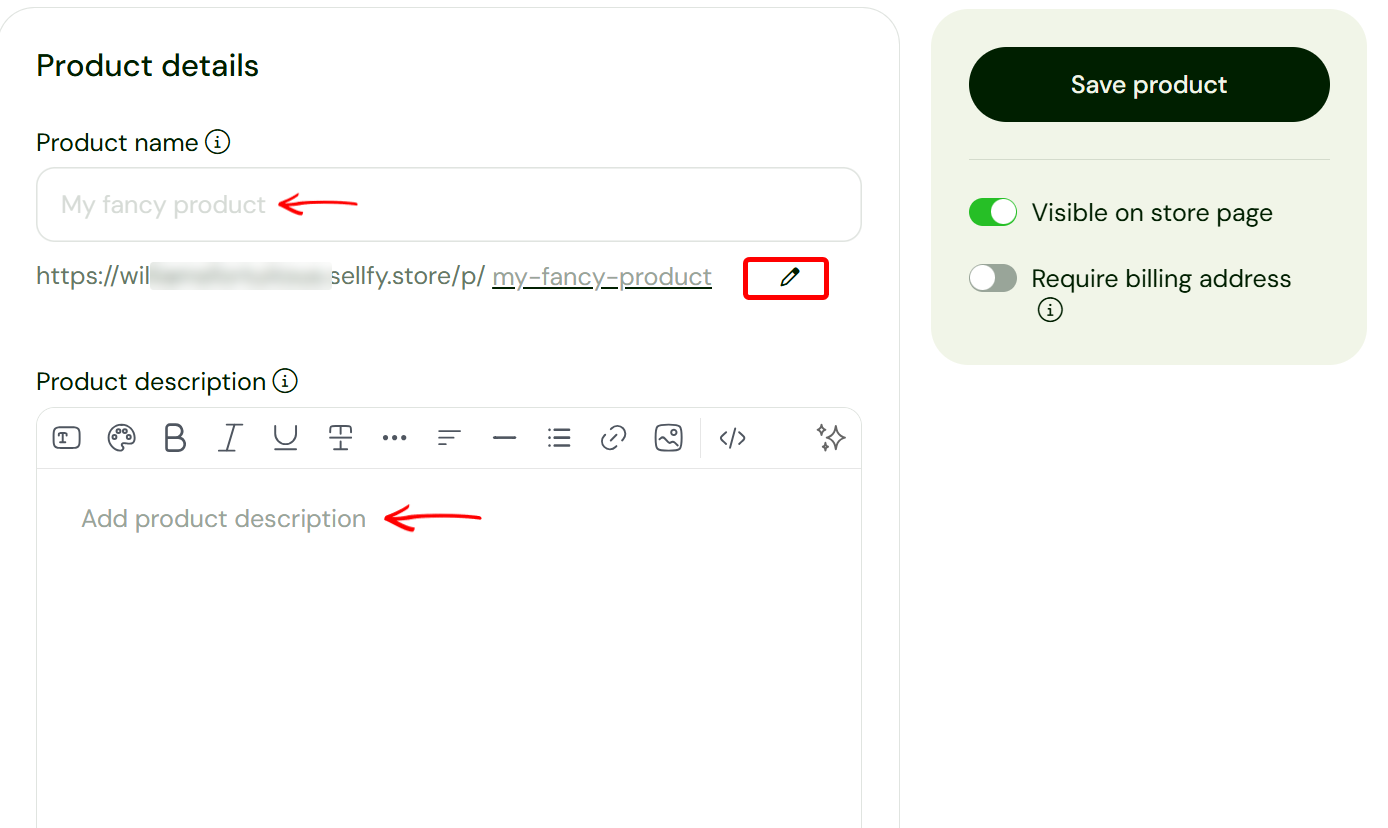
Scroll to the product details section to define your course. Simply enter the course’s name and describe it. As an added option, you can customize the link leading to its store page.
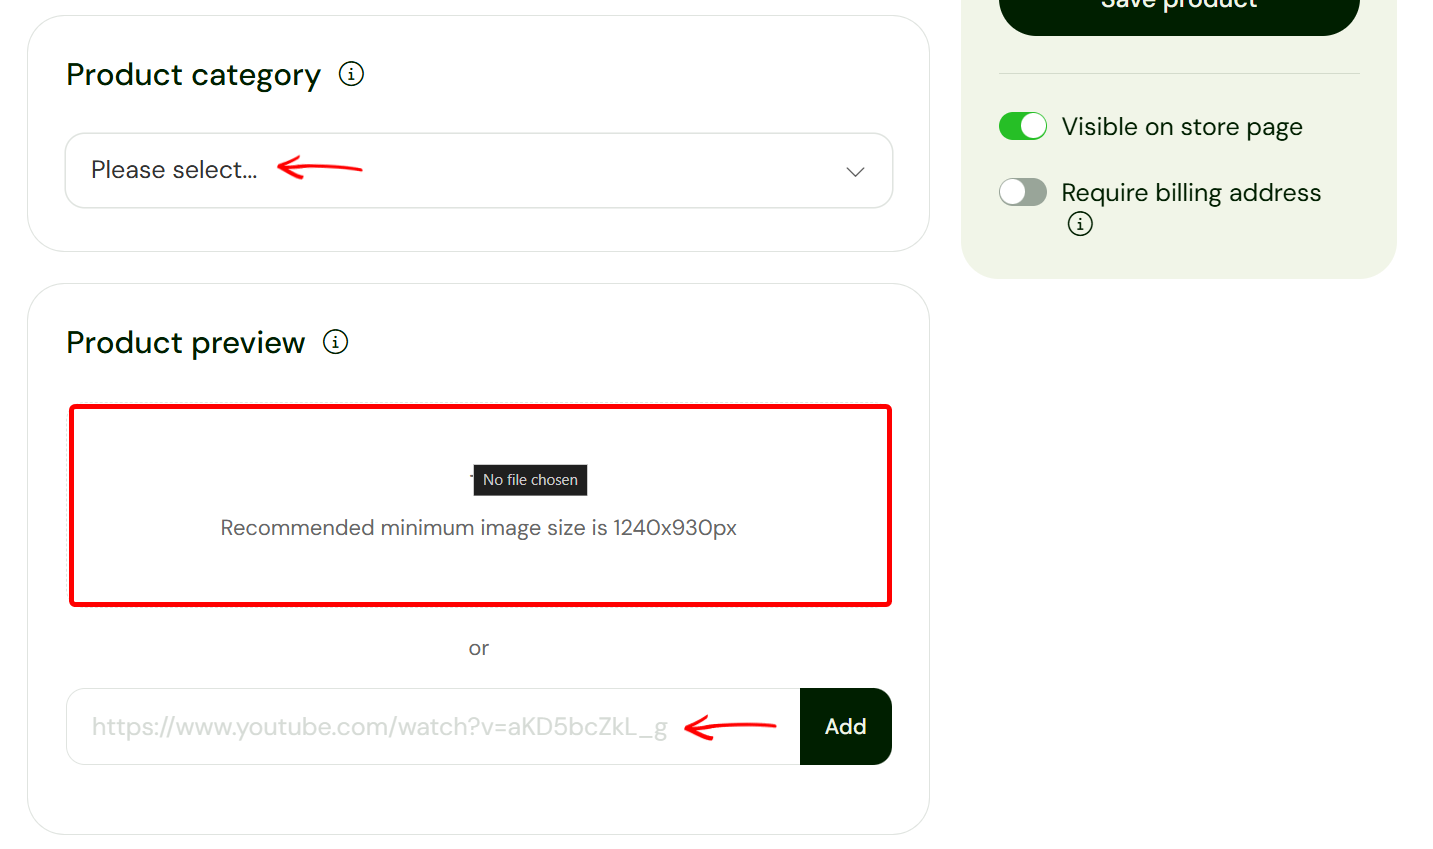
Afterwards, locate the product category and preview section to categorize your course, and add images or a link to preview your course content on the store page.
Now, locate the pricing settings to indicate the price of the course and the currency. You can make it a fixed price or let the buyer pay any amount. Check out our guide on how to price your online course to learn tips from experts.
Also, you can set the amount of stock for the course or make it unlimited.
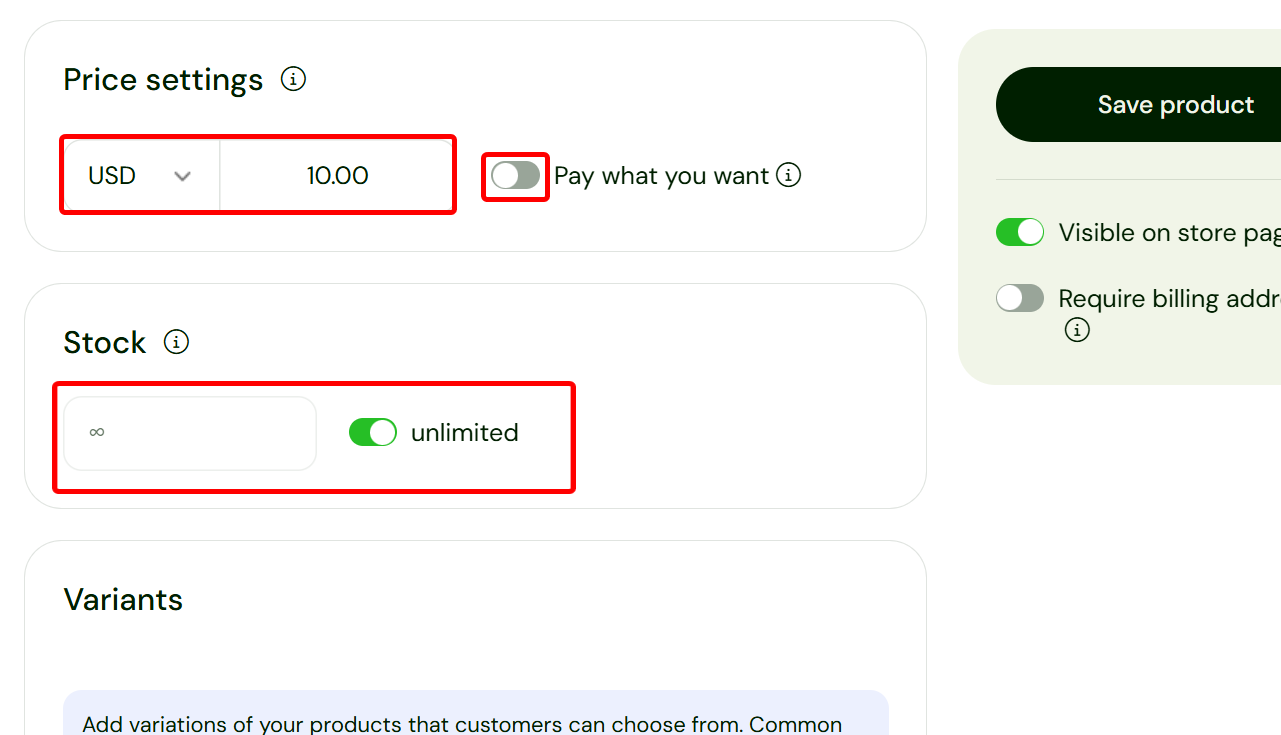
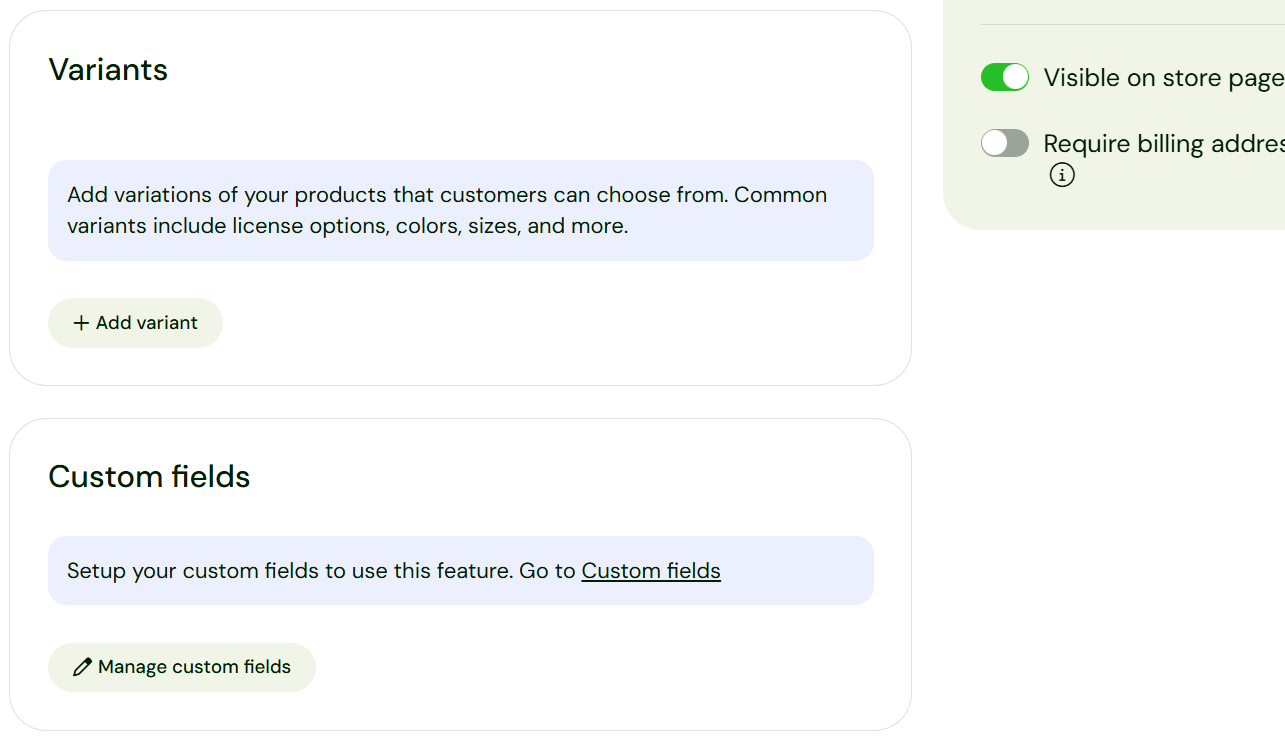
Sellfy allows you to add variants to the course, add custom fields for questions on the store page, and set SEO elements like title tags and meta descriptions.
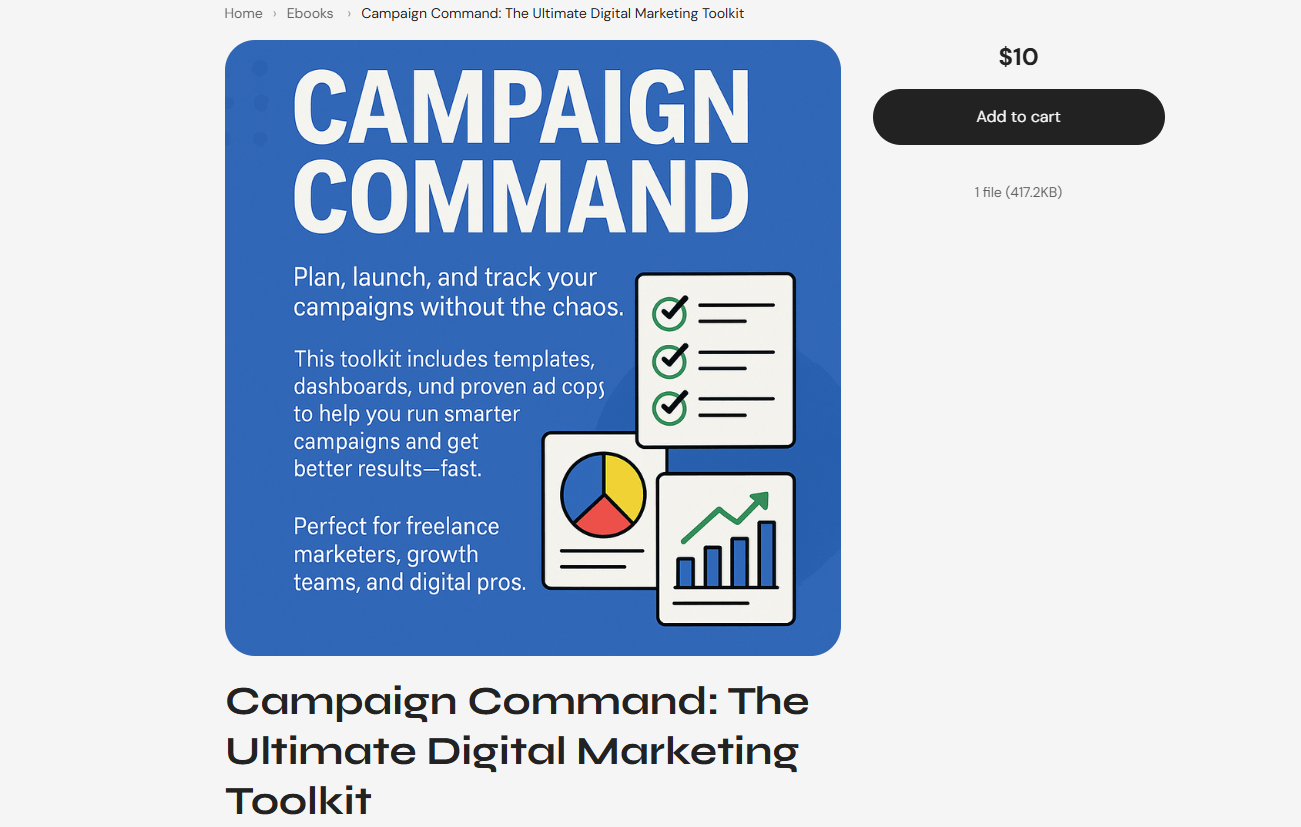
When published, the buyer can see the product, image details, and add it to their cart.
The course I created here has a fixed price of $10.
[fs-toc-omit]Key Features
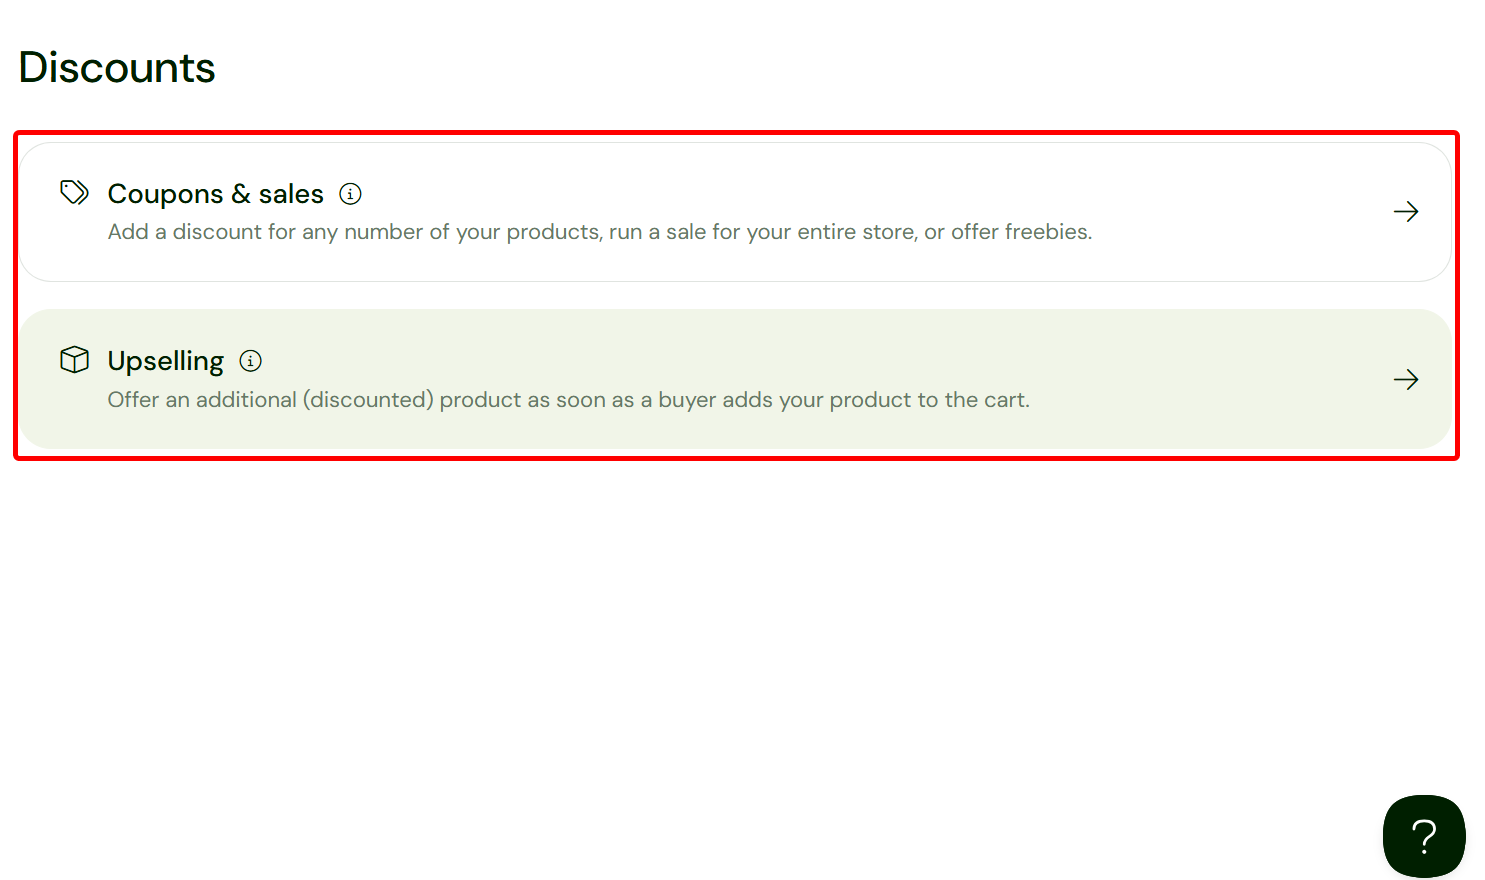
1. Discounts
The discount tool allows you to offer a price reduction on a specific product or storewide.
You are allowed to control it by limiting how many times the code can be used. You can also choose which products it applies to and set minimum order values.
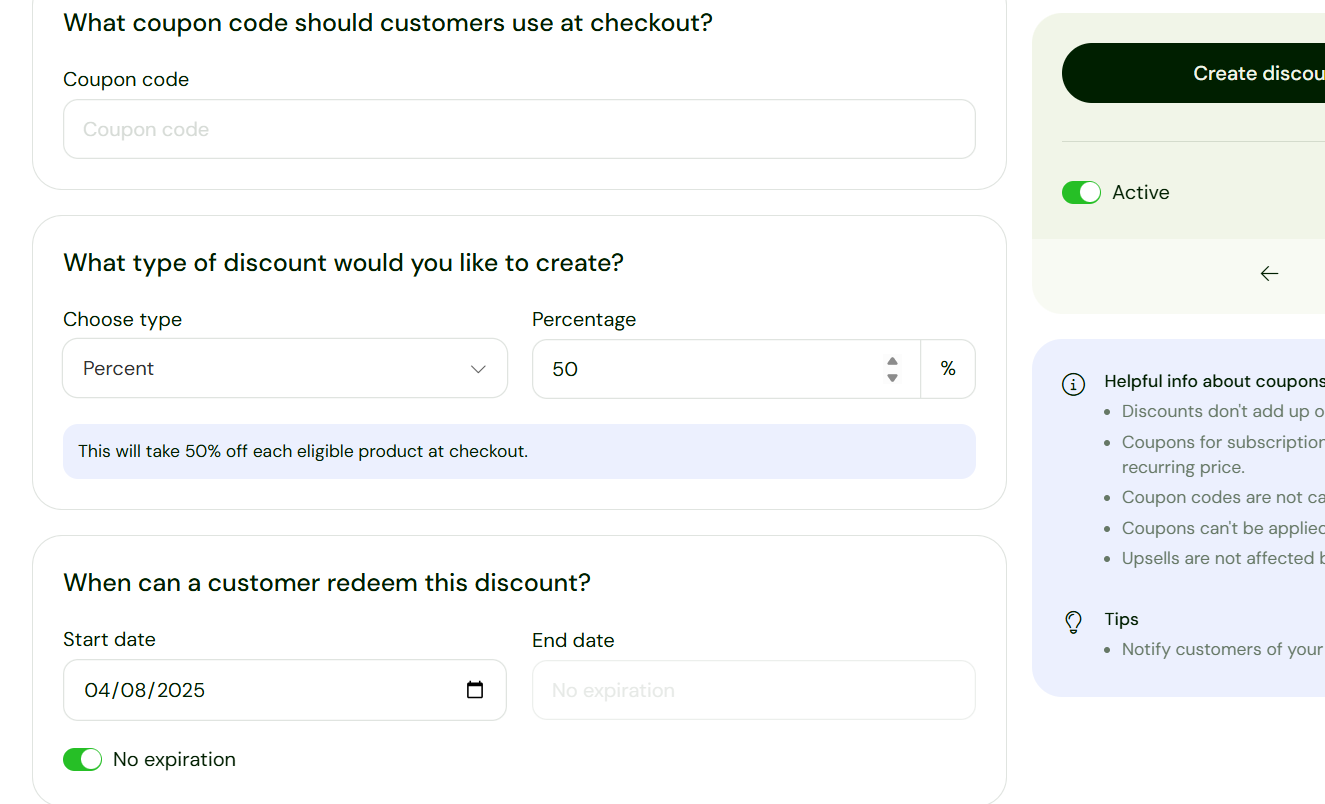
The coupon tool gives you the options to create coupons, sales, or upsells.
To create a new coupon, you need to name it and enter its code.
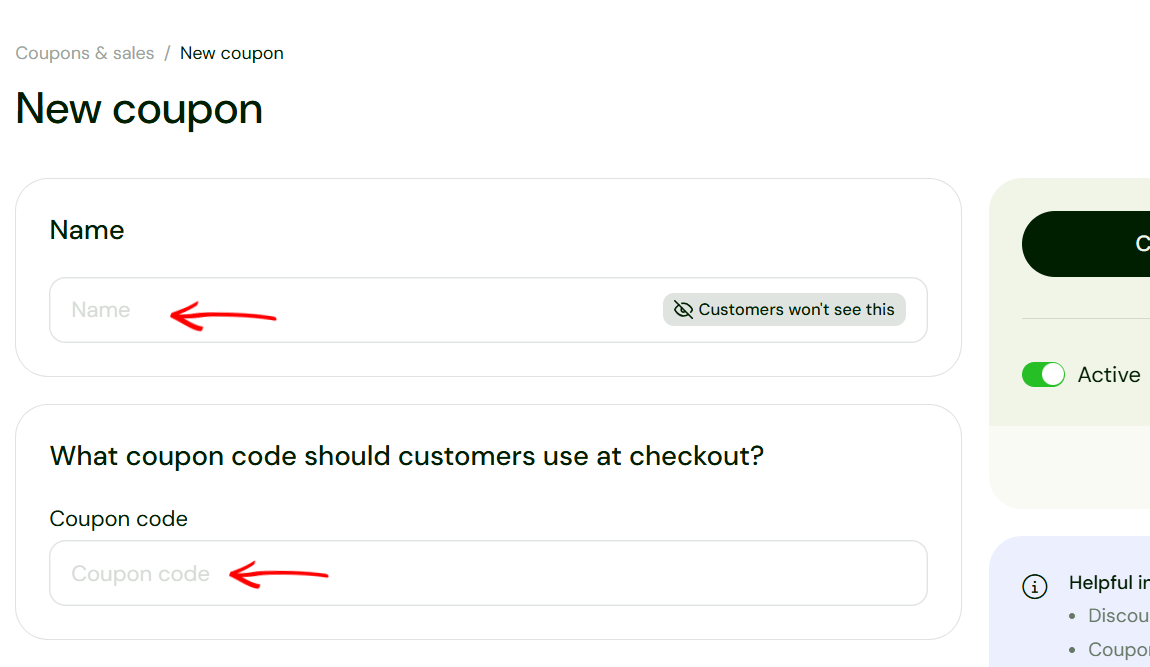
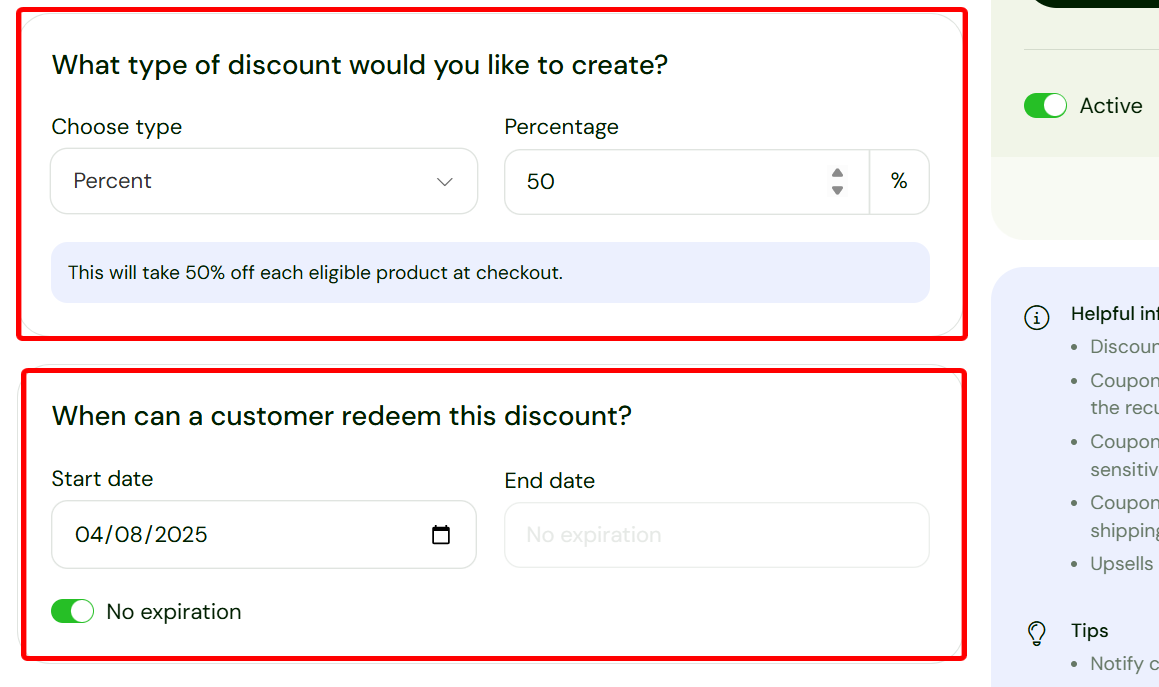
Next, select the discount type, such as a percentage, and indicate the amount. Then, select the start and end date for the coupon, or toggle the “No expiration” option.
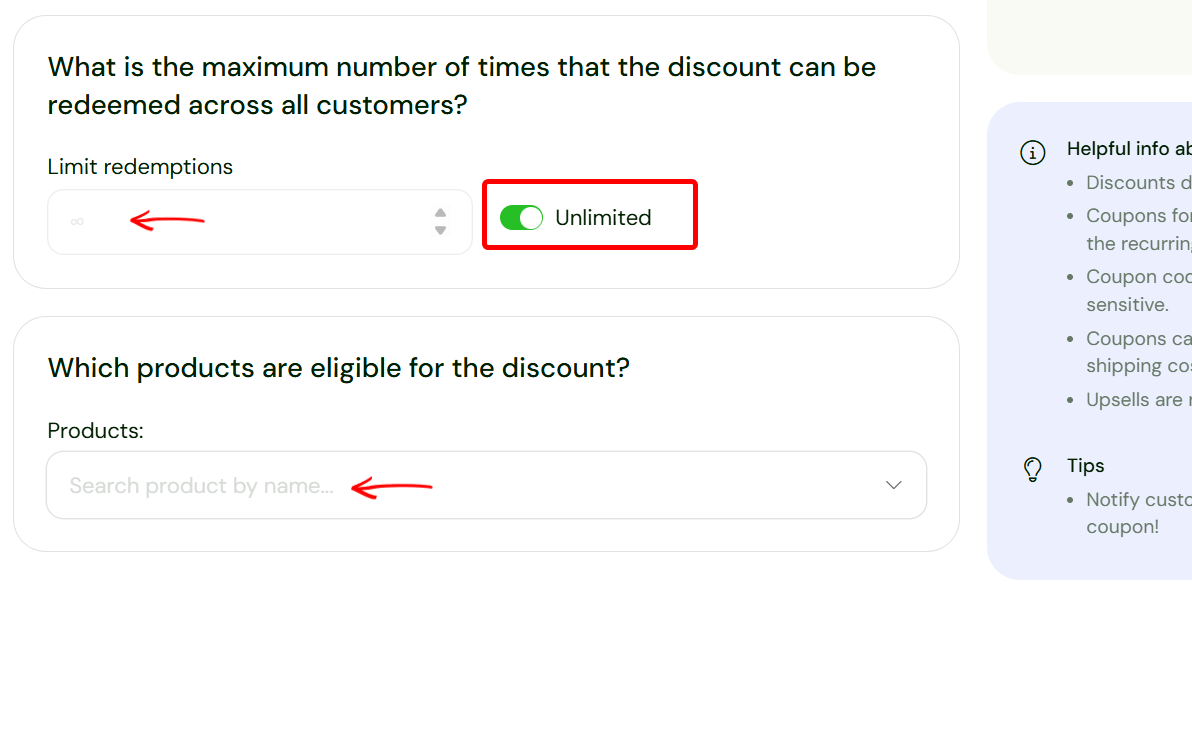
Beyond that, you can set a limit on the number of times the discount can be redeemed, and what products the discount applies to.
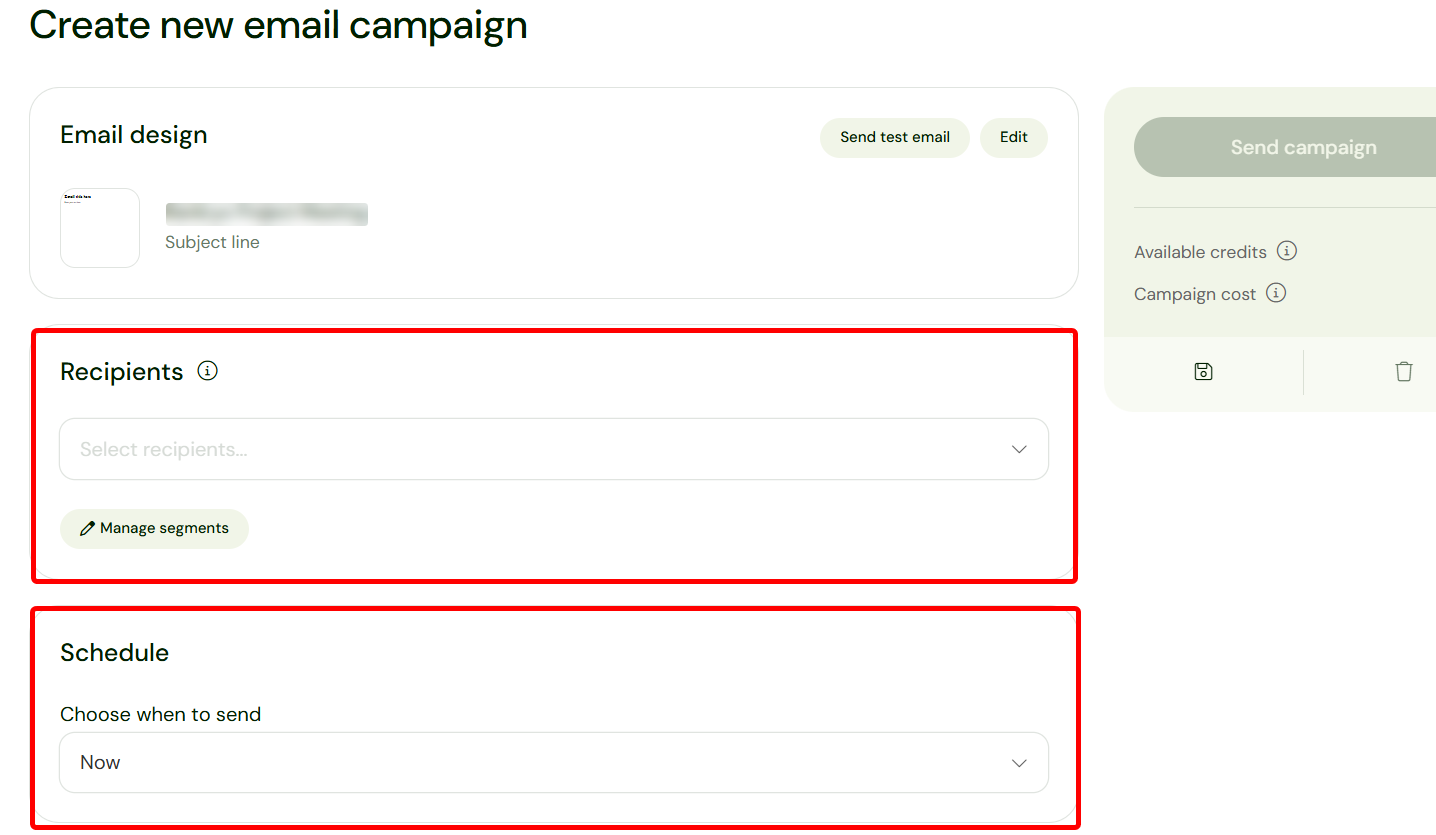
2. Email marketing
The email marketing tool lets you send targeted emails, like outreach and campaigns, to customers and subscribers. It helps you draft the email message, select the target, and choose when to send.
Moreover, the email marketing tools let you create marketing newsletters and product update messages.
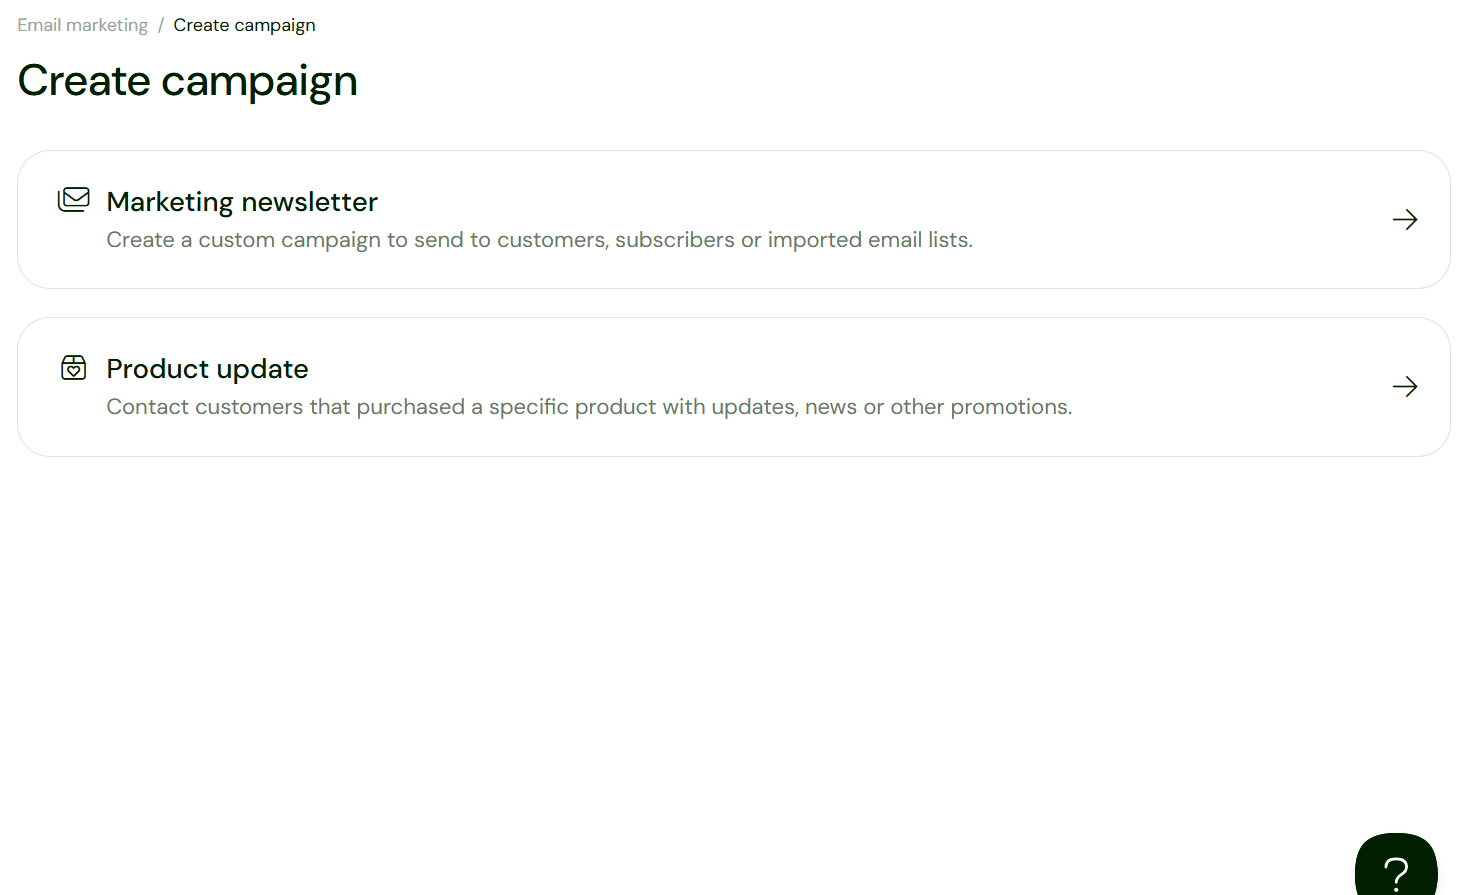
When creating an email campaign, for instance, draft the email body and subject first.
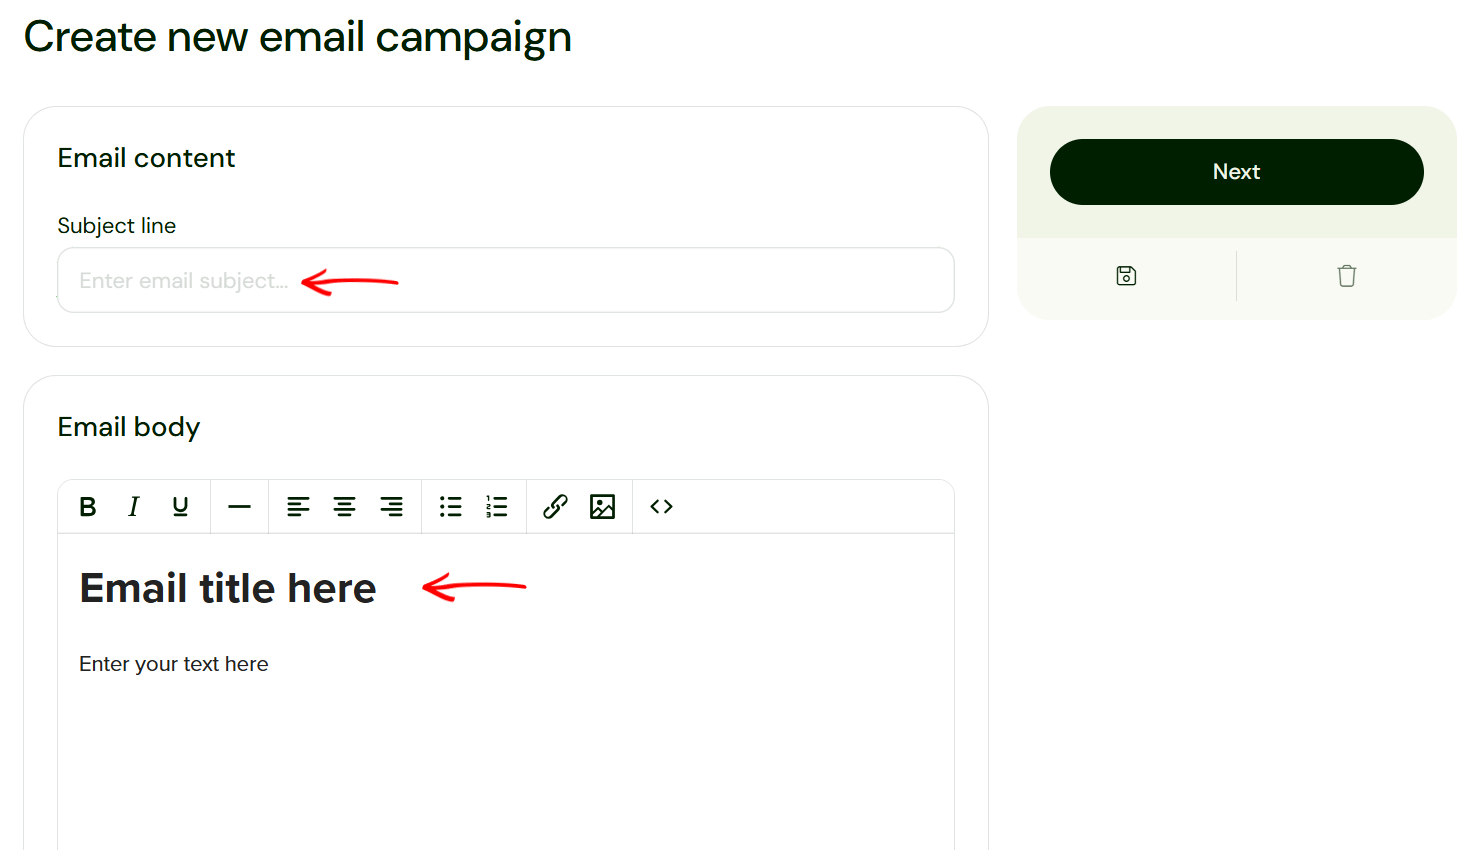
Then indicate the recipients or targets before you schedule it. You can also review and edit the email design before sending.
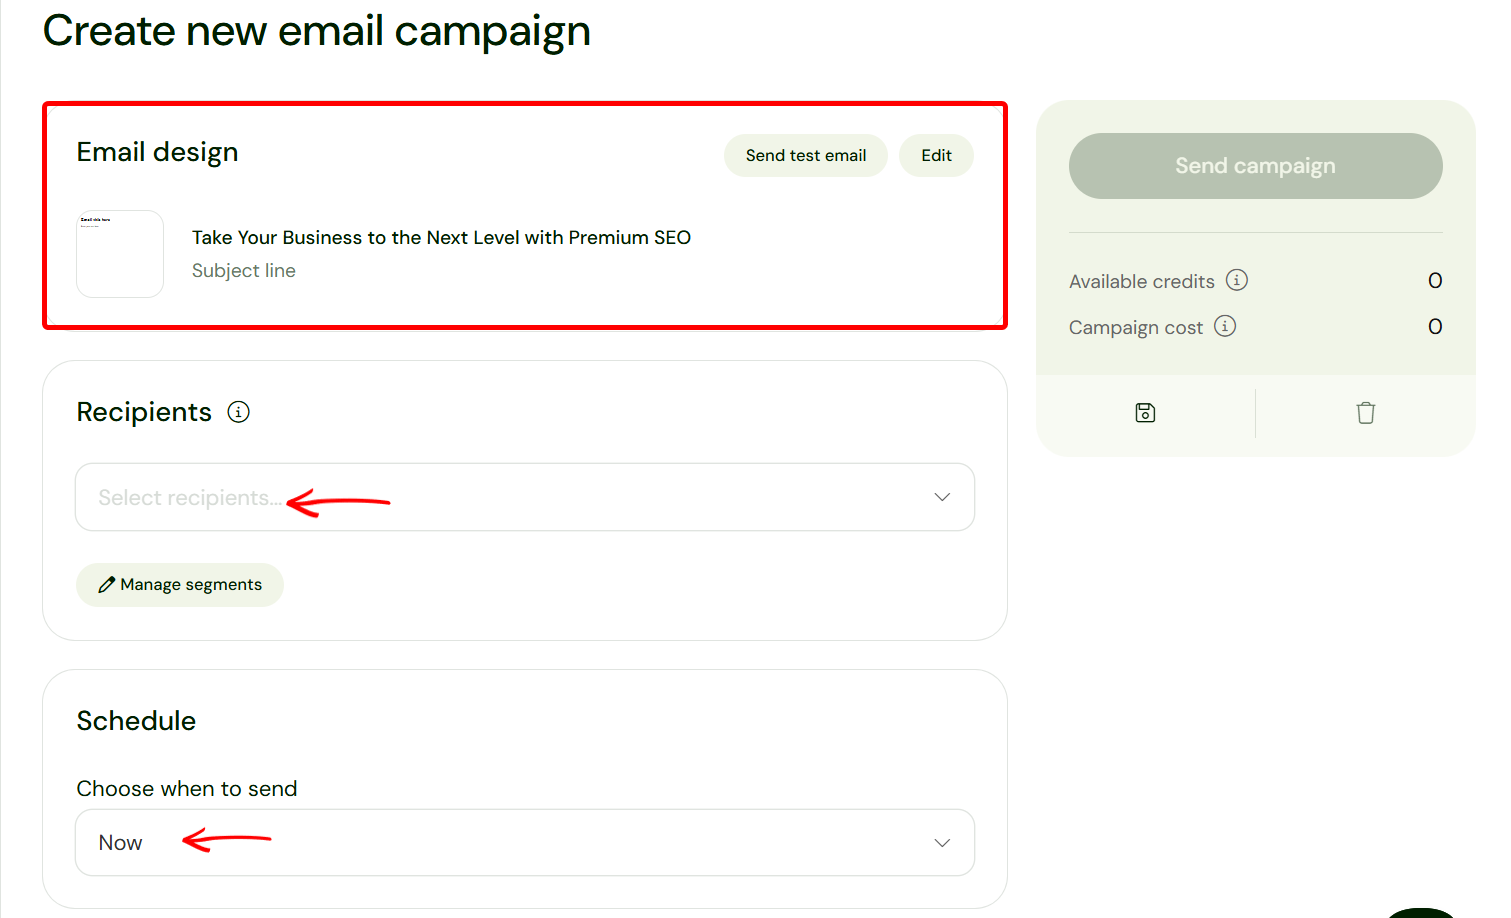
Sellfy’s email marketing tool's main dashboard provides key metrics like the number of customers, subscribers, unsubscribers, and emails sent. These help you track your customers’ growth and the campaign’s performance.

[Fs-toc-omit]Best For
- Digital creators like designers or authors who seek to sell downloads and manage payments from a simple online store.
[fs-toc-omit]Pricing
- Starter - $29/ month
- Business - $79/ month
- Premium - $159/ month

5. Payhip
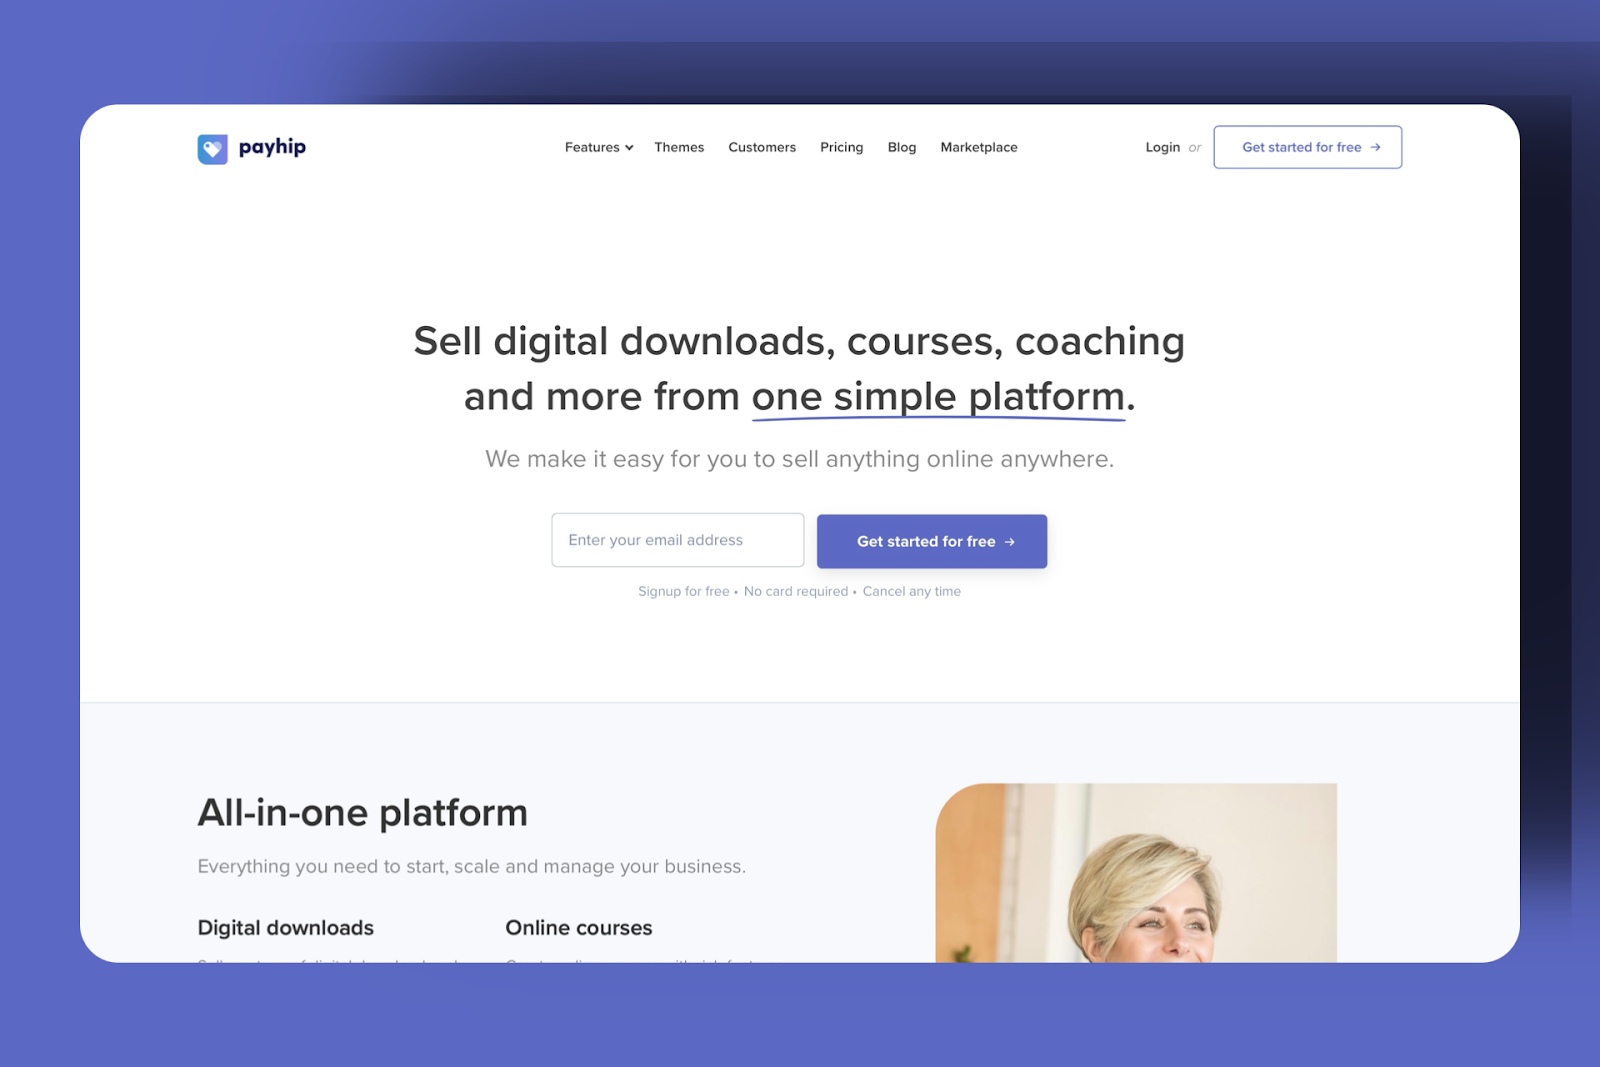
Next among our best platforms to sell digital products is Payhip.
Payhip is an all-in-one online platform that helps creators to sell digital downloads, online courses, coaching, memberships, and physical products.
Creators especially recommend Payhip’s marketing feature to attract and retain customers through coupons, affiliate marketing, cross-selling, and referral rewards.
With the Store feature, publishing a blog or connecting my existing domain to my Payhip store is only a few clicks away.
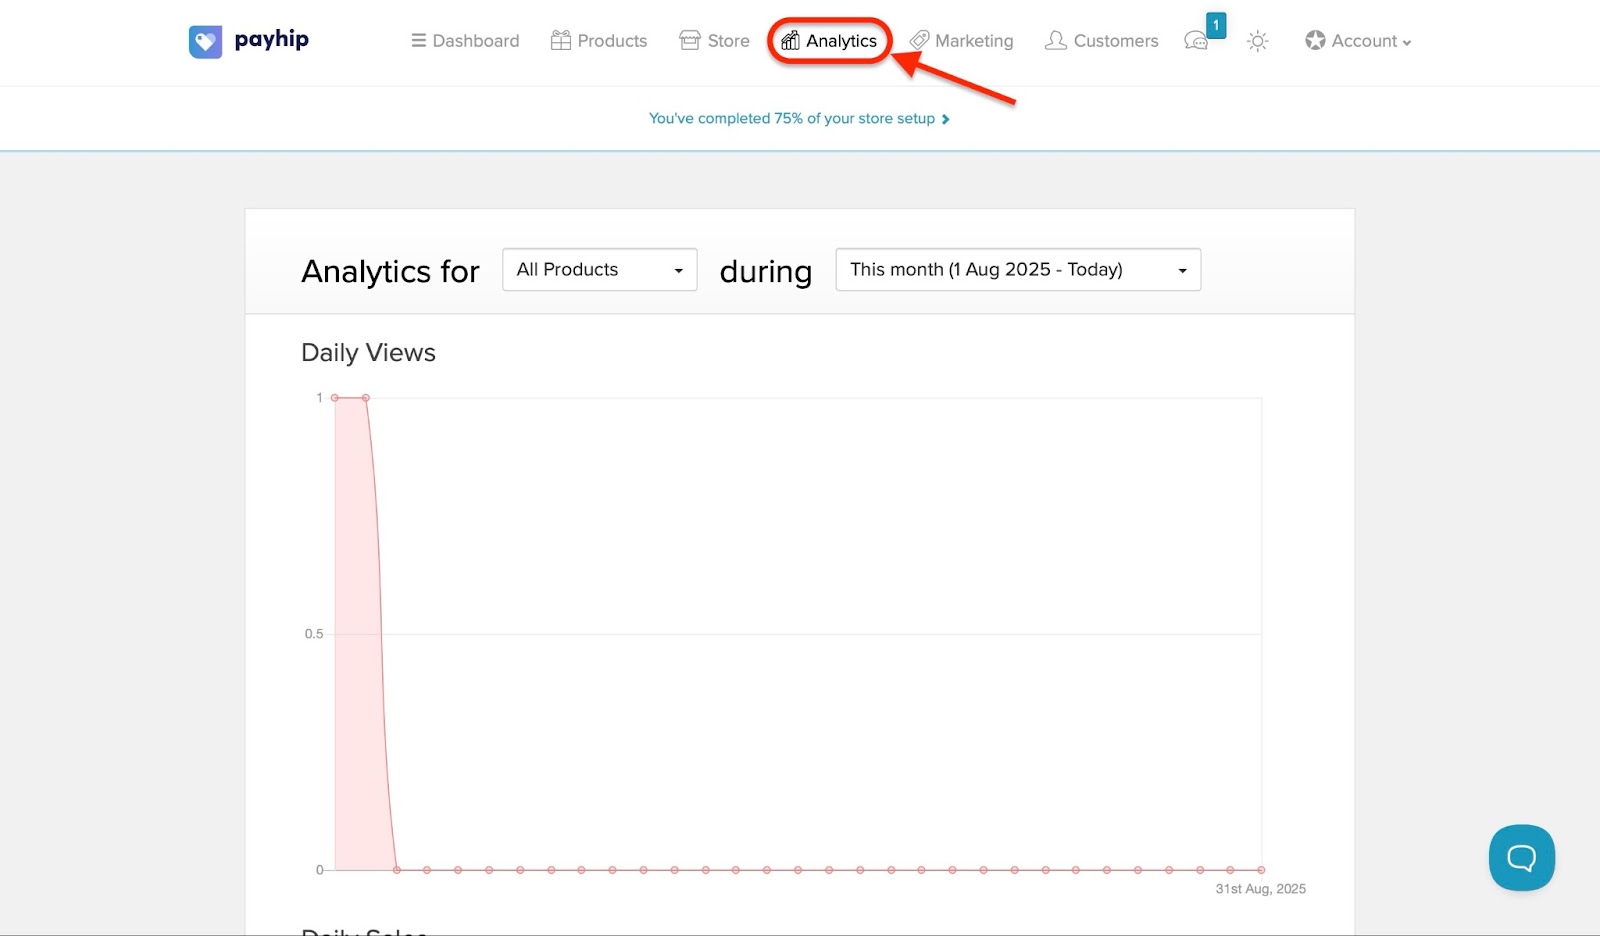
Using the Analytics feature, I could track views, sales, and conversion rates performance using charts.
Finally, the Dashboard feature made it easy to get started by making store creation, customization, and checkout setup accessible in a single click.

Now, Payhip’s store is a customizable and ready-made online store for creators who want a simple and easy solution to selling digital products.
To create a customized Payhip store, first log in or create a new account if you don’t have one. It’s best to add one or more digital products so you can get a real sense of how your store will look after customization.
After you’ve added one or more digital products, click on “Store”, which is the third tab after the dashboard and products.
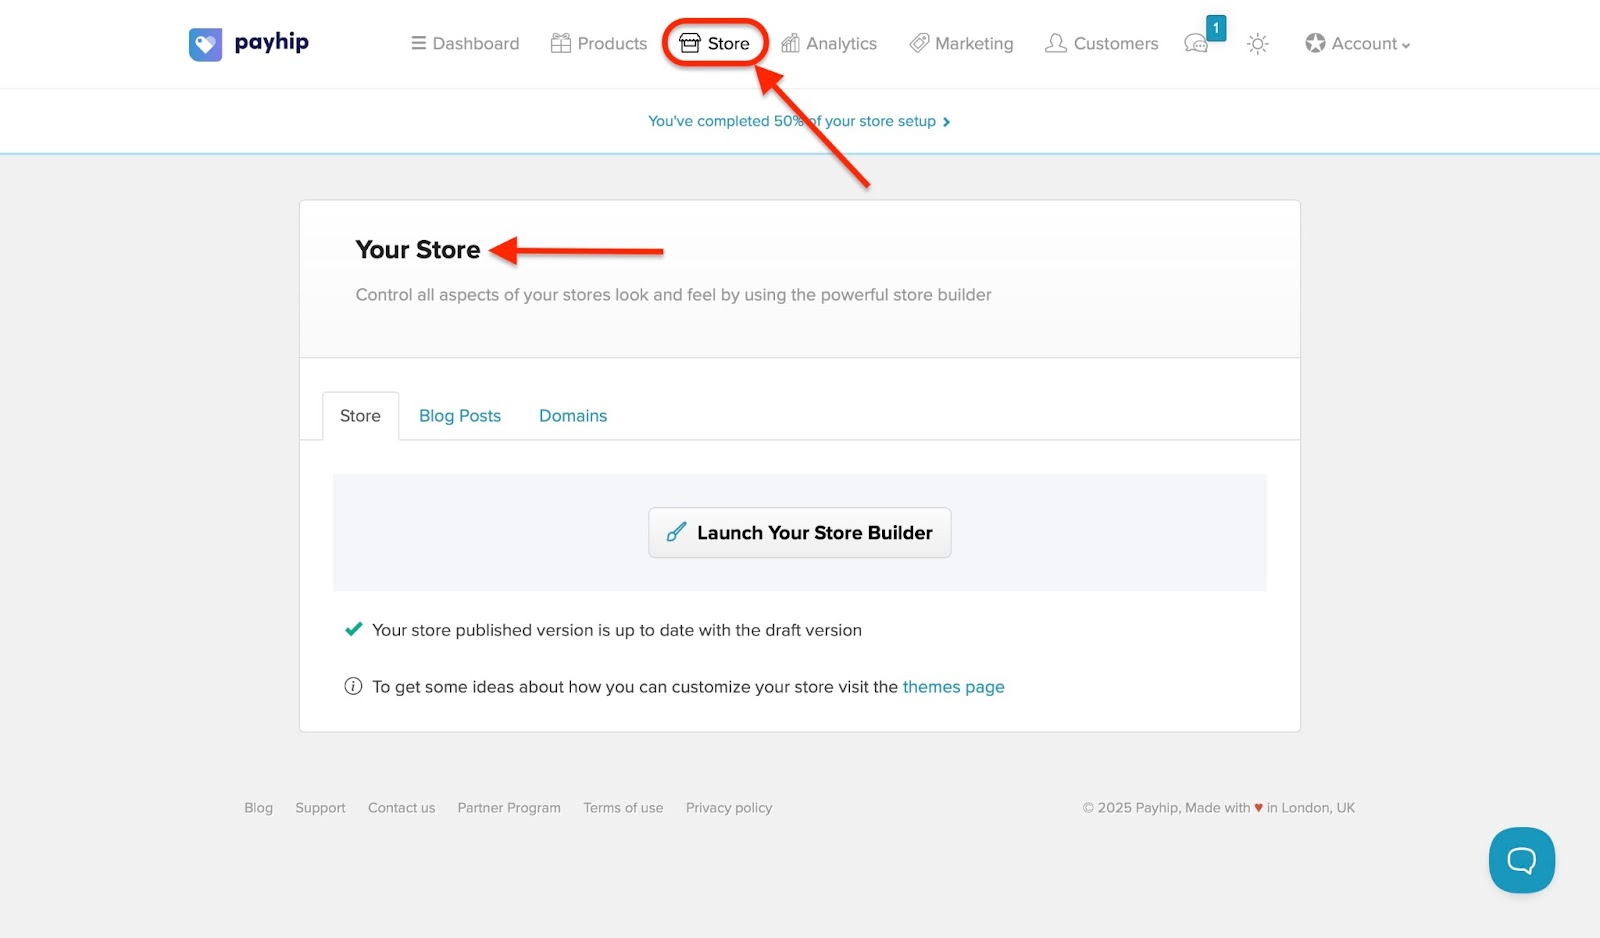
You will see three options in the store window: store, blog posts, and domain.
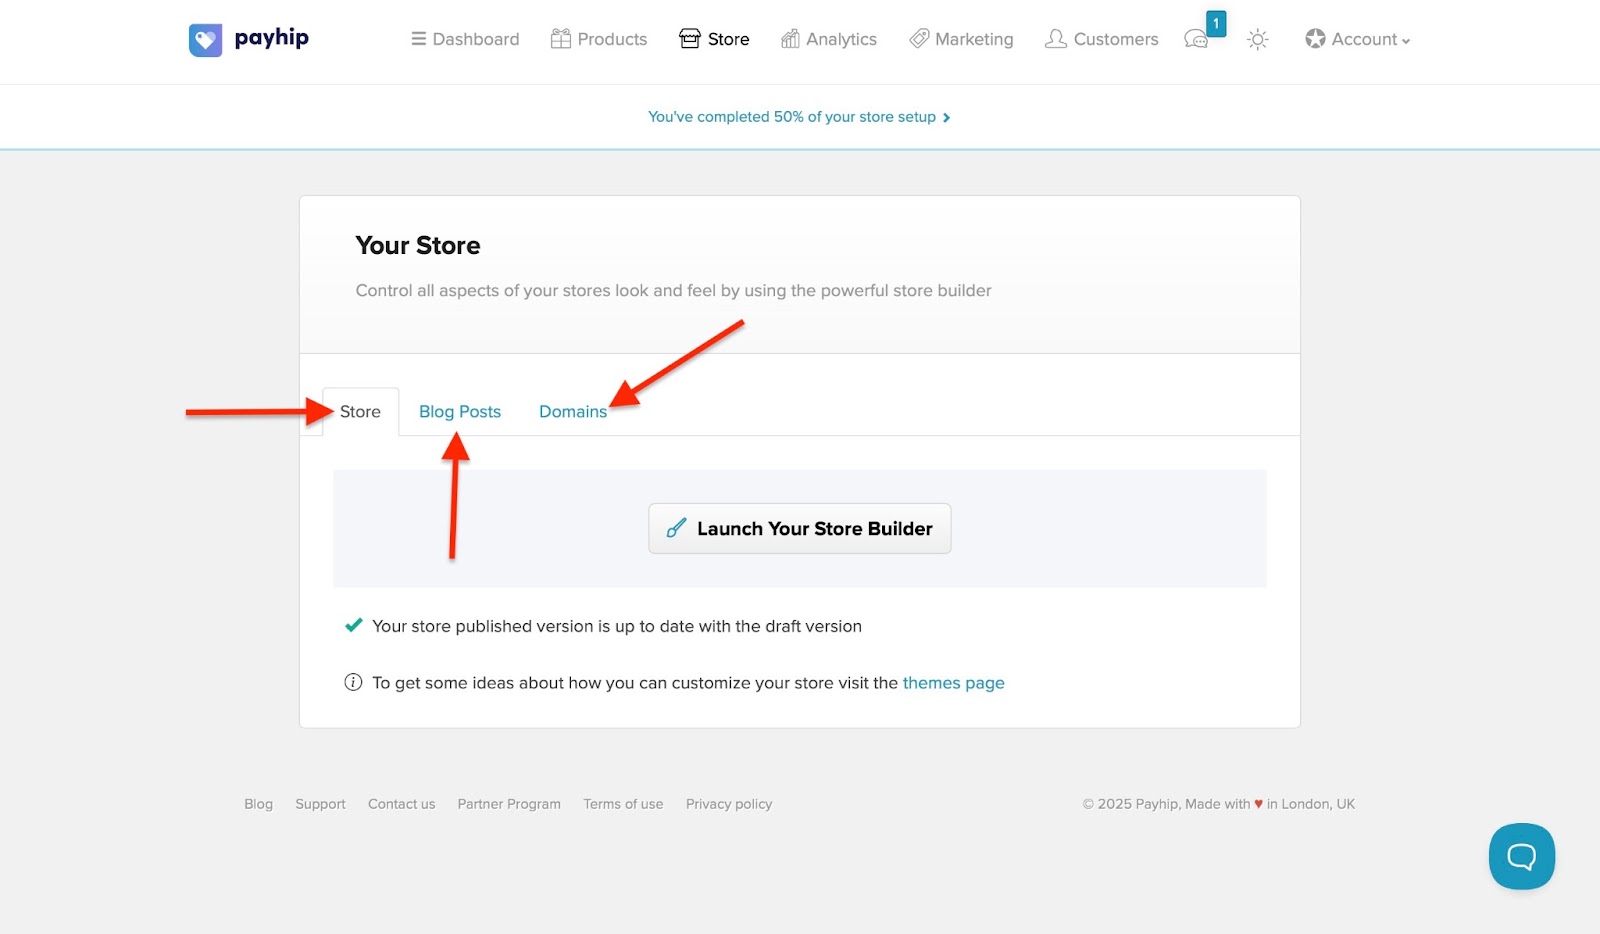
Store is the default page you’ll see, so without selecting any other tab, click “Launch Your Store Builder.”
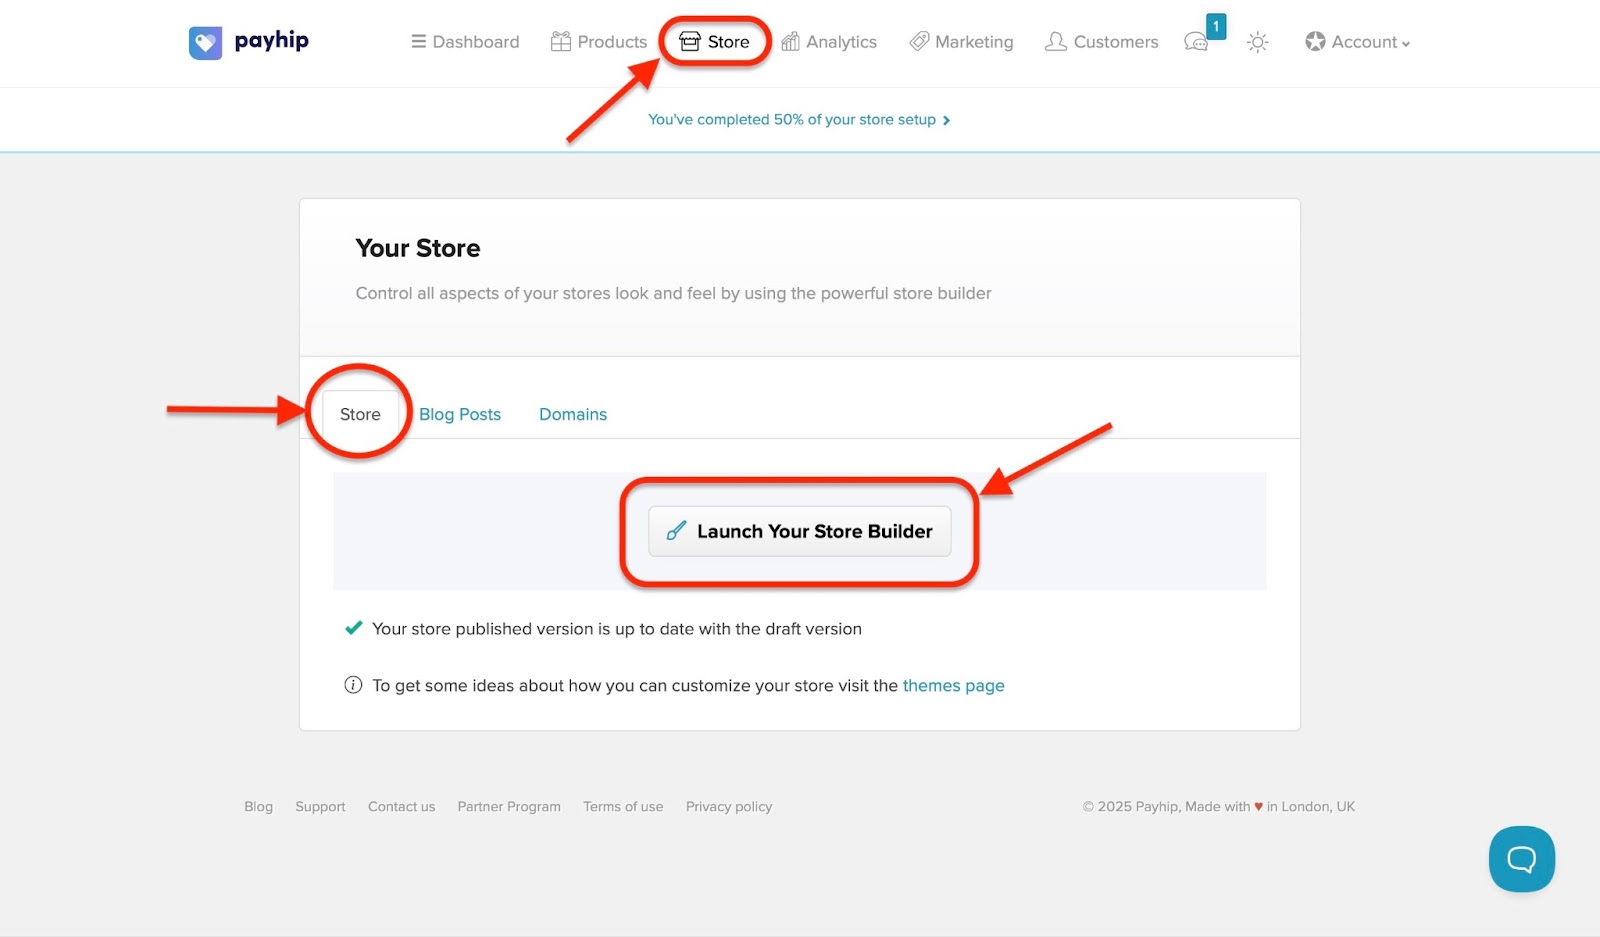
This displays the complete layout of your store and the options you can choose and add.
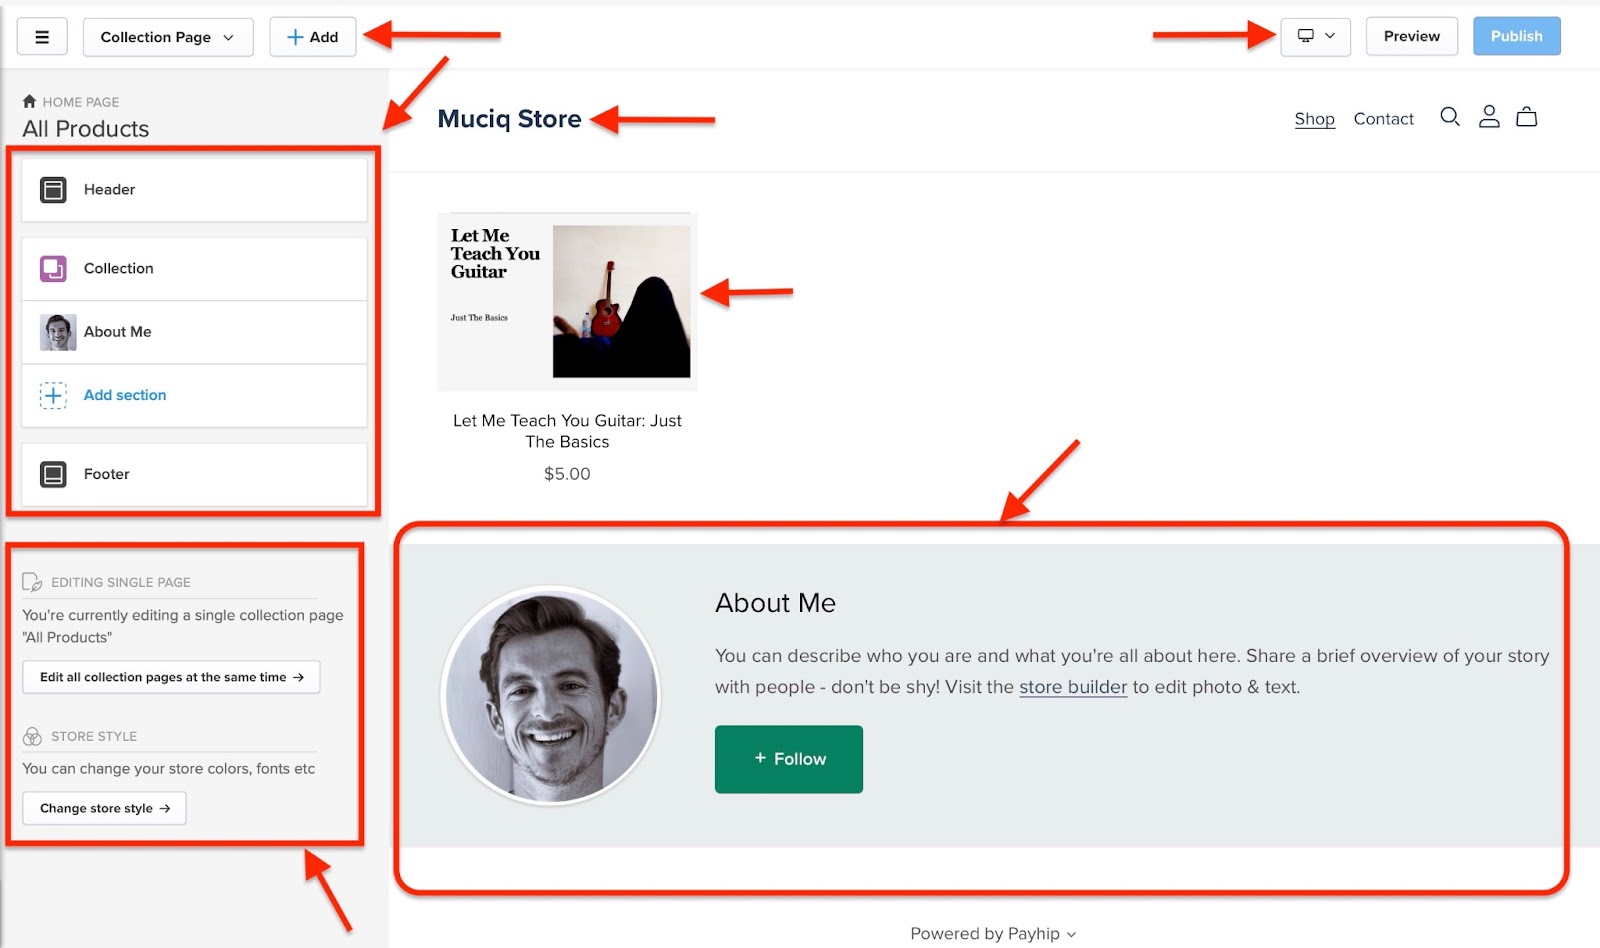
You can customize the header and footer, collection (how your products are displayed), about me, and even add new or more sections.
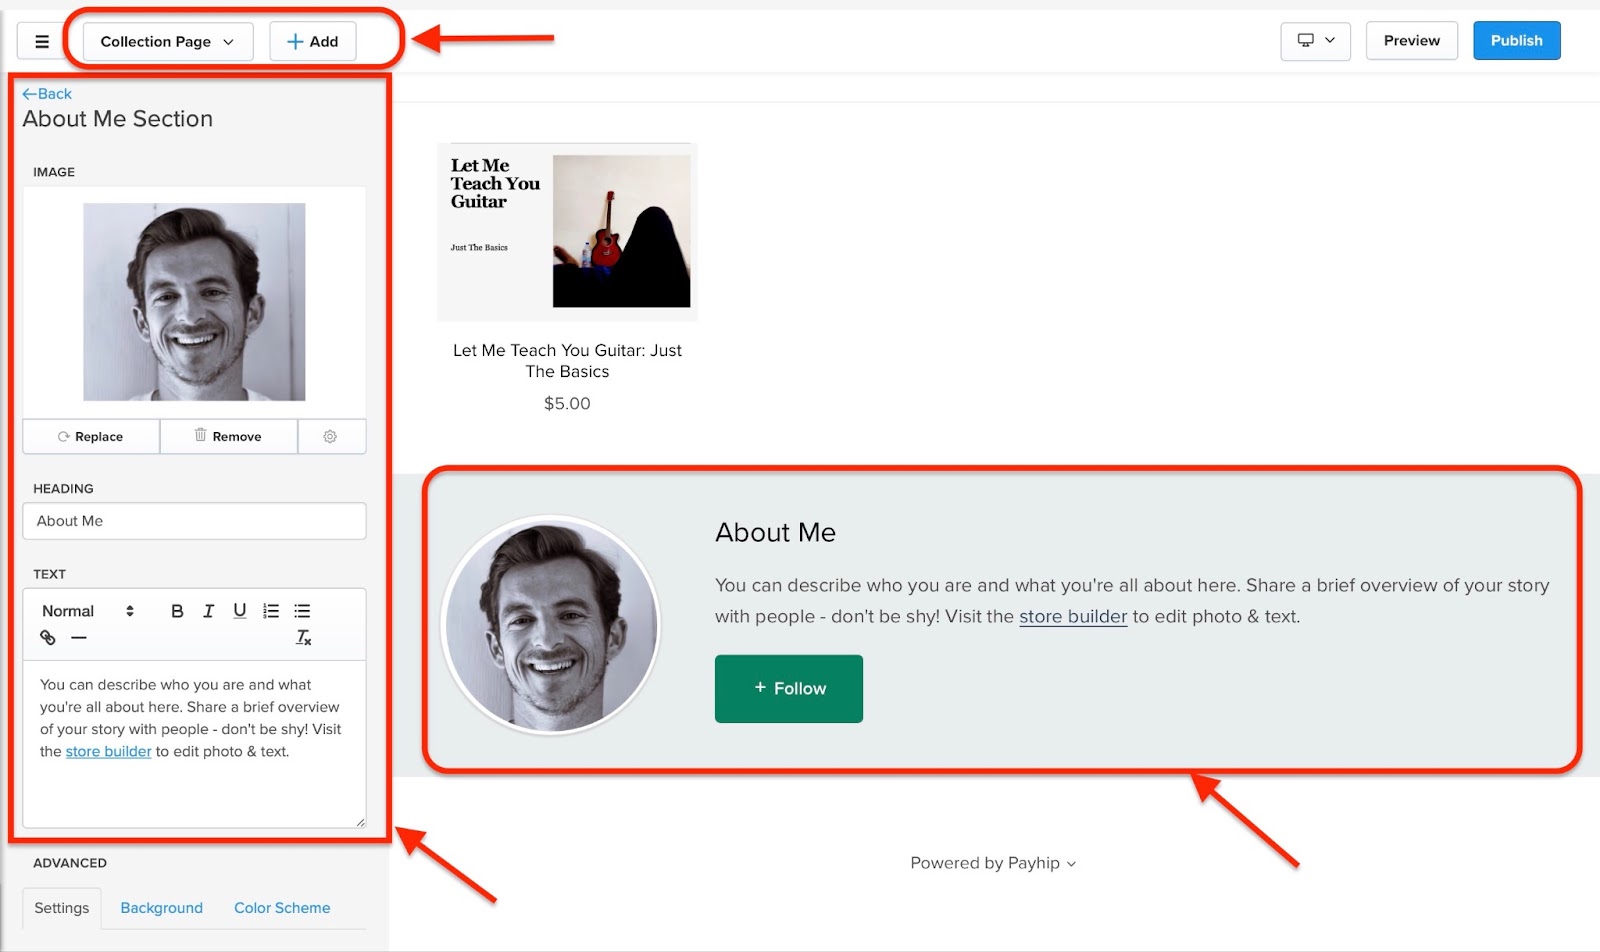
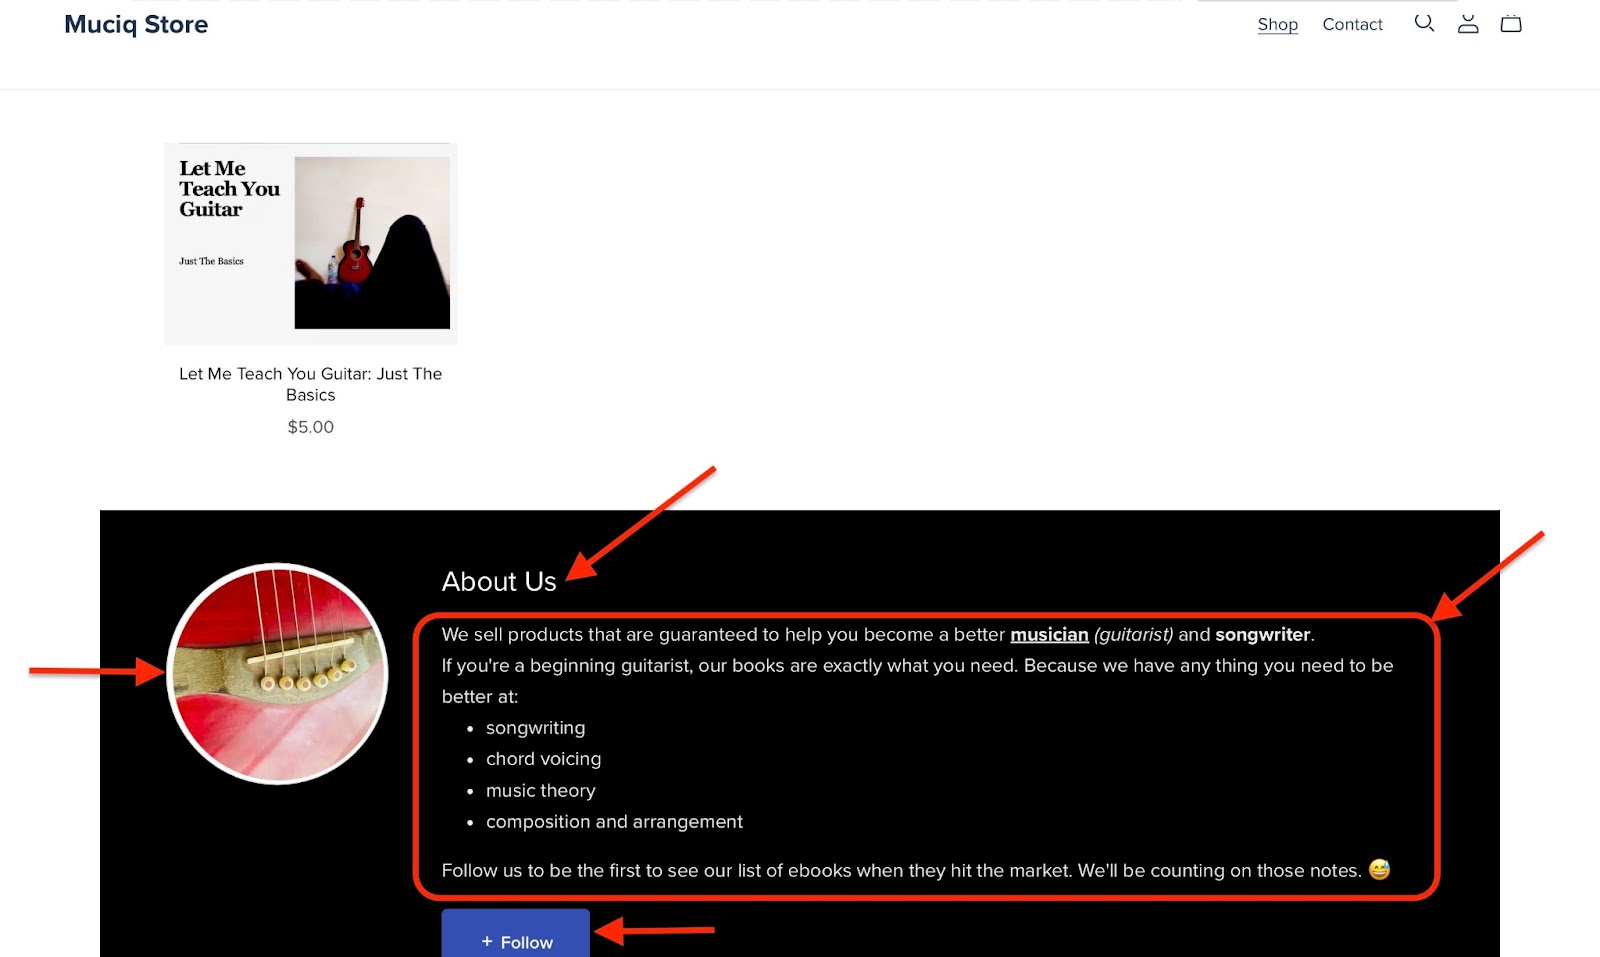
Let’s change the “About Me” section, for instance, since that’s very important to most creators because it shows their credibility. First, click “About Me" in the sidebar.
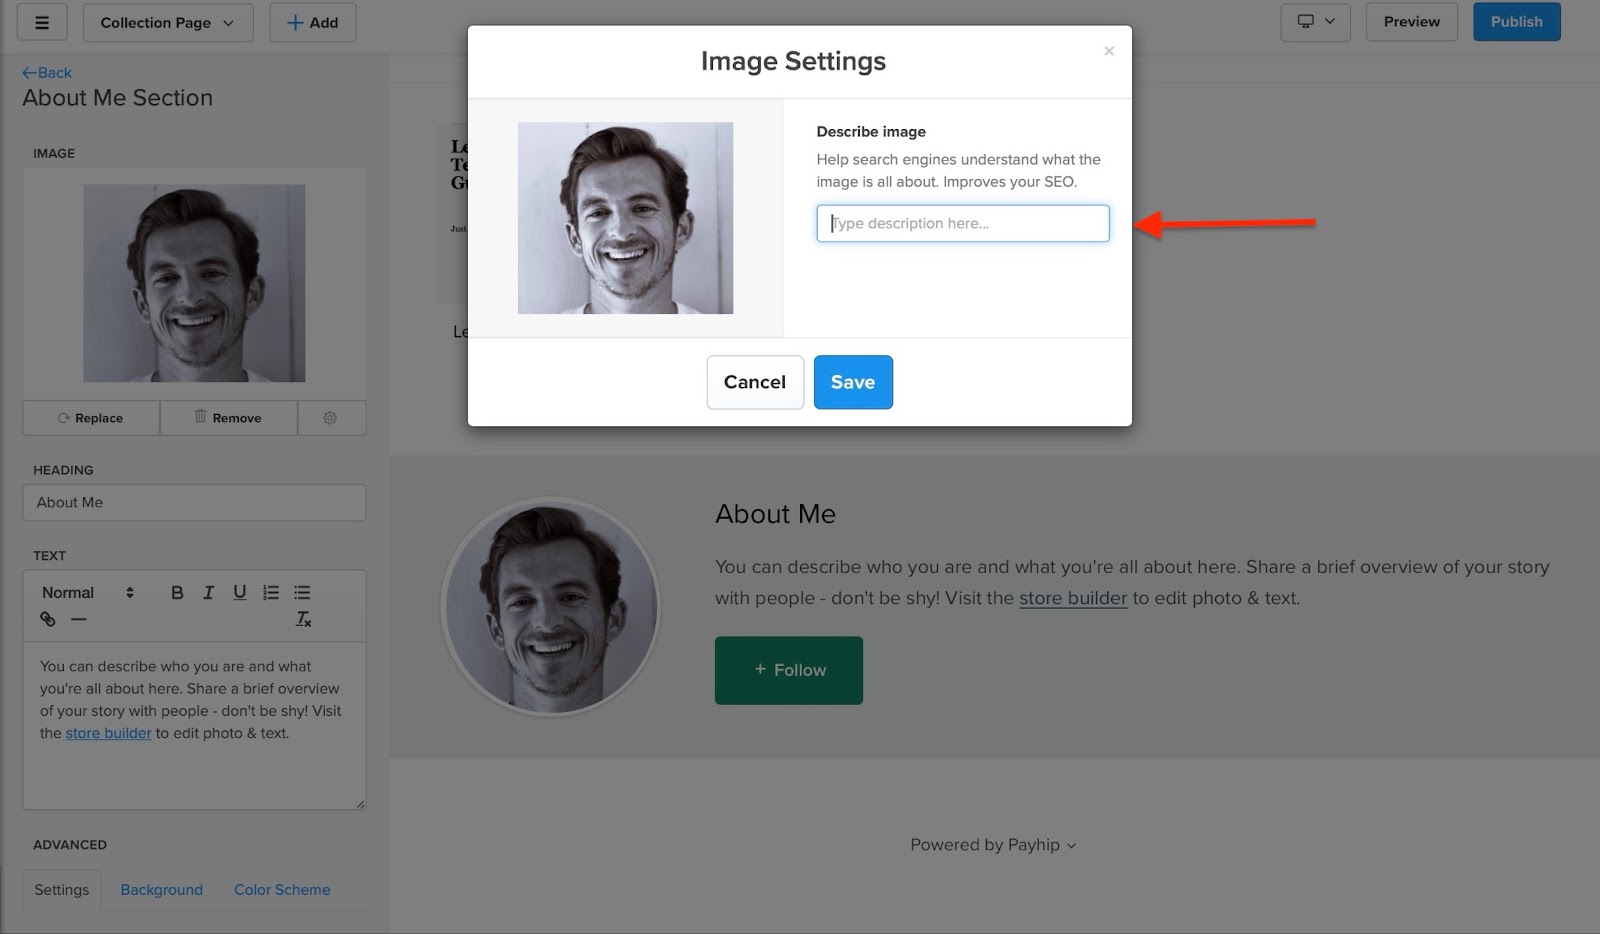
You can then add your picture and a short bio by just clicking the appropriate box. You can also click on the “Settings” icon next to the remove button under “Image” to add an SEO description of your picture.
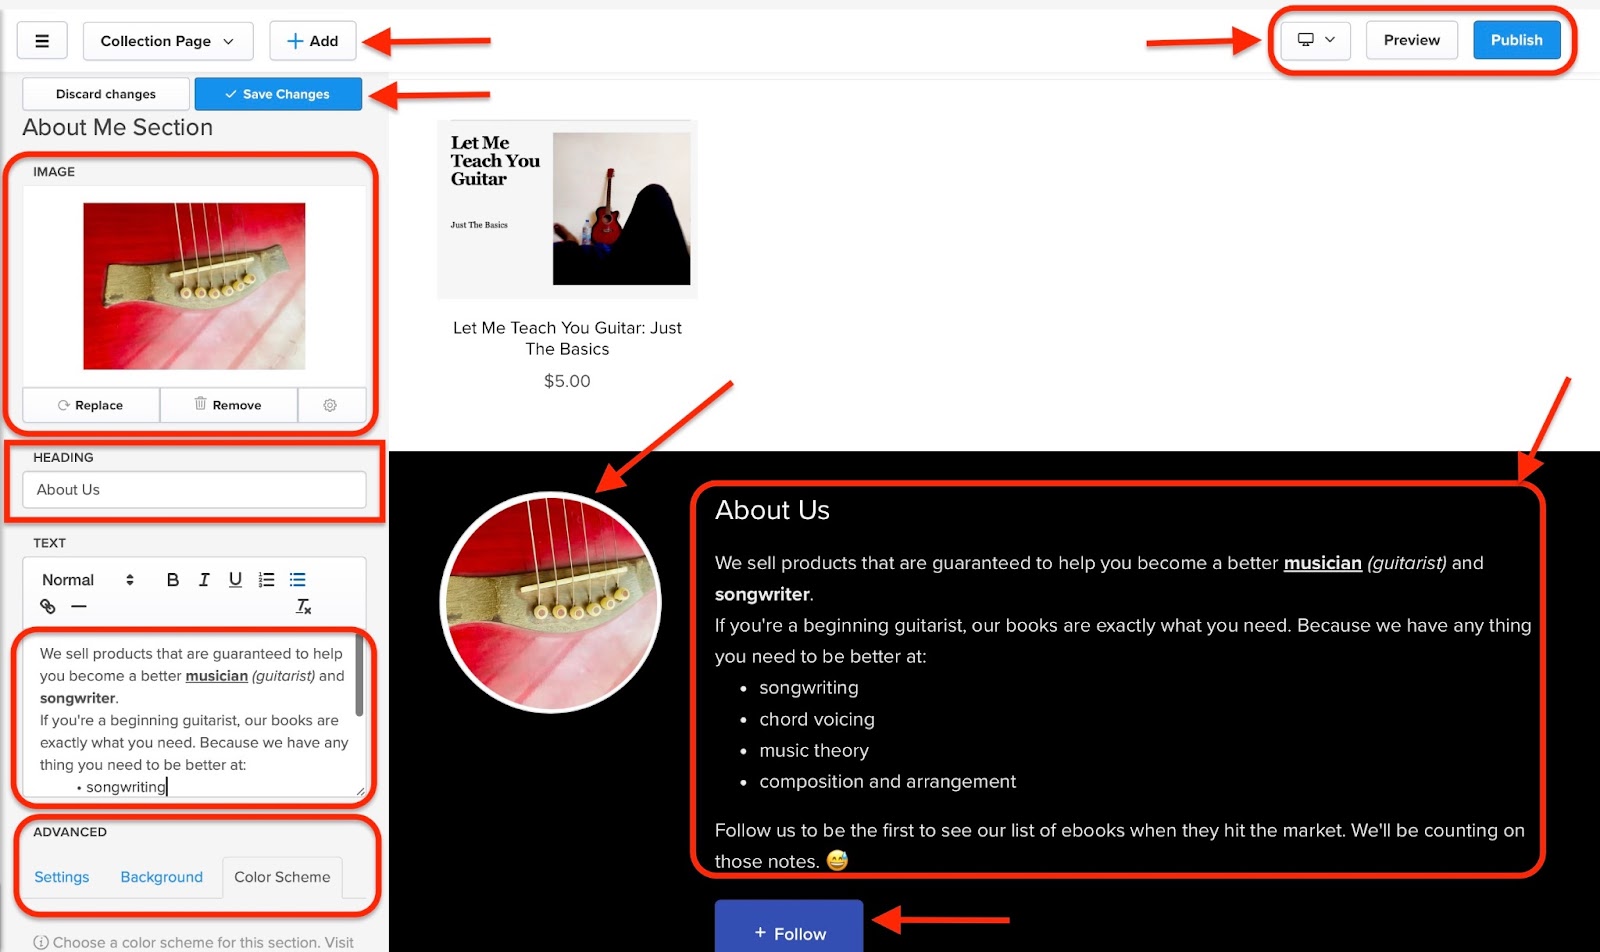
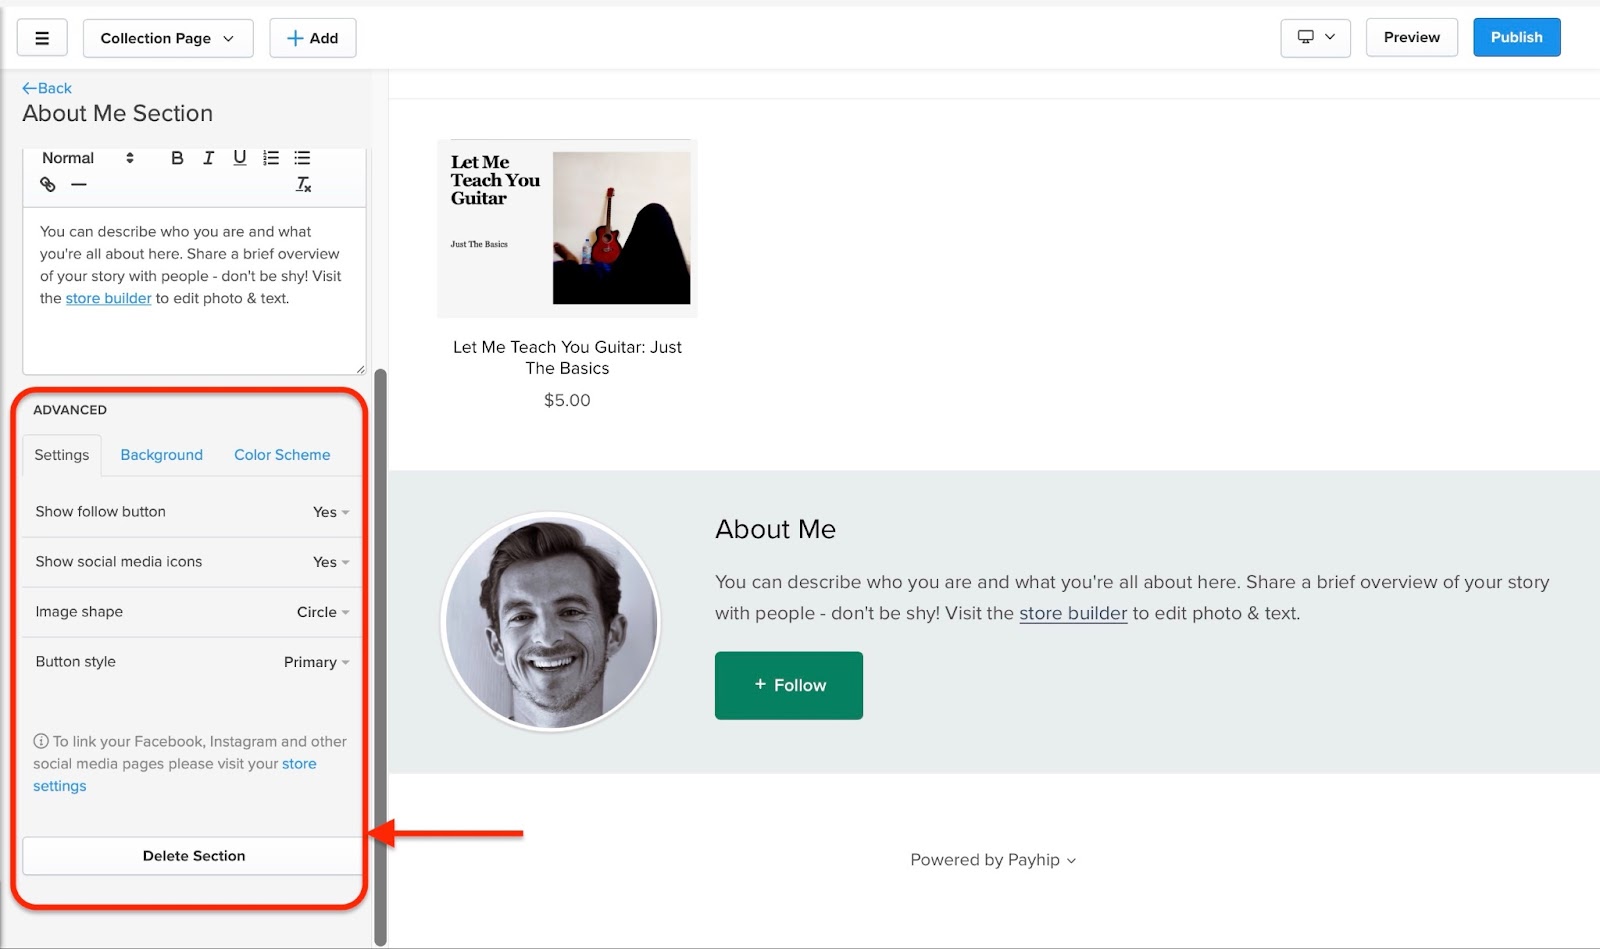
Furthermore, Payhip allows you to change the heading of the “About Me” section and add other advanced options.
Other formatting features available to use include italics, bold, and underline. Feel free to add website links (hyperlinks), bullets, and numbered points, among other choices.
When you’re done adding everything about you, click “Save Changes" and then click “Preview” to see the changes. If you are satisfied with it, then click “Publish”, and your About Me section is customized to your preferences.
[fs-toc-omit]Key Features
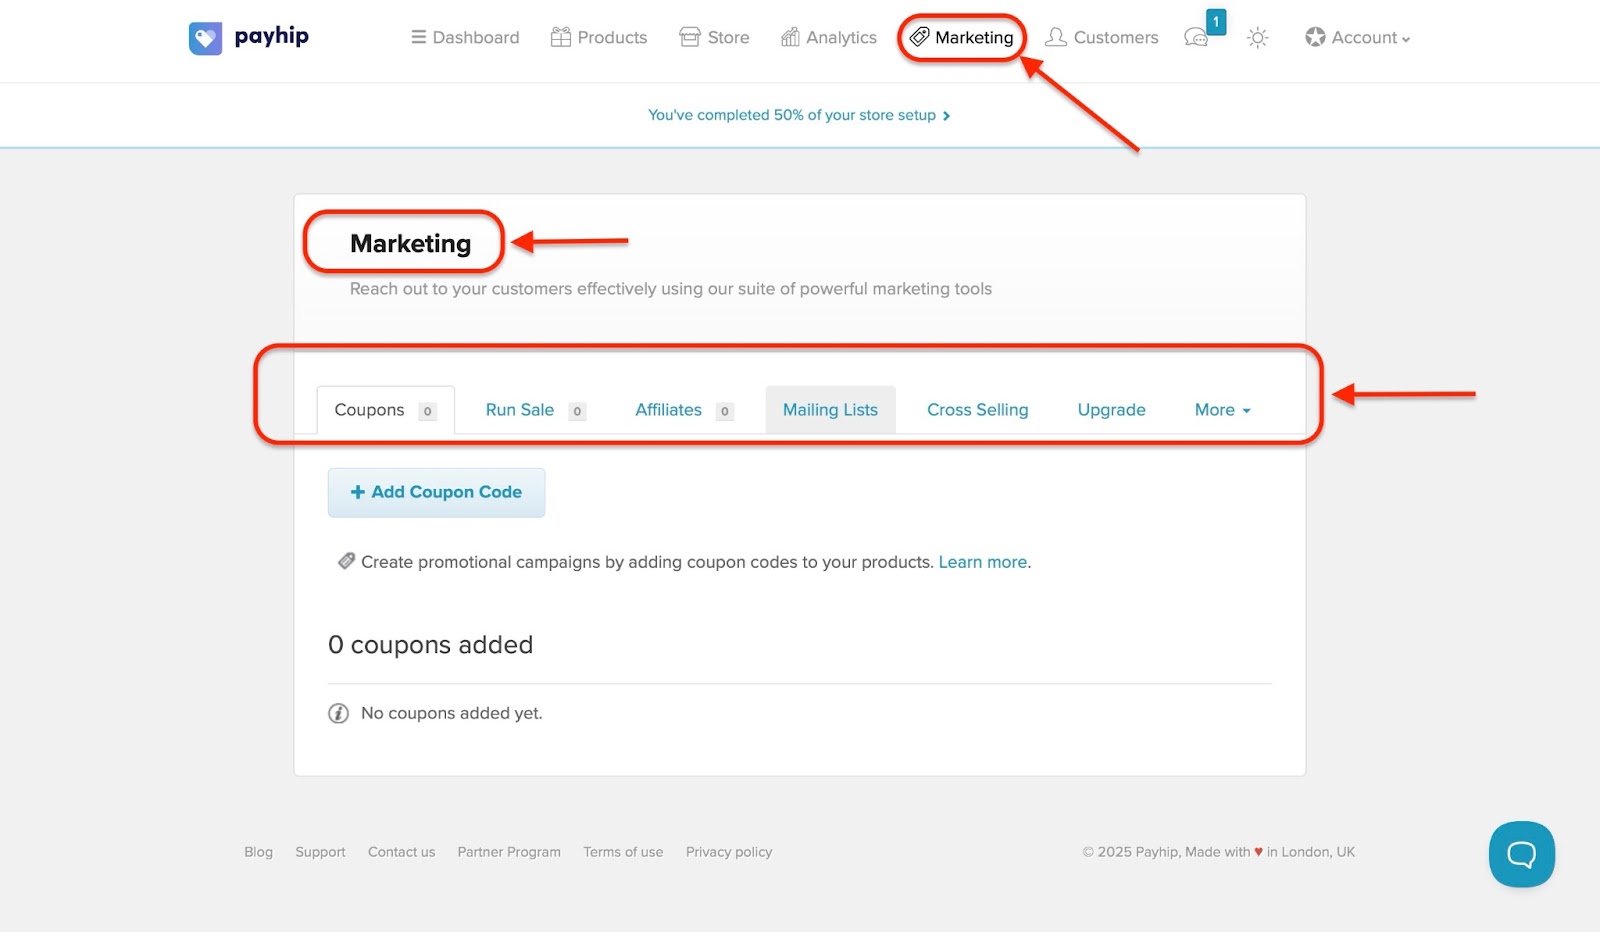
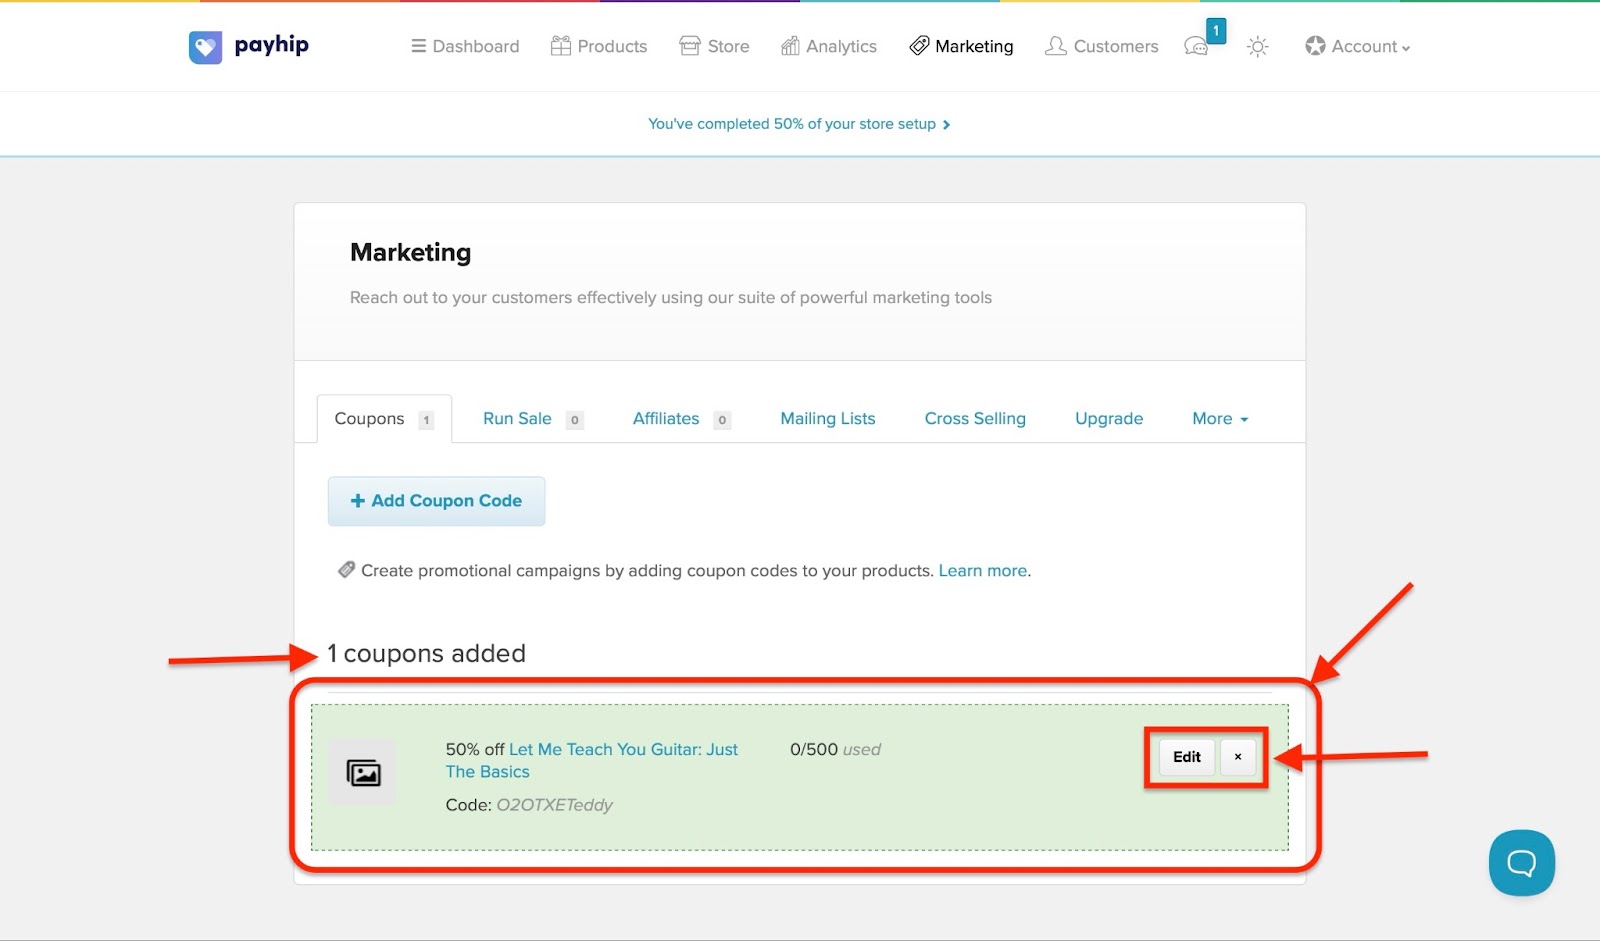
1. Marketing
In the marketing feature, there's an overview of tools that you can use to sell your digital products.
These include coupons, running sales, affiliates, mailing lists (for email marketing), cross-selling, upgrades (for membership subscriptions), and referrals.
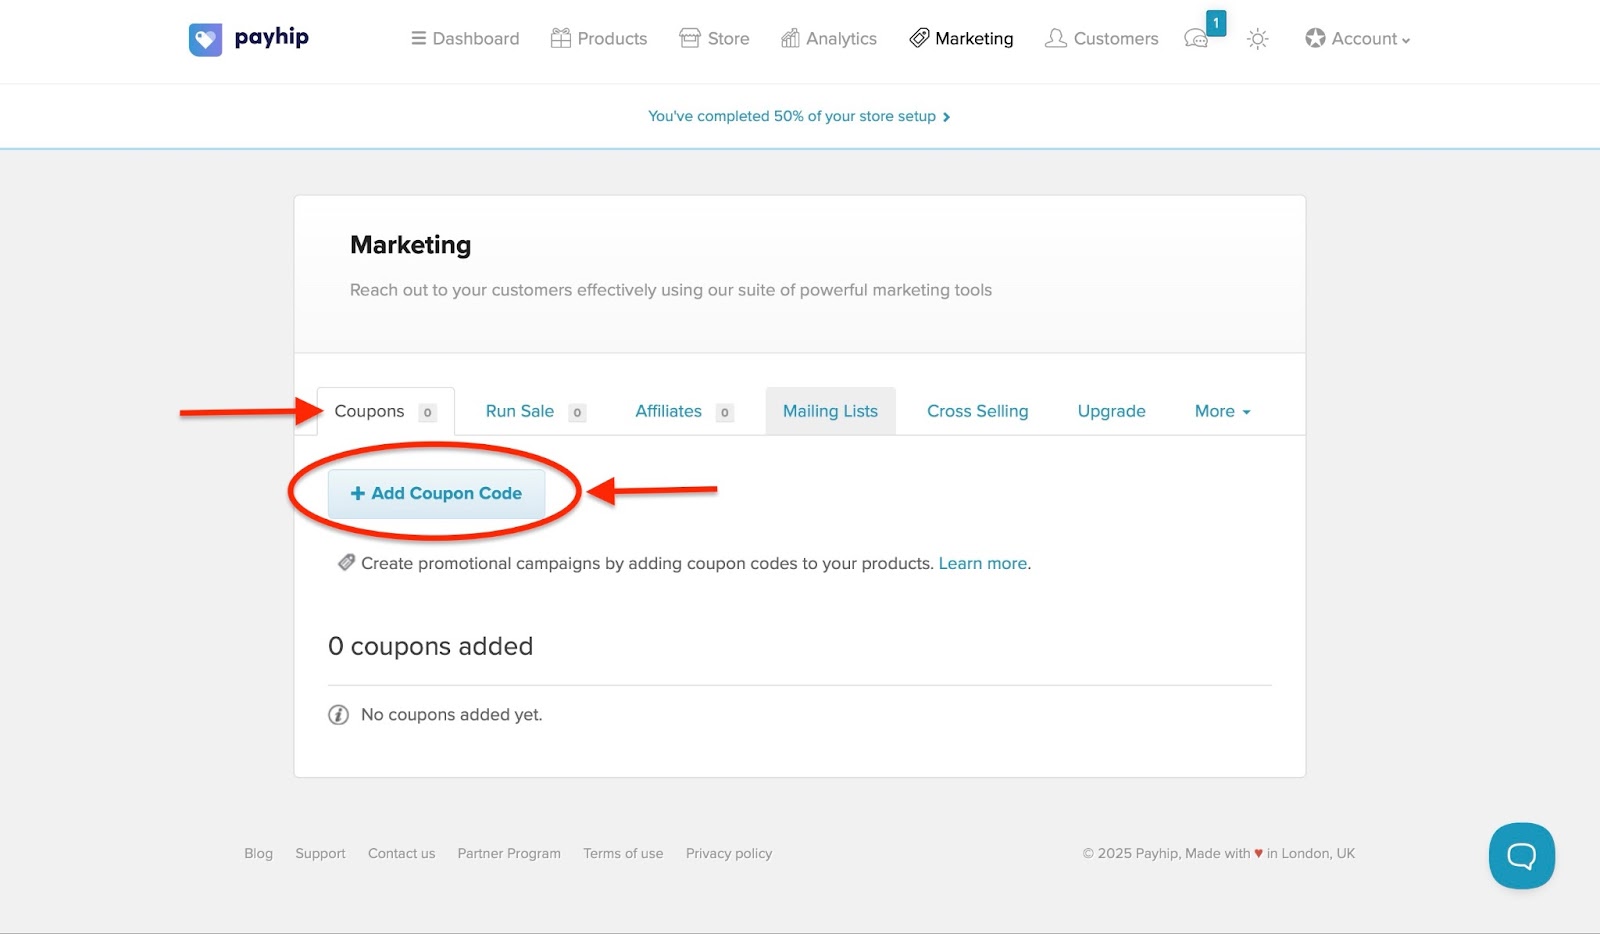
Let me walk you through how to quickly use coupons, since creators widely use them to increase the sales of their digital products.
First, select the coupons tab, and click “Add Coupon Code.”
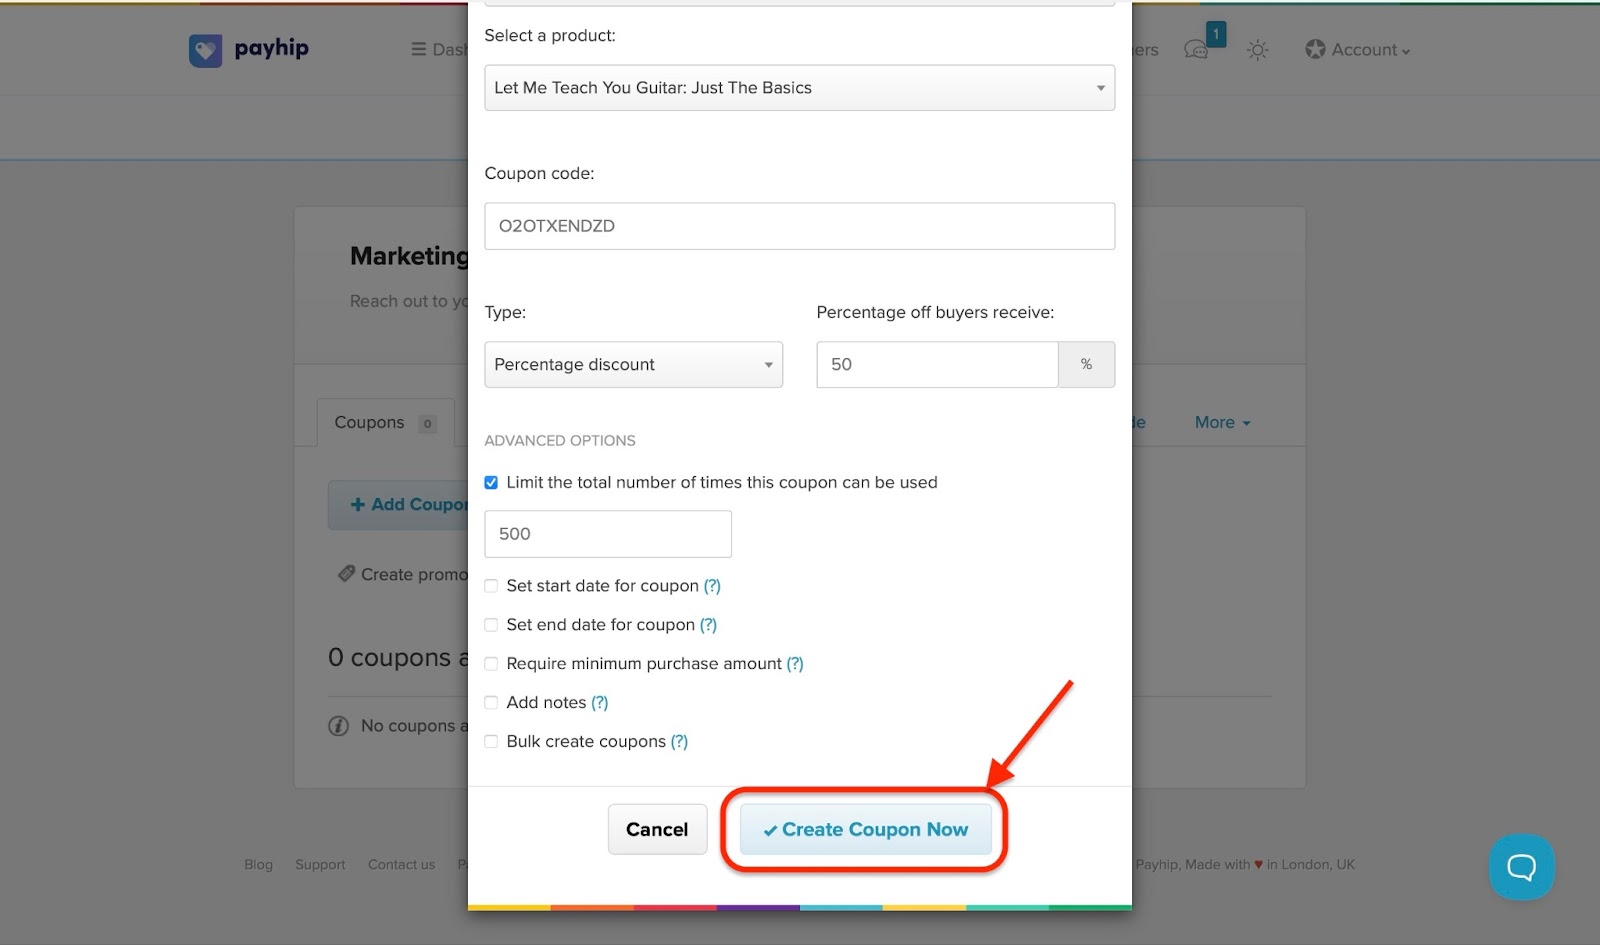
A pop-up window opens. You can decide to apply the coupon to the total order amount or a specific product.
The new coupon can also be a percentage or fixed amount discount. Feel free to select your preferred option.
You also have six more options to choose from in the Advanced Options section.
After filling out this form, click “Create Coupon Now.”
After you've created the new coupon, you can click “Edit” to change or add different options.
2. Products
Payhip’s products tab shows an overview of all your digital products on sale and key metrics, including views, orders, and sales.
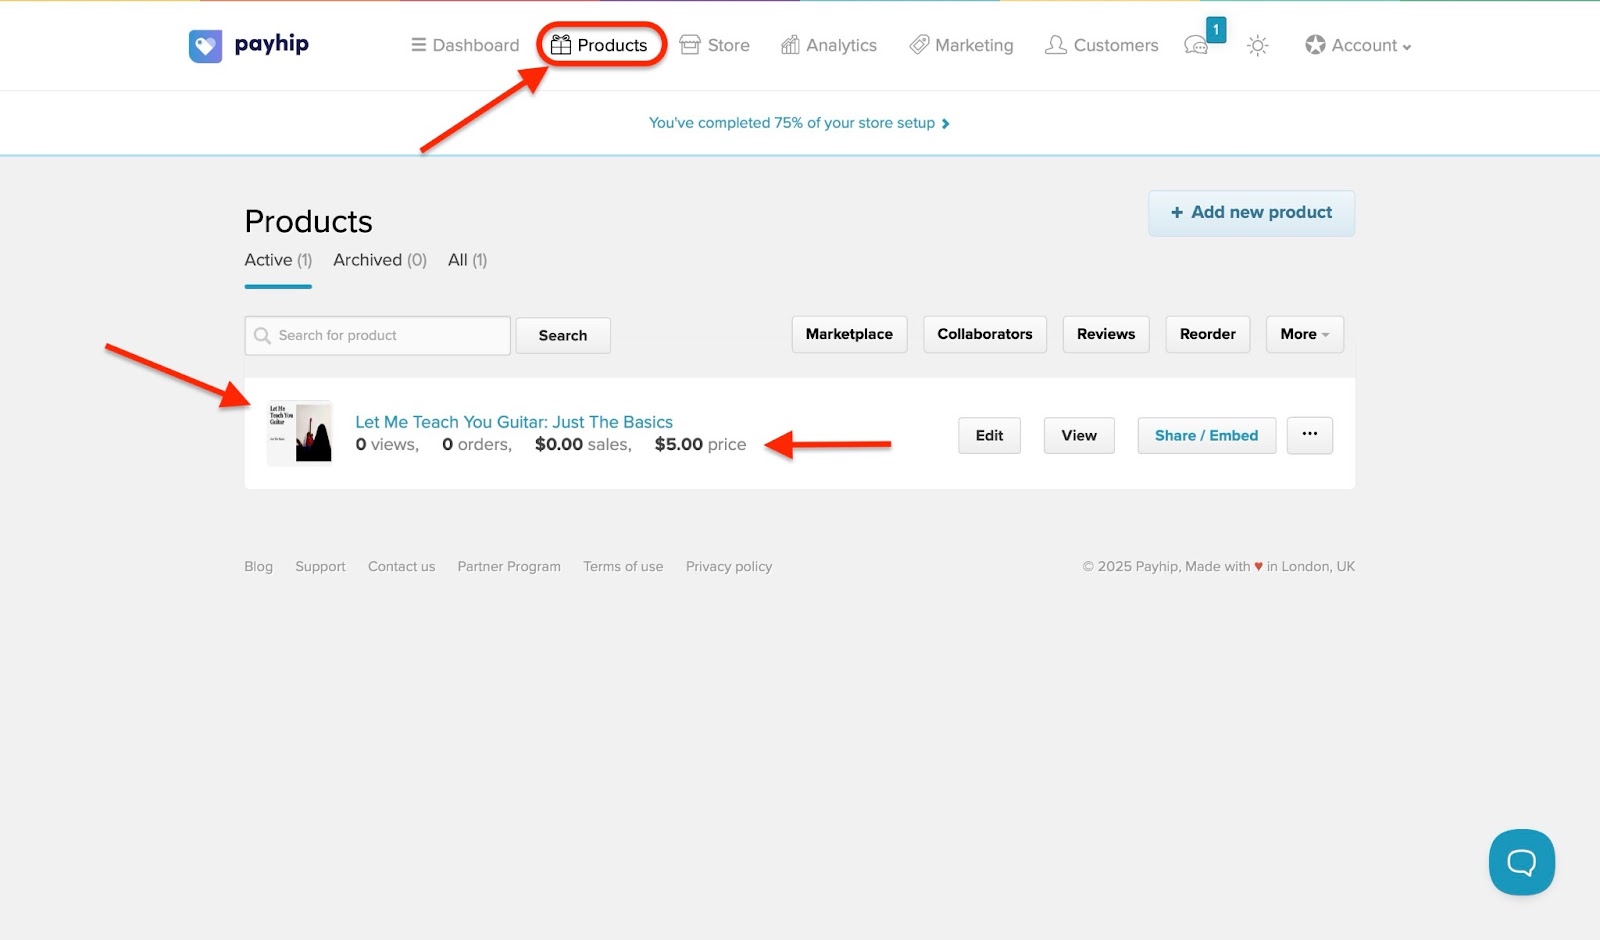
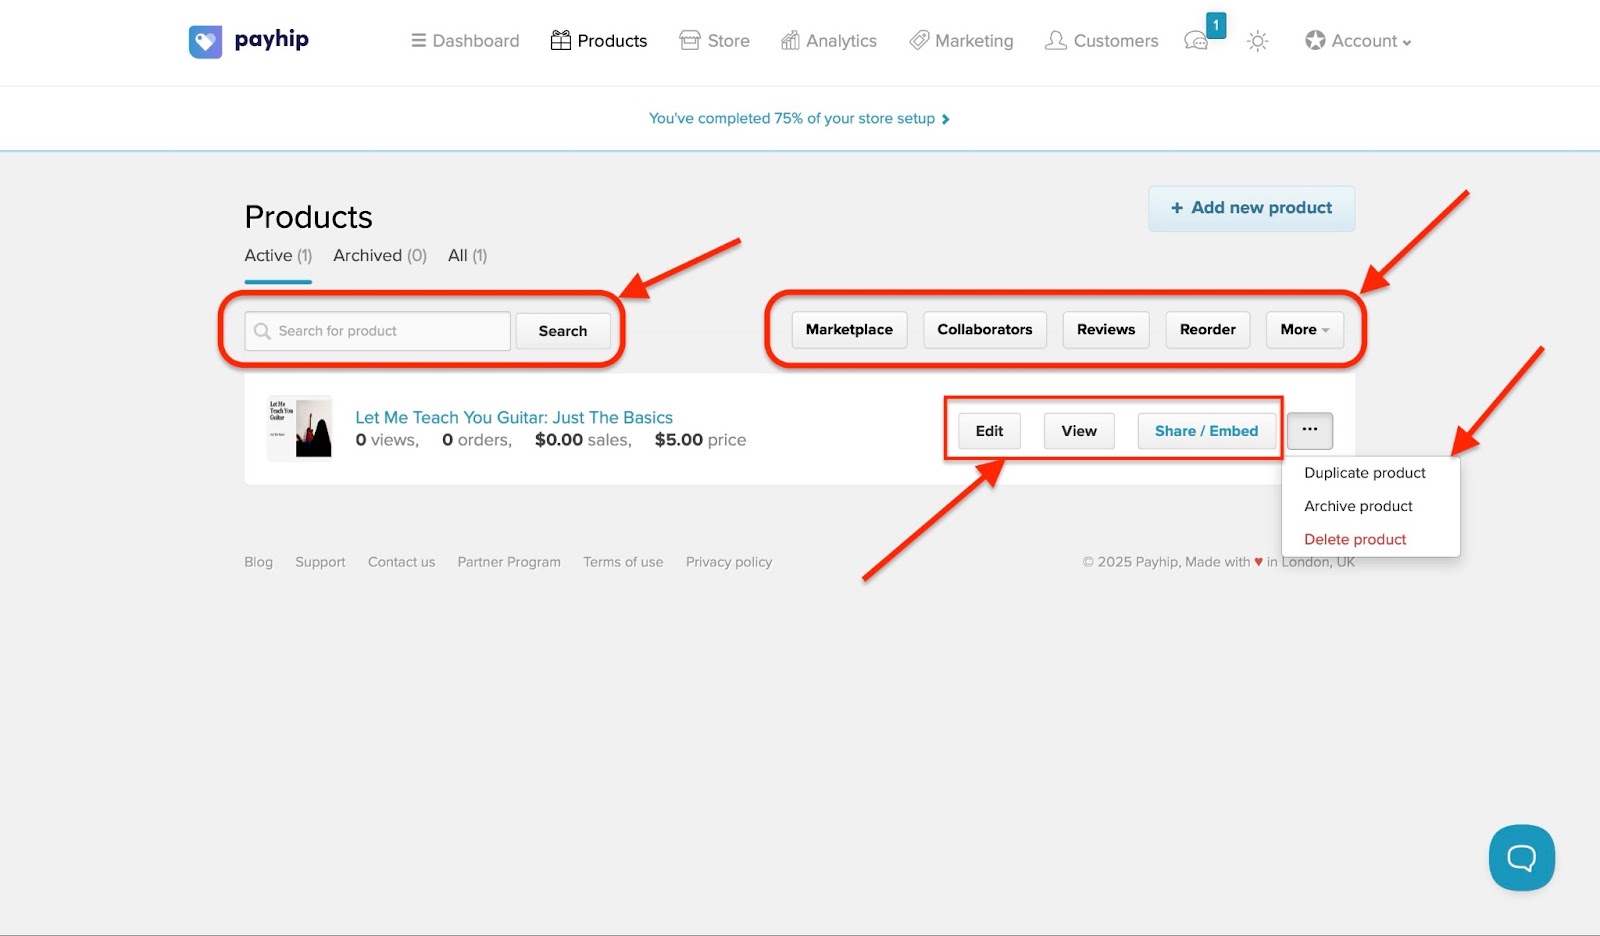
There are options to add more products or to delete, duplicate, view, share, archive, or edit digital products you’ve already added.
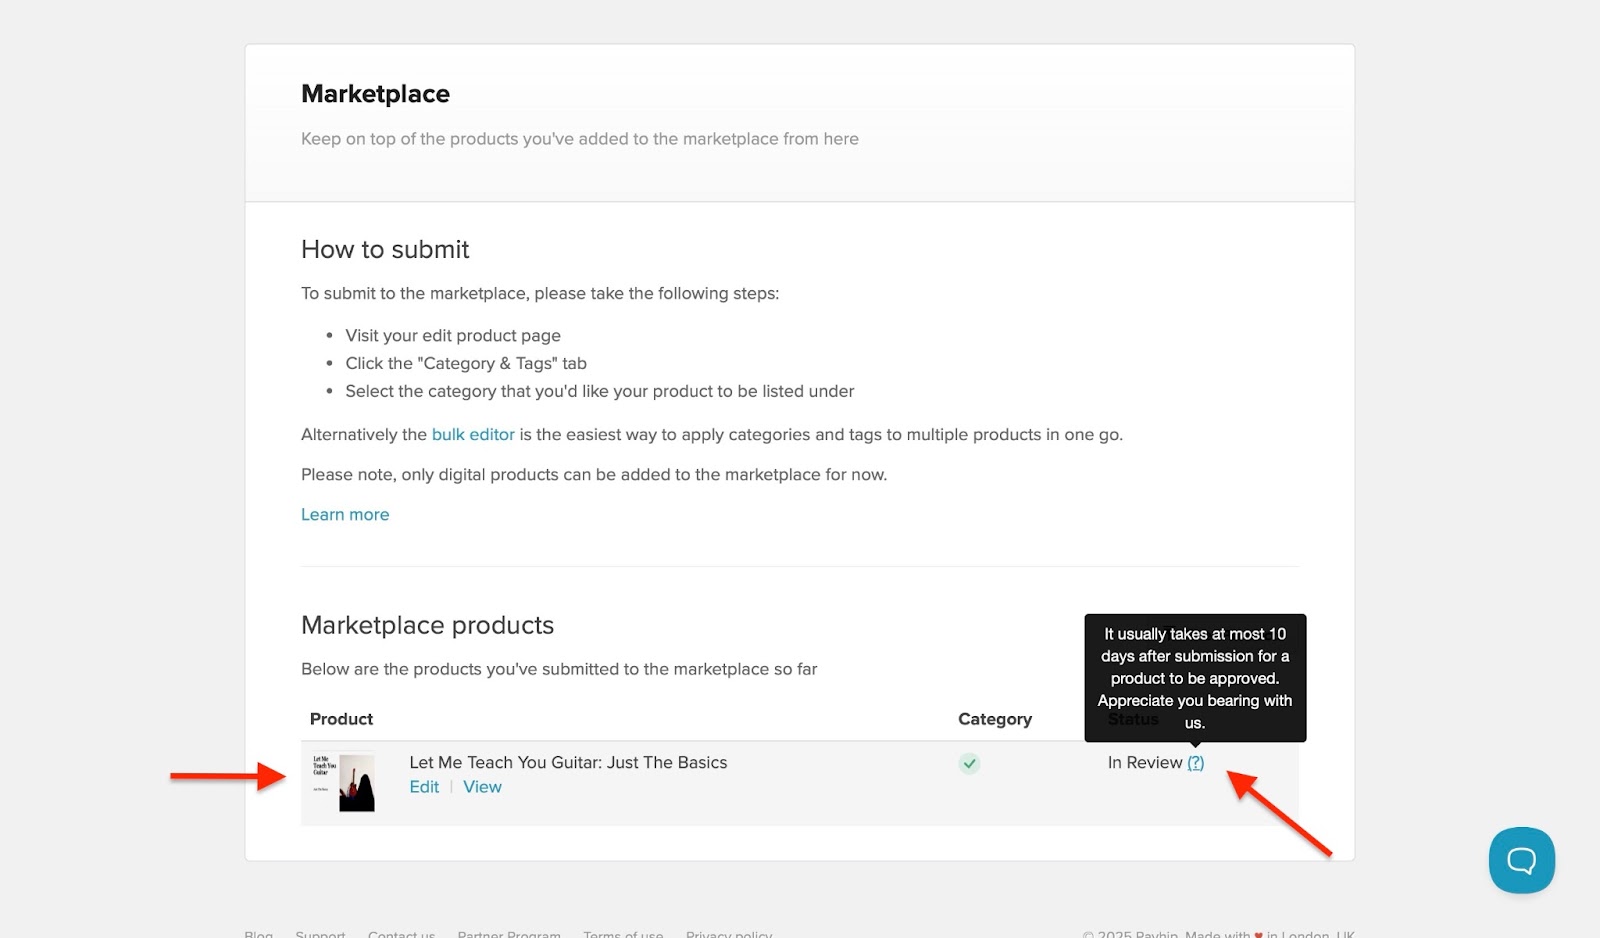
If you have lots of digital products on sale, you can use the Search box to find the specific item you want. Add collaborators, check your product’s reviews, reorder your items on sale, or even add it to the Payhip marketplace.
To submit your digital product to the Payhip marketplace, first click “Edit.” The page that opens will have both product and category & tags tabs.
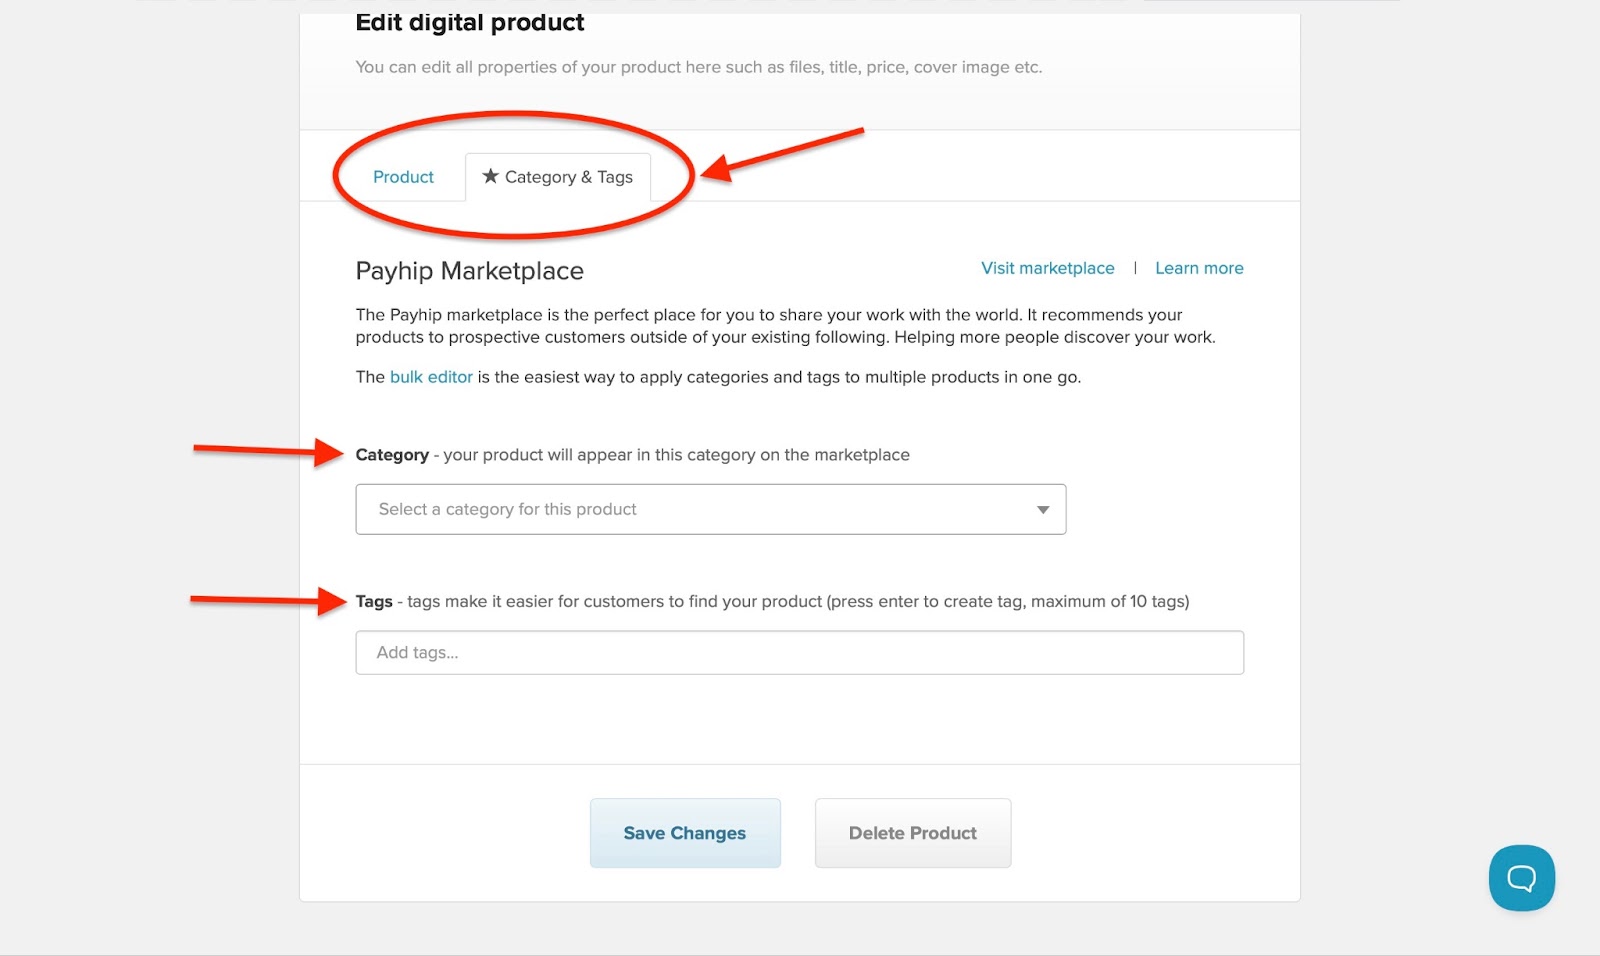
Click “Category & Tags.” Then select the appropriate category in the category box and add a maximum of 10 tags in the Tag box. Having done that, save your changes.
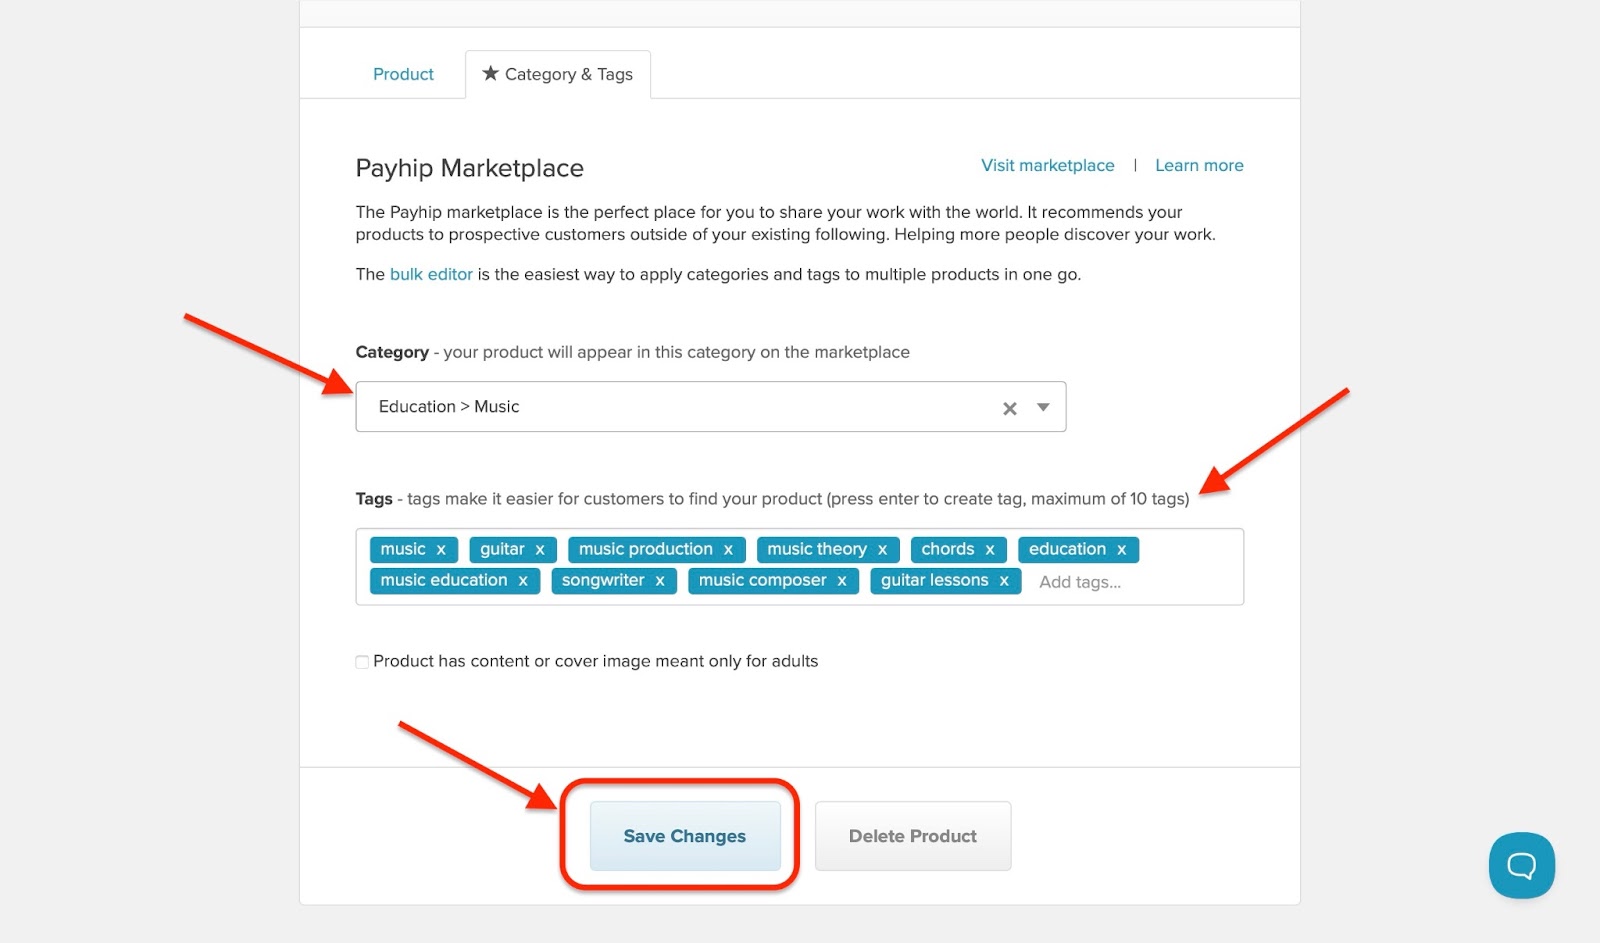
Your digital product will be under review for a minimum of 10 days after submission before Payhip approves it
[fs-toc-omit]Best For
- Creators and indie entrepreneurs who want to sell digital and physical products to their audiences.
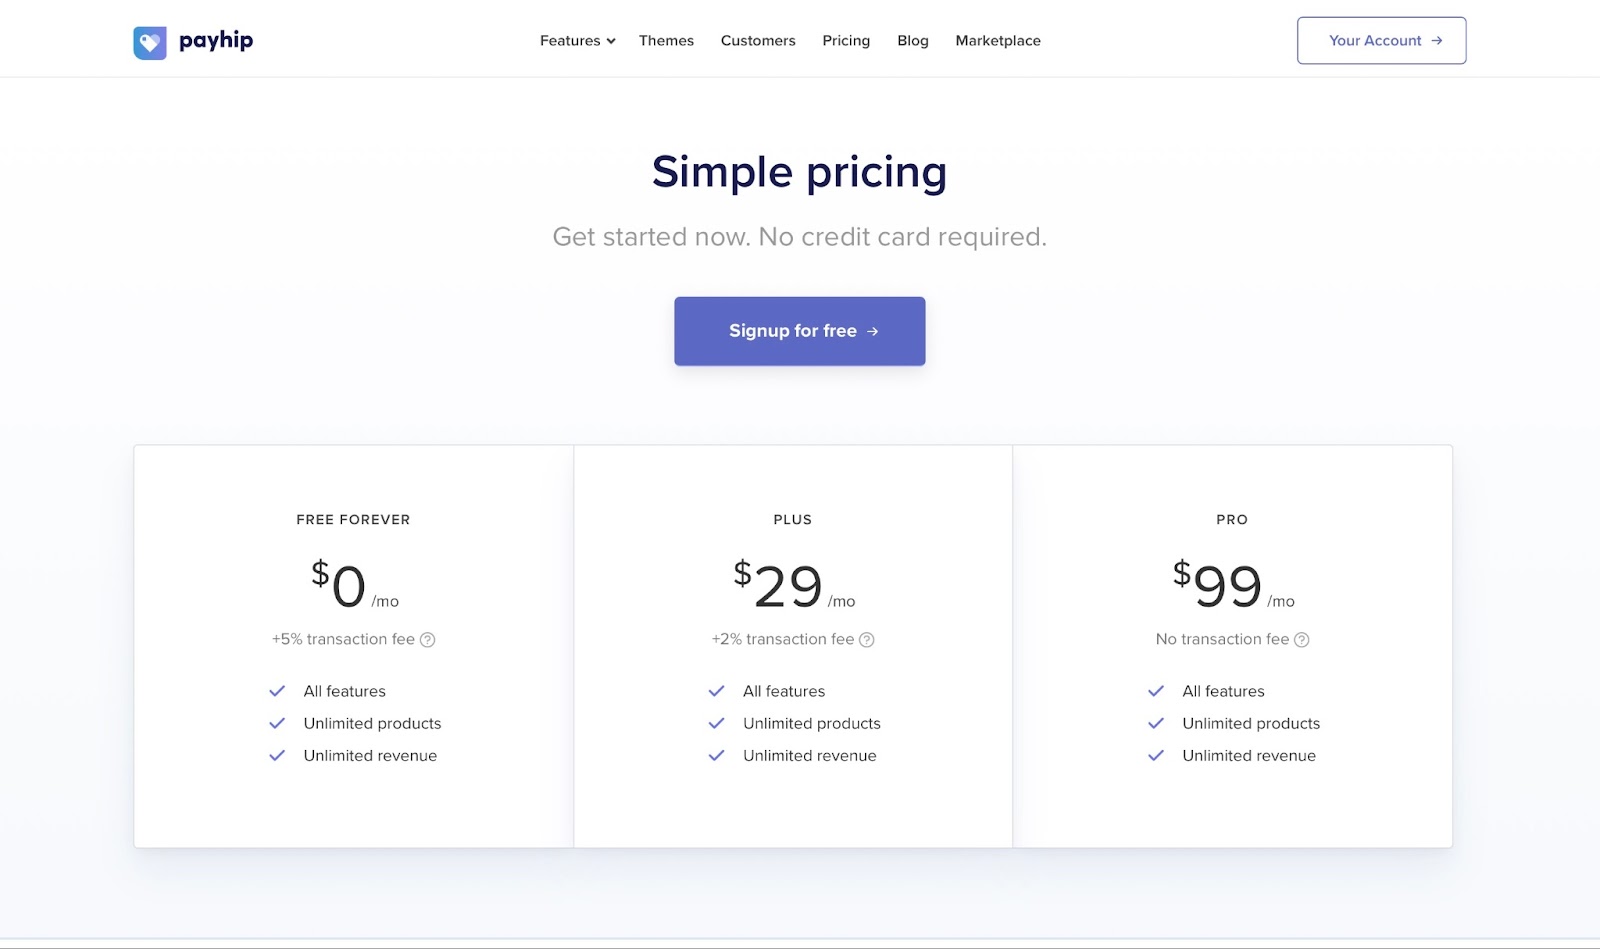
[fs-toc-omit]Pricing
- Free Forever: $0 +5% transaction fee
- Plus: $29/month + 2% transaction fee
- Pro: $99/month + 0% transaction fee
6. Beacons.ai
Beacons is next on our list of top sites to sell digital products.
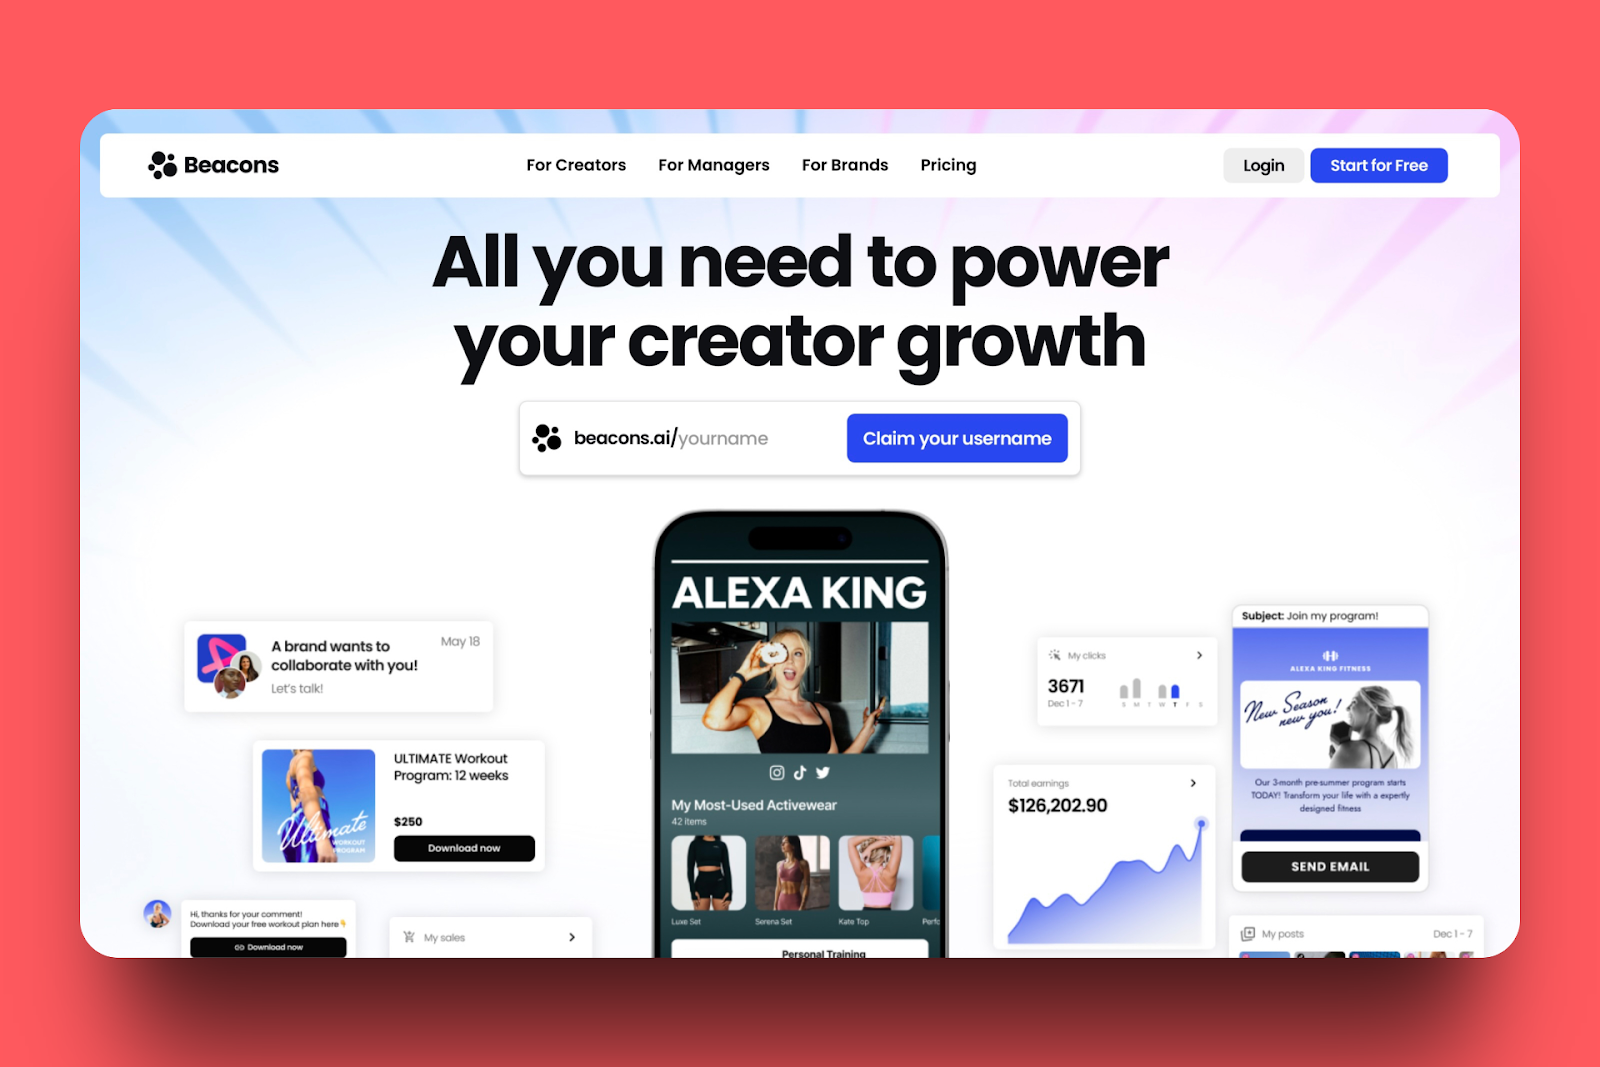
With Beacons’ link in bio and website feature, I can display a link to my store or digital product in my Instagram bio.
I’m also able to quickly add more blocks for email forms, live events, and contact forms. The feature also offers customization options to control the appearance of the page.
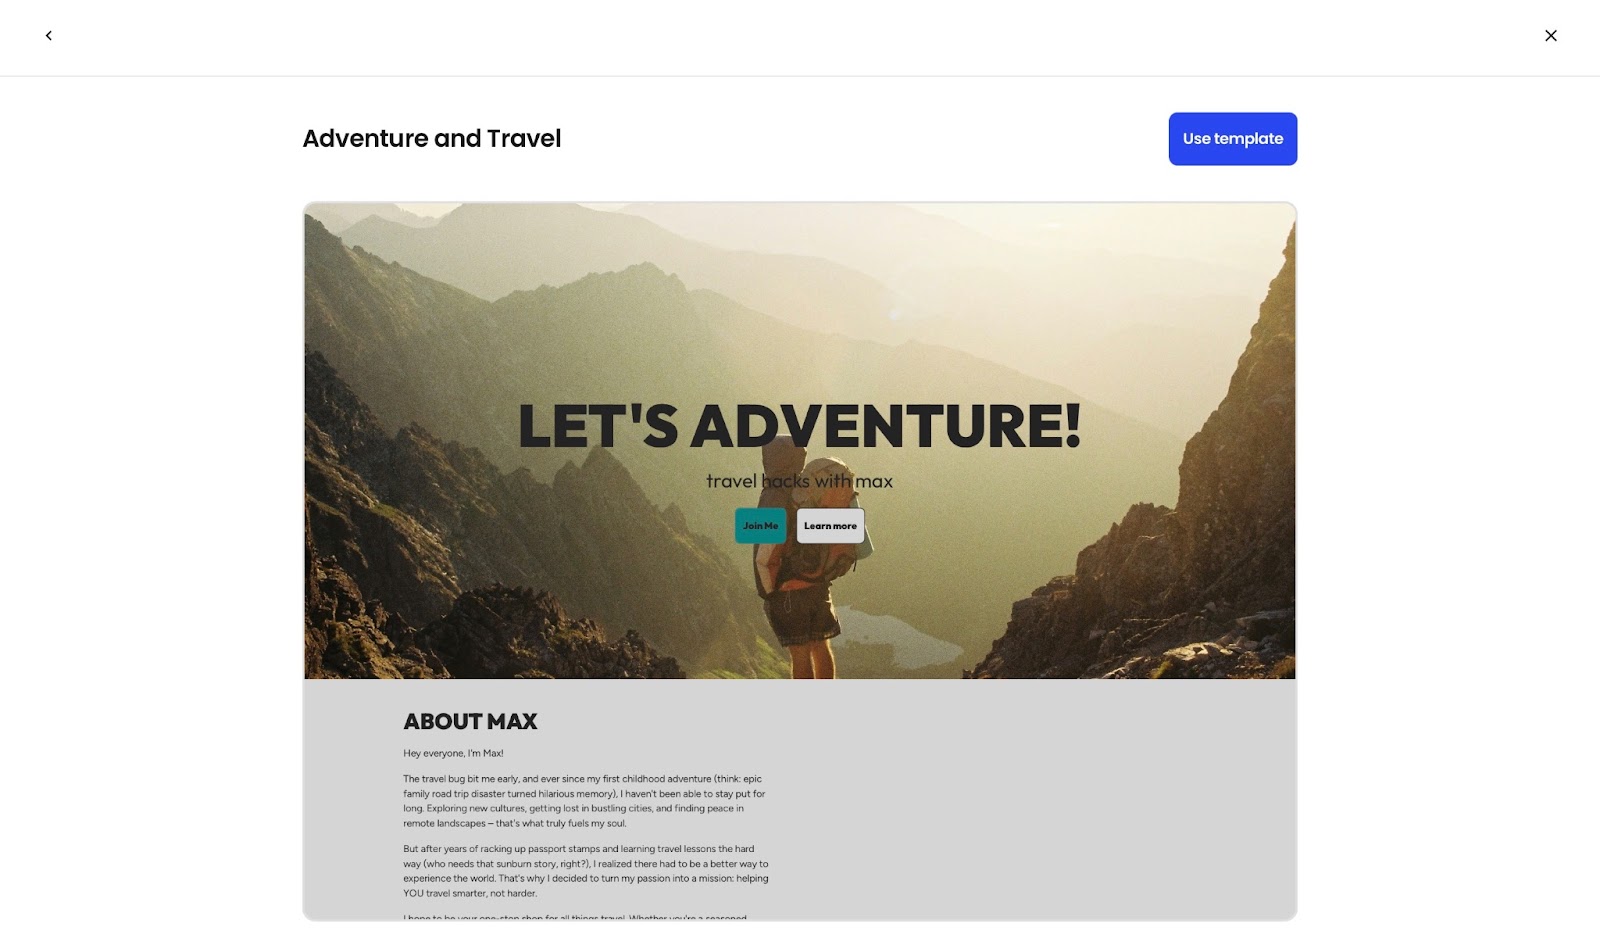
Moreover, this feature makes it possible to add and create a website to share my adventures with my audience. They can also read the personal essays and see my pictures by visiting this website I created.
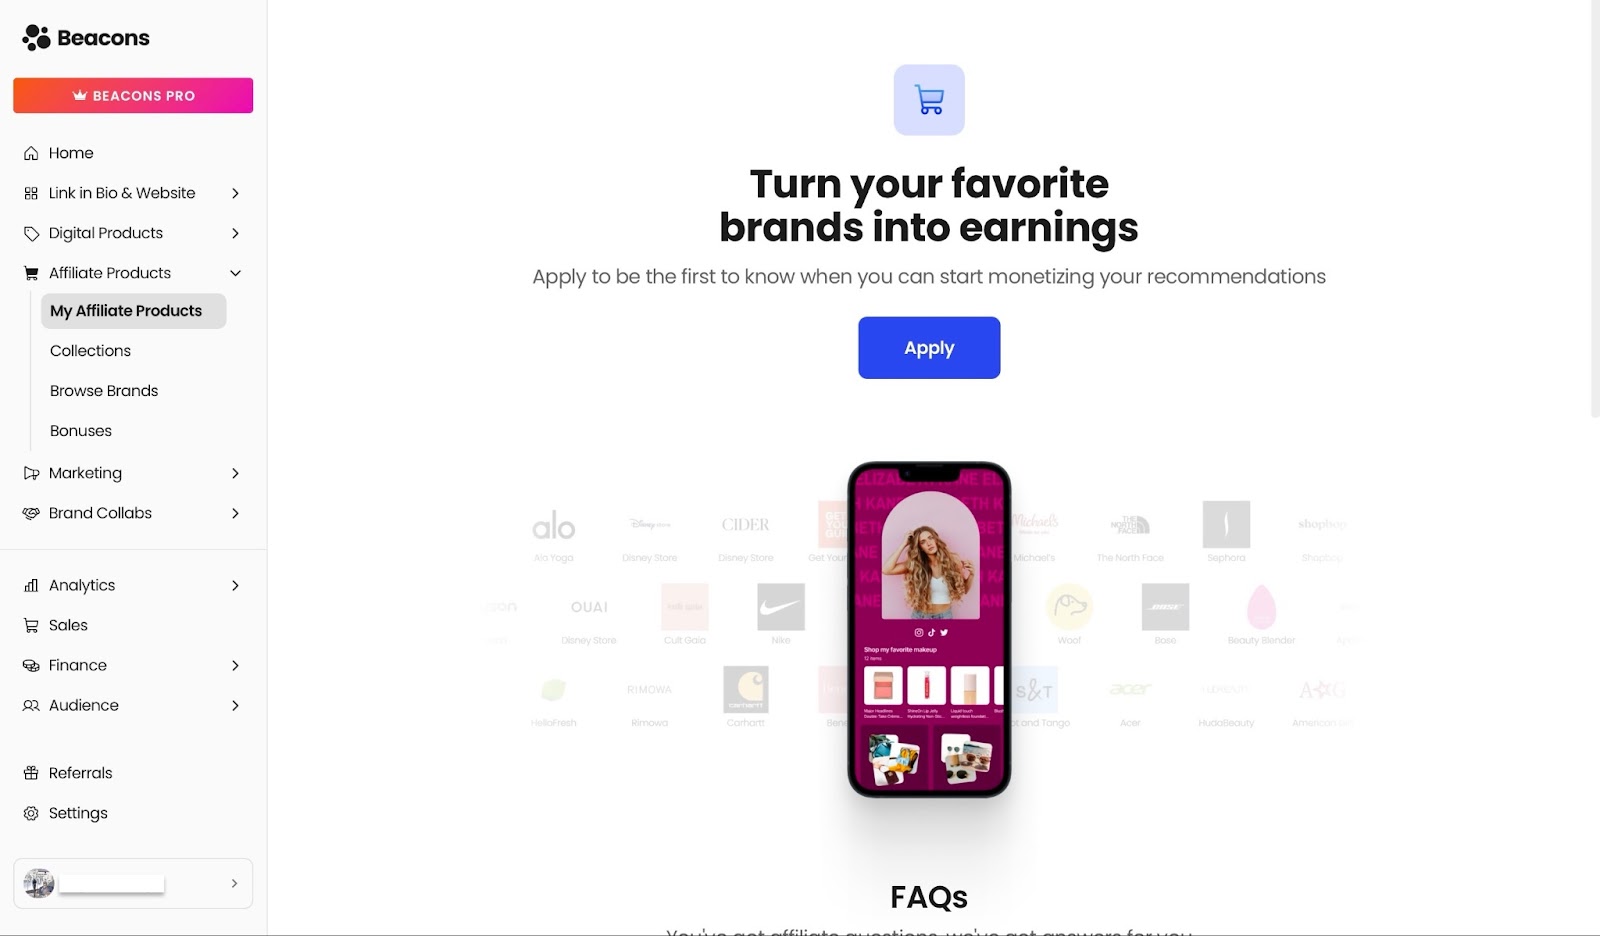
Beacons’ affiliate products feature is my go-to feature. It works by generating a unique affiliate link specifically for you to share on your socials. Every time someone purchases a product using your link, you stand to earn a commission.
Furthermore, you can add digital products, courses, memberships, and links to other products on other platforms, using the digital product feature.
There’s an option to import a any link, e.g. from Etsy, Gumroad, Shopify, Stan Store, and Payhip.
After you’re done creating digital products on Beacons, you can easily copy its link and share it online. If you have many products listed, I click the pin icon to place and keep important products at the top.
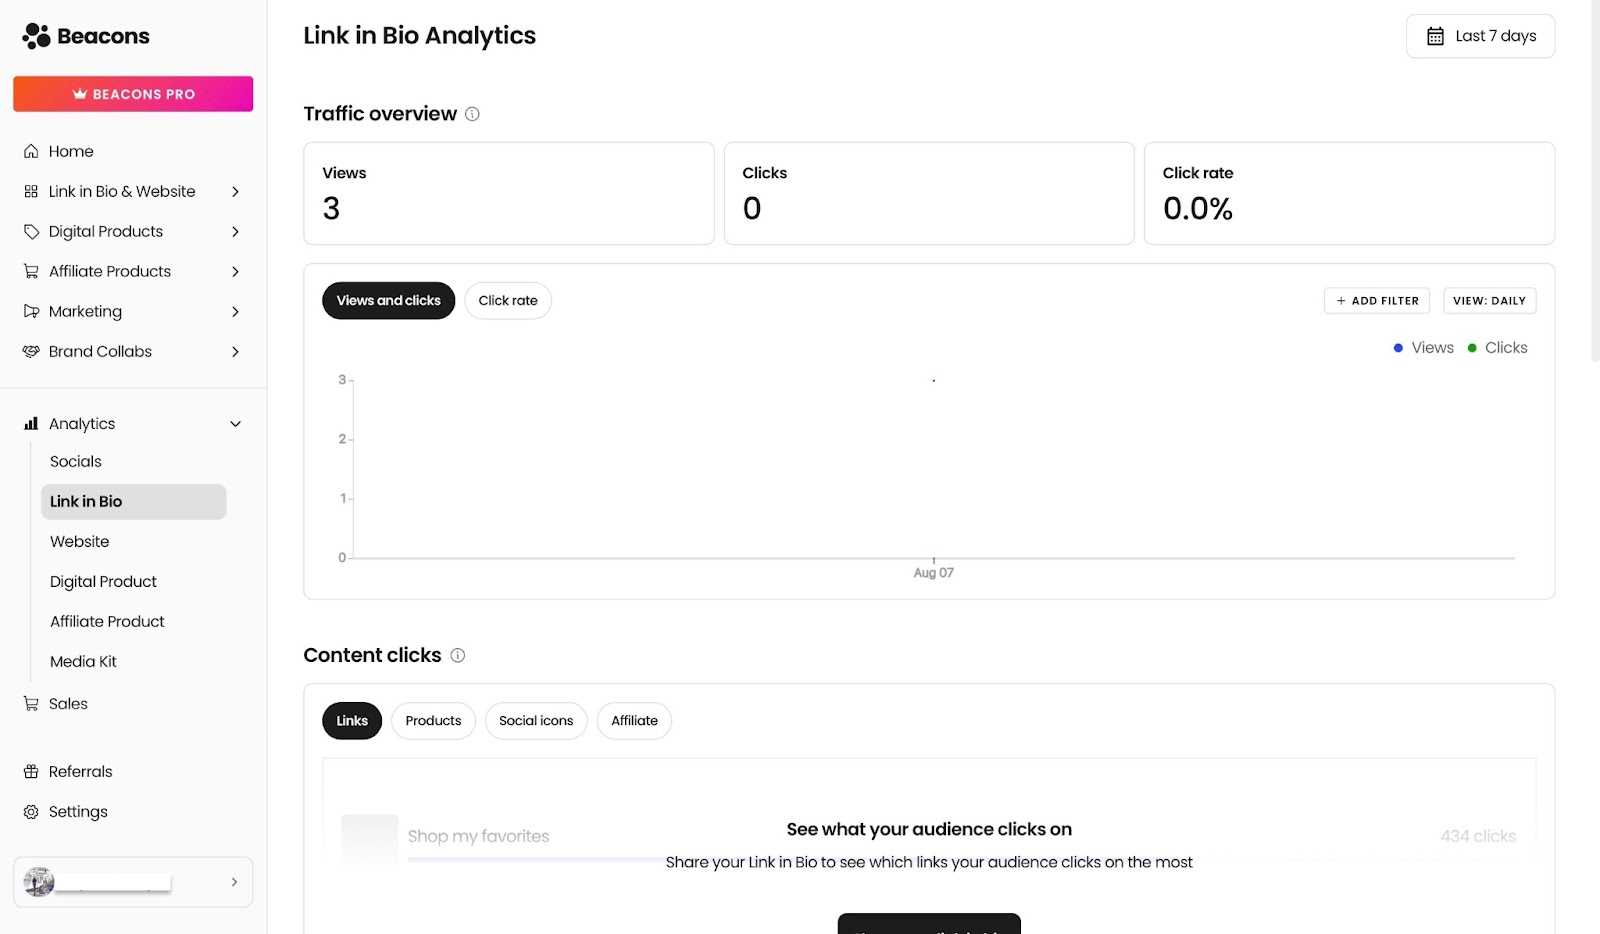
On Beacons, you can track important metrics with its analytics feature.
Perhaps you’re primarily interested in analytics for digital products, but it provides metrics for many other items such as link-in-bios, affiliate products, and media kits.
By default, the analytics show weekly, monthly, and quarterly time ranges. However, you can set it to a custom timeline.
Most creators who are active on TikTok, Instagram, and other platforms use Beacons because of the link-in-bio feature. So, let me show you how to set that up.
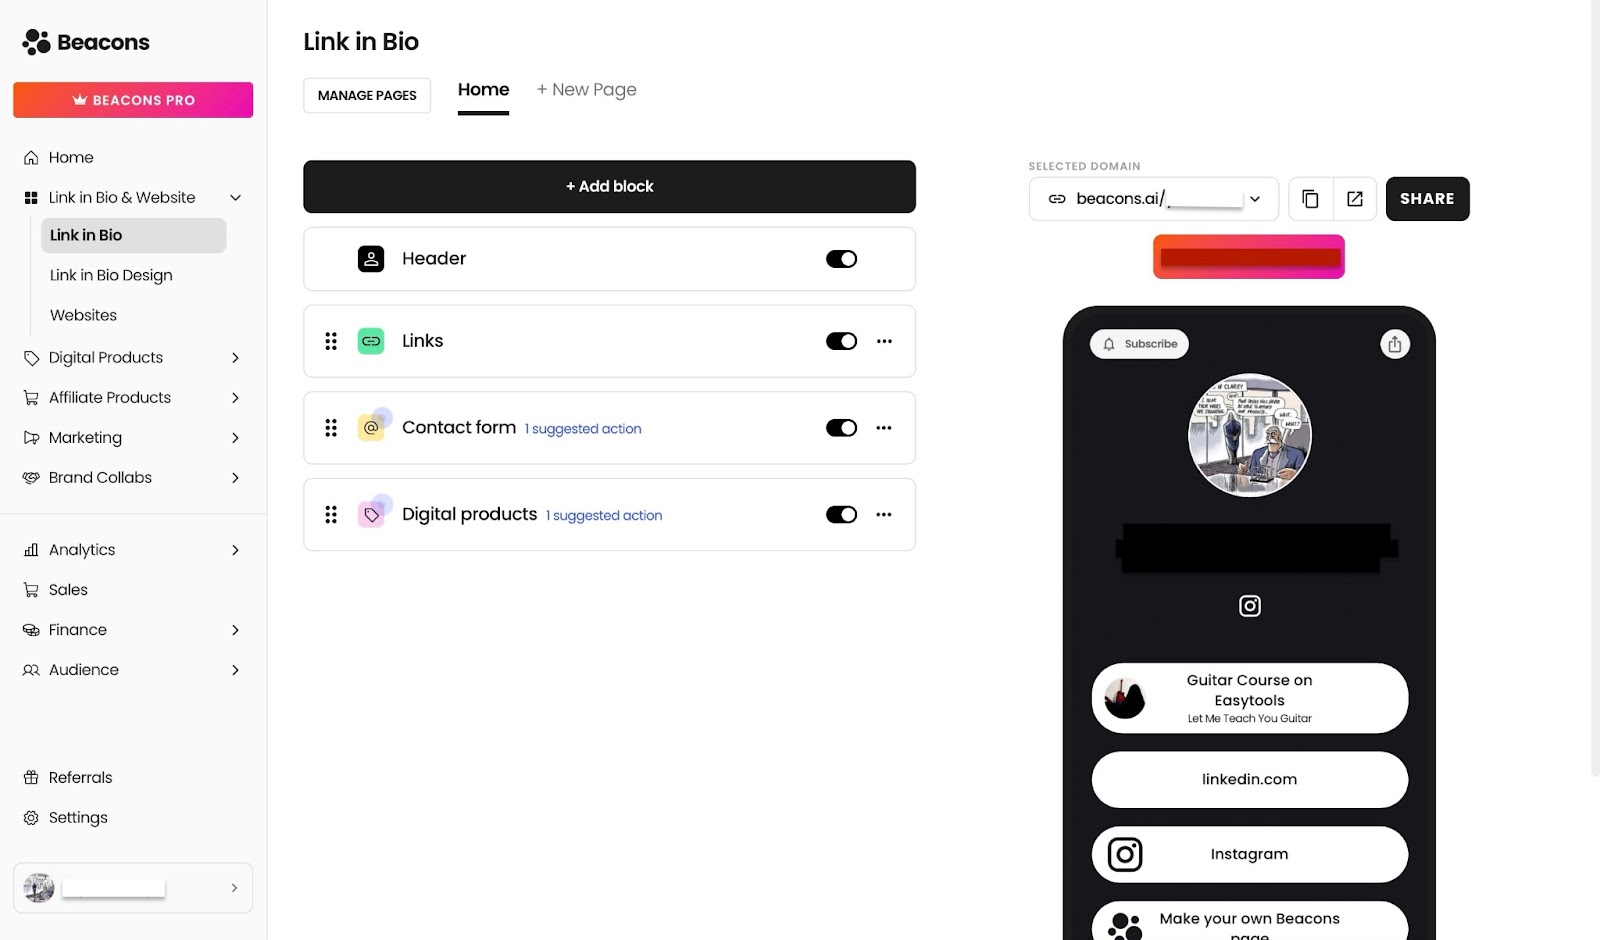
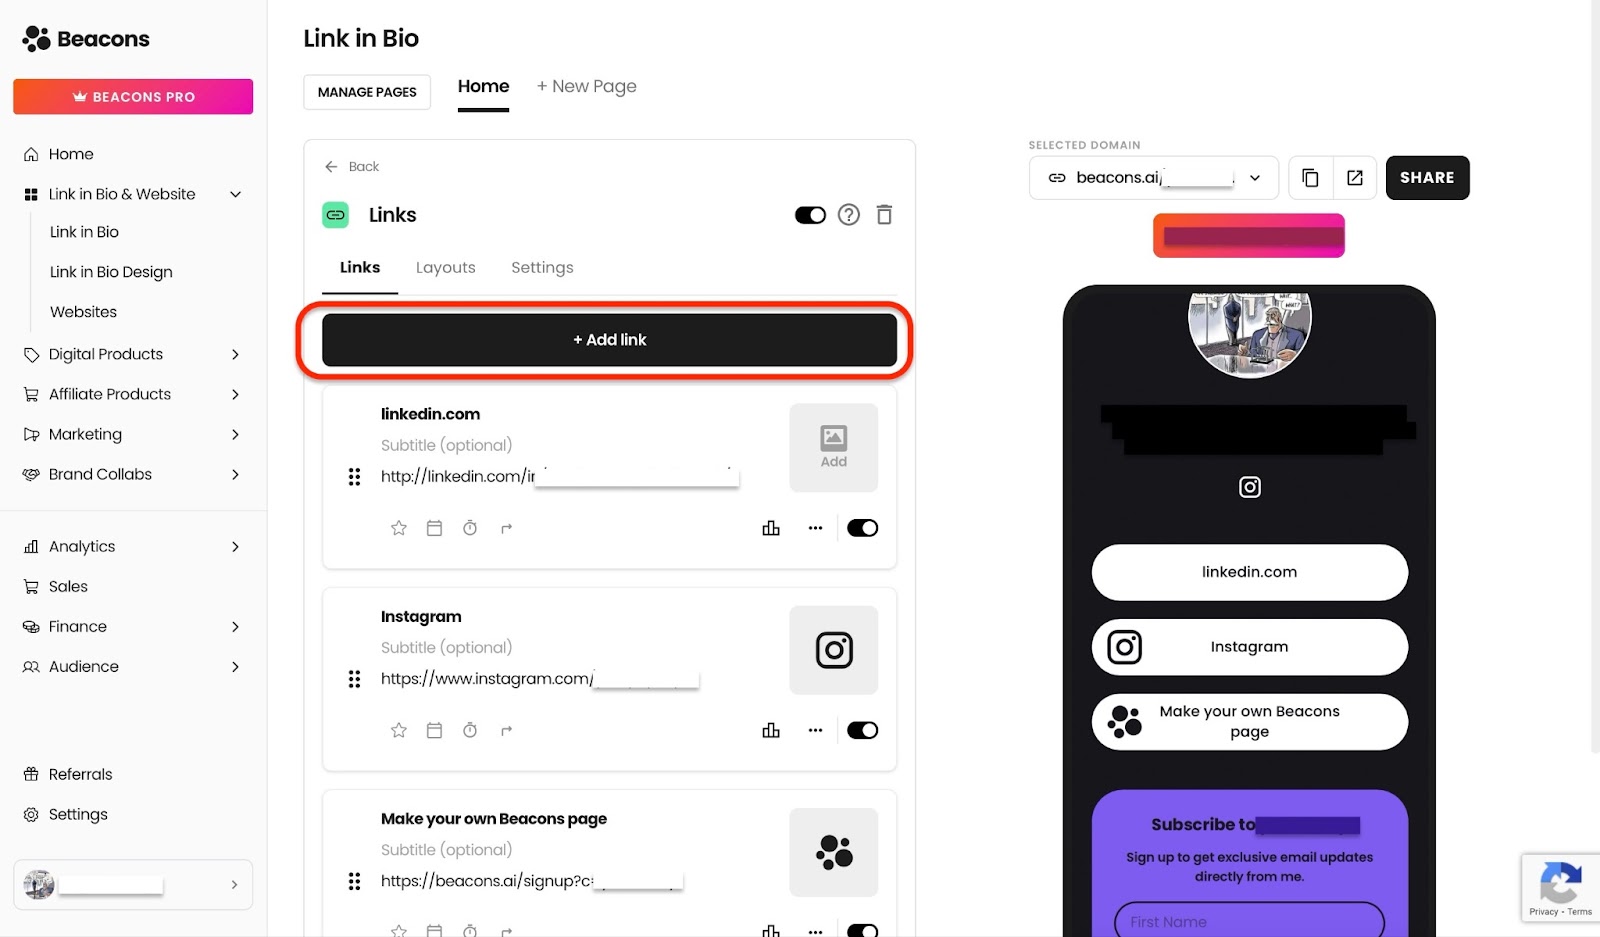
On Beacons’ homepage, click “Link in Bio & Website” on the sidebar.
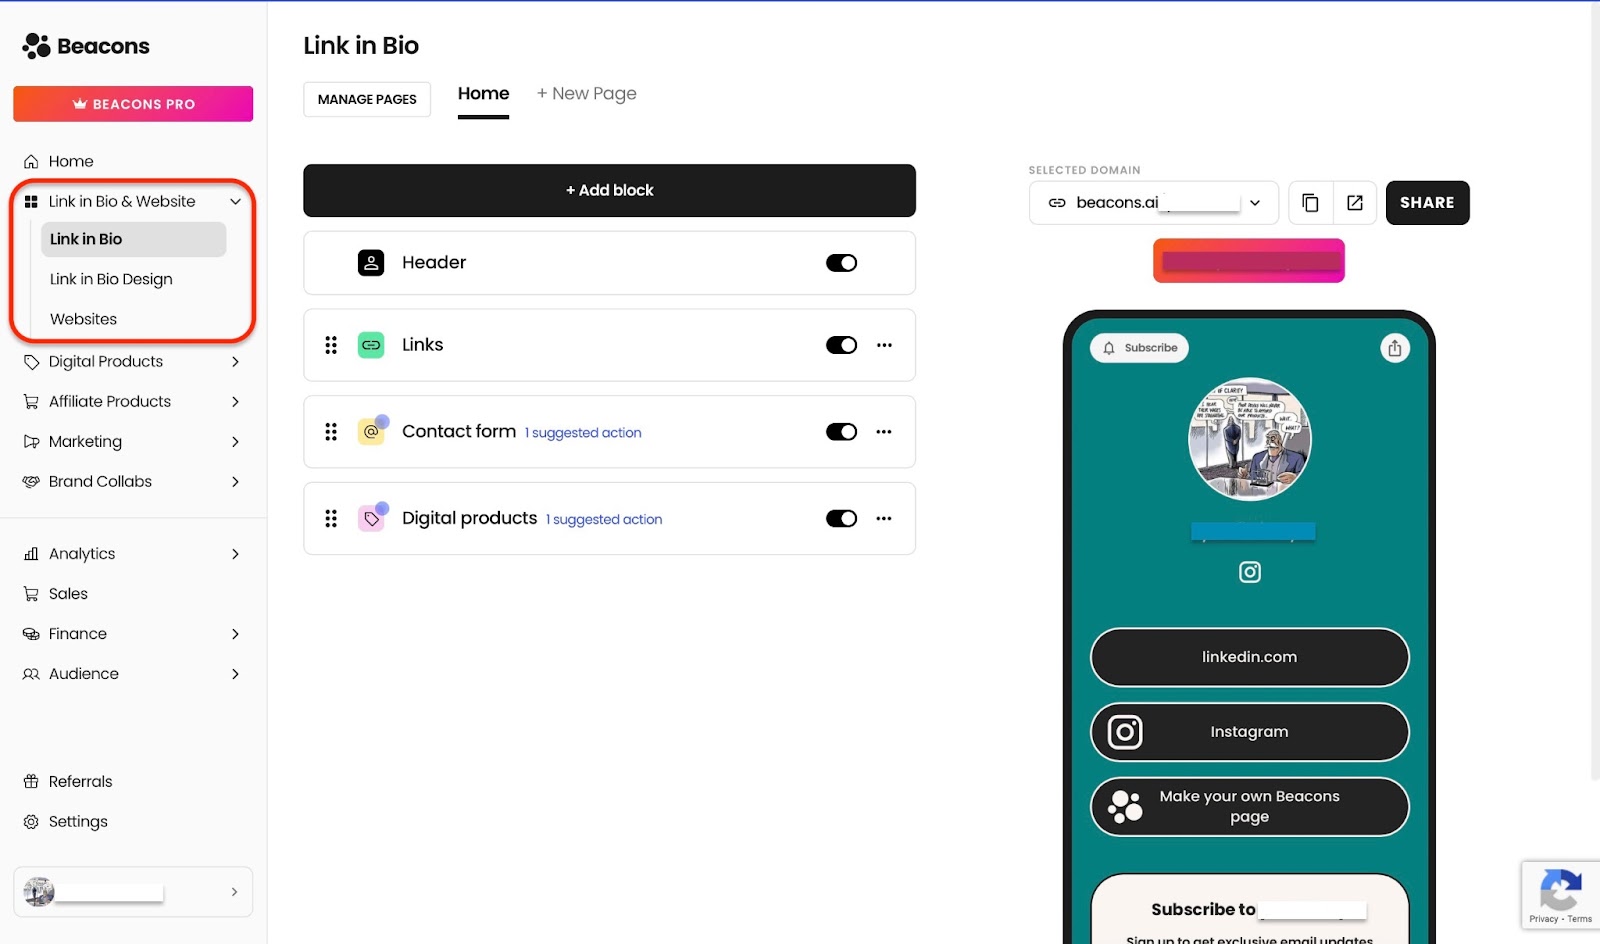
Below this feature are the link in bio, link in bio design, and website options. Select “Link in Bio,” then click on any of the displayed buttons in the link-in-bio window to add links, a contact form, or digital products.
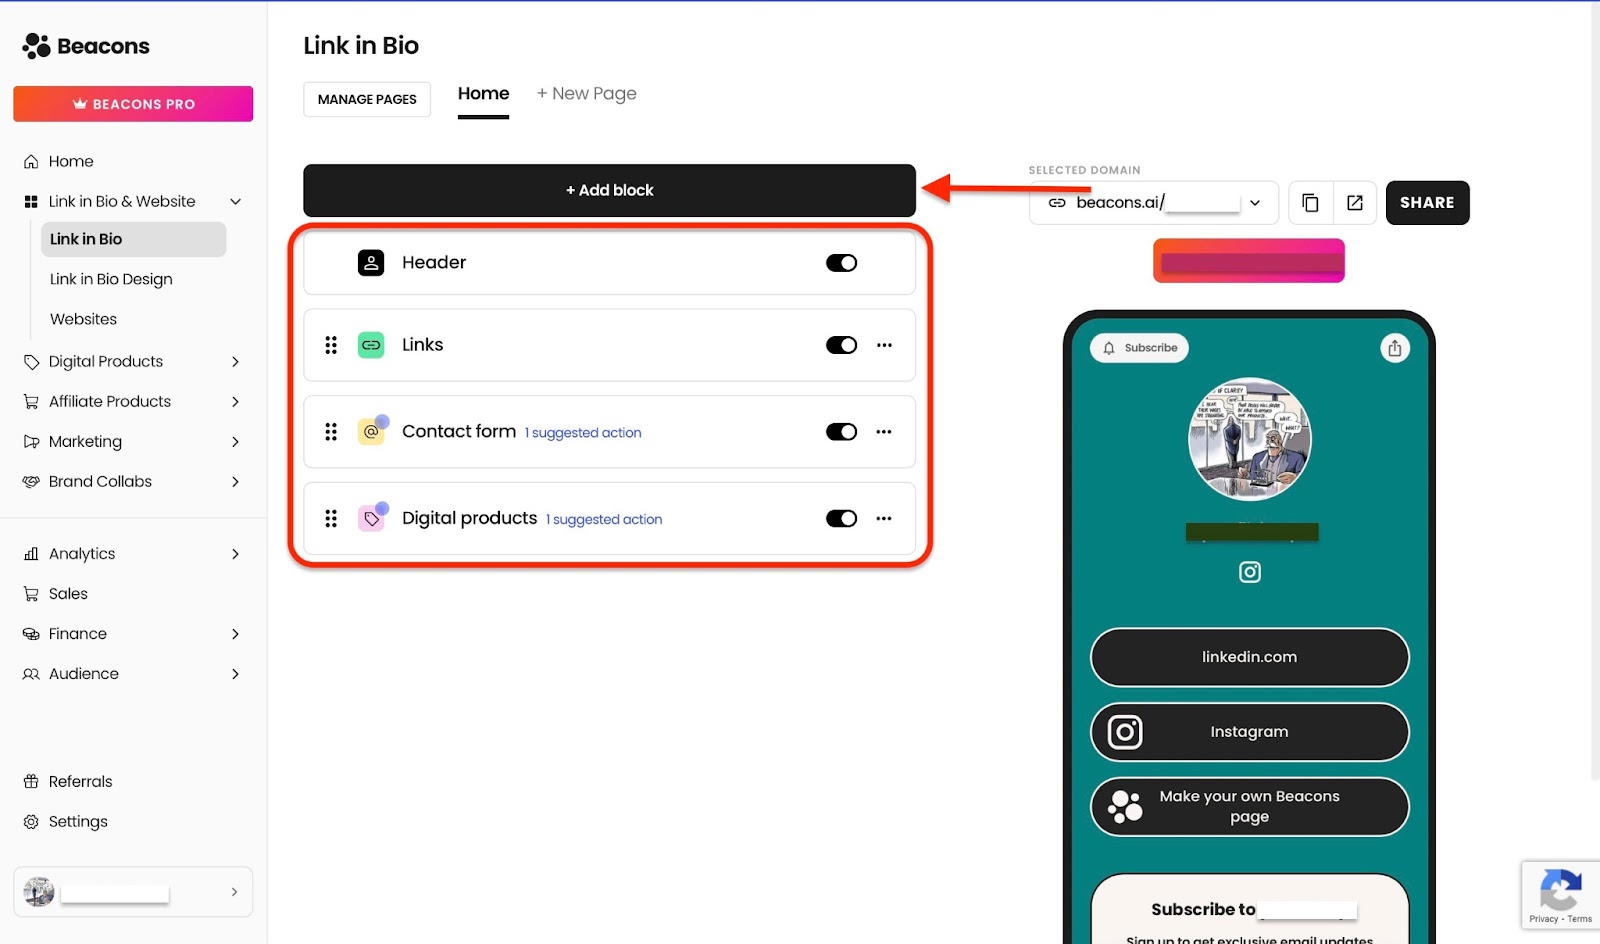
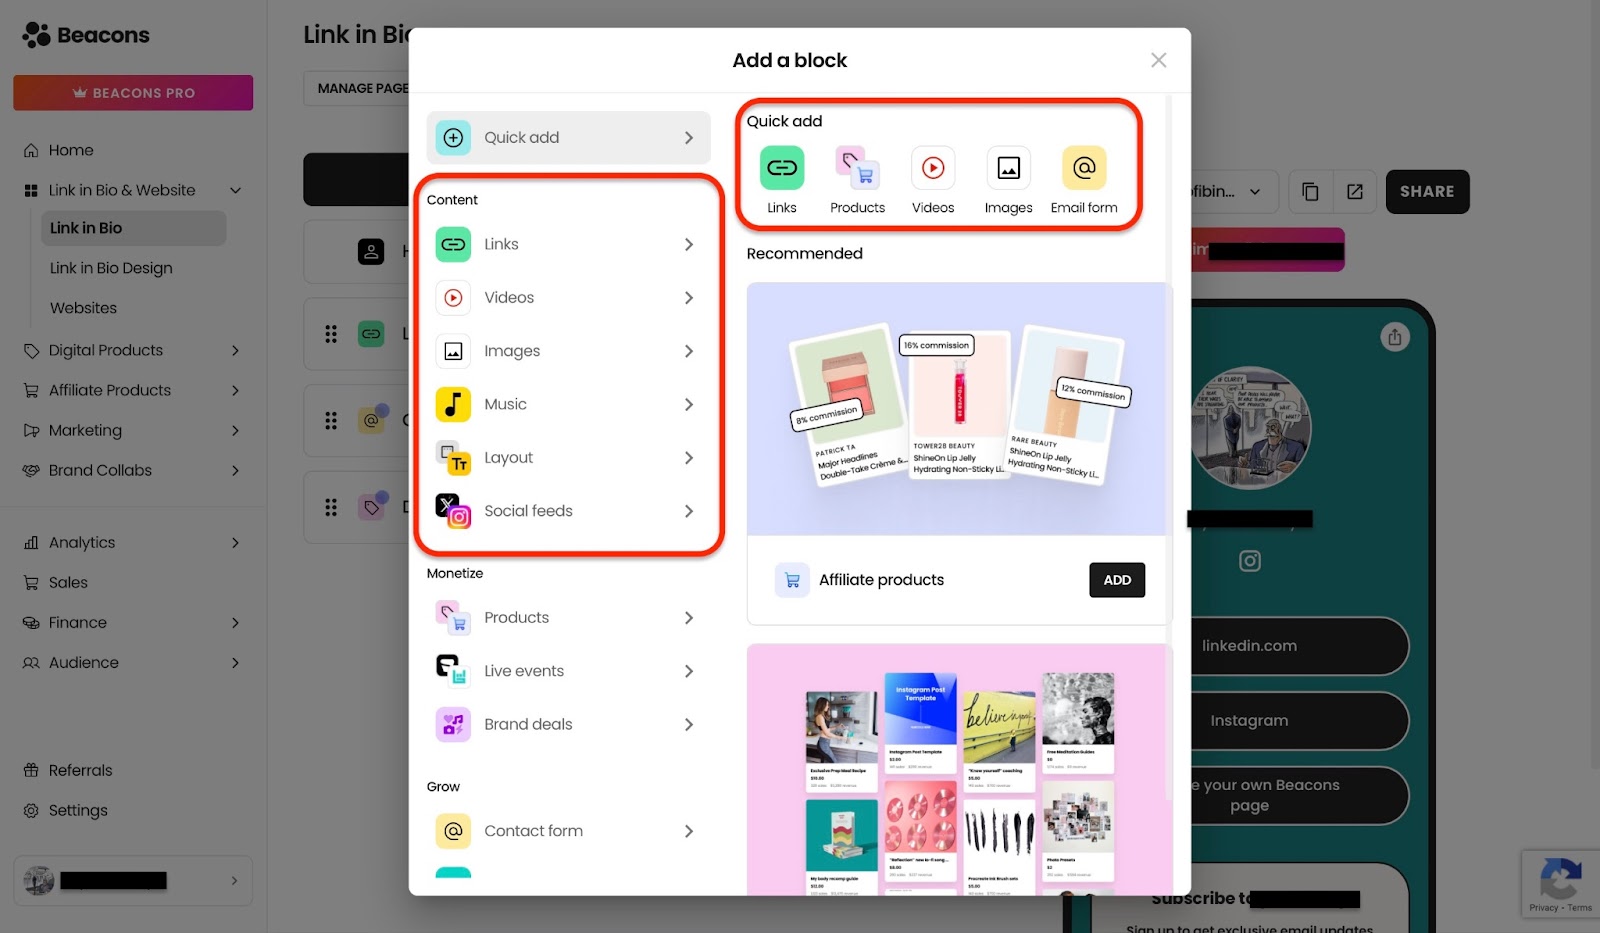
Alternatively, click “Add pages.” That opens a pop-up window which allows you to quickly add blocks for links, digital products, videos, images, or an email form.
You can also add blocks for affiliate products, music, brand deals, tool integration, social feeds, and follower count.
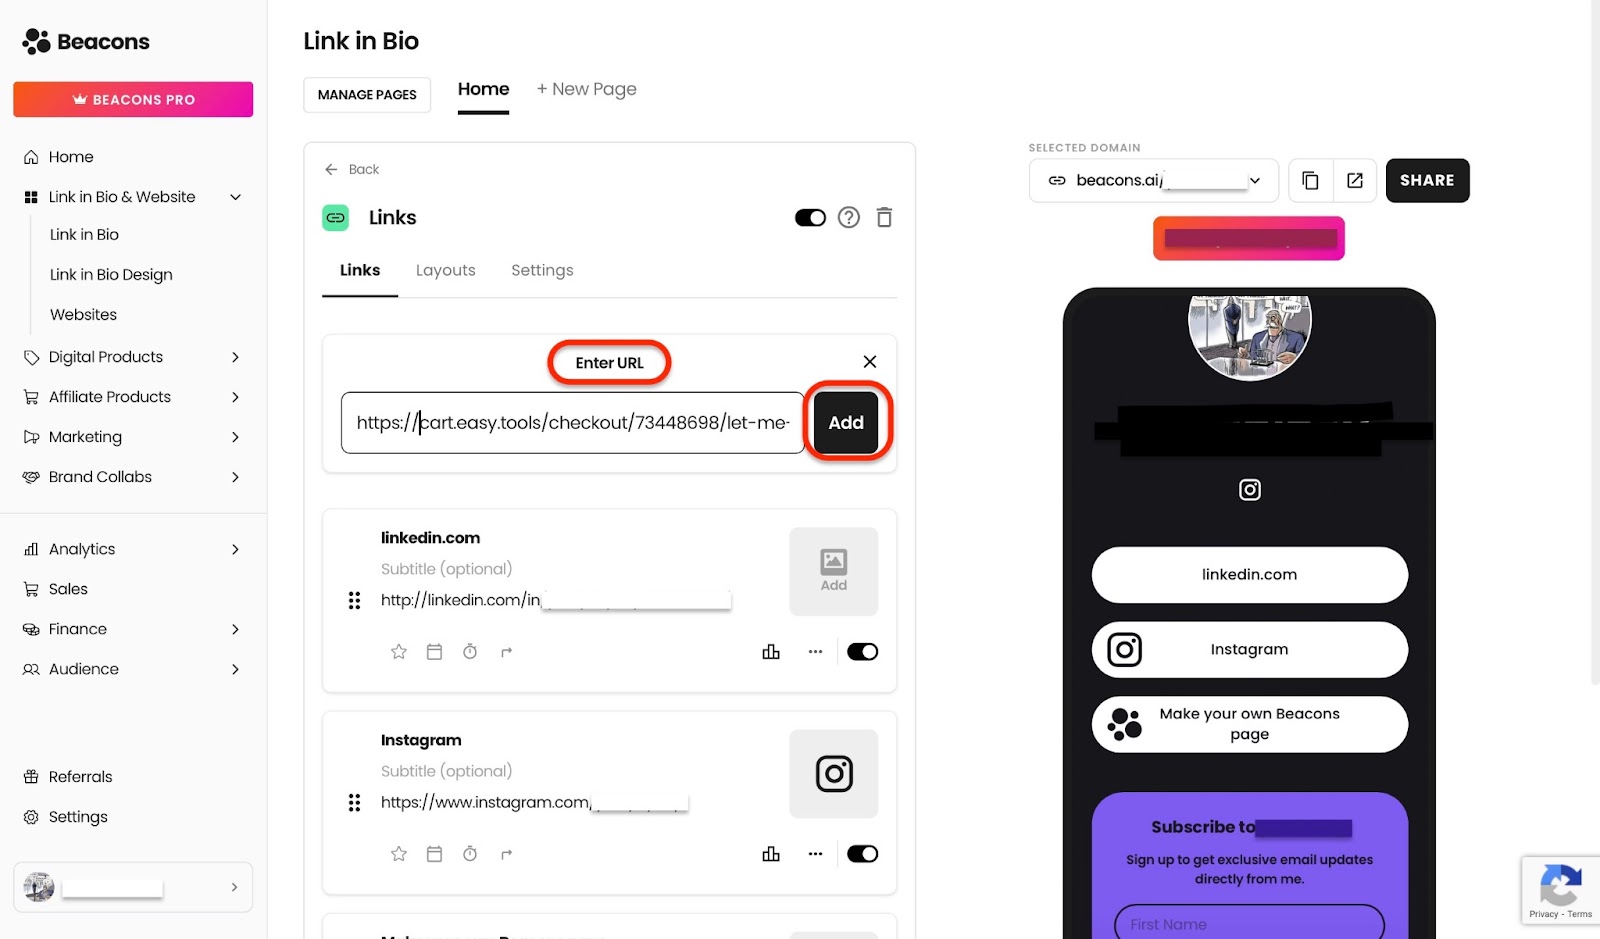
In our case, I’ll click the links button to add a URL of an online course I’m currently selling.
I’ll copy the link and paste it in the box displayed below “Enter URL.” Next, I’ll click on “Add.”
Next, I’ll add a title and a subtitle to help differentiate it from the other links I’ve already added.

I’ll then add an image by clicking the icon towards the right end of the URL box.
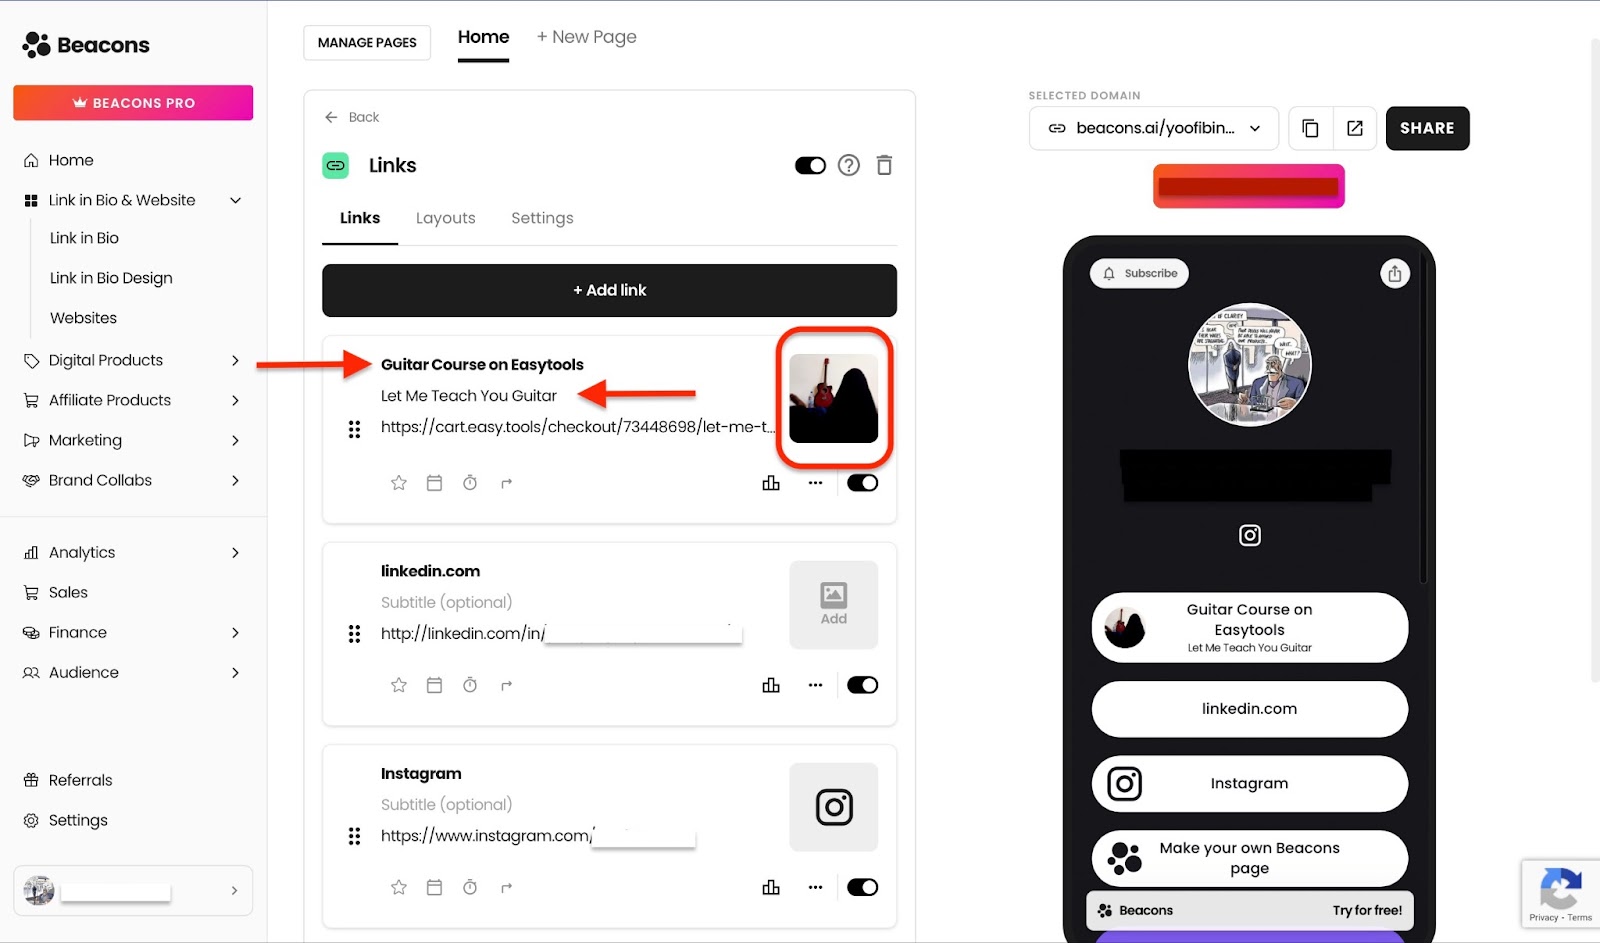
After this, all the links that I’ve added will show on my bio for my audience to see. And, of course, the links to my digital products will be accessible right from there.

That’s one of the features that makes Beacons AI one of the best platforms to sell digital products.
[fs-toc-omit]Key Features
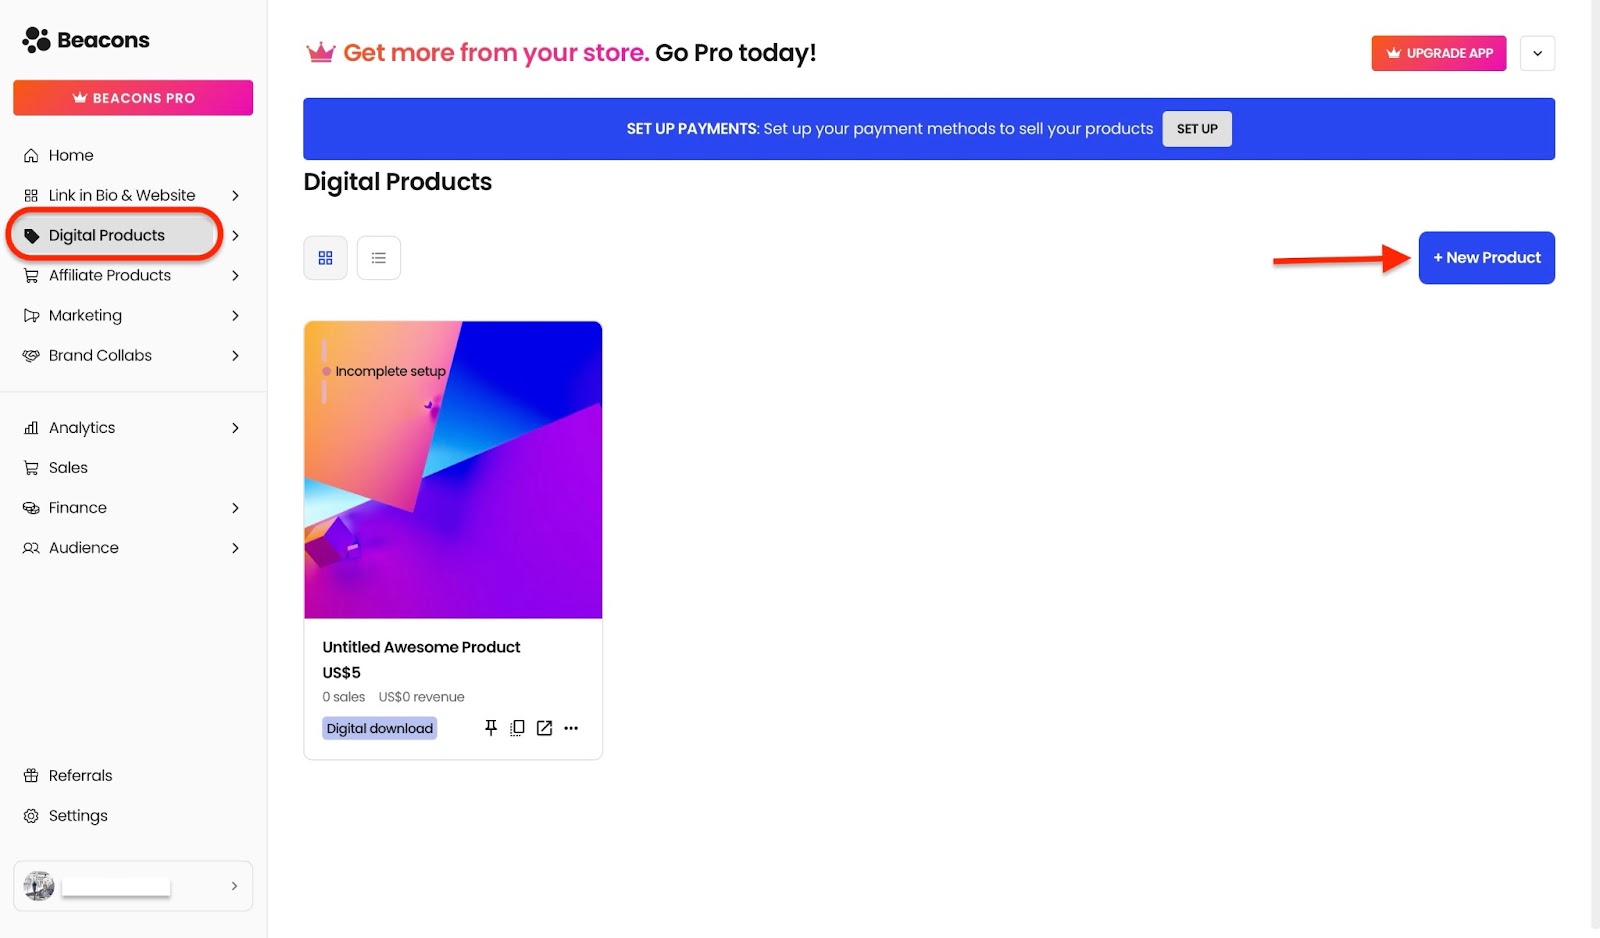
1. Digital Products
Beacons' digital product feature lets you create an entirely new product right on the platform. It also shows reviews and inquiries about your digital products.
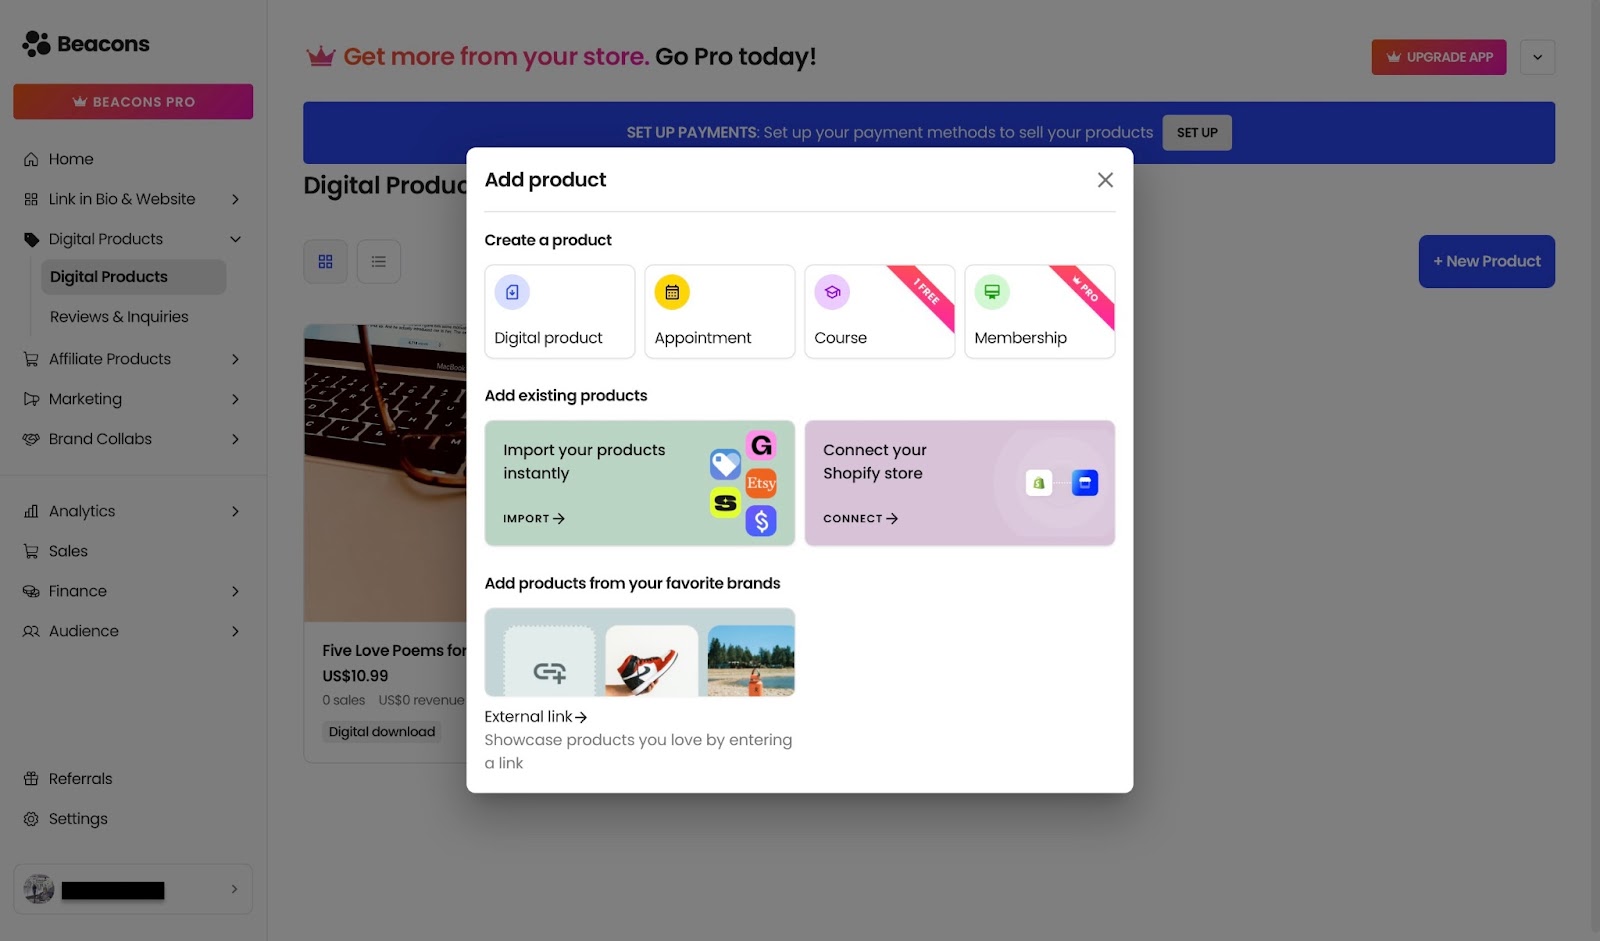
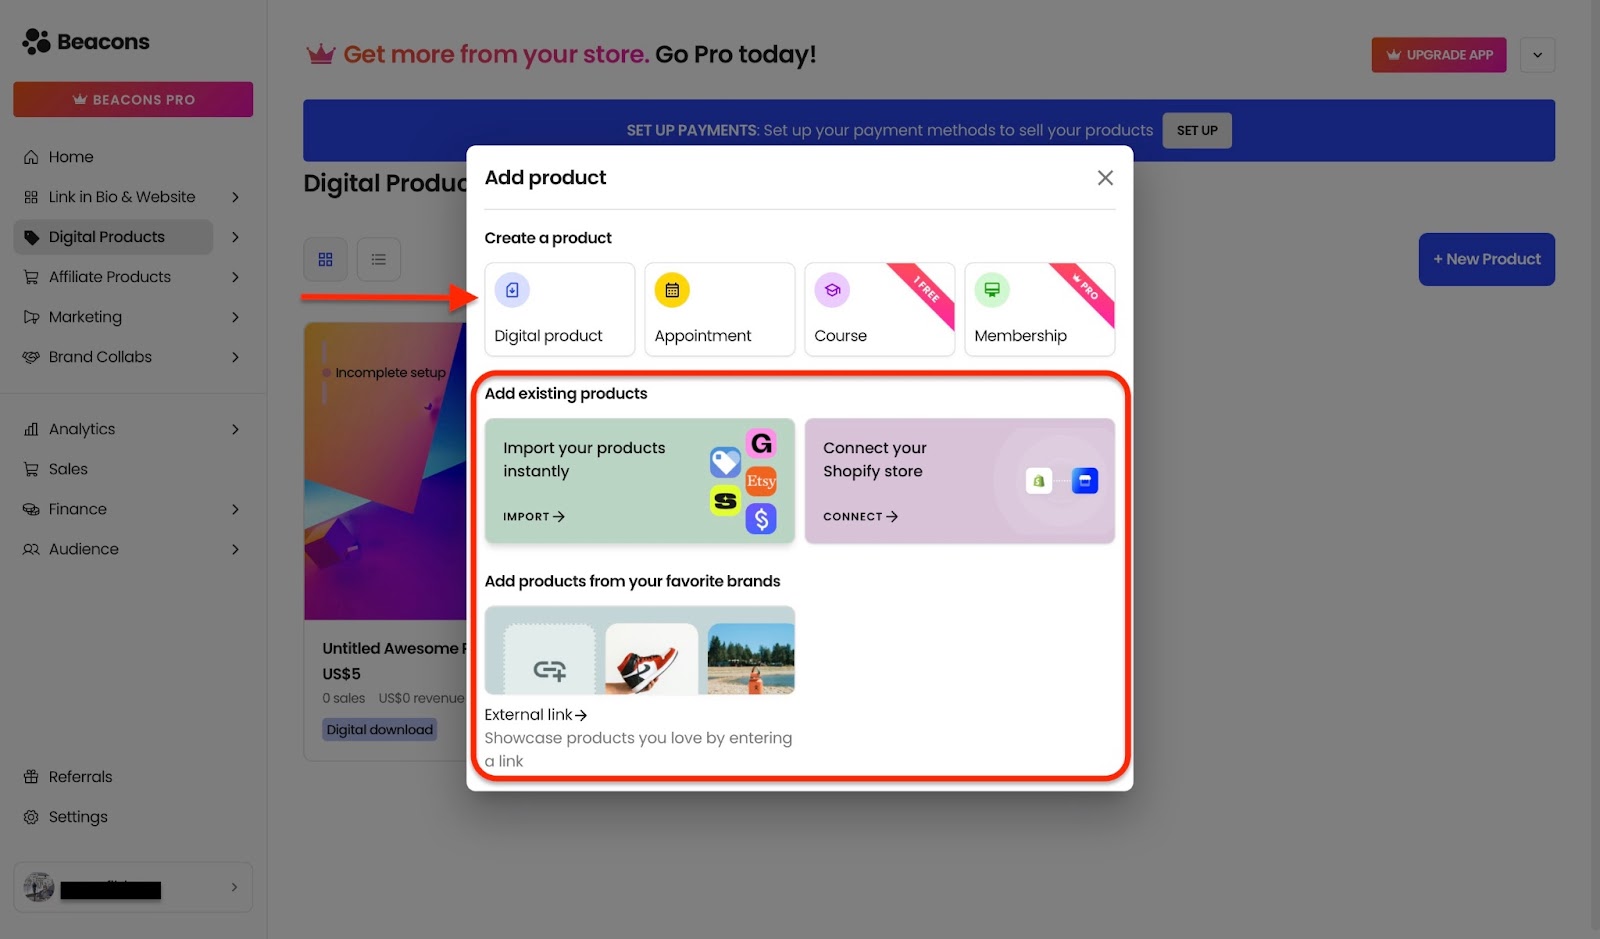
To start, click "Digital Products" on the sidebar of the homepage. Then, select “+ New Product” on the far right side of the window.
Click the digital product button in the pop-up window, or add existing products from other platforms.
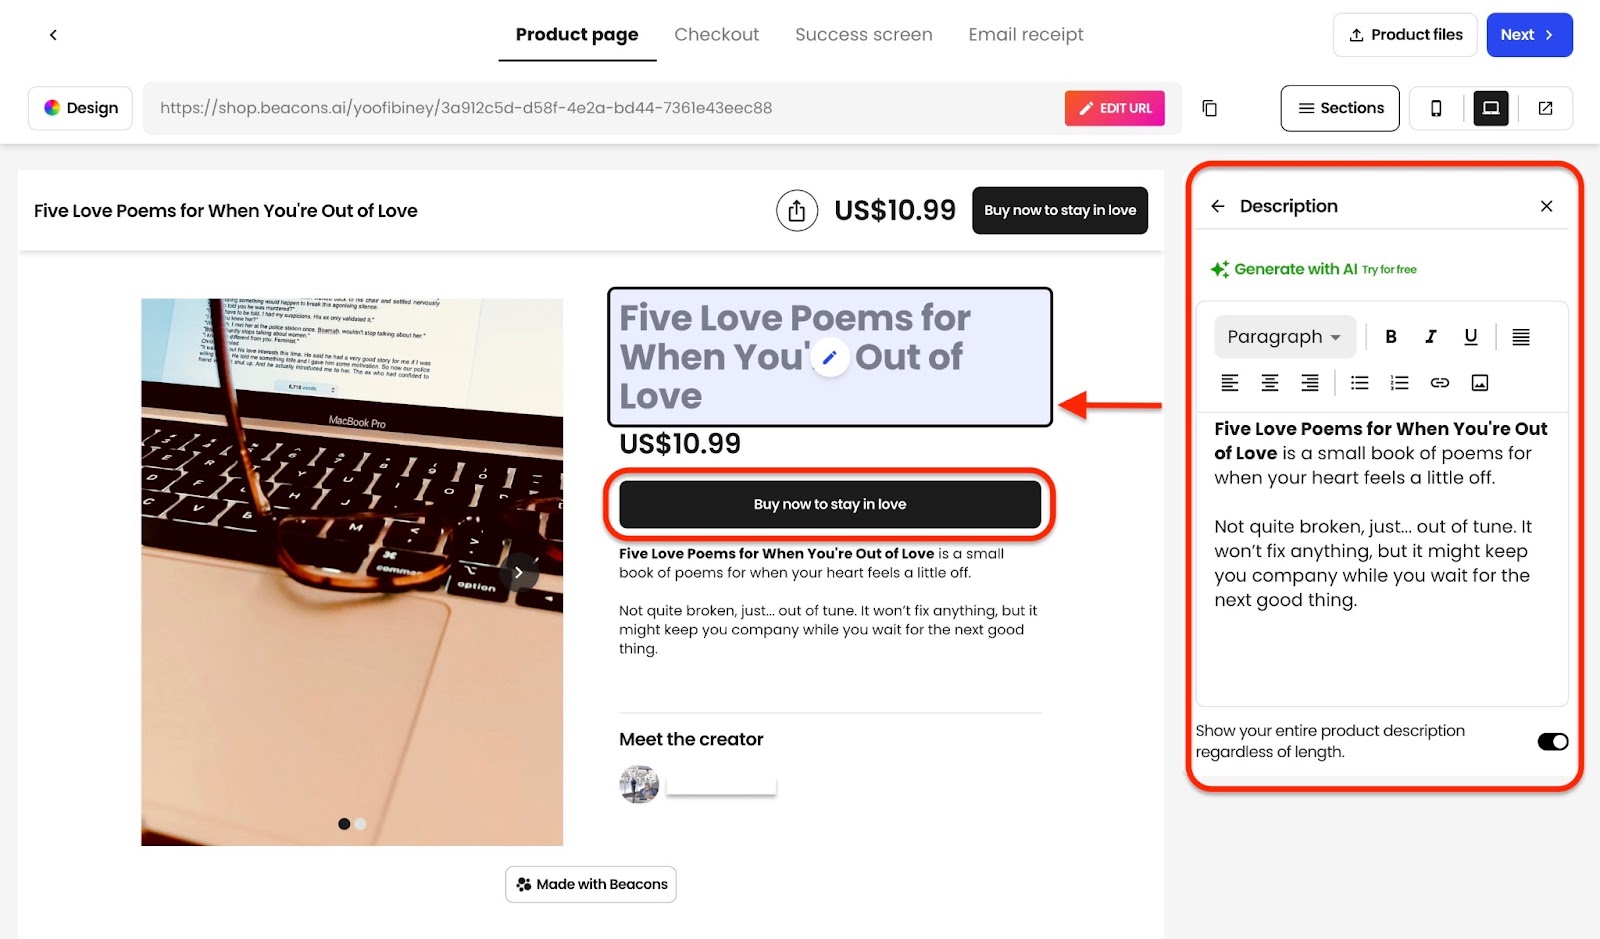
Next, add or edit the product title and description. Add a price tag, an image, and customize the call-to-action button (CTA) like I did: “Buy now to stay in love.”
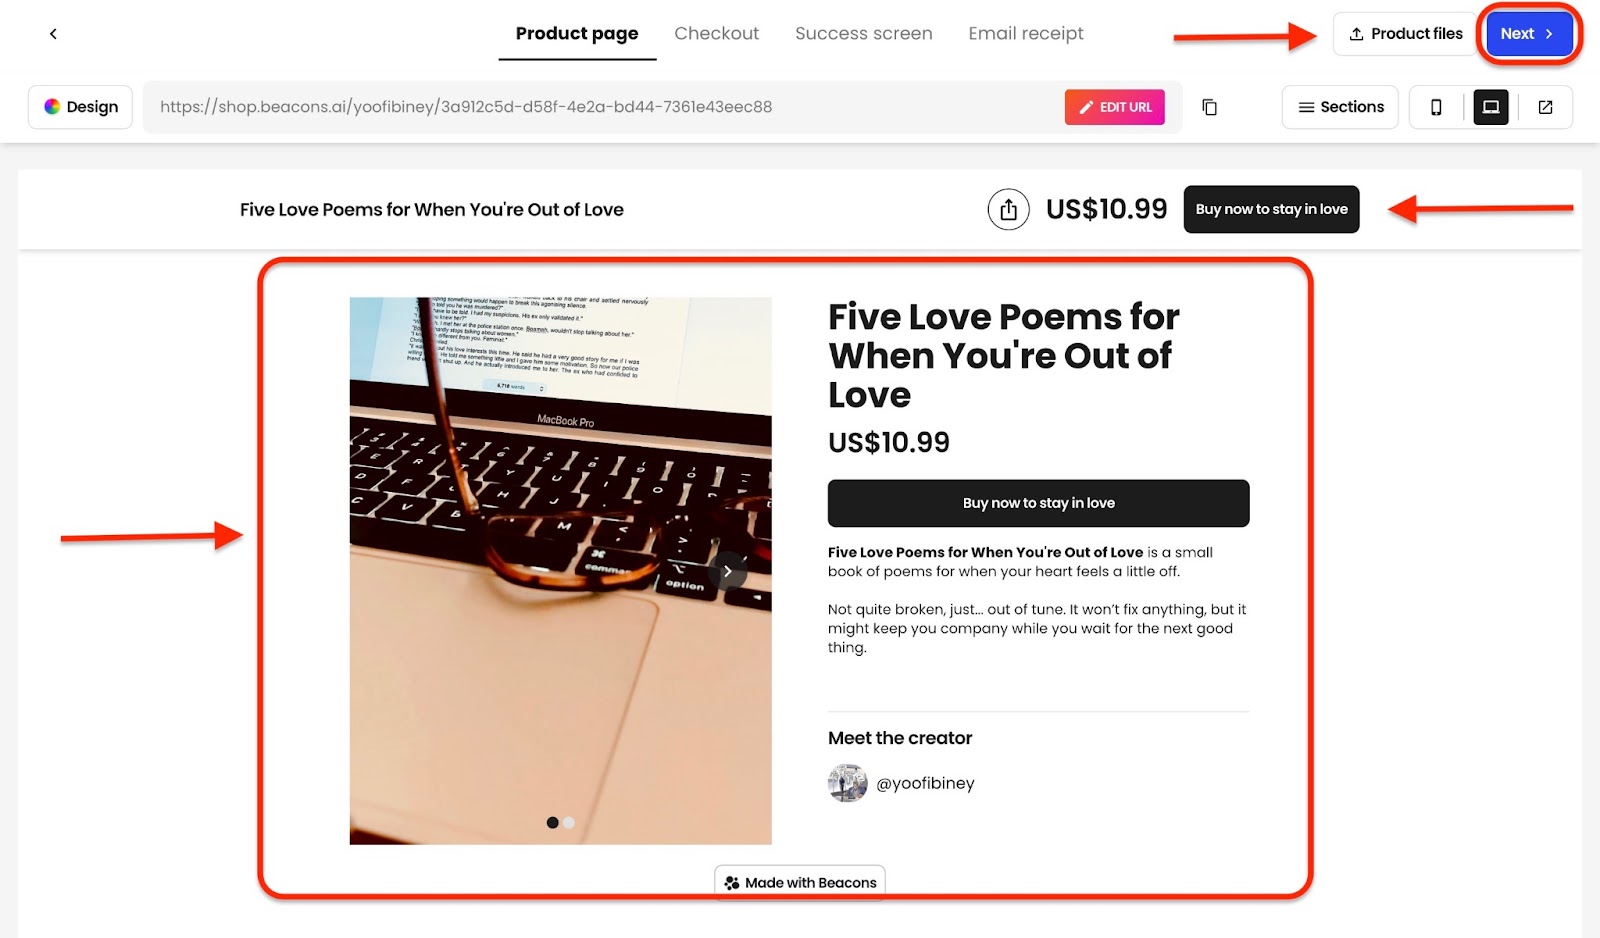
After that, click “Product files” at the top right corner of the window to upload up to six files. You can also add the file’s link and click “Next.”
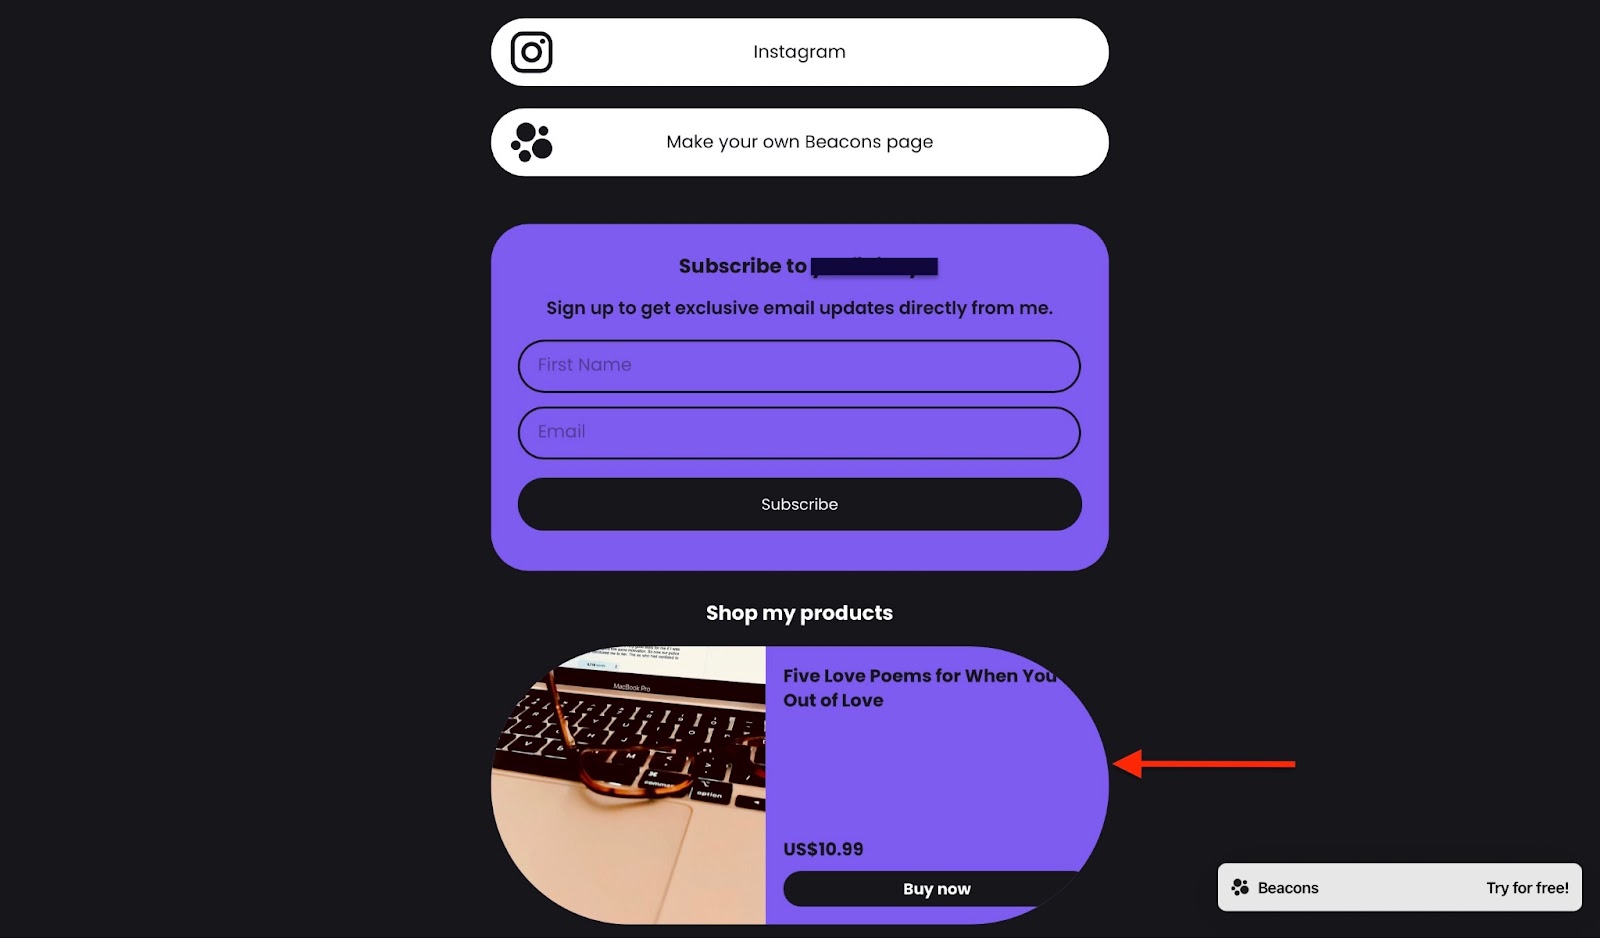
Finally, list the digital product by adding it to your link in bio and website, and it’ll be live.
2. Analytics
The analytics feature shows metrics of your socials, link in bio, website, digital and affiliate products, and media kit.
To check the general sales activity of your digital product, click “Analytics” and select “Digital Product.”
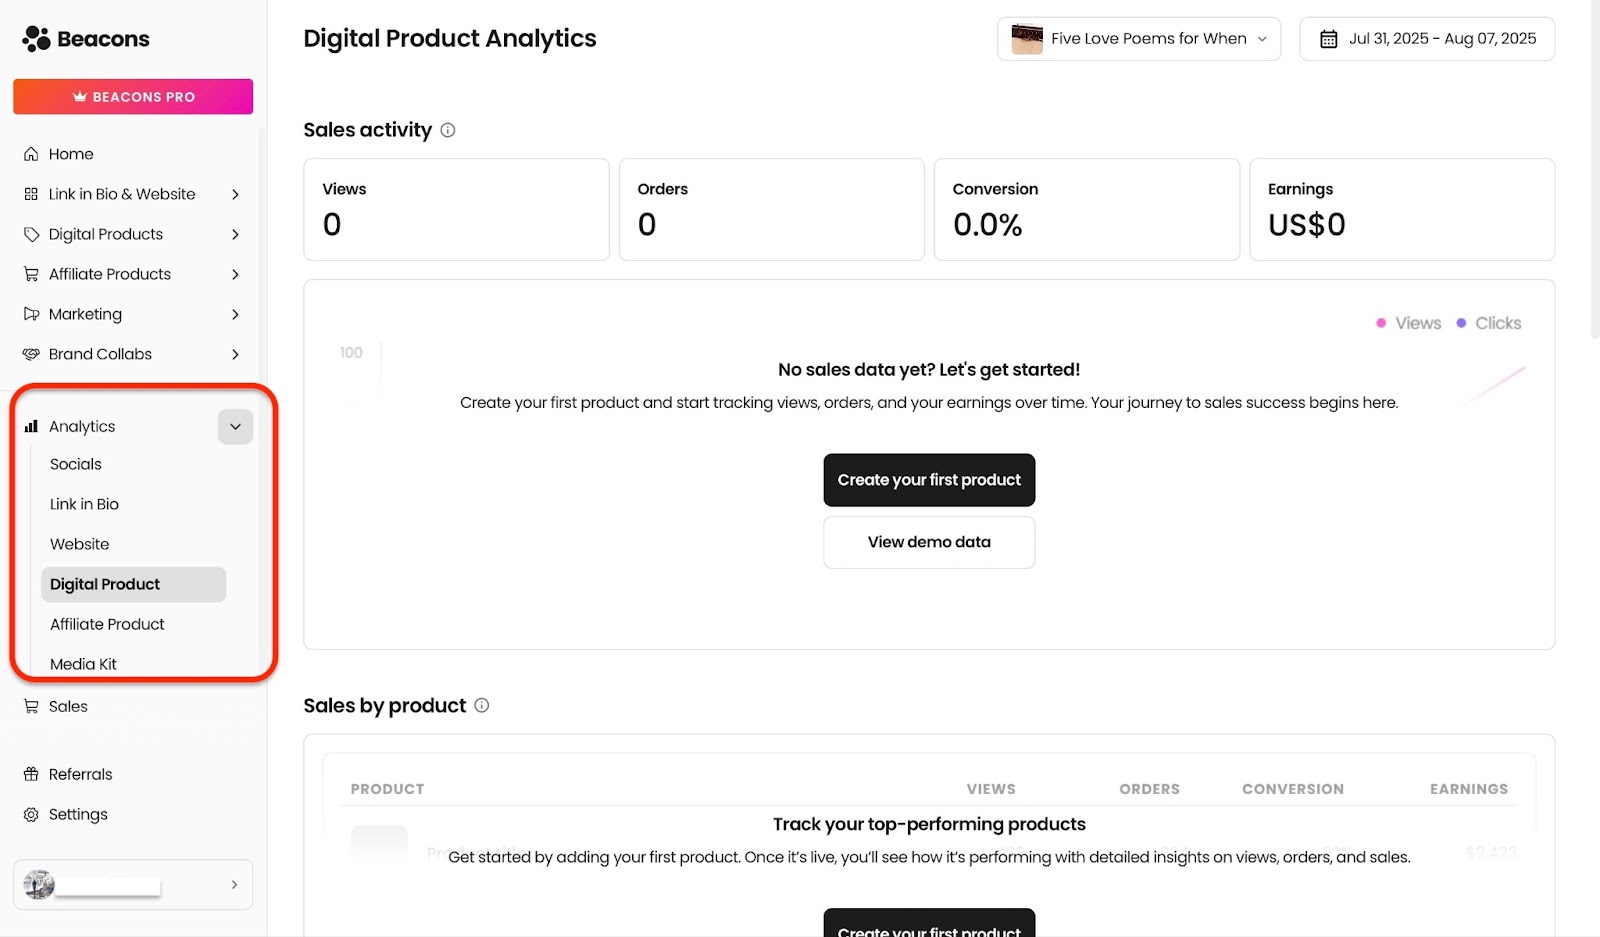
At the top of the window is the general sales activity. Click the first tab on the top right to select which product’s analytics you’d like to view.

Next, select the second tab to view analytics according to weekly, monthly, quarterly, and yearly timelines.
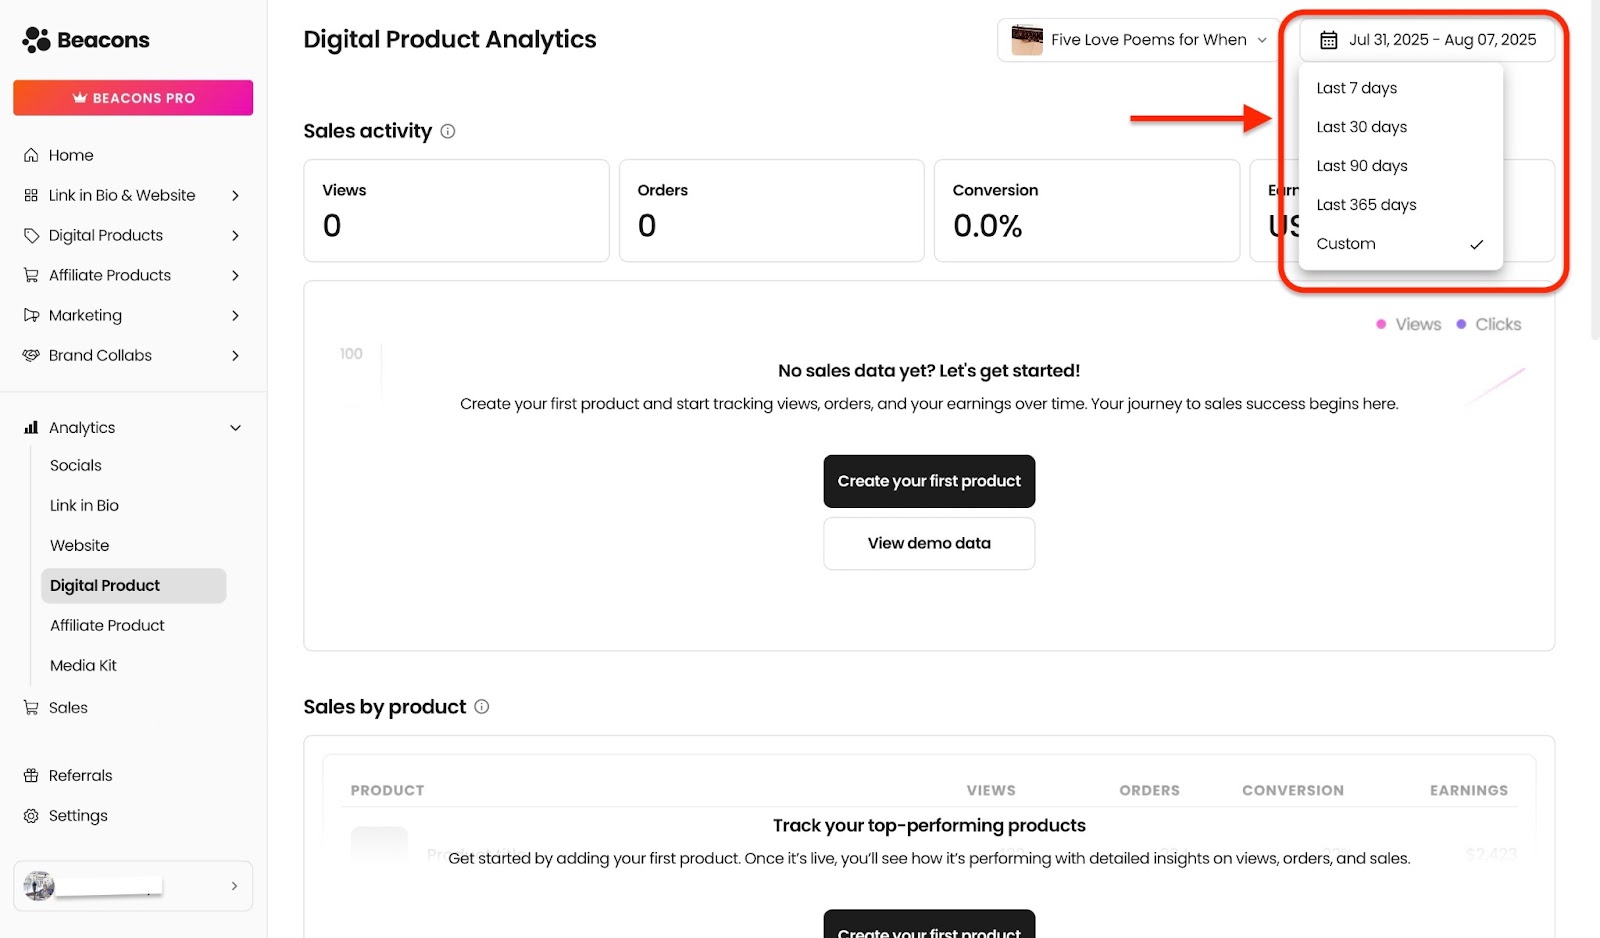
You can even select a custom timeline.
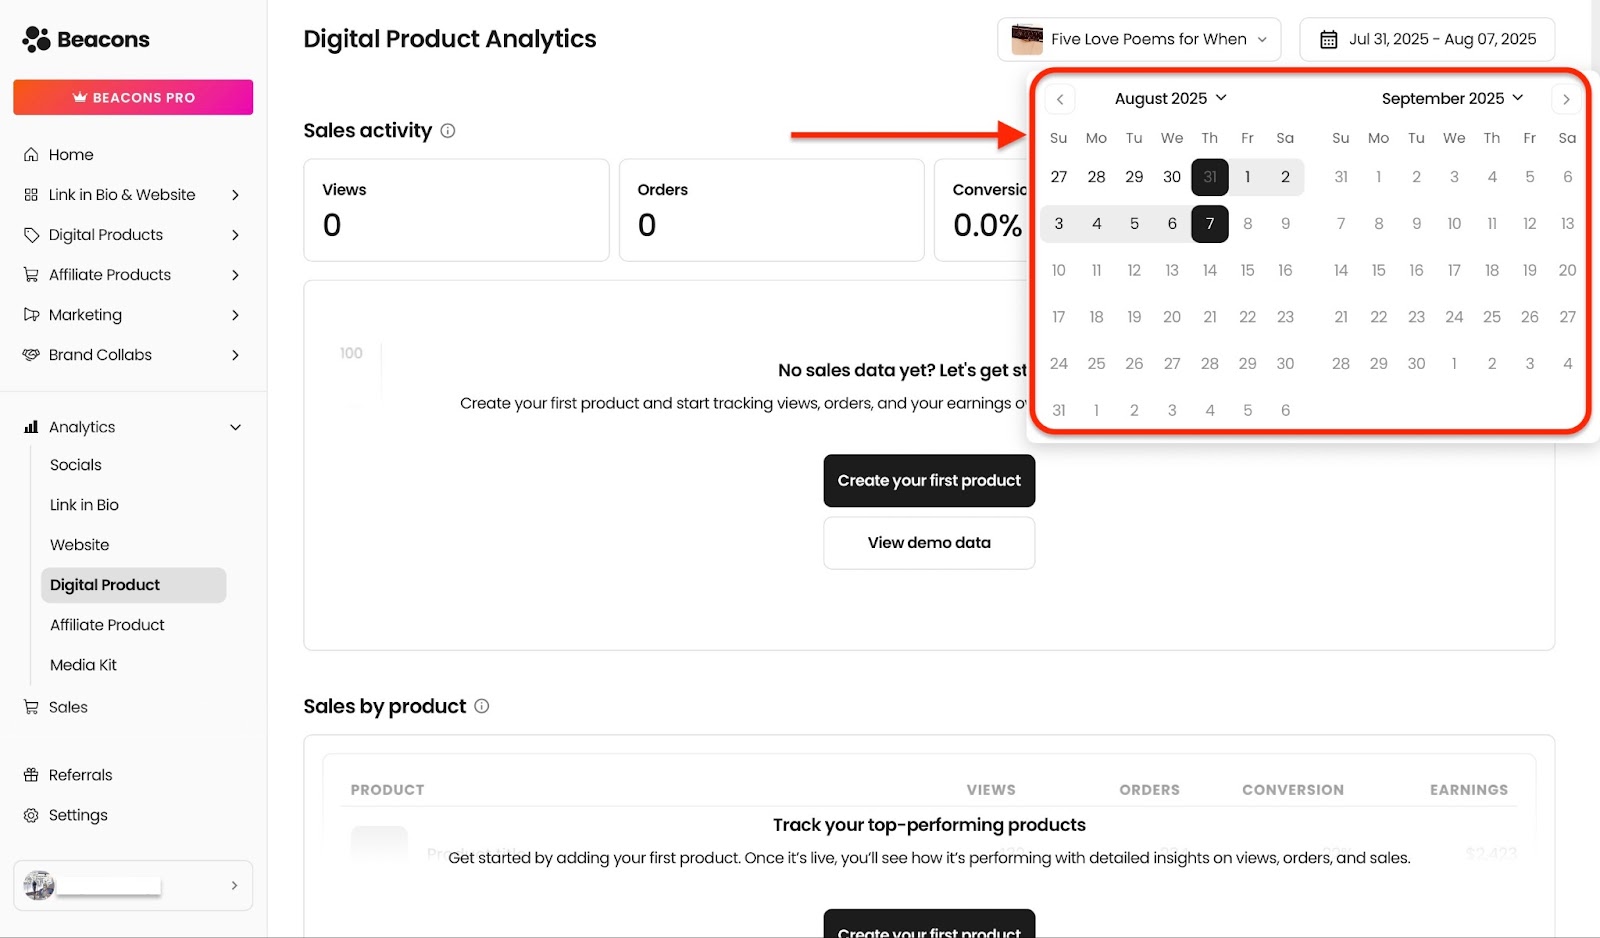
With these options, you decide which analytics are important to you.
[fs-toc-omit]Best For
- Brands and businesses that want to connect with their audience and monetize their content.
[fs-toc-omit]Pricing
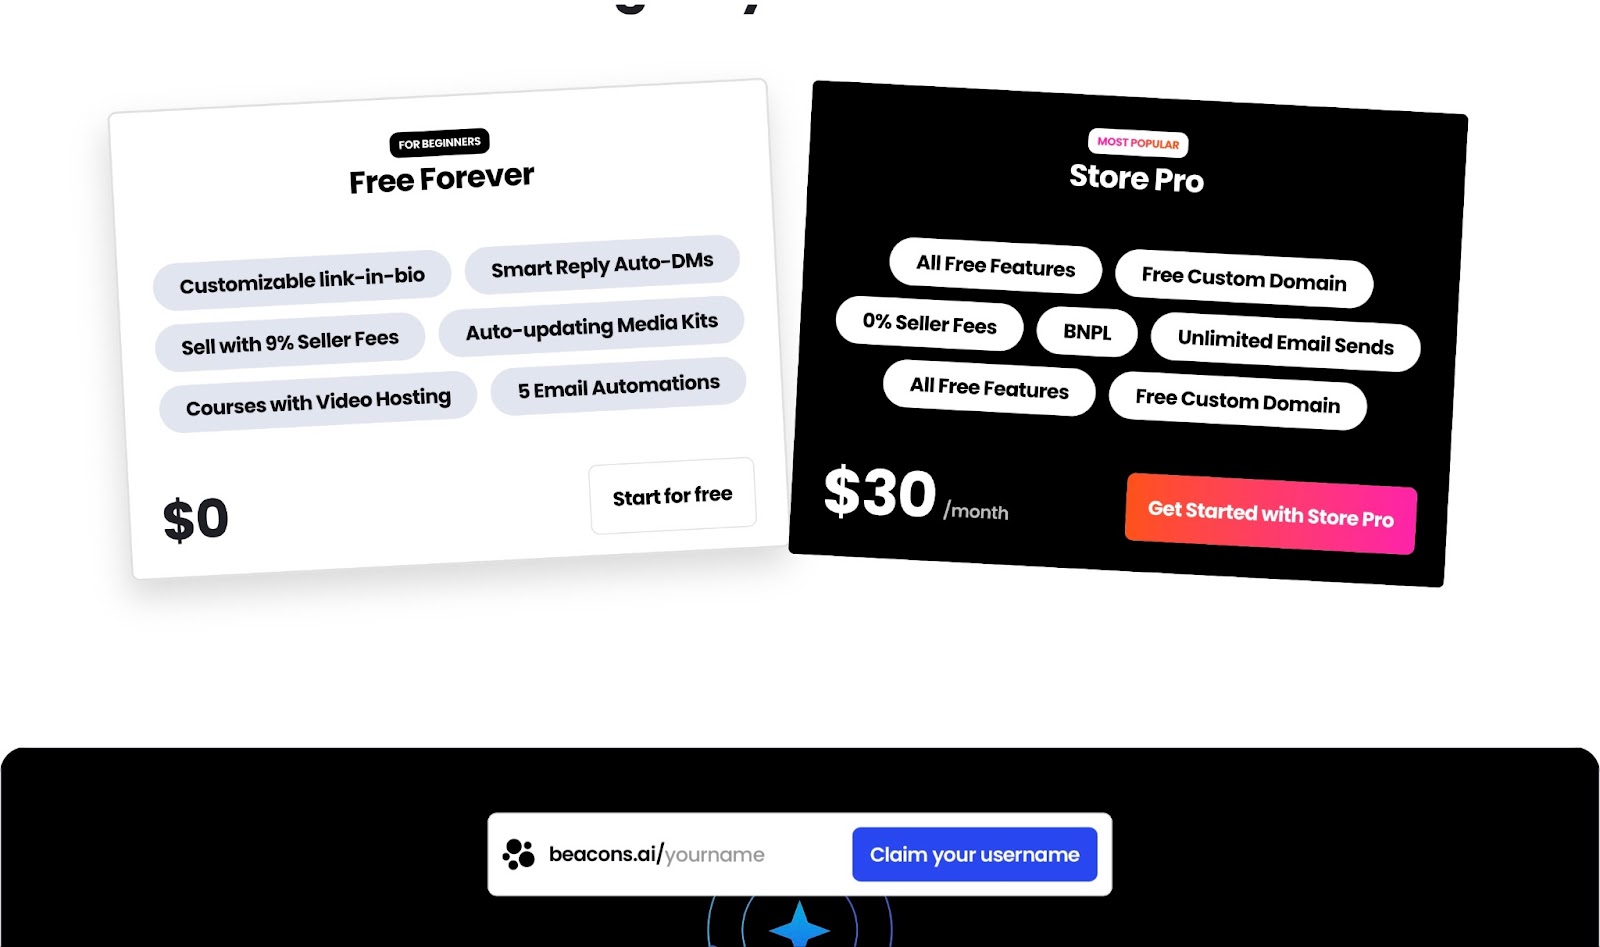
For Creators
- Free Forever: $0
- Store Pro: $30/month
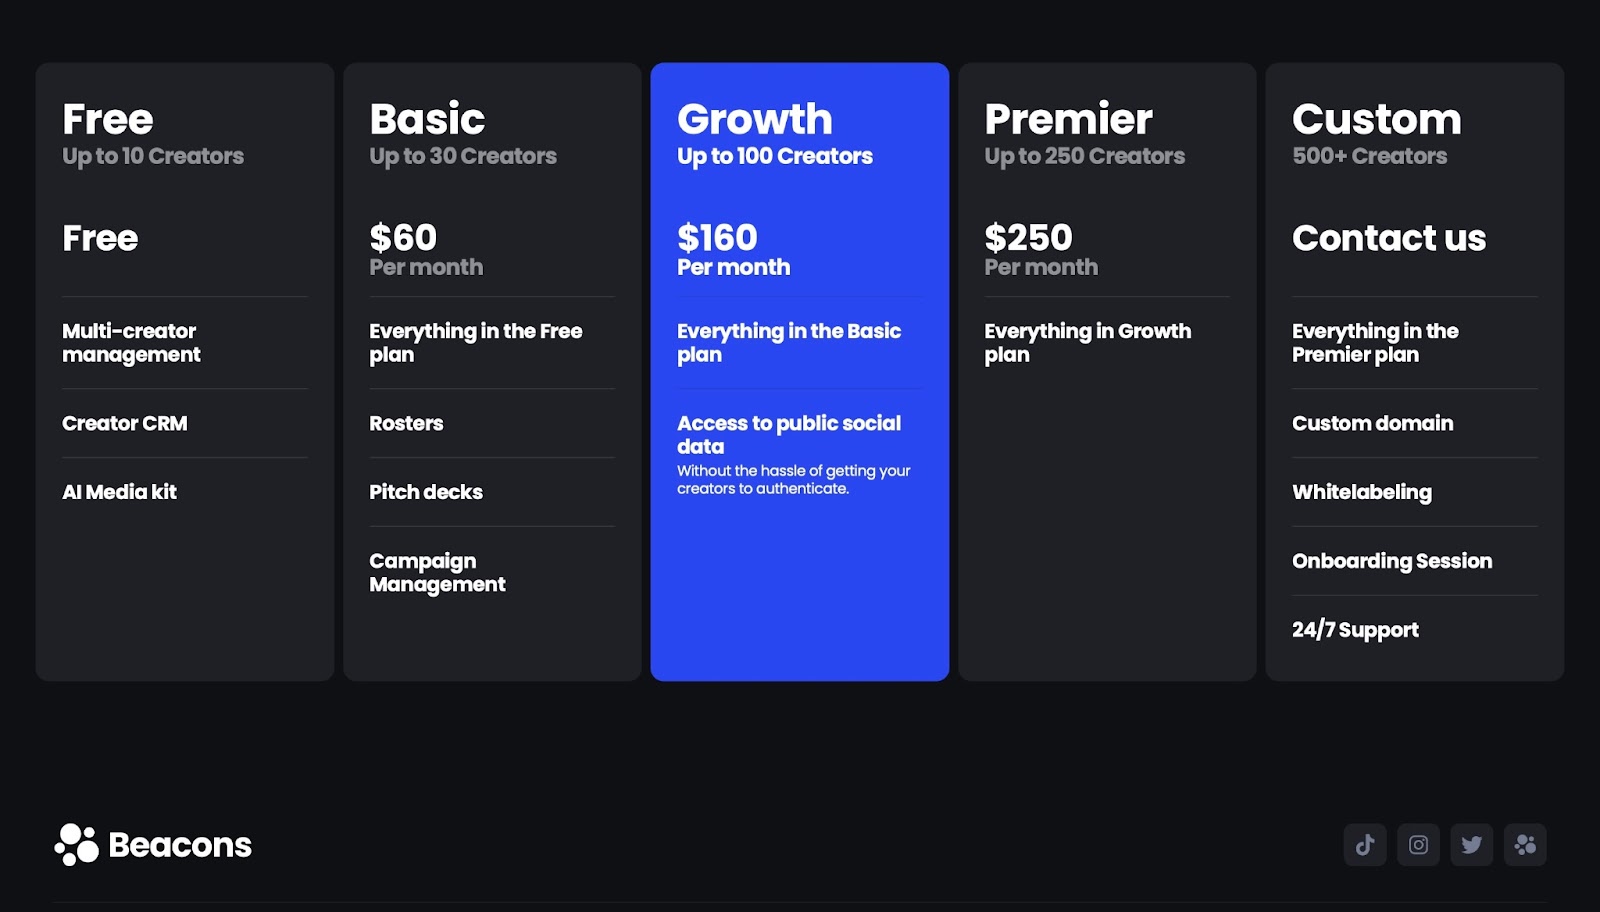
For Managers
- Free: $0
- Basic: $60/month
- Growth: $160/month
- Premier: $250/month
- Custom: Contact for pricing
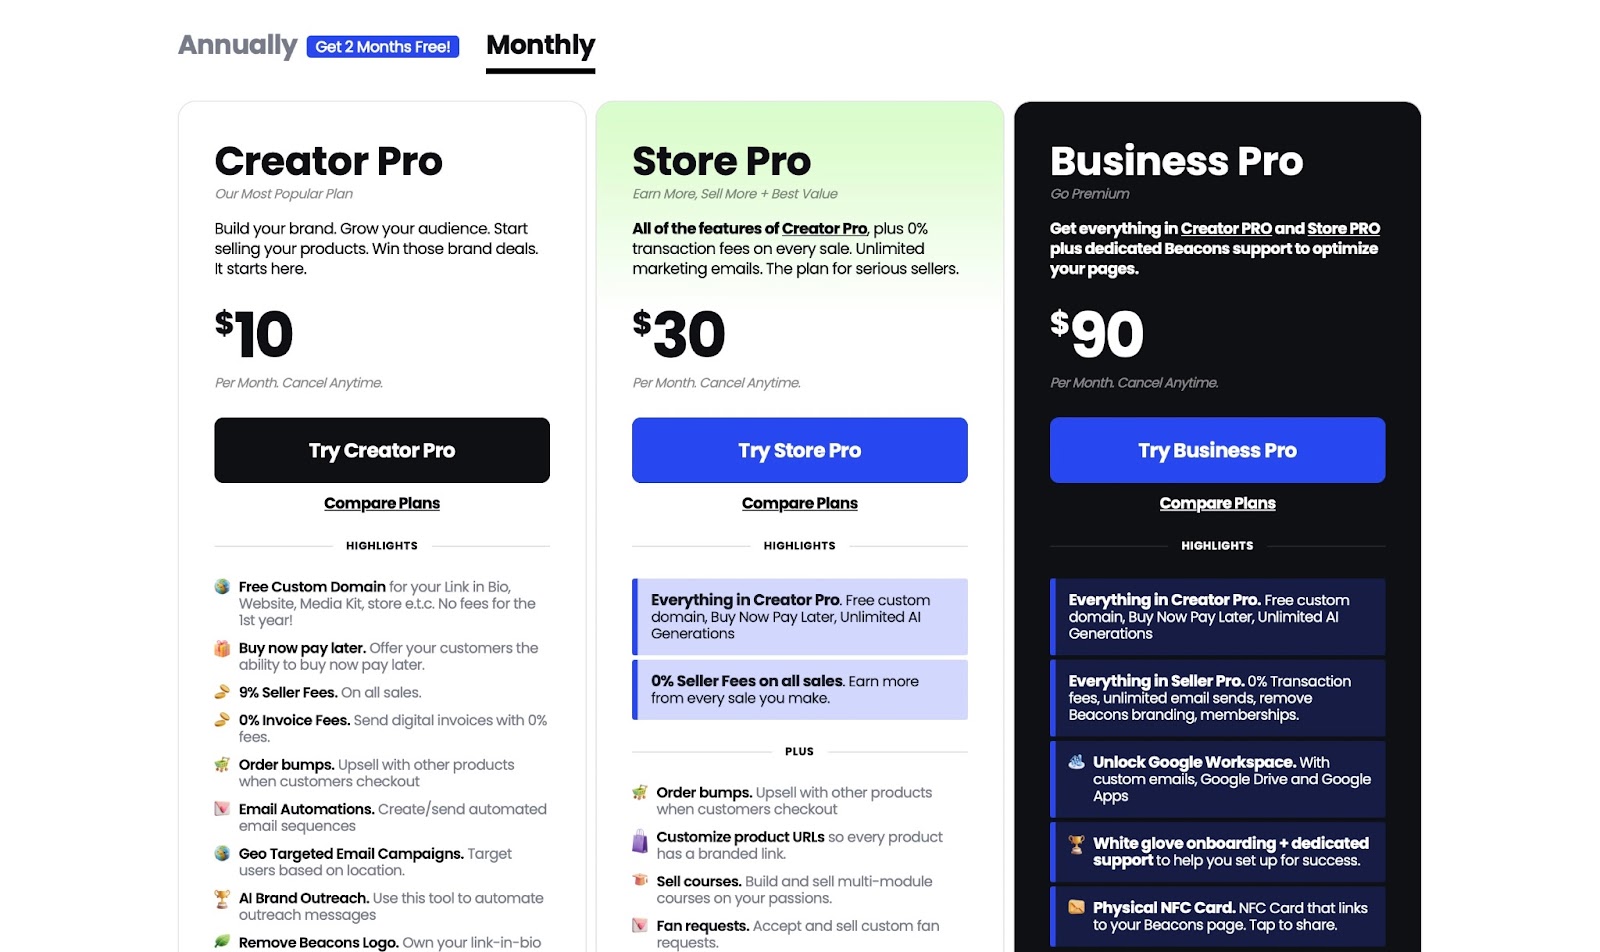
For Brands
- Creator Pro: $10/month
- Store Pro: $30/month
- Business Pro: $90/month
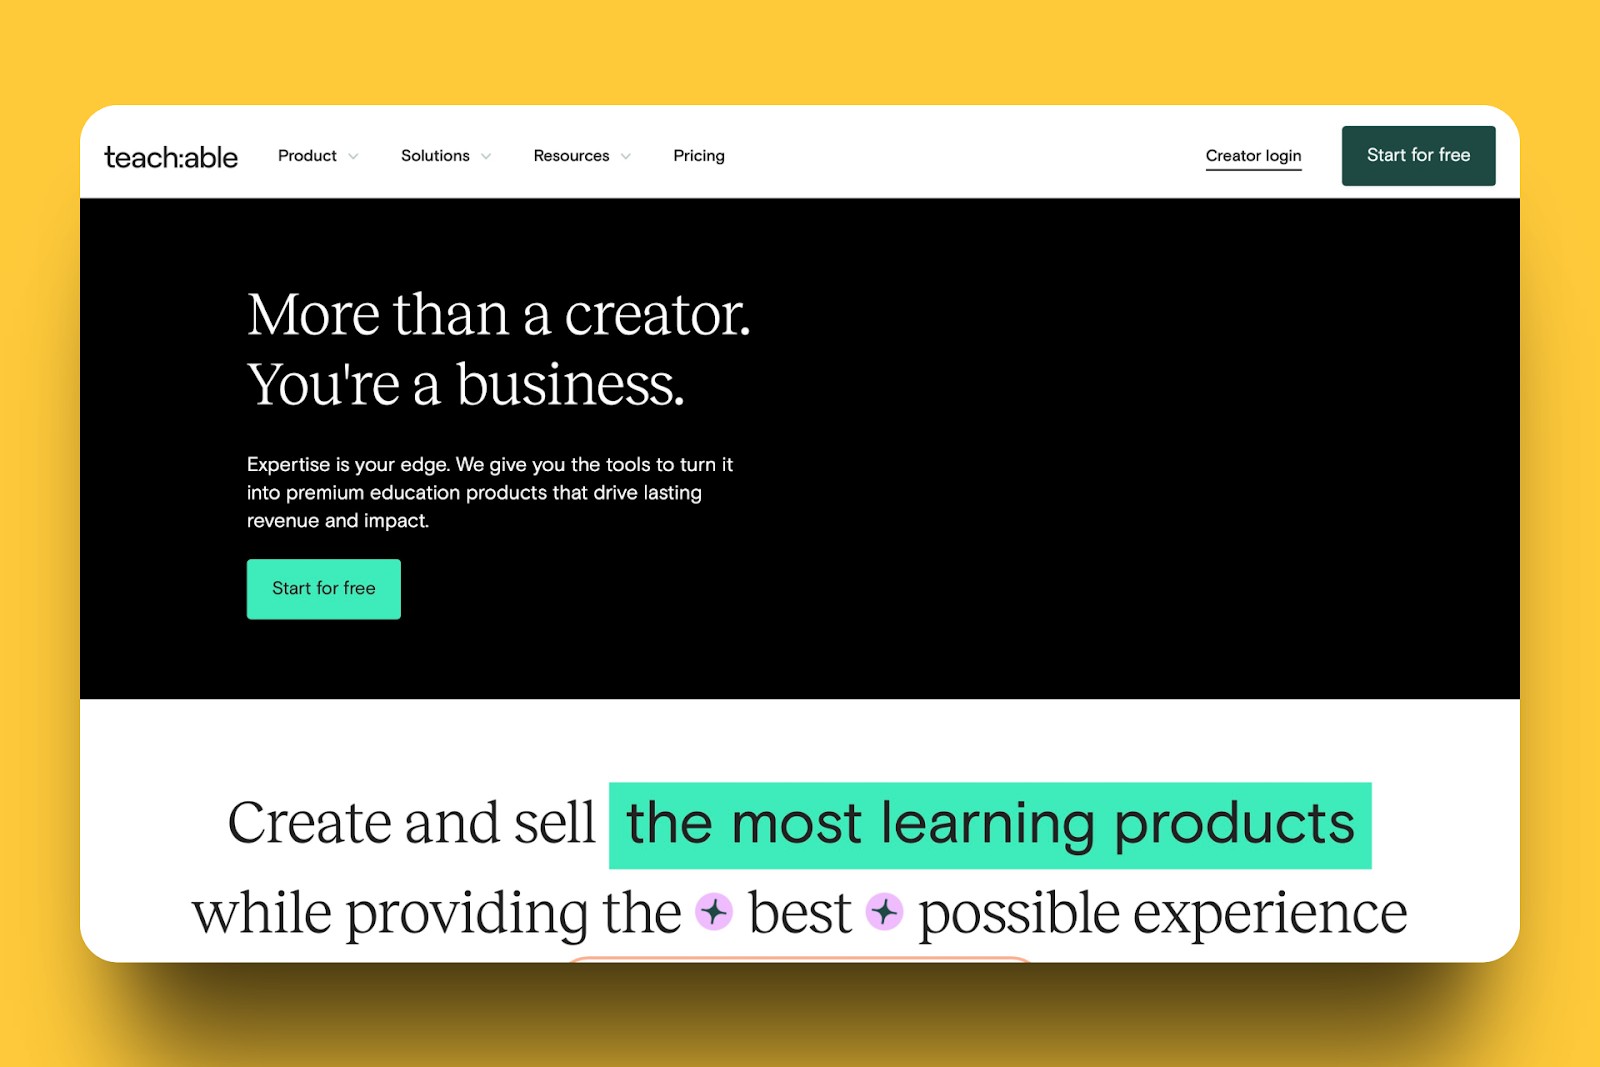
7. Teachable
Teachable definitely has a place among the top platforms to sell digital products.
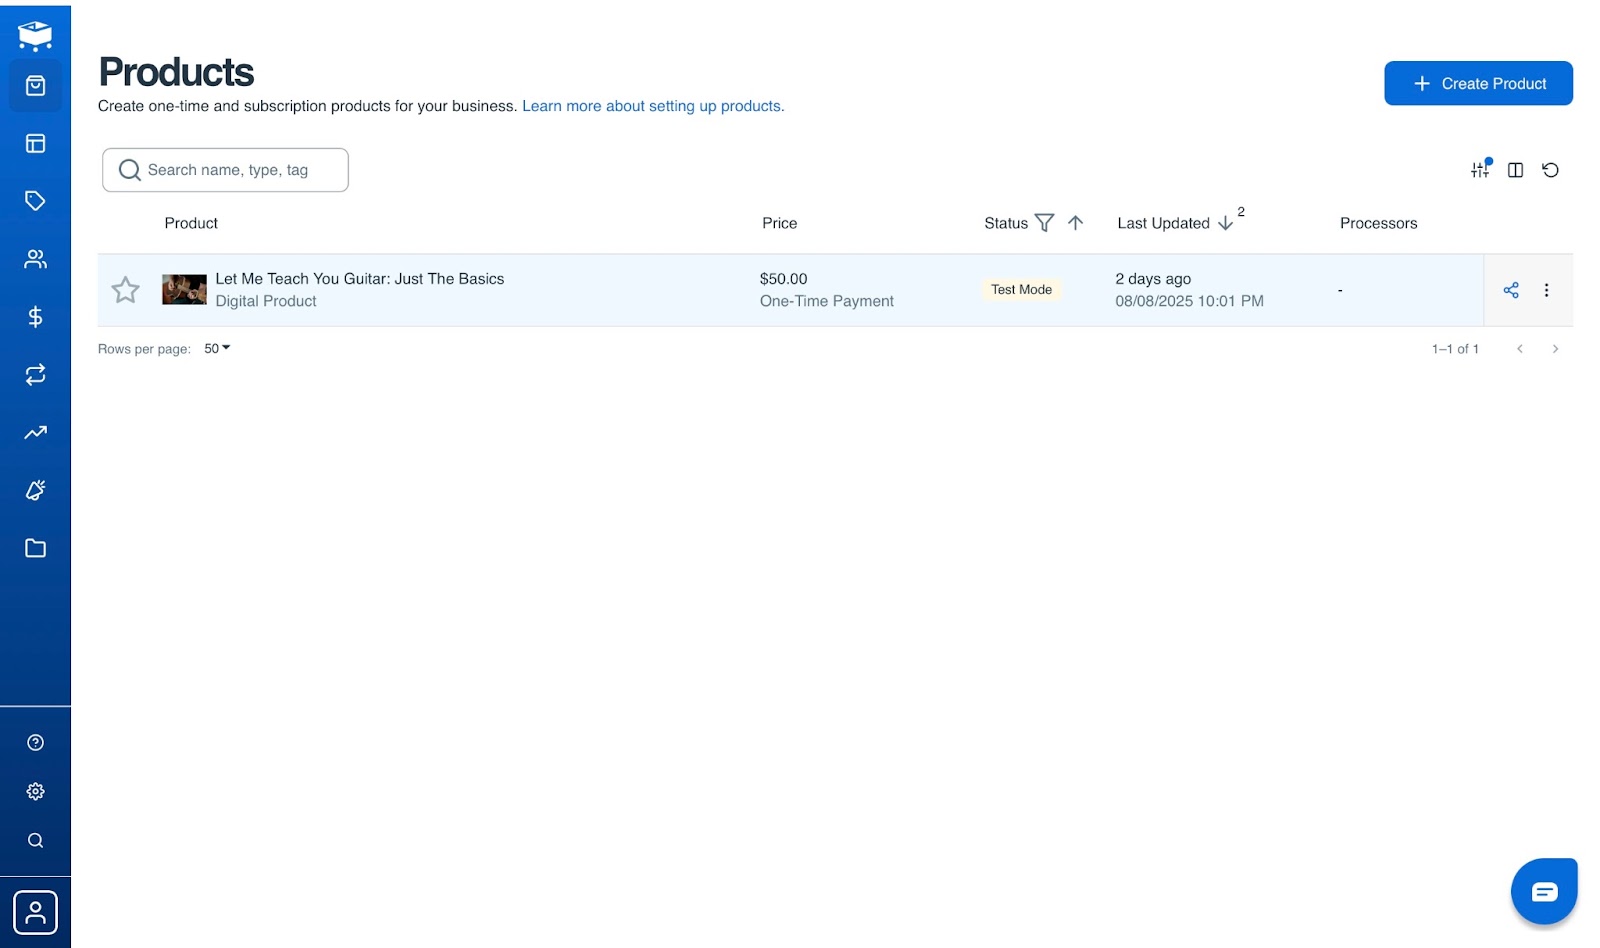
You can use the digital downloads feature on Teachable to add and sell your e-book. There’s also the option to create a downloadable file, add a URL link, and include a customized call-to-action (CTA) button.
Additionally, you can read the number of sales enrollments right from the display page. This feature will also allow you to change my product status from published to unpublished easily from the action column.

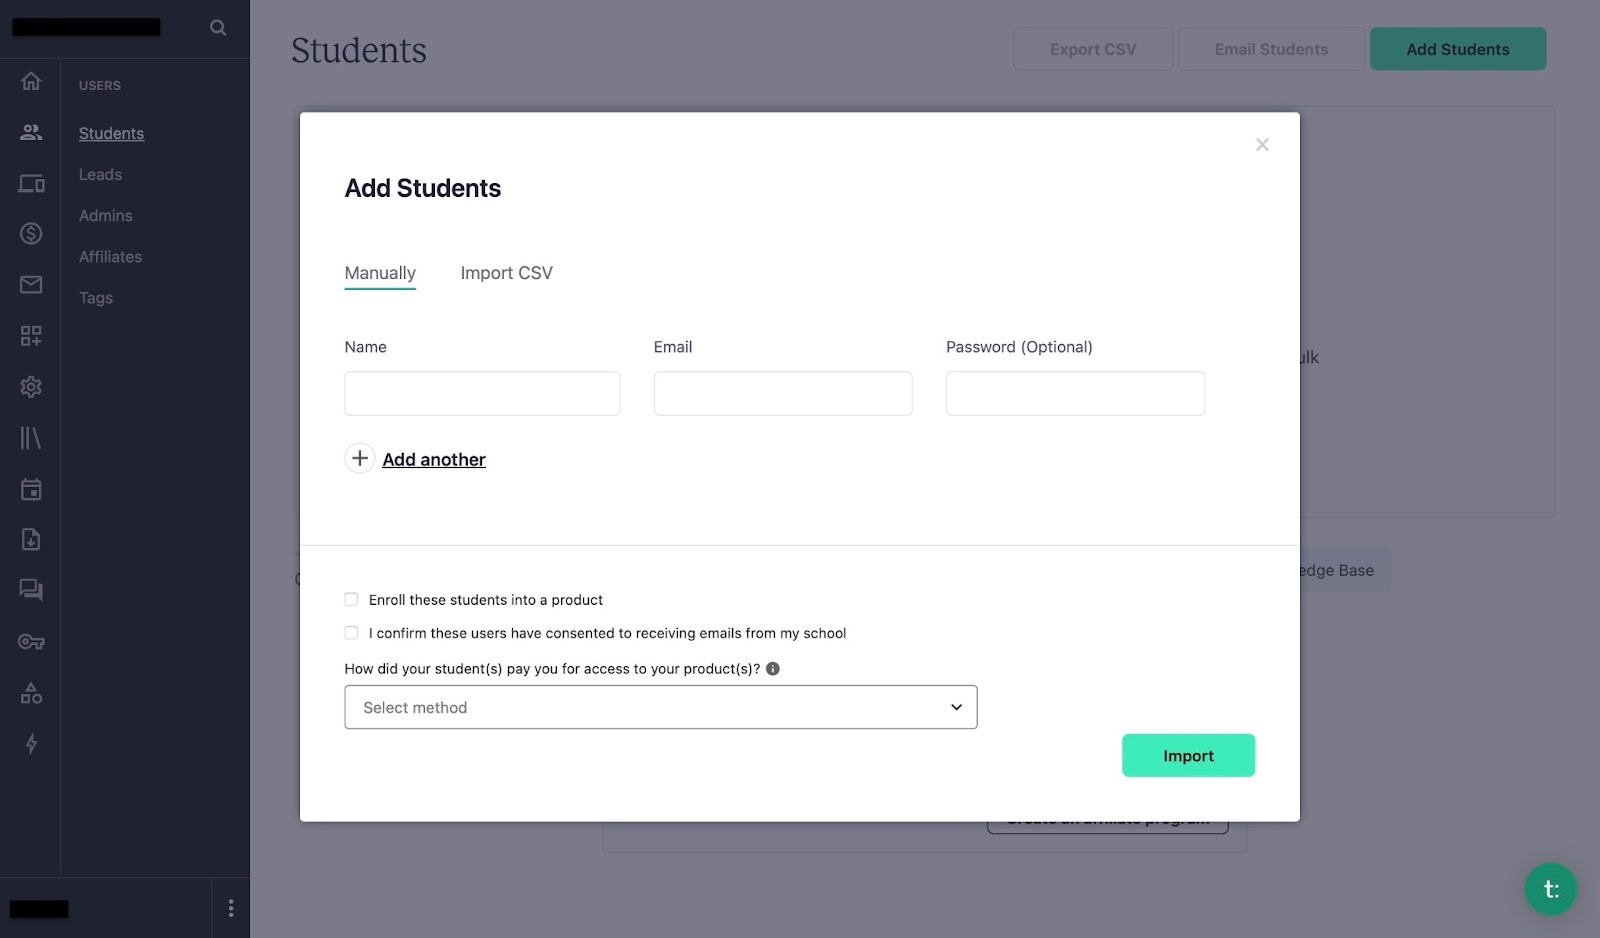
If you want to see the names and email addresses of your students, the users feature on Teachable allows you to view this information. You can import student details manually or import a CSV.
Also, you can add up to 1,000 students, and it’s possible to export and save your CSV natively.
Not only can you know all your students’ names and emails, but it’s also possible to build a community for them with the community feature on Teachable. This will be a space where your students can interact with each other.
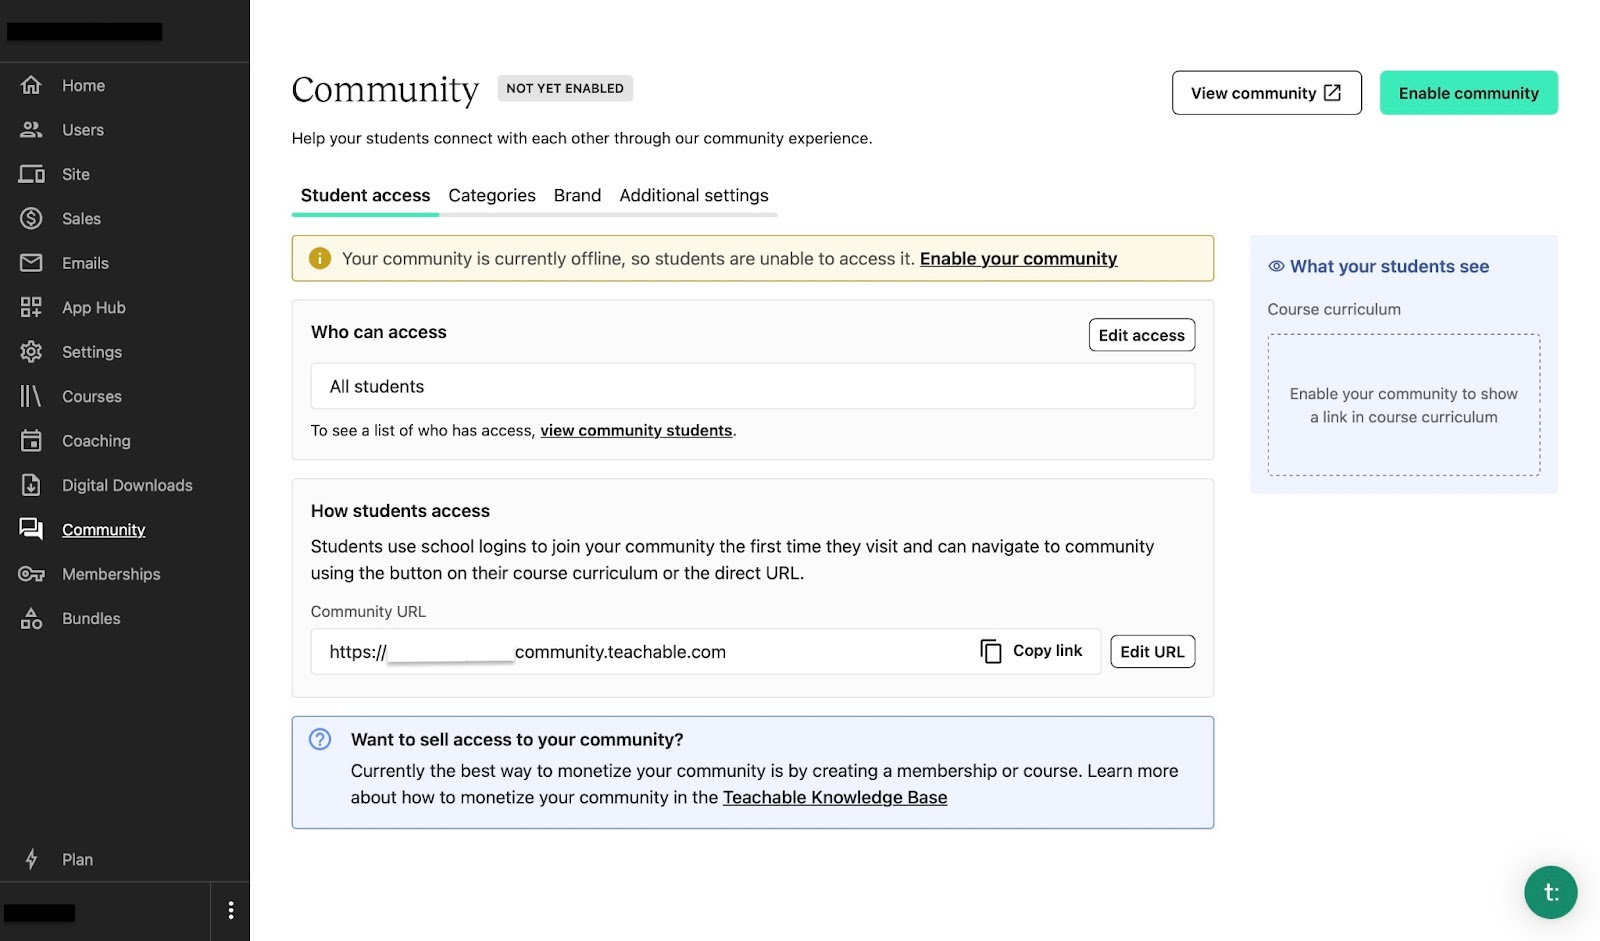
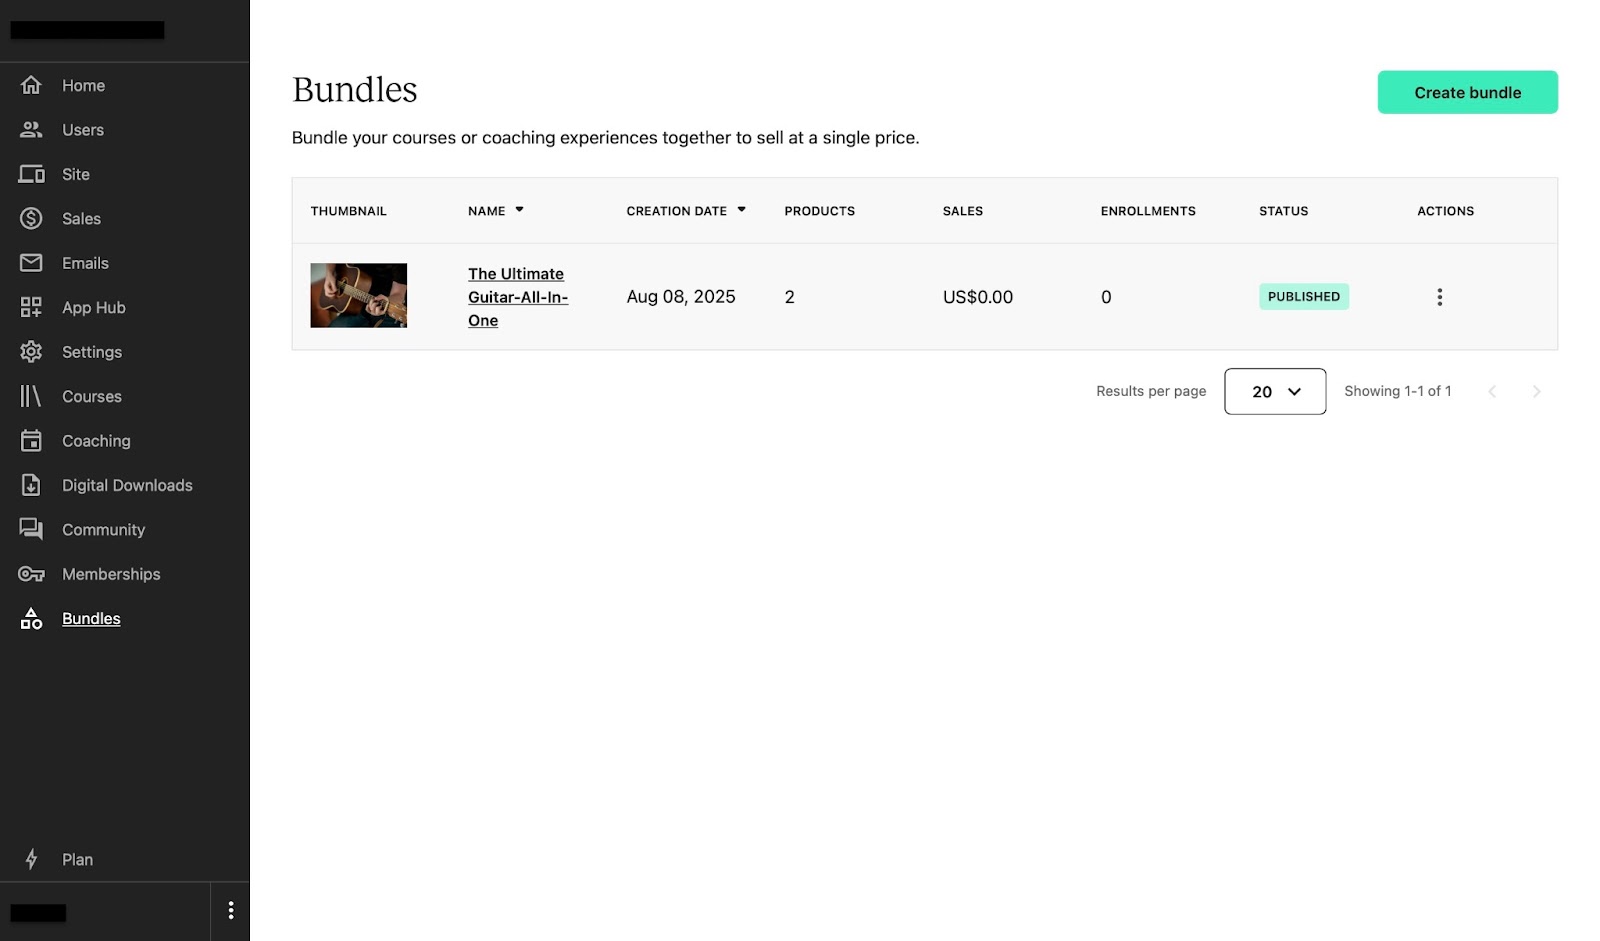
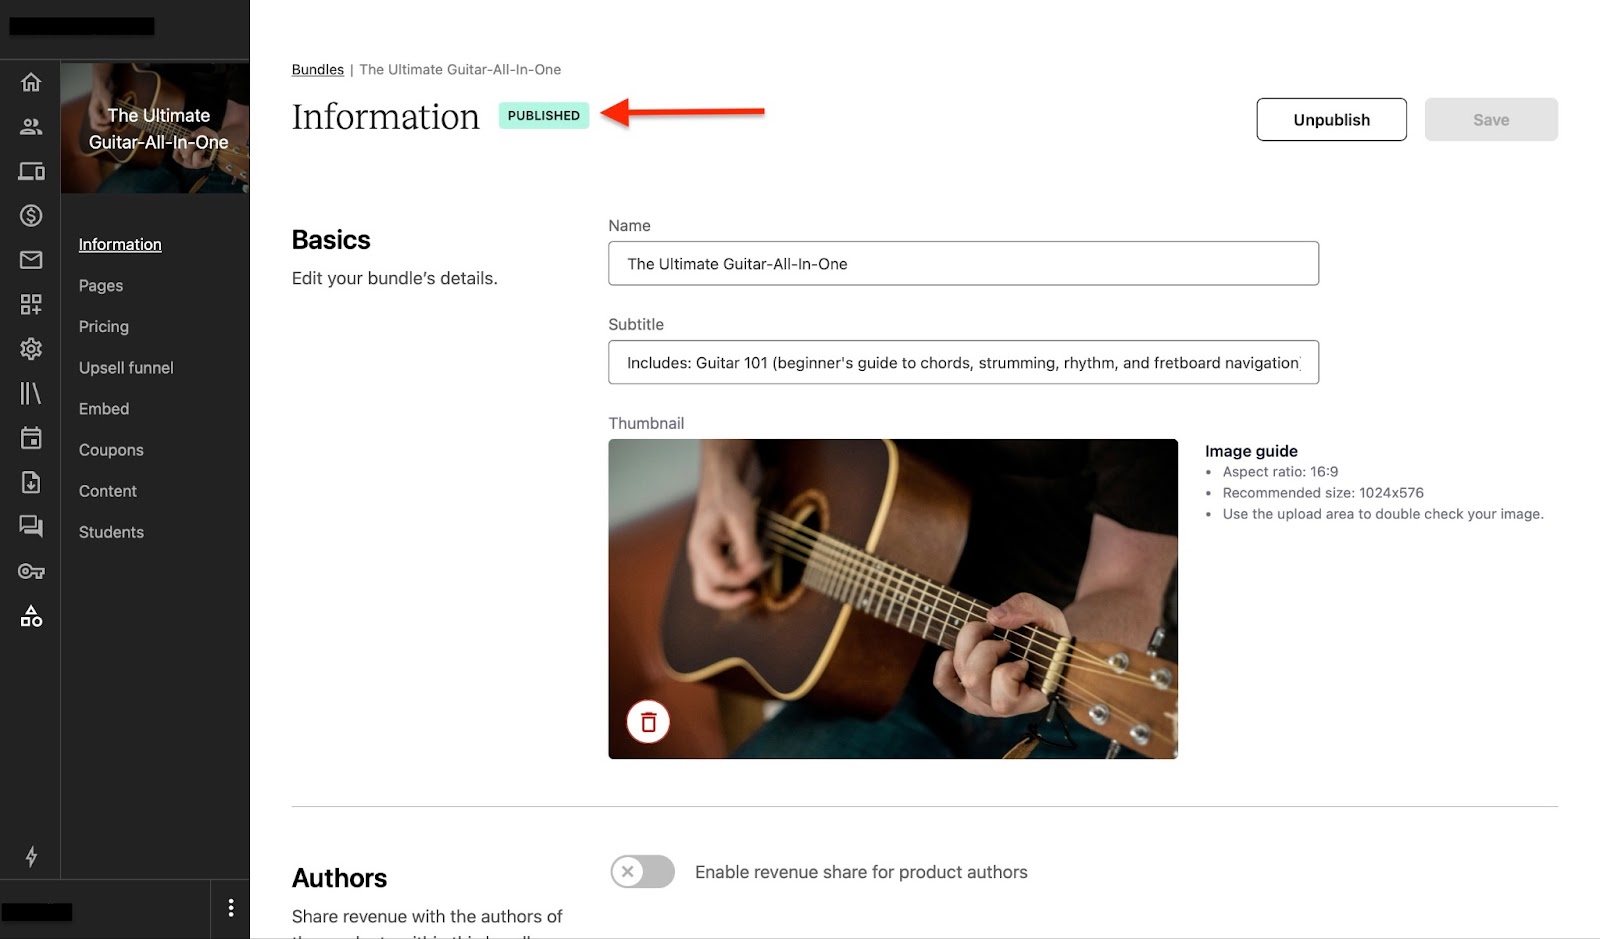
Whenever you want to combine two or more courses to sell, you can use the bundles feature. It allows you to compile multiple projects (digital products) into a single work for a fee.
Moreover, you can check the bundle’s sales and enrollment, and if you want to make changes and edits, simply click on the course.
Let me guide you through how you can get started on Teachable. Let’s begin by creating a digital product.
First, click the “+” symbol beside “Products” on the sidebar. Next, choose a product. Select “Course,” “Coaching,” or “Digital Download” depending on what you’d like to offer.
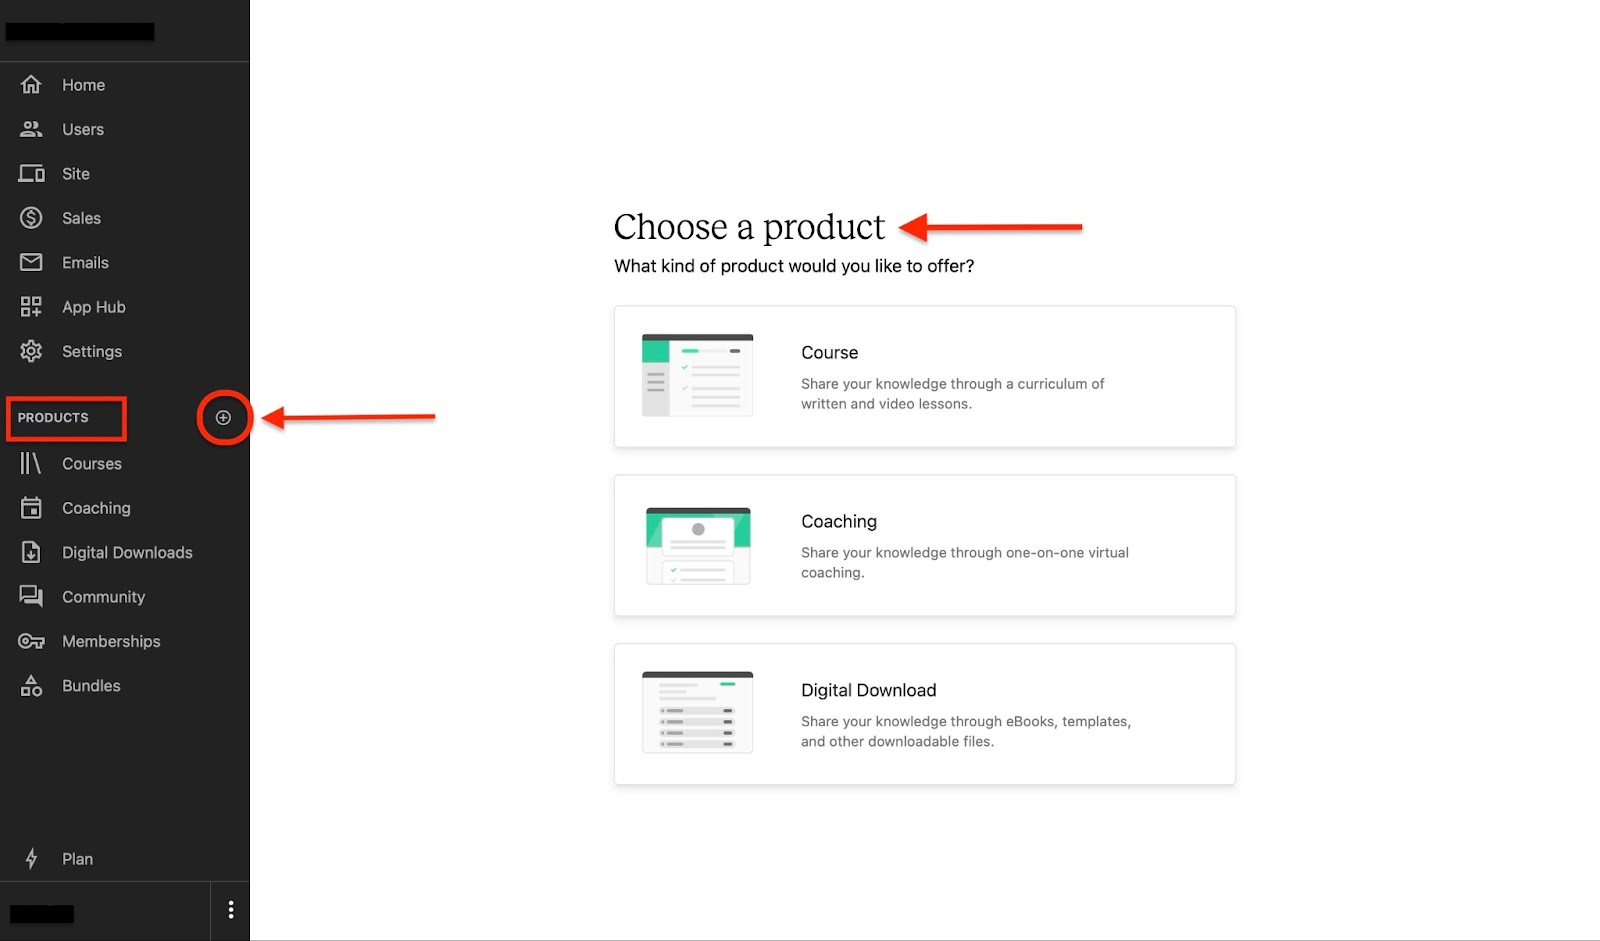
Let’s choose “Course” for this demonstration. Next, fill in the sections for “Course title” and add a description. Then, click “Continue.”

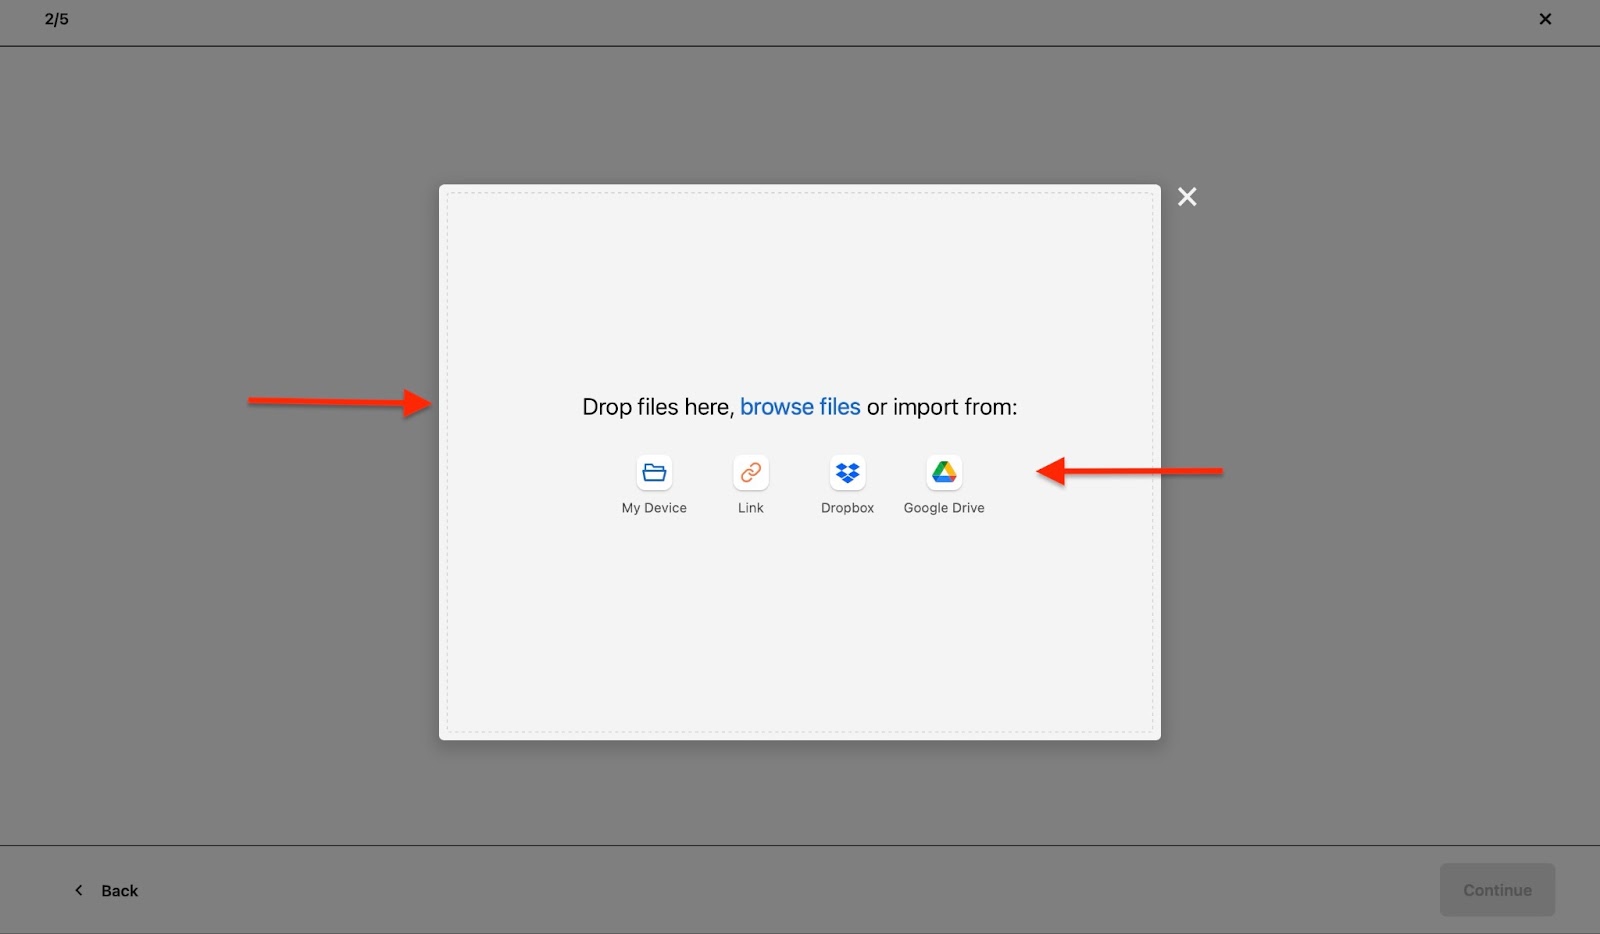
On the next page, upload an image by clicking the first box in the window.
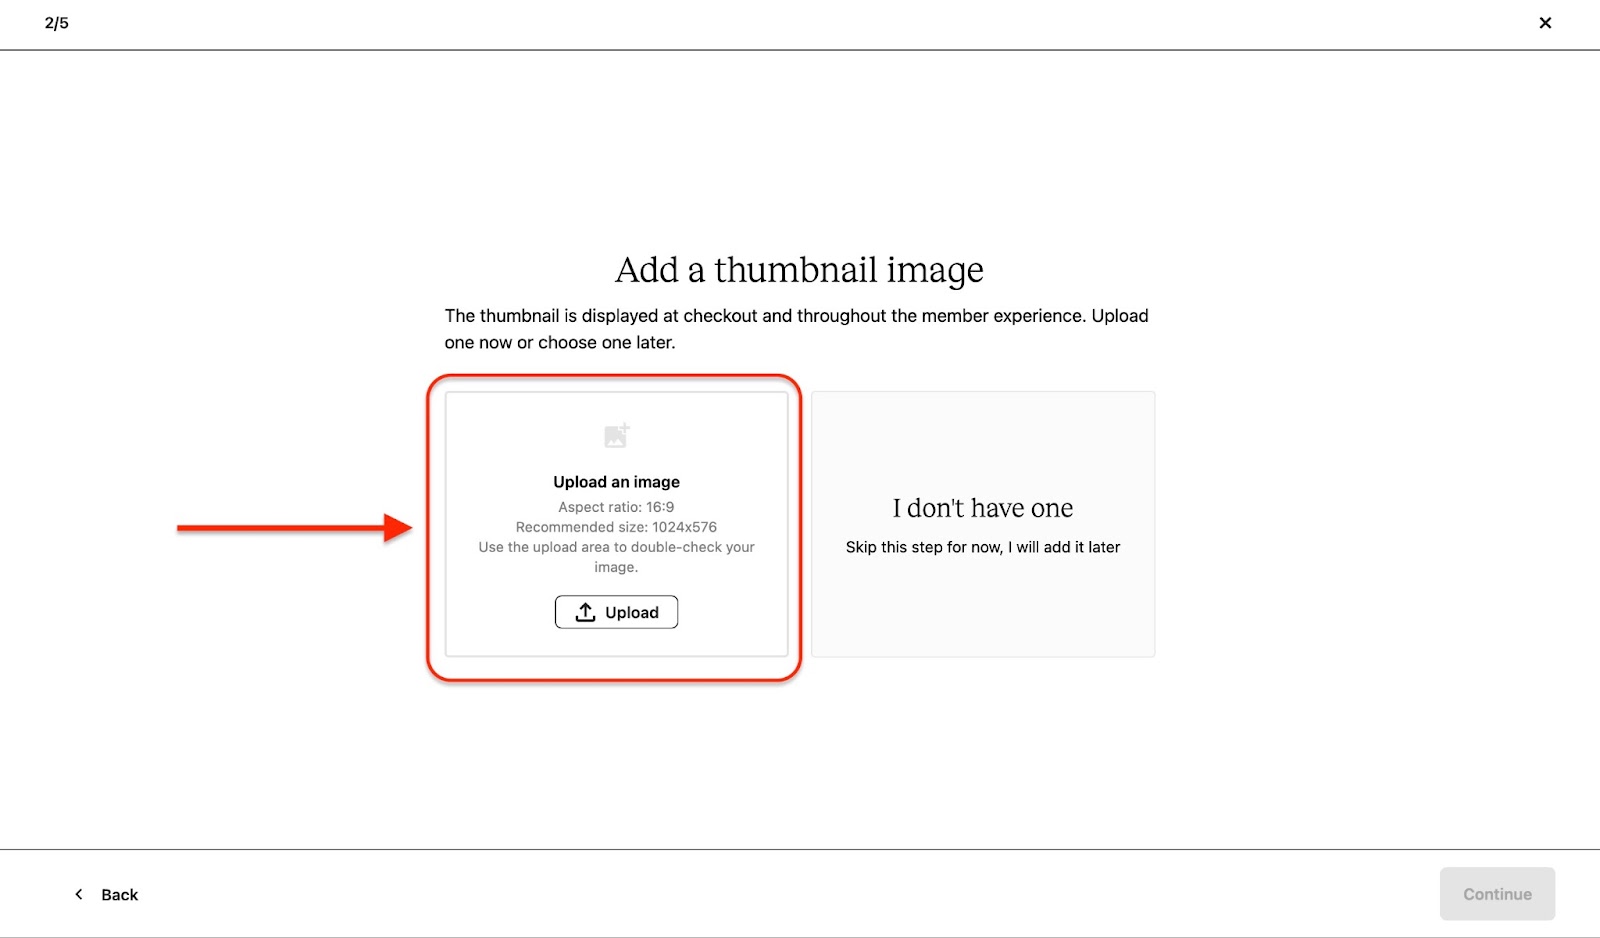
Drag and drop your image in the pop-up box. You can also browse and upload a photo from your device, or import it using a link, Dropbox, or Google Drive.
The image should have an aspect ratio of 16:9 with a size of 1024x576. If you can’t set these recommendations natively on your device, use the upload area to double-check your image.
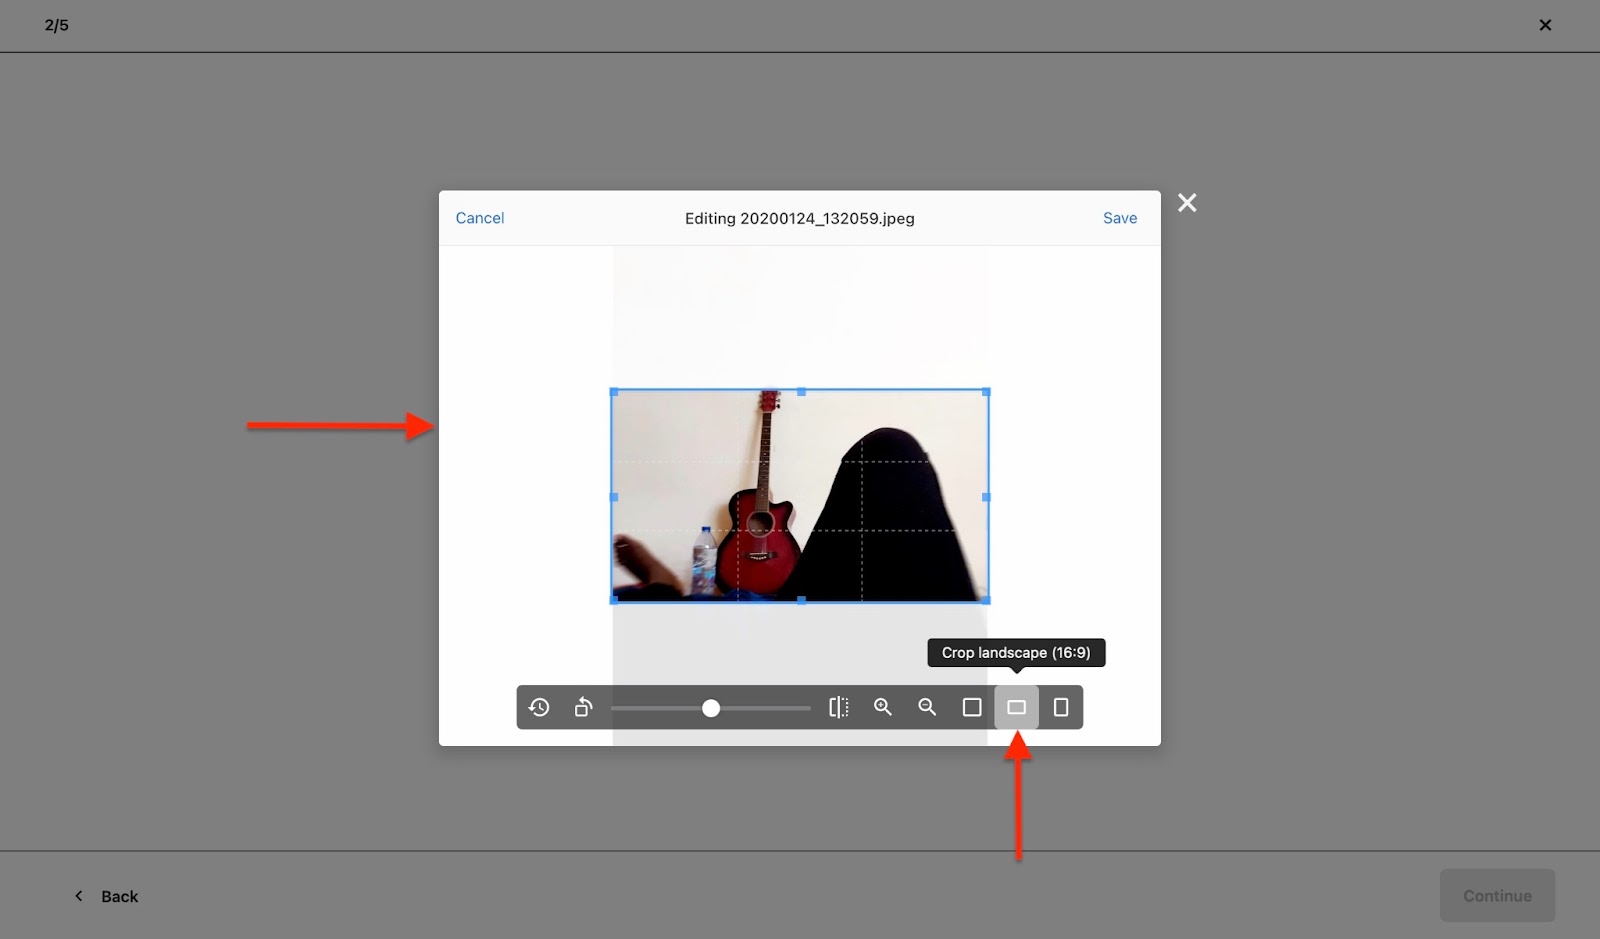
You can click on "Remove" or “Replace” to either delete or upload a new image. If you decide to keep the image, click “Continue”.

Now, select how you’d like to get paid for your course. Will it be a one-time purchase, a payment plan, a subscription, or free of charge? There's an option to skip this step if you haven't decided yet.

Let’s select the subscription option. On the next page, fill out the appropriate details and click “Continue.”

Finally, choose a method to create your course curriculum. You can generate it with AI, create it by yourself, or upload multiple files to generate it online. To wrap it up, click “Finish.”

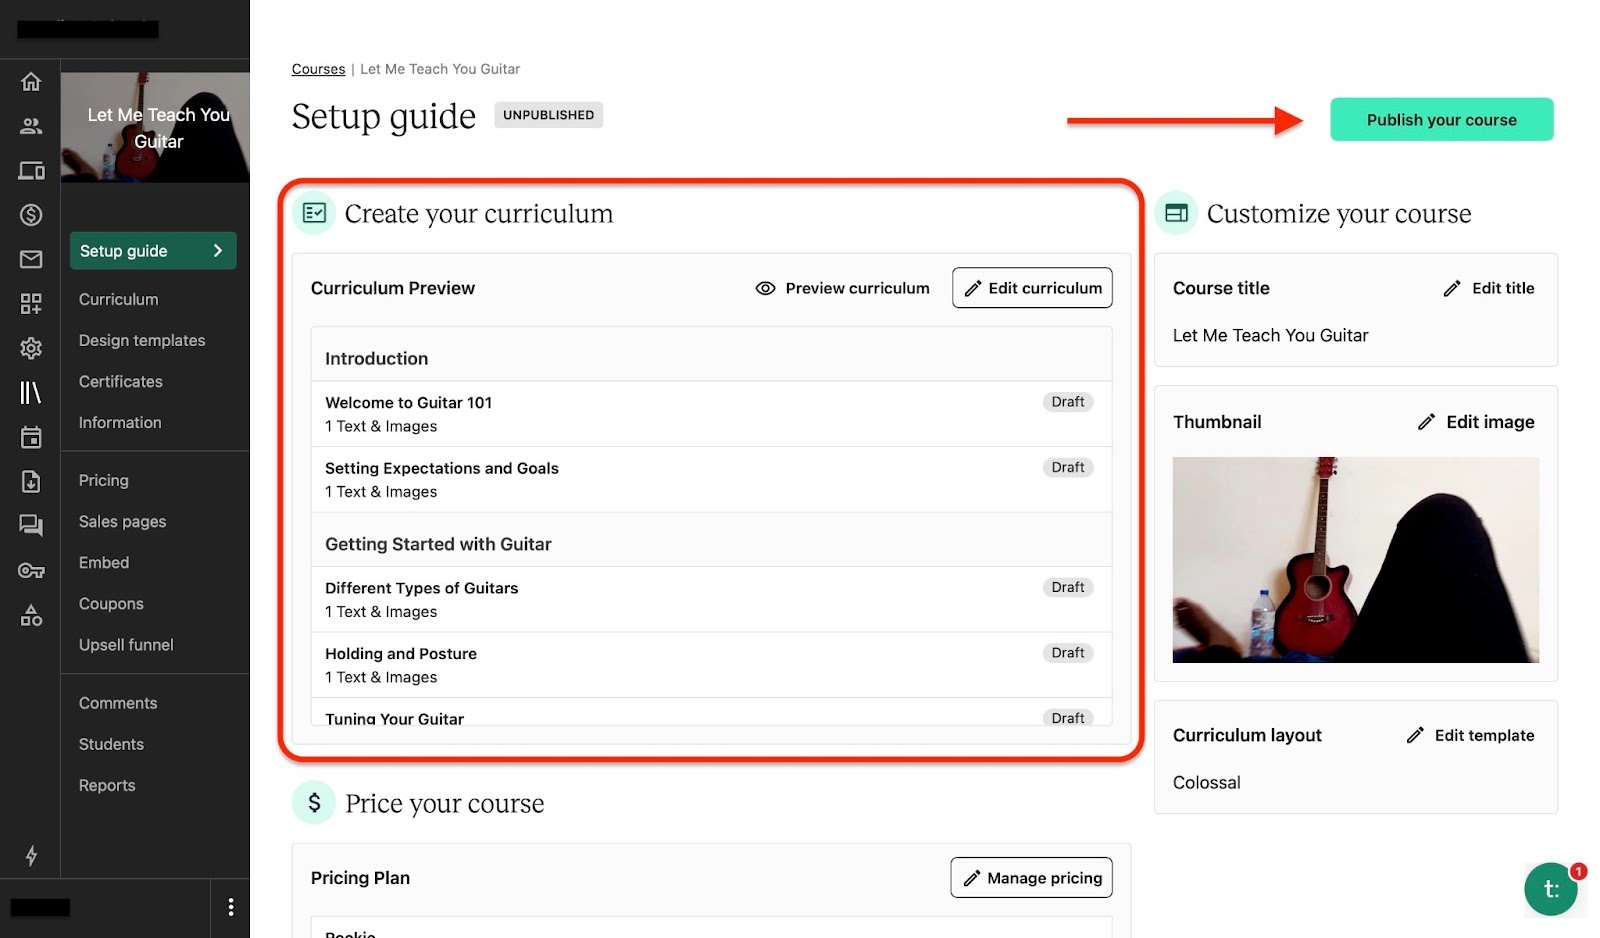
You can now publish your course to share it with learners on Teachable.
[fs-toc-omit]Key features
1. Bundles
Now that we’ve built a course on Teachable, we can decide to create more or add pre-existing ones into one bundle.
Let me show you how you can build a bundle in a few simple steps using the bundle feature.
First, select “Bundles” from the menu. Next, click “Create bundle.”

Add the name and description of your bundle. After that, upload an image and choose how your students will pay for the course. Let's pick the one-time purchase this time round.

Next, review your bundle.
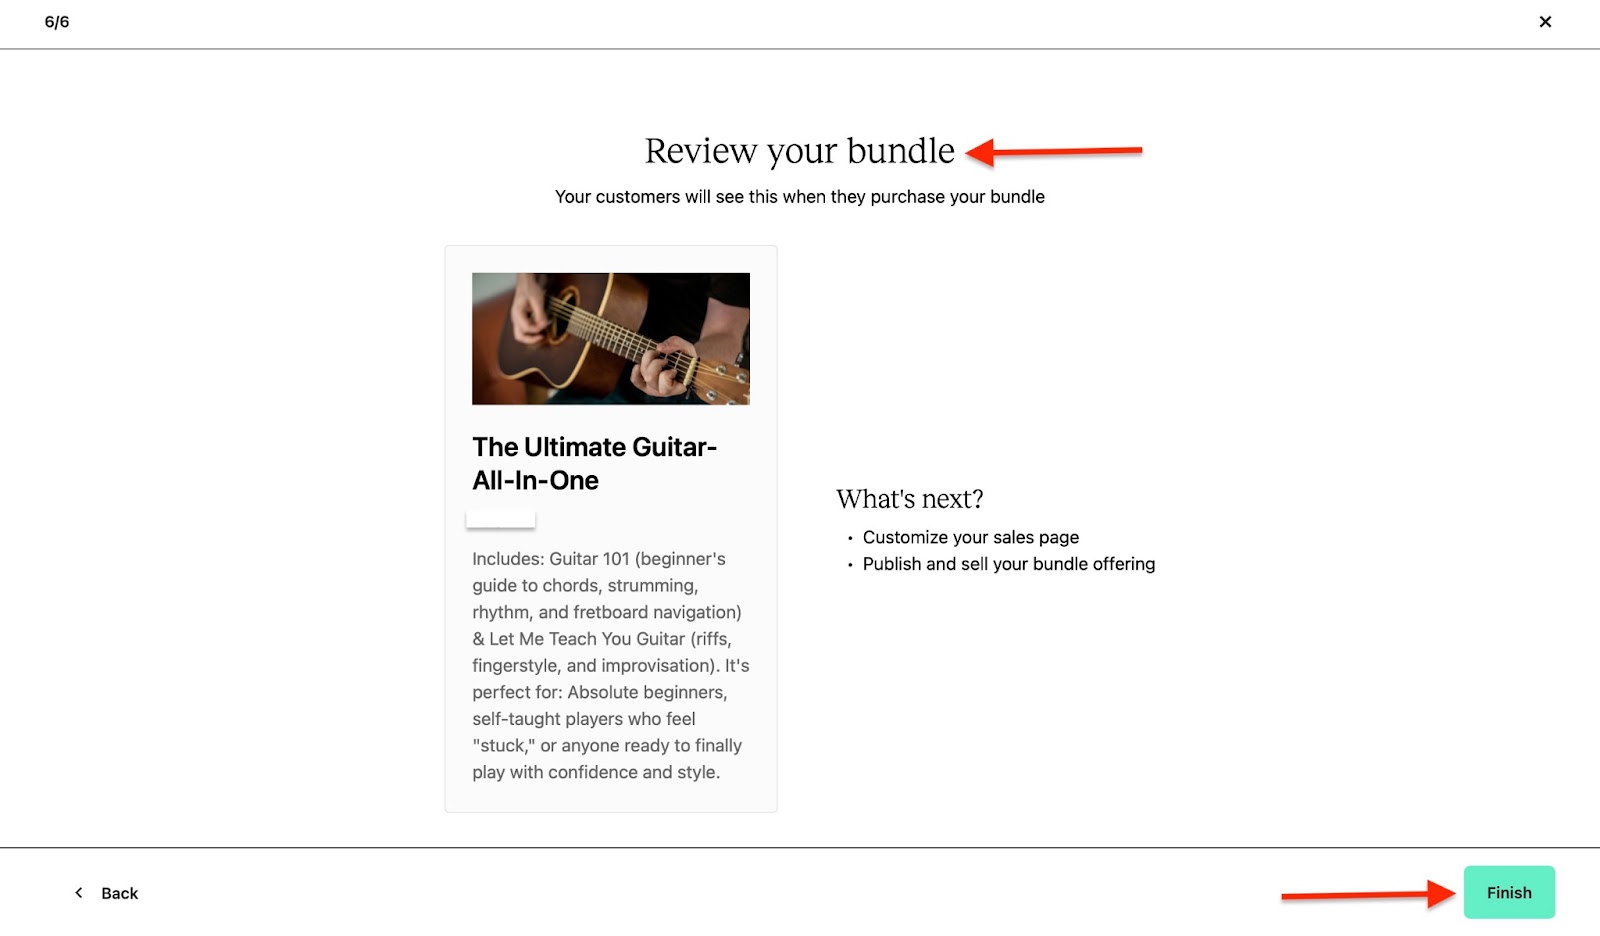
Lastly, click “Publish” to share it with students.
2. Sales pages
After you’ve published a course, Teachable’s sales pages allow you to design how everything will display on your online store.
To do this, first click “Courses” in the sidebar, then select a course you’ve created.
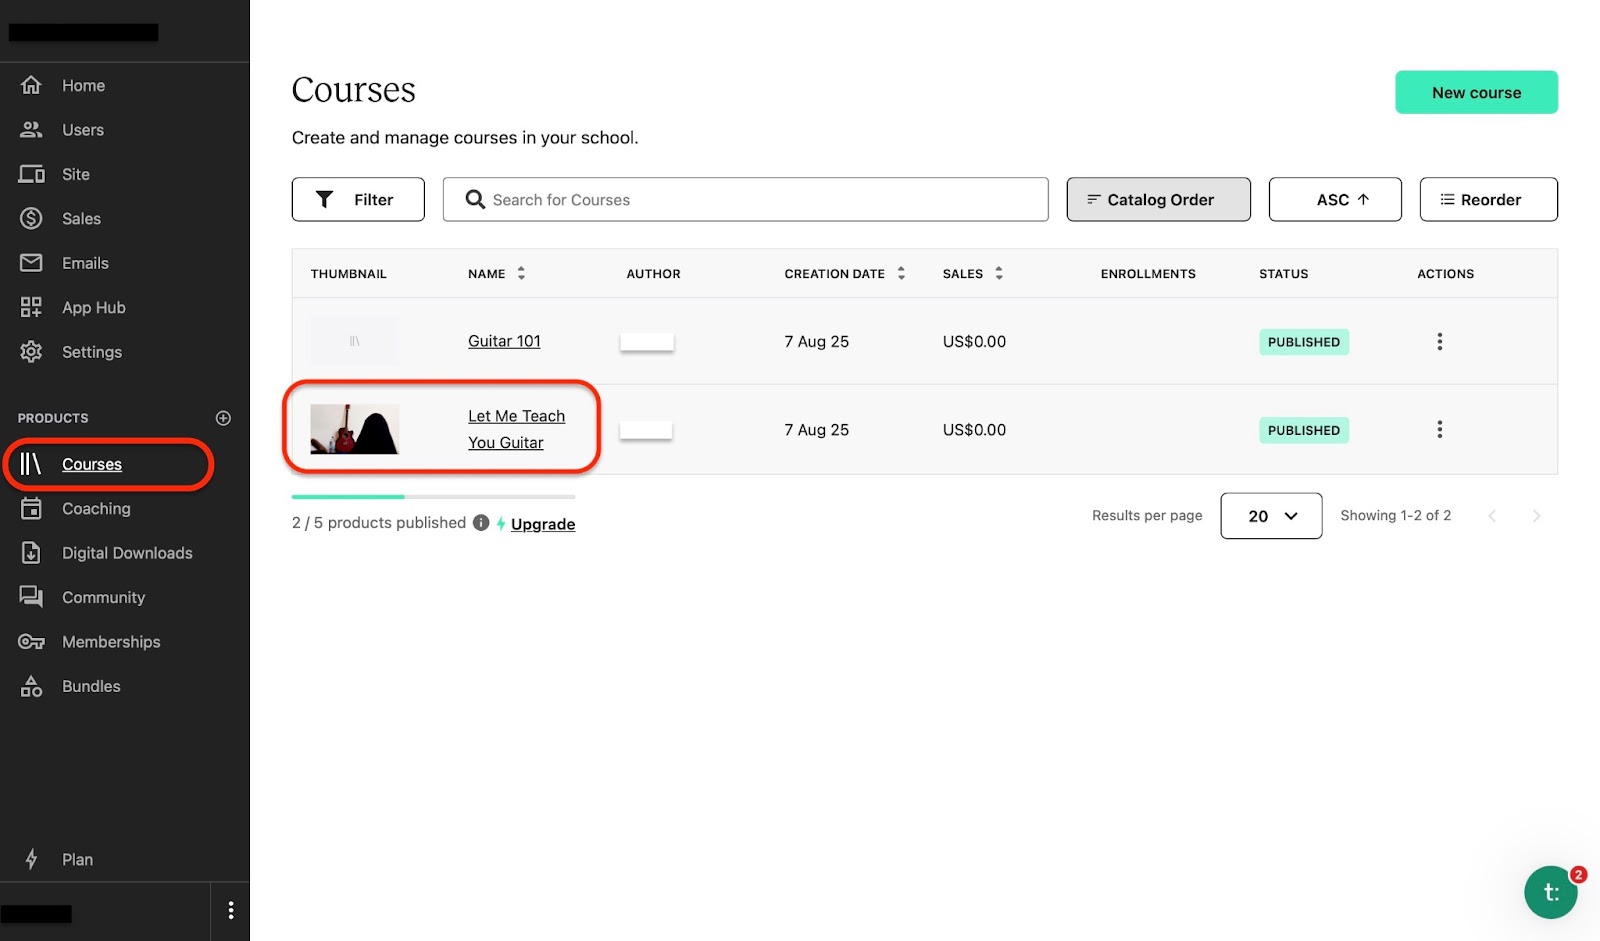
A setup guide will open in the next window. Select “Sales pages” from the sidebar.
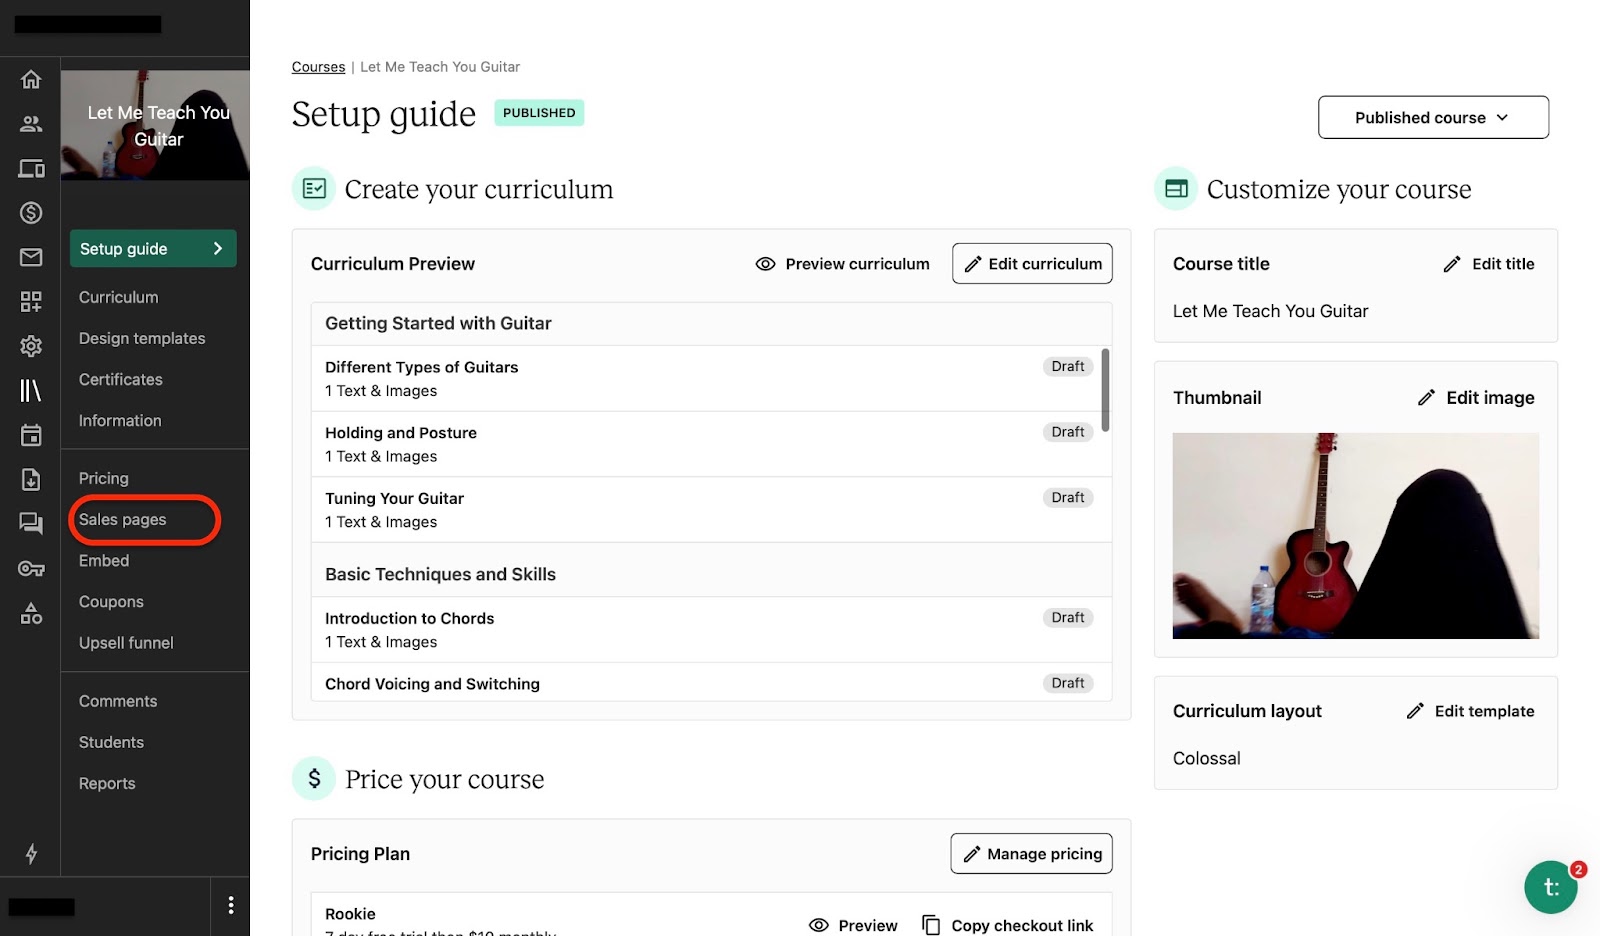
Then click the edit button in the “Sales Pages” section.

This will open an entirely new window. You can edit your course display to the tiniest details. Make changes to the banner and course curriculum, and add new page blocks.
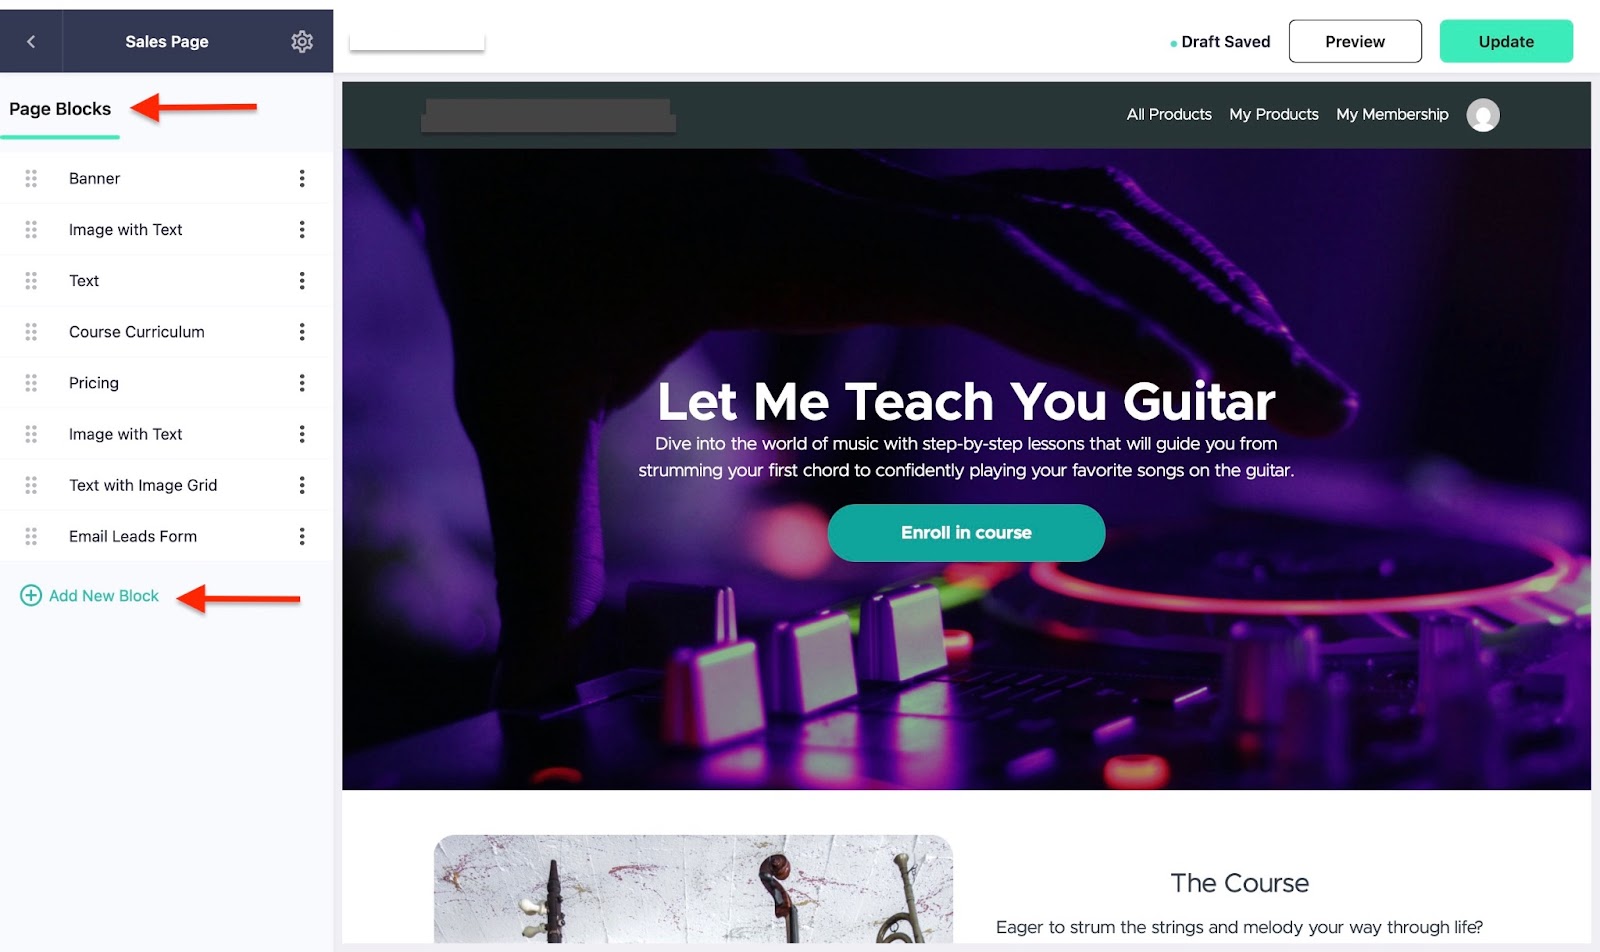
You can preview your sales page as a student or with the public view. These options give you a visual of how the new additions and edits will look when published.
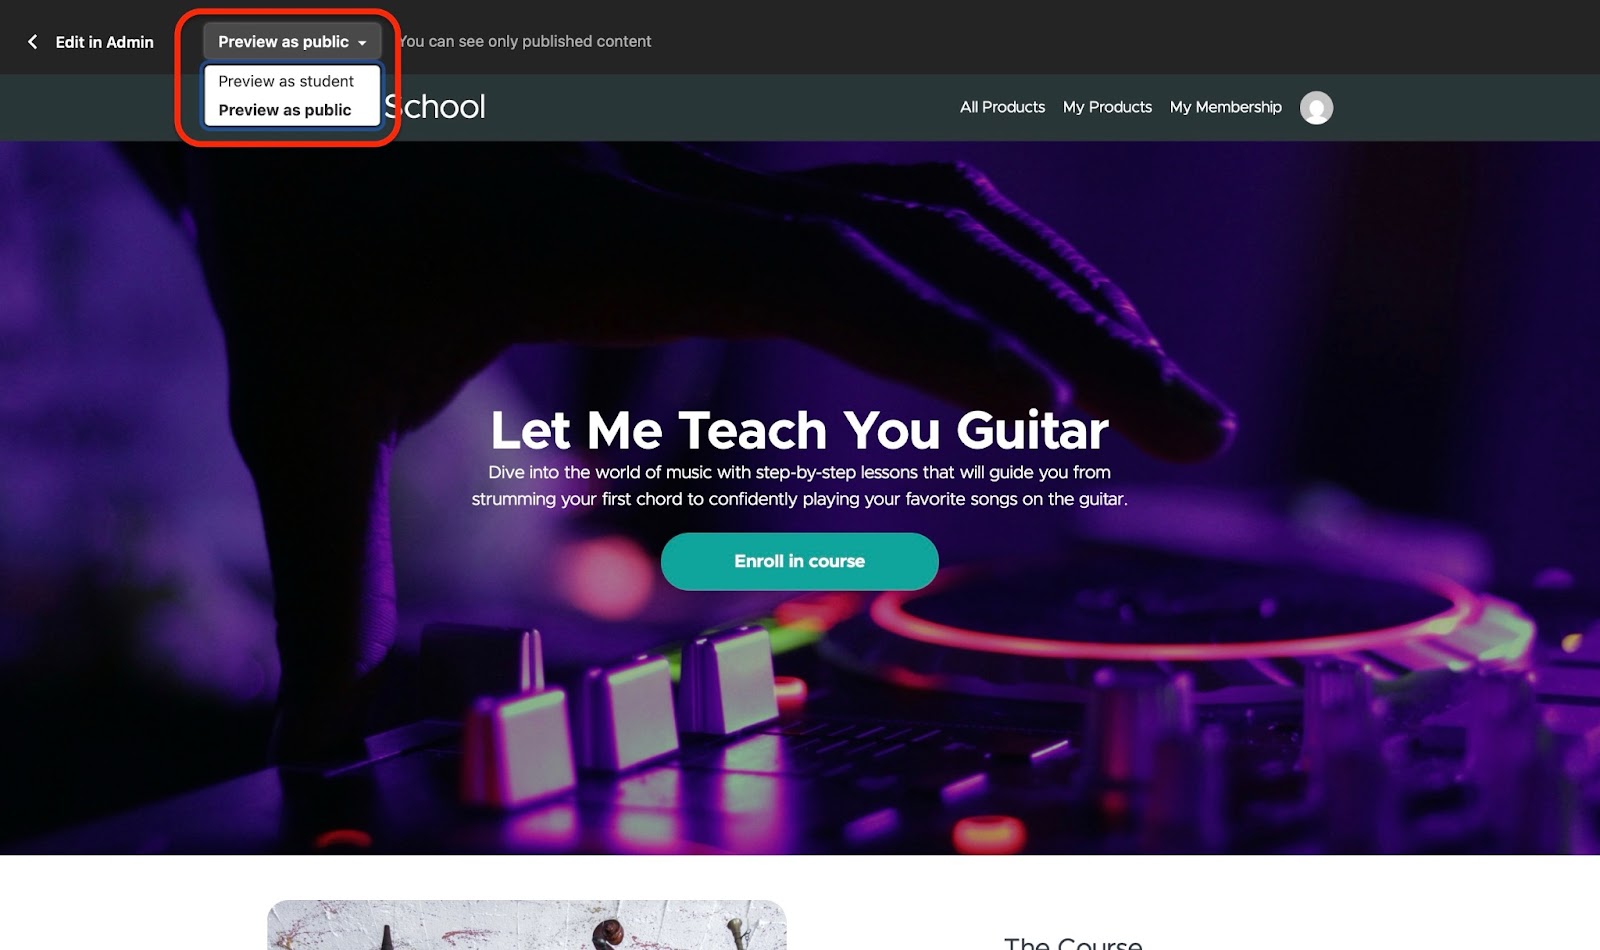
You can select “Update” to save and publish your edits and changes.
[fs-toc-omit]Best for
- Companies and businesses looking for a simple platform to create, market, and sell courses or coaching services.
[fs-toc-omit]Pricing
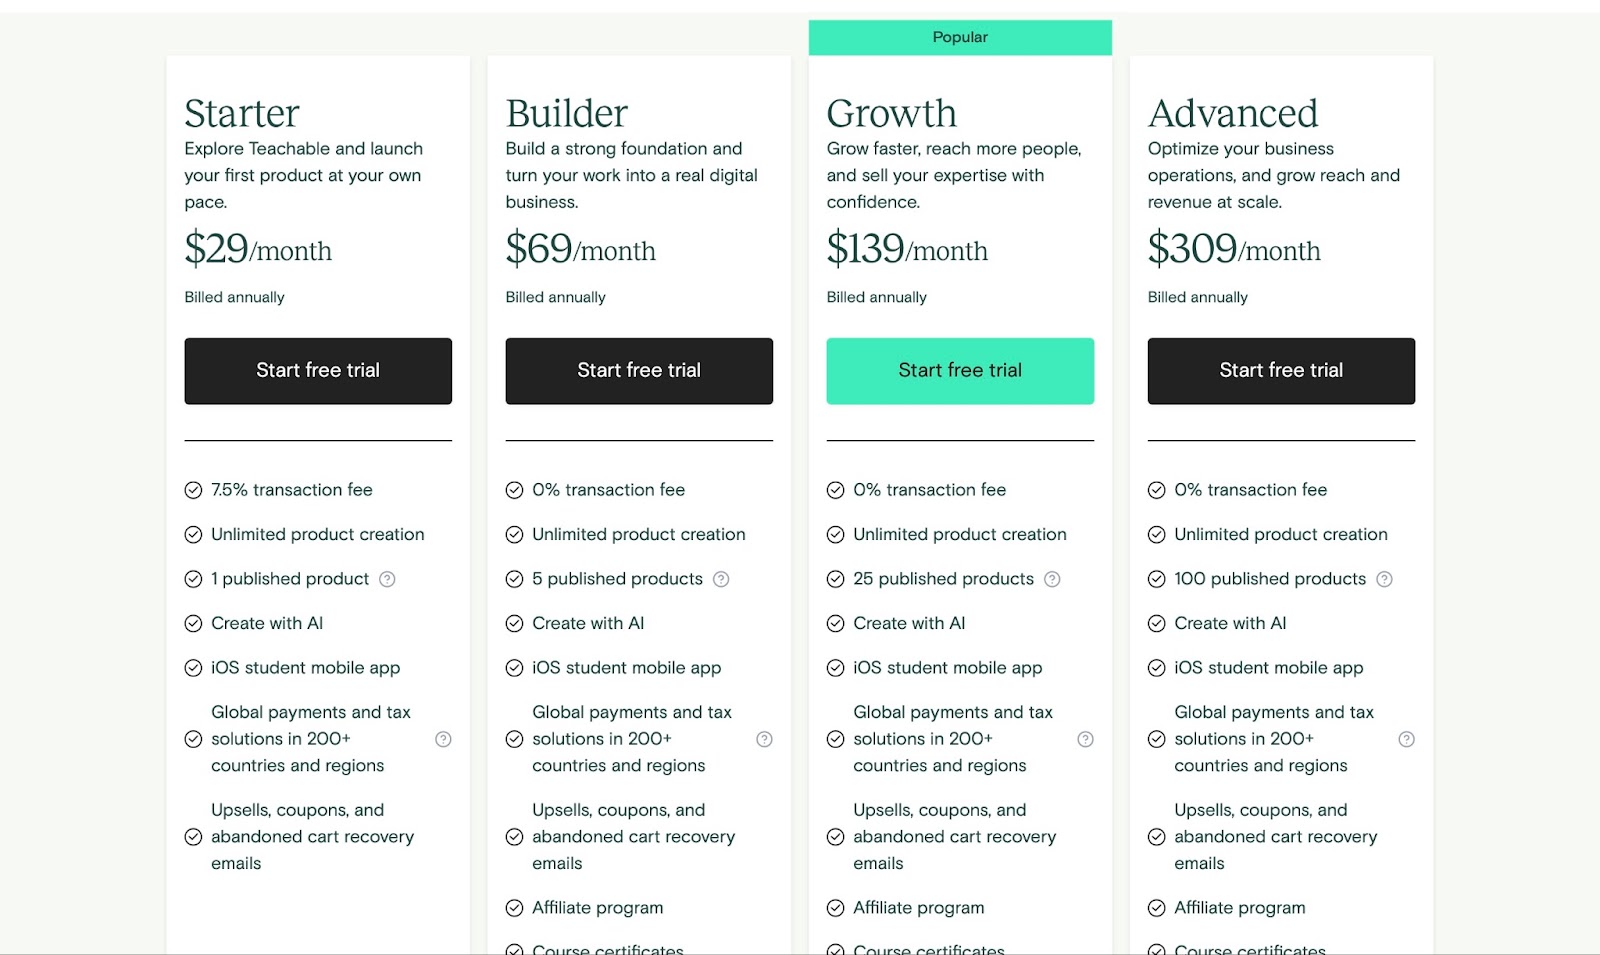
- Starter: $39/month
- Builder: $89/month
- Growth: $189/month
- Advanced: $399/month
- Custom: Contact for pricing
8. SamCart
SamCart is the next e-commerce platform for selling digital products on this list.

Using SamCart’s product feature, you can sell a digital product when you fill in the details of your product. These include the product name, description, image, and checkout options. You can also add a downloadable URL to the product.
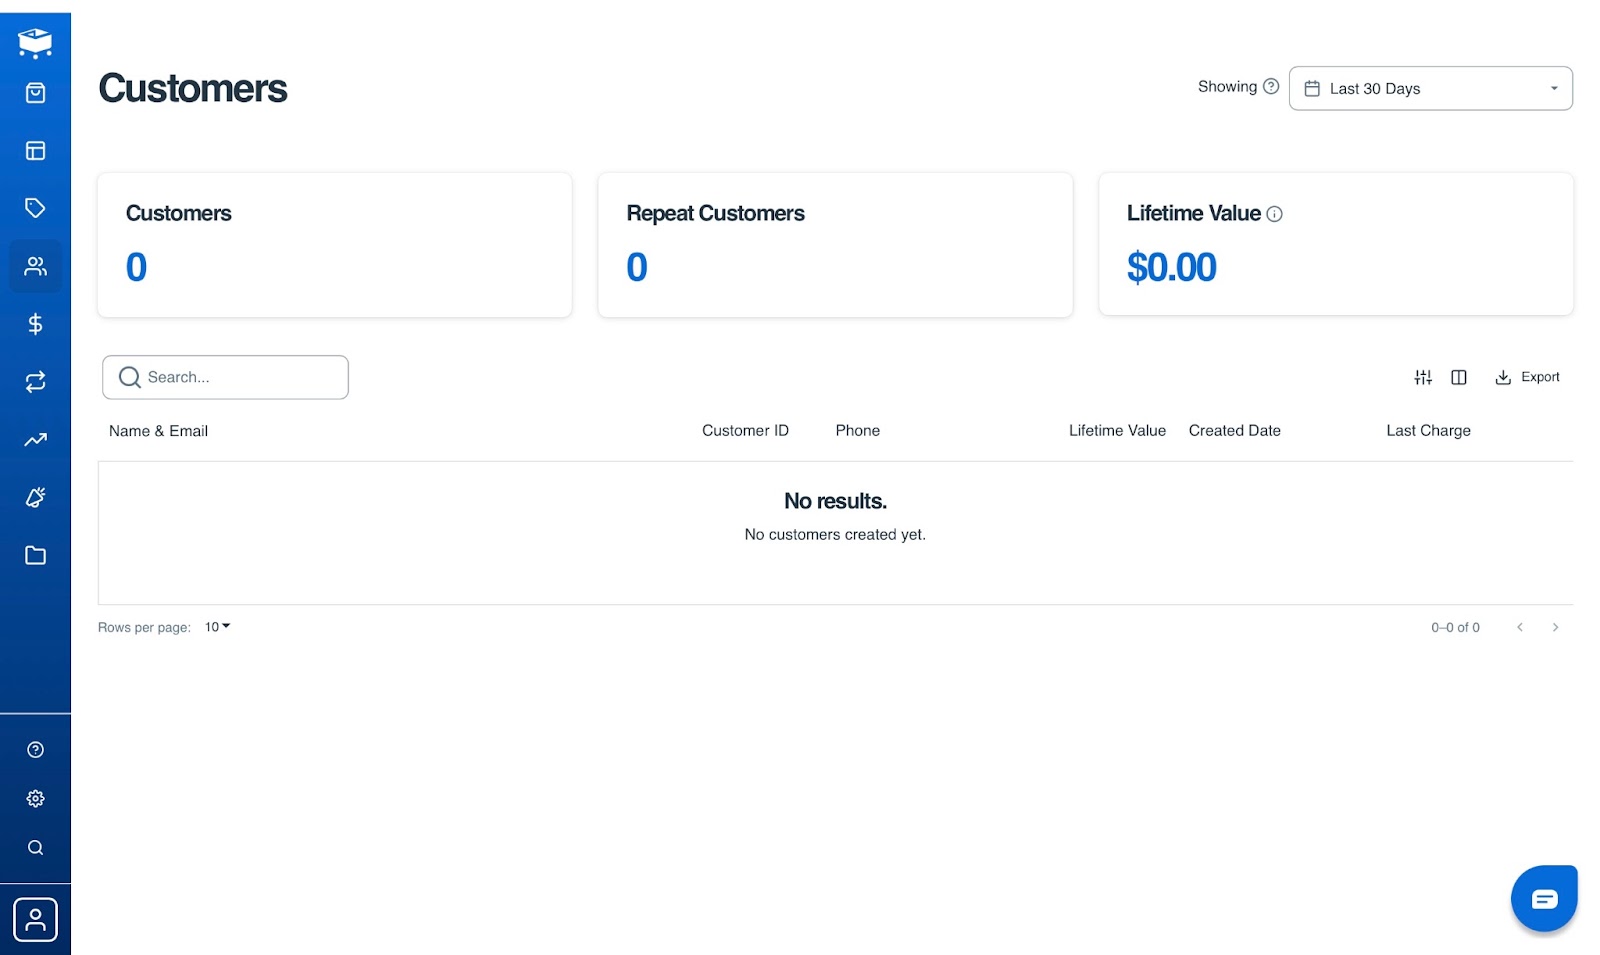
The customers feature helps you check important customer details, such as their total number, and those who have purchased from you more than once.
What’s more, you can view the customer lifetime value (CLV). You can opt to show customers' statistics for today, yesterday, the past week, the past month, the past year, and the year before. While testing, I realized that I could set a custom rate to check customer data.
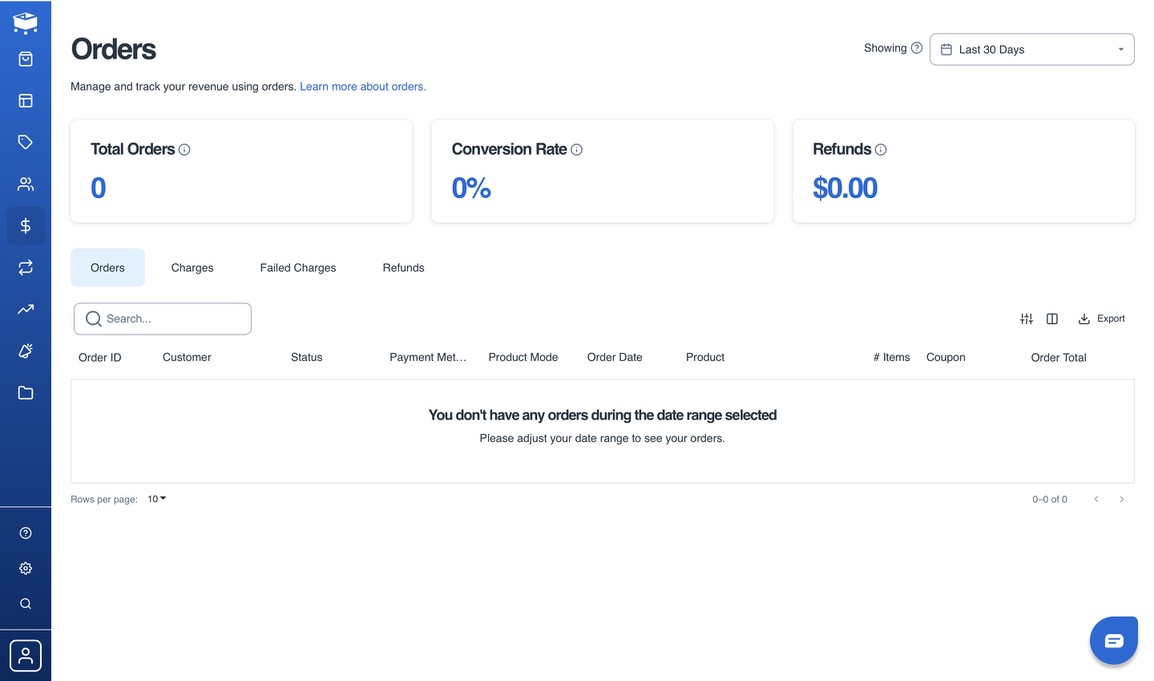
SamCart’s order feature works hand in hand with the customer feature. Not only did I have access to customer metrics, but I also knew which customers bought what. I was able to view the customer’s name, the items they purchased, how they paid, and when.
I could also check conversion rates (CR). Here, if you want to save all the data on your device, you can use the export button.
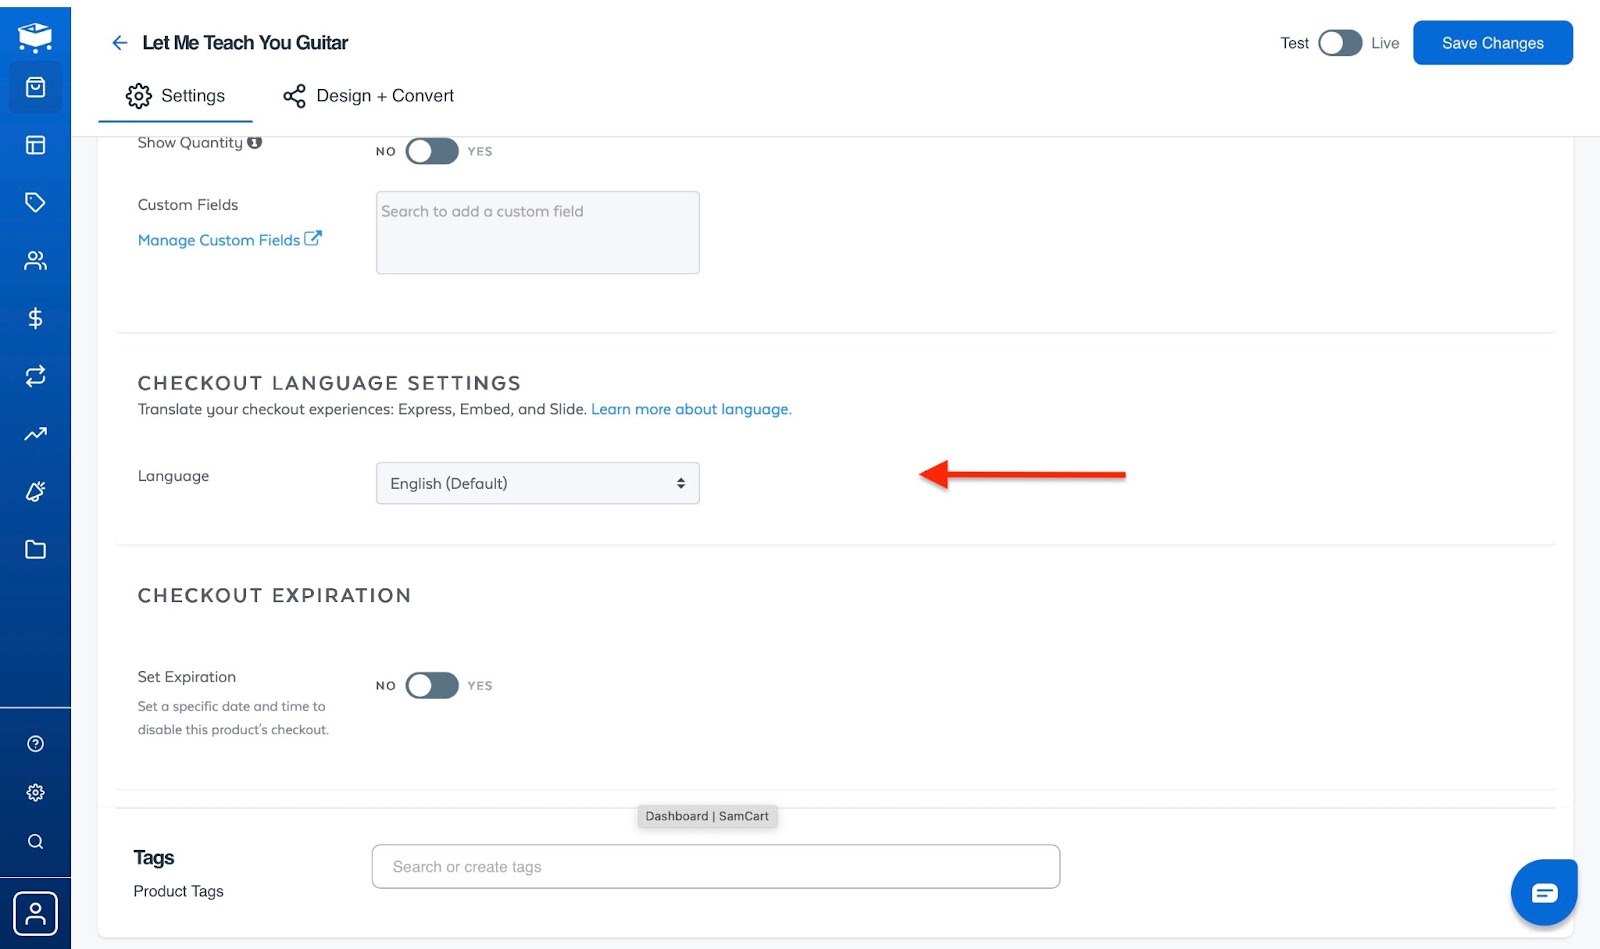
With SamCart’s pages feature, you can create a landing page using available templates. Within these templates are sections for pricing, reviews, FAQs, and a call-to-action (CTA).
You can also create checkout pages, link-in-bios, and lead capture pages.
Let me guide you through creating your first digital product on SamCart.
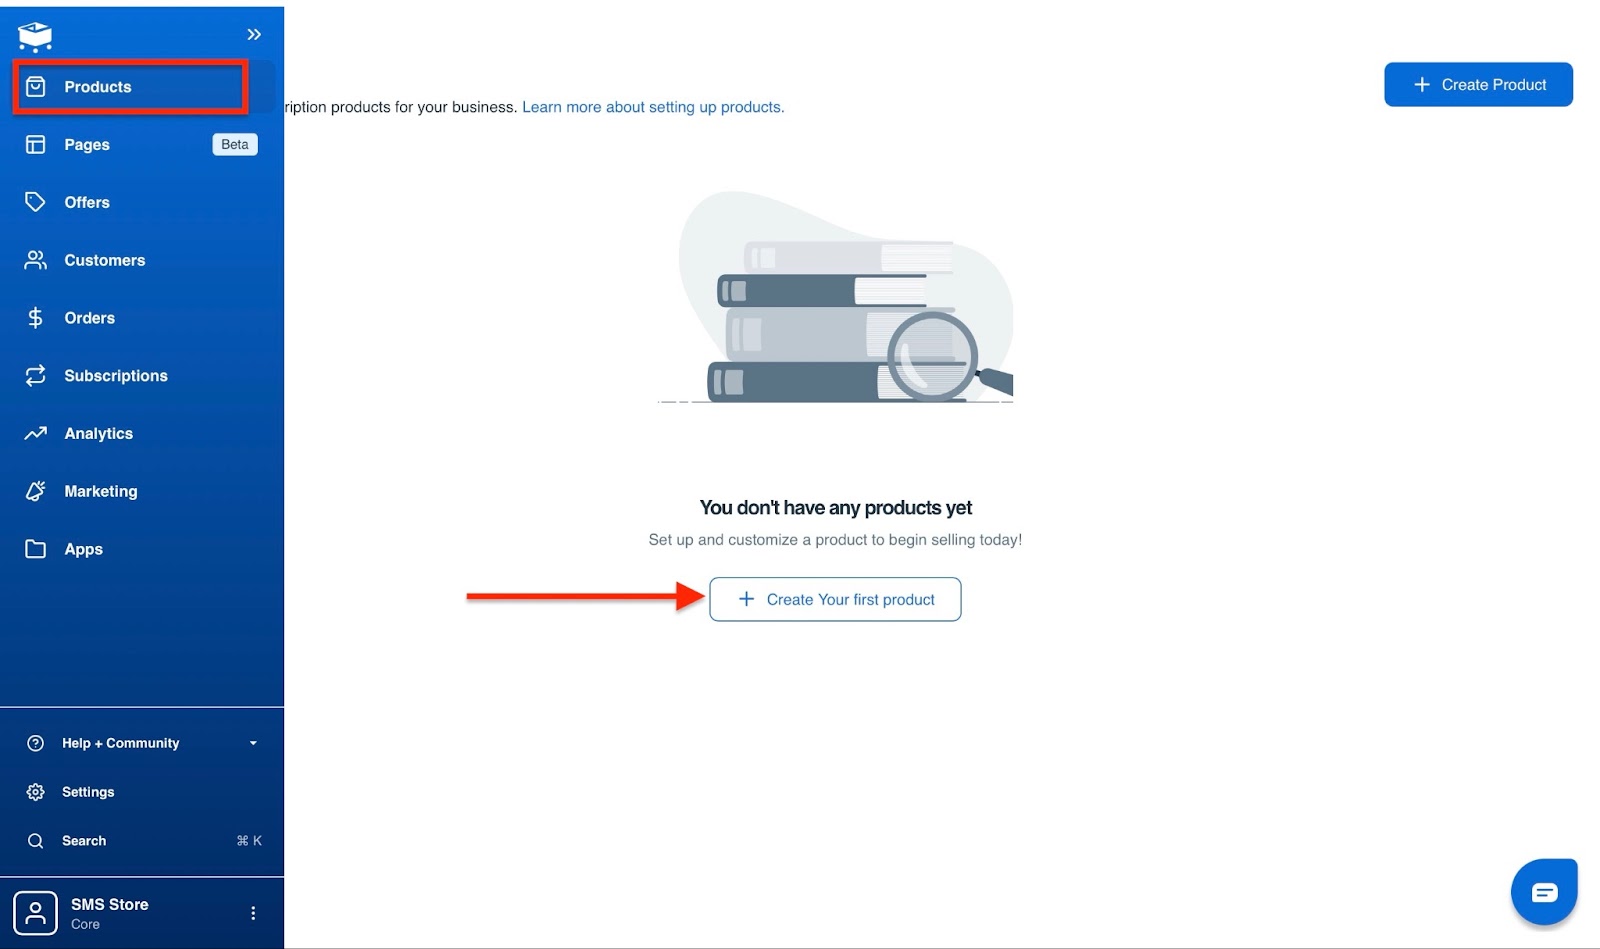
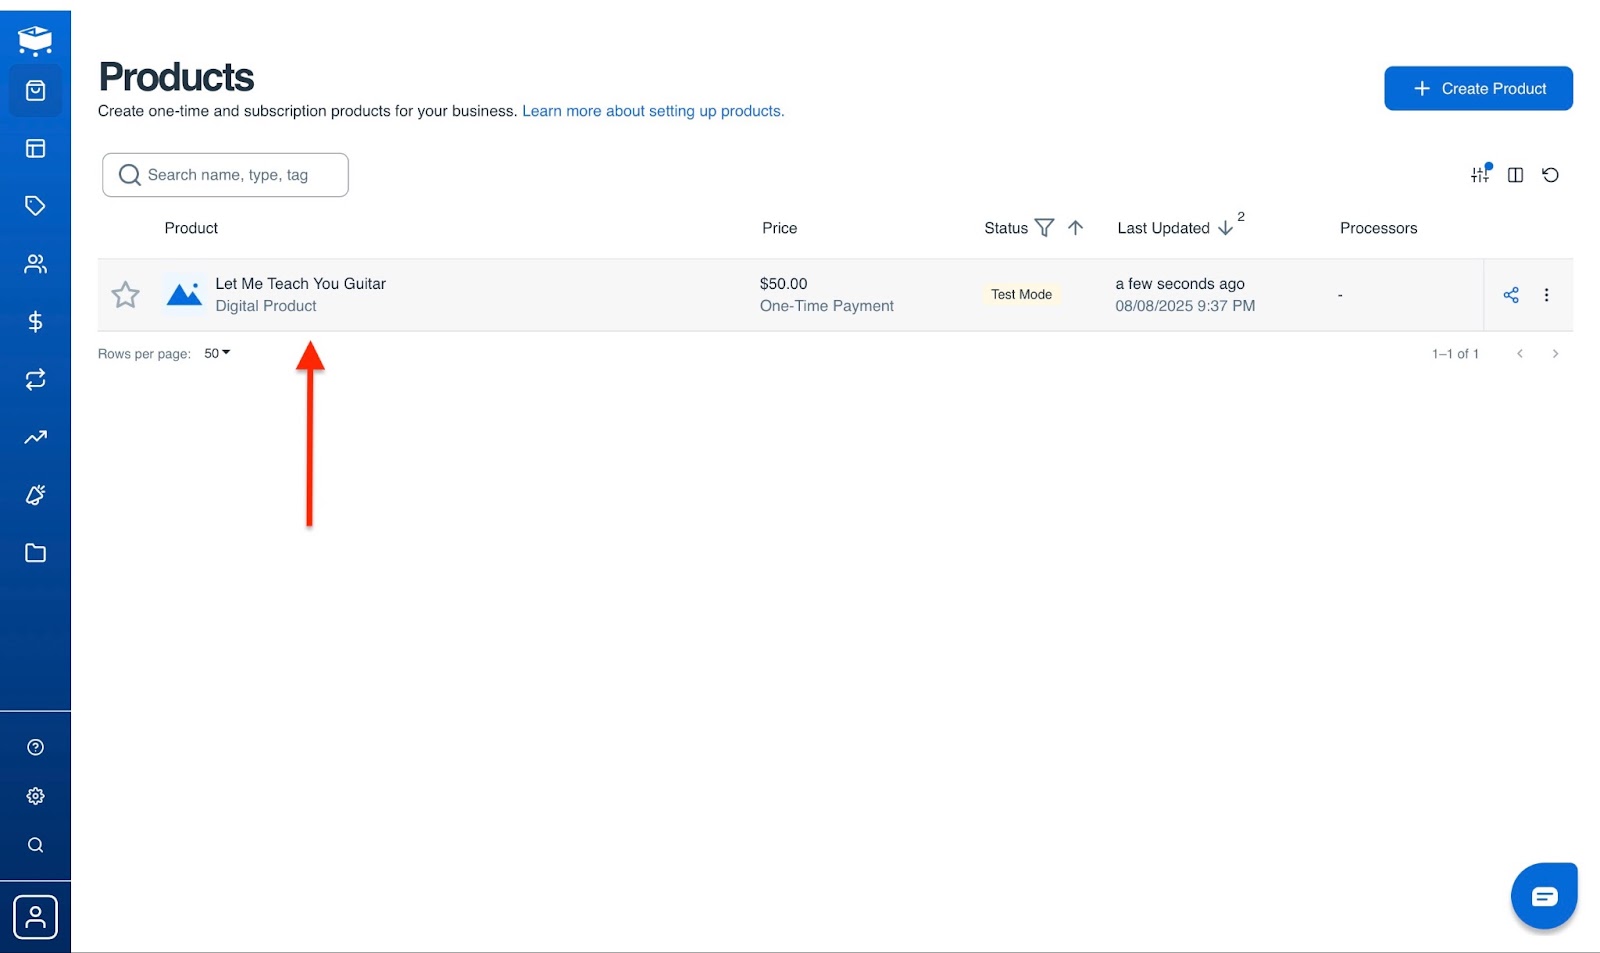
Begin by selecting “Products” in the sidebar. Next, click “+ Create Your First Product.”
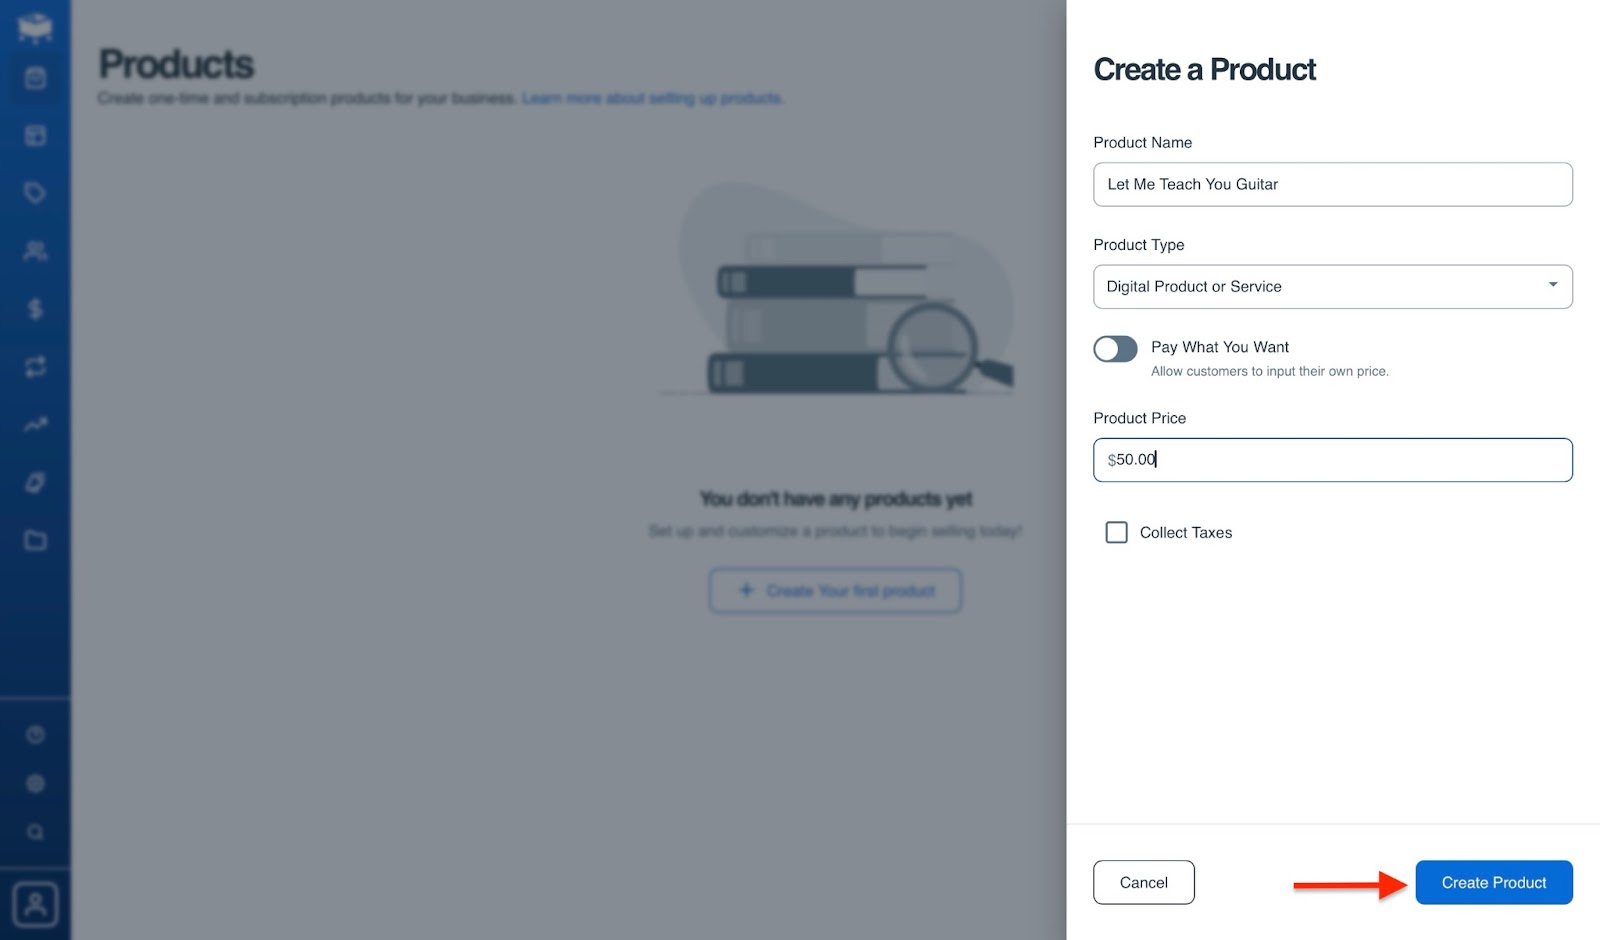
Now, enter the product name, type, and price. Once done, click the “Create Product” button.
Your product will be in the Products window, but it’s not ready. So let's click on it to add more details.
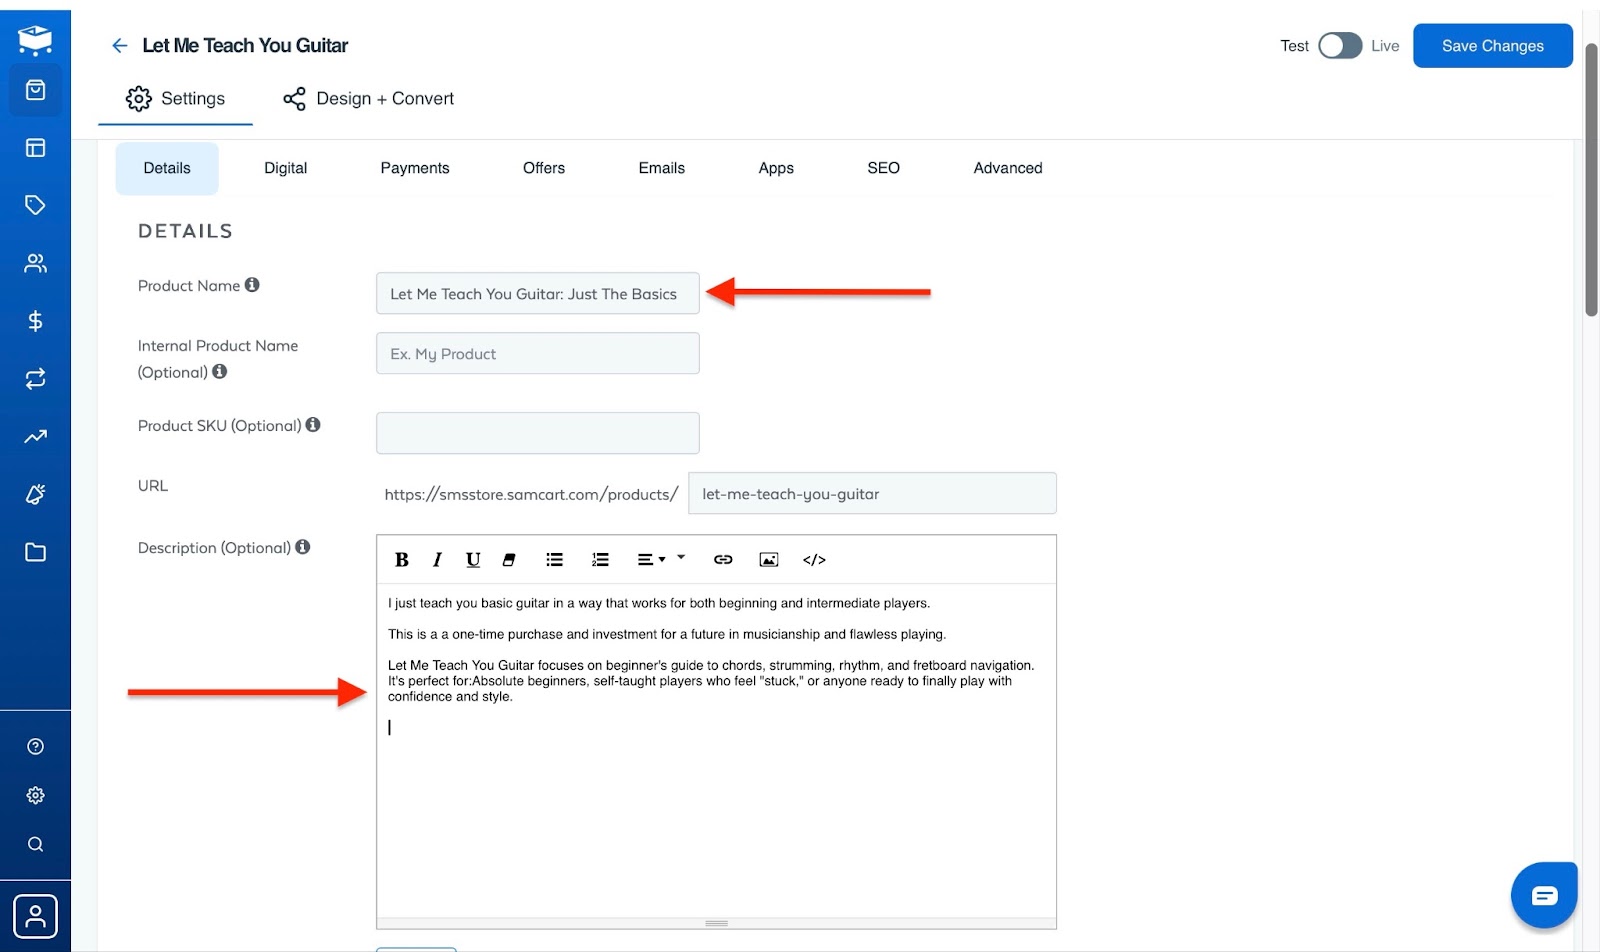
The first detail to add is a product name that your customers will see. Then add an elaborate product description.
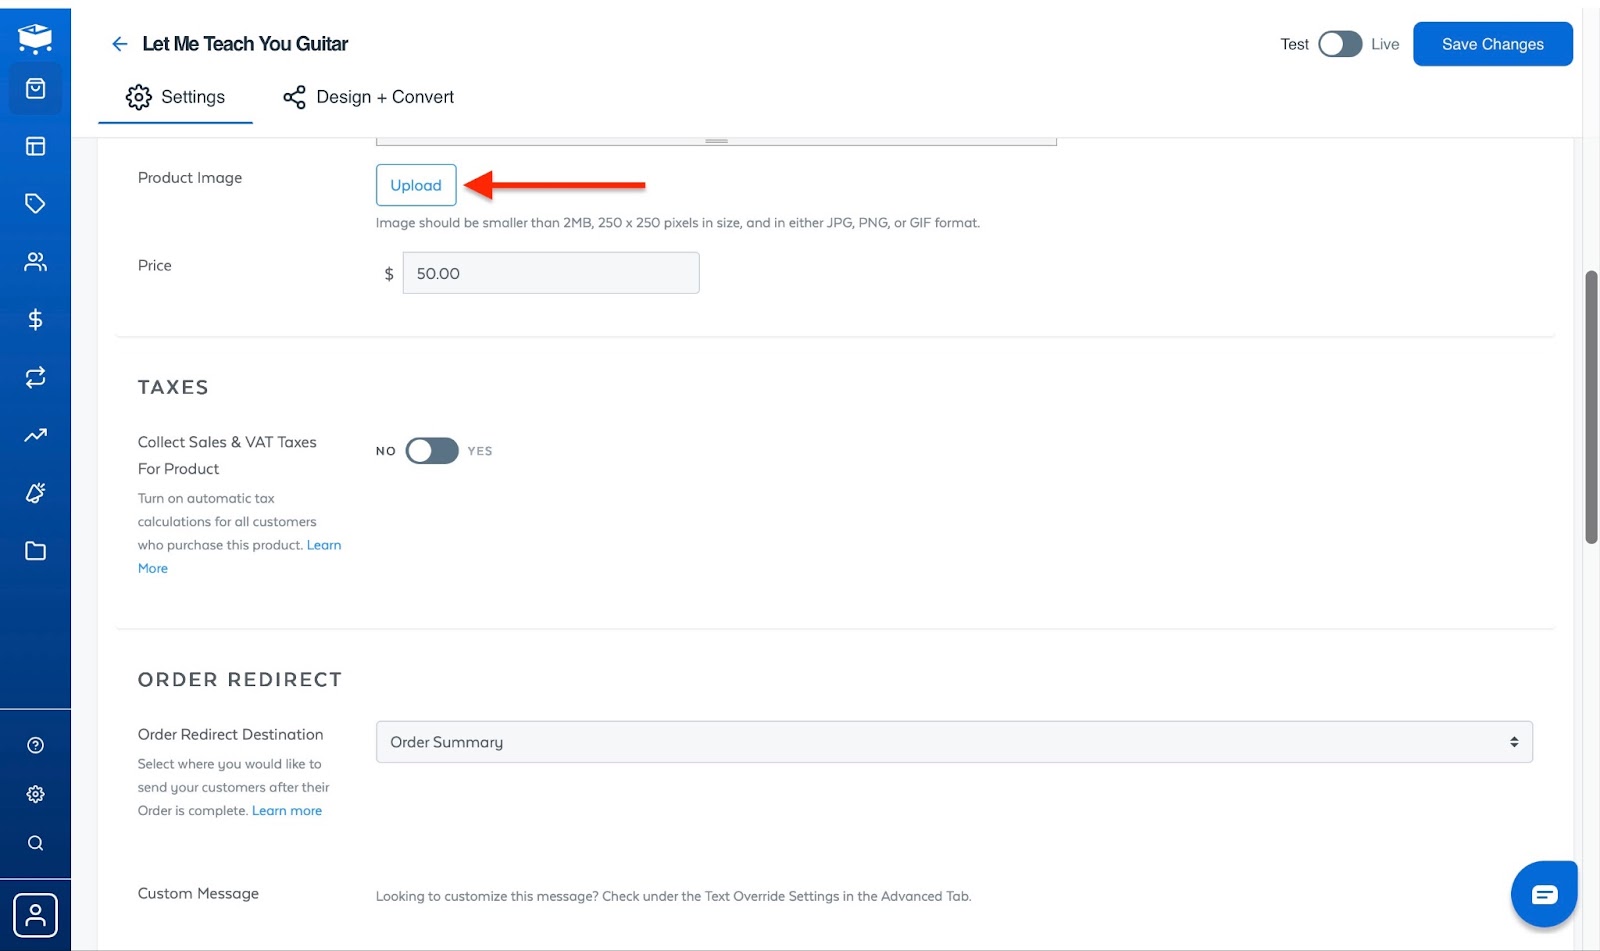
Scroll down to set the price and upload an image. To add one, click the “Upload” button.
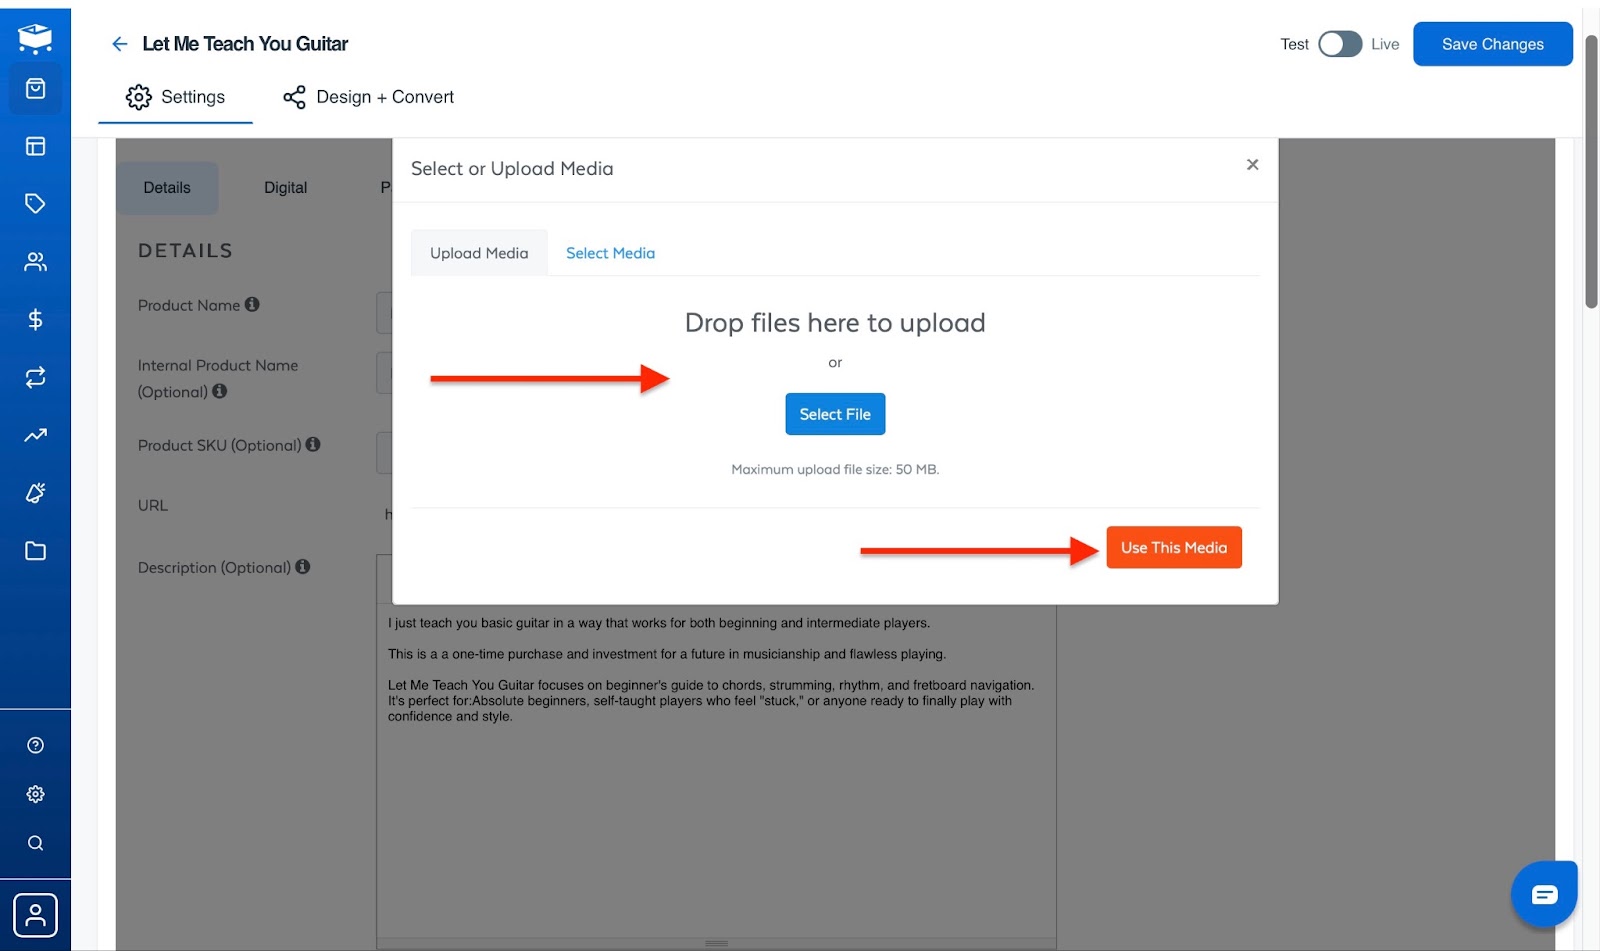
Next, drag and drop an image file into the pop-up window or select a file from your device. Then click “Use This Media.”
After that, scroll further down and fill in the tax and order section, as well as sections for checkout options. You can even add product tags.
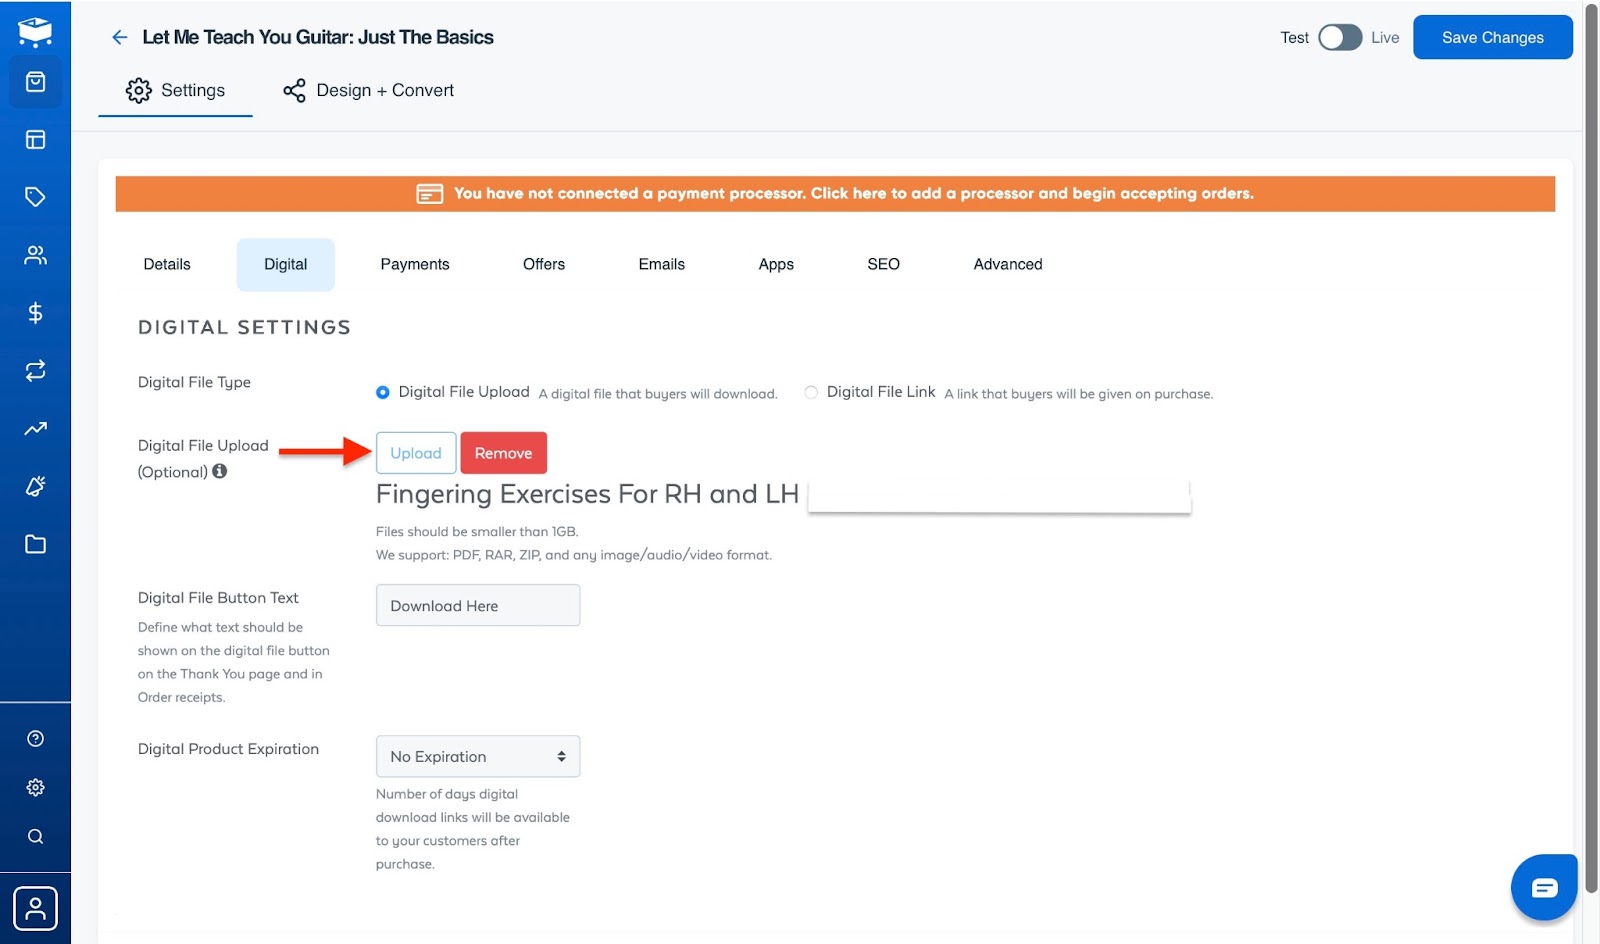
Then, upload a copy of the digital product you’ve created by clicking on the “Digital” tab next to “Details”. Next, click “Upload” to choose the file from your device.
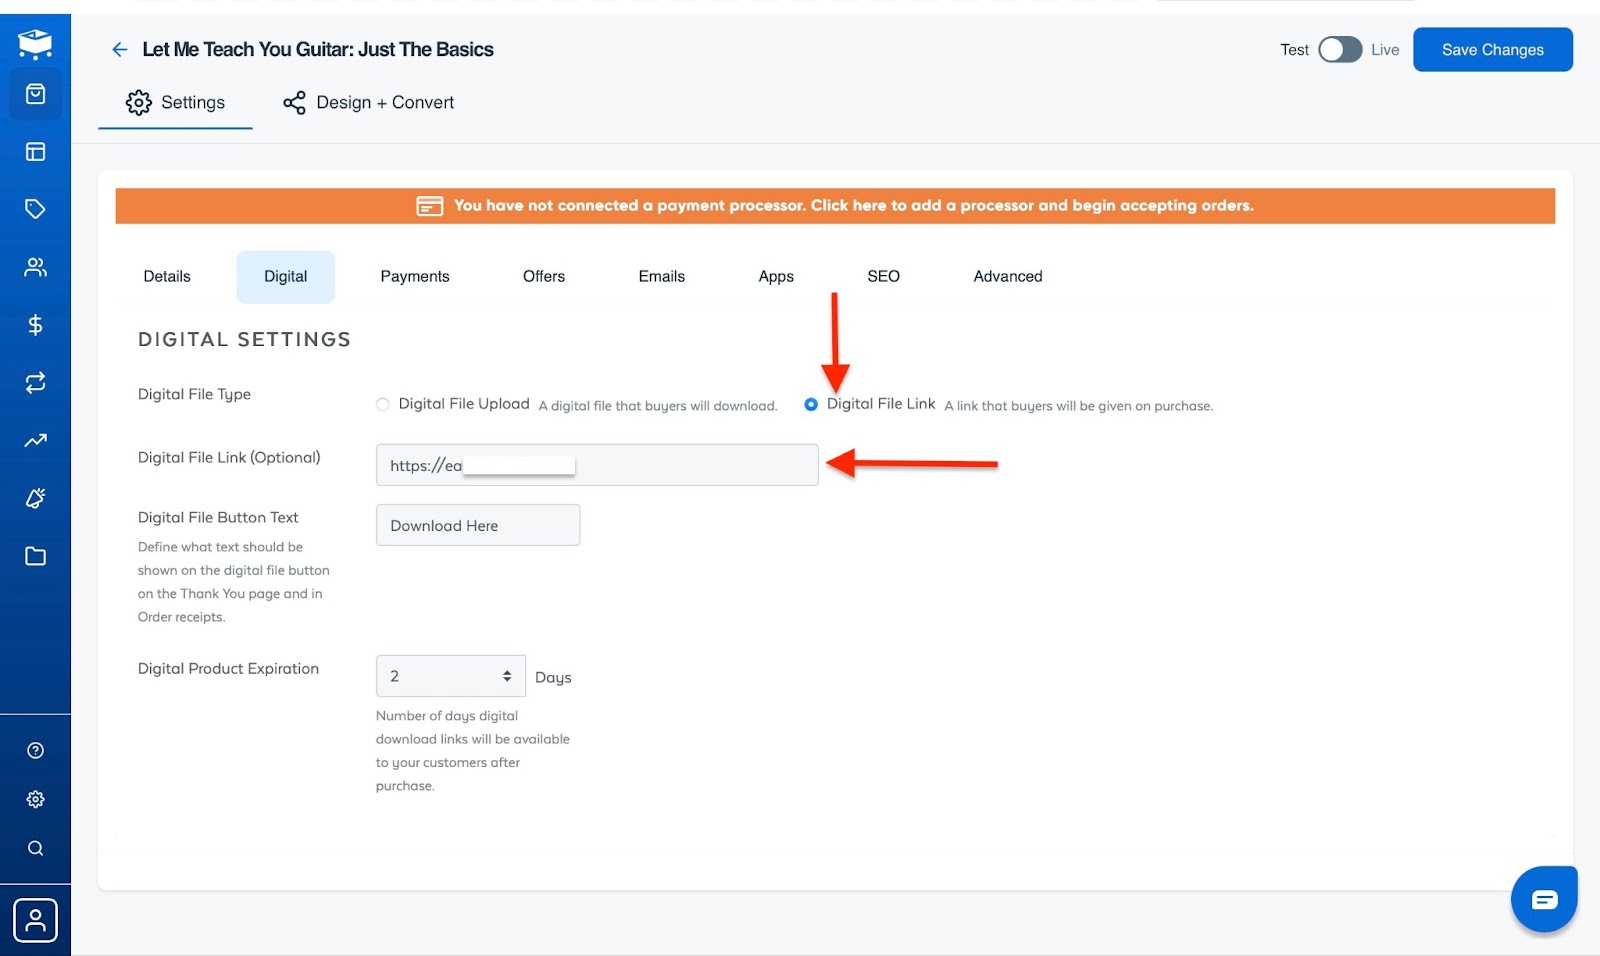
The alternative is to provide a link to your digital product file. To do this, click “Digital File Link.” It’s the second option in the “Digital File Type” column. Then paste the file’s URL into the field provided.
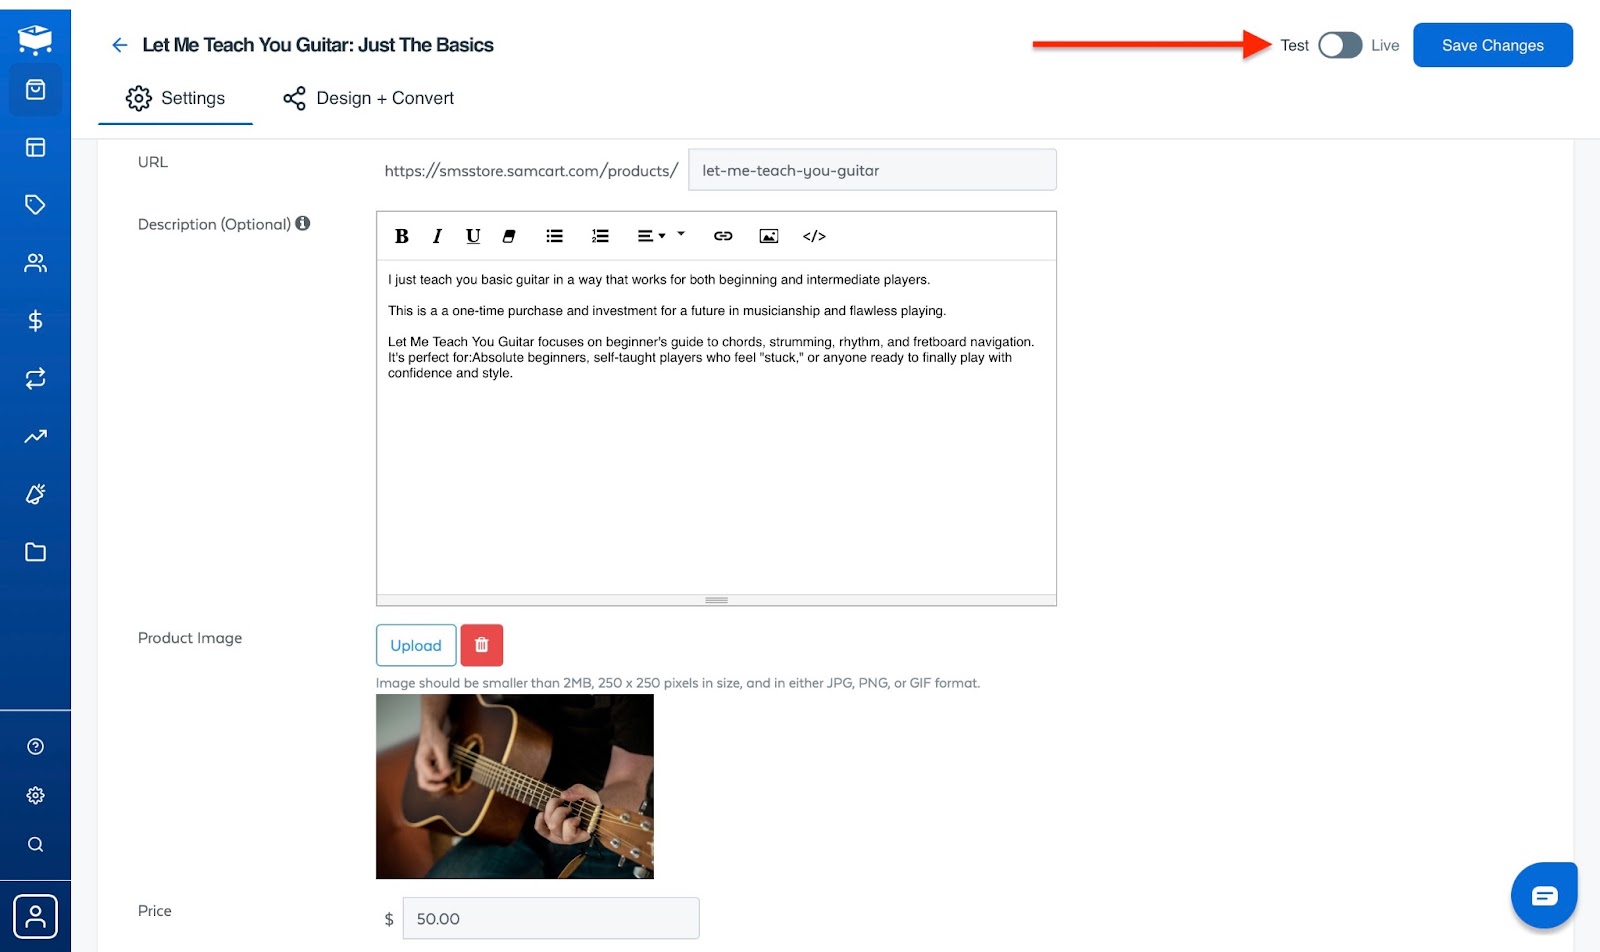
To save your new settings, click “Save Changes.” Afterwards, toggle between “Test” and “Live” to either publish changes or keep them unpublished.
[fs-toc-omit]Key features
1. Pages
This is one reason I added SamCart to my list of the best platforms to sell digital products.
SamCart’s pages feature lets you create checkout pages, lead capture pages, landing pages, and link-in-bios.
I’ll create a page now to demonstrate.
To start, select “Pages” from the menu and click “Landing Page” in the window.
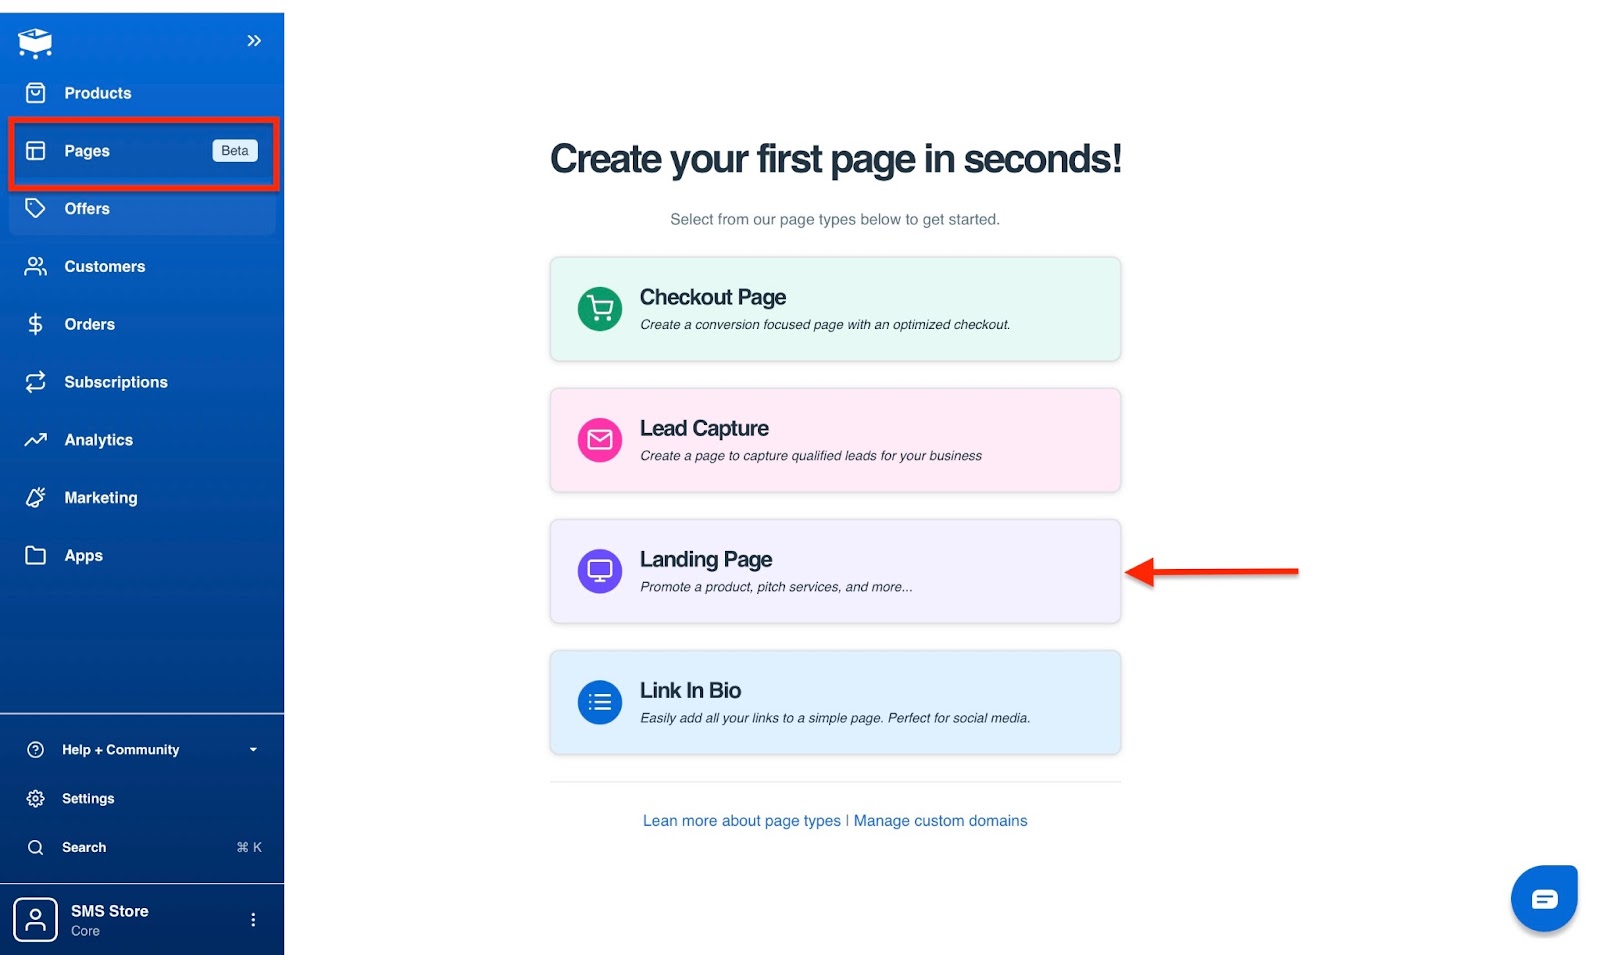
Next, enter the name of your new landing page, add the URL slug, and create your page.

Next, select a template and make the necessary edits.

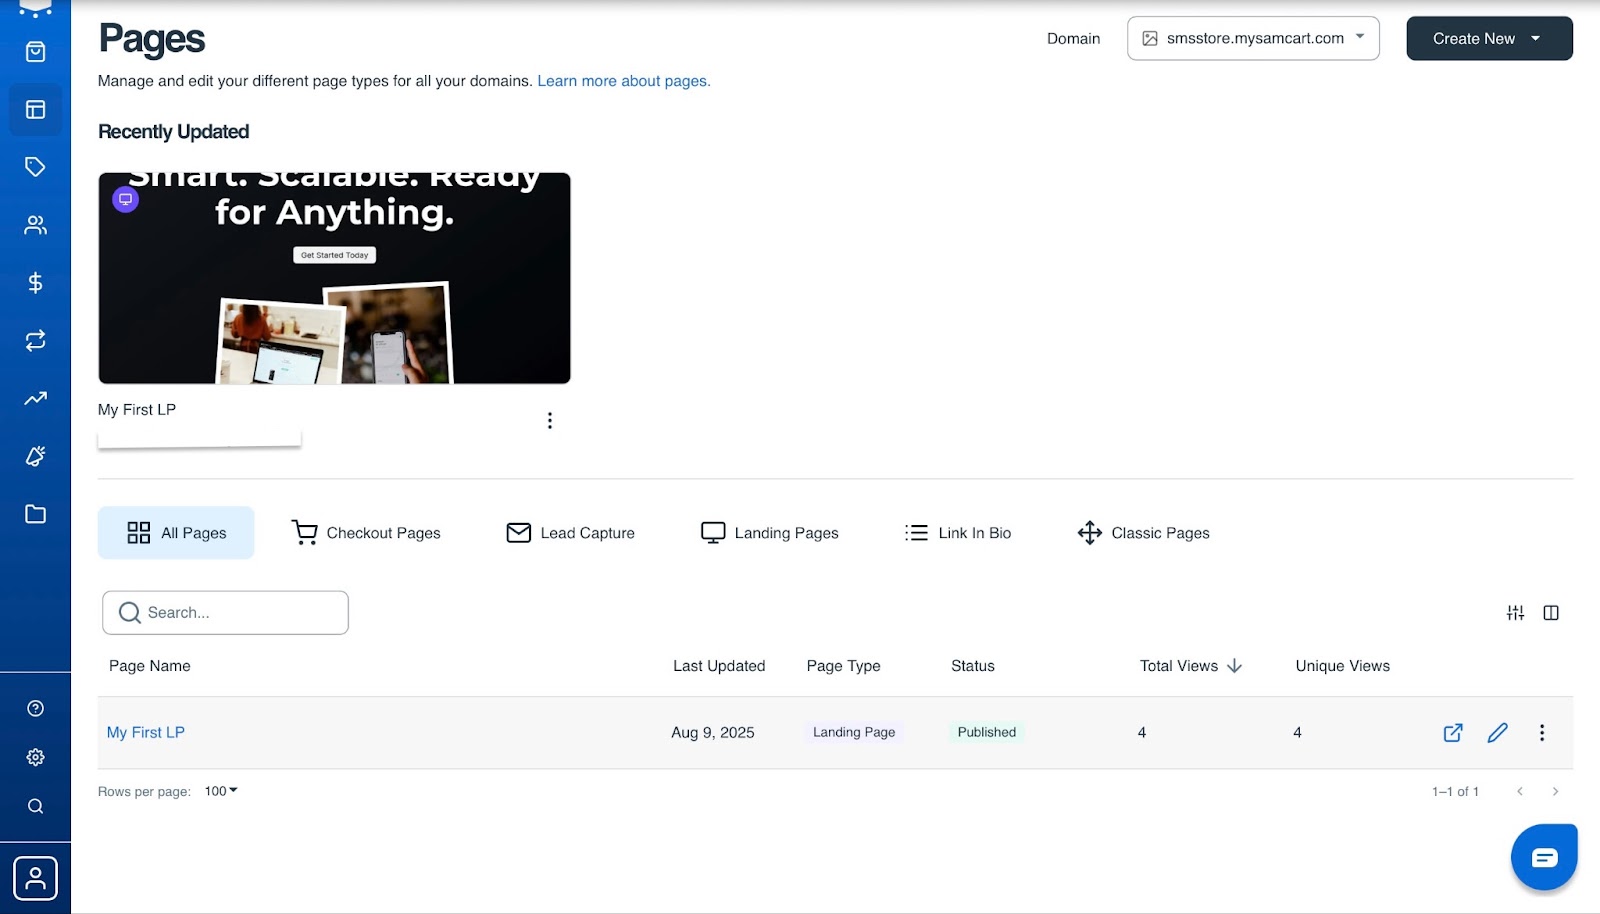
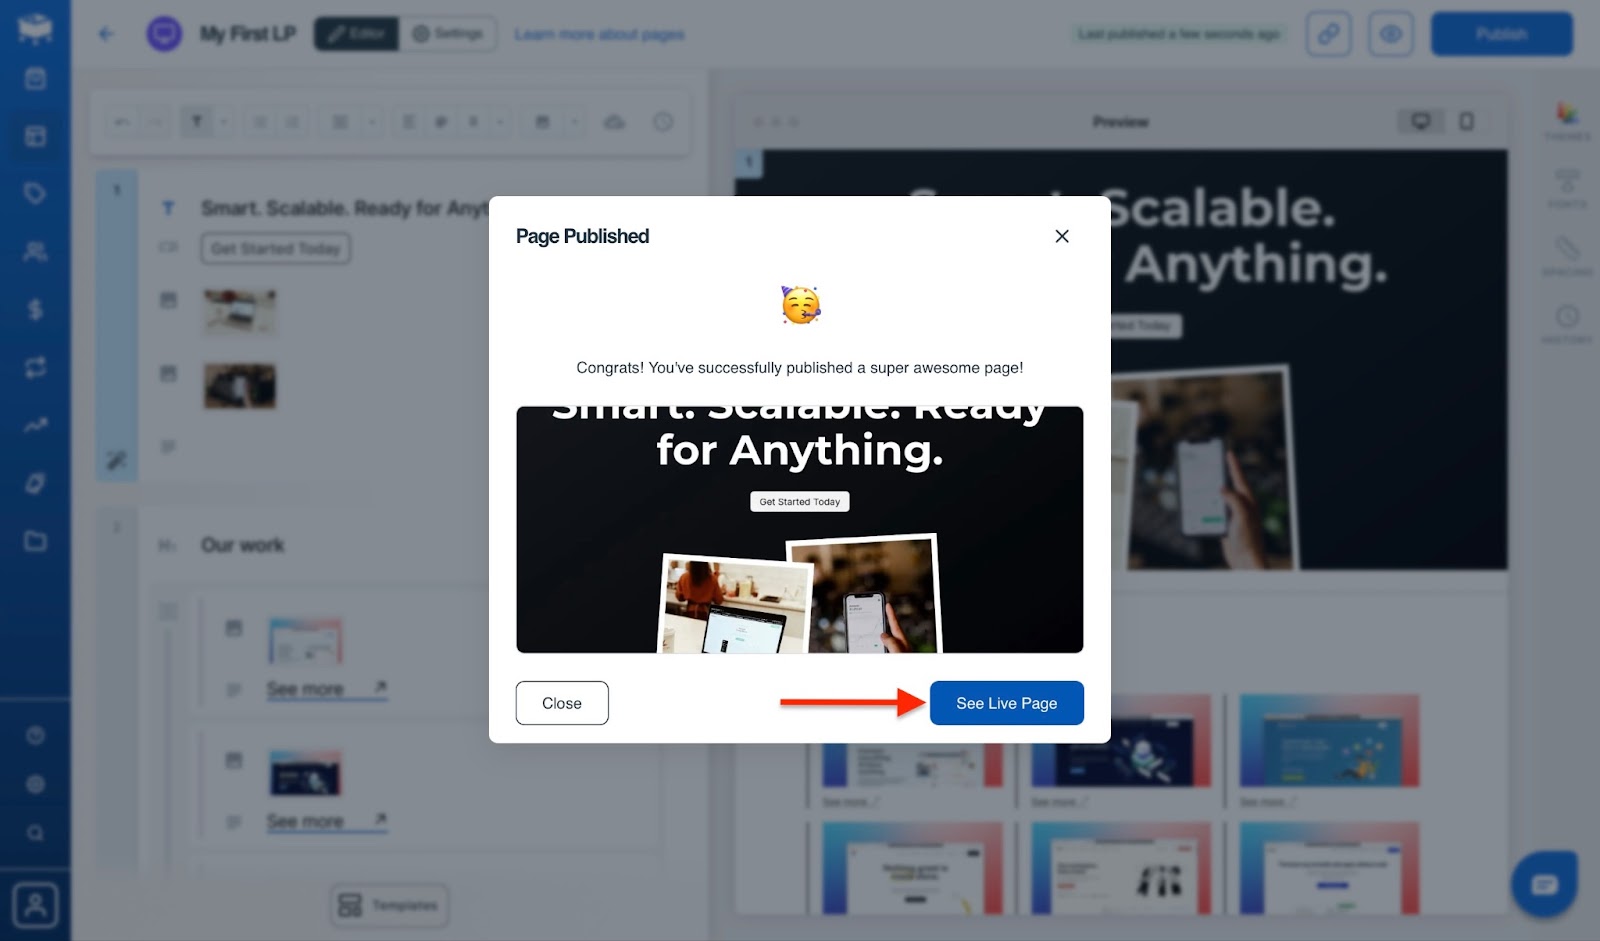
Once you are satisfied with your page, publish it. You can view your live page right away.
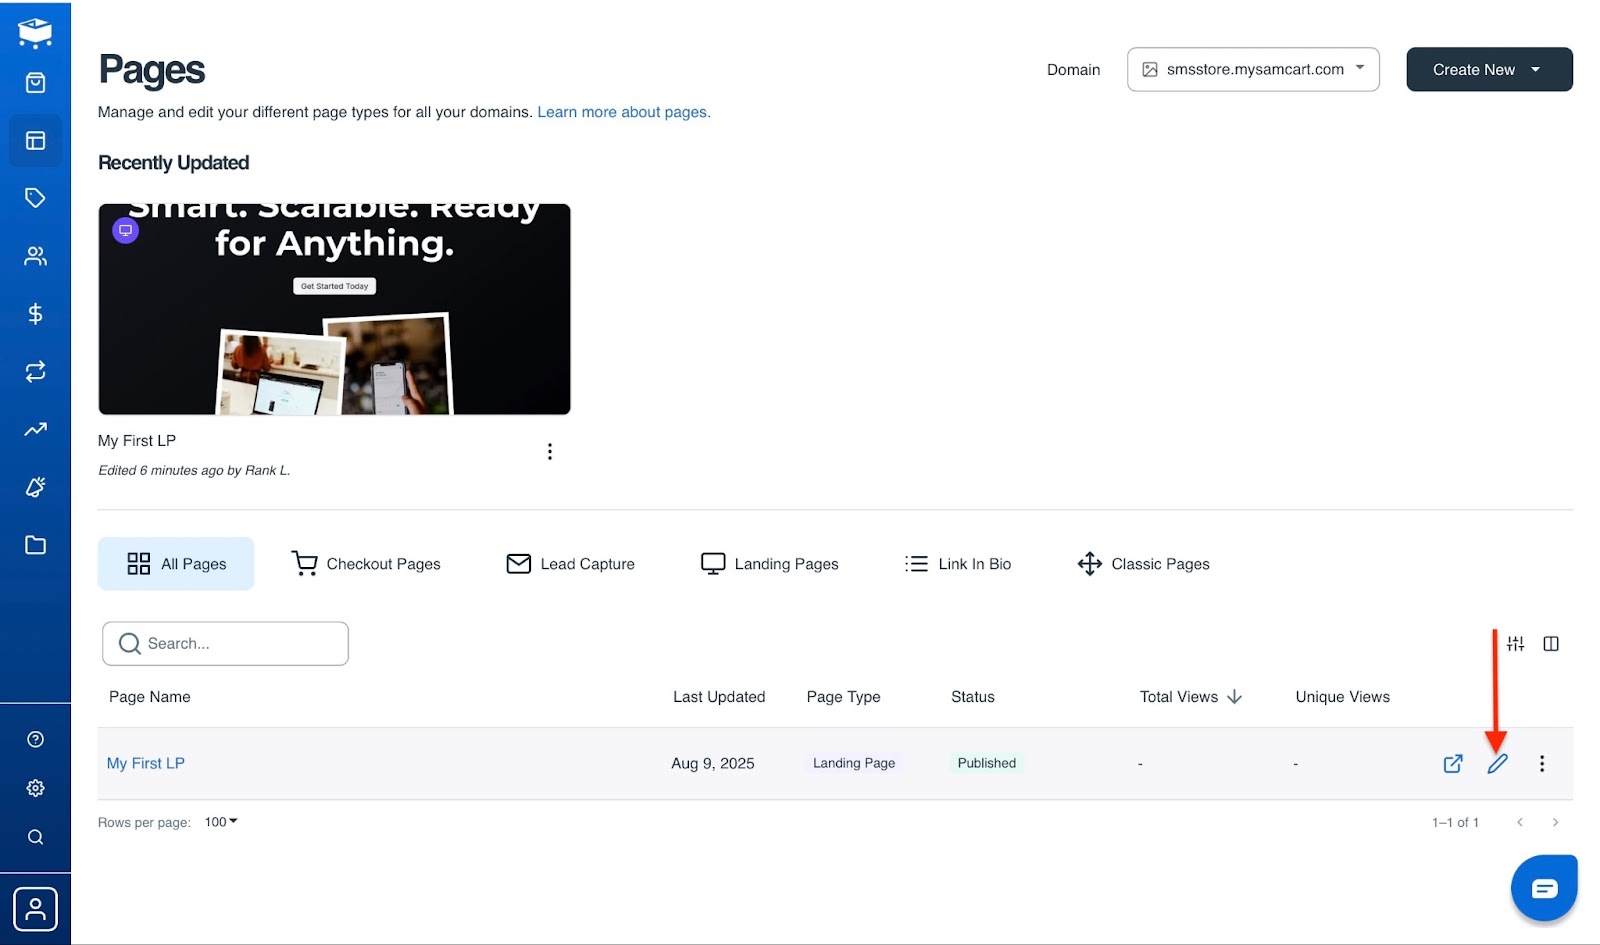
SamCart will display your landing page in the Pages window. You can click on the pen icon to edit it.
2. Offers
The offers feature on SamCart gives you strong control over sales promotions to help you sell better. These include tabs such as upsells, funnels, and coupons.
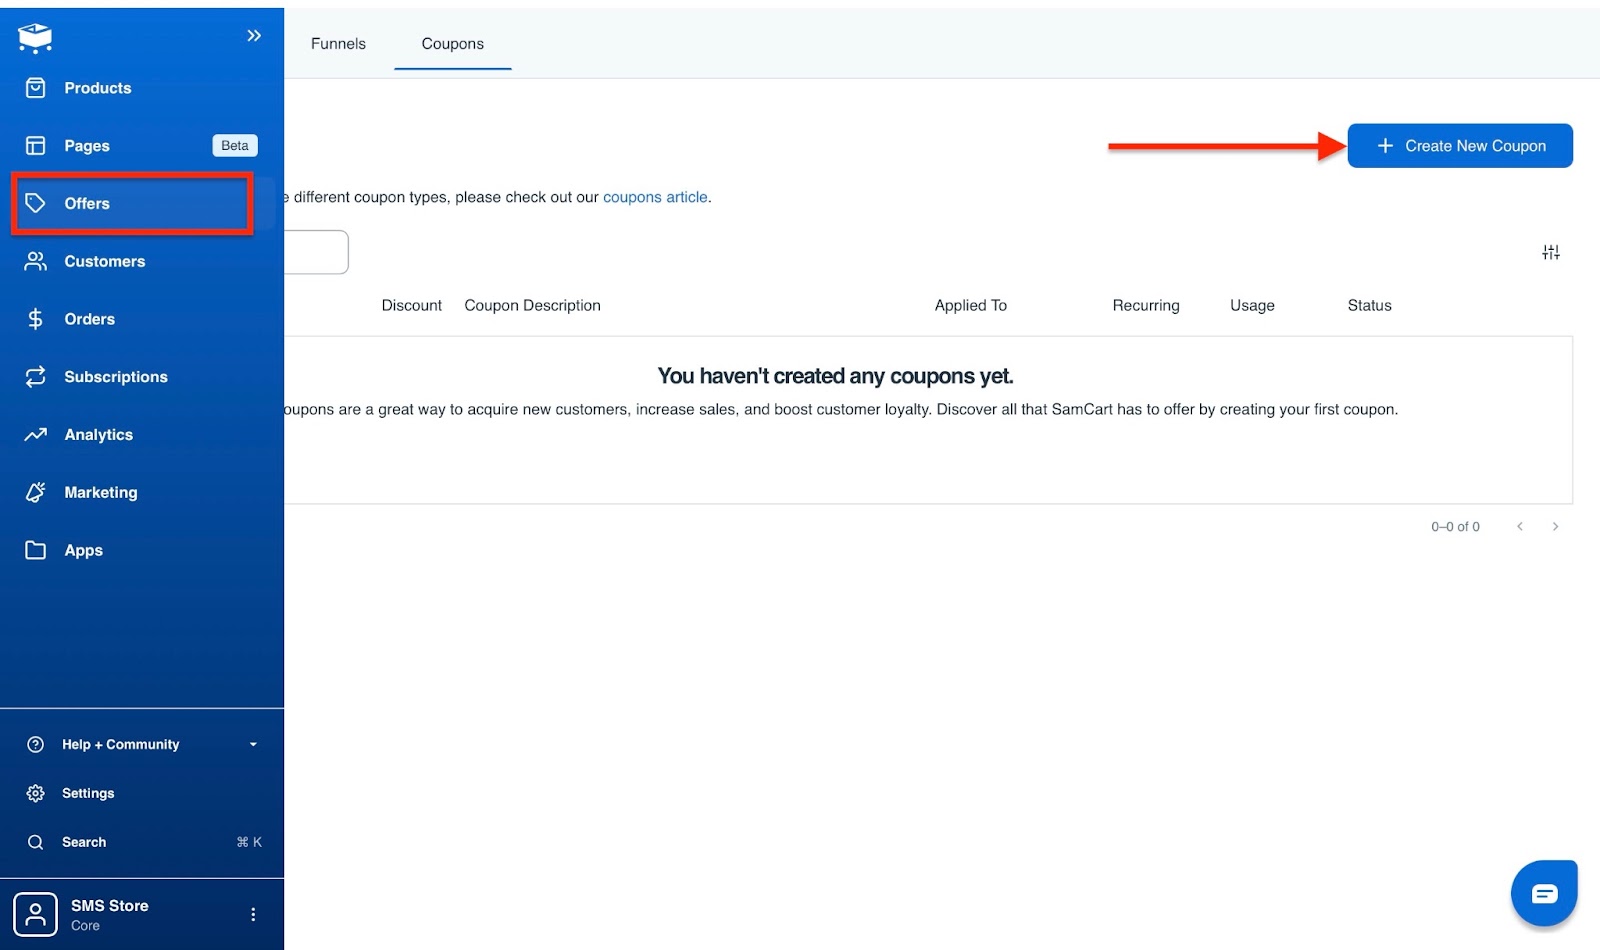
Let’s go through a few steps to create a coupon. First, go to the sidebar and select “Offers.”
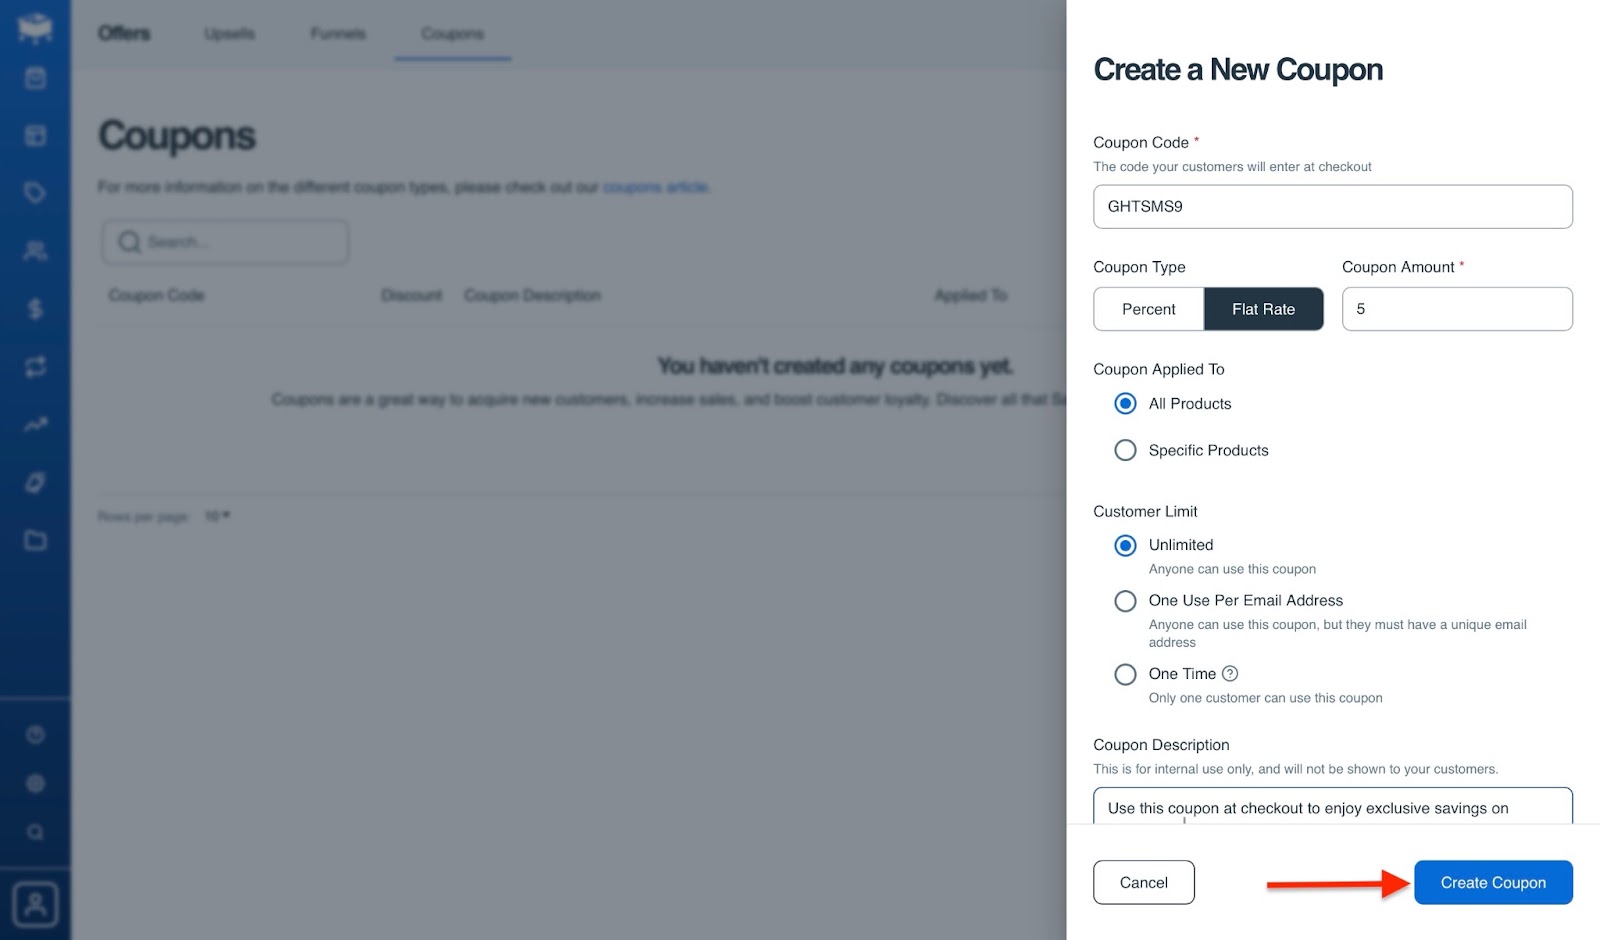
Then choose the Coupons tab and click “Create New Coupon.”
Enter the necessary details on the form and click “Create Coupon.”
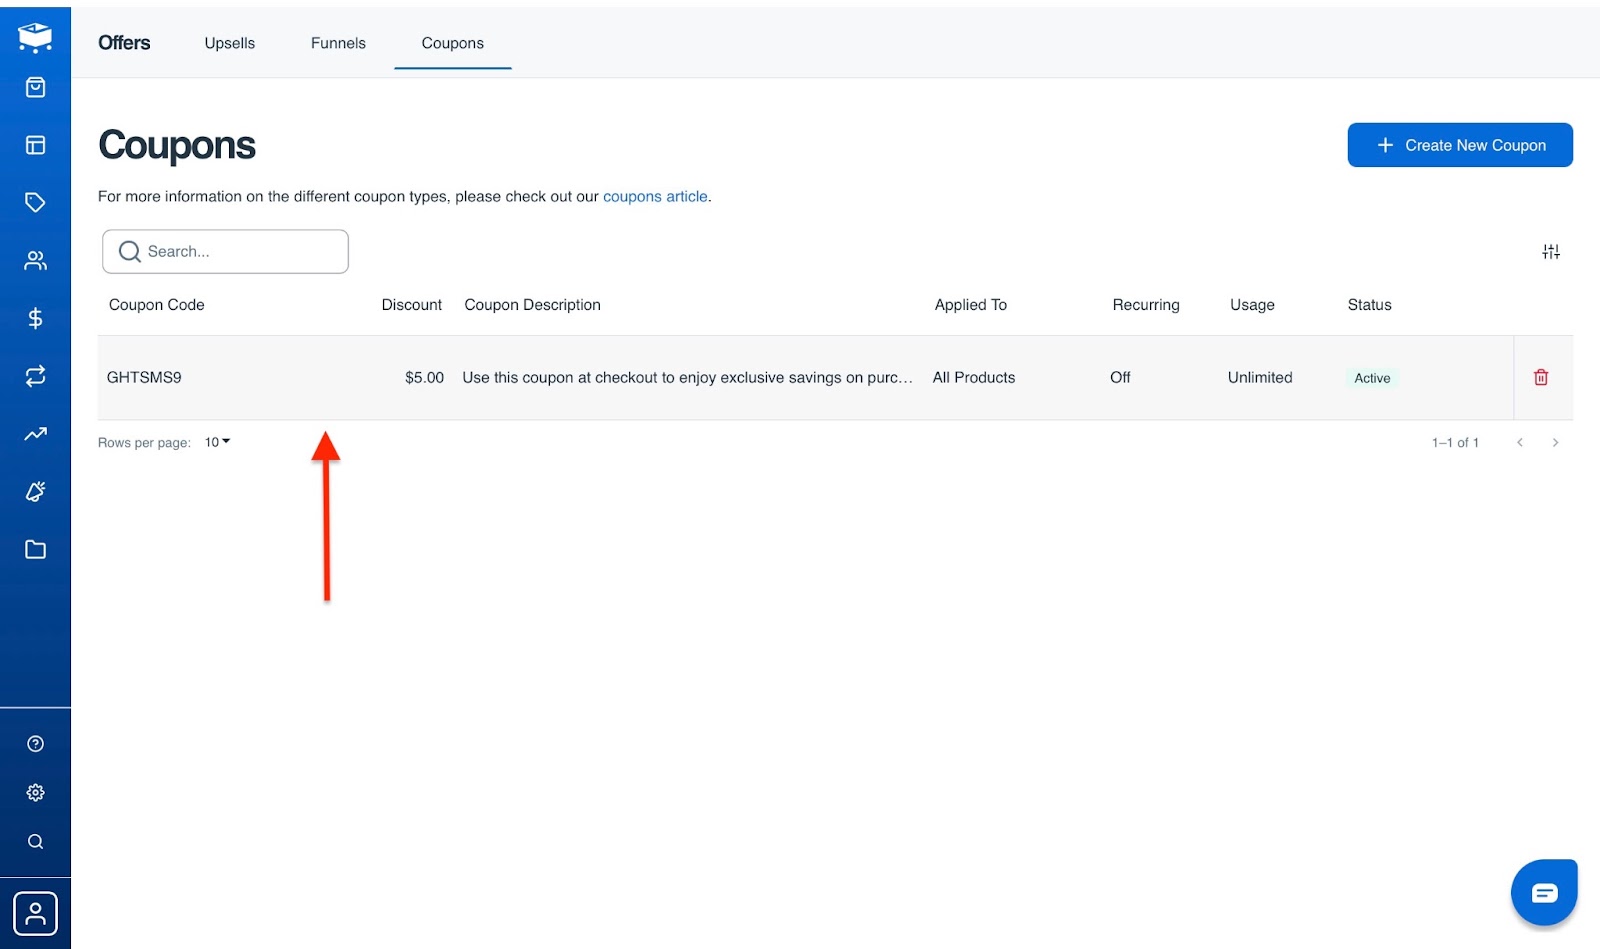
You can find your new coupon in the coupons window. Feel free to create more coupons for any new products you add.
[Fs-Toc-Omit]Best For
- Small to medium-scale companies that want to build high-converting checkout and landing pages, and have strong control over their sales funnels.
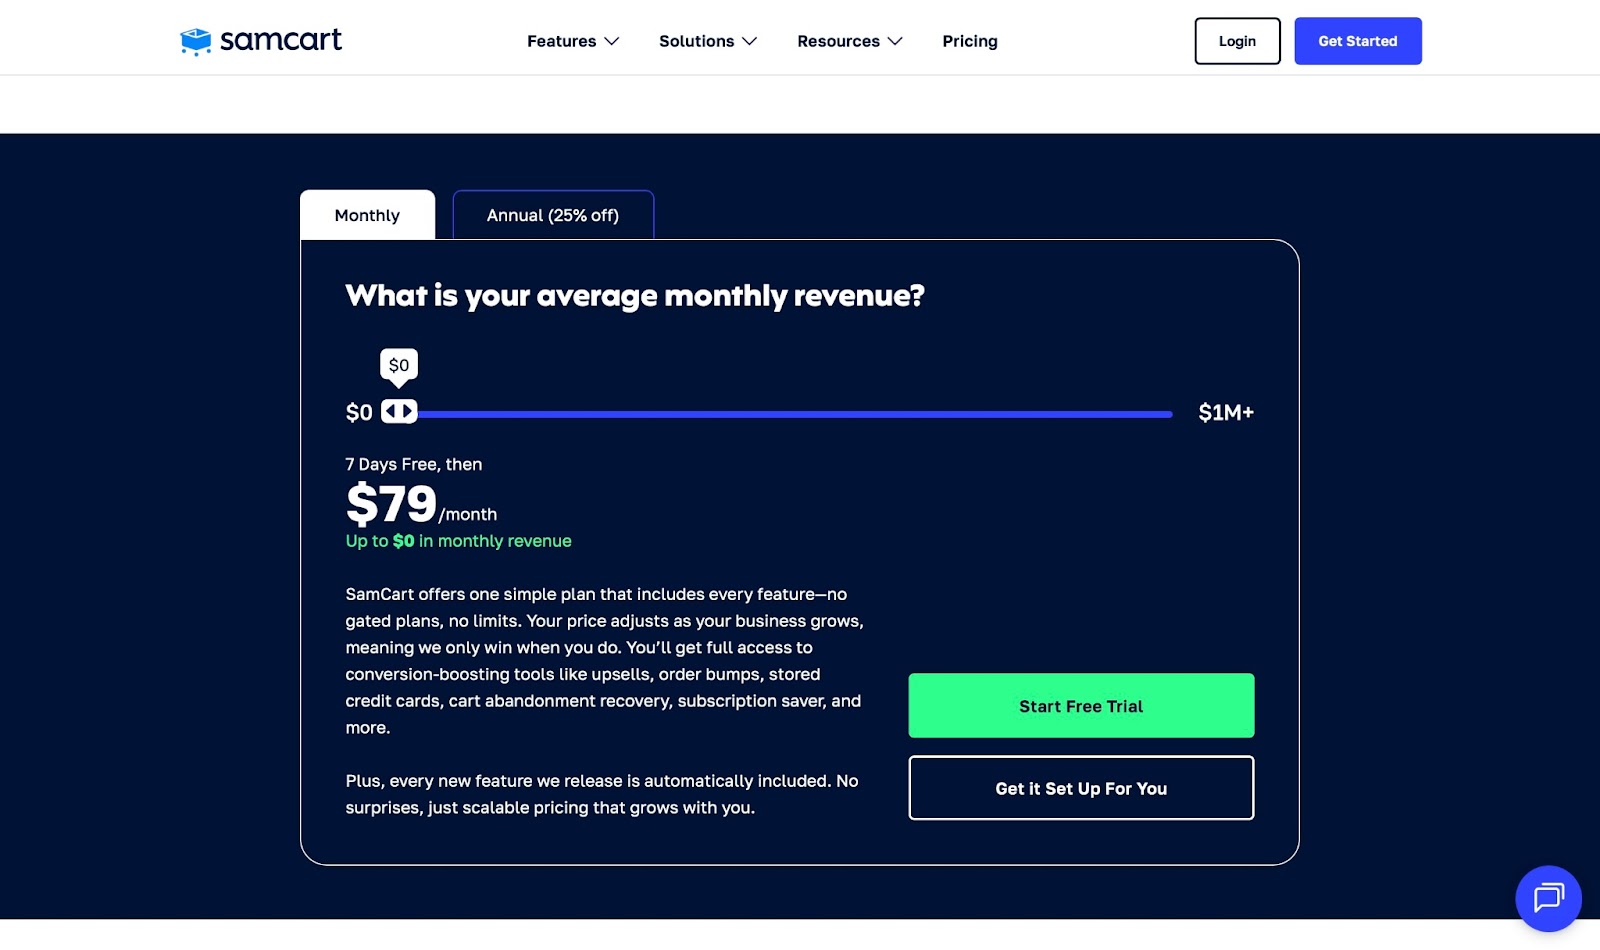
[fs-toc-omit]Pricing
- $79/month
9. SendOwl
Among our list of best platforms to sell digital products, SendOwl focuses primarily on digital product delivery. They are like the DHL or FedEx of digital products.

With SendOwl’s product feature, you either upload your digital product or provide a URL link, and it automatically delivers access to customers immediately after their payment is confirmed.
You don’t always have to upload an actual copy of the product. You can just provide the URL, and customers can still access the product.
After customers receive the product, the email buyers feature sends thank-you notes to them. It’s also possible to create and save email templates that SendOwl automatically sends to customers after purchase.
SendOwl’s email marketing feature allows you to add elements like subscribe buttons, social links, CTAs, stock images, videos, and URLs to customize your messages.
Within its storefront feature, you can upload a profile image and add social media links without leaving the page. Your SendOwl storefront link is displayed at the top right corner, so you have the option to copy and share it across platforms.
Again, the feature allows you to organize your storefront products by adding, removing, or sorting items alphabetically.
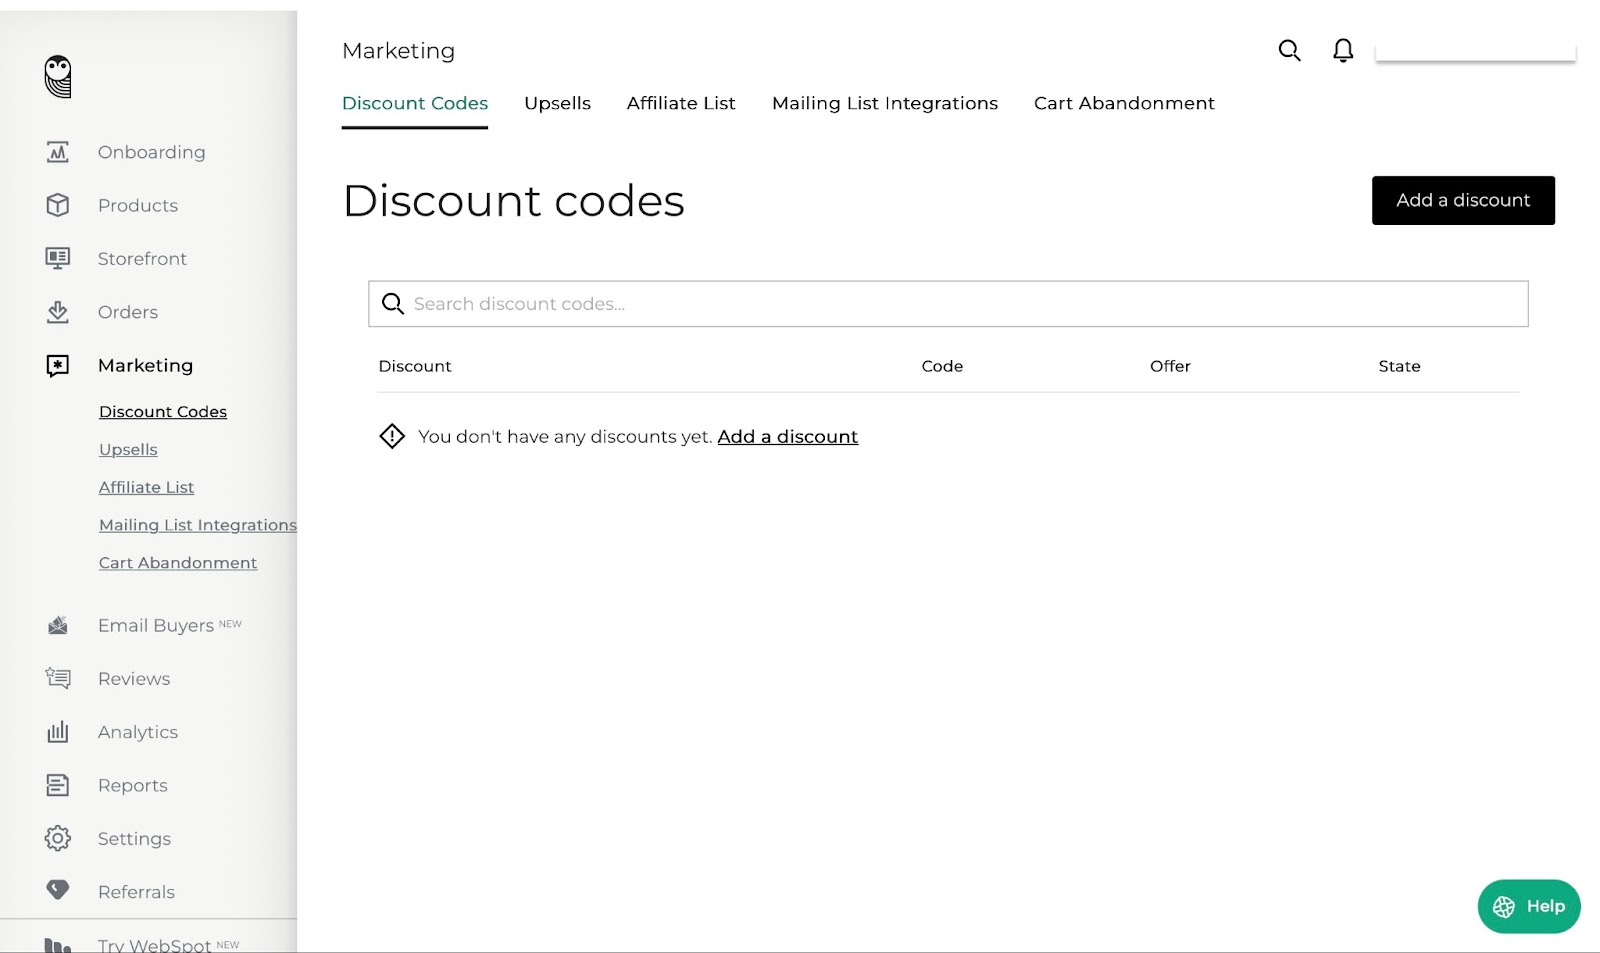
Additionally, SendOwl’s marketing feature helps you create discount codes from the marketing tab by clicking “Add a discount.”
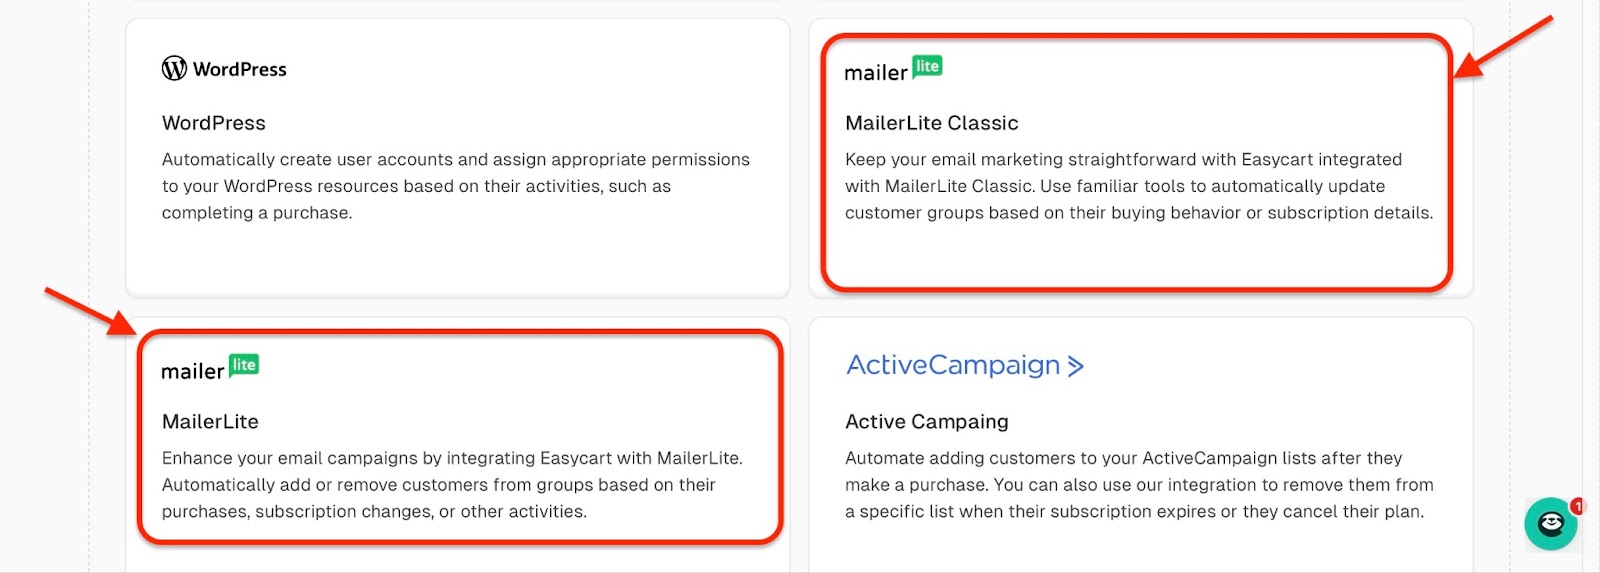
Your affiliate and mailing lists are all in one place. You can integrate your mailing list with top industry apps like MailChimp, MailerLite, and ActiveCampaign, among others.
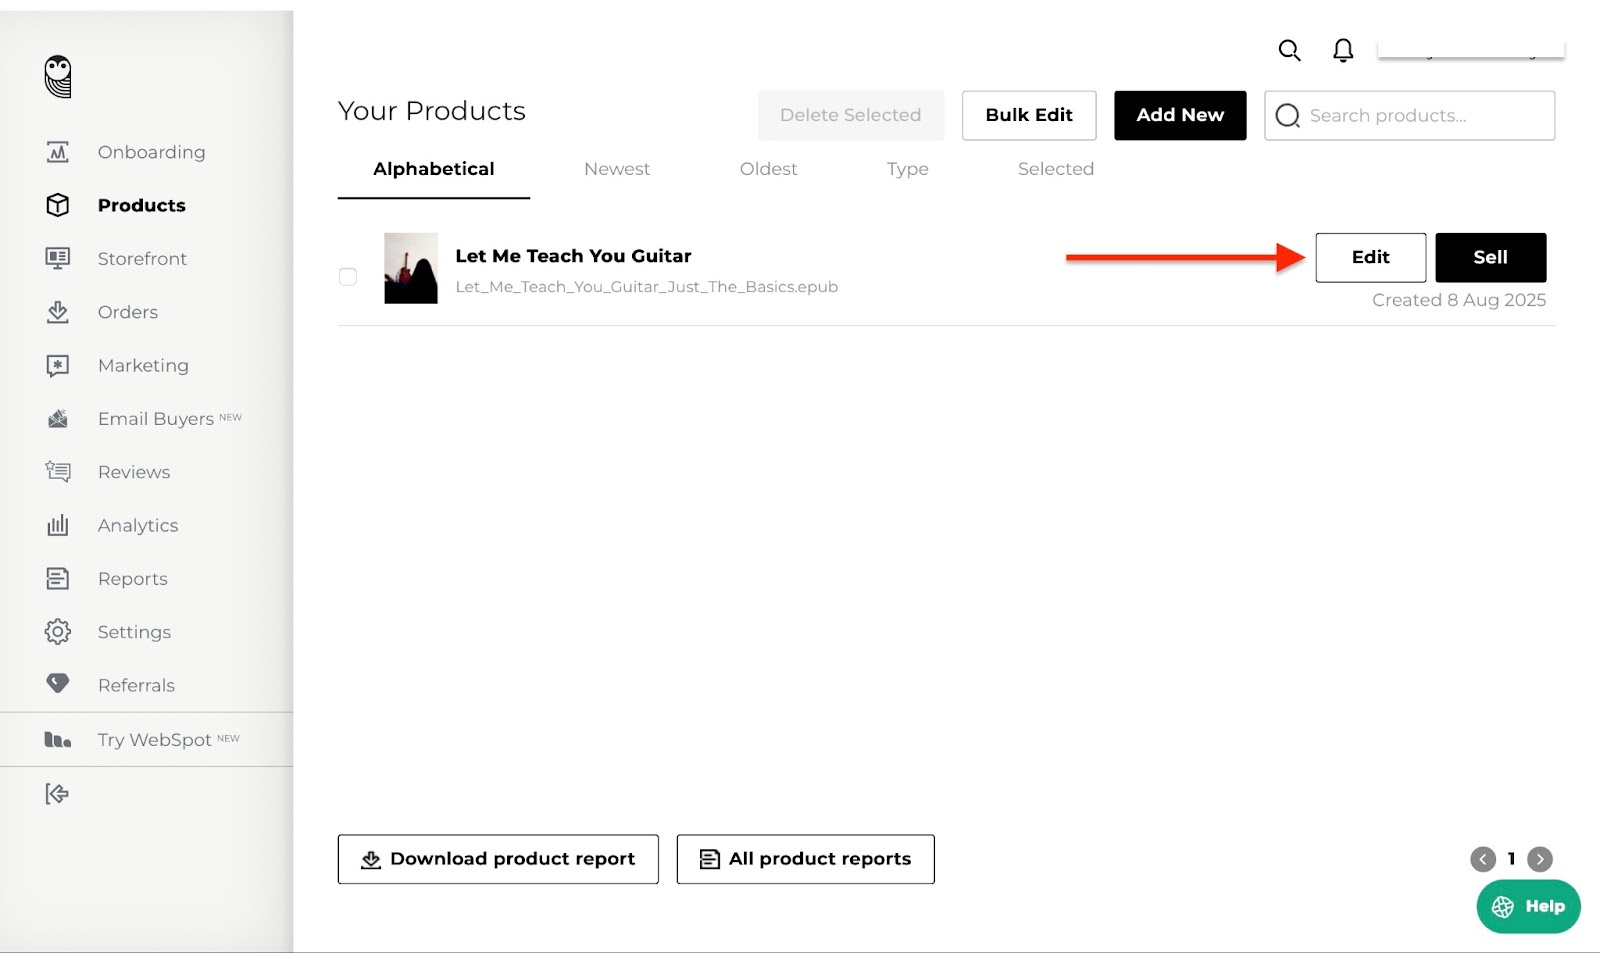
I’ll show you how to add your first product on SendOwl.
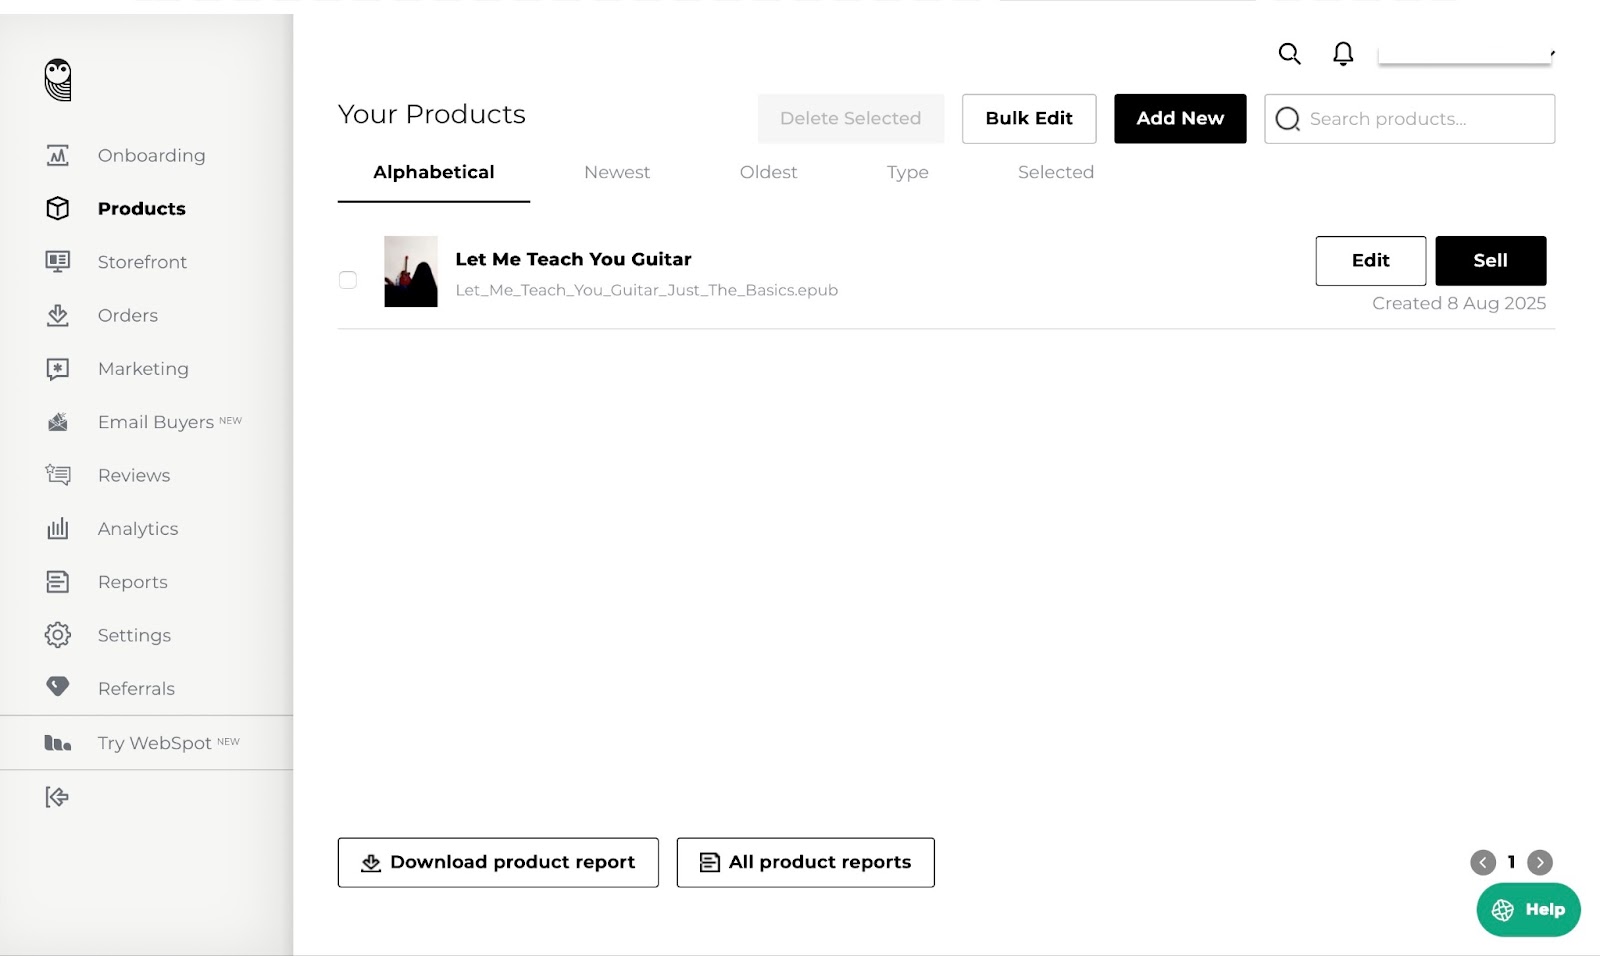
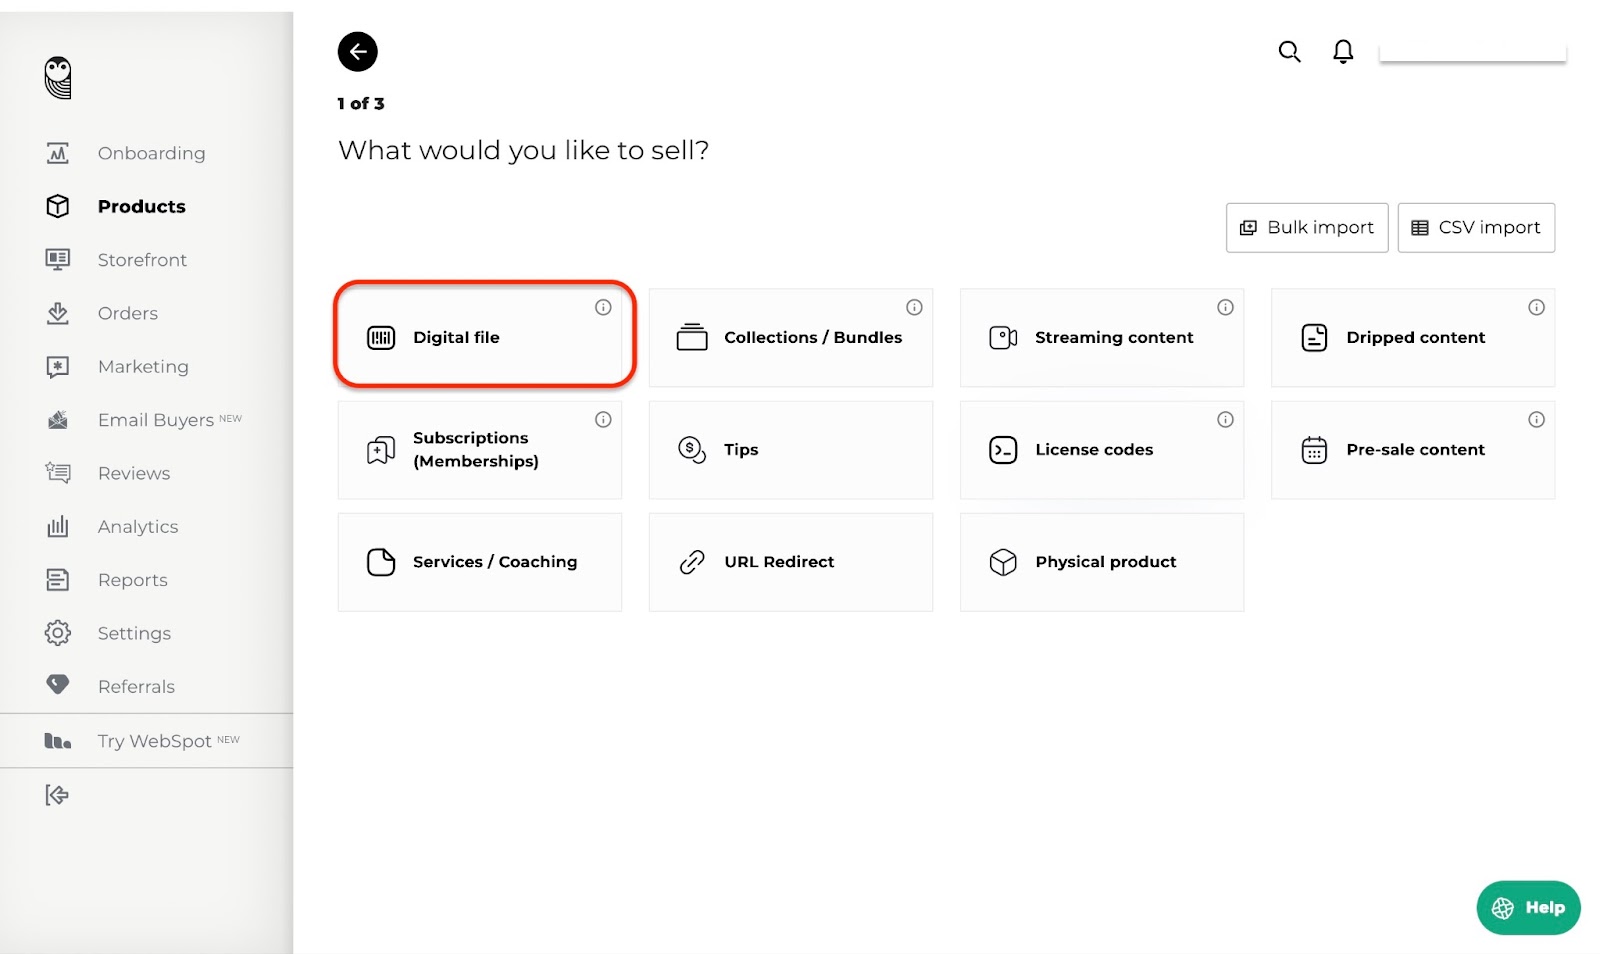
In the products window, click the “Add your first product” button.
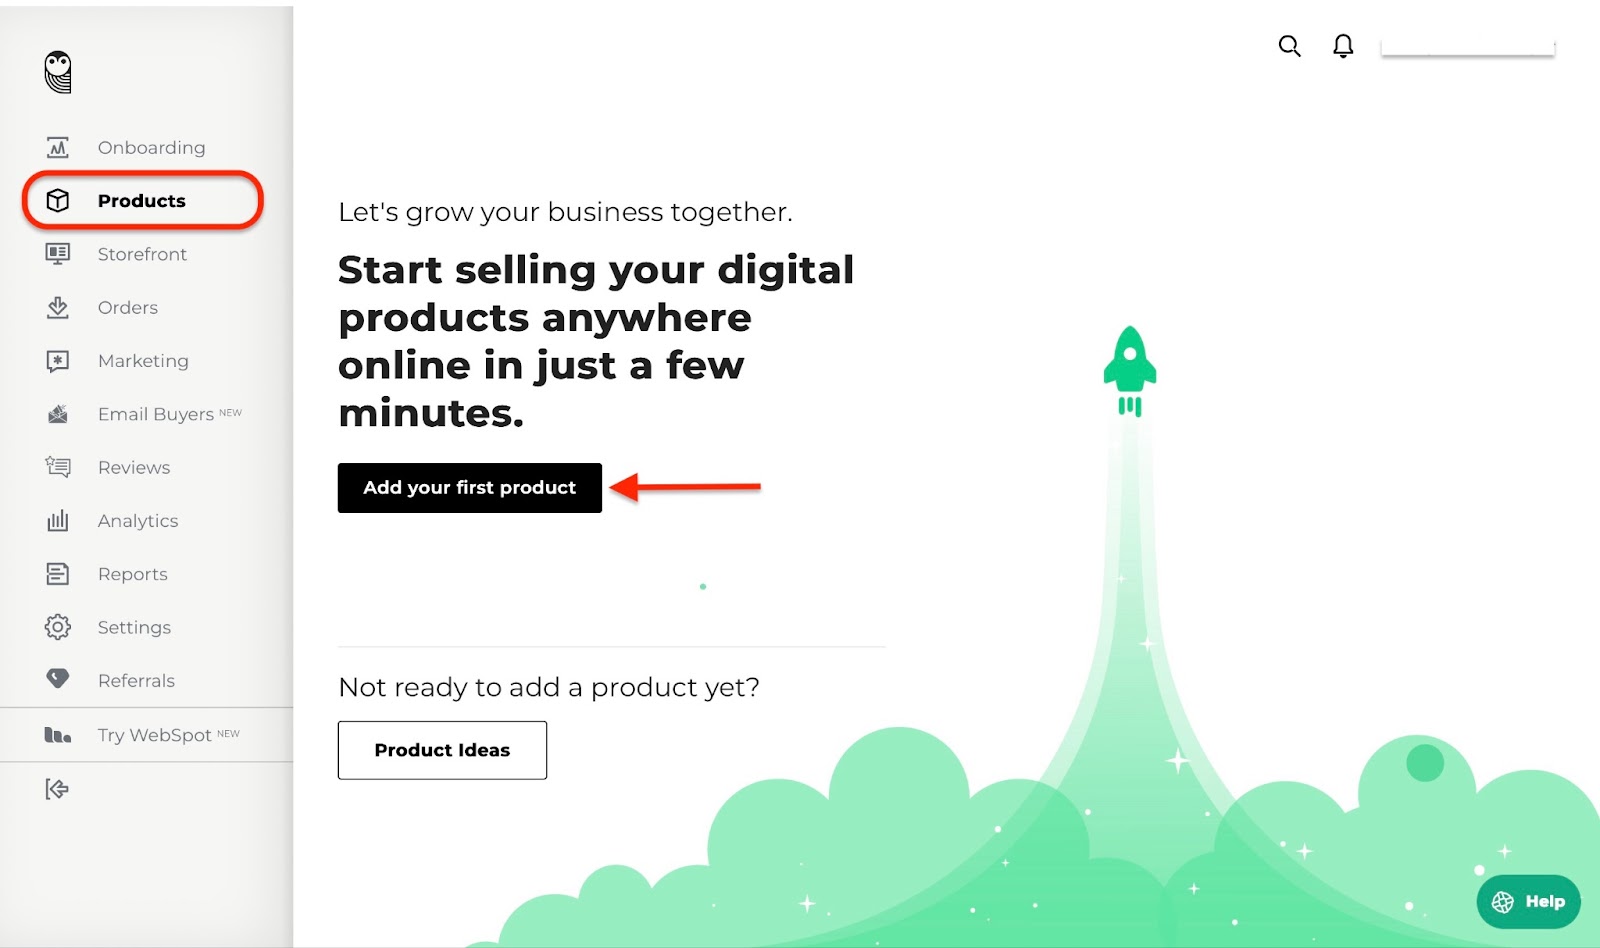
Next, choose what you would like to sell. In this example, let’s go with “Digital file”.
Fill out the form in the next window.
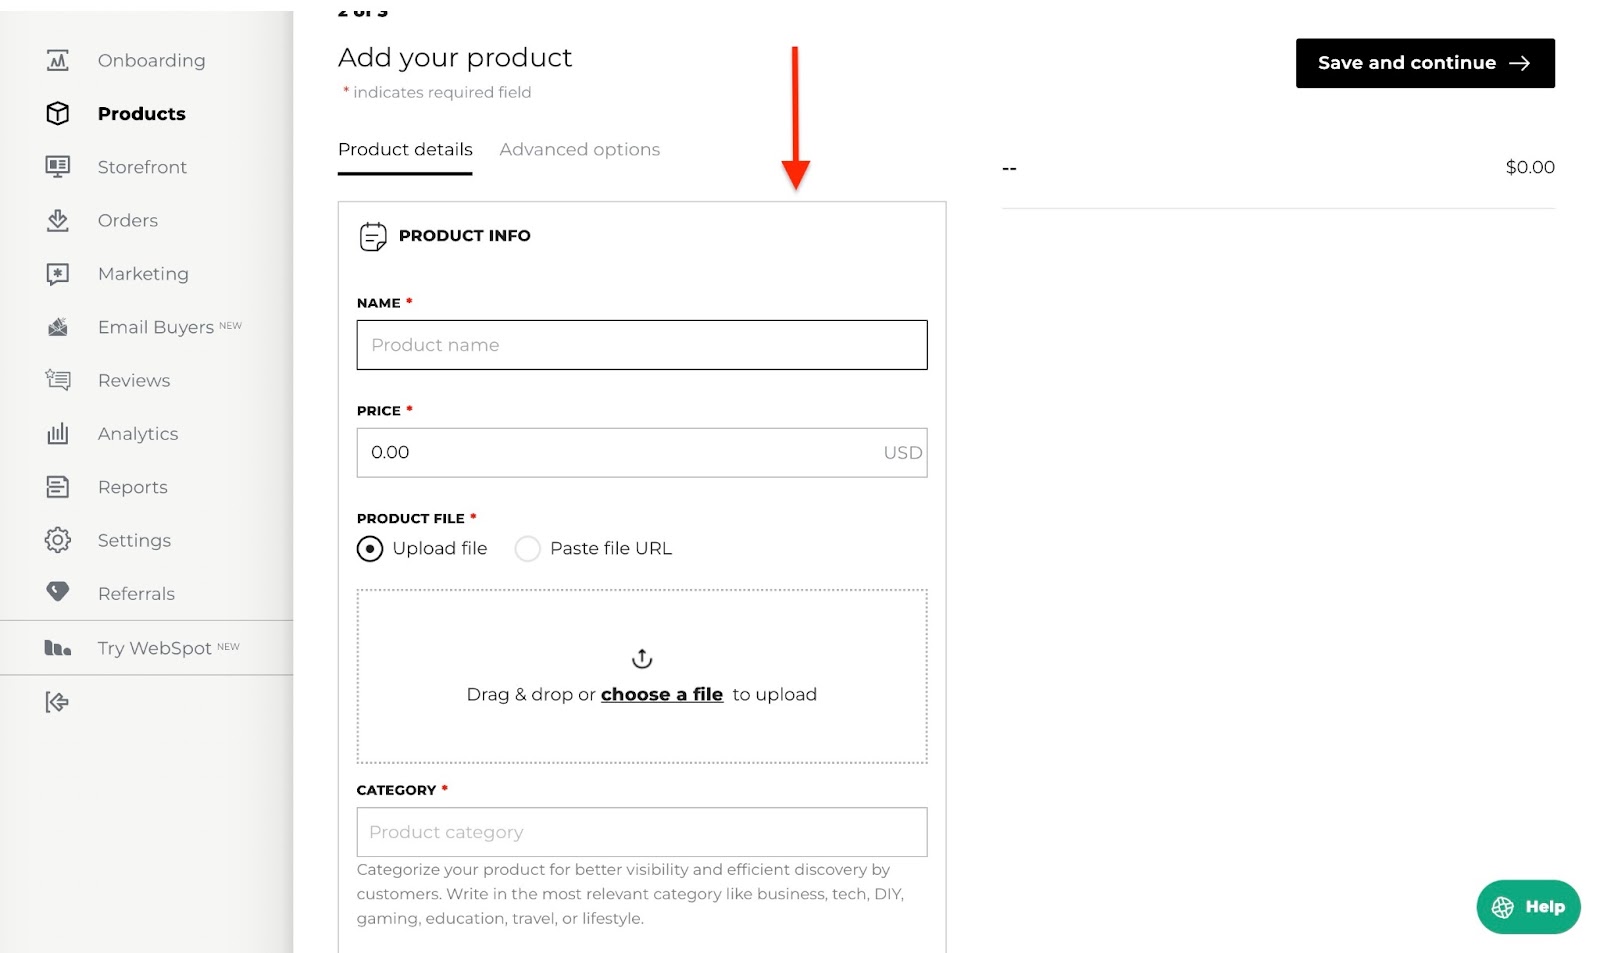
Next, upload a file or paste the URL of a digital product.

Click “Advanced options” to add more details such as tax category, download validity, download attempts, and download page folder, among other choices.
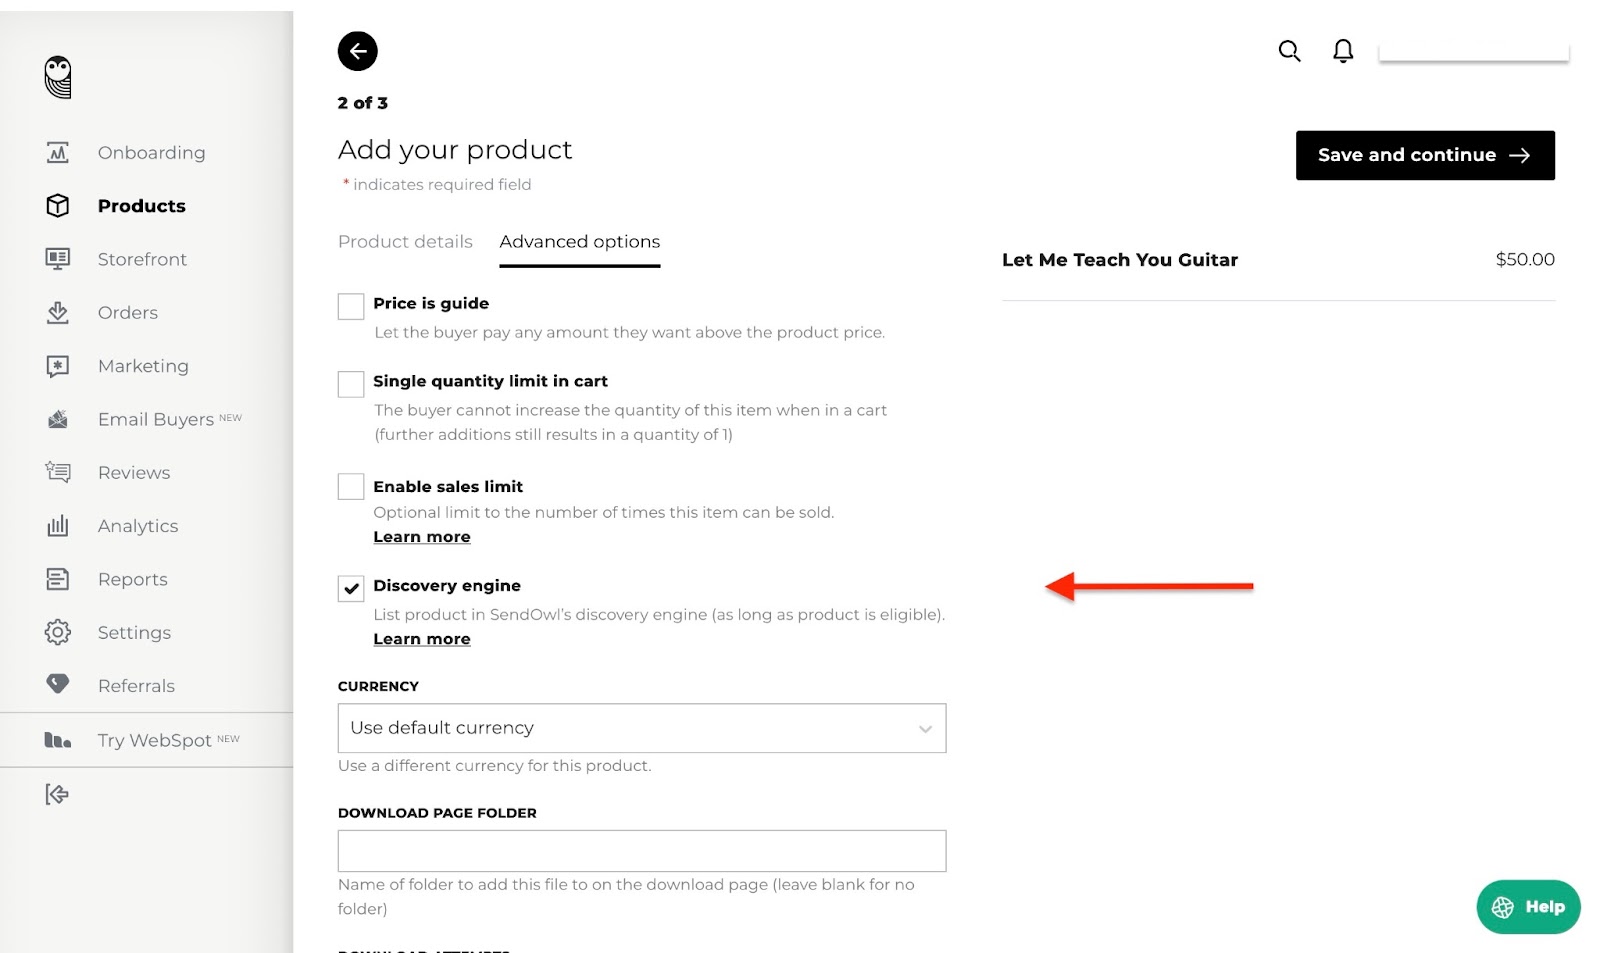
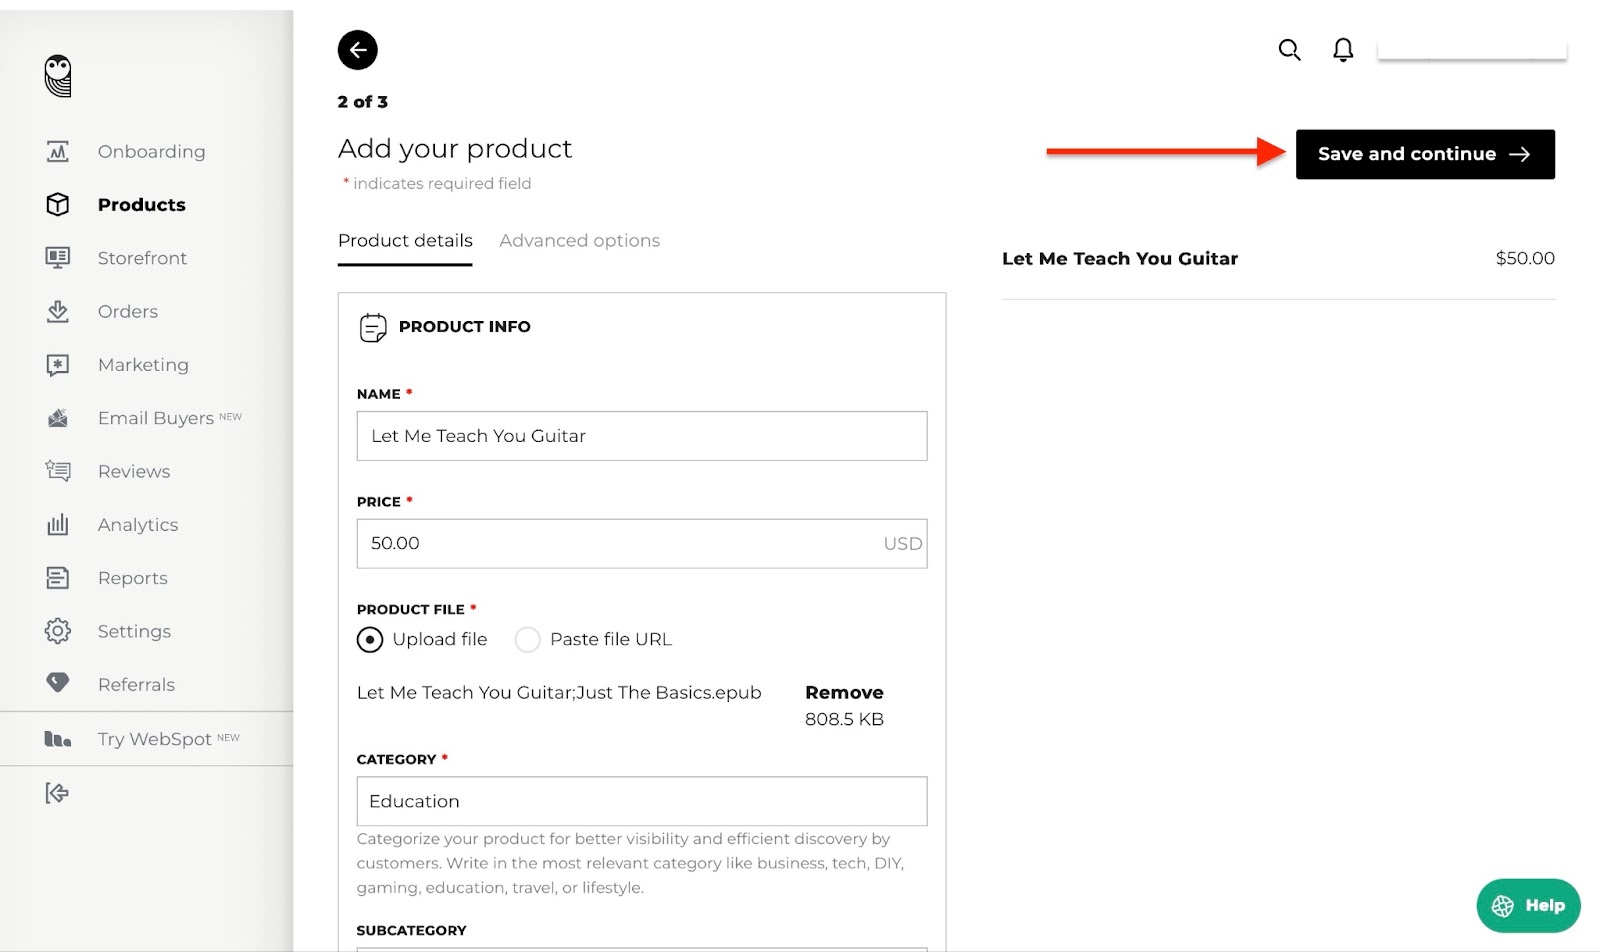
Tick the appropriate boxes and fill in the necessary information in that section. After that, click “Save and continue.”
If you're using SendOwl for the first time, you’ll need to add your company details before you begin selling.
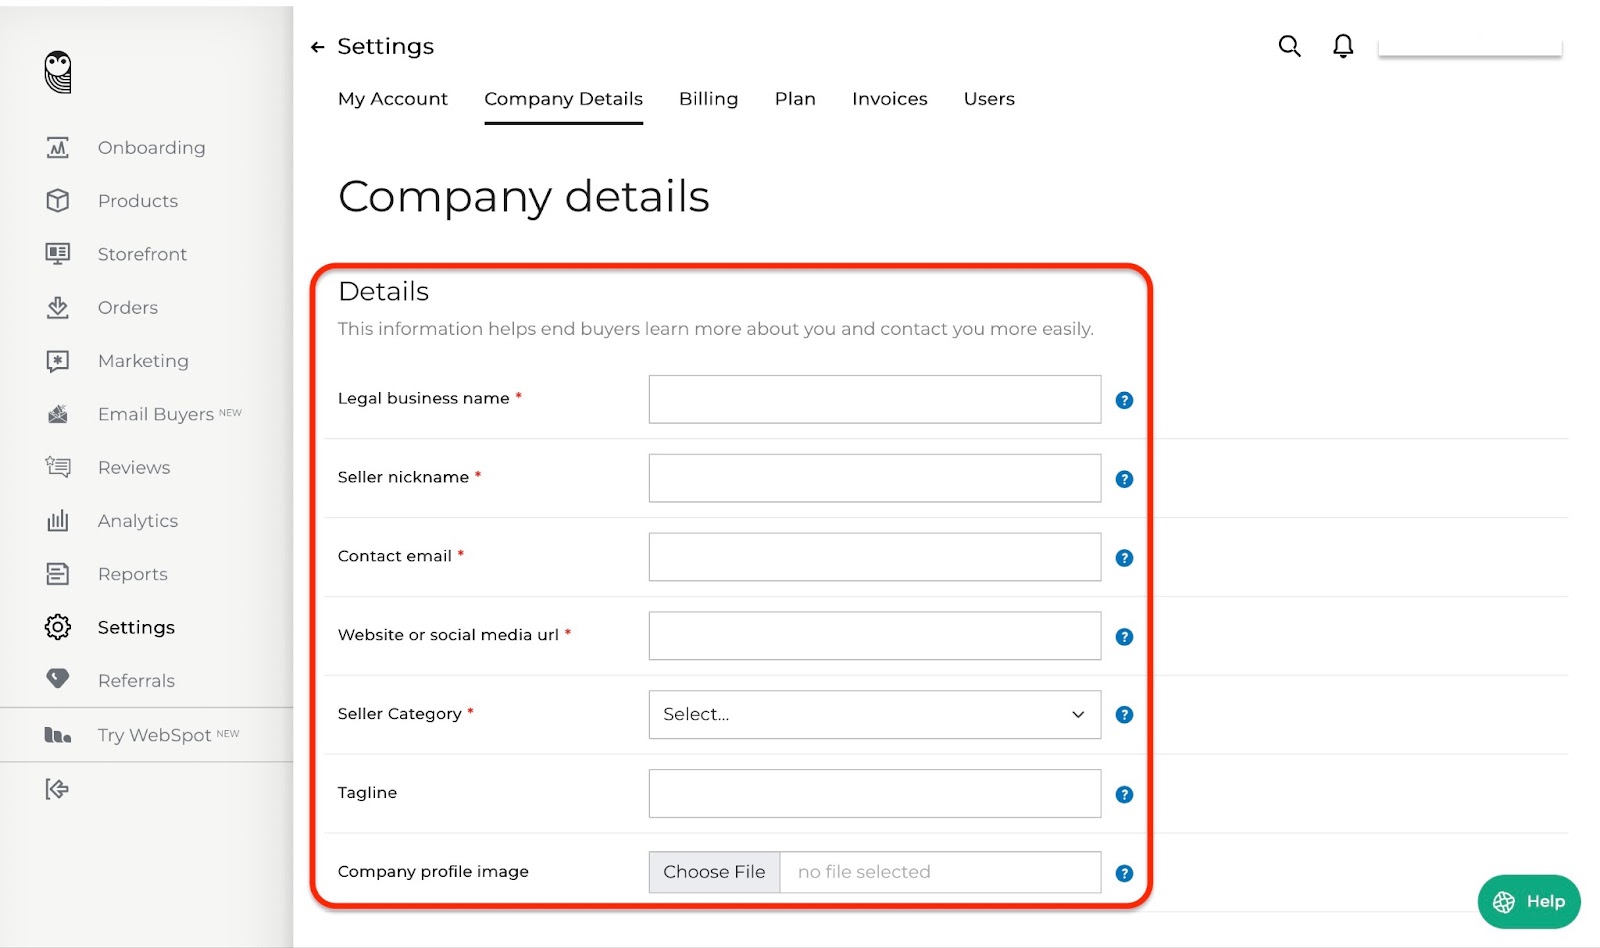
Fill in the necessary details and click “Update.” Now, your digital product is ready to sell.
[fs-toc-omit]Key features
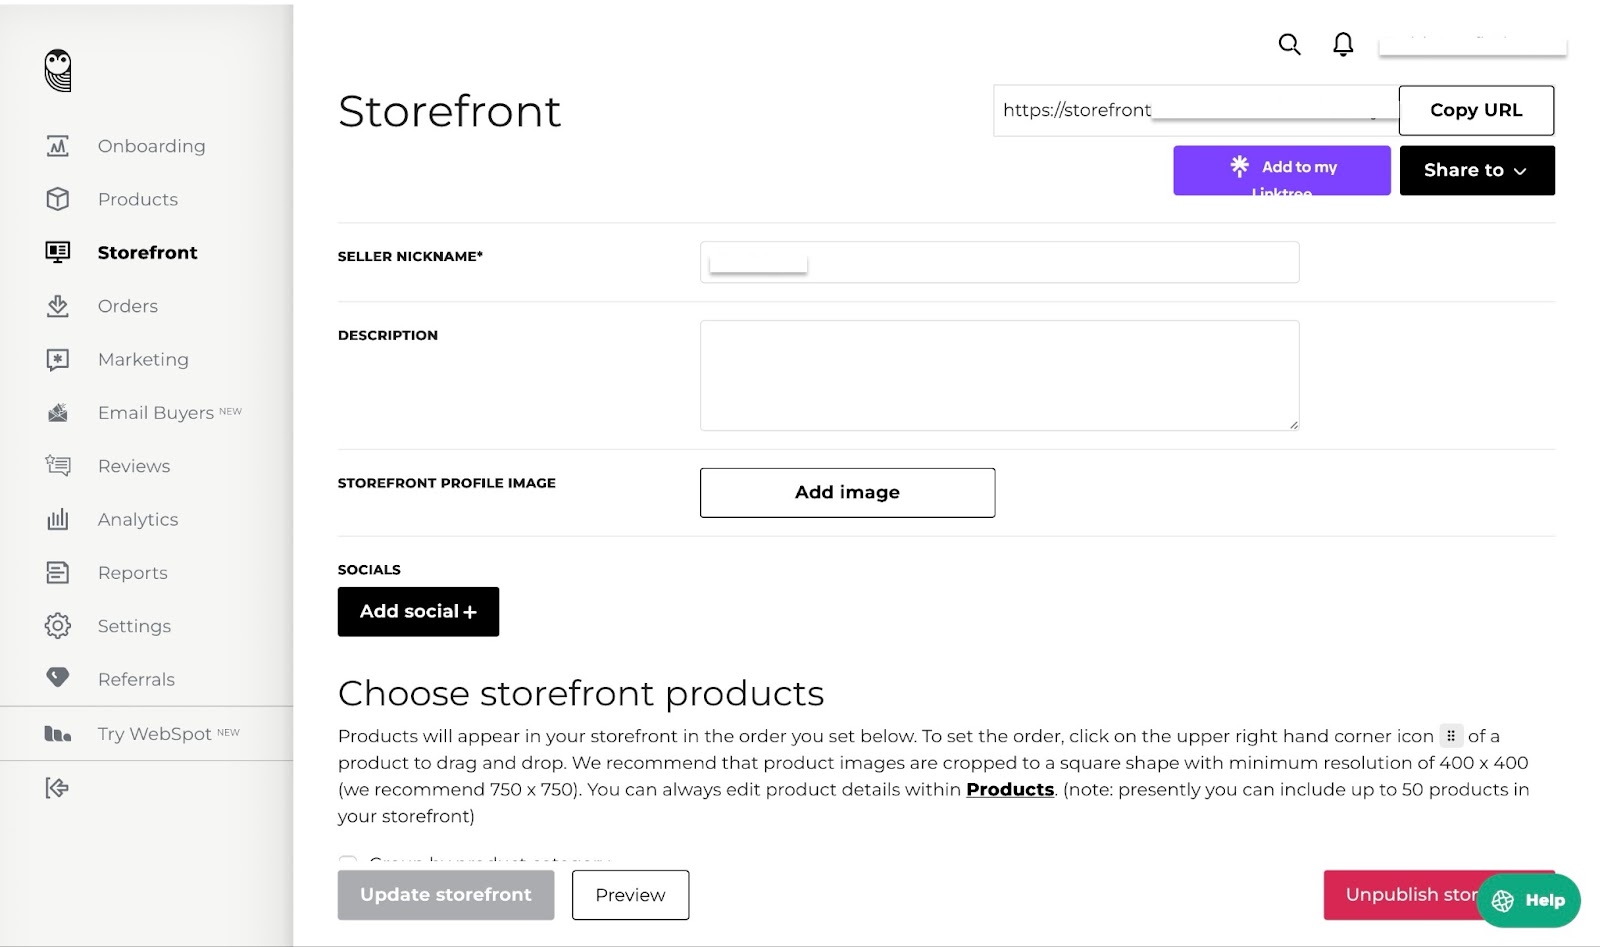
1. Storefront
SendOwl’s storefront feature is an online store for displaying the digital products you’ve added.
To create a SendOwl storefront, select “Storefront” from your menu.
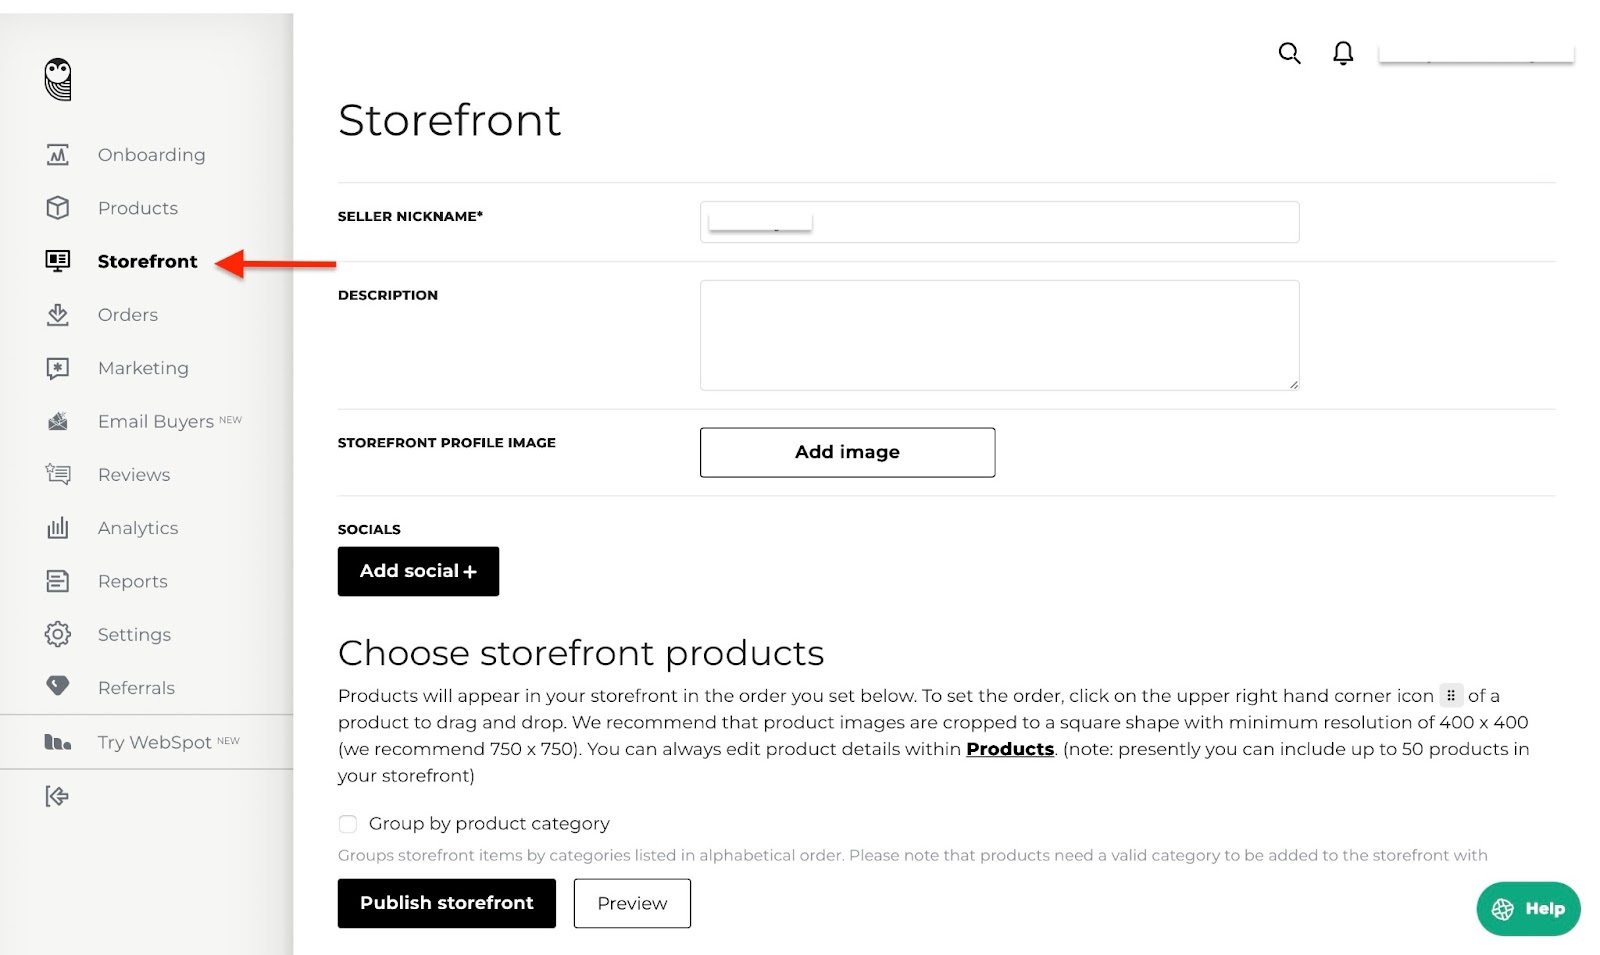
Next, add a description of the store, your social media links, and an image.

Once you have done that, publish your storefront. You can choose to take a preview of it.
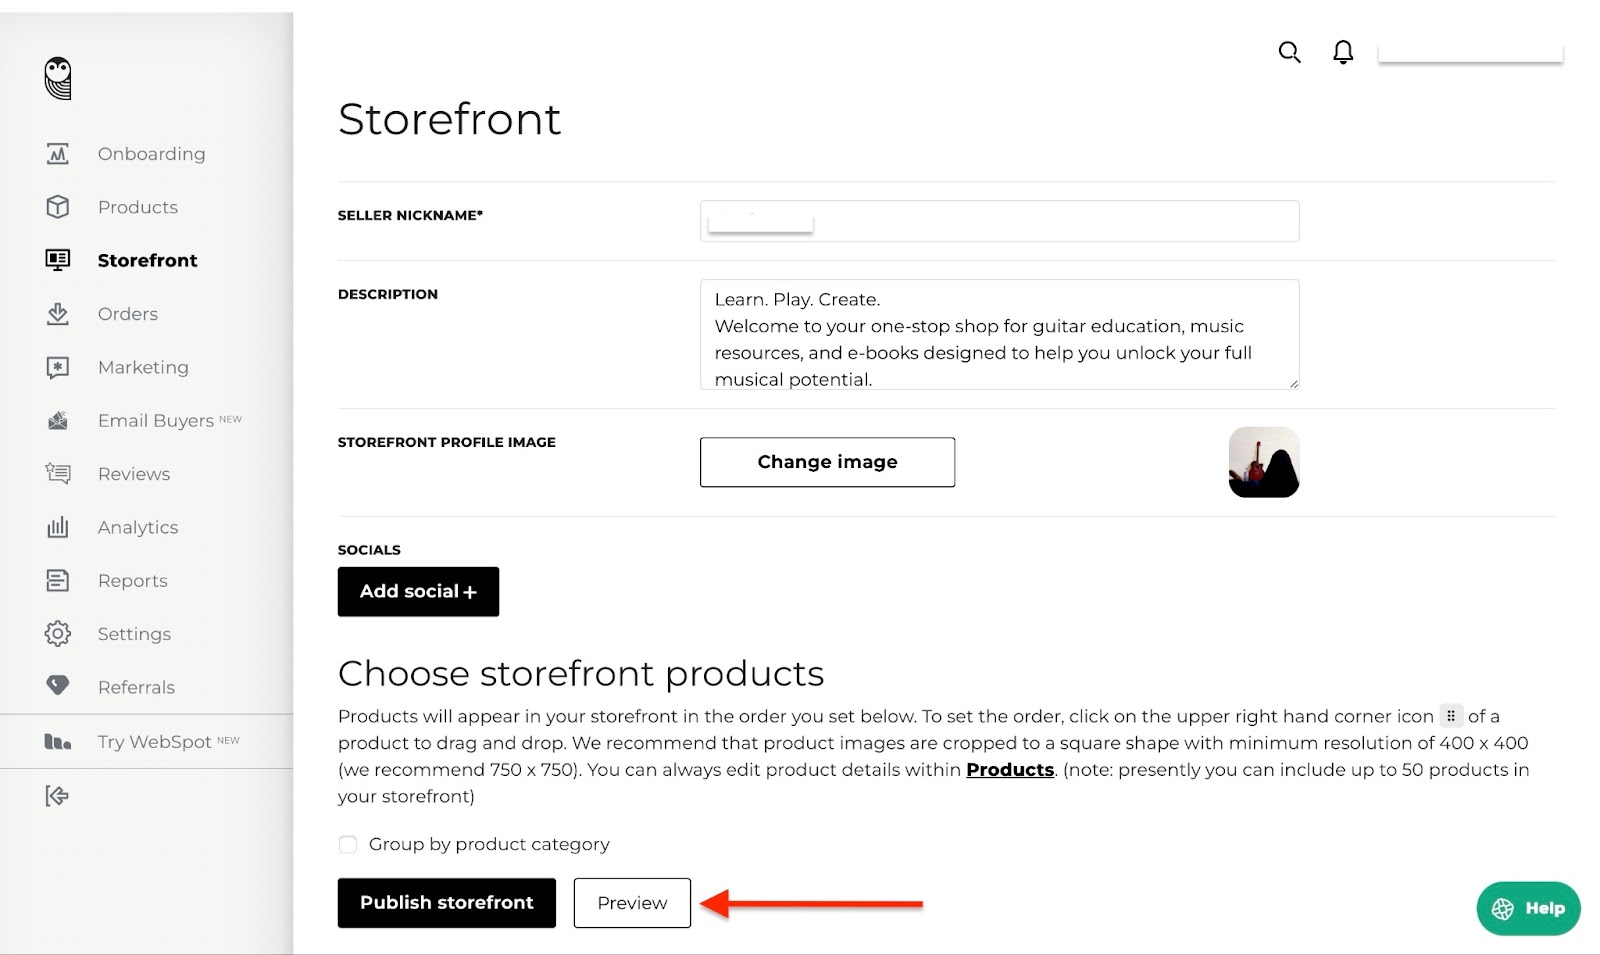
This is what the storefront will look like once published:

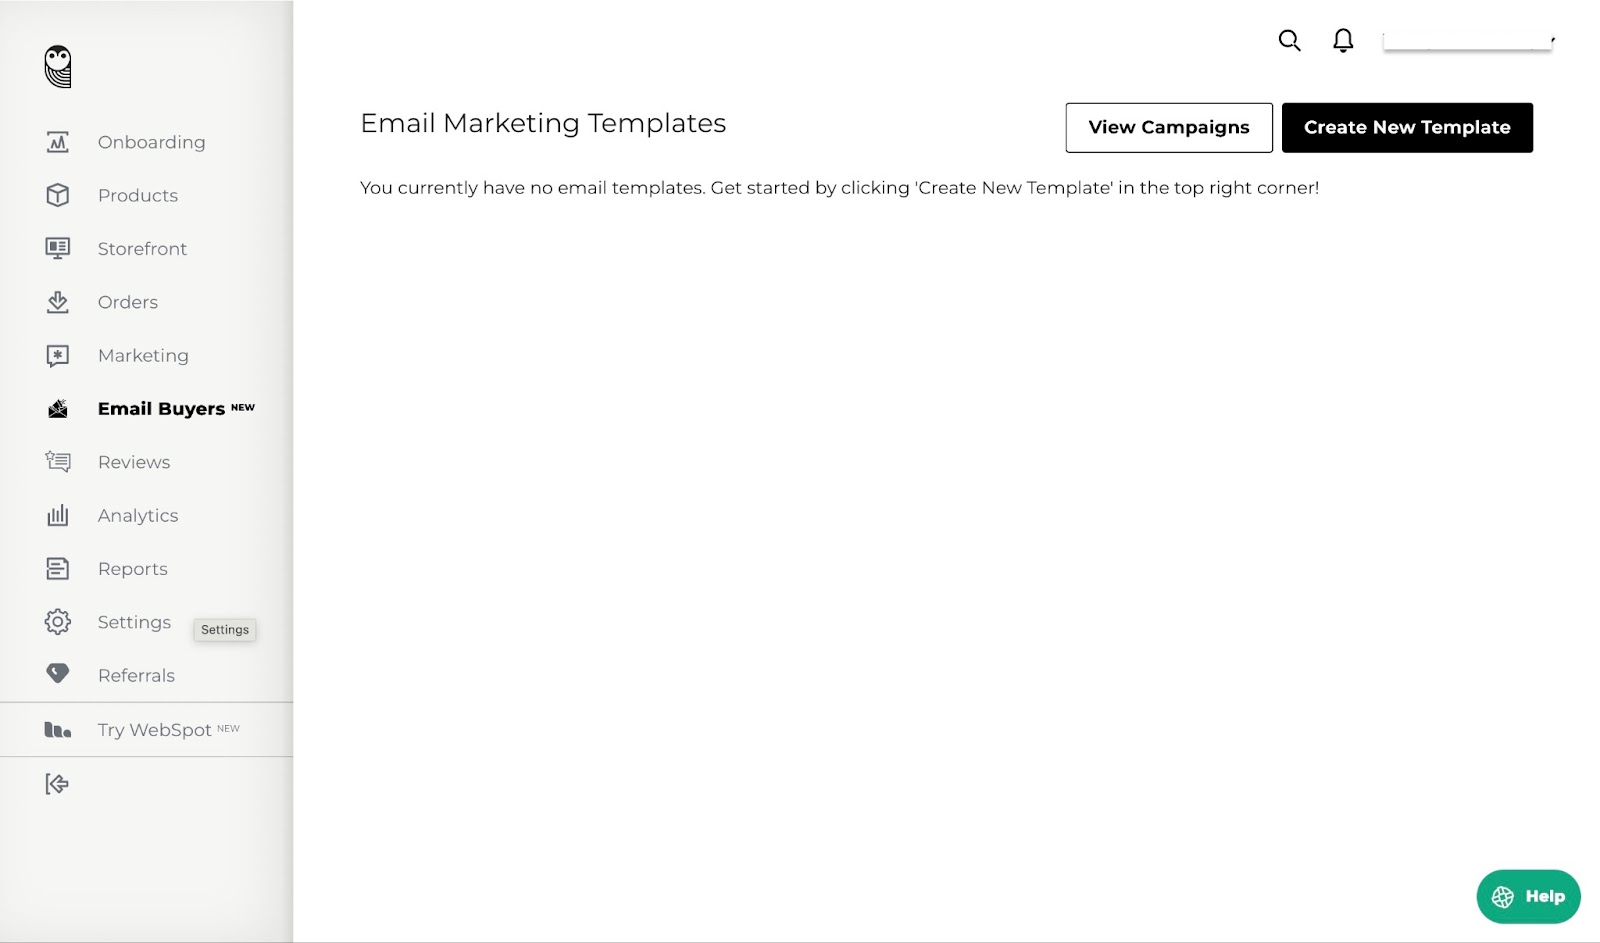
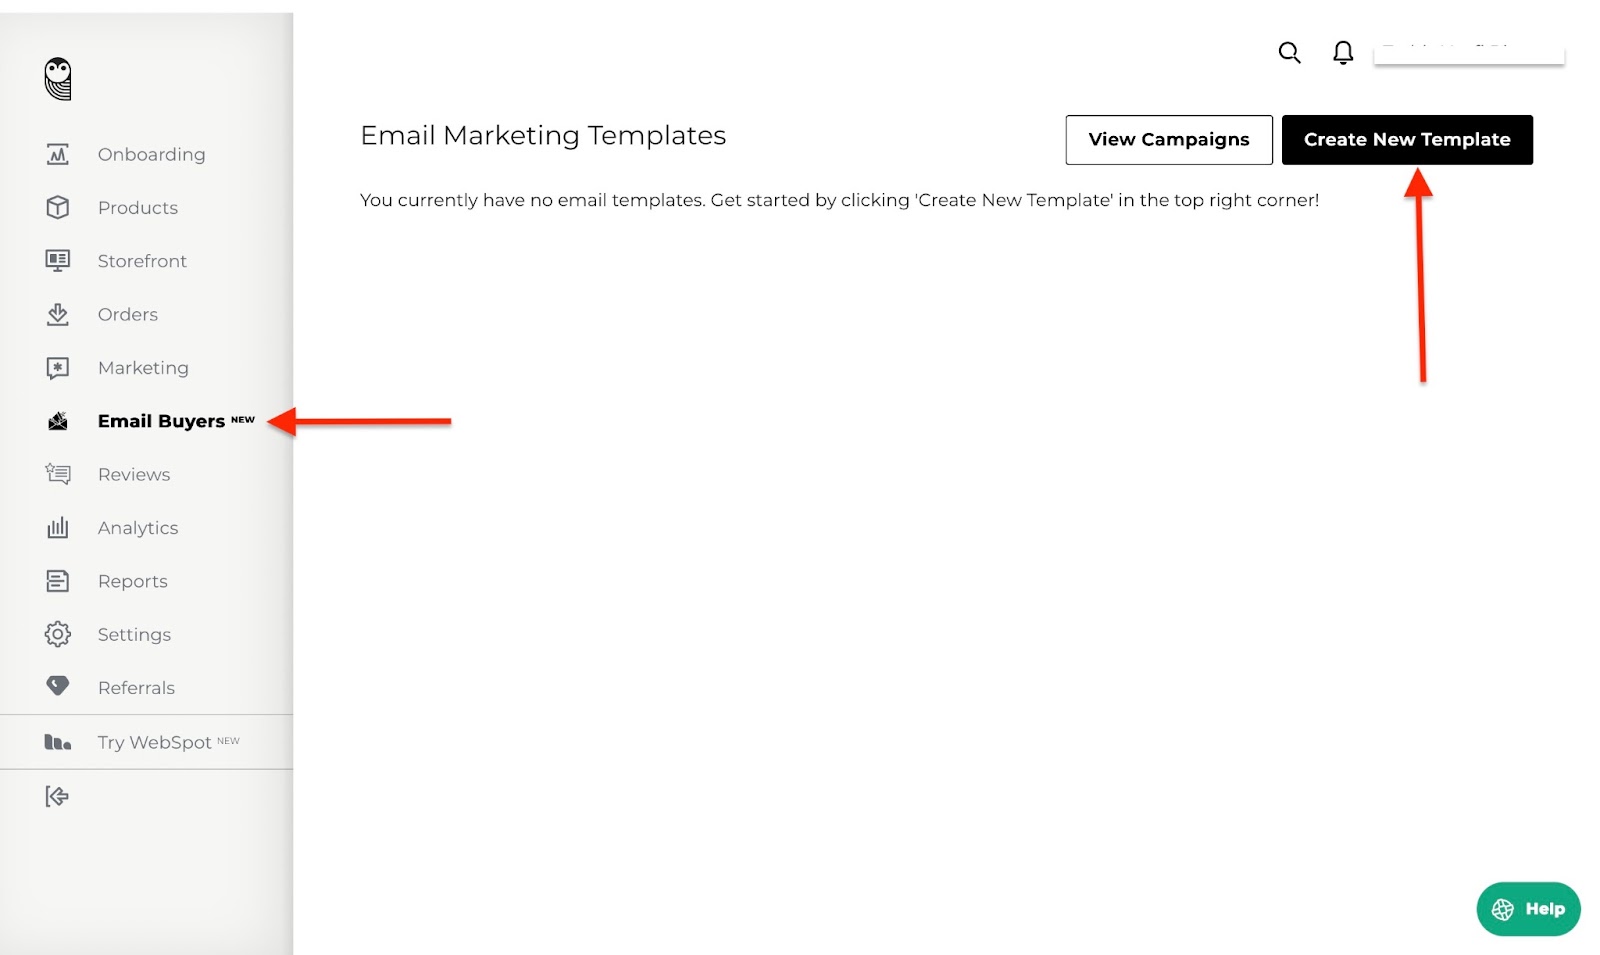
2. Email buyer
The email buyer feature lets SendOwl automatically send an email to a customer after they buy from you.
You can set it up to send a thank-you message, share bonus content or next steps, offer customer support, or provide download links. The email buyer allows you to create templates for all of these. Let me show you how.
First, click “Email Buyers” in the sidebar. Then, click “Create New Template.”
Type in the template name and email subject in the boxes. You can also edit other sections, such as the heading and content, and add images.
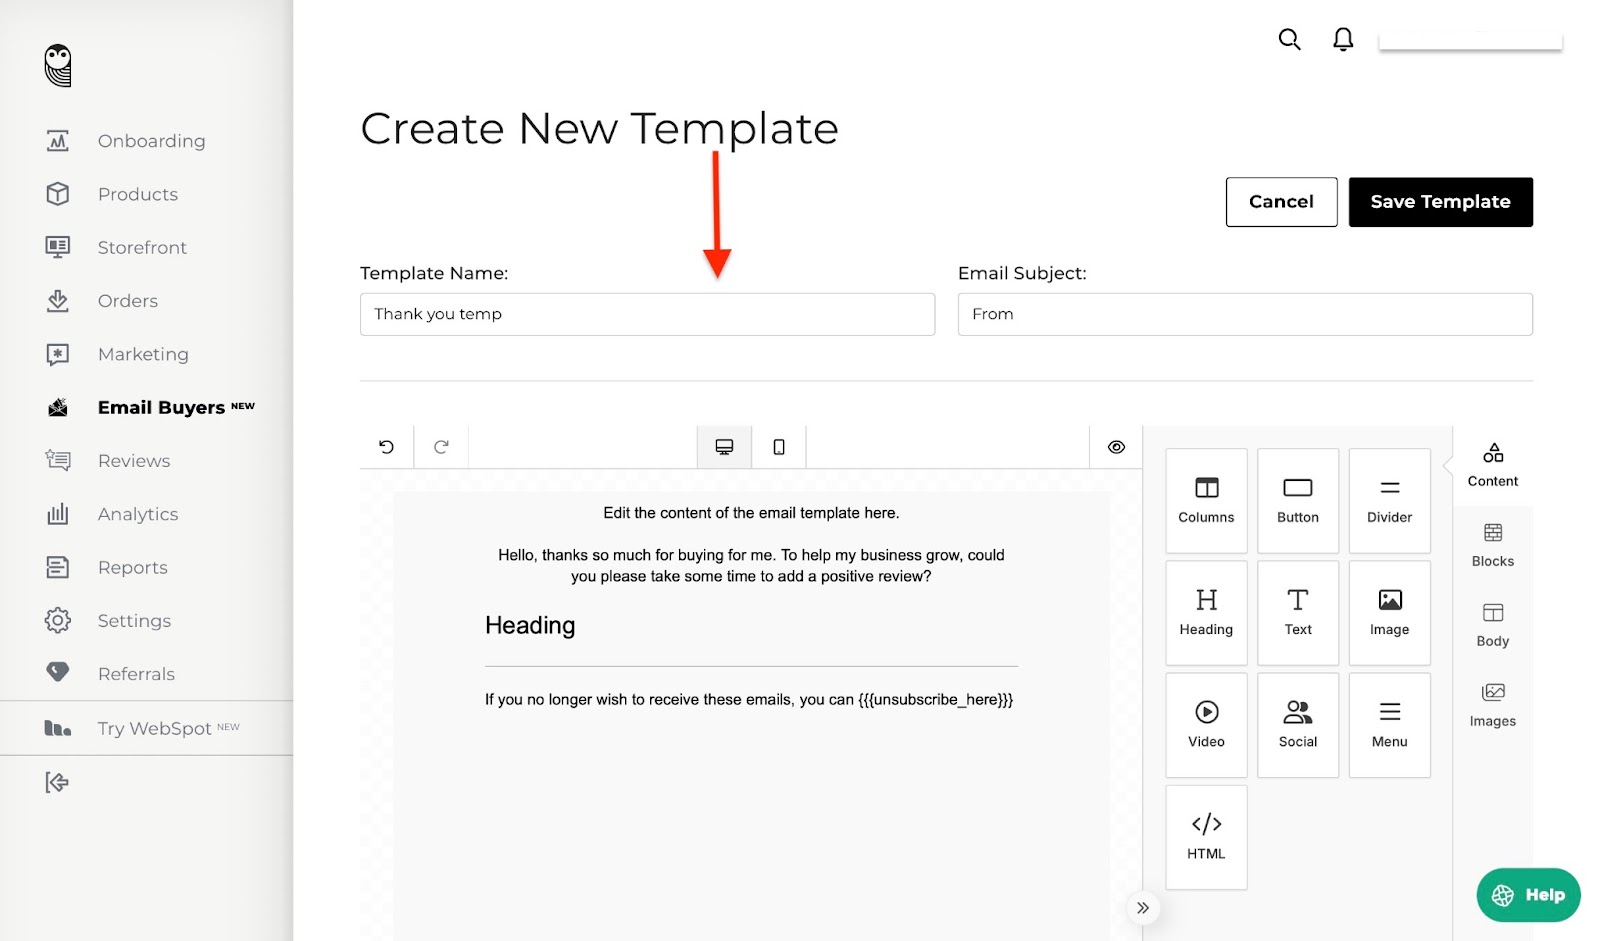
Next, click “Save Template” to finish.
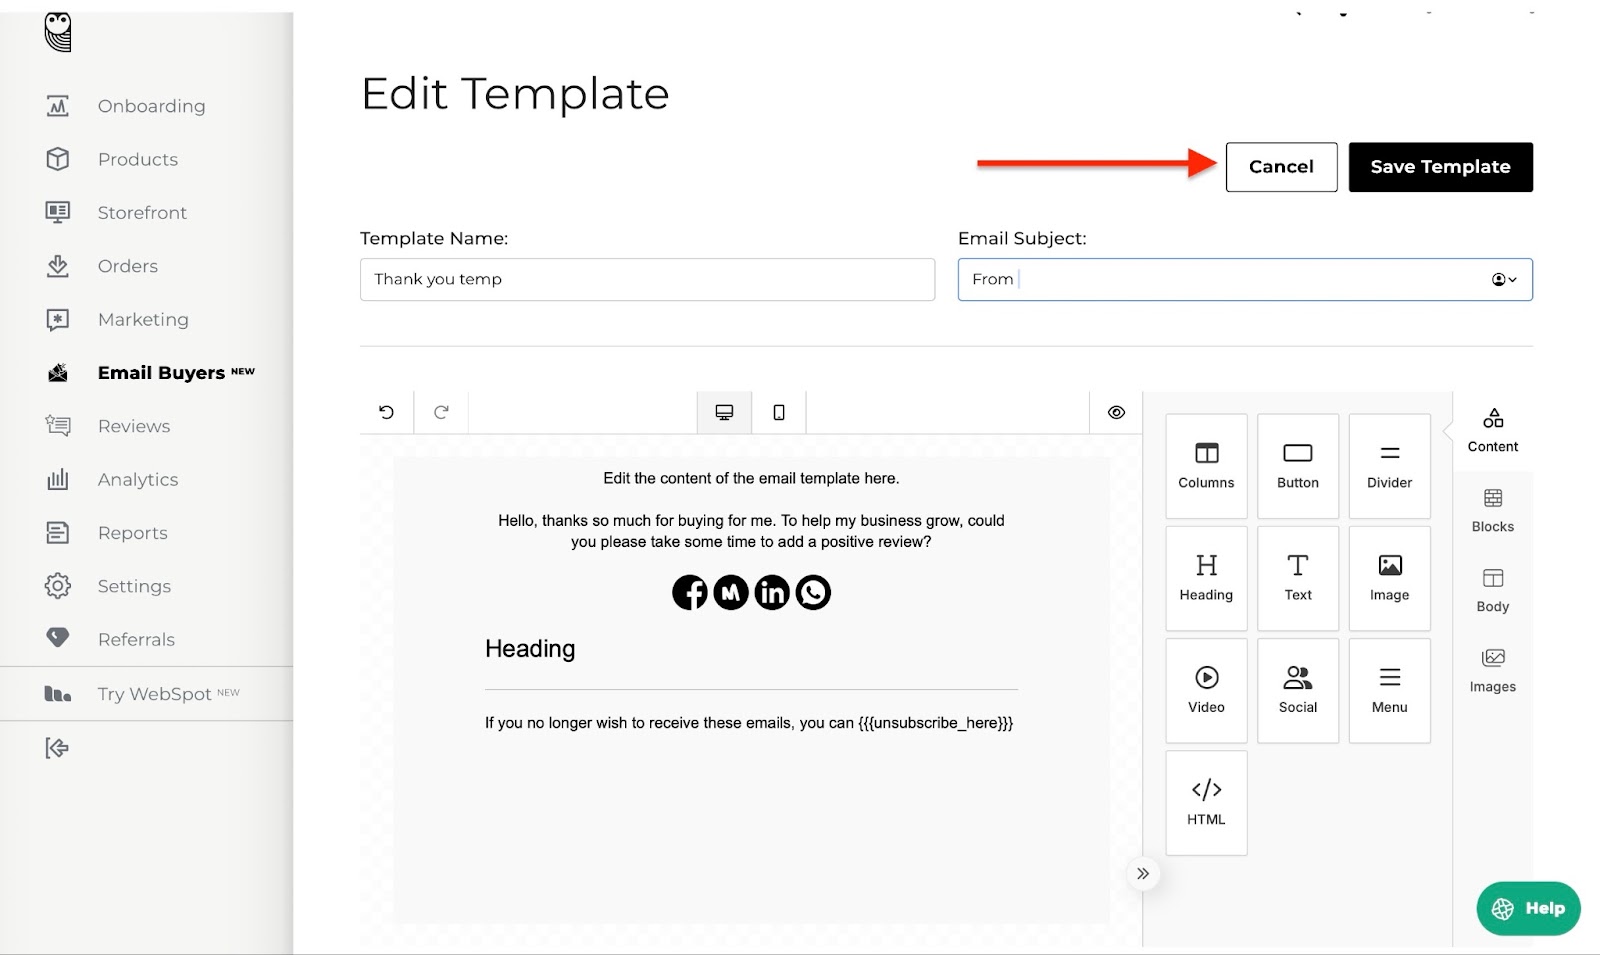
The email marketing template you just created will be listed. You can add more templates as you please. Also, click “Edit” or “Delete” to either edit or delete your templates.

[fs-toc-omit]Best for
- Small business owners who want a stress-free way of selling and securely delivering digital products directly to customers.
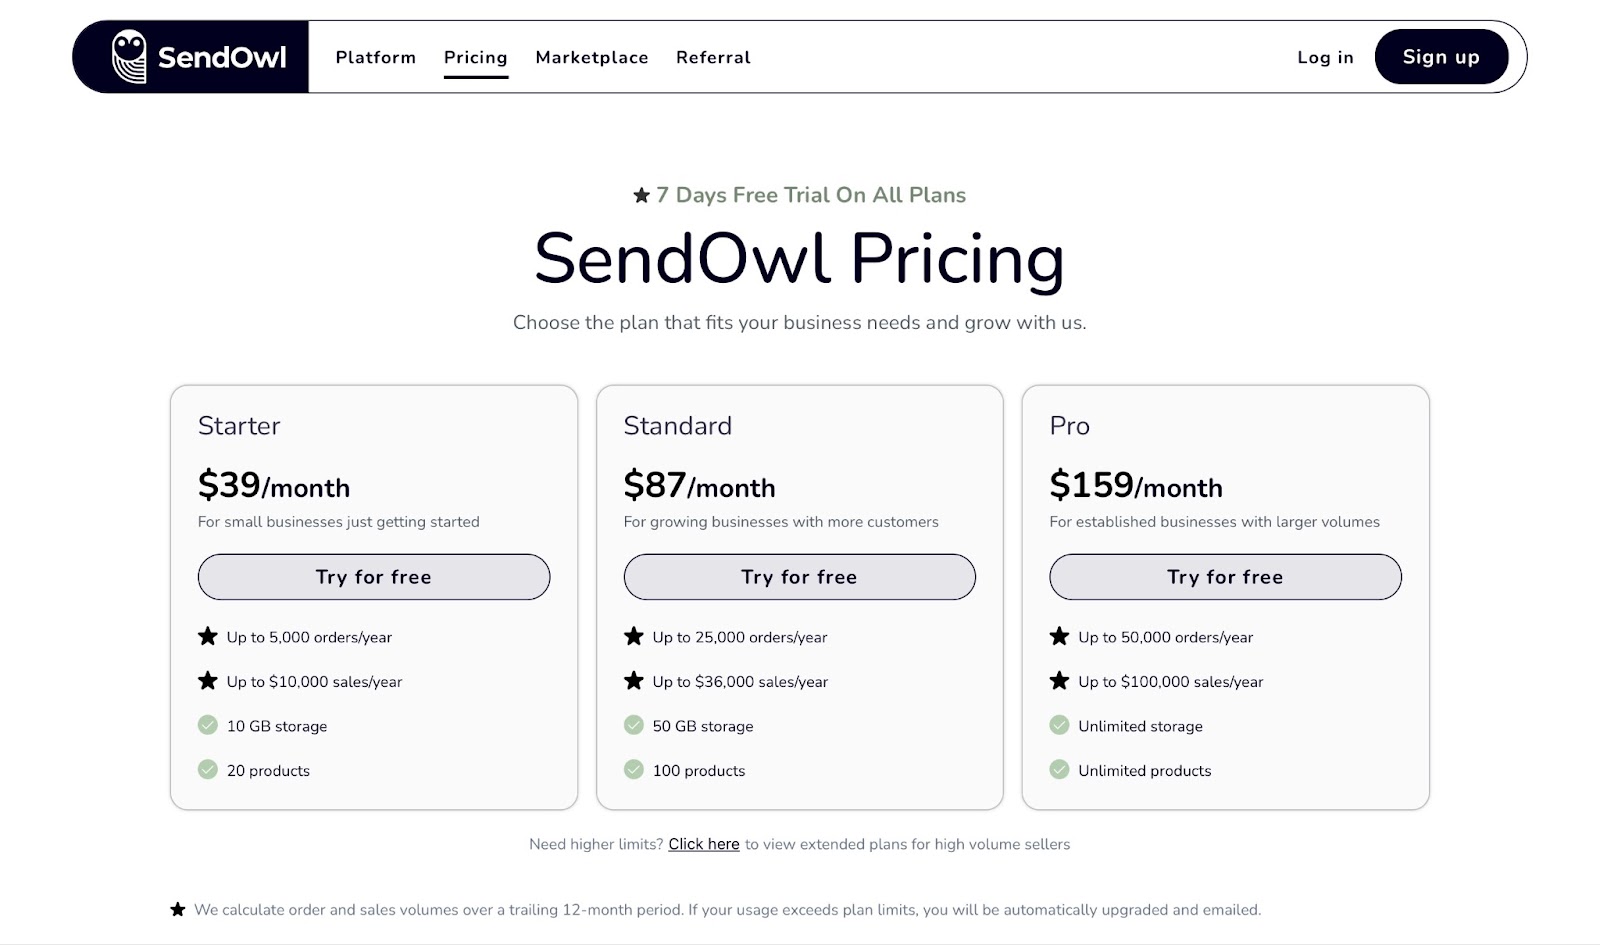
[fs-toc-omit]Pricing
- Starter: $39/month
- Standard: $87/month
- Pro: $159/month
10. Stan Store
Last but not least on our list of the best platforms for selling digital products is Stan Store.
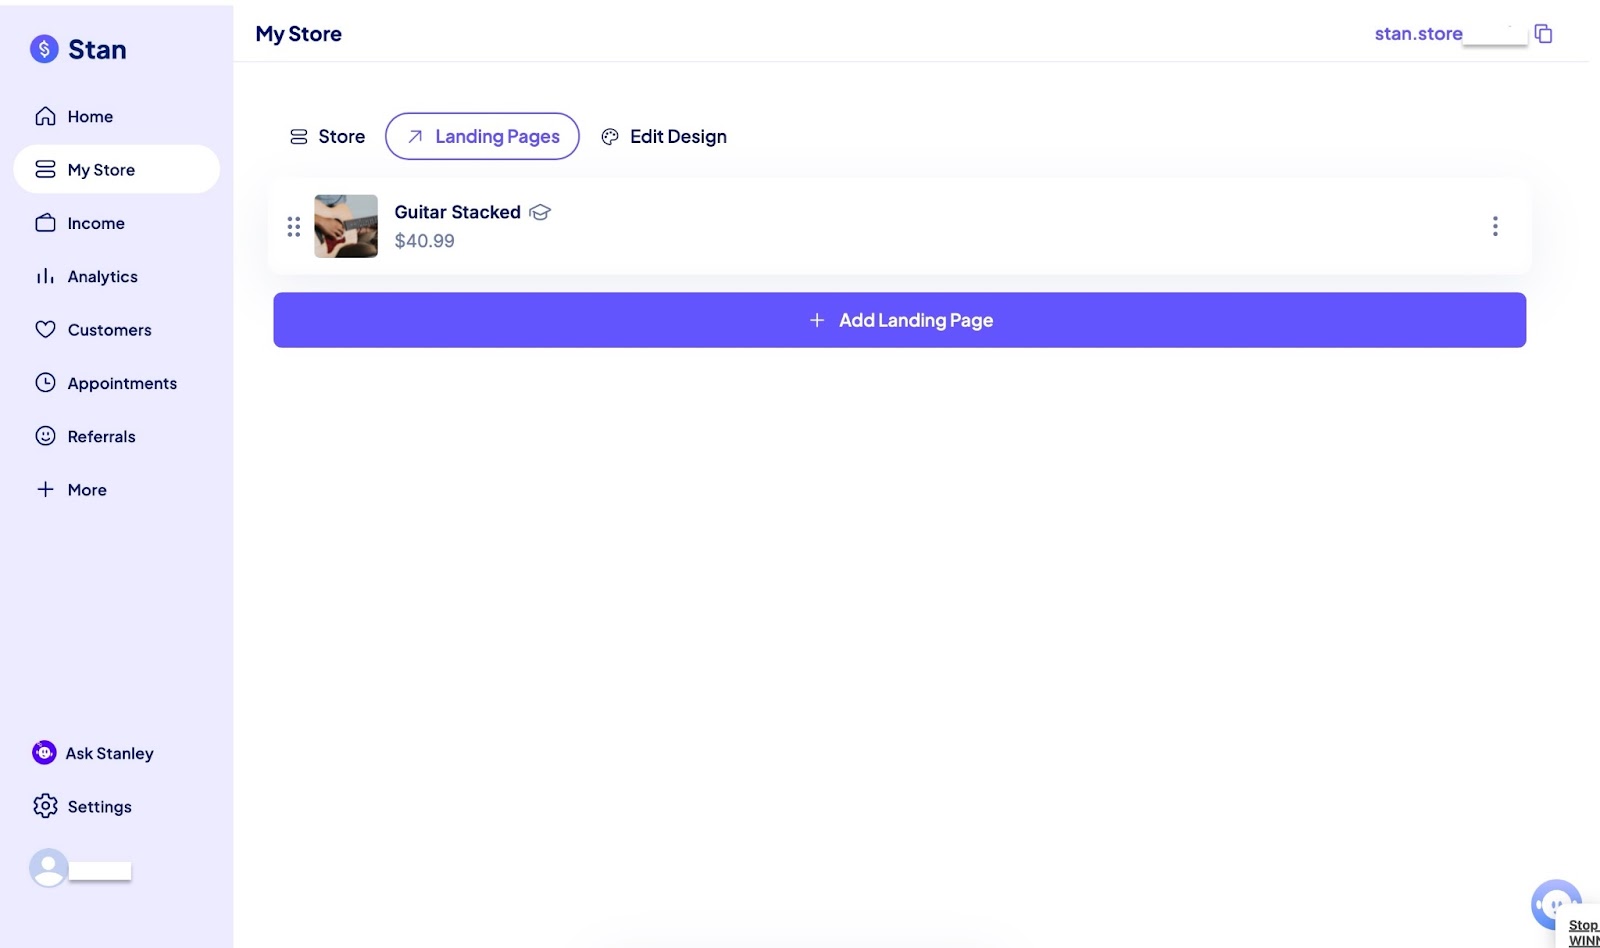
Stan Store’s store feature allows you to add new digital products, such as paid coaching, e-books, webinars, and subscriptions, to name a few.
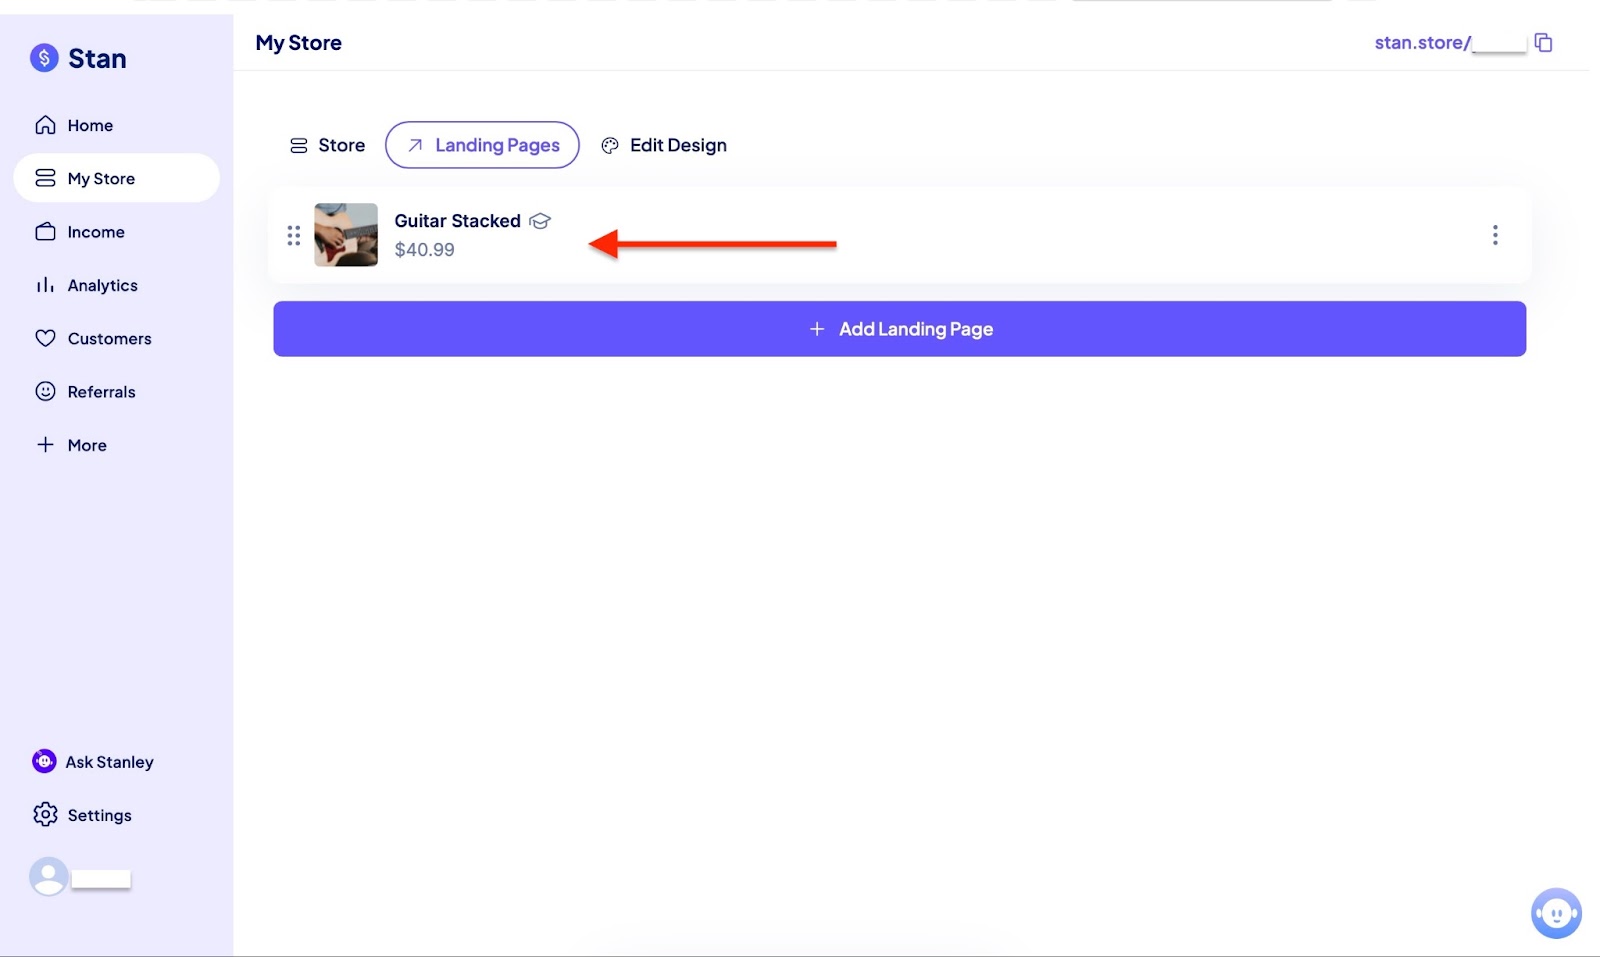
Within this same feature, I can click the Landing Page tab to create landing pages, edit them, and customize each item.
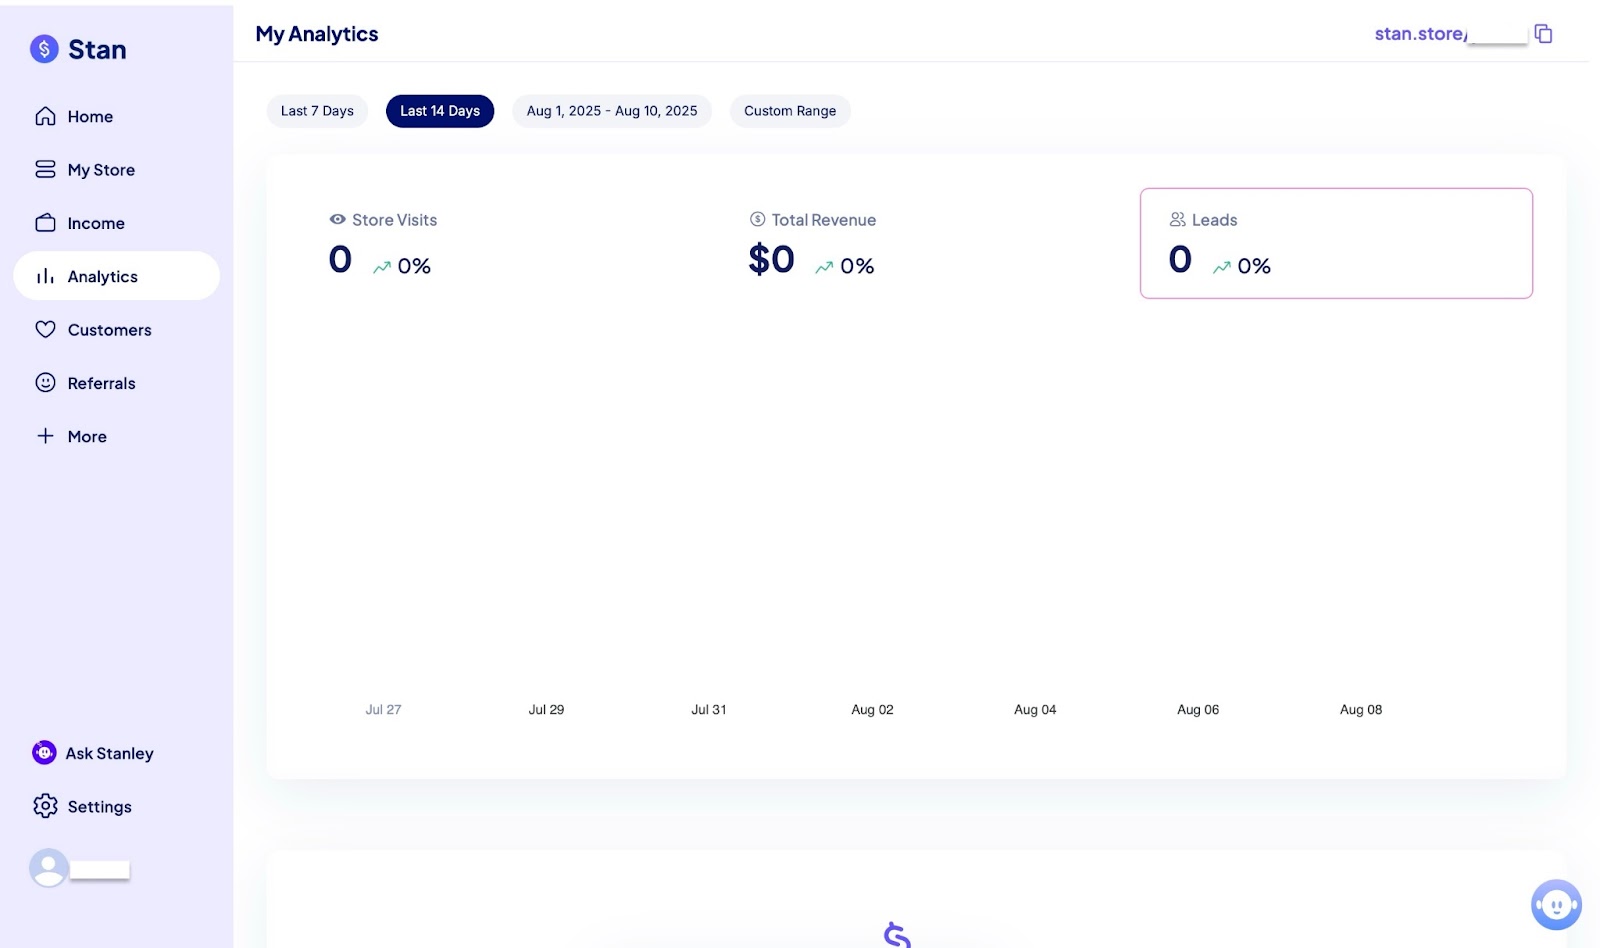
Using the analytics feature, you can view the number of store visits and the total revenue generated by your listed products. More so, you can see the total number of your leads.
The feature also allows you to check the weekly, fortnightly, or monthly performance of your products. There’s even a custom range option if you need to check specific times.
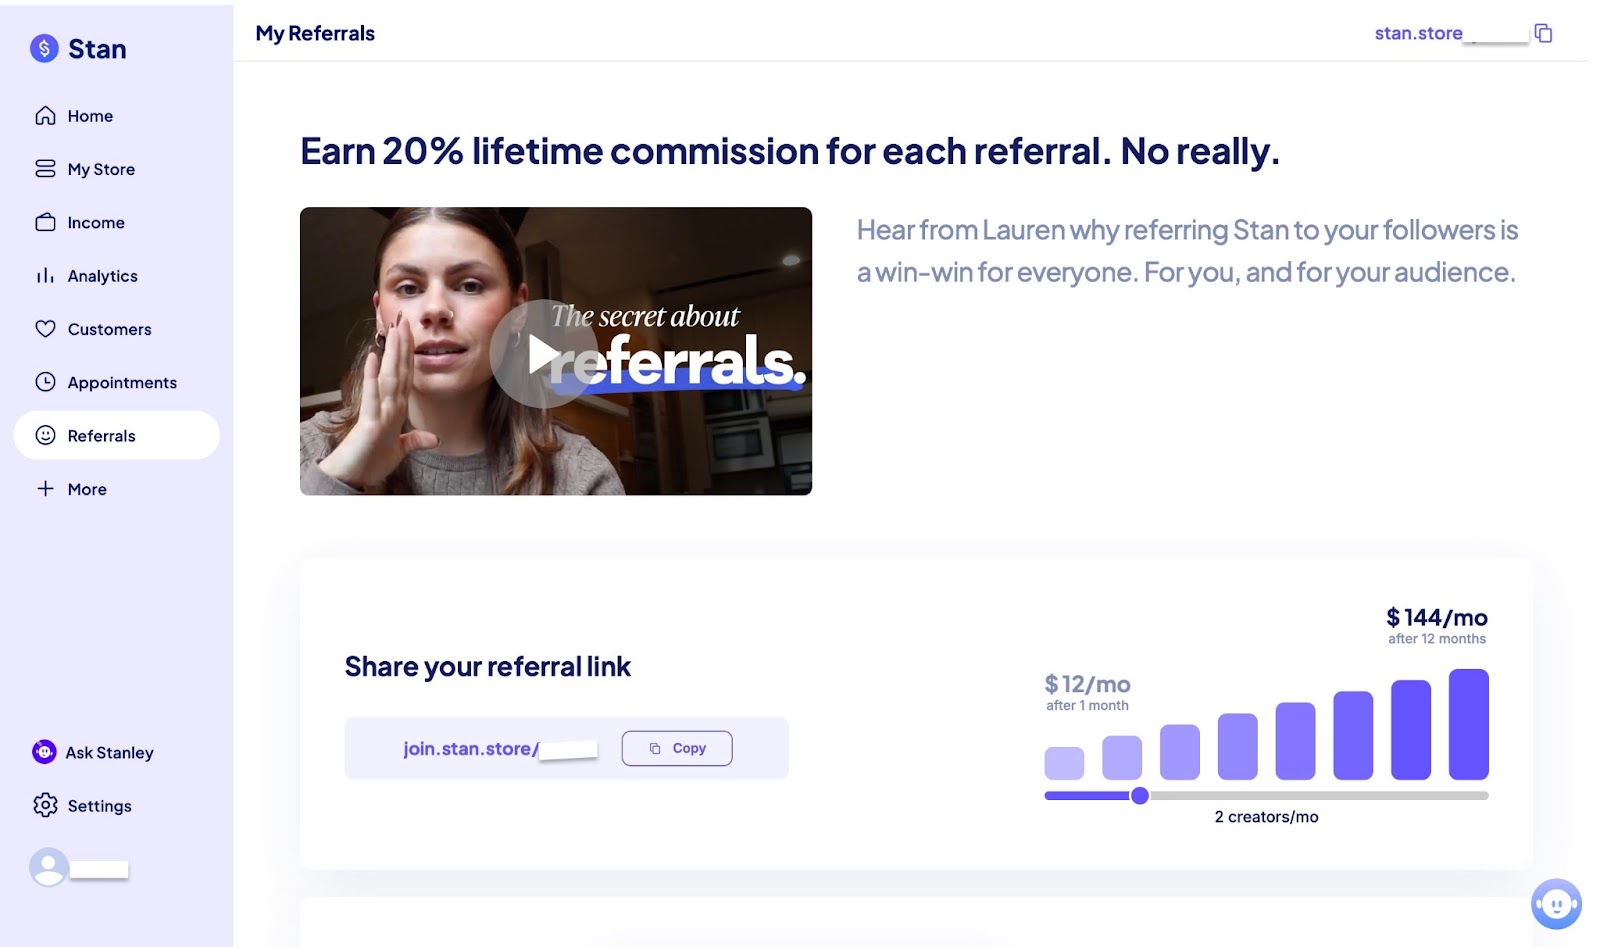
Stan store has a referral feature for creating referral codes every time you add new products. For every product you add, you can create and share a code that invites others to help you sell.
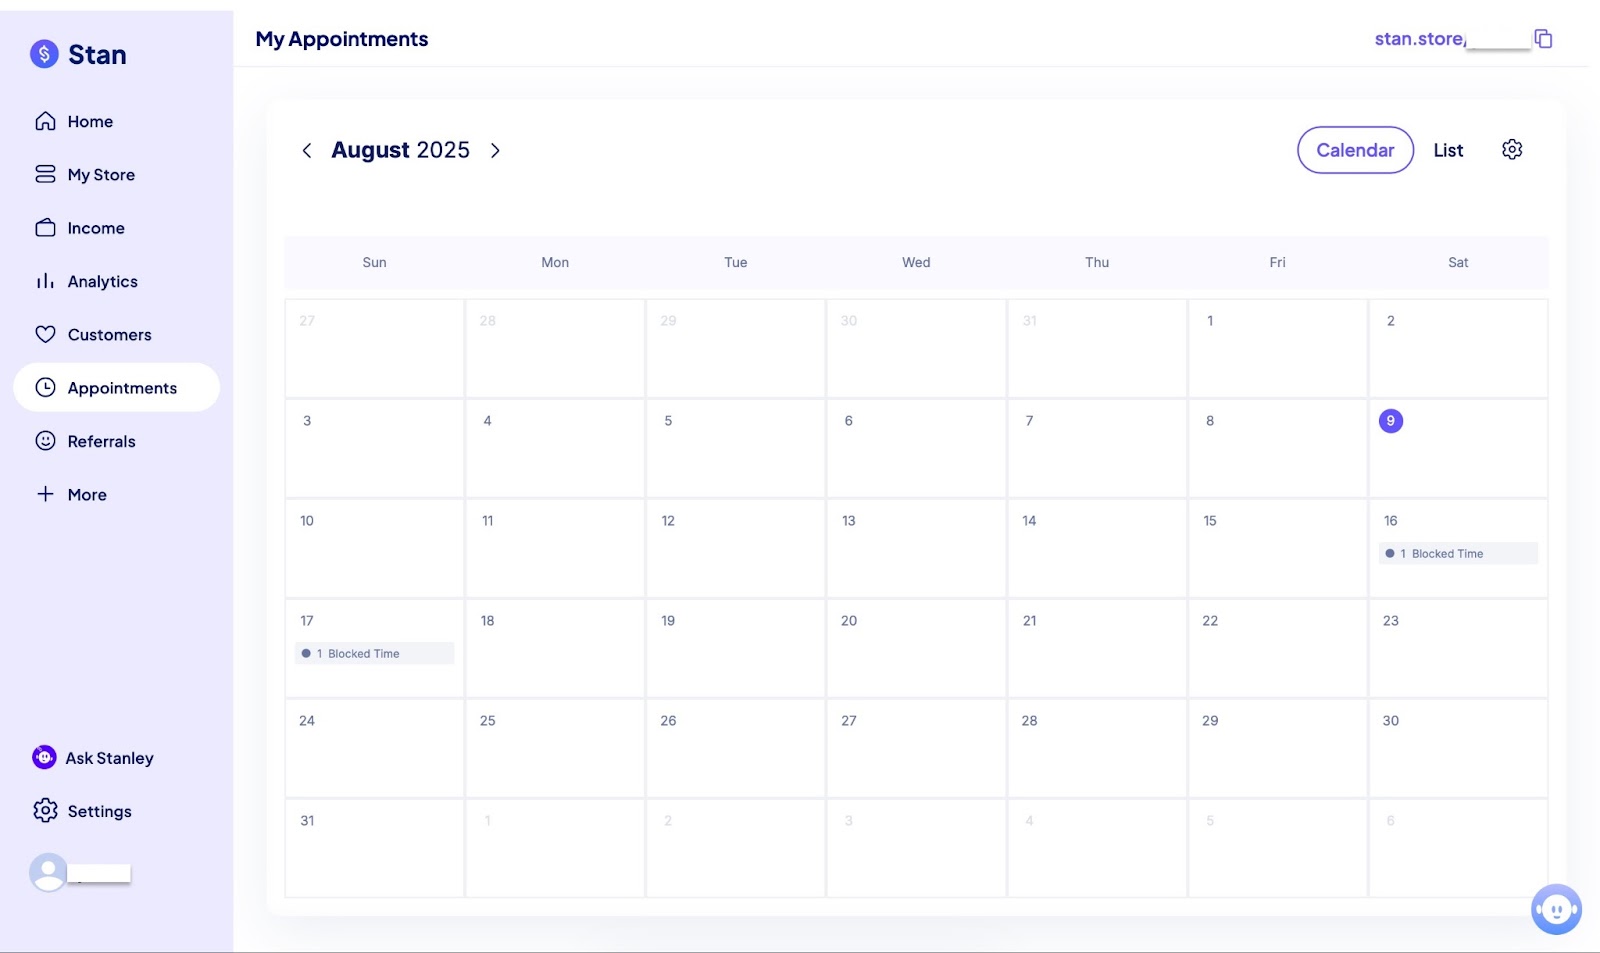
With Stan Store’s appointment feature, when I add a course that involves one-on-one meetings, my customers can view blocked times on the calendar and schedule appointments accordingly.
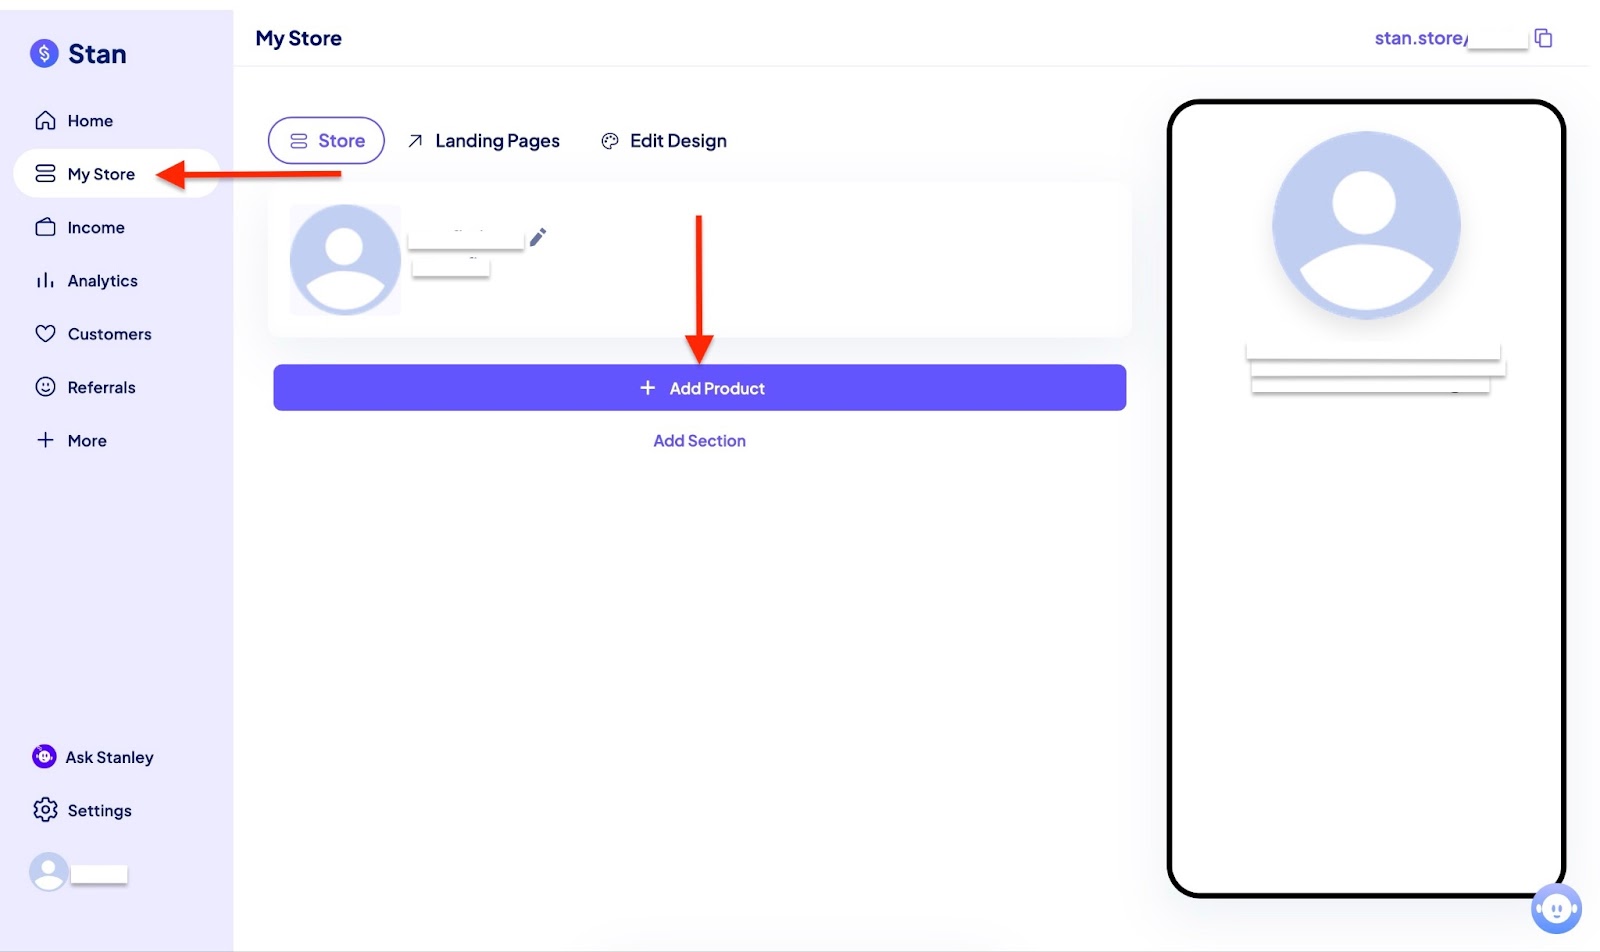
Let me show you how to add digital products to your store feature on Stan Store.
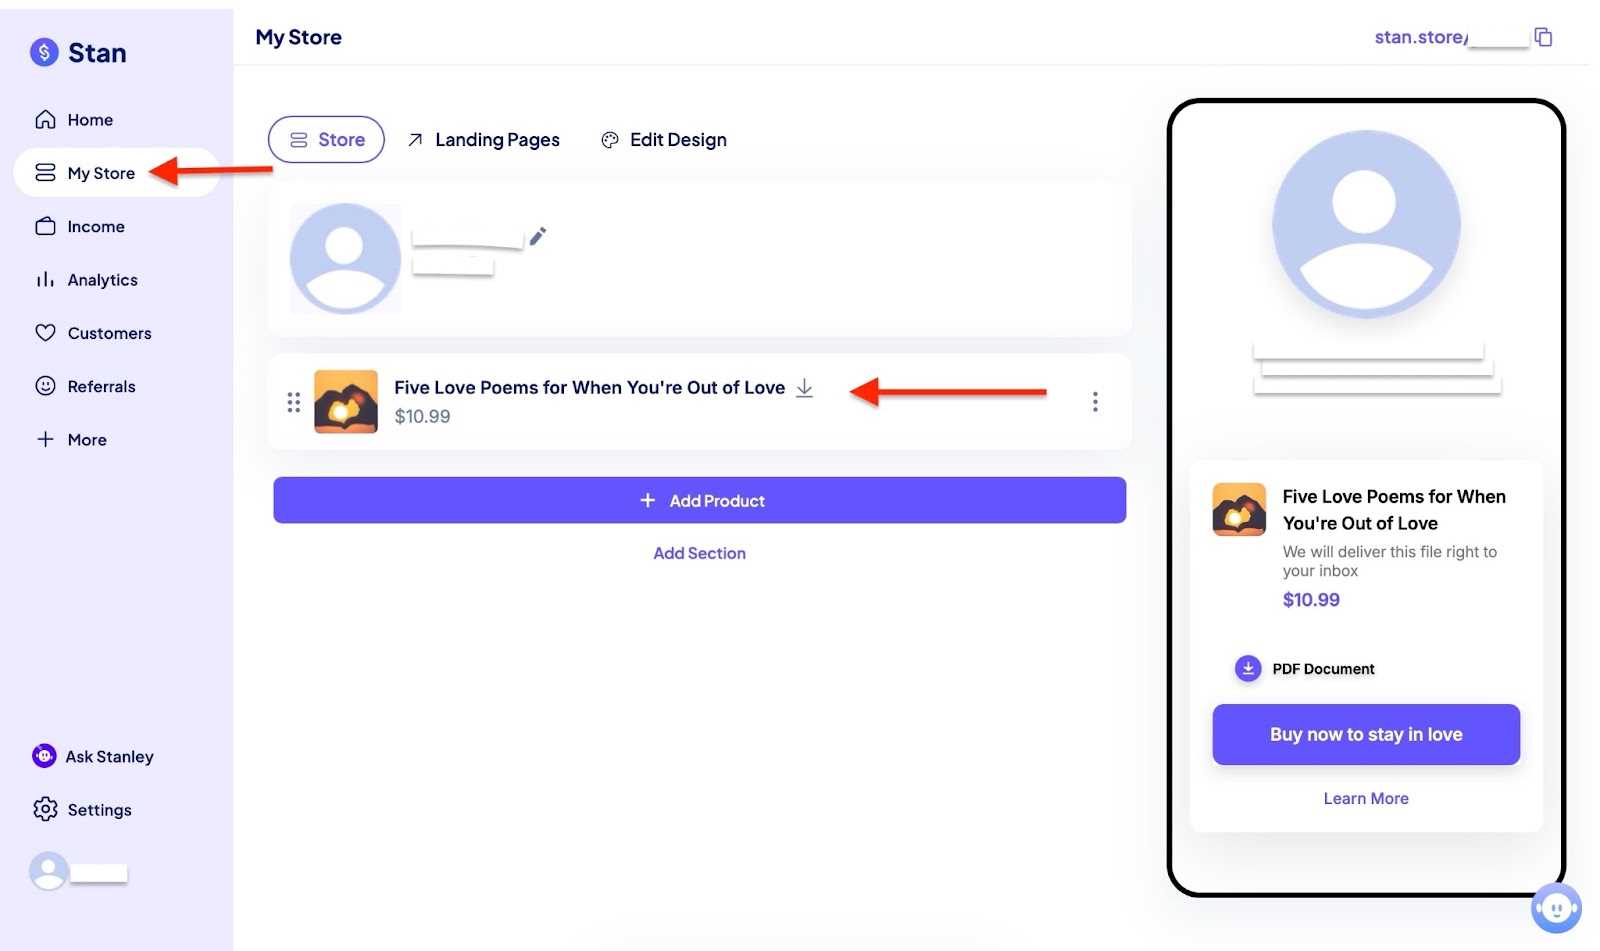
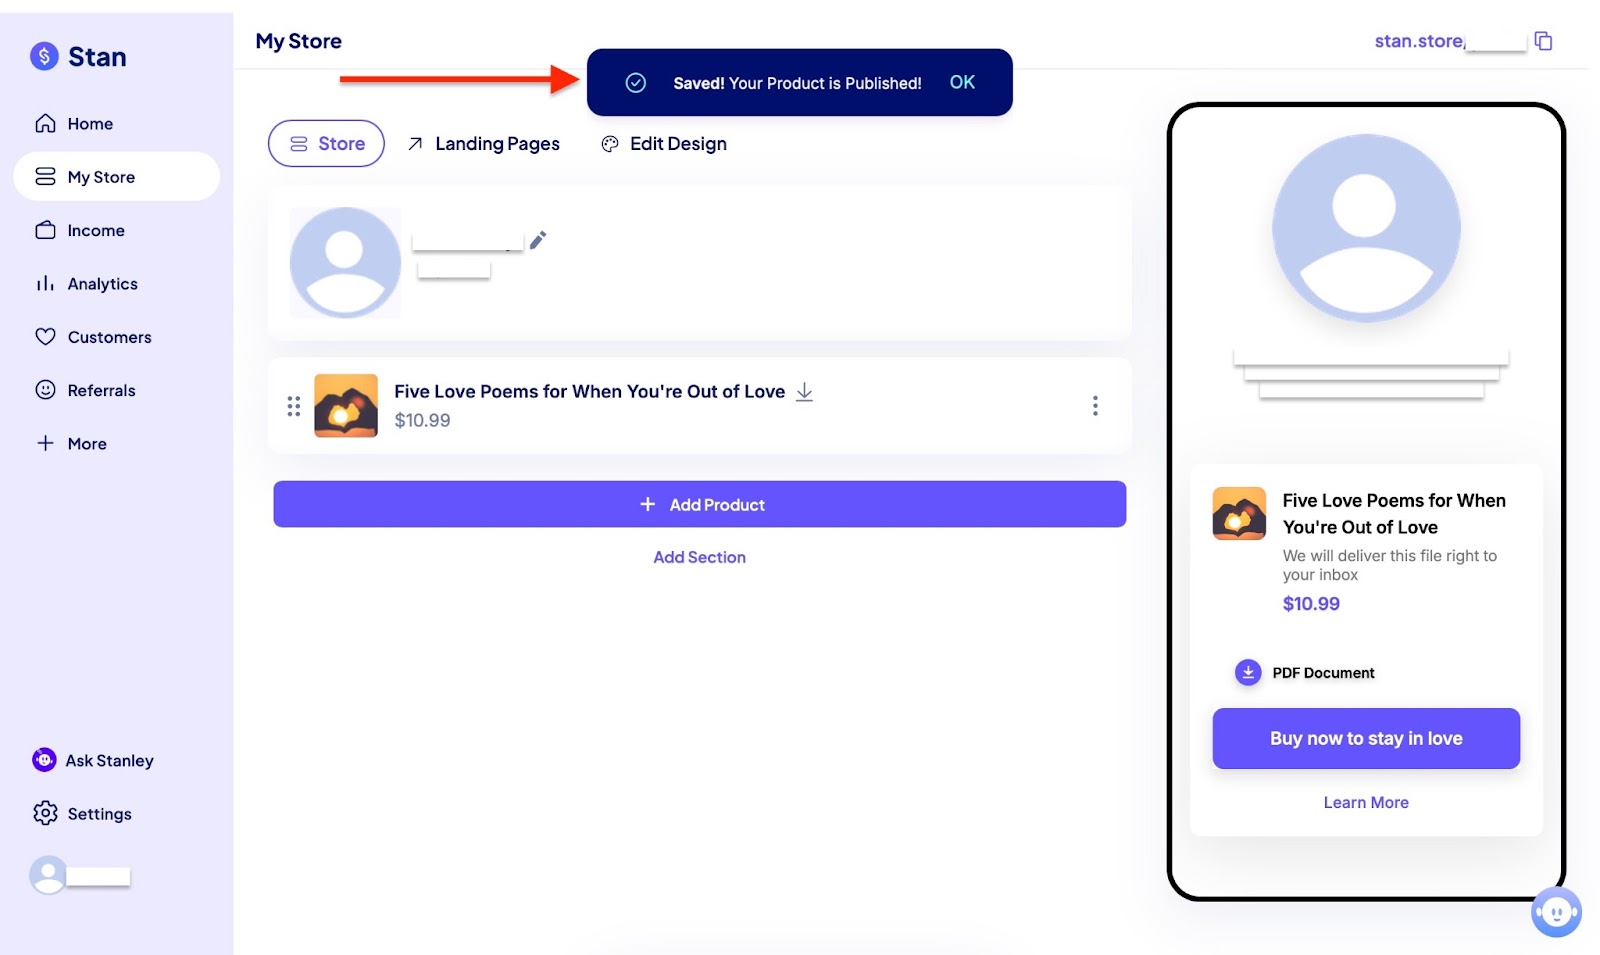
To get started, select “My Store” in the sidebar. Then click “+ Add Product.”
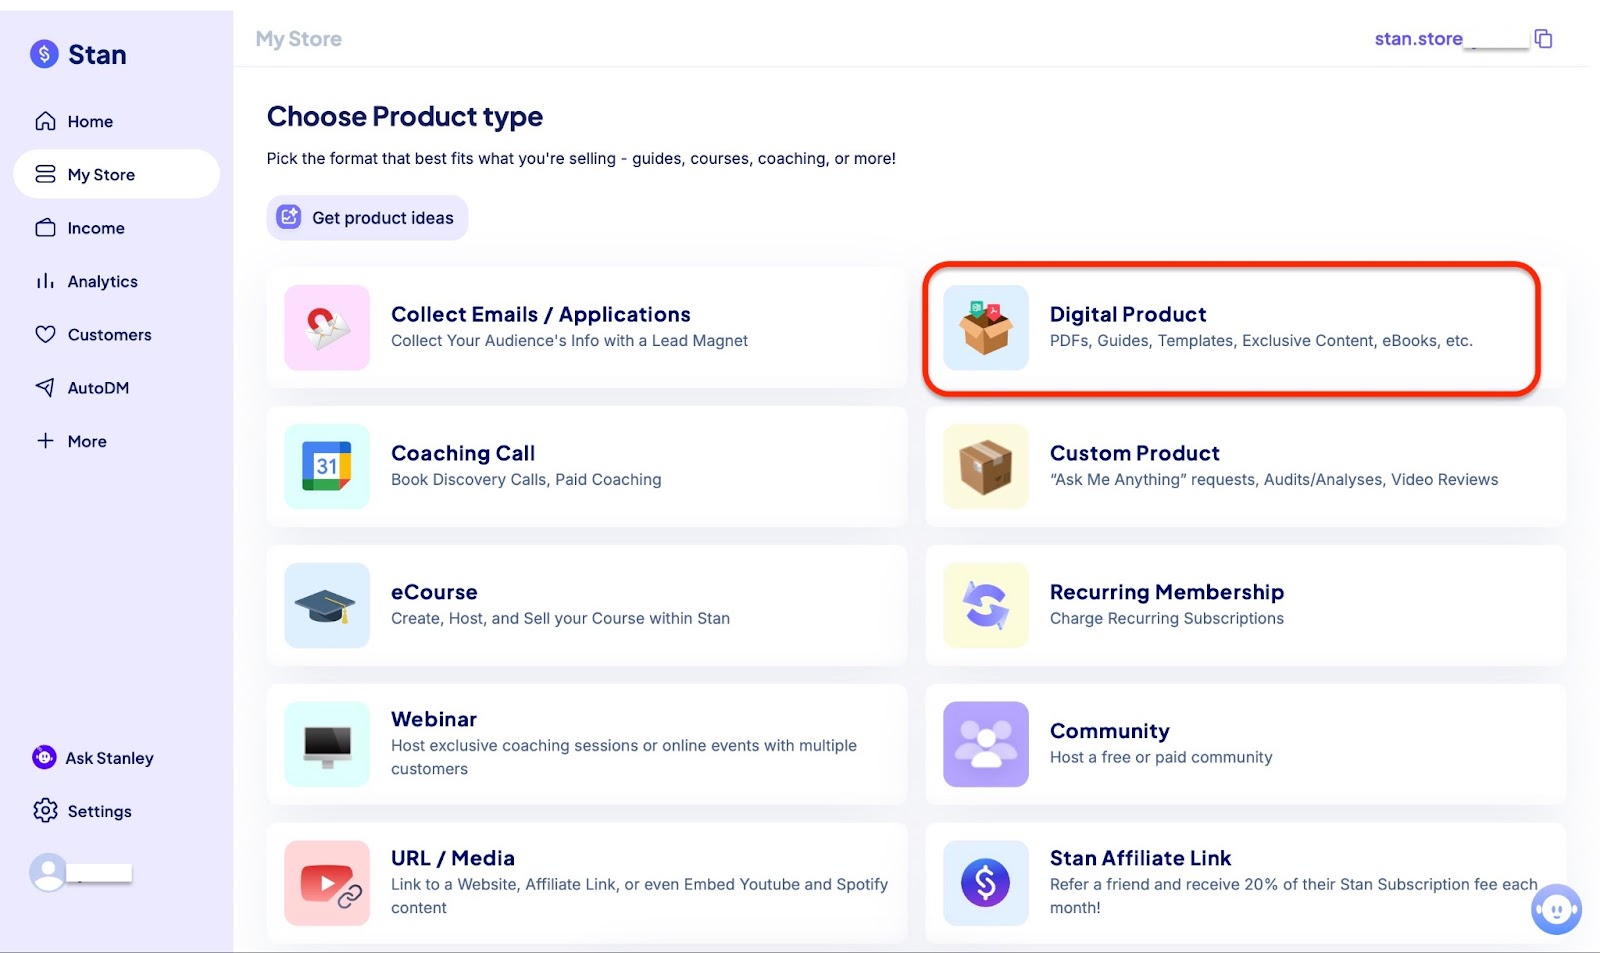
Next, choose the product type. We’ll be using an e-book, hence the “Digital product” type.
In the thumbnail section, pick the style of the product that appears on your bio and select the thumbnail image.
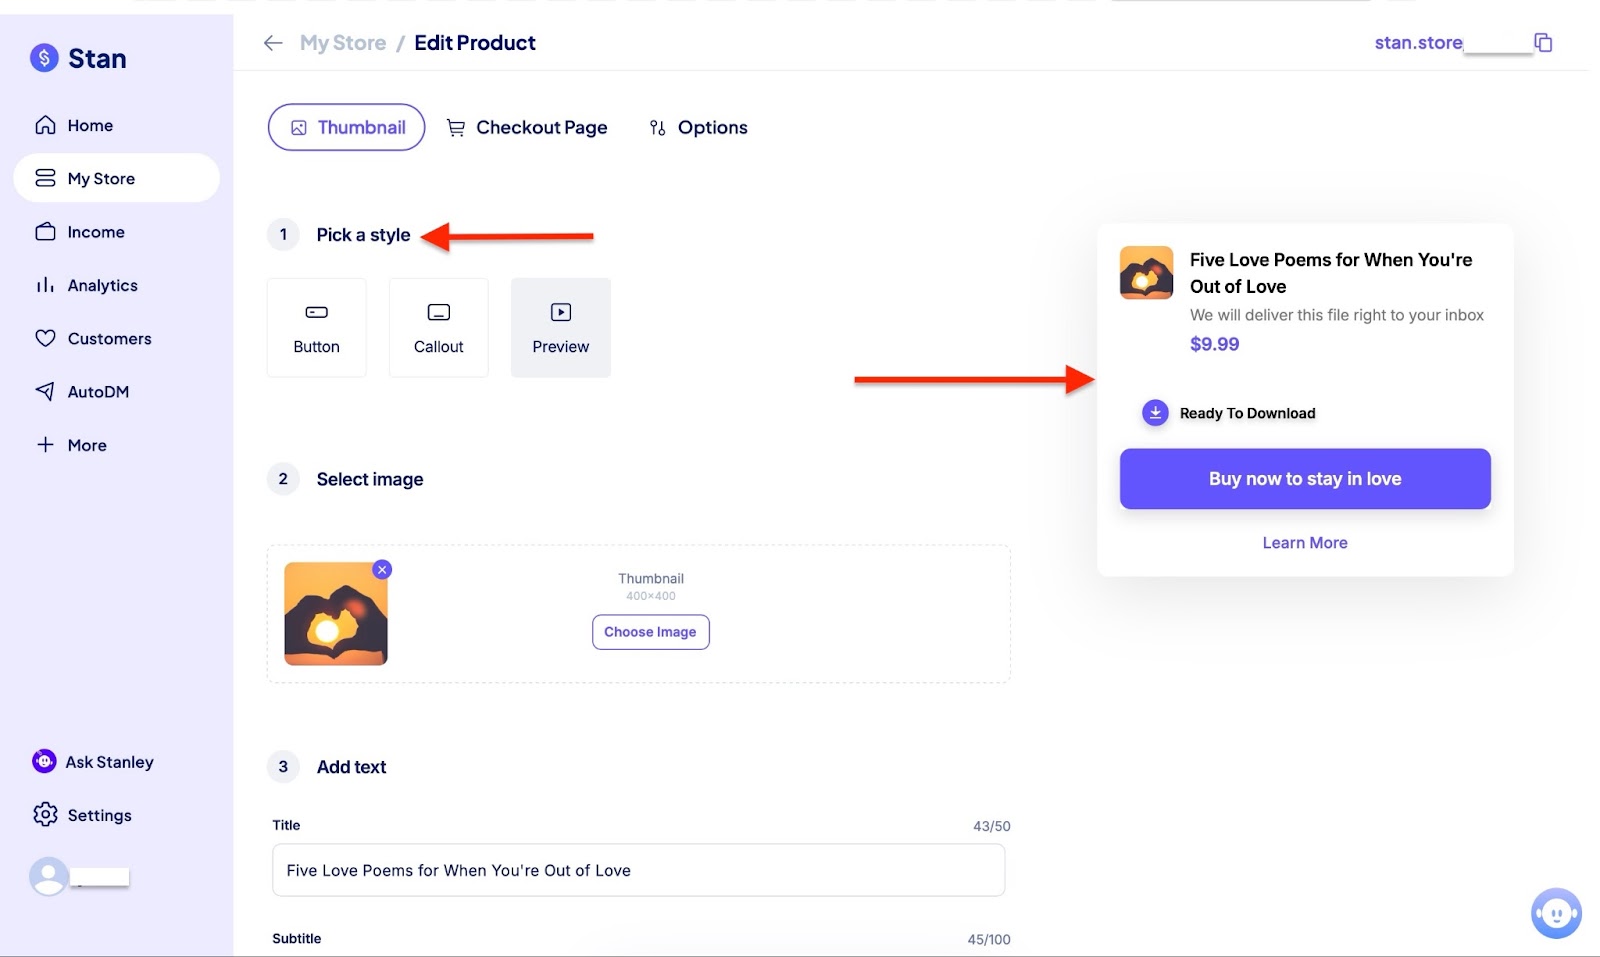
Afterwards, scroll down and use the input boxes to add the product title, subtitle, and button text for the bio.
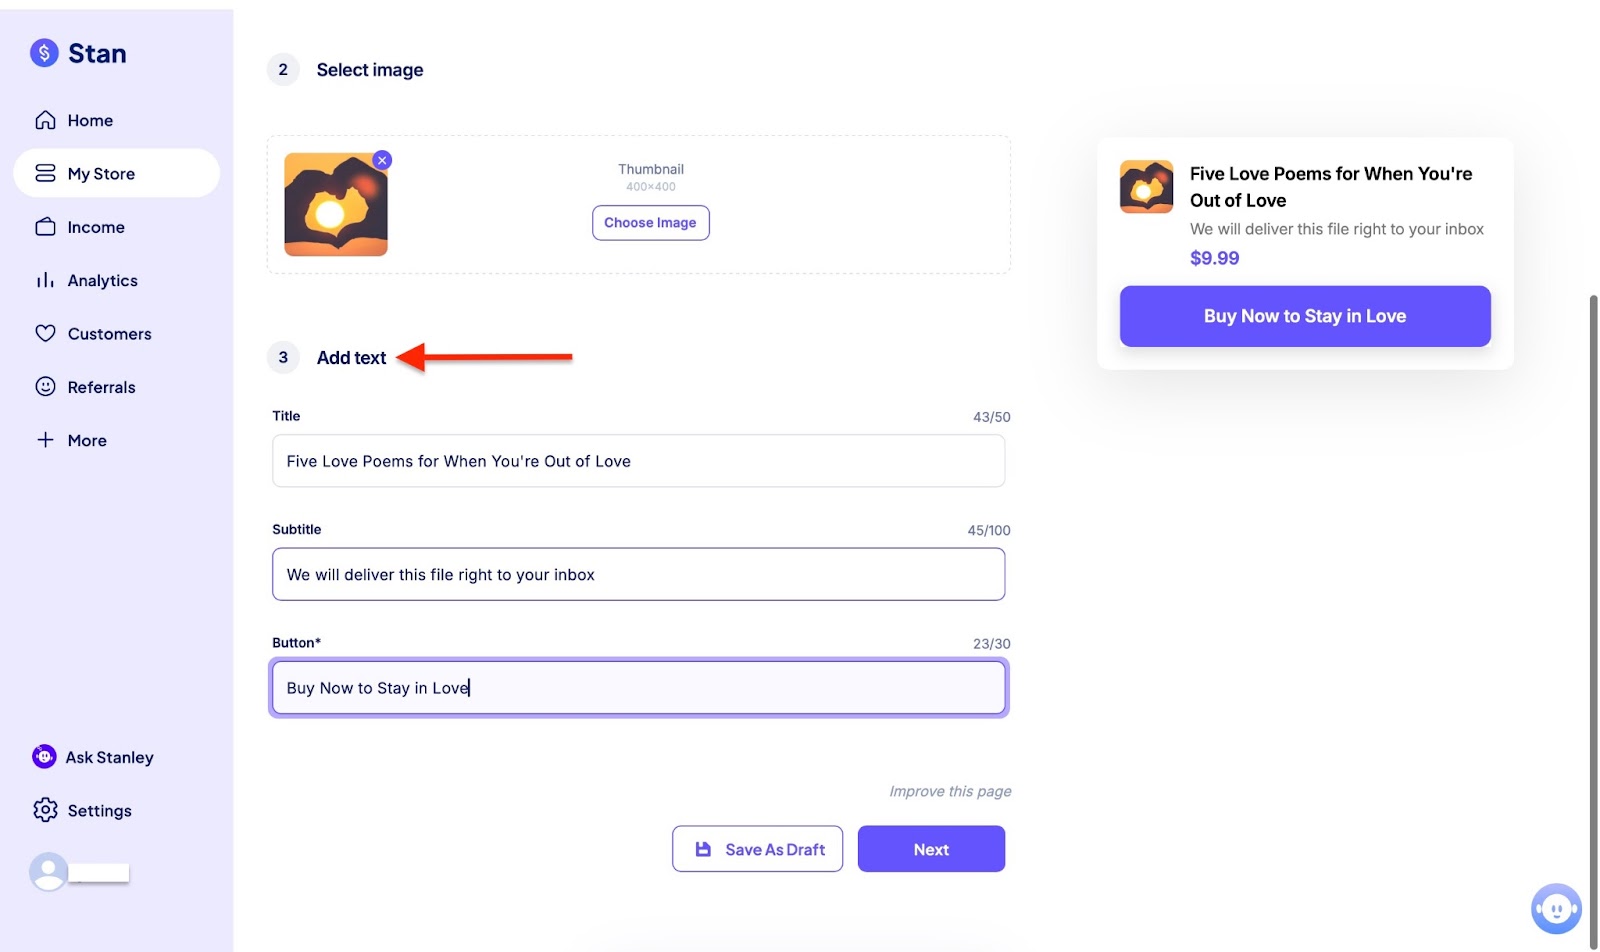
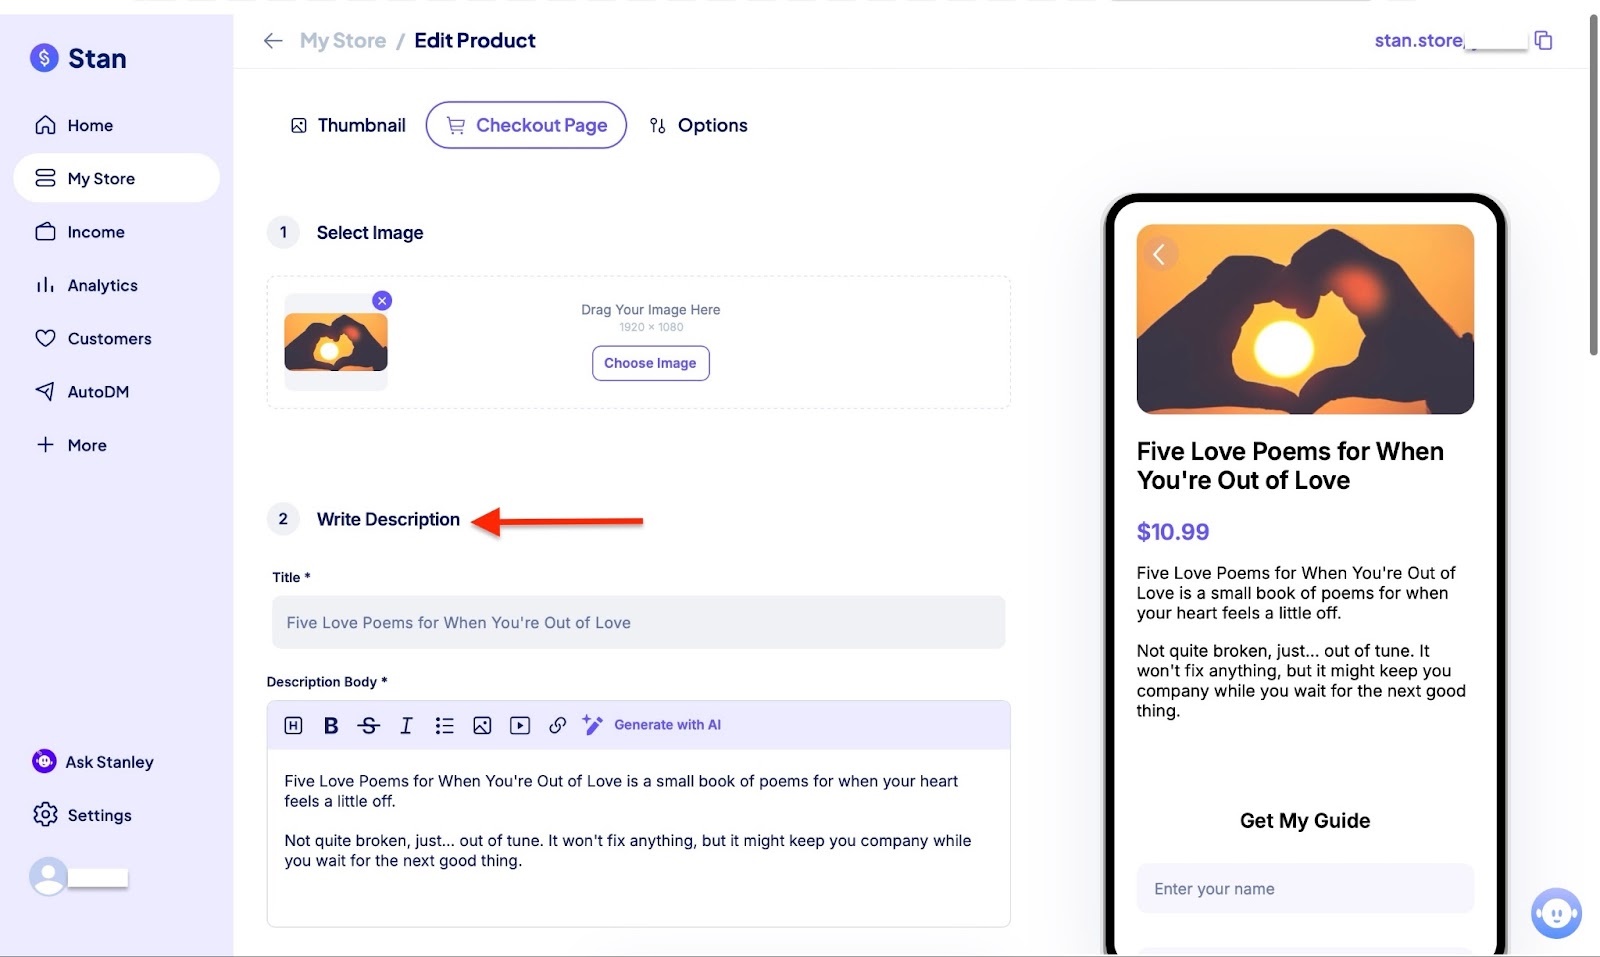
After that, click “Checkout” to make changes to images, add a product description, and a price.
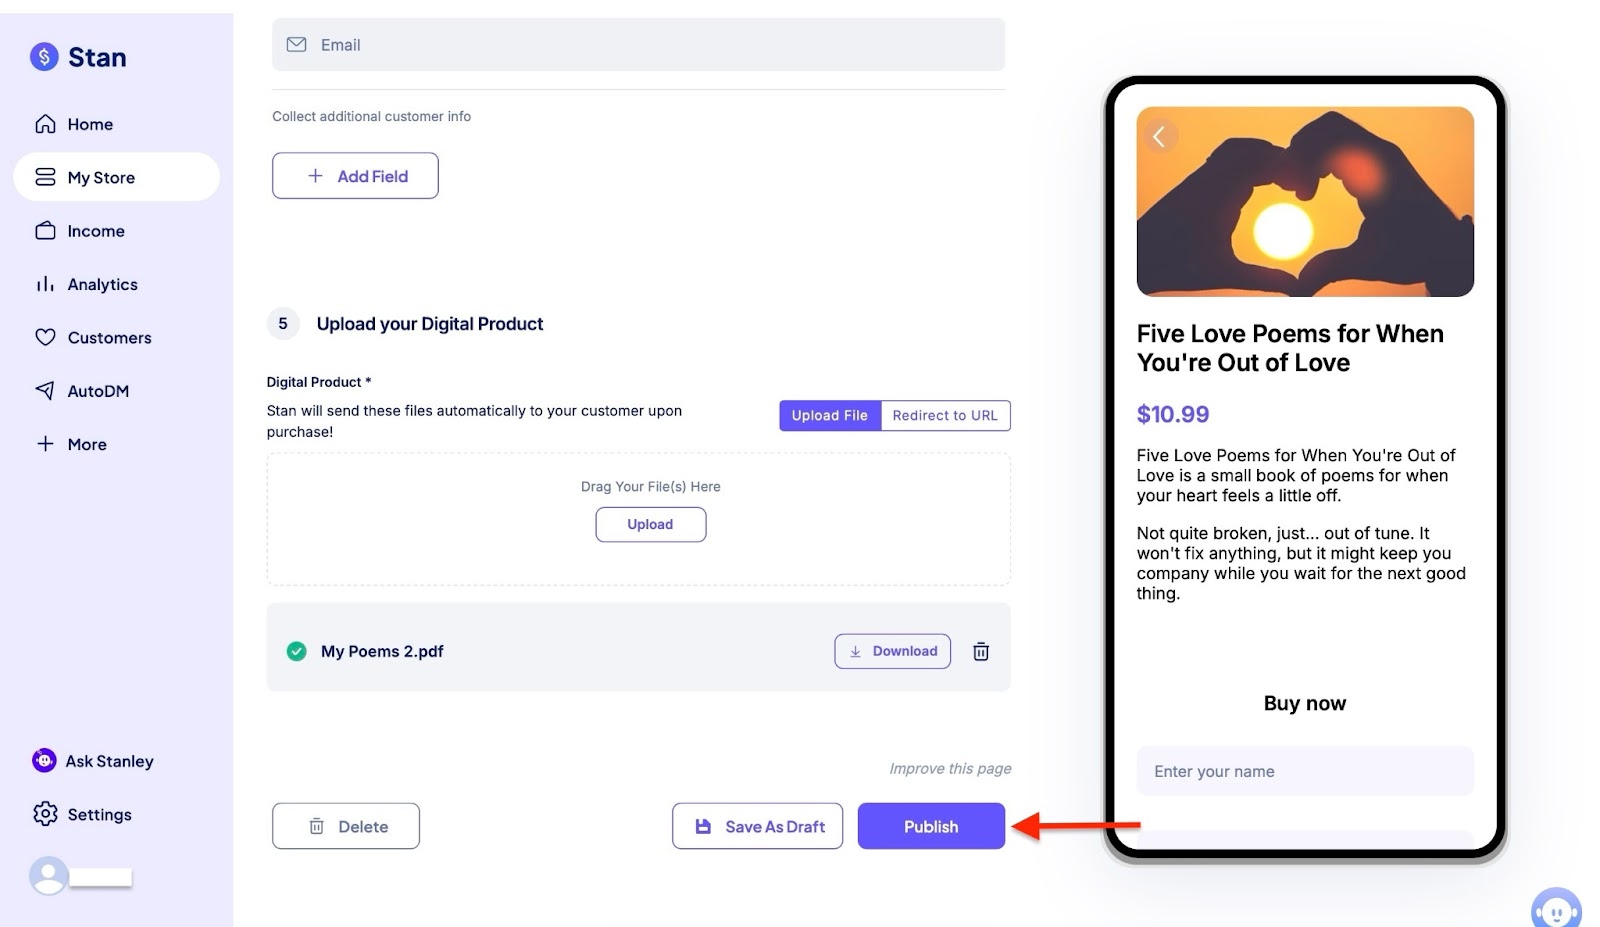
Scroll down and fill out the necessary details. Click “Upload File” to add a copy of the digital product for customers to download. You could select “Redirect to URL” to share a downloadable link from another platform.

Finally, click “Publish” to make the product available for purchase.
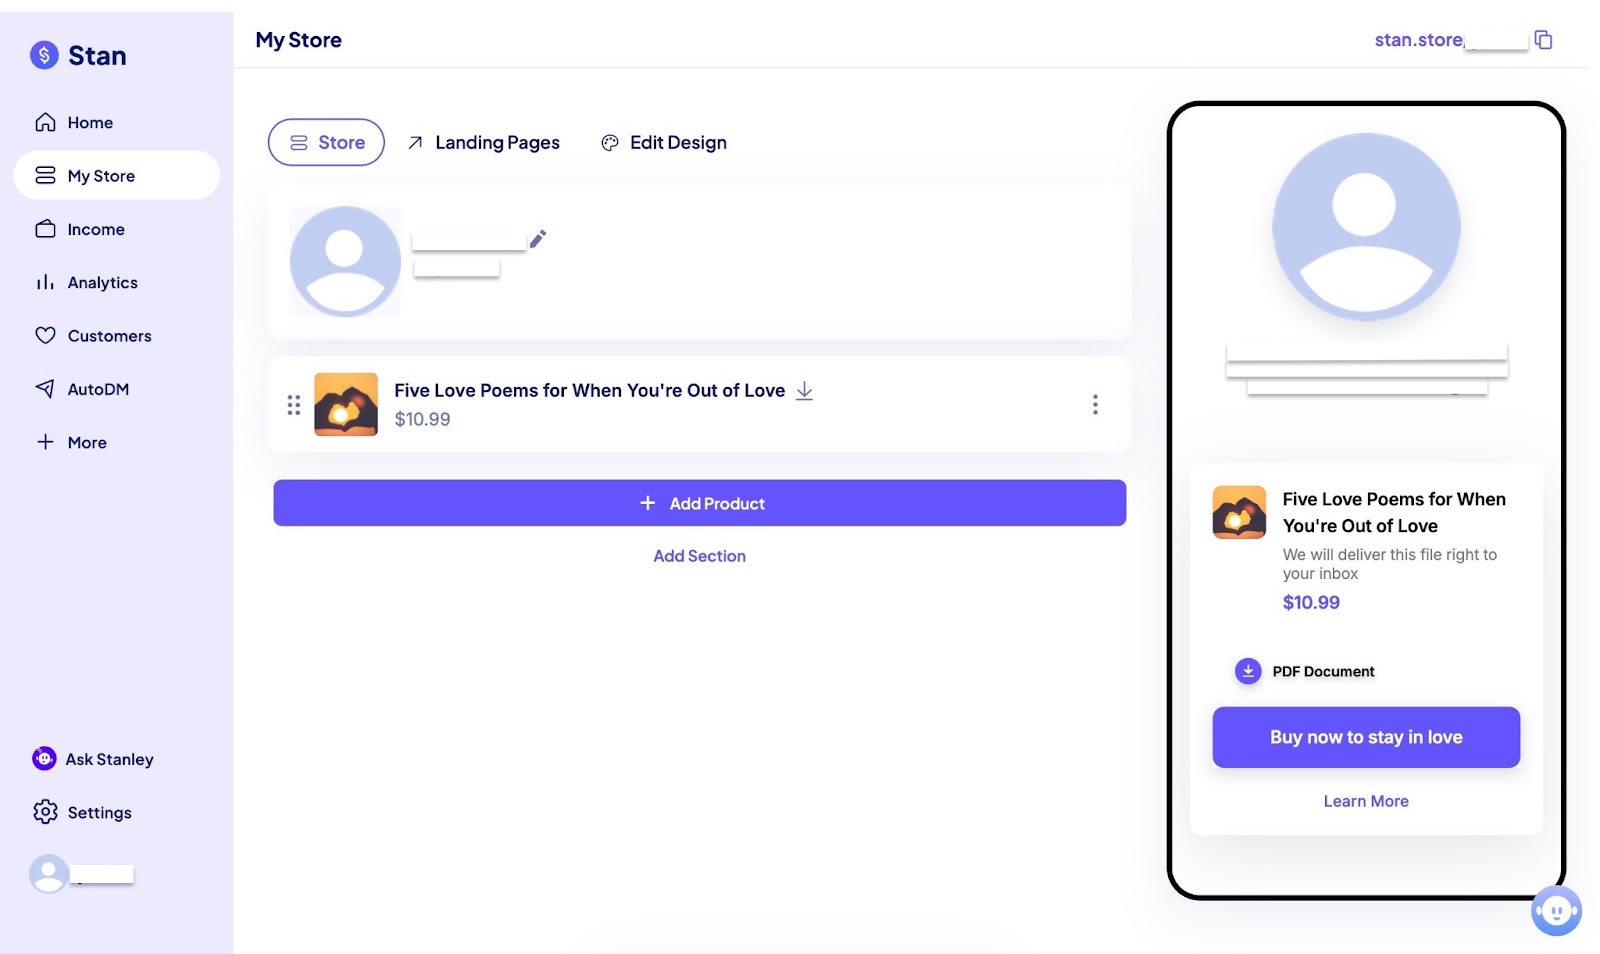
You should be able to view the product within your store.
[fs-toc-omit]Key features
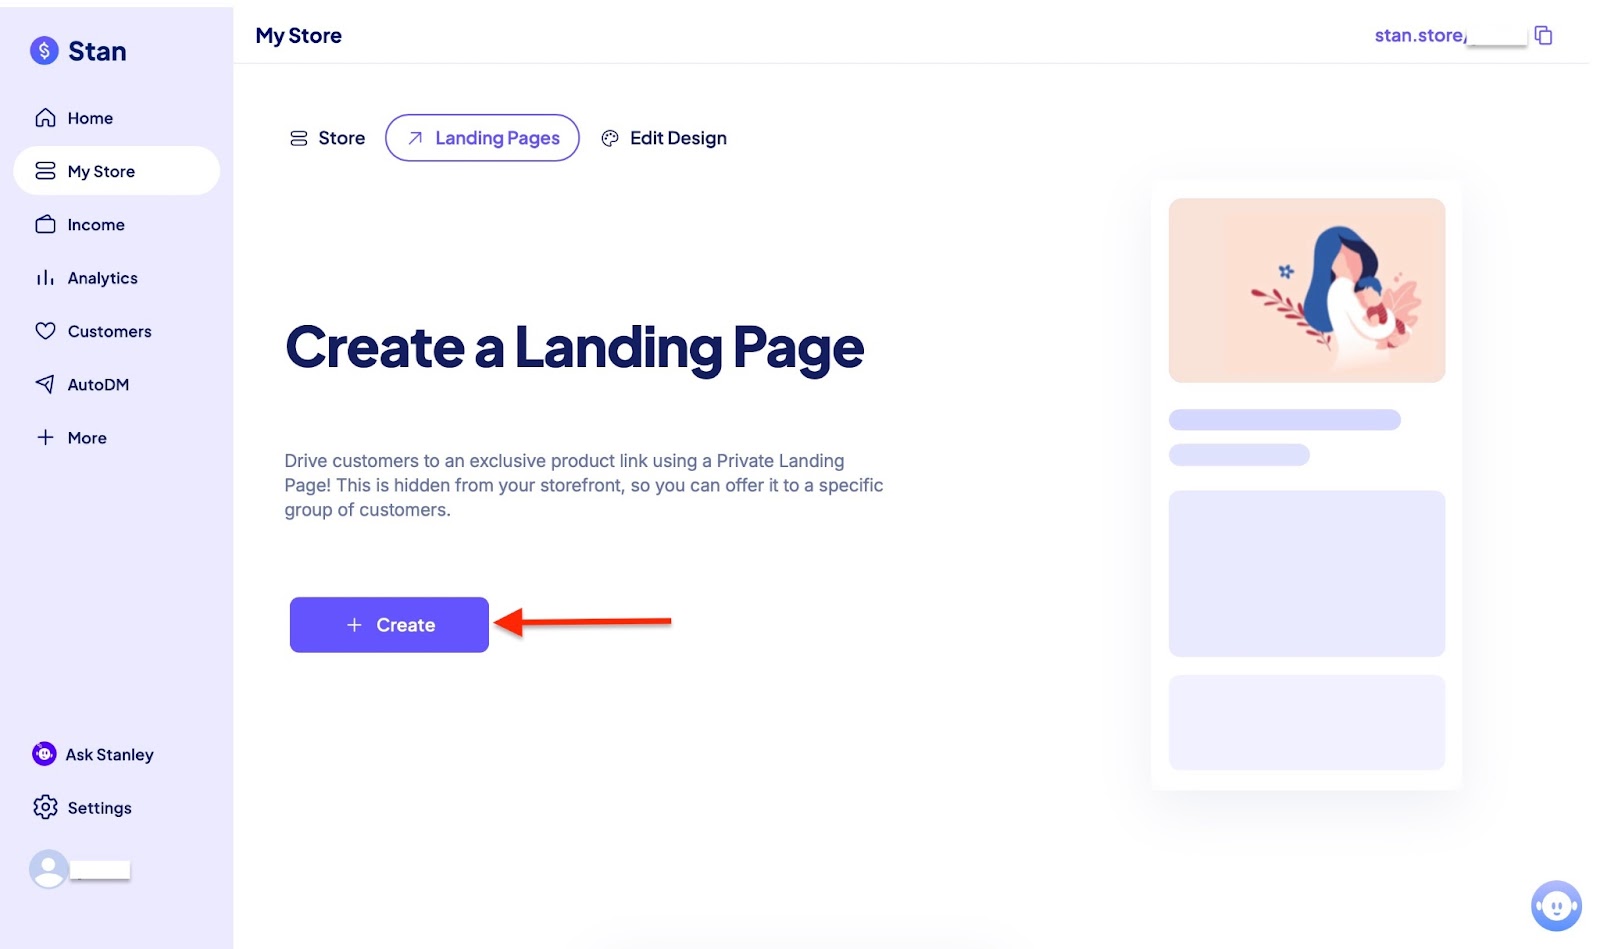
1. Landing pages
Stan Store’s landing page feature is not displayed on your storefront, which means you can offer it to special/premium customers.
To create a landing page, first select “Landing Pages” in the My Store window. Then click “+ Create.”
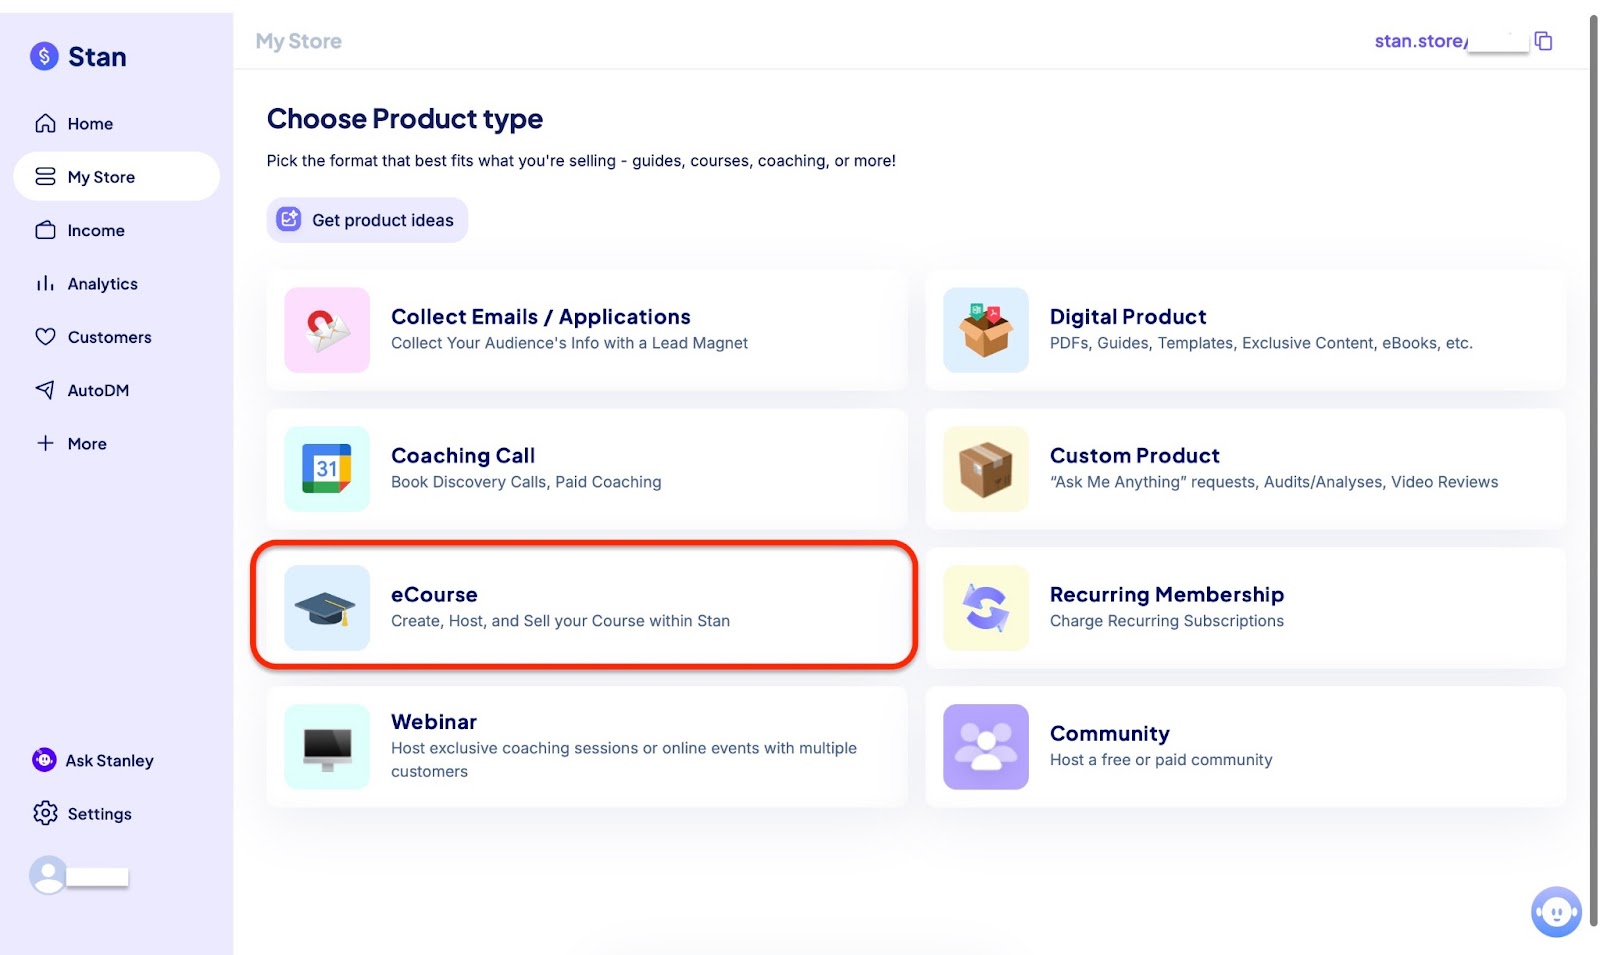
On the window, choose the type of product you would like to sell. This time, let's create an online course. Select “eCourse,” which is the third item on the left.
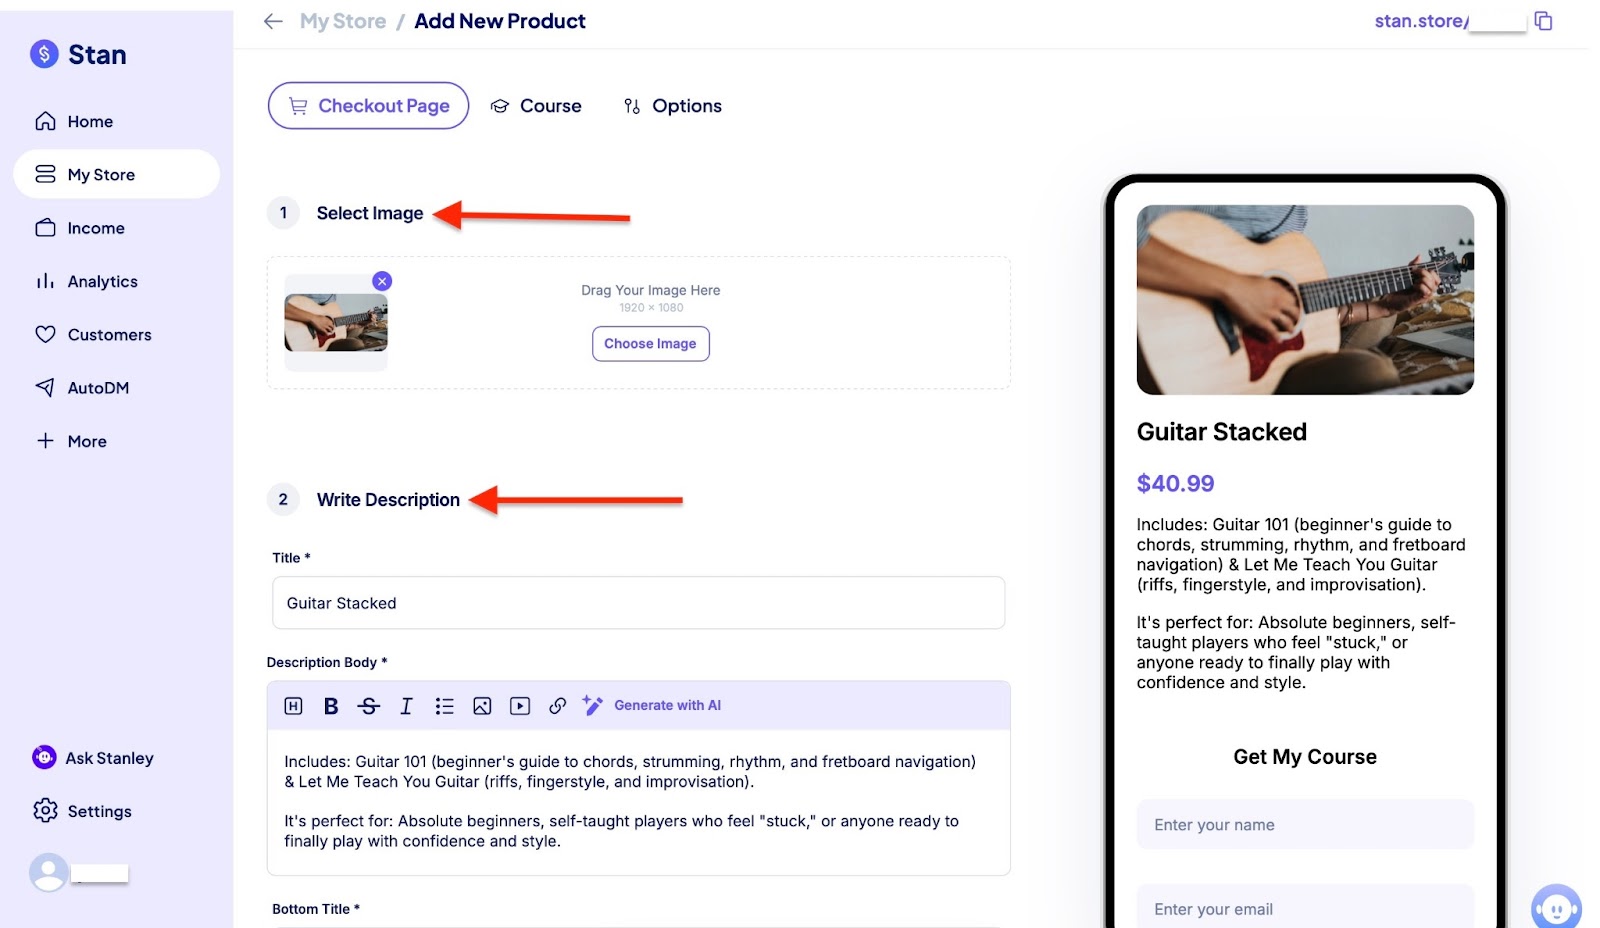
Add your course title, description, images, bottom title, and set a price.
Now, click the “Course” tab next to the Checkout page tab. You can edit the course homepage and add various modules and lessons.
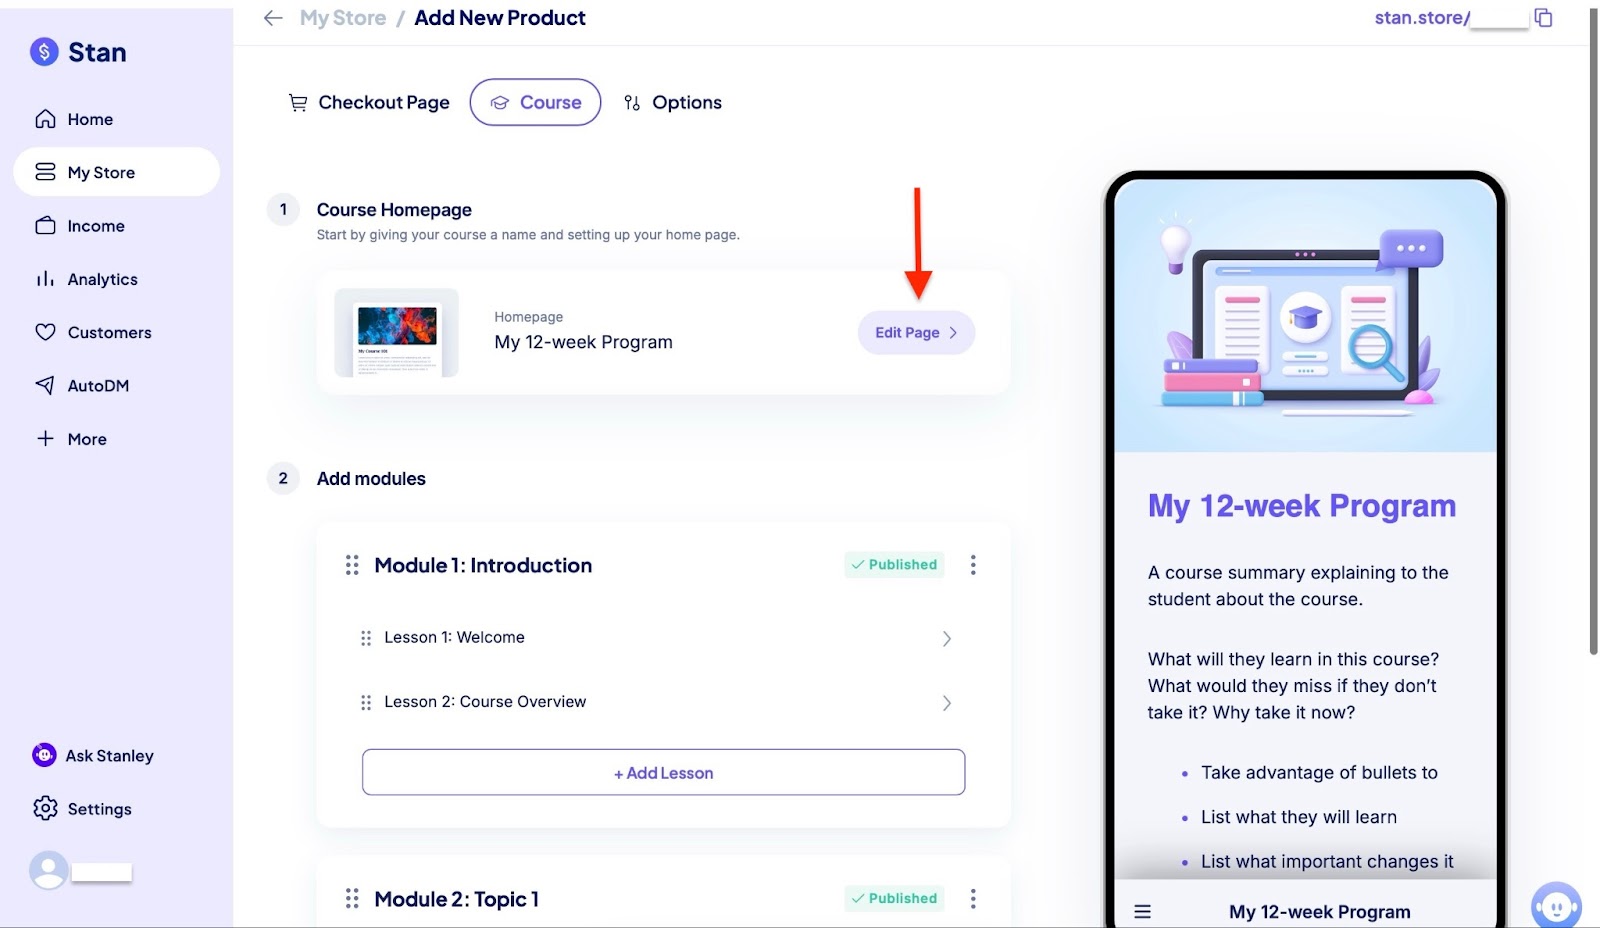
Finally, click “Publish” to finish. Your landing page is ready.
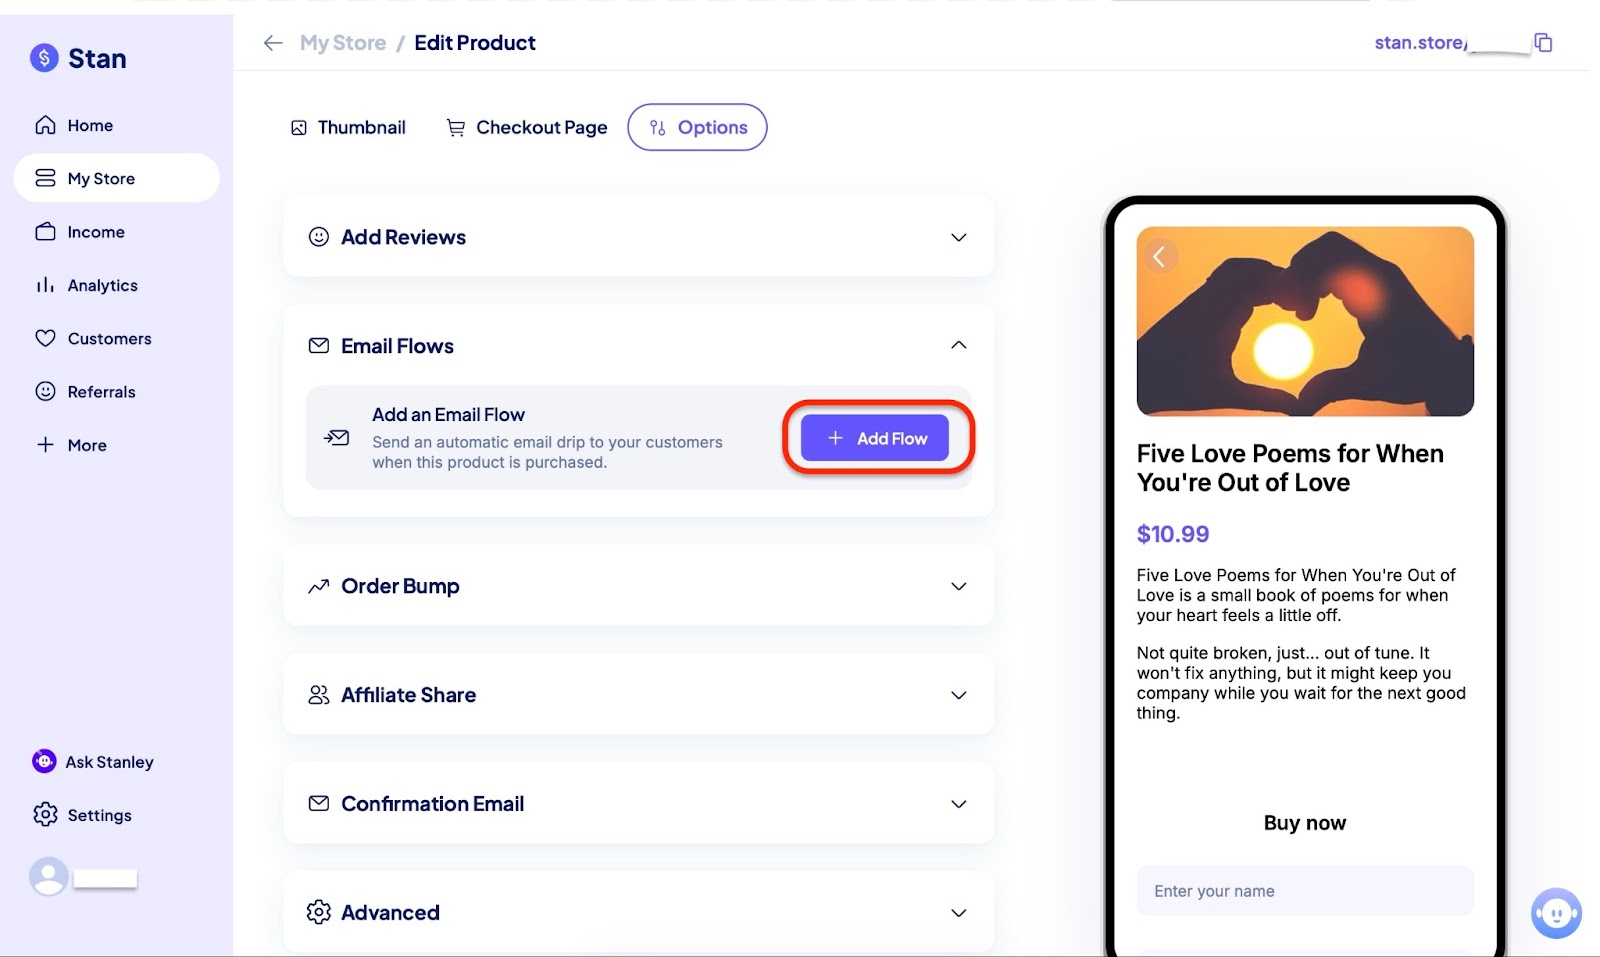
2. Email flows
With the email flow feature on Stan Store, your customers will receive automated emails from you after they make a purchase, sign up, or download a product from your store.
For example, if a customer purchases an e-book from your store, they’ll get a thank-you message and a download link.
I’ll show you how to add or create email flows in just a few steps.
Start by selecting “My Store” in the sidebar. Then click on one of your products.
Under the options tab, select “Email Flows” and click the “Add flow” button.
In the pop-up window, choose “Create Email flow.”
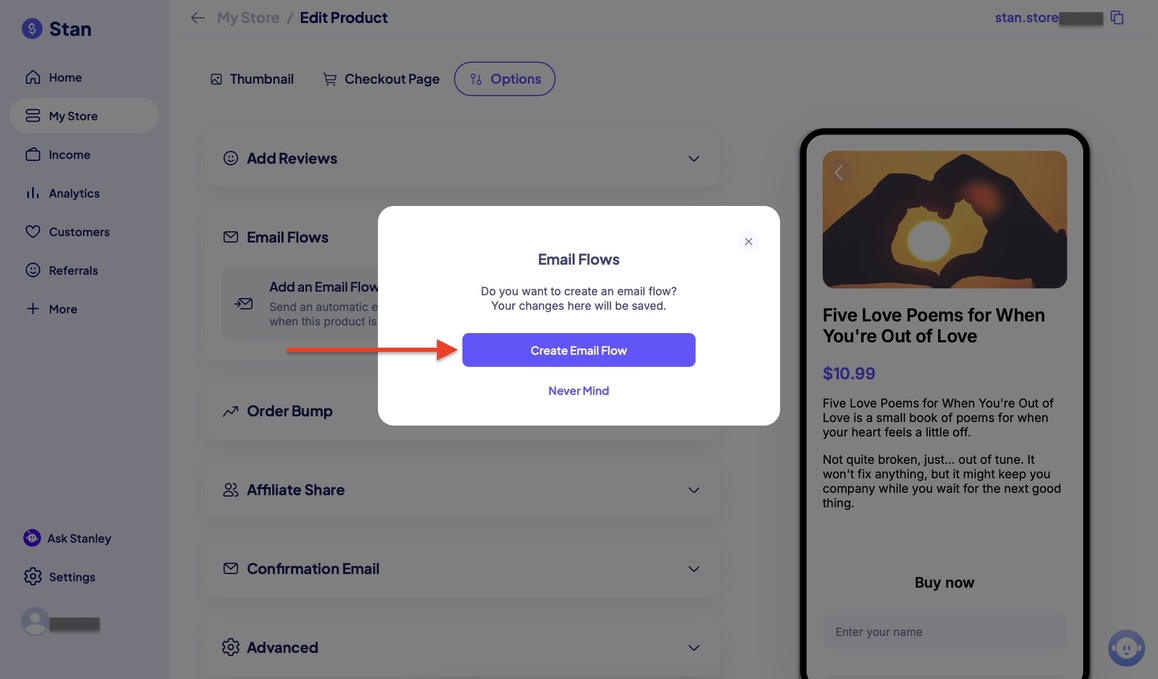
Finally, publish your email flows.
[fs-toc-omit]Best For
- Business owners and companies who want a simple, all-in-one storefront to sell digital products, services, and memberships directly from their social media bio.
[fs-toc-omit]Pricing
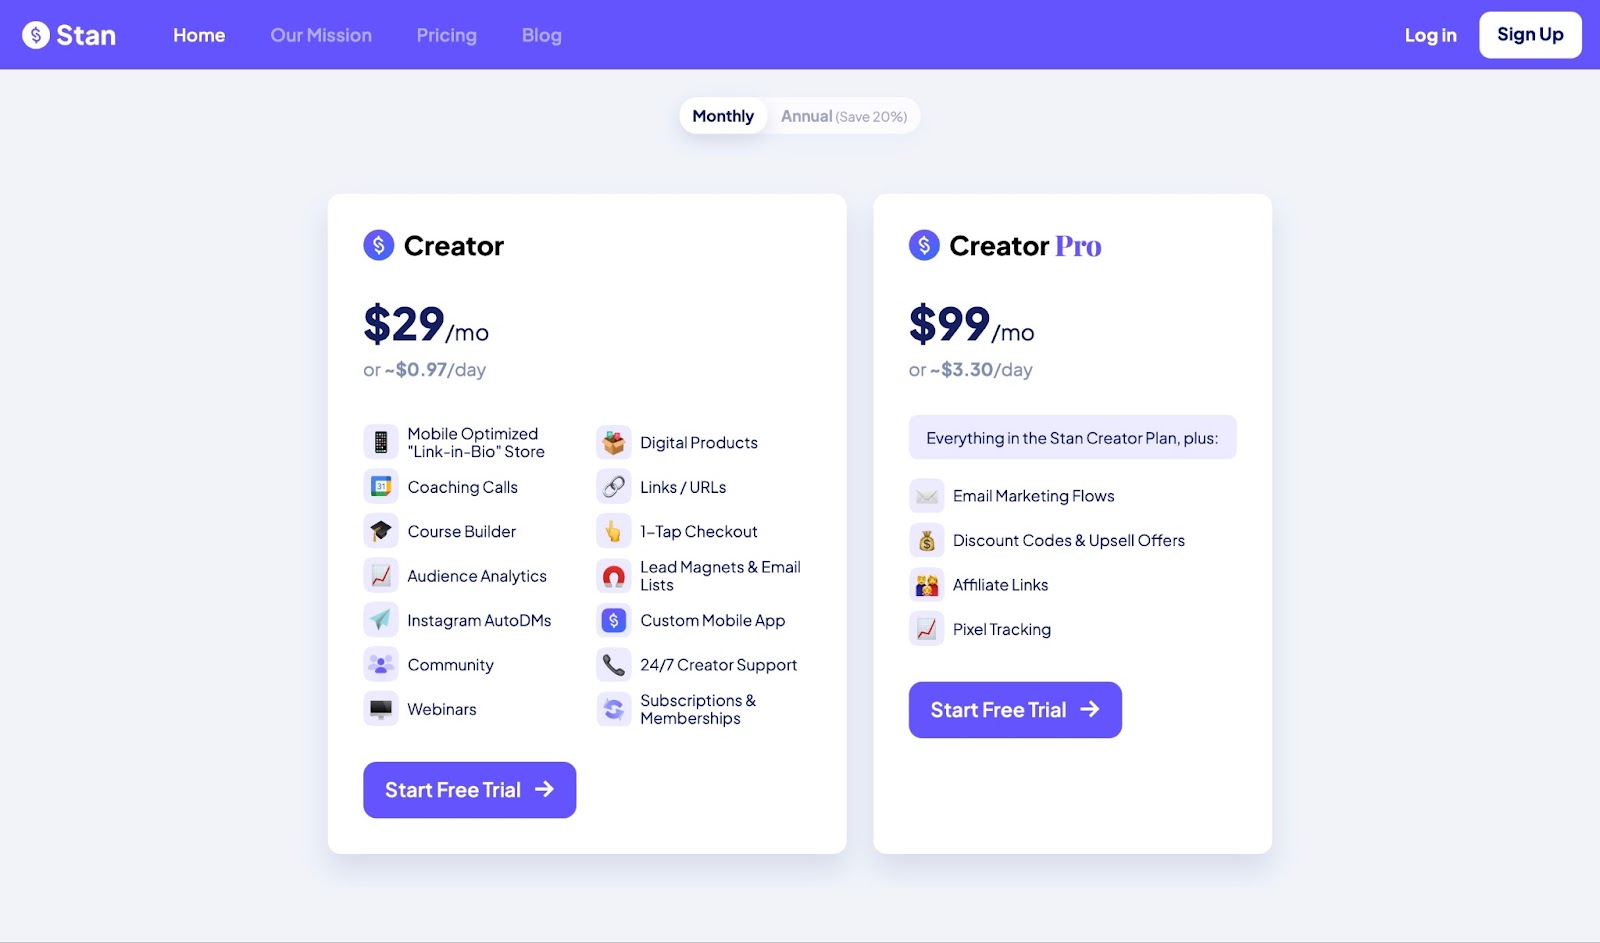
- Creator: $29/month
- Creator Pro: $99/month
I could mention more websites to sell digital products, like
Other creators even use their e-commerce platforms, like
- Shopify
- WooCommerce and
- BigCommerce
Now that you know where to sell digital products online, let’s see how to choose the right platform.
What to look for when choosing a platform to sell your digital products
There are several factors to consider when choosing a platform to sell your digital products. The list is as follows:
- Transaction fees and commissions
- Ease of use
- Customization options
- Payment processing
- File hosting and delivery
- Marketing tools (email, coupons, upsells)
- Integrations with other tools (email, CRM, etc.)
- Support and community
We will dive into each of them in detail.
1. Transaction fees and commissions
The very first factor to consider when choosing a platform to sell your digital product is, without a doubt, the transaction fees and commissions.
It’s clearly a very important factor because, as you scale, higher fees can eat into your margins quickly.
Take the example of Gumroad.
The platform charges a flat 10% + $0.50 per transaction for all sales through your profile or direct links to your customers. More so, Gumroad charges 30% per transaction when new customers find and buy from you through their Discover Marketplace.
These high percentages will significantly affect and reduce your earnings over time.
Meanwhile, Easytools offers much lower fees:
Let’s do the math.
Say you sell a $100 digital product.
By using Gumroad’s first plan, you would pay $10.50 in fees every time you sell the product. Meanwhile, on Easytools’ creator plan, you save so much more as your sales increase.
The difference is huge. Plus, when you reach 100 sales, Easytools’ Pro plan becomes even more profitable, and the costs will look as follows:
Creators who sell regularly will benefit in the long term by choosing Easytools rather than Gumroad, which requires high transaction fees and commissions.
2. Ease of use
If a platform is already complicated to use, I recommend against choosing it.
Some platforms are so messy that you can’t even find your way. You want a platform that you can easily use and locate features.
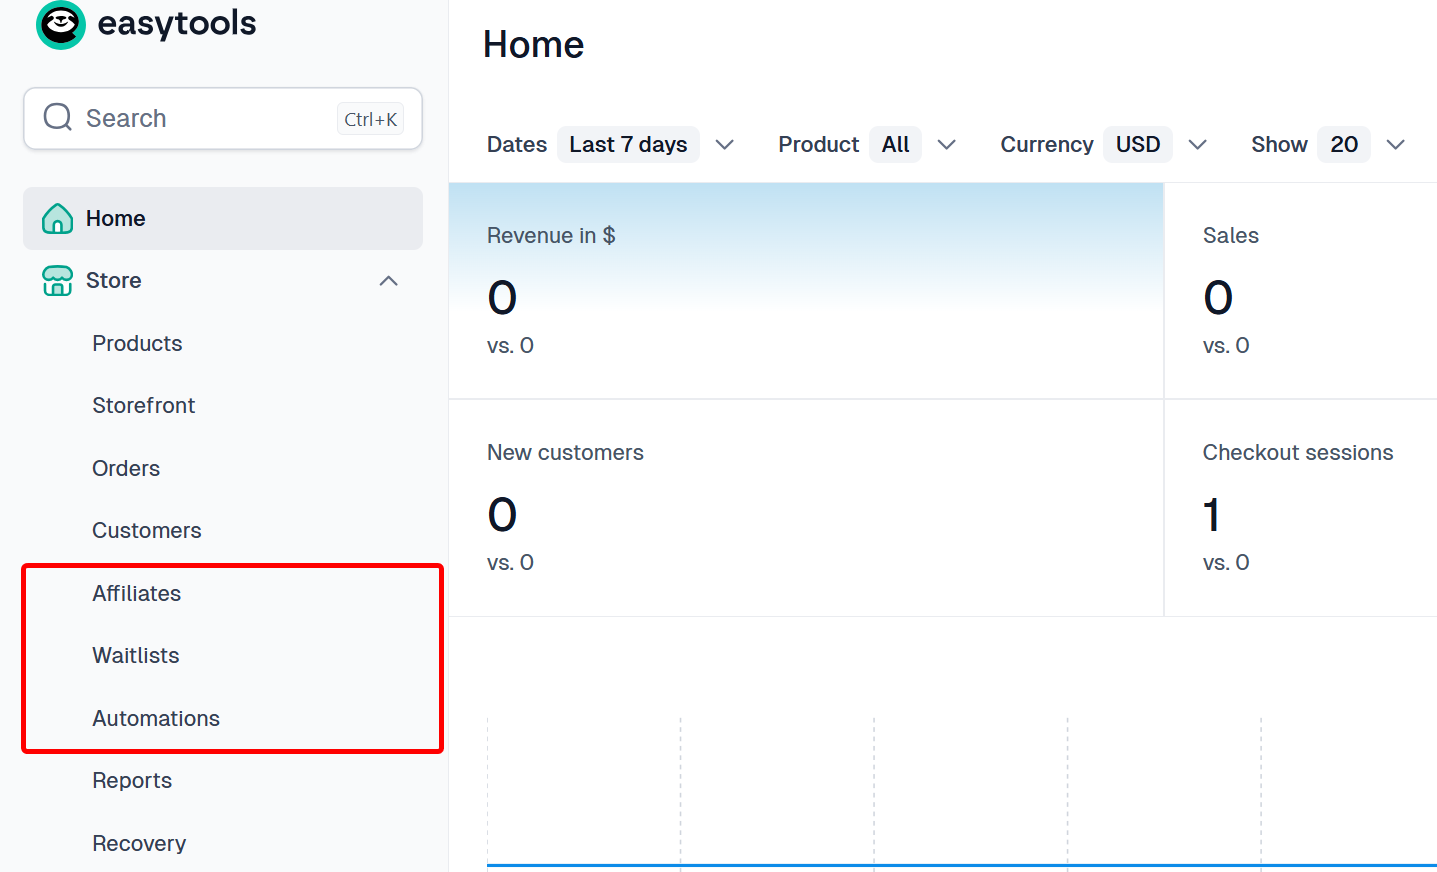
For example, on Easytools, you can find all the features you need on the sidebar. That’s how simple and minimalist the menu is.
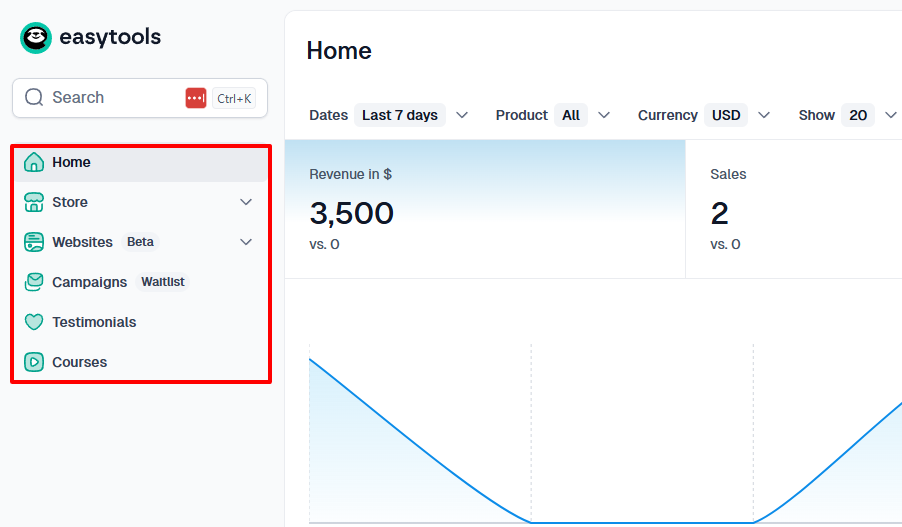
The sub-features are also much closer than you think.
Just click one of the features on the sidebar, and the list will automatically pop up. No need for a standalone page.
Since you want to sell your digital product, a good platform must clearly show you all the possible options so you can choose based on your needs.
You may want to start from scratch, or with a template, or add, e.g., a new course.
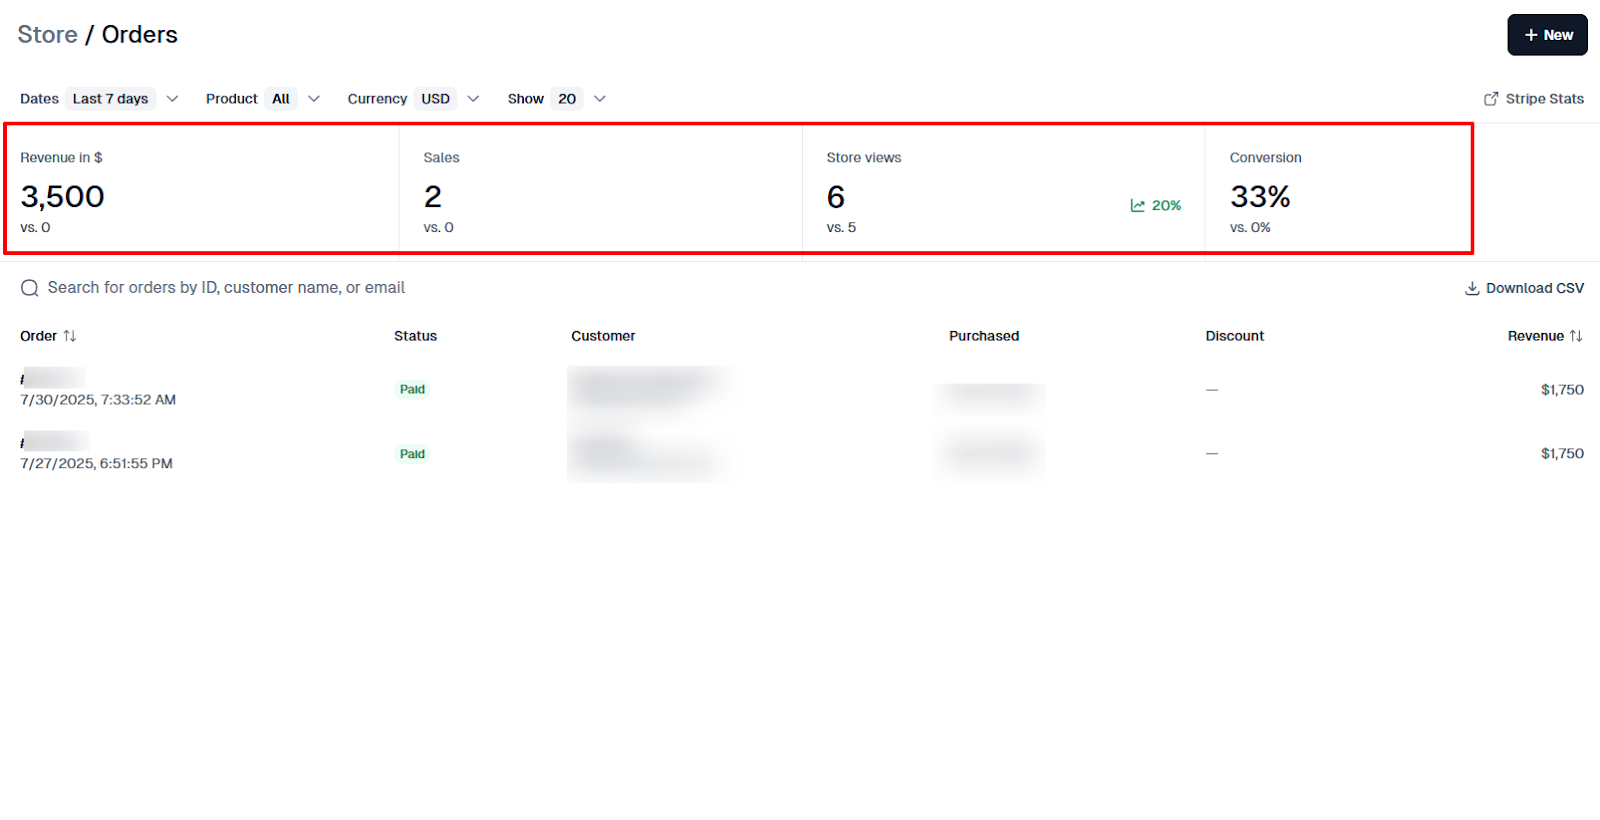
Also, the platform you choose to sell your digital product with must let you track your orders.
It must display your revenue, number of sales, and views, as well as your conversion rate.
3. Customization options
A report from Statista reveals that 59% of online shoppers were more likely to purchase from a brand that offers customization options.

This survey clearly shows the importance of customization. Hence, you should check if the platform you want to choose has the customization settings you need.
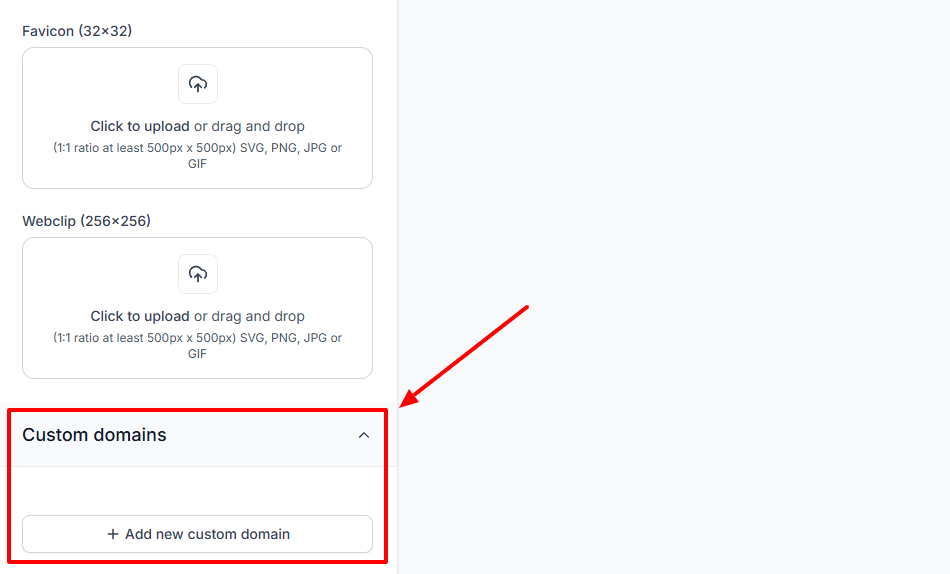
For instance, does the platform you are considering offer a custom domain feature?
It is an important feature for trust and professionalism. On Easytools, you can add your custom domain.
Even after publishing your digital product, a good platform should let you edit it.
More so, the tool should allow you to customize your company or personal branding. This helps your customers easily identify and match your brand online.
4. Payment processing
As a business, your customer should not encounter any issues when paying for your product.
According to Baymard Institute, out of the 70% of US online shoppers who abandon their cart, 18% said it was due to the checkout being too complex or taking too long.

This is why payment processing is another important feature to look into when deciding on the platform to sell your digital products.
The platform you are looking for should be able to support secure, instant payments and payout options that make sense for your region.
Not only that, but flexibility and trust also matter a lot.
Ideally, your buyer should be able to complete their checkout in just a few clicks, using their preferred method.
This is where the Easytools’ payment tool ticks every box.
Easytools can handle standard payment methods, including credit cards and local payments through Stripe.
Since the payment feature is an in-built feature, you don't need to set it up manually or use an external plugin.
All you need to do is connect your account.
Plus, we simplify the experience for you and your customer.
You can control how payments should be handled, including VAT rules, select your preferred currency, and even set up automatic tax collection depending on your country.
There is more. Easytools gives you detailed records of your payment history, such as payment time, amount, and the purchased product.
5. File hosting and delivery
Once a customer purchases your digital product, they expect to get it instantly.
This shows why file hosting and delivery features are also crucial to look at.
For example, a good online course platform should host and deliver your video lessons. And a top platform to sell ebooks should let buyers download the PDF after purchase.
Also, it should protect your products from unauthorized access or piracy.
You can add the Easytools login wall to your product page so that only those who have purchased it can enter to access it.
This means that until a customer makes the payment for your course, for example, they cannot access it. Easytools sends them a secure download link to get their PDF.
Be it an e-book, a course, or a video bundle, Easytools delivers instant and consistent results.
6. Marketing tools (email, coupons, upsells)
To turn your digital products into a huge market, you need marketing tools.
A marketing tool or technique, like upselling, for example, can increase your customer lifetime value by 20%. Also, brands that apply cross-selling experience 10 to 30% revenue growth.
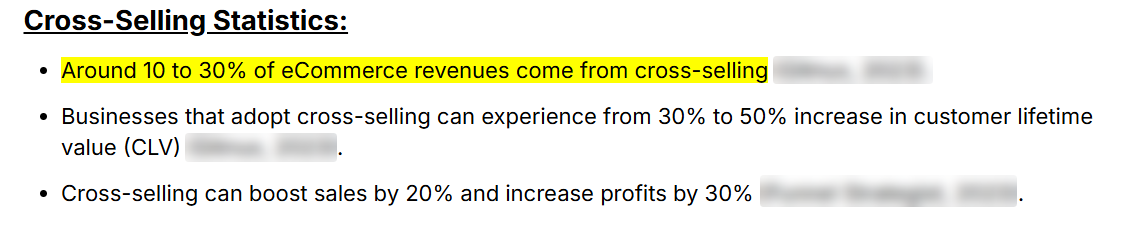
These statistics indicate that a good platform will have built-in tools to promote your digital products without any extra subscription.
A good digital product platform should have emails, upsells, cross-sells, coupons, affiliate links, and testimonials.
With email marketing, you send campaigns to sell other products or send emails to educate.
If you want to run a promo, the tool should let you create coupons. You should be able to enter the discount amount, apply it to specific products, and set start or end dates.
Then, when a visitor checks your product, upsell and cross-sell to suggest other items, which can increase the average order value.
Also, you can use the affiliate tool to create custom affiliate links and reward those who promote your digital products with commissions.
7. Integrations with other tools (email, CRM, etc.)
When choosing a platform to sell your digital products, you should also consider its integration with other tools.
An ideal digital platform should integrate with tools for:
- Payment
- Email marketing
- Customer Relationship Management (CRM)
- Tracking and analytics
- Affiliate management
- Social proof and reviews
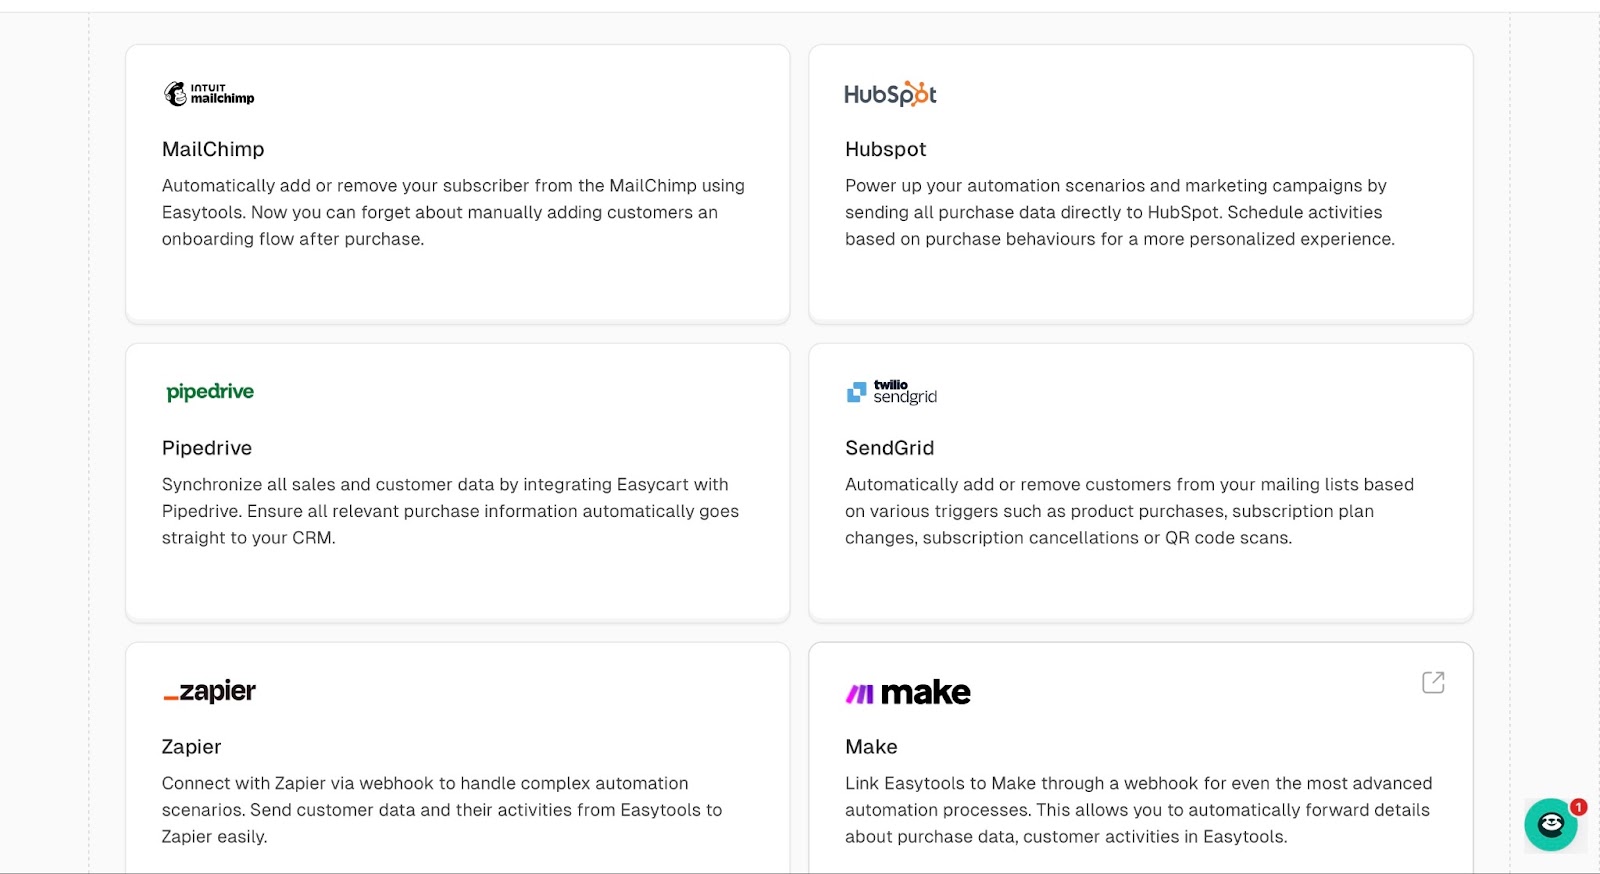
Easytools, for instance, integrates with more than 20 tools.
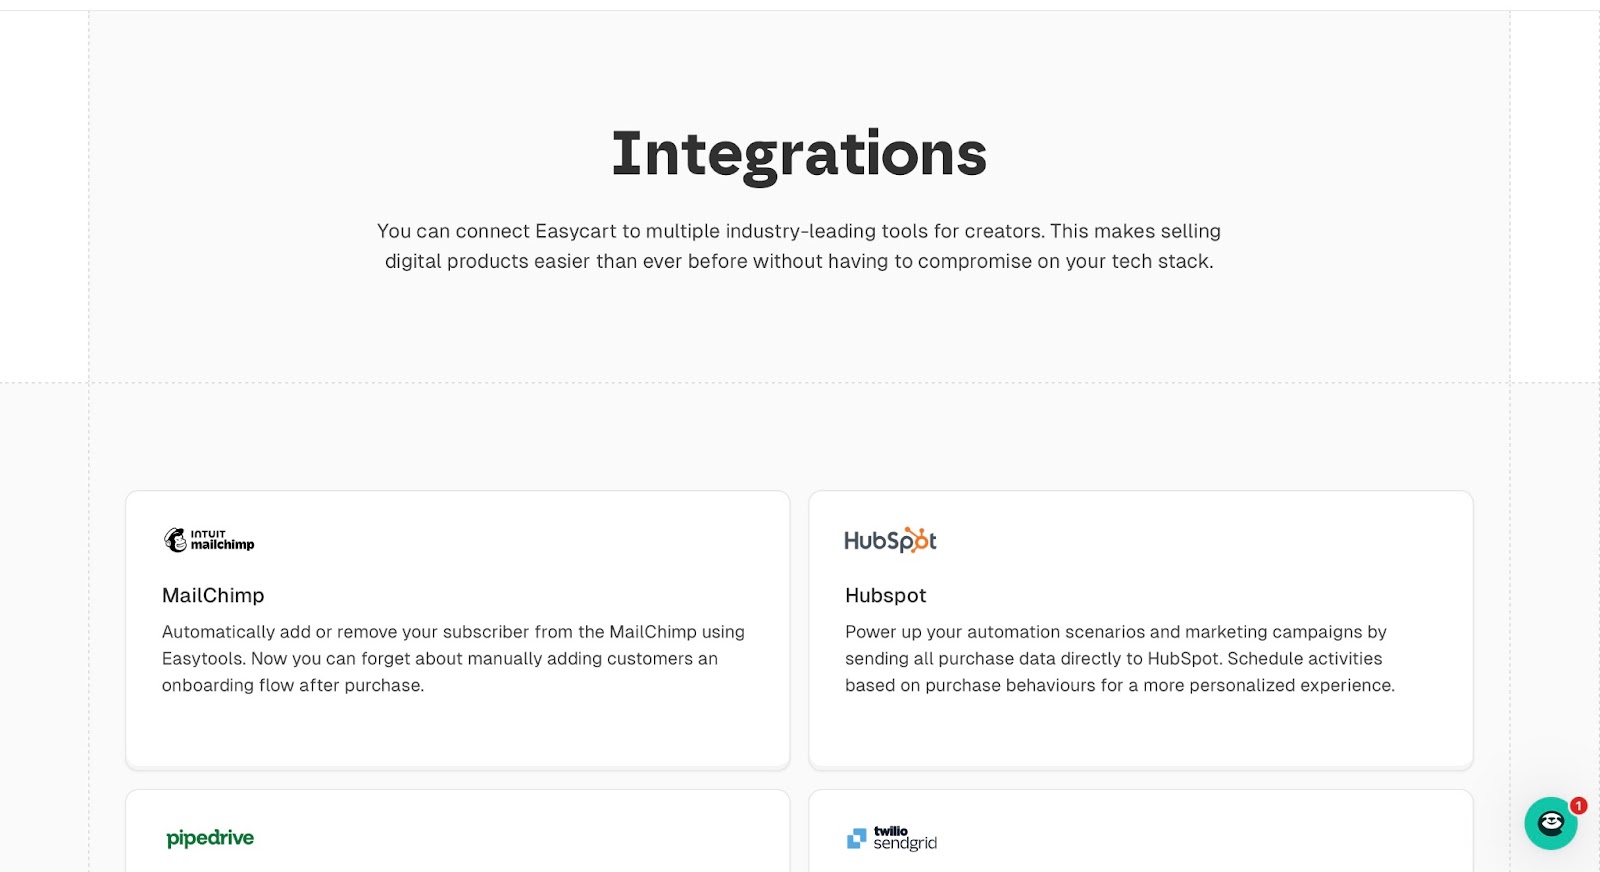
Examples of these are HubSpot, MailChimp, Pipedrive, Zapier, SendGrid, and Circle, among other essential tools.
You may ask why tool integration is so important.
The reason is that payment gateways are how creators collect money after they make a sale.
Email marketing helps retain customers while promoting your digital products. CRM tracks leads, buyer journeys, and behavior. It signals creators about who to target and how to personalize marketing strategies for higher conversion rates.
Additionally, tracking and analytics show what’s working and what needs fixing. Affiliate marketing is essential for scaling and has a low customer acquisition cost (CAC).
Lastly, social proof and reviews build trust and reduce customer doubt. That means creators can gain brand credibility, which eventually drives more lead conversions.
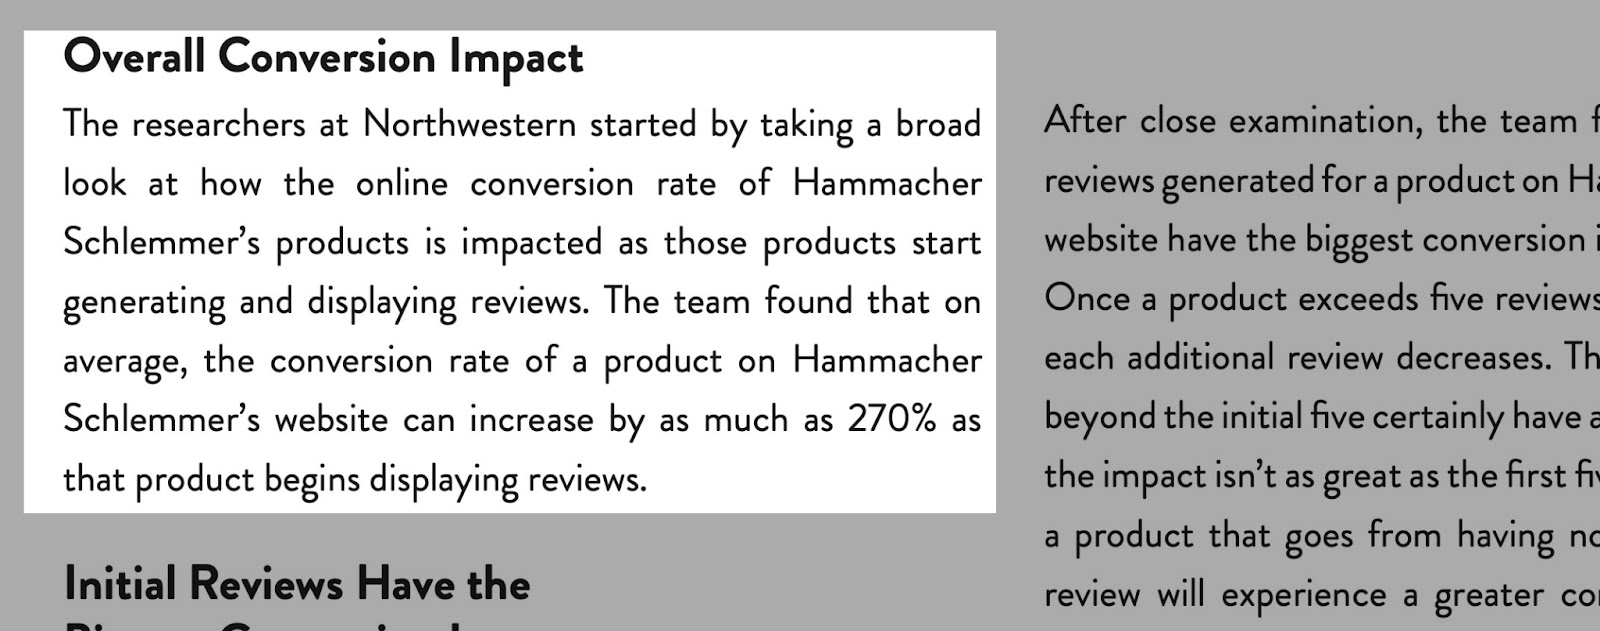
Regarding social proof and reviews, a study by Spiegel Research Center (Northwestern University) found that displaying reviews can increase conversion rates by up to 270%.
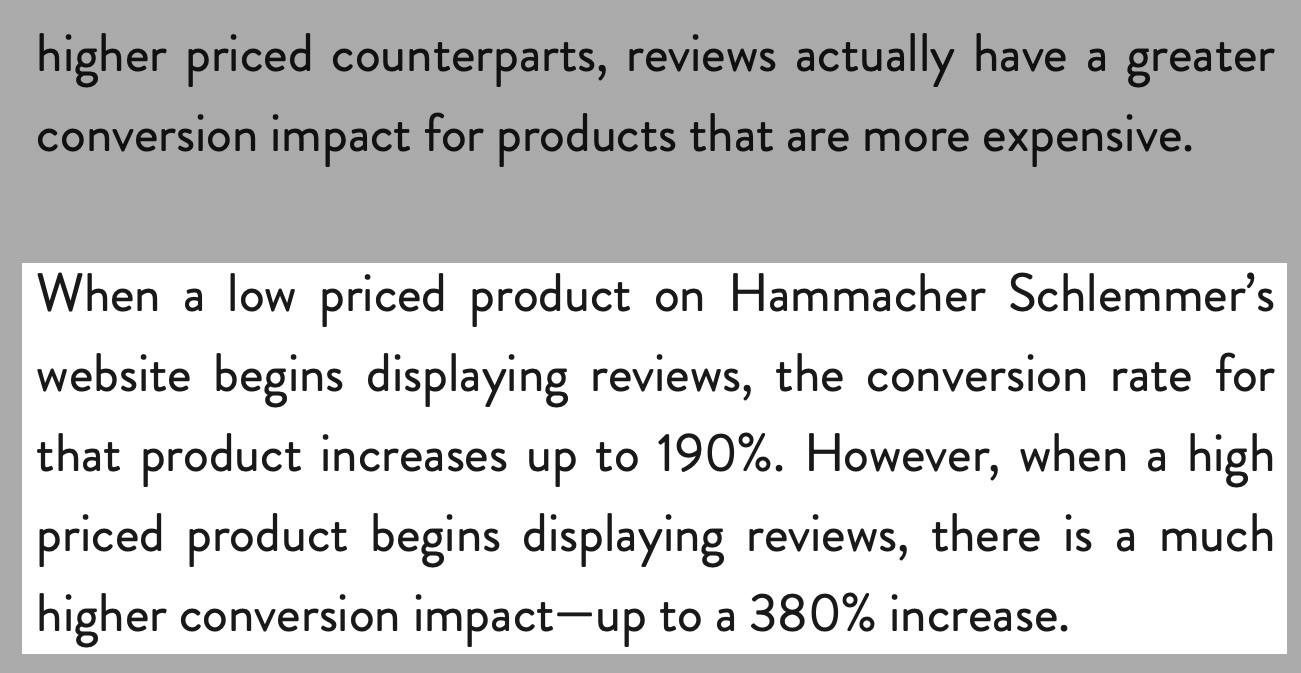
They also found that when they displayed reviews on a cheap product, the conversion rate increased by 190%. However, it was “up to a 380% increase” in the conversion rate for costly products.
All in all, these integrations affect your profit and the performance of your digital business.
8. Support and community
Finally, you should look for a vibrant culture of support and community.
The impact of a thriving online community on sales and marketing is understated, but still important.
A thriving online community can lower customer acquisition costs, drive conversions, and positively impact scalability.
Let’s say you want to buy a SaaS product.
A strong online community can help you (the new user) solve problems you have encountered before.
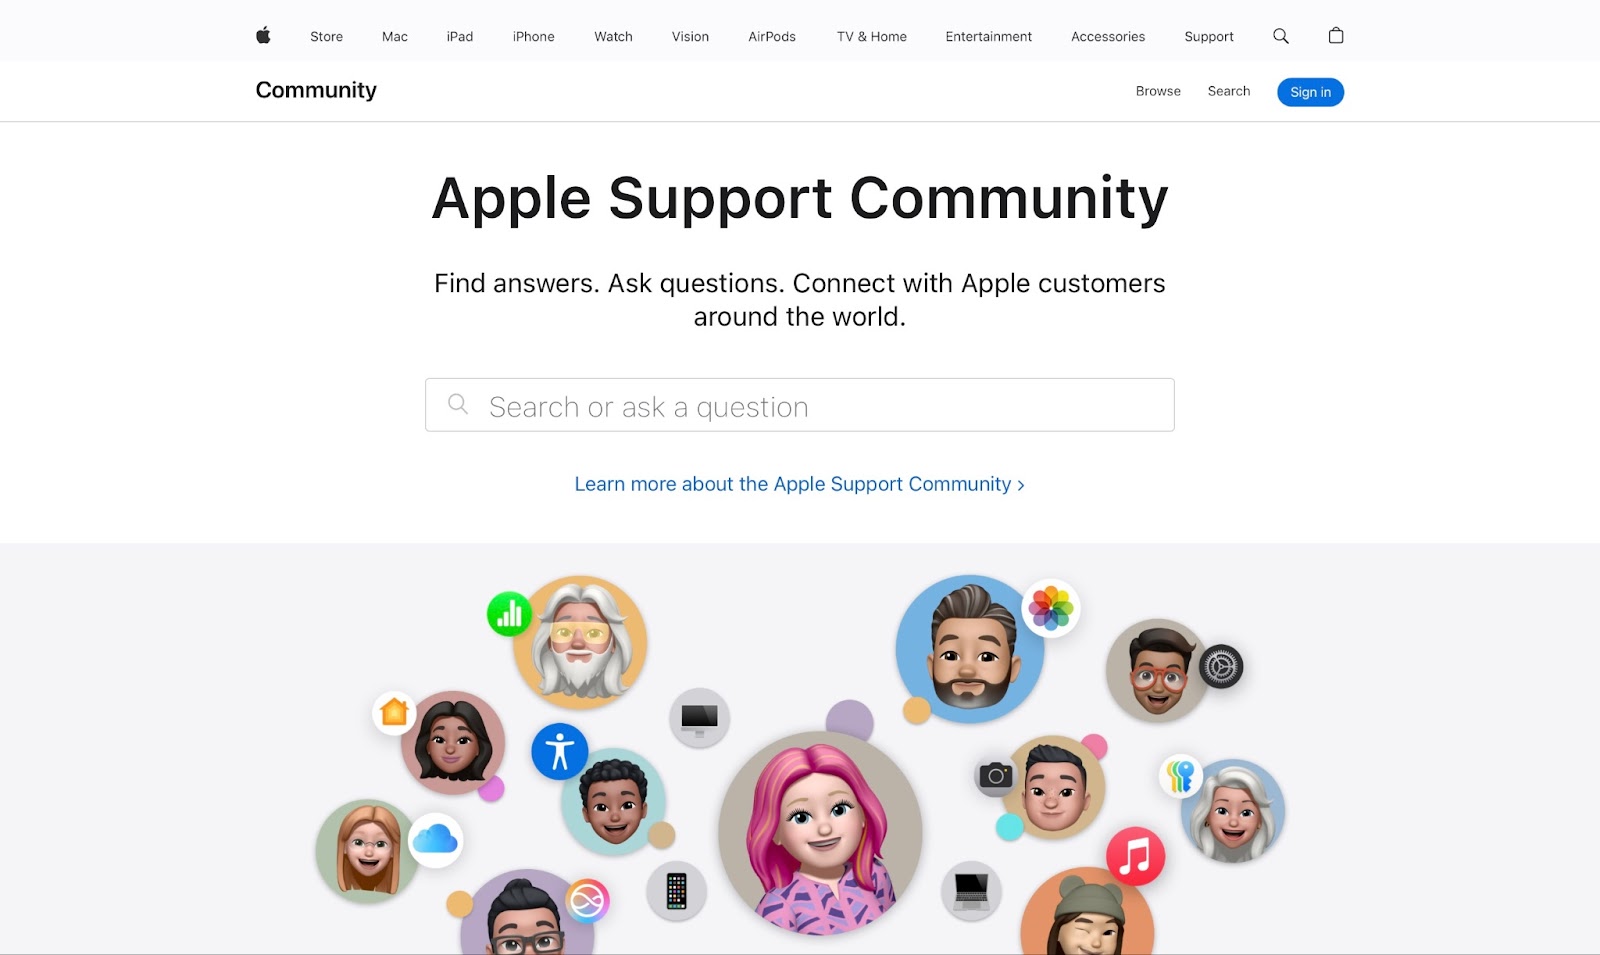
We see that with big tech firms that have large online communities, like Apple, Microsoft, Adobe, and Google.
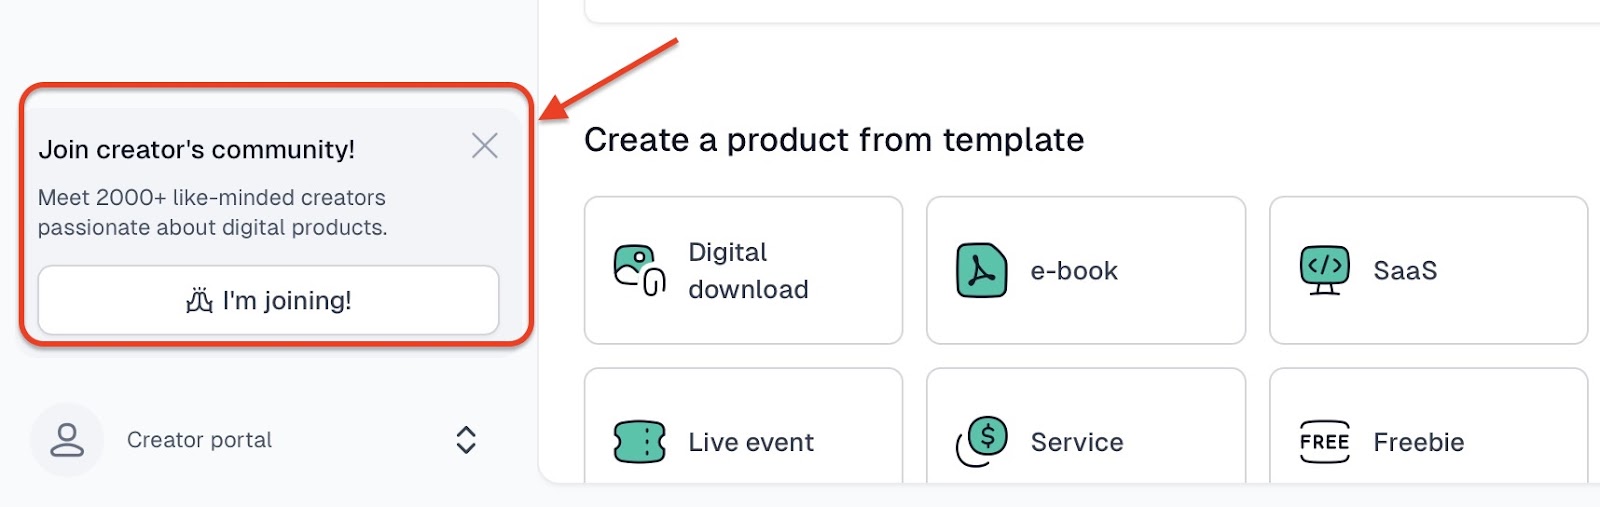
Among the best platforms to sell digital products I recommended here, Easytools is among the few that have a fully dedicated online community.

You can join Easytools’ online community by clicking the “I’m joining!” button below the Home page, right above “Creator portal.”
Choose the best site to sell your digital products
All too soon, you have reached the end of this article.
Now, you have seen what each of these platforms for selling digital products offers. I've shared my experience using all of them. Choosing a good platform can be a little confusing when you aren’t sure which tool appeals to your needs.
However, you have seen the various categories that matter when making a good selection. You have everything you need to make the right choice for your business.
No fees, no legal hassle – start selling anywhere instantly.
Sign up FREECancel anytime · No merchant lock-in

More
Related articles
Ready for more? Check out these related articles that will keep your momentum going. They’re packed with easy-to-follow tips and tricks to help you supercharge your digital goods business.


Start now
Take it easy with Easytools
Focus on creating, and let Easytools handle the behind the scenes work.
No coding · No credit card required · Built on Stripe
© 2024 Easytools. All rights reserved.