Timer sections
Use Easypage built-in timer sections to add customizable, eye-catching timers to create urgency and increase conversions on your landing pages.
Last updated
November 3, 2025
Thanks to the Countdown Timer section, you can easily add time-limited elements to your page — such as a countdown to the end of a promotion or the start of an event. A timer helps create a sense of urgency and effectively encourages users to take action.
Key features
- Real-time countdown with smooth animations
- Option to customize labels, colors, and positioning
- Fixed positioning with an optional Close button
- Integration of primary and secondary CTA buttons
- Fully responsive design that adapts to any device
- Automatic hiding of zeros in the text variant
How to add a timer
To create a timer in Easypage, follow these steps:
- Go to your project in Easypage, under Websites → Landing Page.
- Click + New Section.
- From the section list, select Countdown Timers.
- Choose one of the available templates and drag it onto the canvas.
The timer will appear on your page, and you can start customizing it right away.
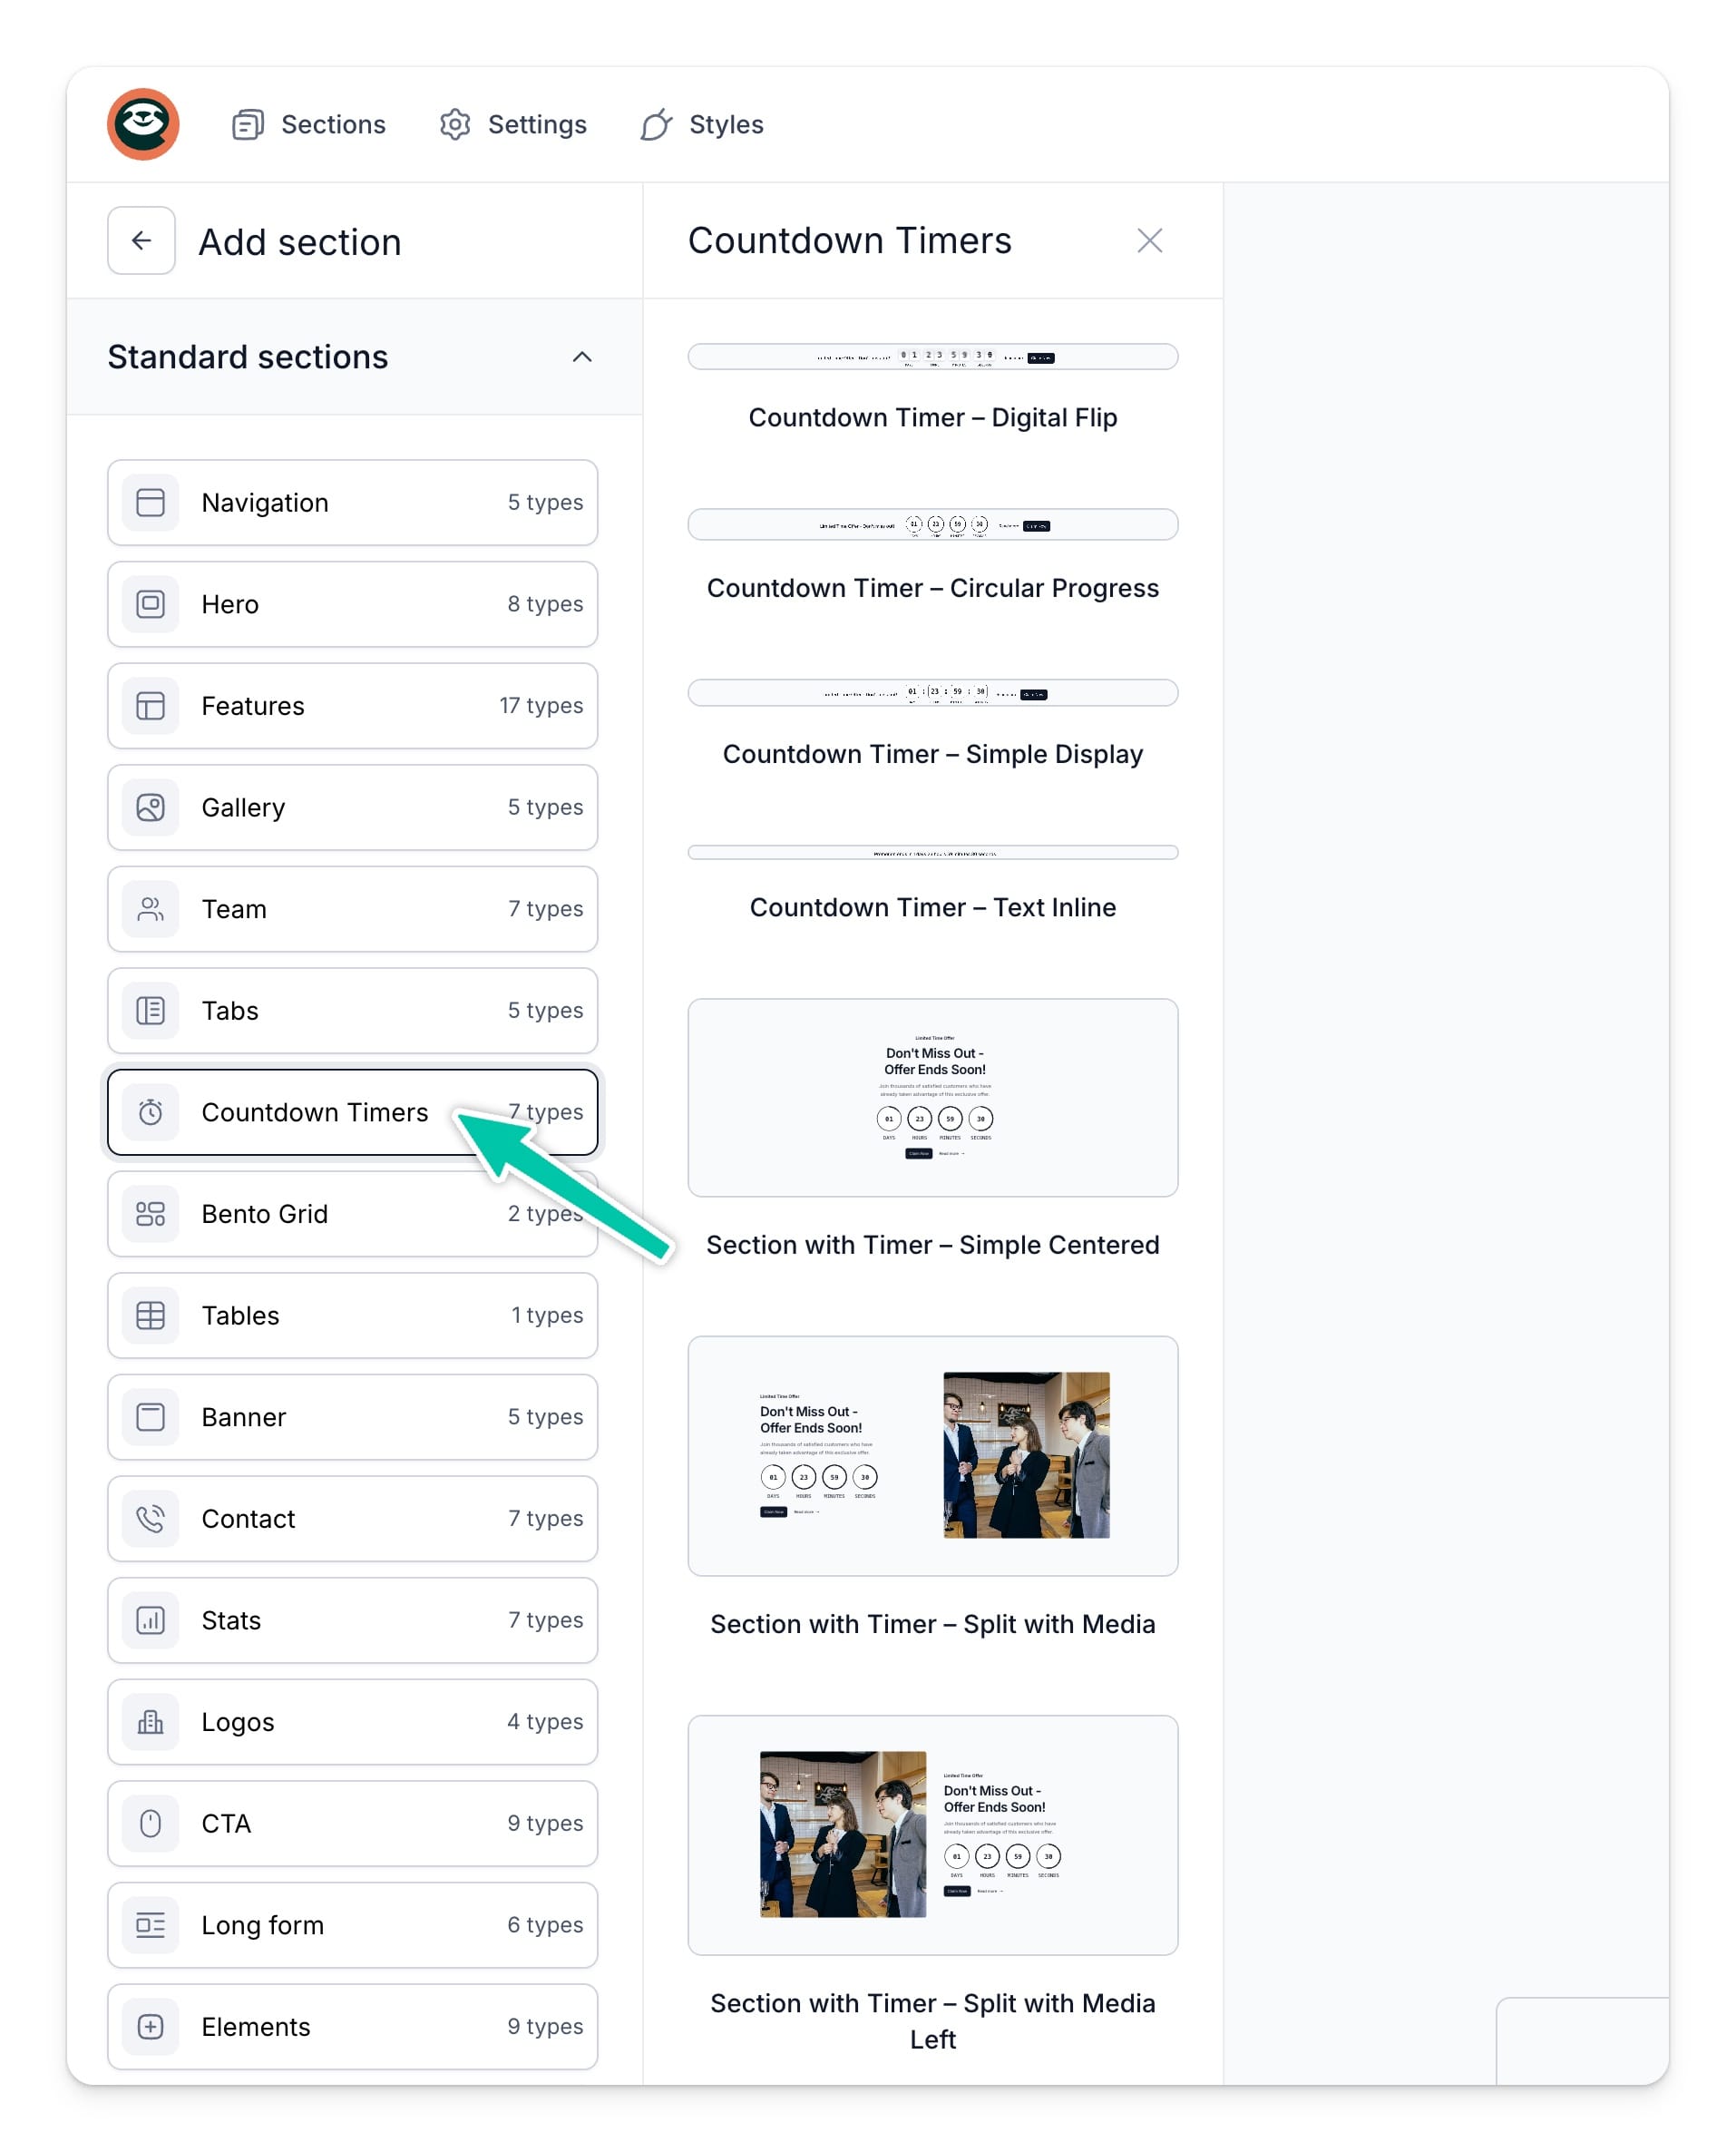
Available timer variants
Horizontal banners
- Digital Flip – animated flipping cards with a dynamic "flip" effect. Each change in seconds, minutes, or hours is smoothly animated, drawing the visitor’s attention. This modern, energetic style works great for short, time-limited promotional campaigns.
- Circular Progress – round progress indicators that visualize time passing. Each circle represents a different unit (days, hours, minutes, seconds) and gradually fills with color. Perfect for elegant, minimalist pages like product launches or event countdowns.
- Simple Display – a clean and readable text-based countdown with classic numbers. No animations — just a clear display that doesn’t distract from the main content. A great choice for text-heavy pages or forms.
- Text Inline – a minimalist text timer that automatically hides zeros. You can place it directly within a sentence (e.g. “The offer ends in 03:25:10”). It blends seamlessly with your content and keeps the layout tidy.
Vertical sections
- Simple Centered – a centered layout with a round timer. The entire section (title, timer, description, and buttons) is aligned to the center, making the countdown a key visual element. Perfect for “Coming soon” pages, product launches, or time-limited offers.
- Split with Media – a split layout combining text (tag, title, description, timer, buttons) with media (image, video, or iframe). One side contains the timer and text, while the other features a visual. This setup is ideal for promotional or sales campaigns where visuals support your message.
- Split with Media Left – a variant with media on the left and content on the right. This structure lets users first see the image or video and then read the accompanying text and CTA. Excellent for dynamic landing pages and marketing sections.
Main timer settings
Content tab
- Countdown end time – choose the exact date and time when your promotion or event ends. Once this time passes, the timer automatically stops, and visitors will see your chosen action (e.g. reset to zero or display a custom message).
- When timer expires – decide what happens once the countdown ends. You can keep the timer at zero or show a custom message like “Promotion ended” or “Join the next edition”.
- Title – an optional short heading that appears above or beside the timer. Use it to add a clear, action-oriented message such as “Sale ends in” or “Time left until launch”.
- Unit labels – enter your own text for each time unit (days, hours, minutes, seconds) to match your site’s language and tone.

Buttons
- Primary CTA button – add a main button encouraging users to take action, such as “Buy now”, “Sign up”, or “Check offer”. You can customize its label, color, and link.
- Secondary button – an optional additional button for supporting actions, such as “Learn more”.
- Entire banner as link – enable this option to make the whole banner clickable. When activated, users can click anywhere on the timer to be redirected to your chosen page (with hover effects).
- Close button – add a small X button that lets users close the timer. This is especially useful when the timer is fixed to the top or bottom of the screen.

Style tab
- Colors – customize the section’s look to match your branding. You can change the background, text, button, card, and border colors.
- Layout and positioning – choose where and how the timer should appear on your page:
- Fixed position: Off / Top / Bottom – pin the timer to the top or bottom of the screen.
- Width mode: Full width / Rounded container – decide whether the timer should stretch across the entire screen or sit in a neat, rounded block.

Tip: Use timers together with CTA buttons to effectively direct user attention — for example: The offer ends in 2 hours – place your order now!”


