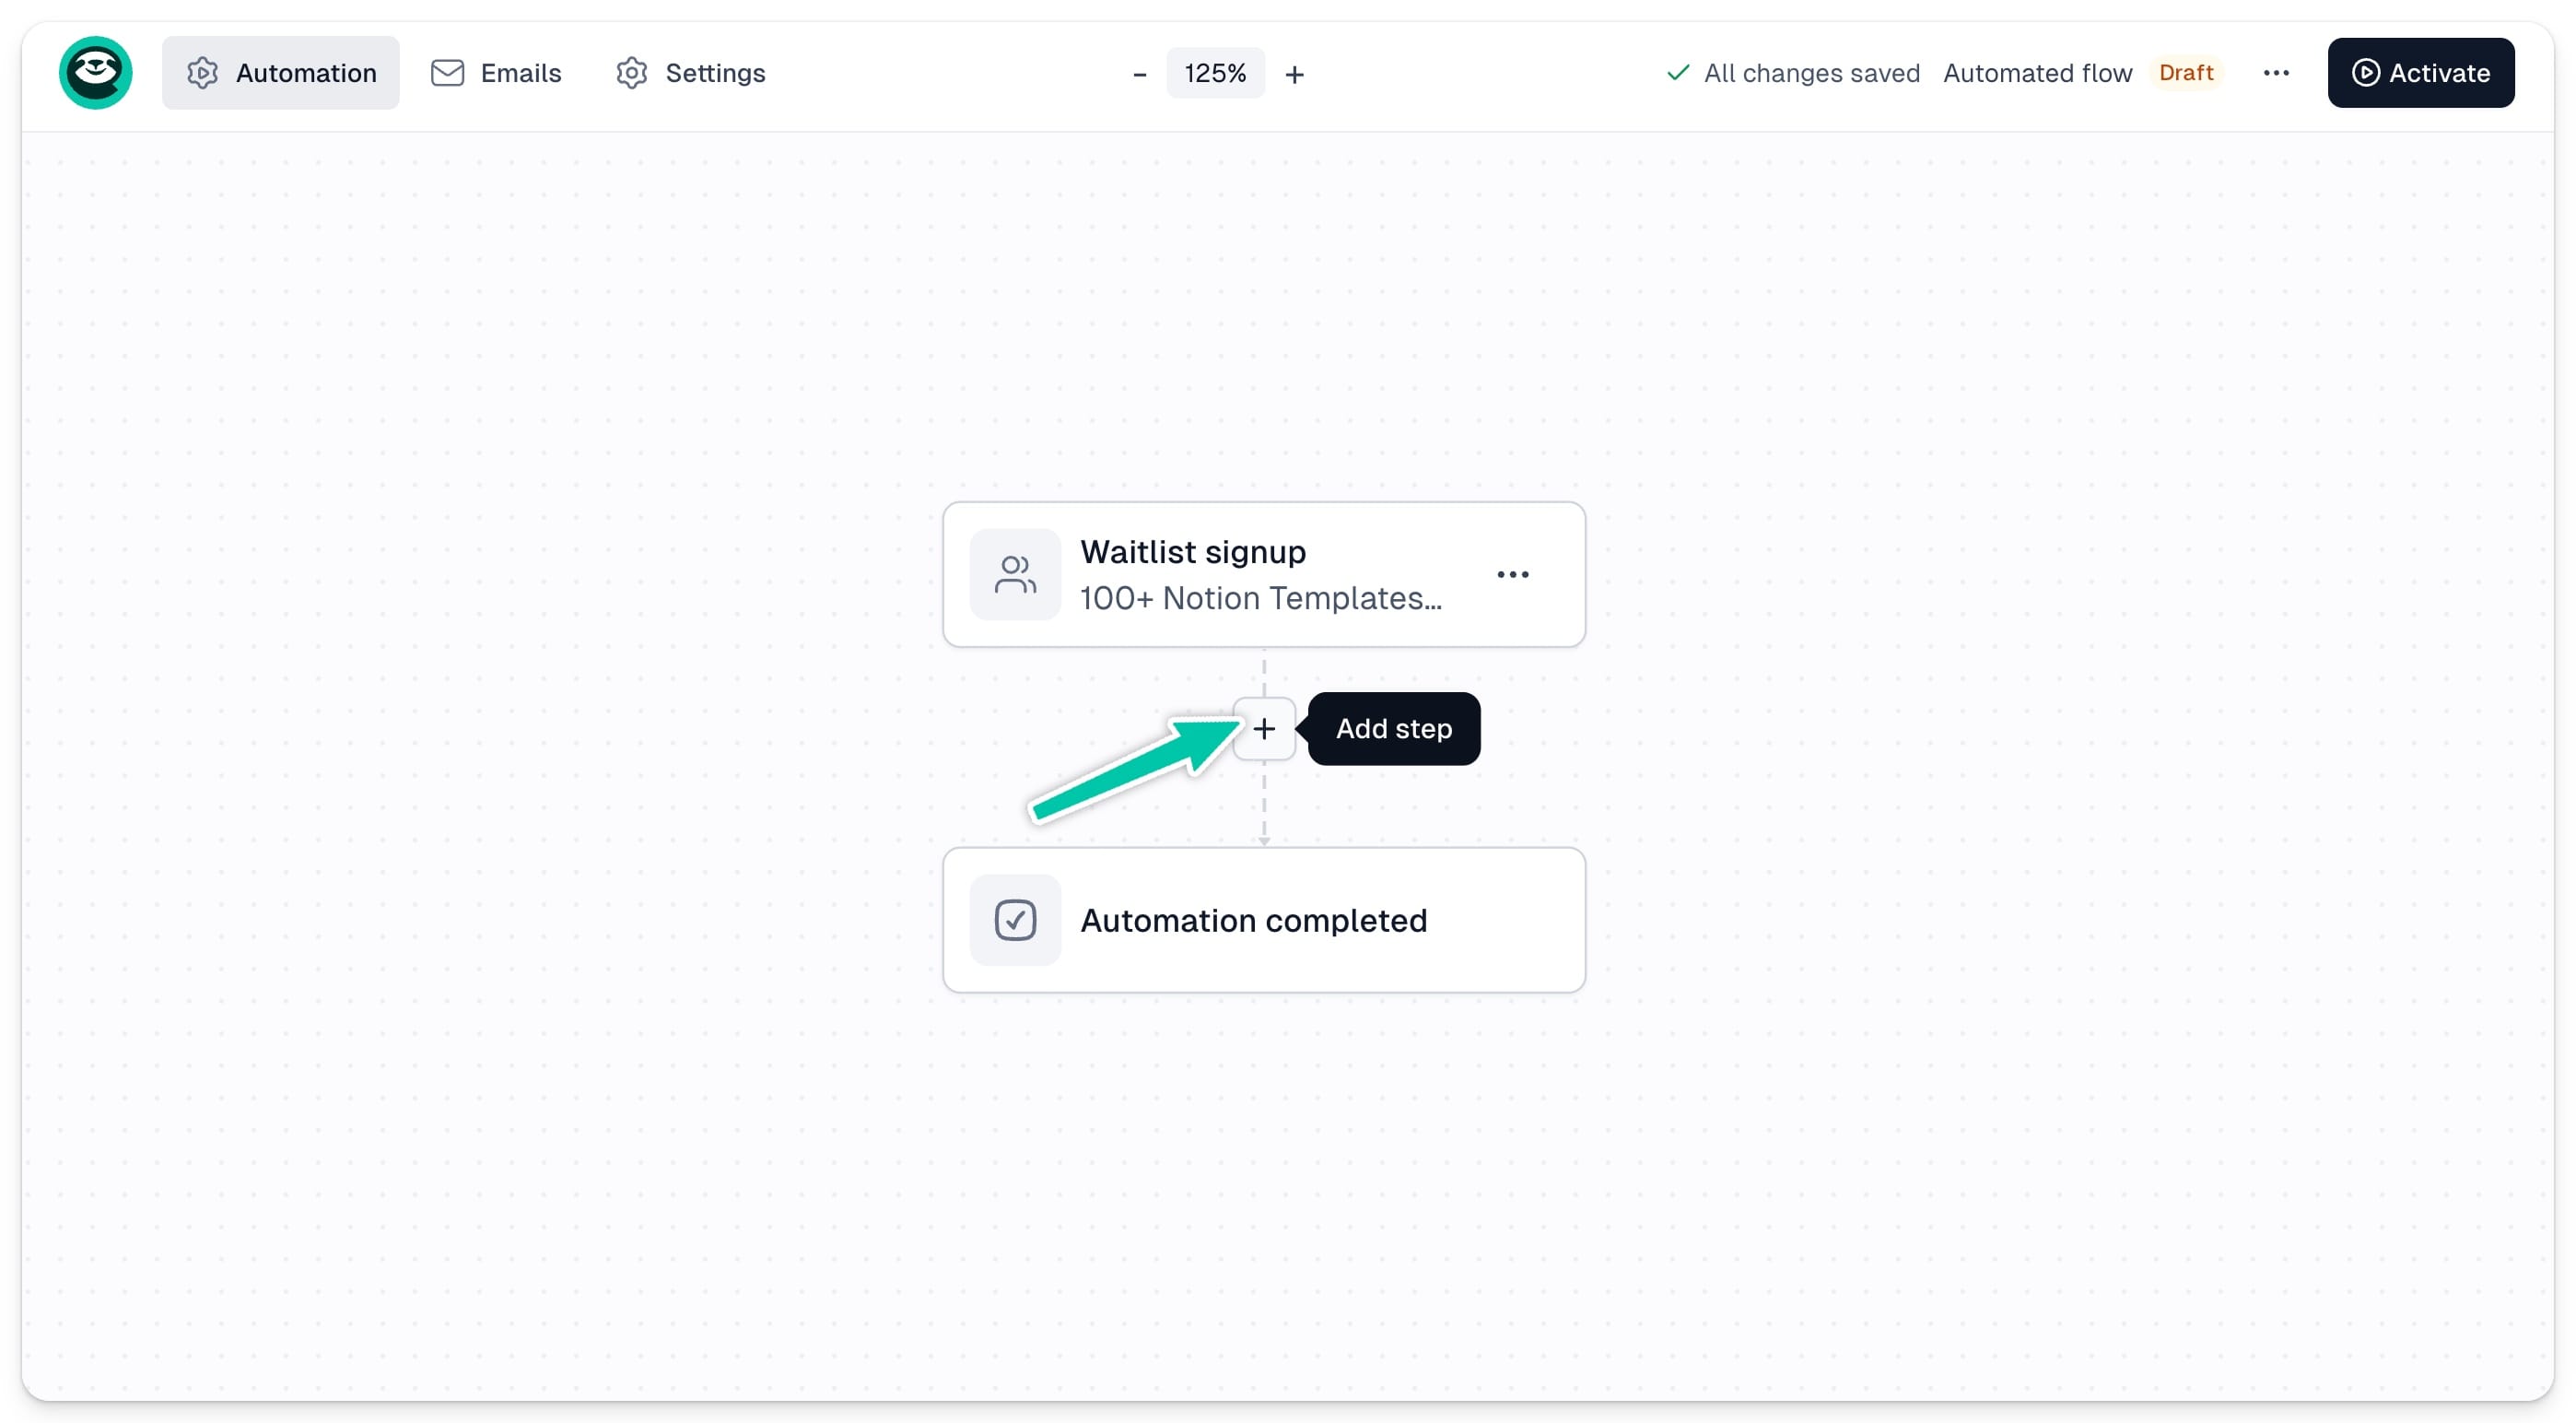
Your automation workflow can include multiple steps and action types, allowing you to create a personalized experience for your contacts. To add a step, click the + button below your trigger or any existing step and choose an action from the list.
Send email
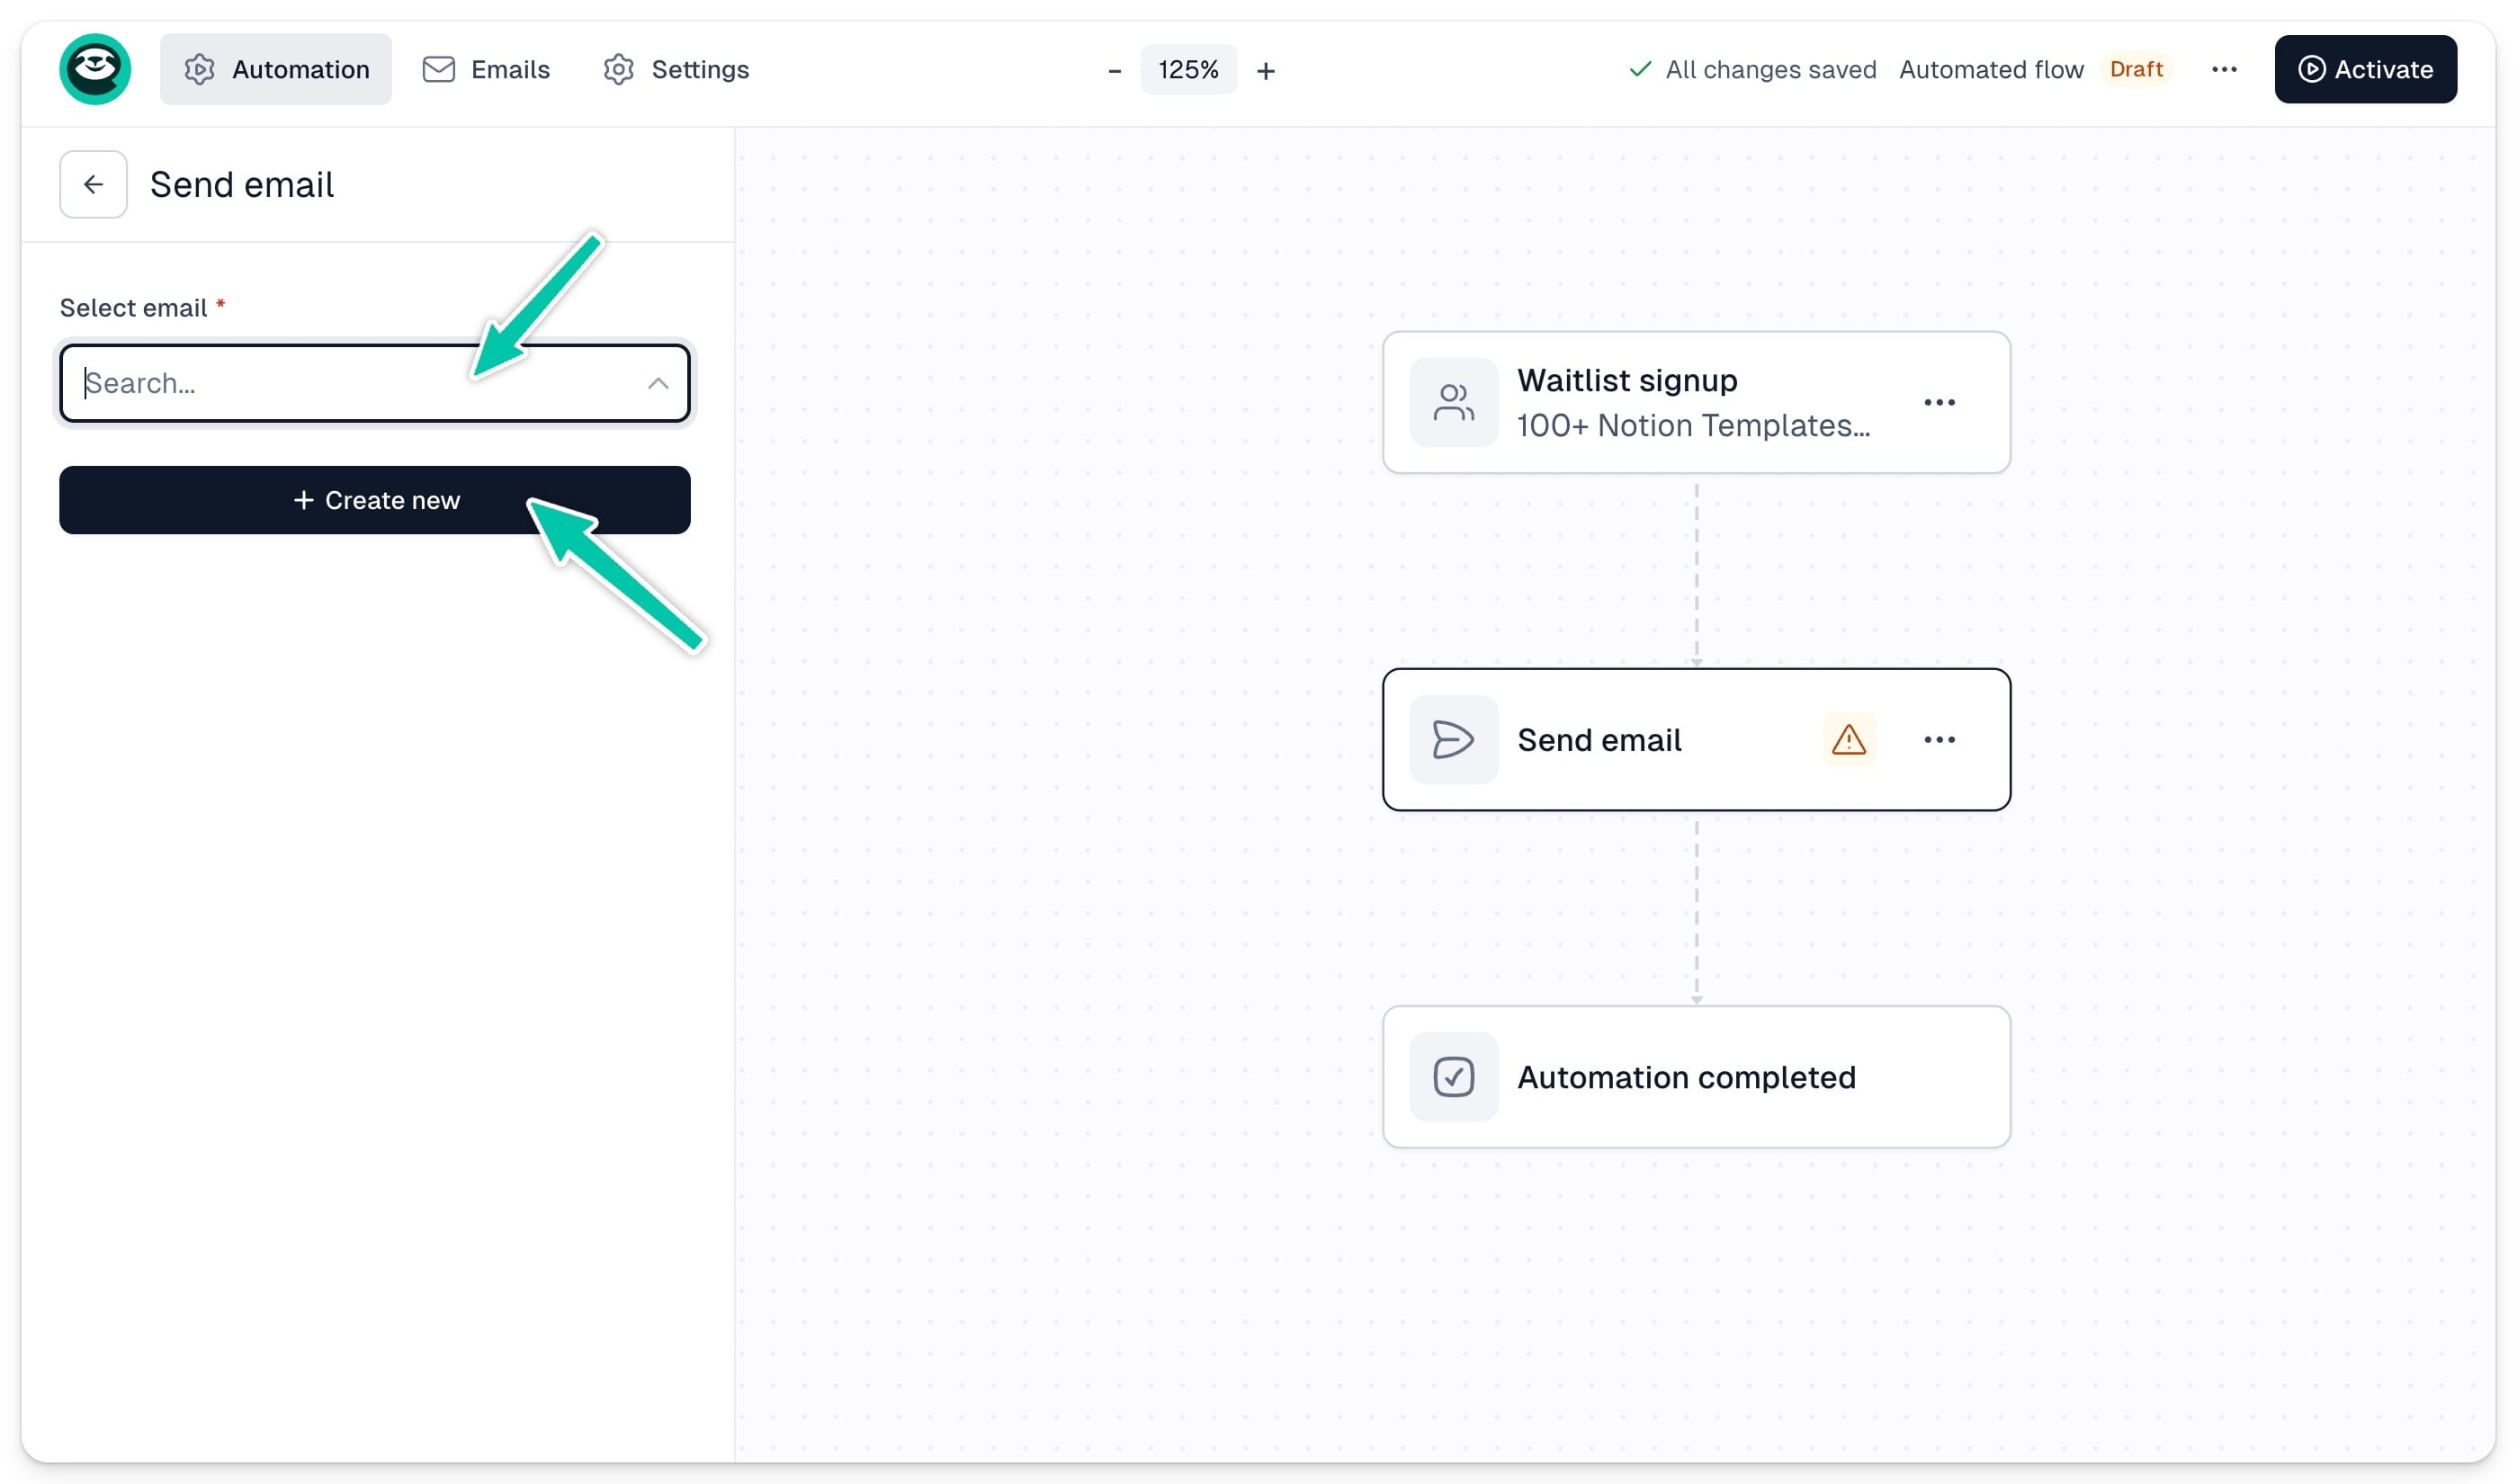
All contacts who reach this step will automatically receive your predefined email.
You can either set up your emails in advance by opening the Emails tab in your workflow editor, or create them on the go when adding a Send email step to your sequence.
When adding the step, choose an email from the list or click + Create new to create a new one. To edit an existing email, click Edit email.
See automation emails for details on creating and configuring your automated emails.
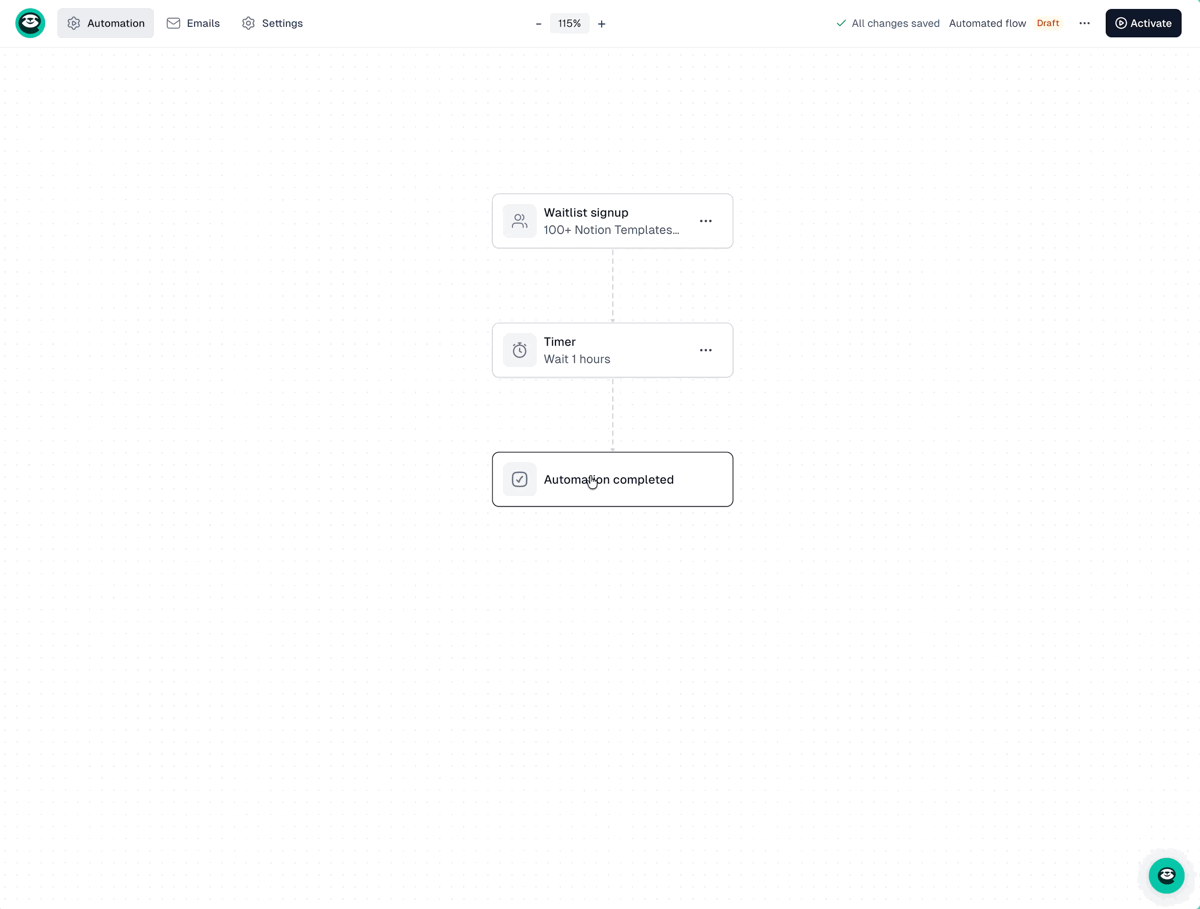
Timer
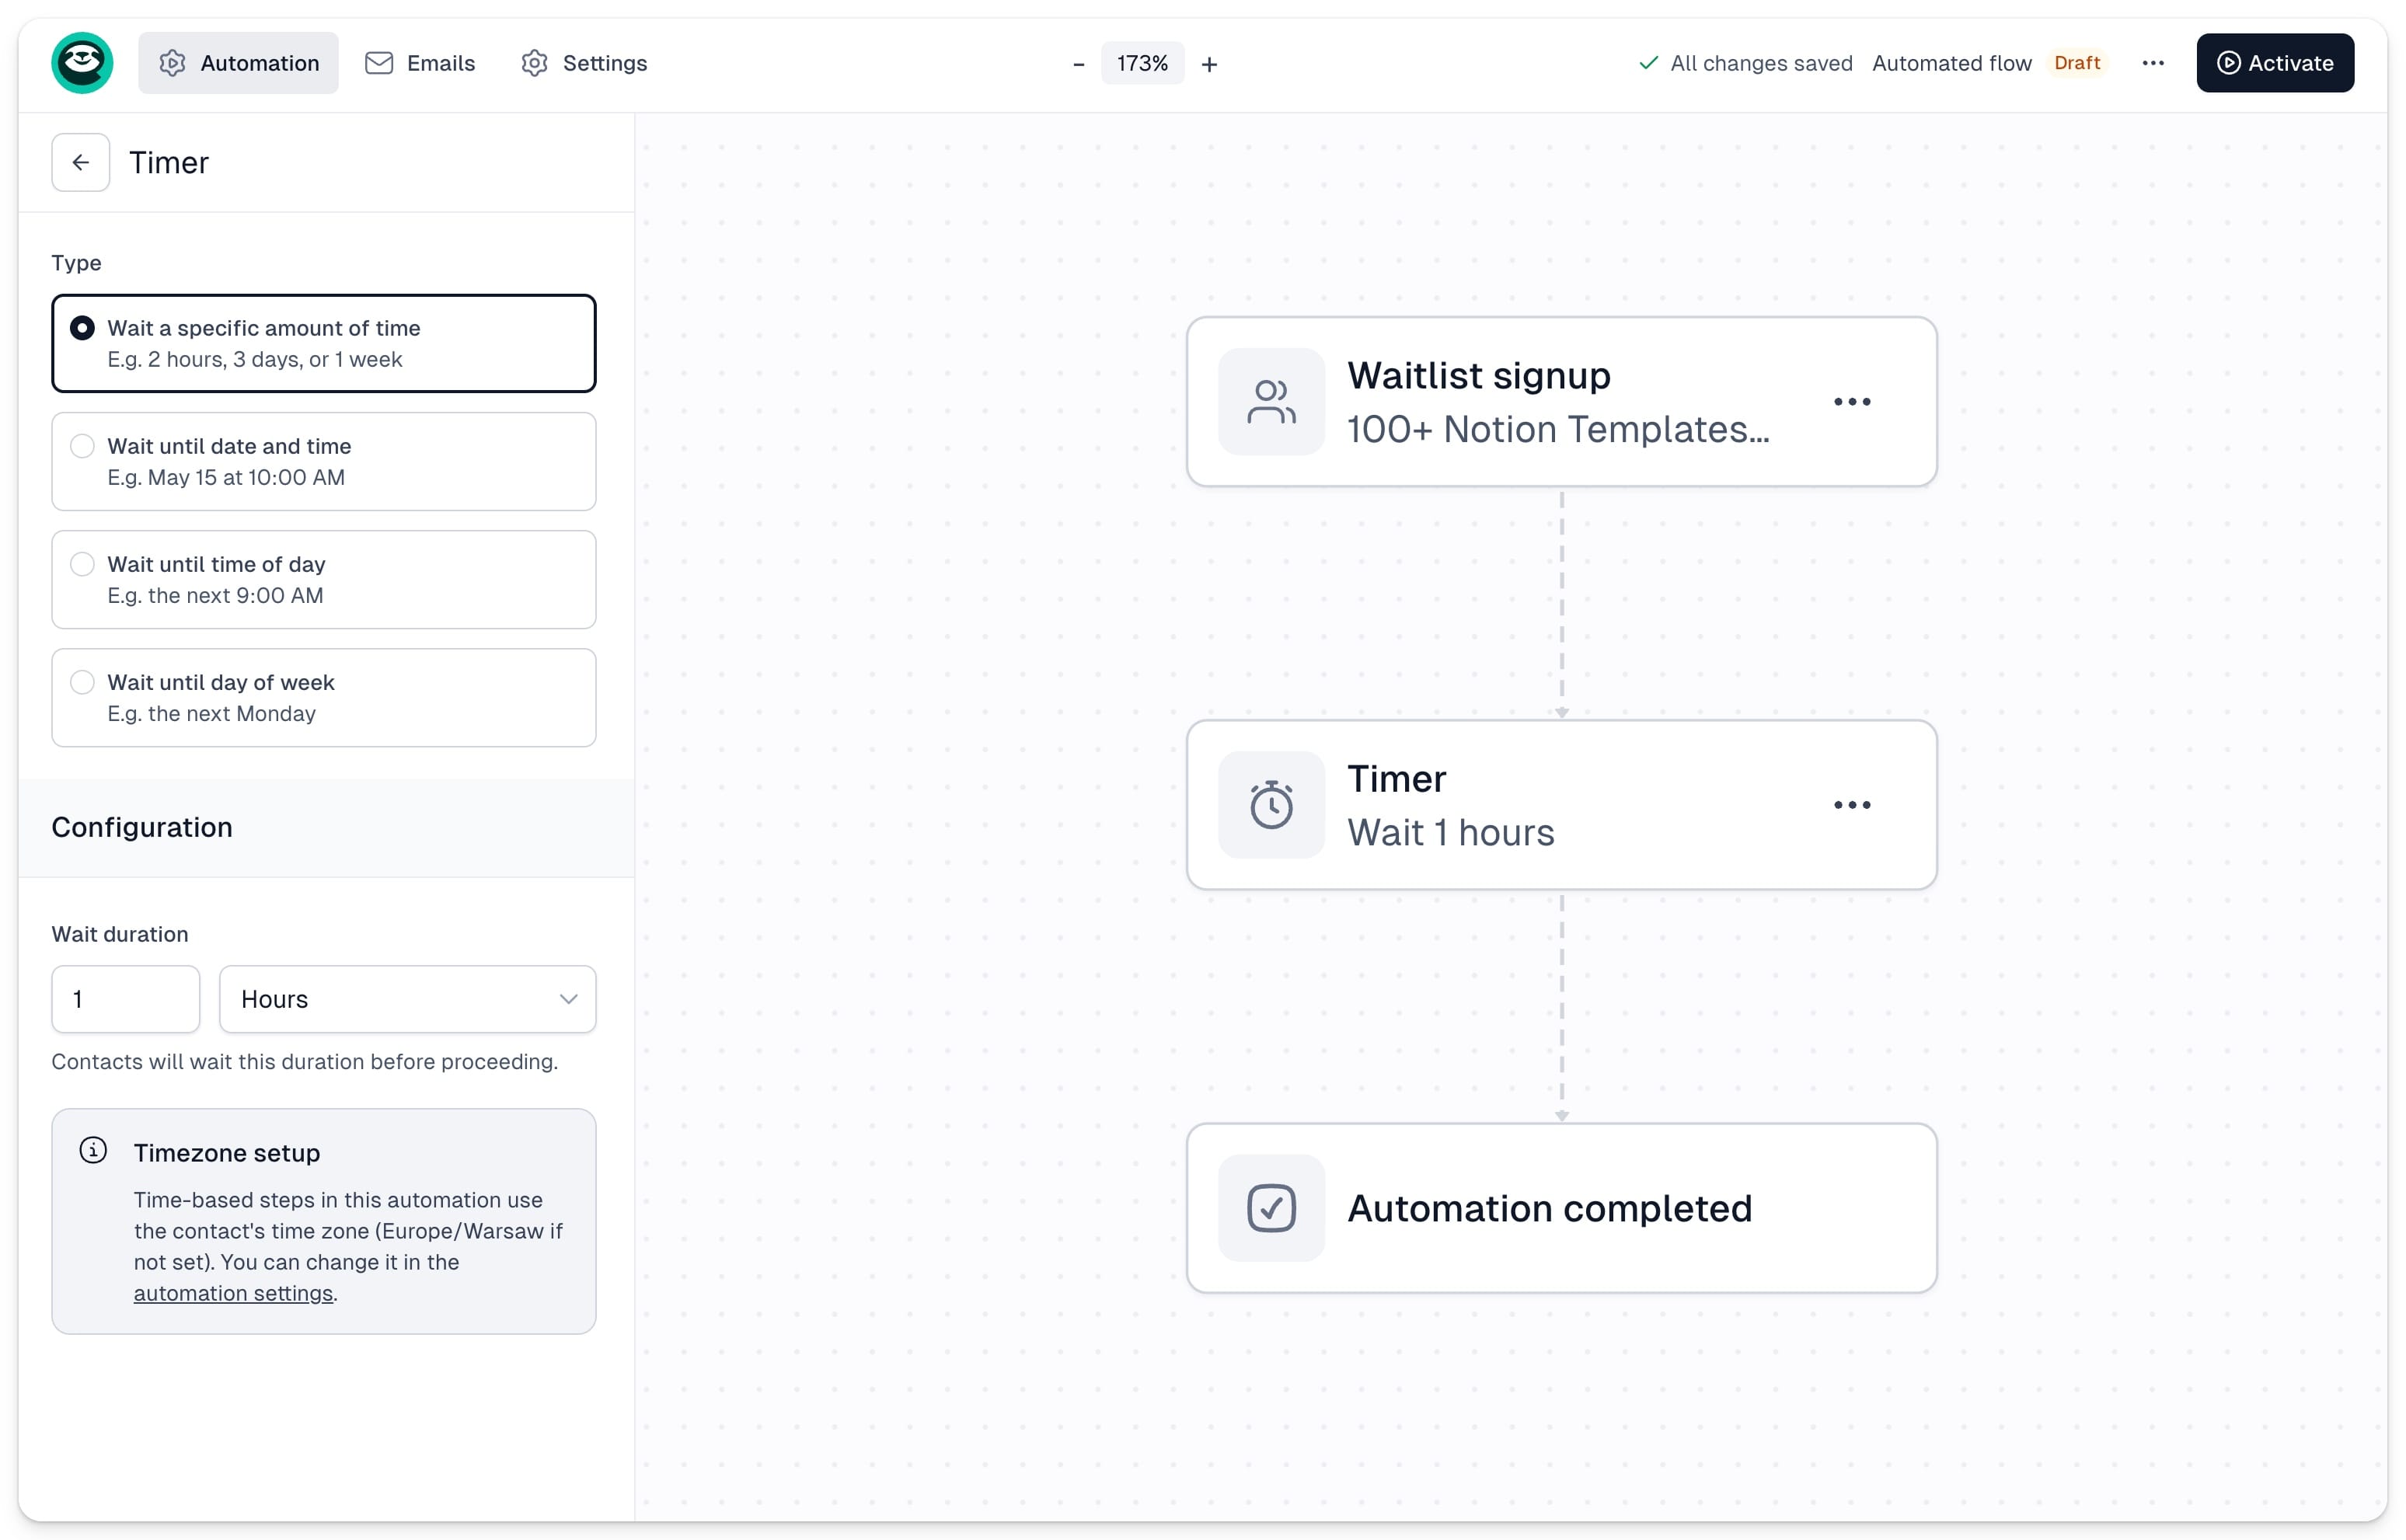
Timers let you delay the next step in your sequence. All contacts at this step will wait until the defined time has passed before moving forward. There are several timer options:
- Specific amount of time - e.g. 2 hours or 1 week
- Date and time - e.g. May 15 at 10:00 AM
- Time of day - e.g. the next 9:00 AM
- Day of week - e.g. the next Monday
Once your sequence is live, you will be able to see the exact list of contacts who are currently waiting at each timer step.
Branch
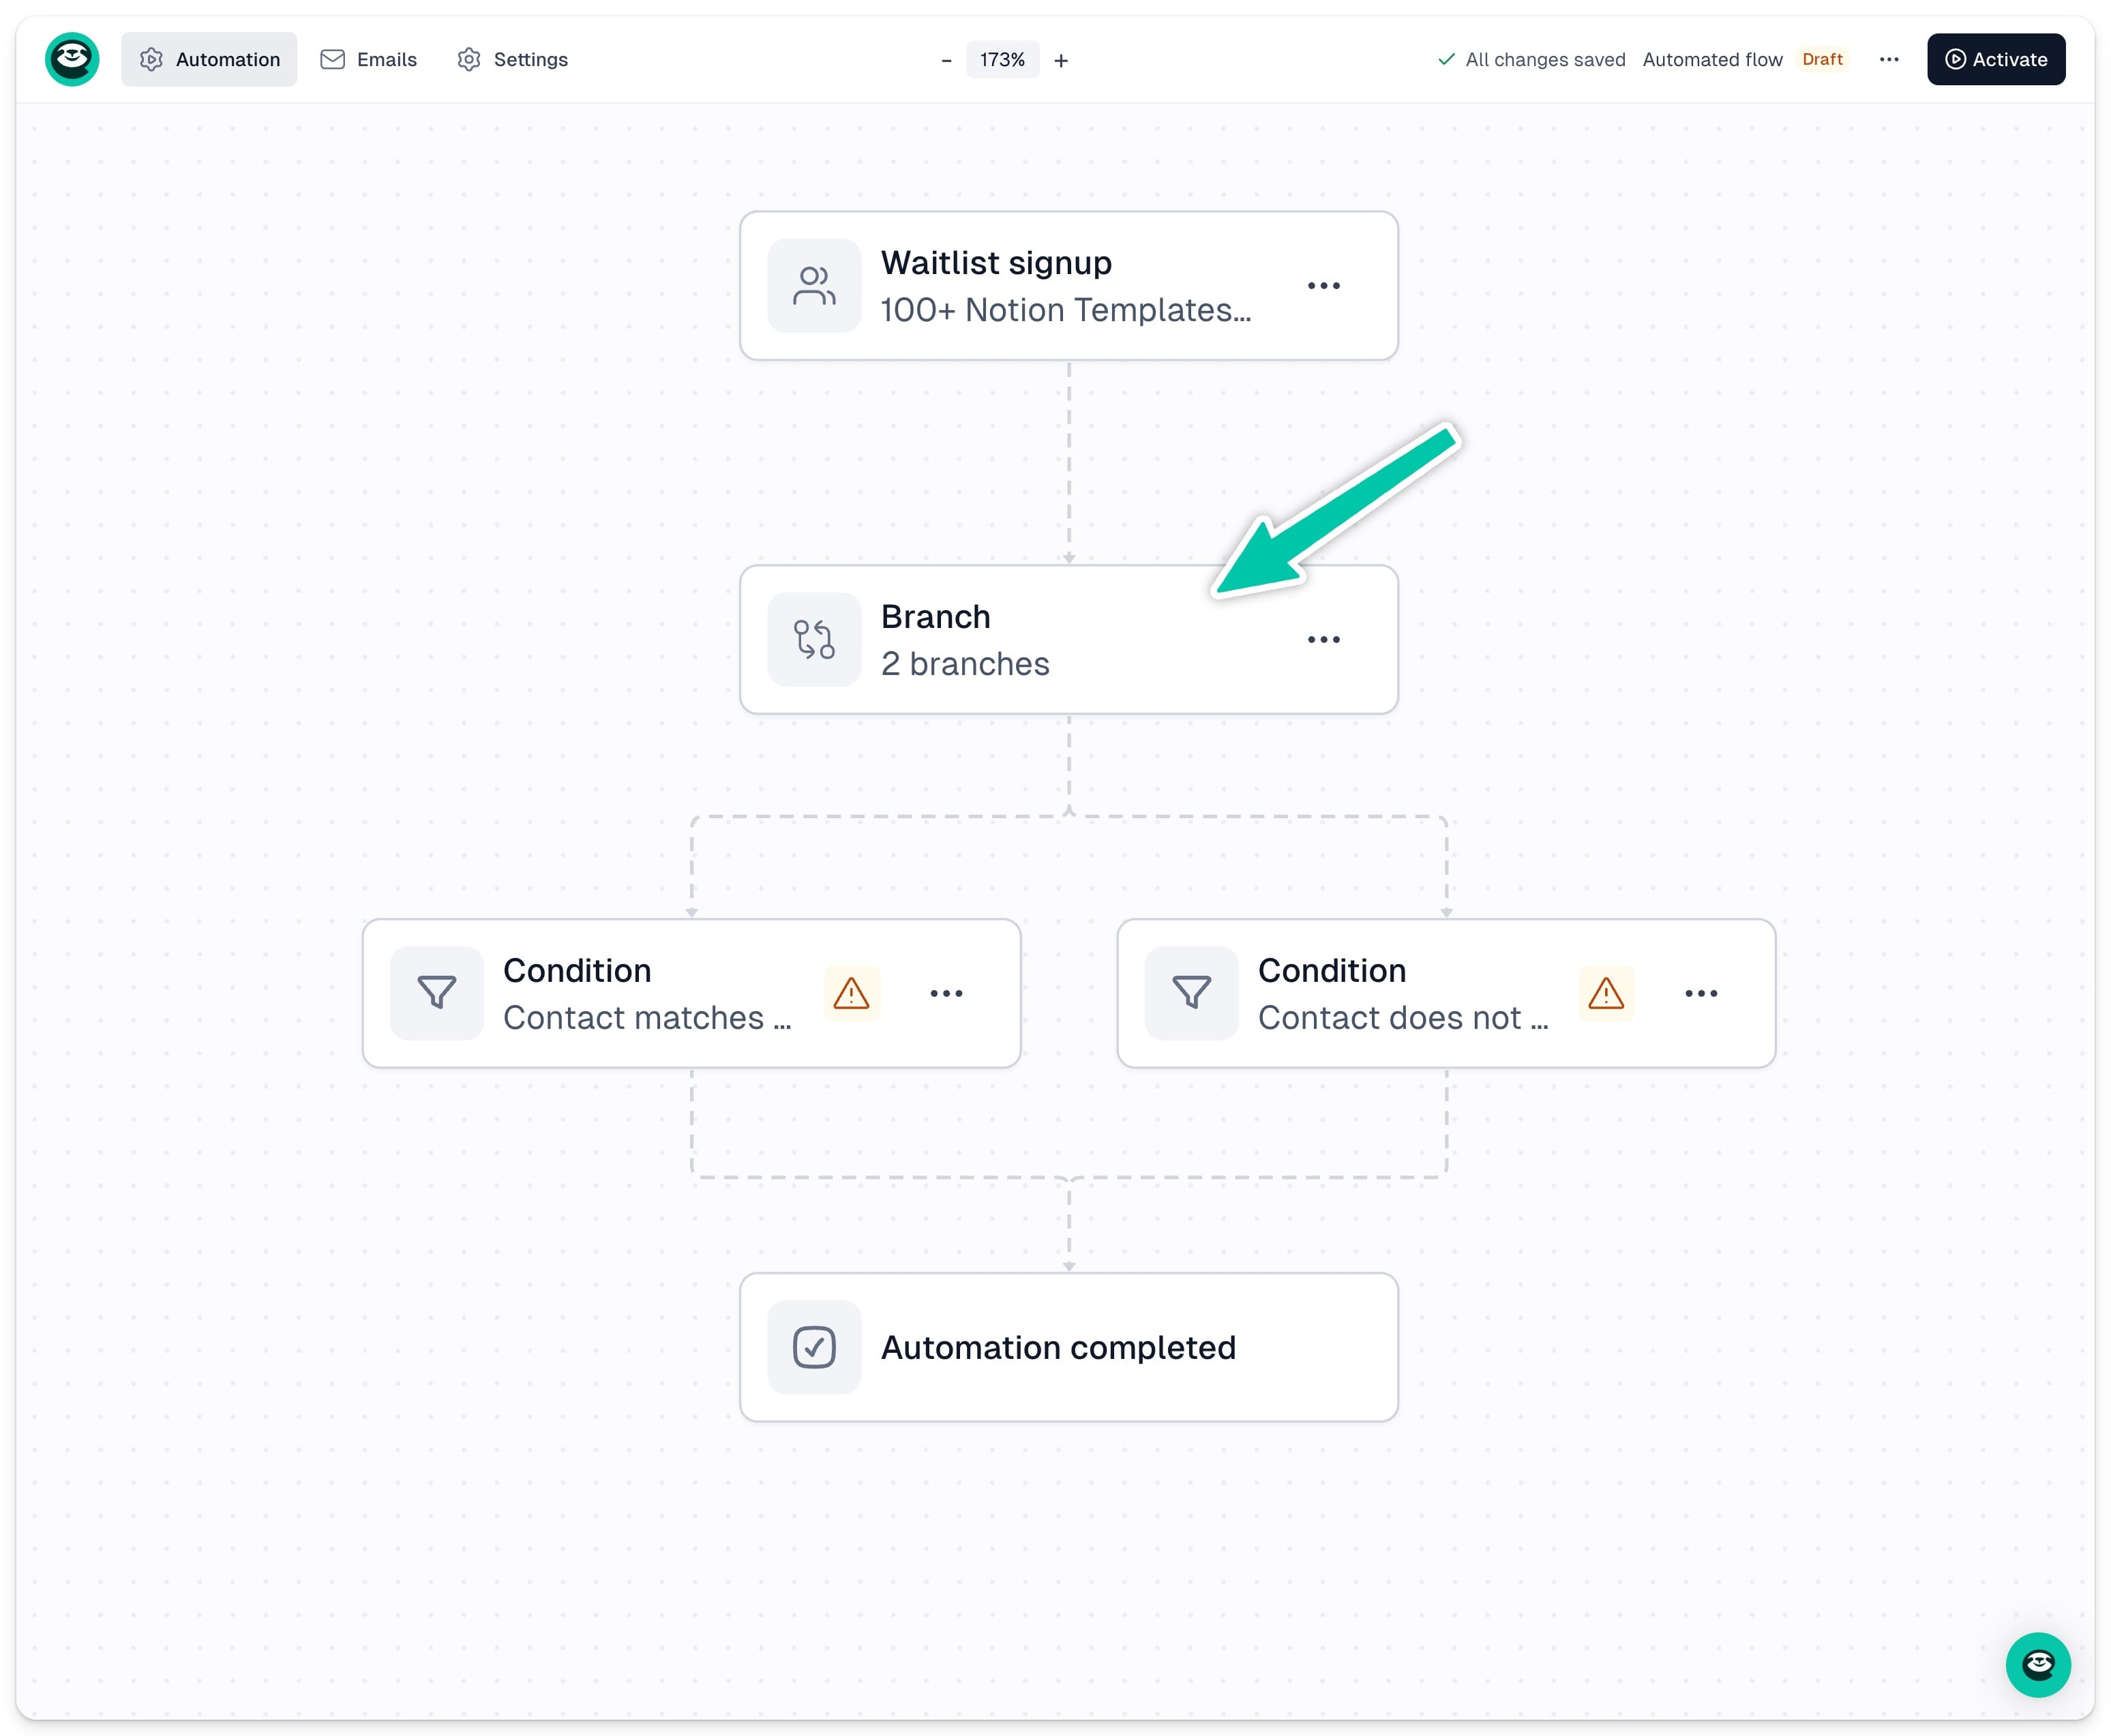
Branches allow you to split your workflow into multiple paths based on specific conditions. This lets you customize what happens next depending on how your contacts behave - for example, sending a different email to those who did or did not open your previous message.
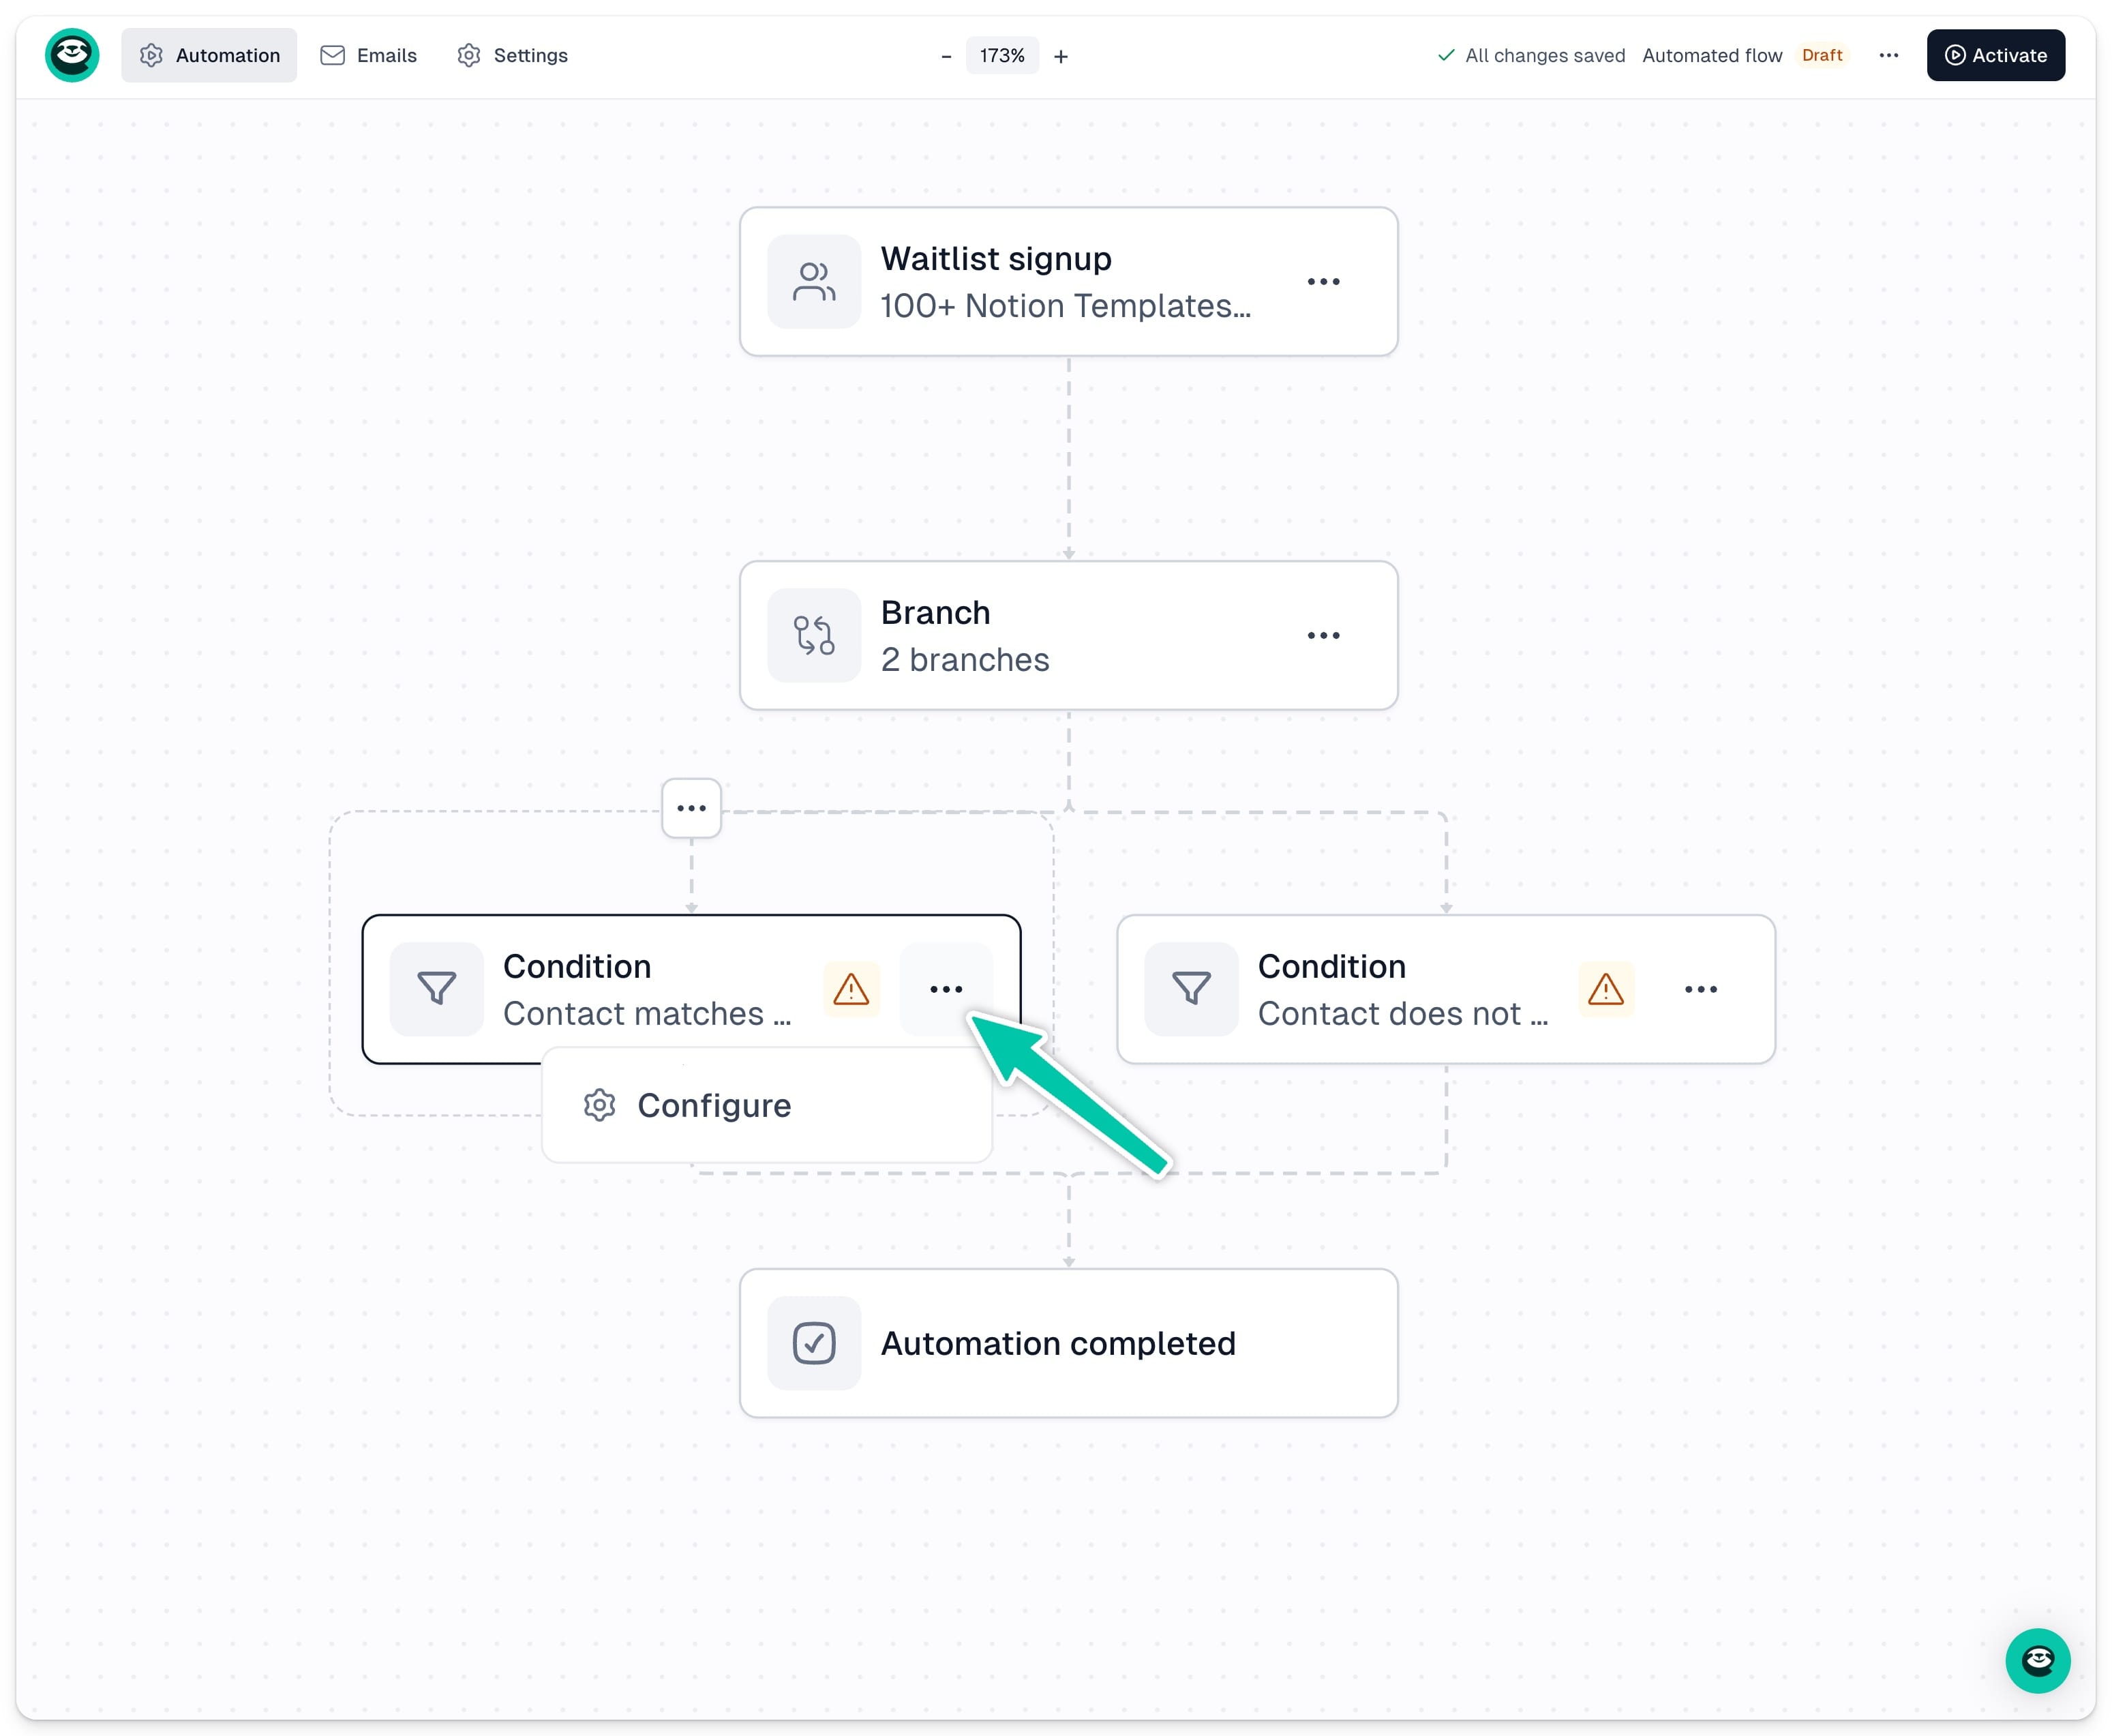
To add a branch, click the + button and select Branch. To define the condition for each path, click … on the branch block, select Configure, and choose your criteria from the left-hand panel.
Important: Each branch must include at least two separate paths.
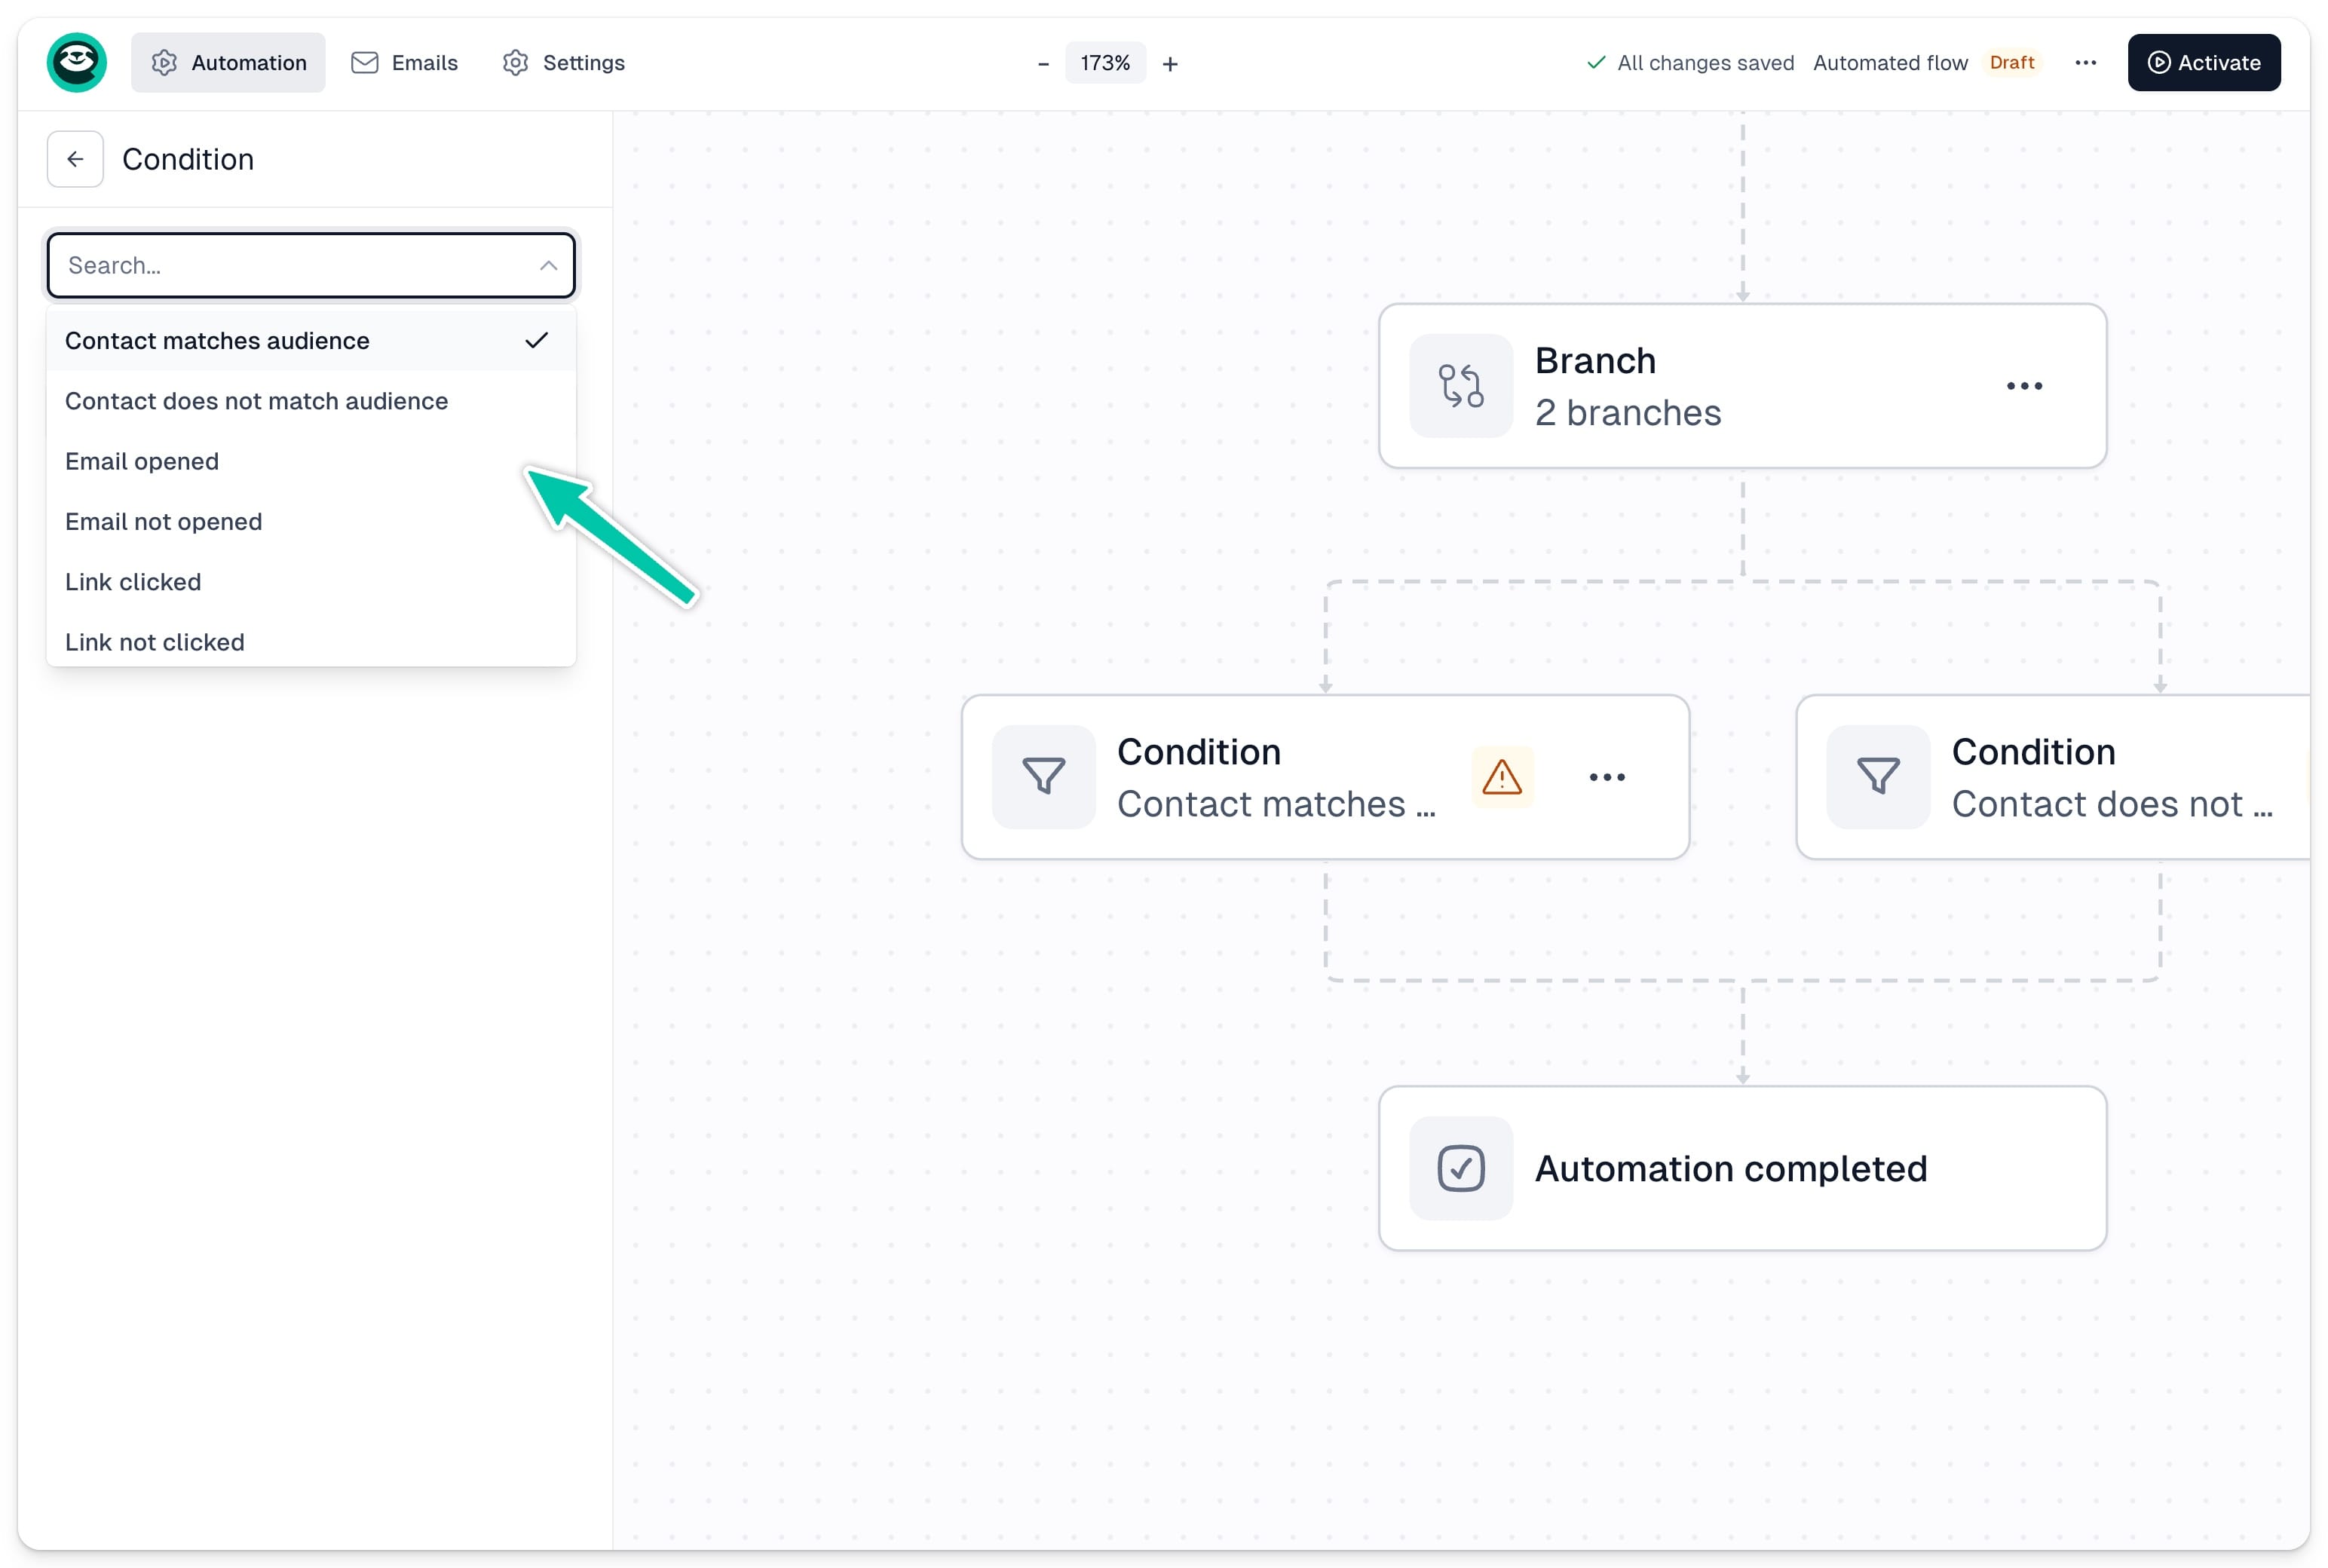
Available branch conditions
[fs-toc-omit] Contact matches audience / Contact does not match audience
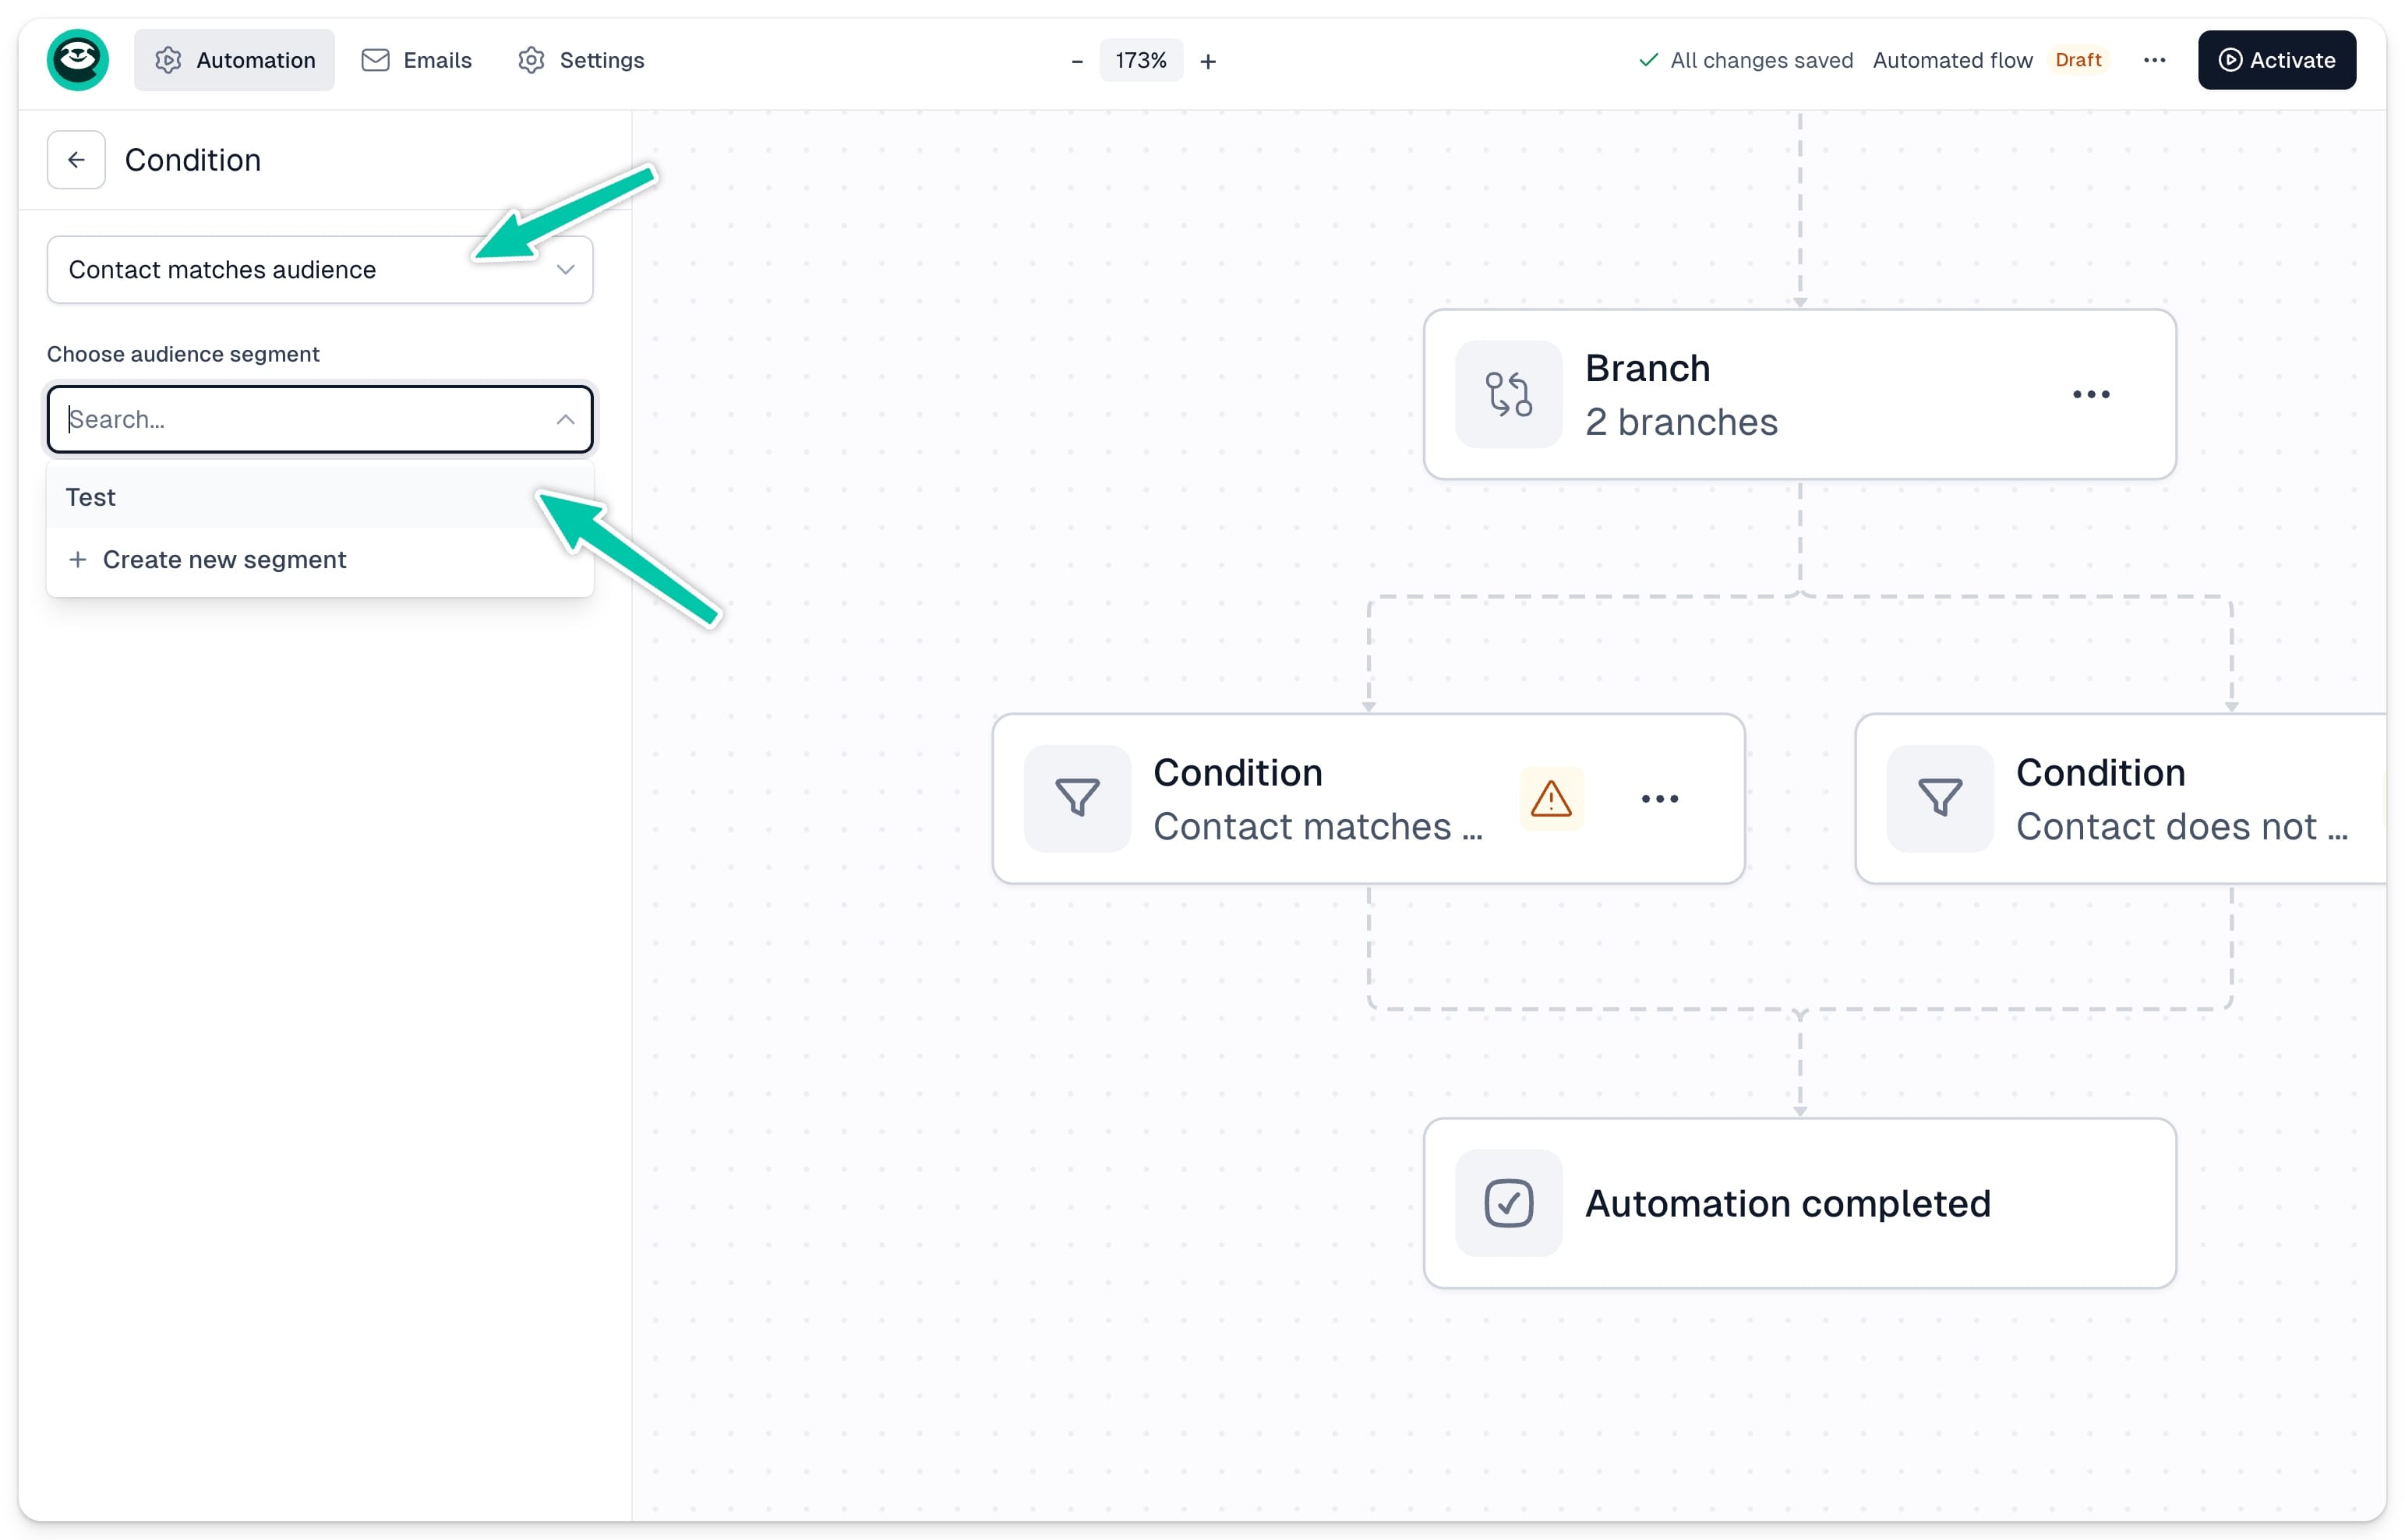
Enroll contacts into a path based on whether they belong to a specific segment. If you haven’t created any segments yet, click + Create new segment to define one. You will be taken to the segment editor where you can filter your contacts and save the segment with an internal name.
Important: Segments are dynamic - whenever a contact meets the segment criteria, they will be automatically added to it and enrolled in the corresponding sequence path.
[fs-toc-omit]Email opened / Email not opened
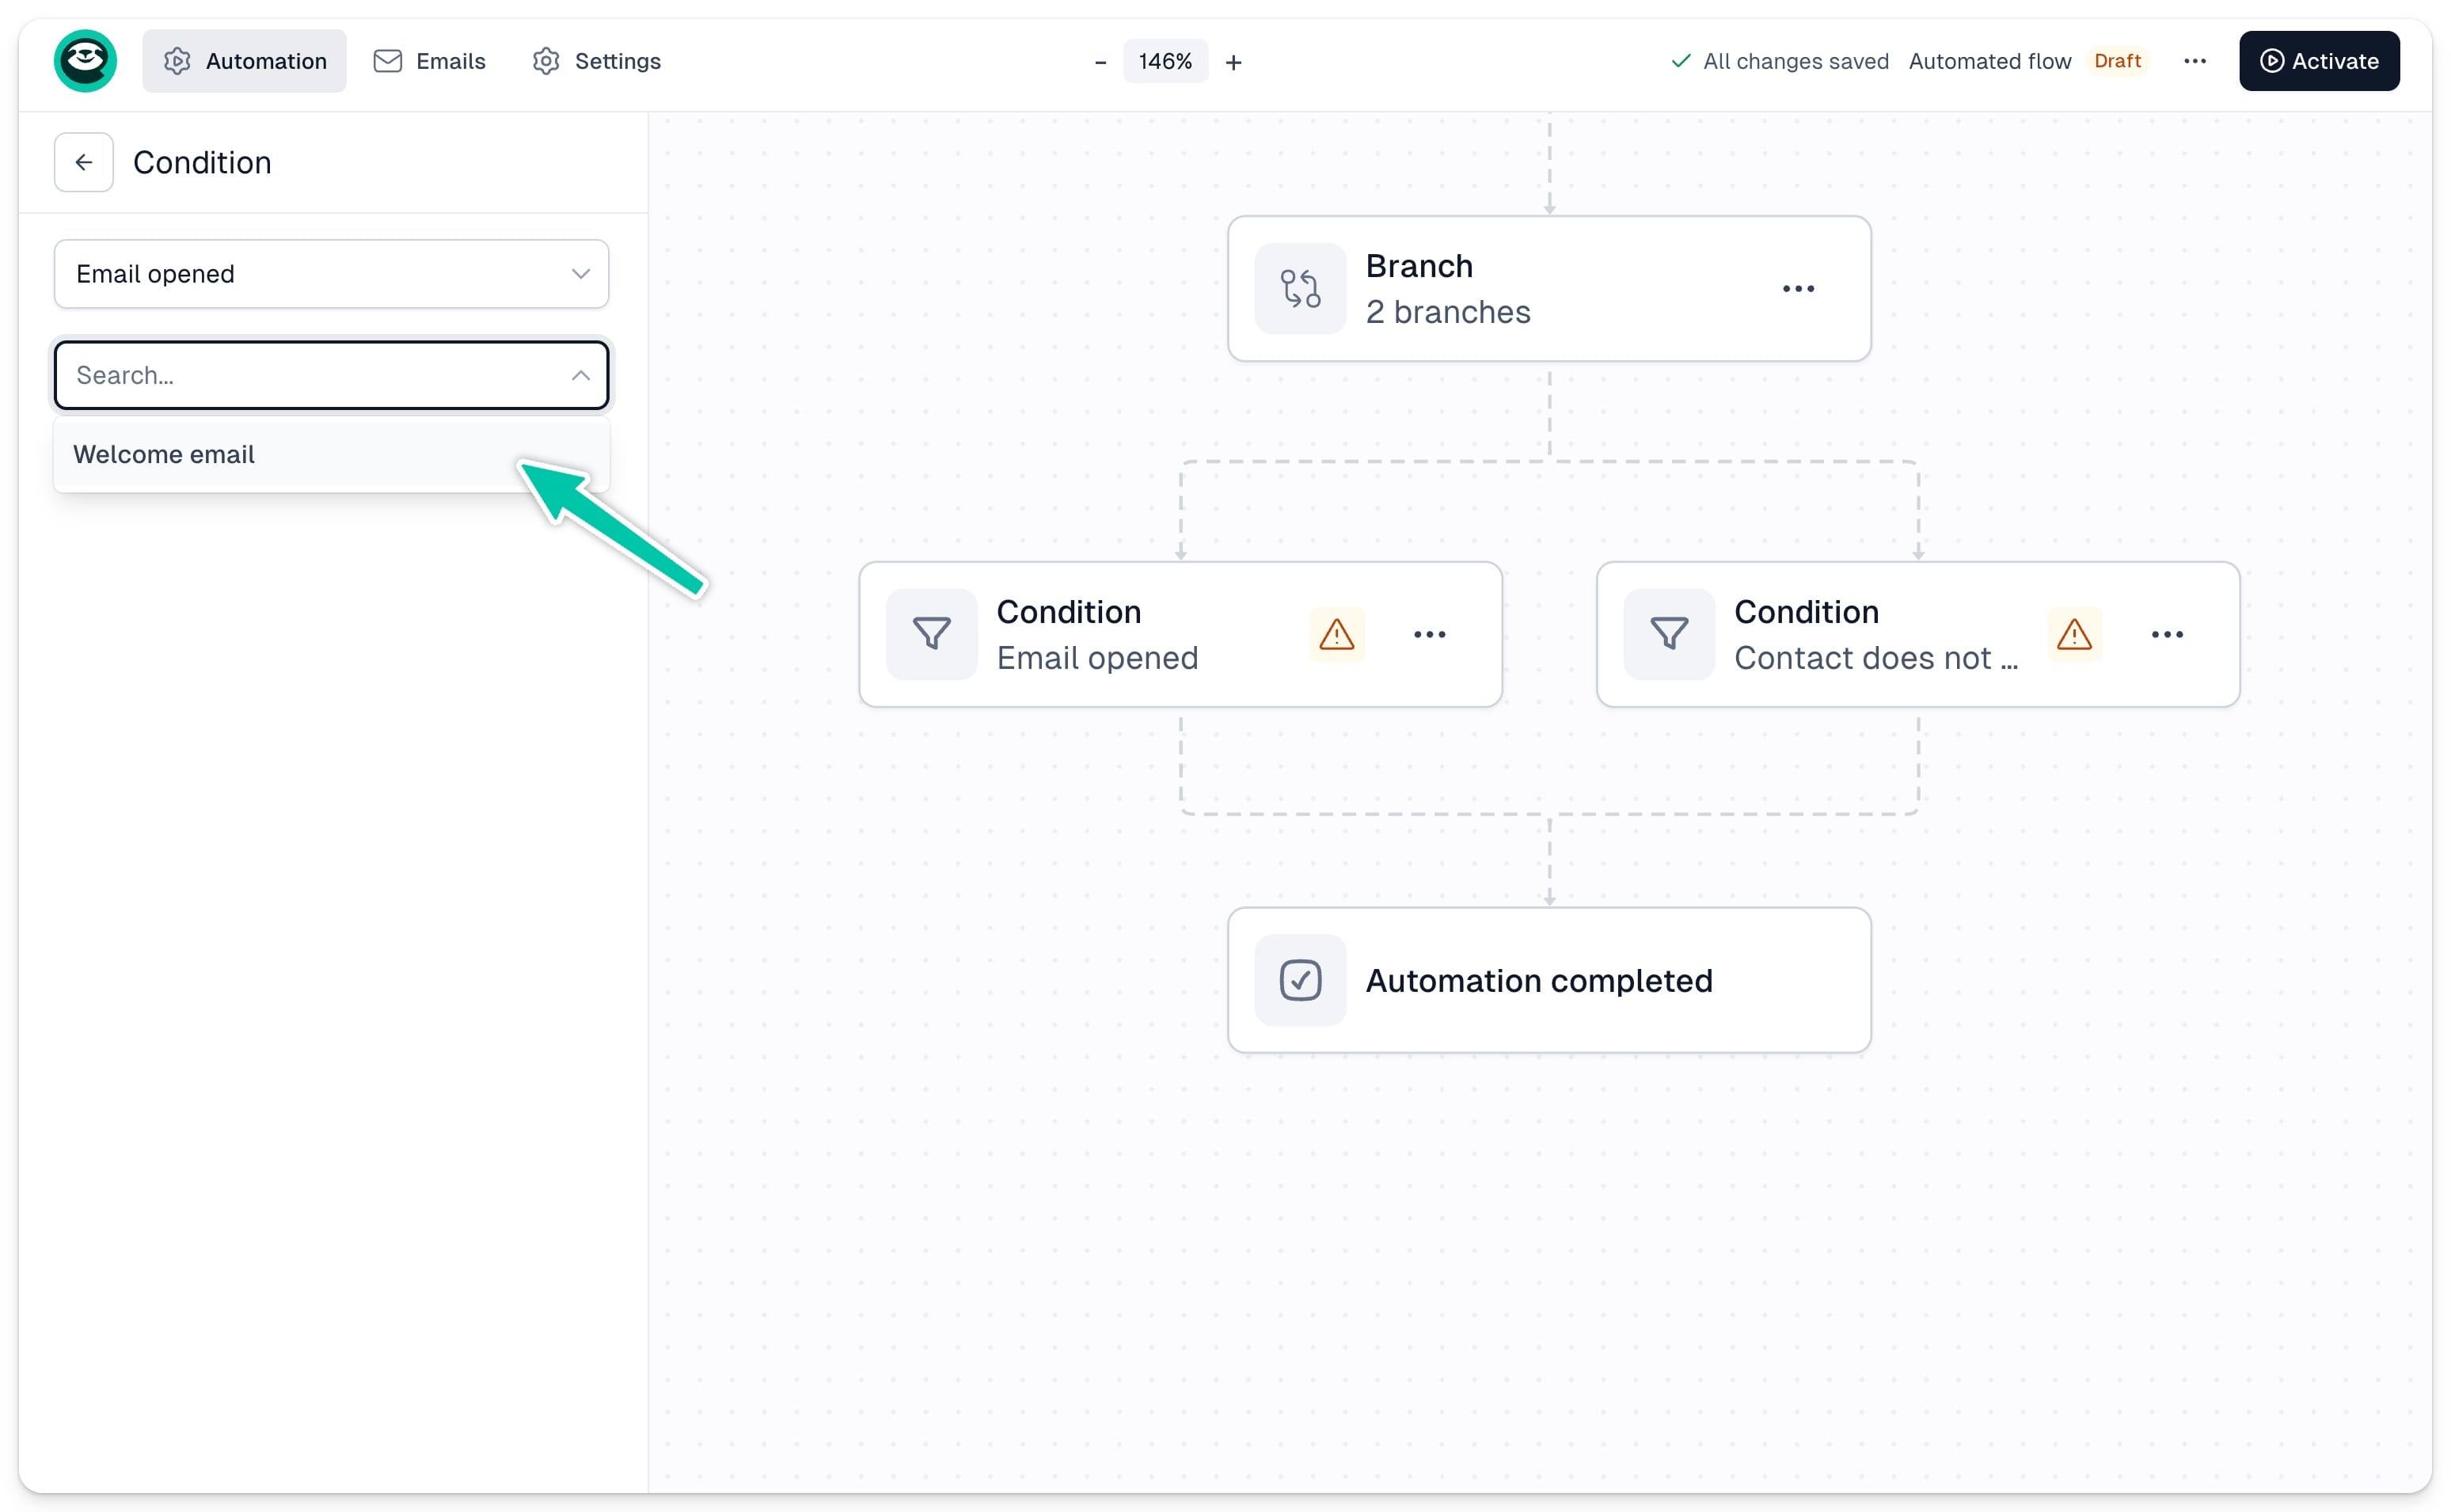
Route contacts based on whether they opened a specific email in your sequence. Your flow must include at least one email to use this condition. Select the email from the list and define the next step for each path.
[fs-toc-omit]Link clicked / Link not clicked
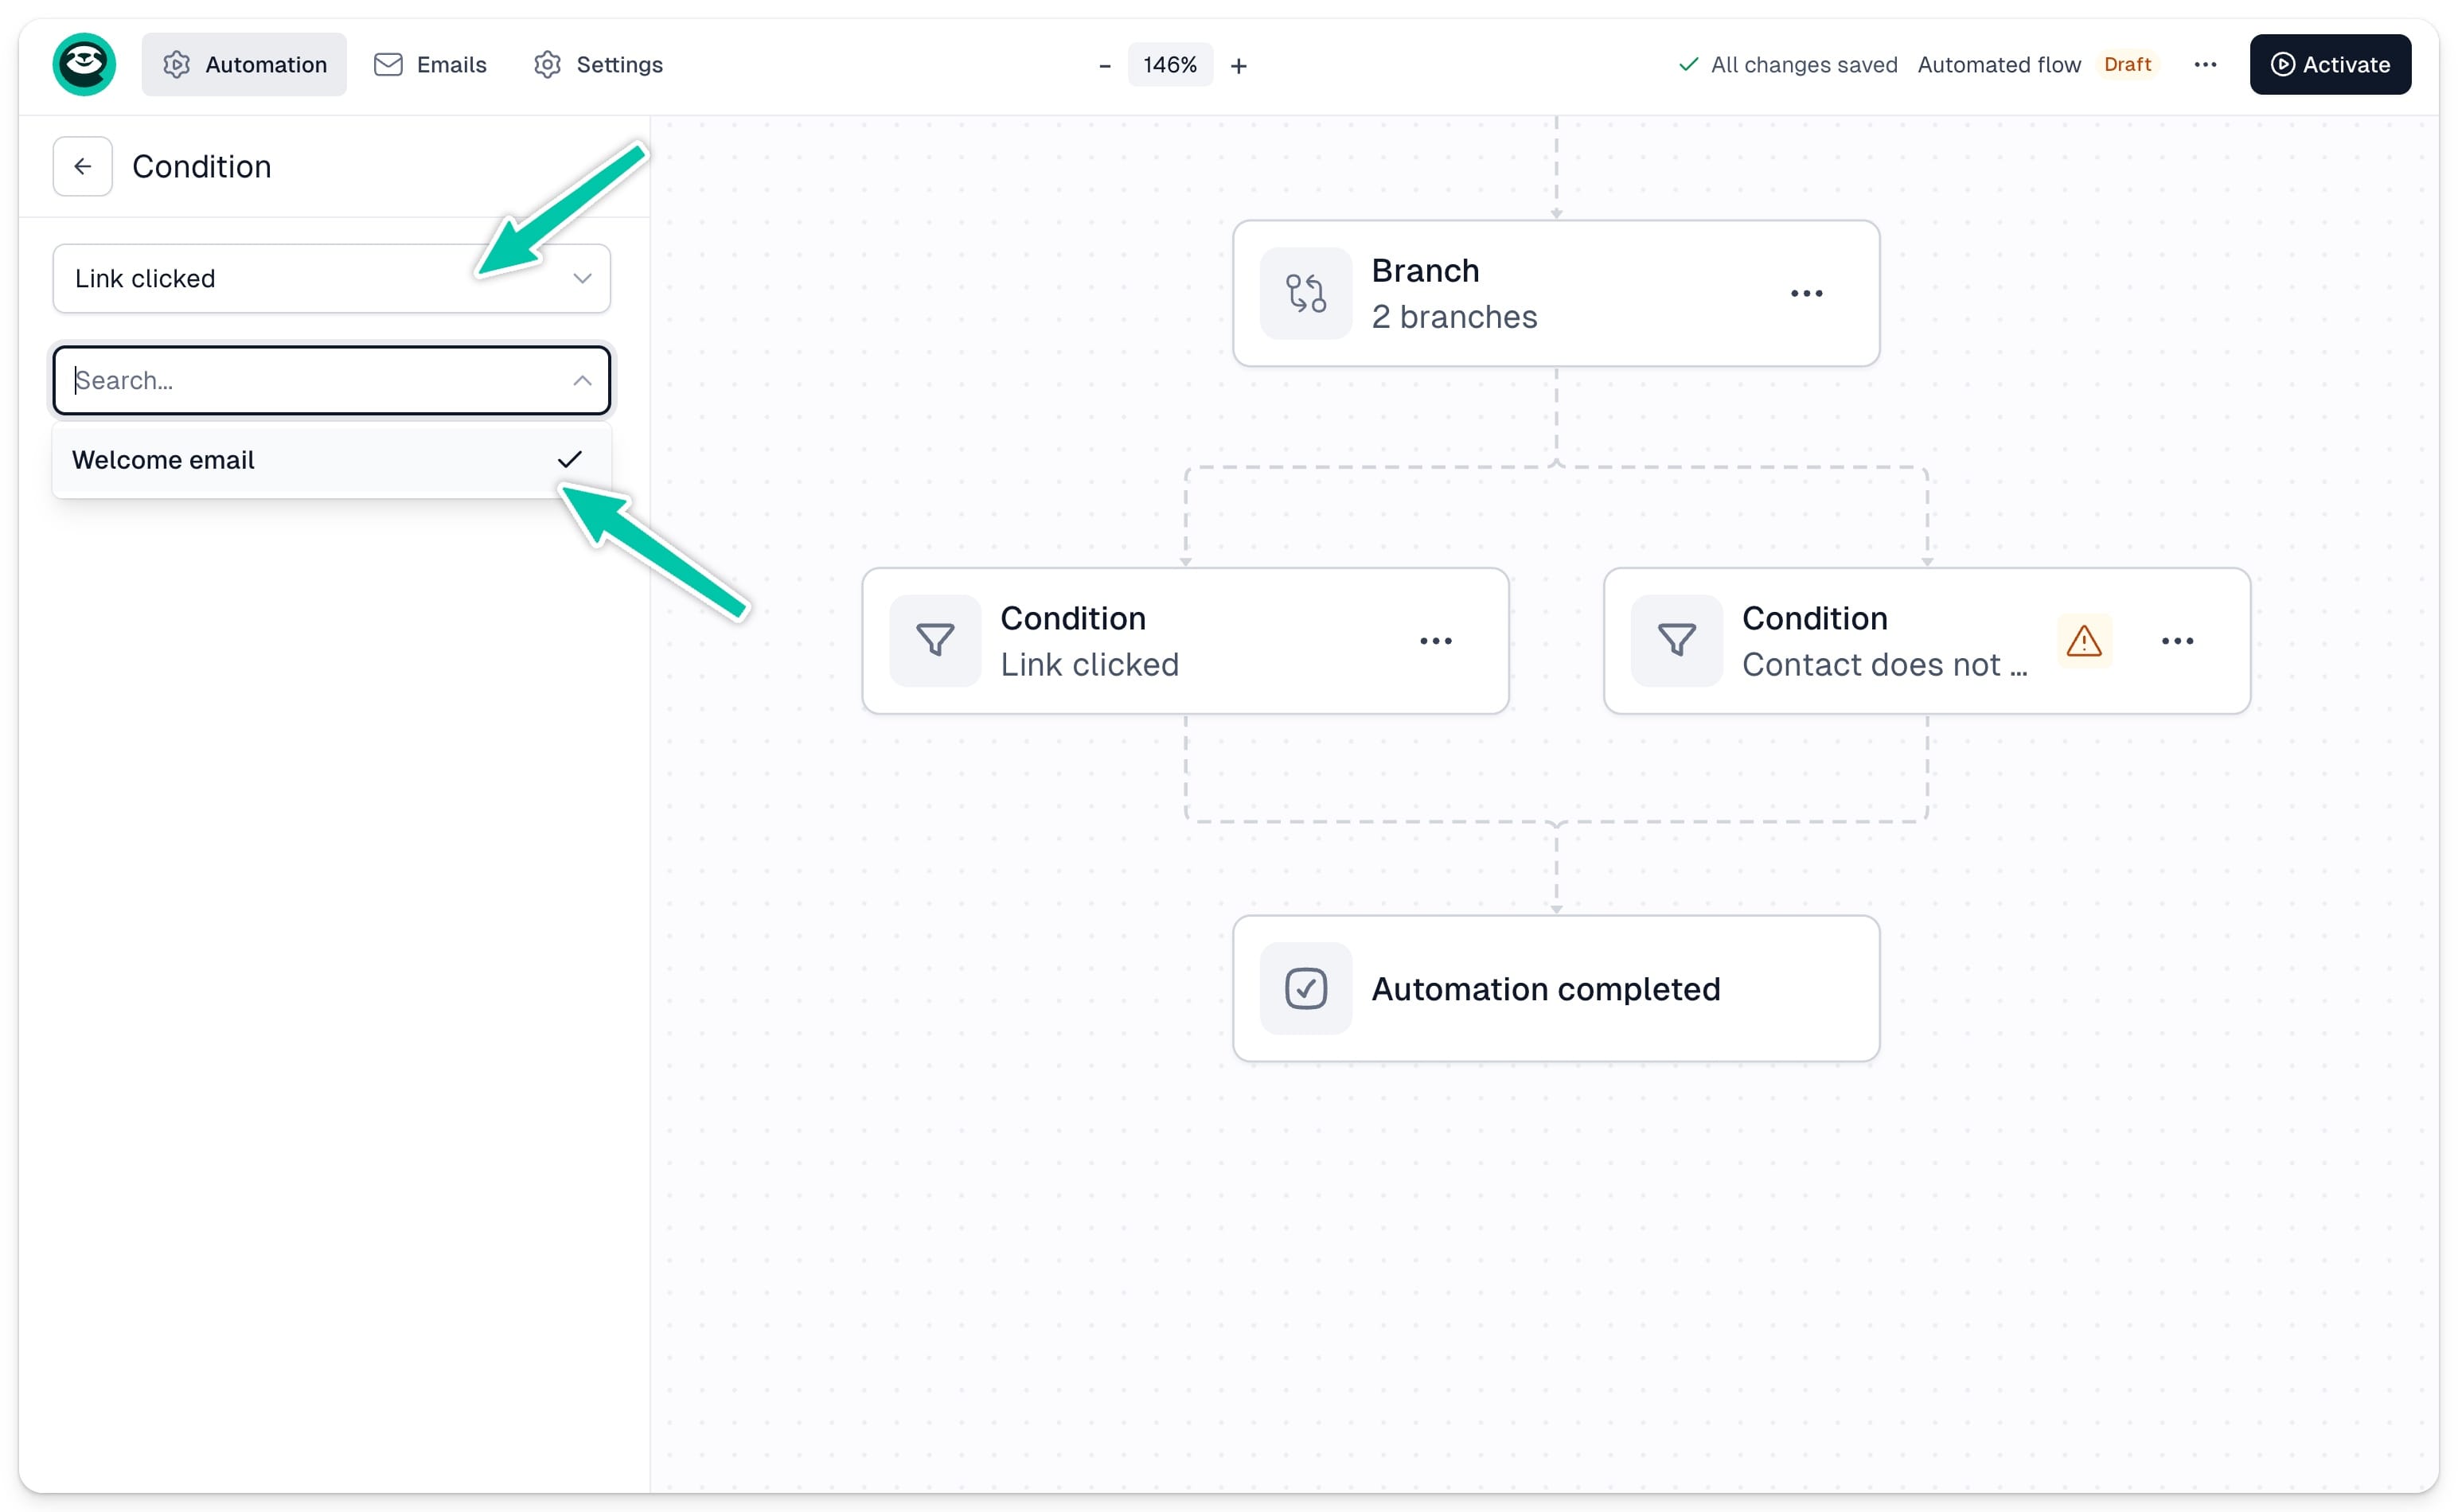
Route contacts based on whether they clicked a specific link in one of your emails. Your flow must include at least one email containing a link. Select the email from the list, then choose the specific link you want to track and define the next step for each path.
Audience filter

Audience filters let you control which contacts proceed to the next step based on specific conditions. Unlike a branch, an audience filter does not split the flow into multiple paths - contacts who don’t match the filter simply don’t move forward.
To configure the filter, click … on the filter block and select Configure. Choose your audience segment from the left-hand panel and decide whether to apply the filter to the next step only or to all steps that follow.