The roles feature allows you to precisely control which parts of the panel and functionalities your team members can access. This lets you safely delegate tasks and limit access only to selected areas.
Where can you find this option?
Go to the Store → Team tab.
There you will find two sections:
- Members - manage people in your team
- Roles - create and edit roles and their permissions
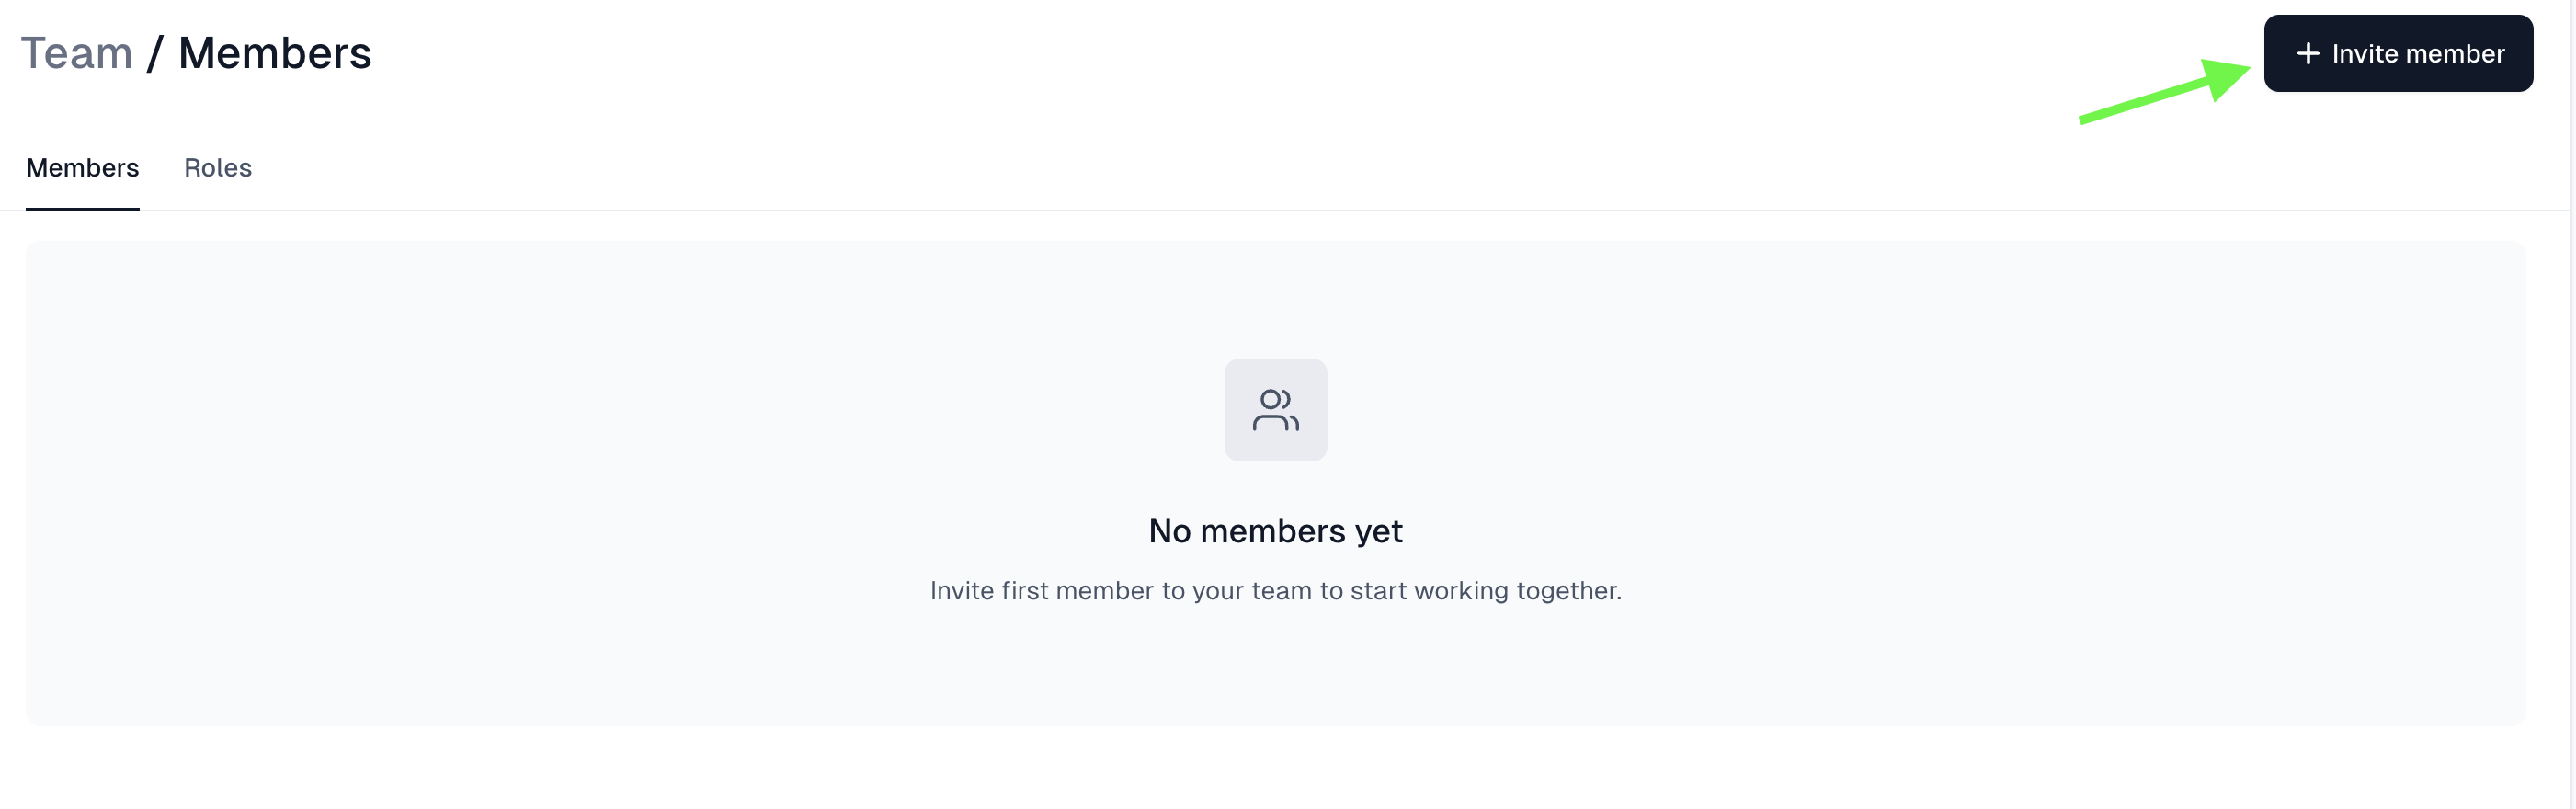
Adding a team member
- Go to the Members section.
- Click the + Invite member button.
- Fill in the email address, first name, and last name.
- Click Invite member.
The invited person will receive an email with an option to join your team.
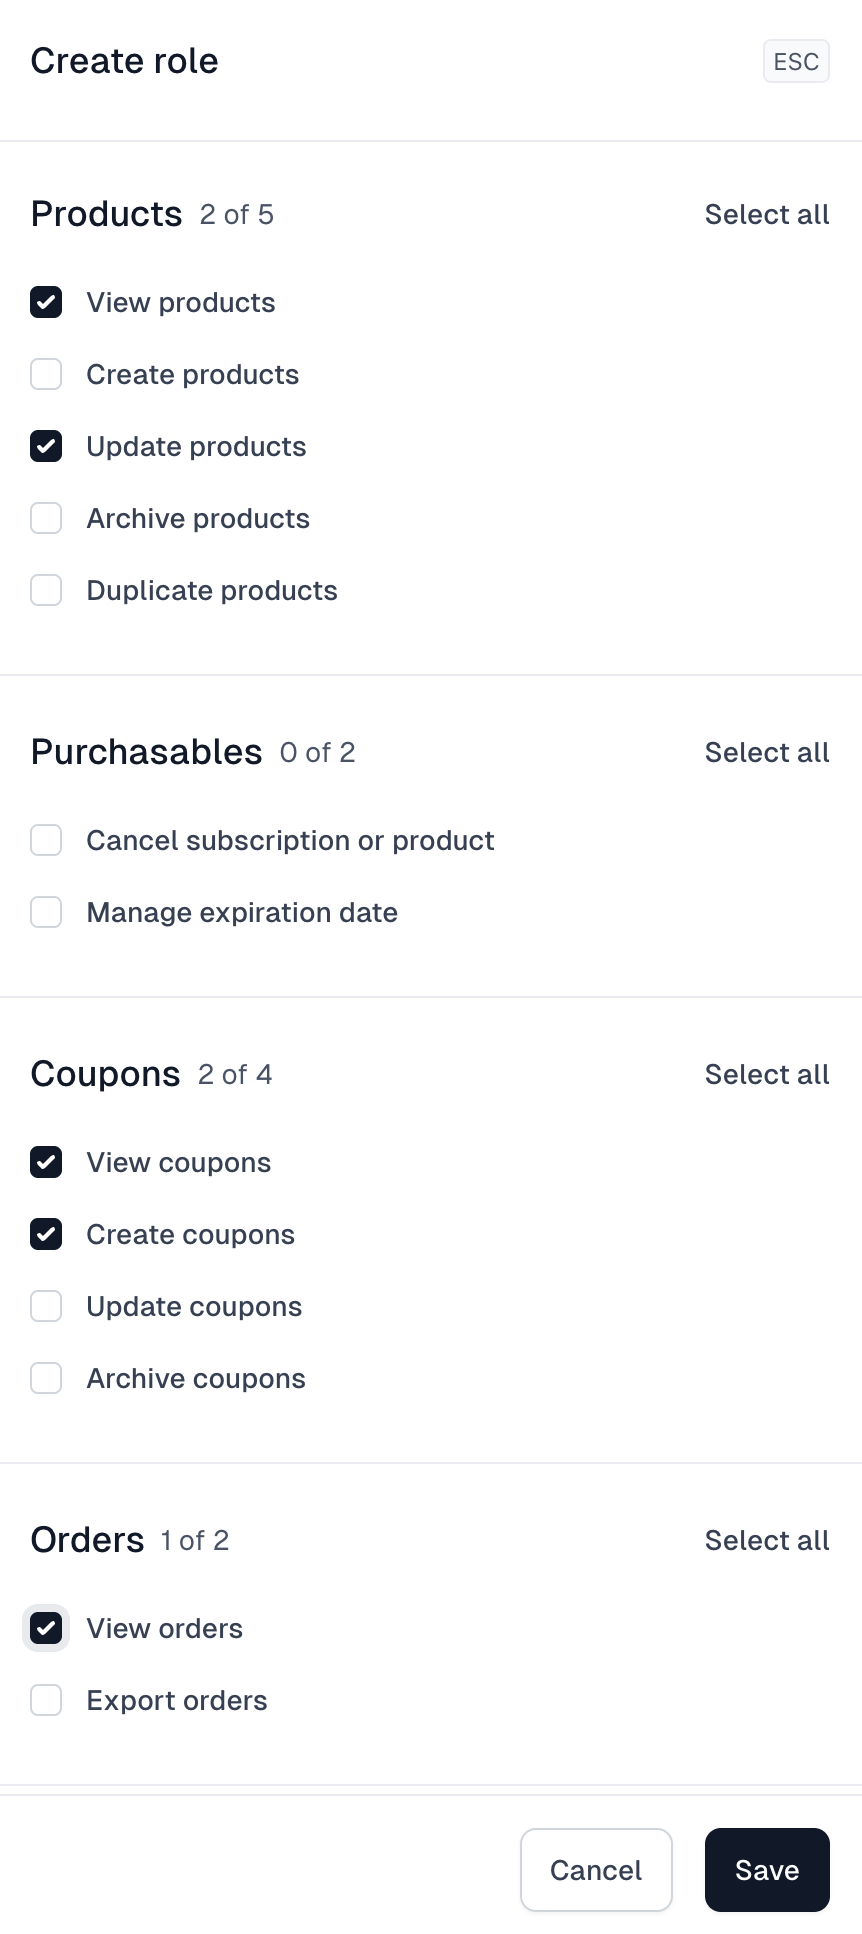
Creating a role and assigning permissions
To create a new role:
- Go to the Roles section.
- Click the option to create a new role.
While creating or editing a role, you can define what a given person will have access to.
Permissions are divided into sections, for example:
- Products (view, create, edit, archive, duplicate)
- Product access
- Other areas of the system, depending on configuration
You can select individual permissions or click Select all to grant full access within a given section. When finished, click Save.
Assigning a role to a team member
Once a role is created, you can assign it to a specific person:
- Go back to the Members section.
- Select a team member.
- Assign the appropriate role.
From that point on, their access scope will match the selected role settings.
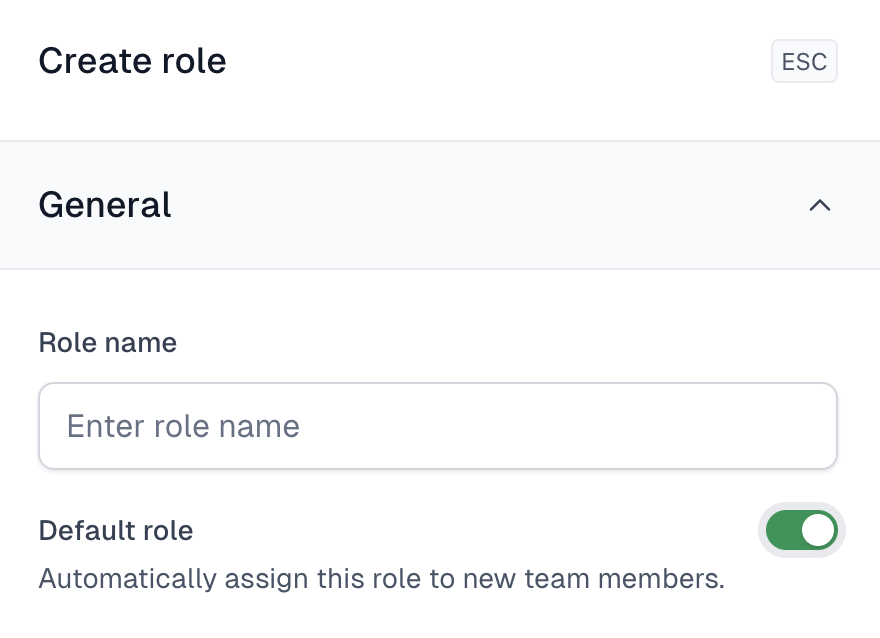
Default role
You can set one role as default.
If you do this, every newly invited team member will automatically receive this role and you won’t need to assign it manually each time.
With roles, you can easily manage access within your team and keep permissions organized without having to configure everything manually for each person.