A creator page is a simple one-page site with a short bio and everything you want to promote - products, free downloads, forms and media. It works great as the link in your Instagram bio.
Create a creator page
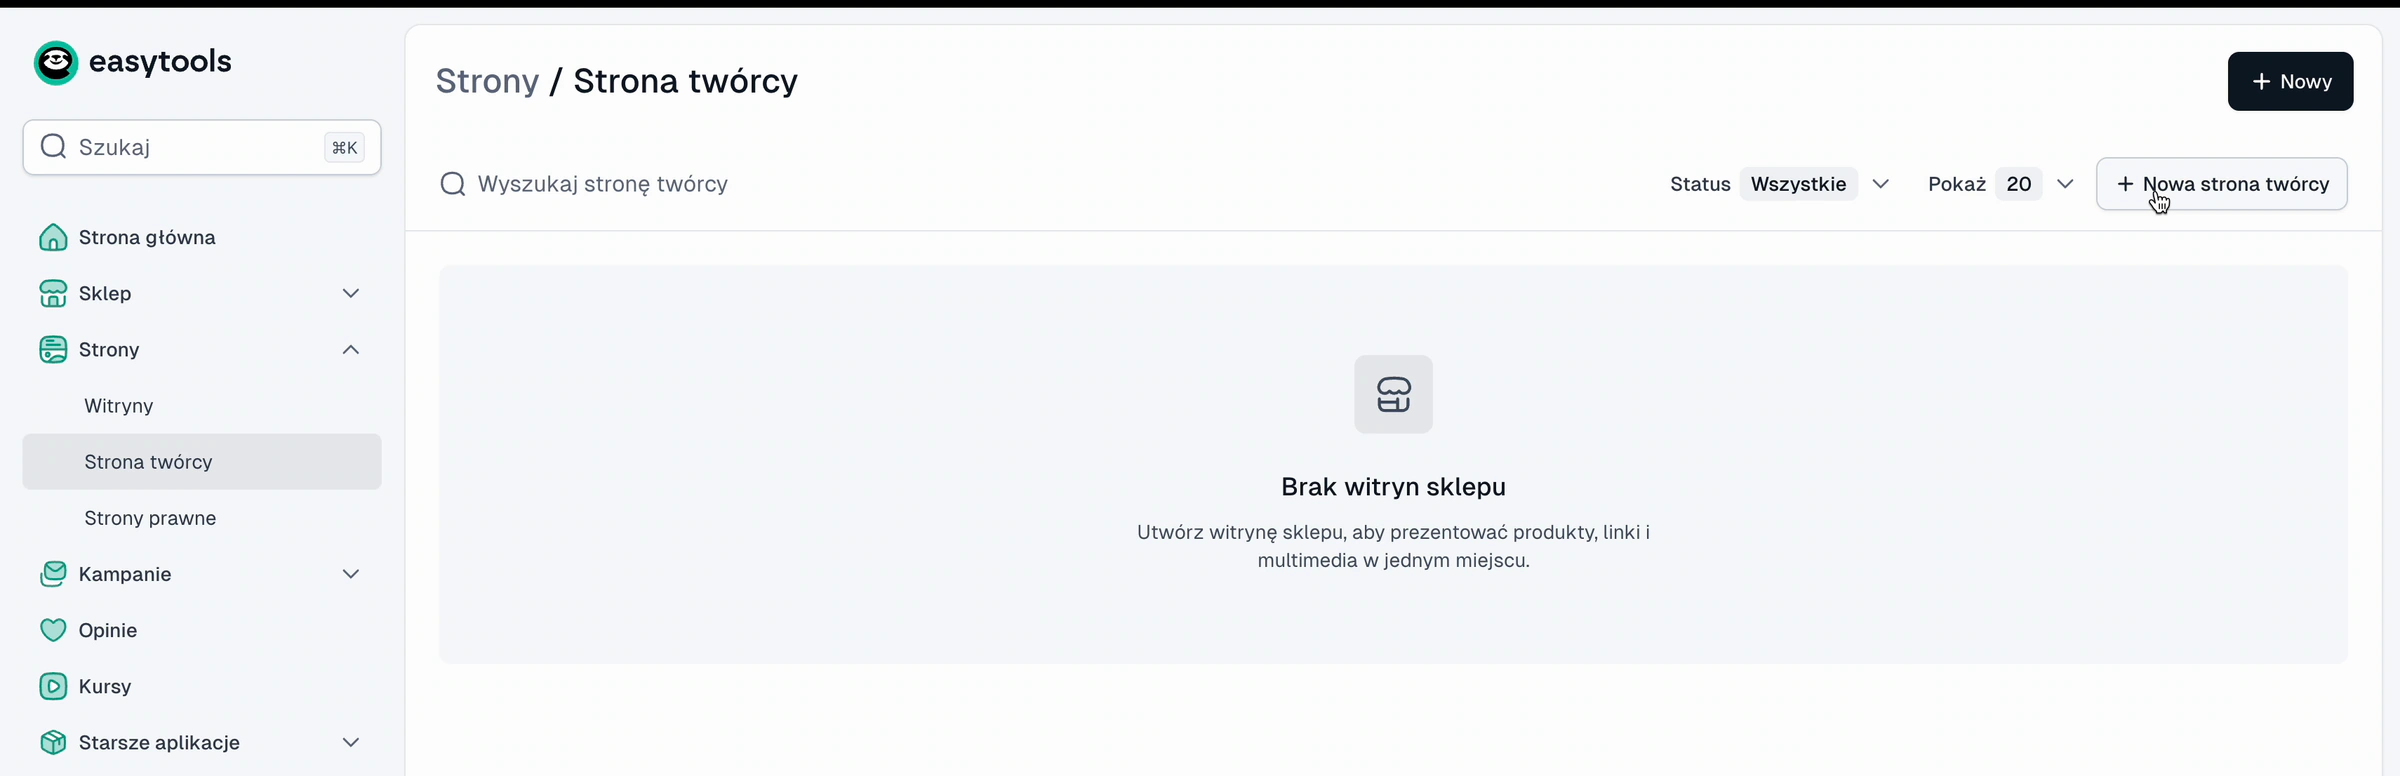
- Go to Pages → Creator page.
- Click + New creator page in the top right corner.
- Enter a name, for example “About me”.
- Click Create.
The editor opens with your branding already applied. The page starts empty - you add everything with widgets. On the left you will find the editor tabs: Content, Header, Style and Settings.
Set up the header
The header is the top of your page - the first thing visitors see.
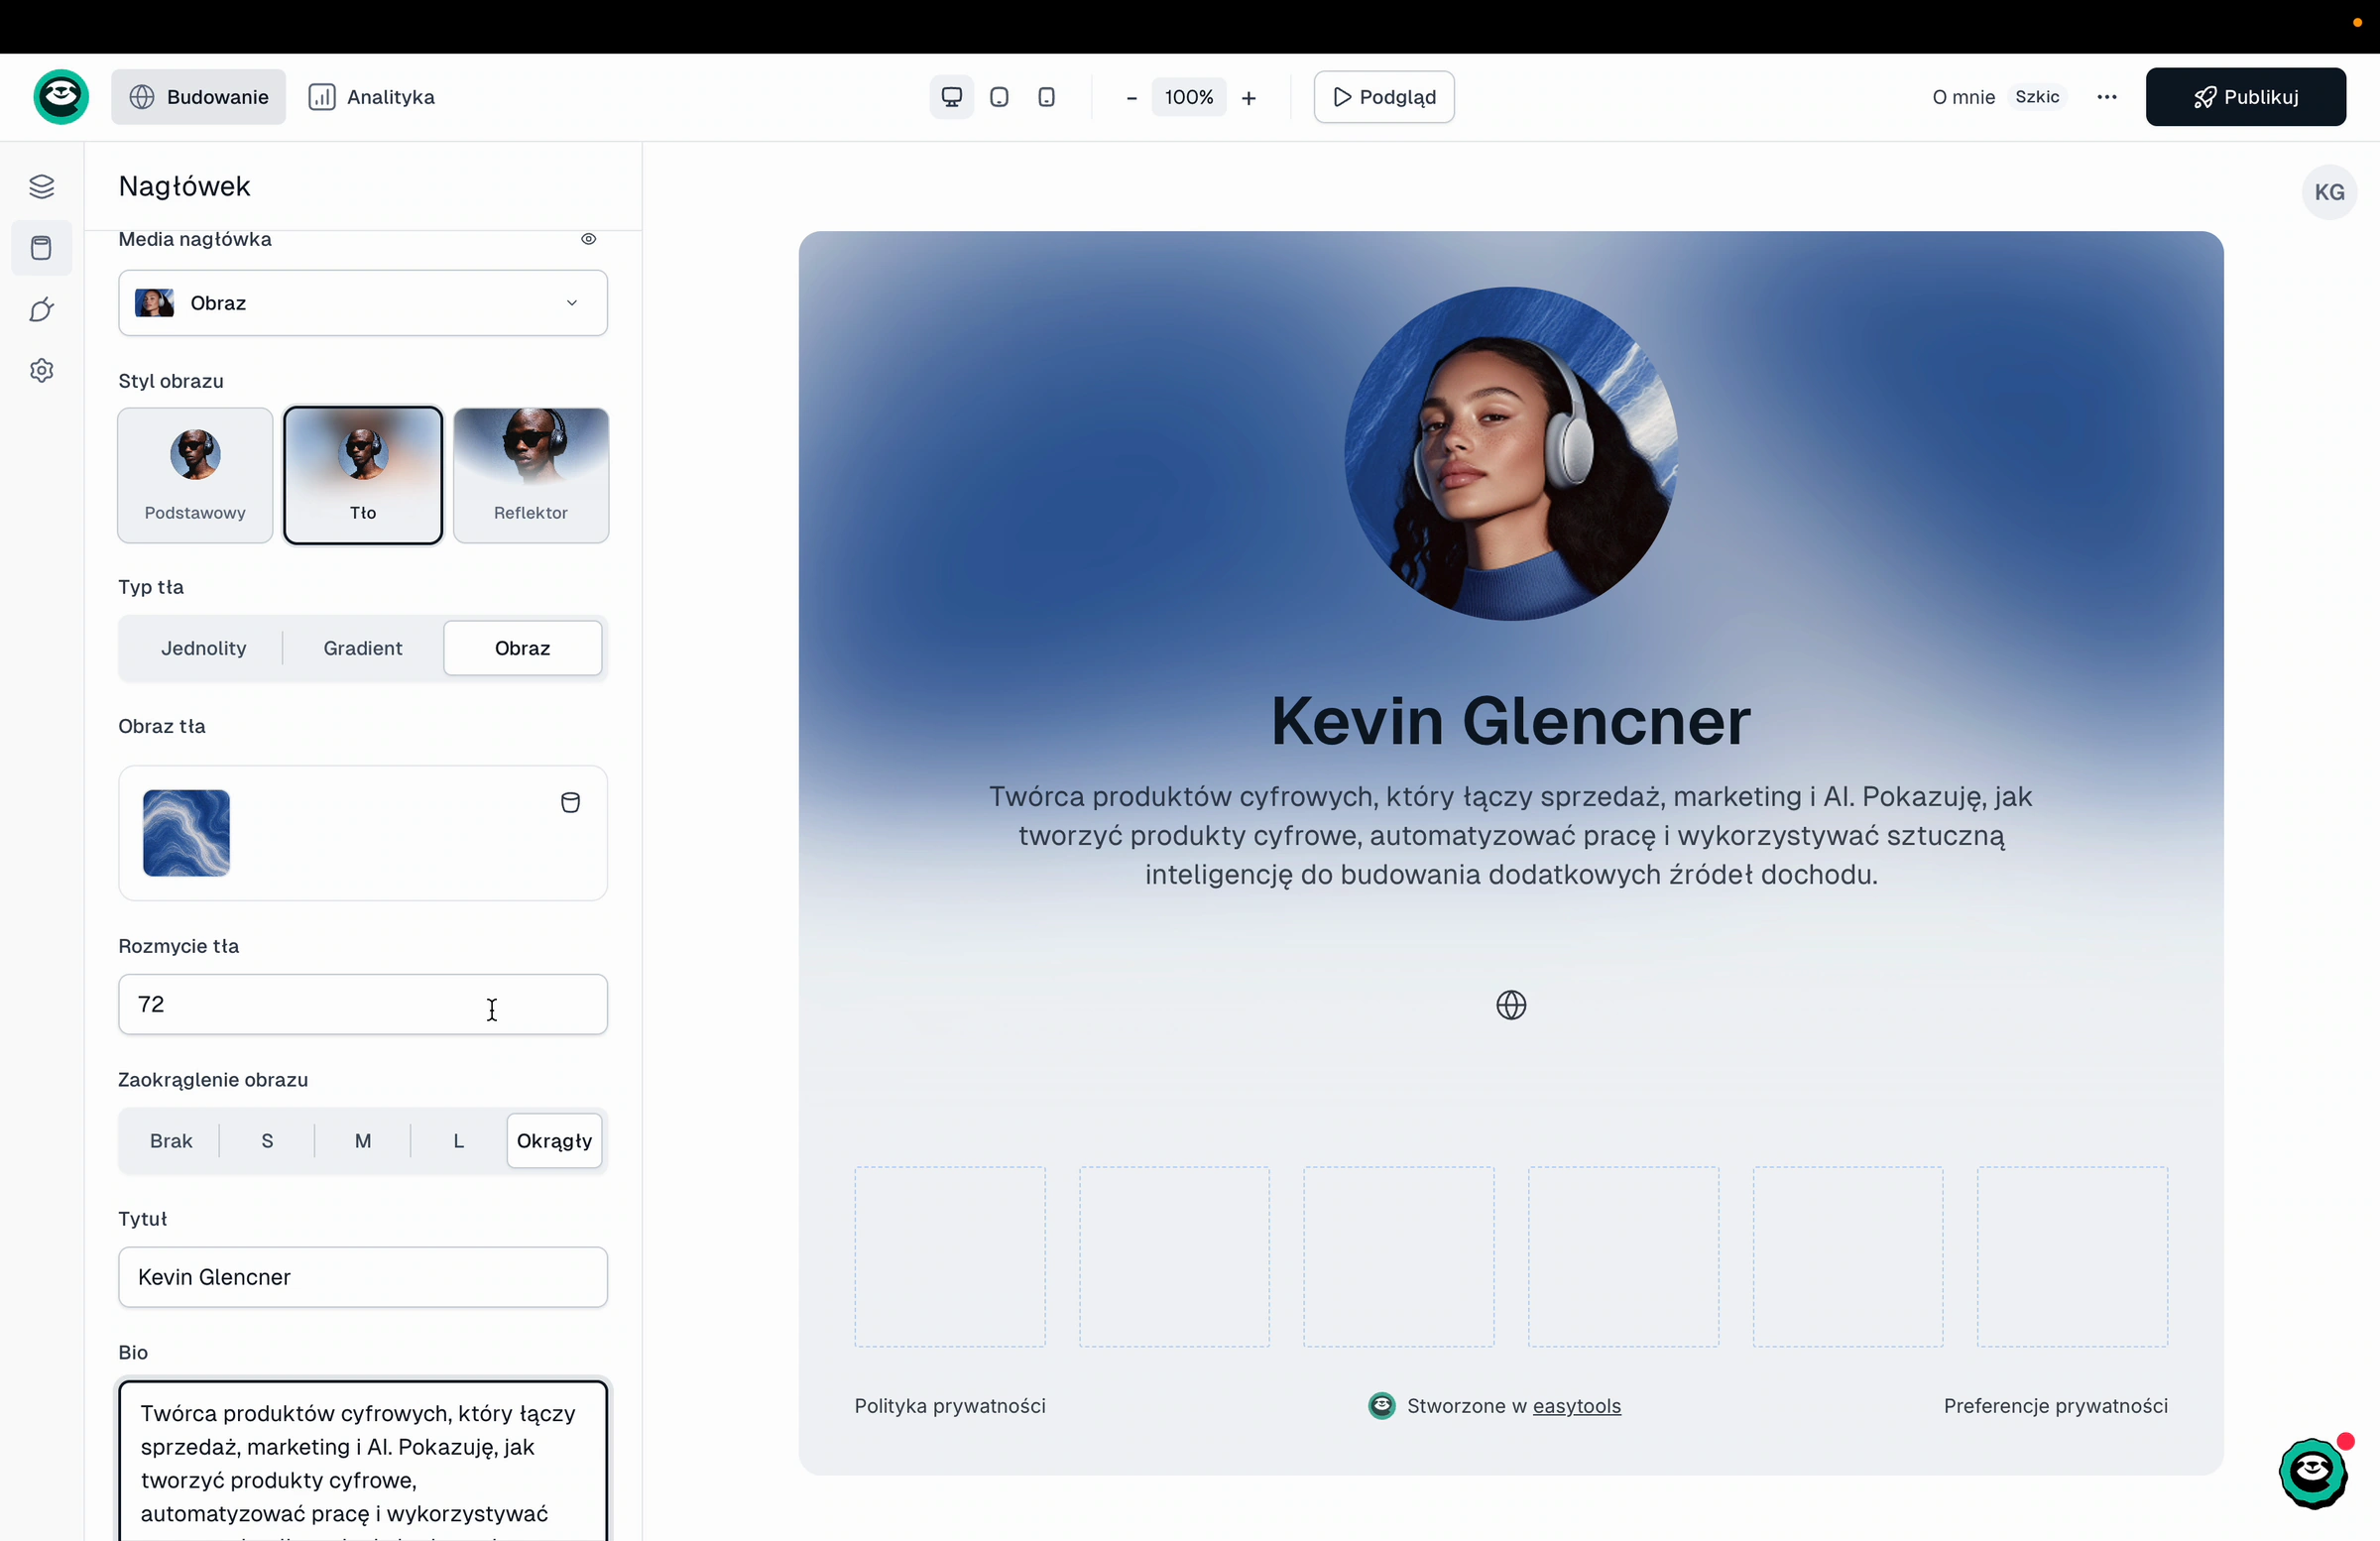
- Open the Header tab.
- Under Header media, add your photo.
- Pick an Image style: Basic, Background or Spotlight.
- Choose the Background type: Solid, Gradient or Image, and set Background blur if you want a softer look.
- Set Image rounding, for example Round for a circular photo.
- In Title, enter your brand name, company name or simply your full name.
- In Bio, describe your brand or the products you sell.
Below you can also change the font, the text color and add links to your social media.
Add widgets
- Open the Content tab.
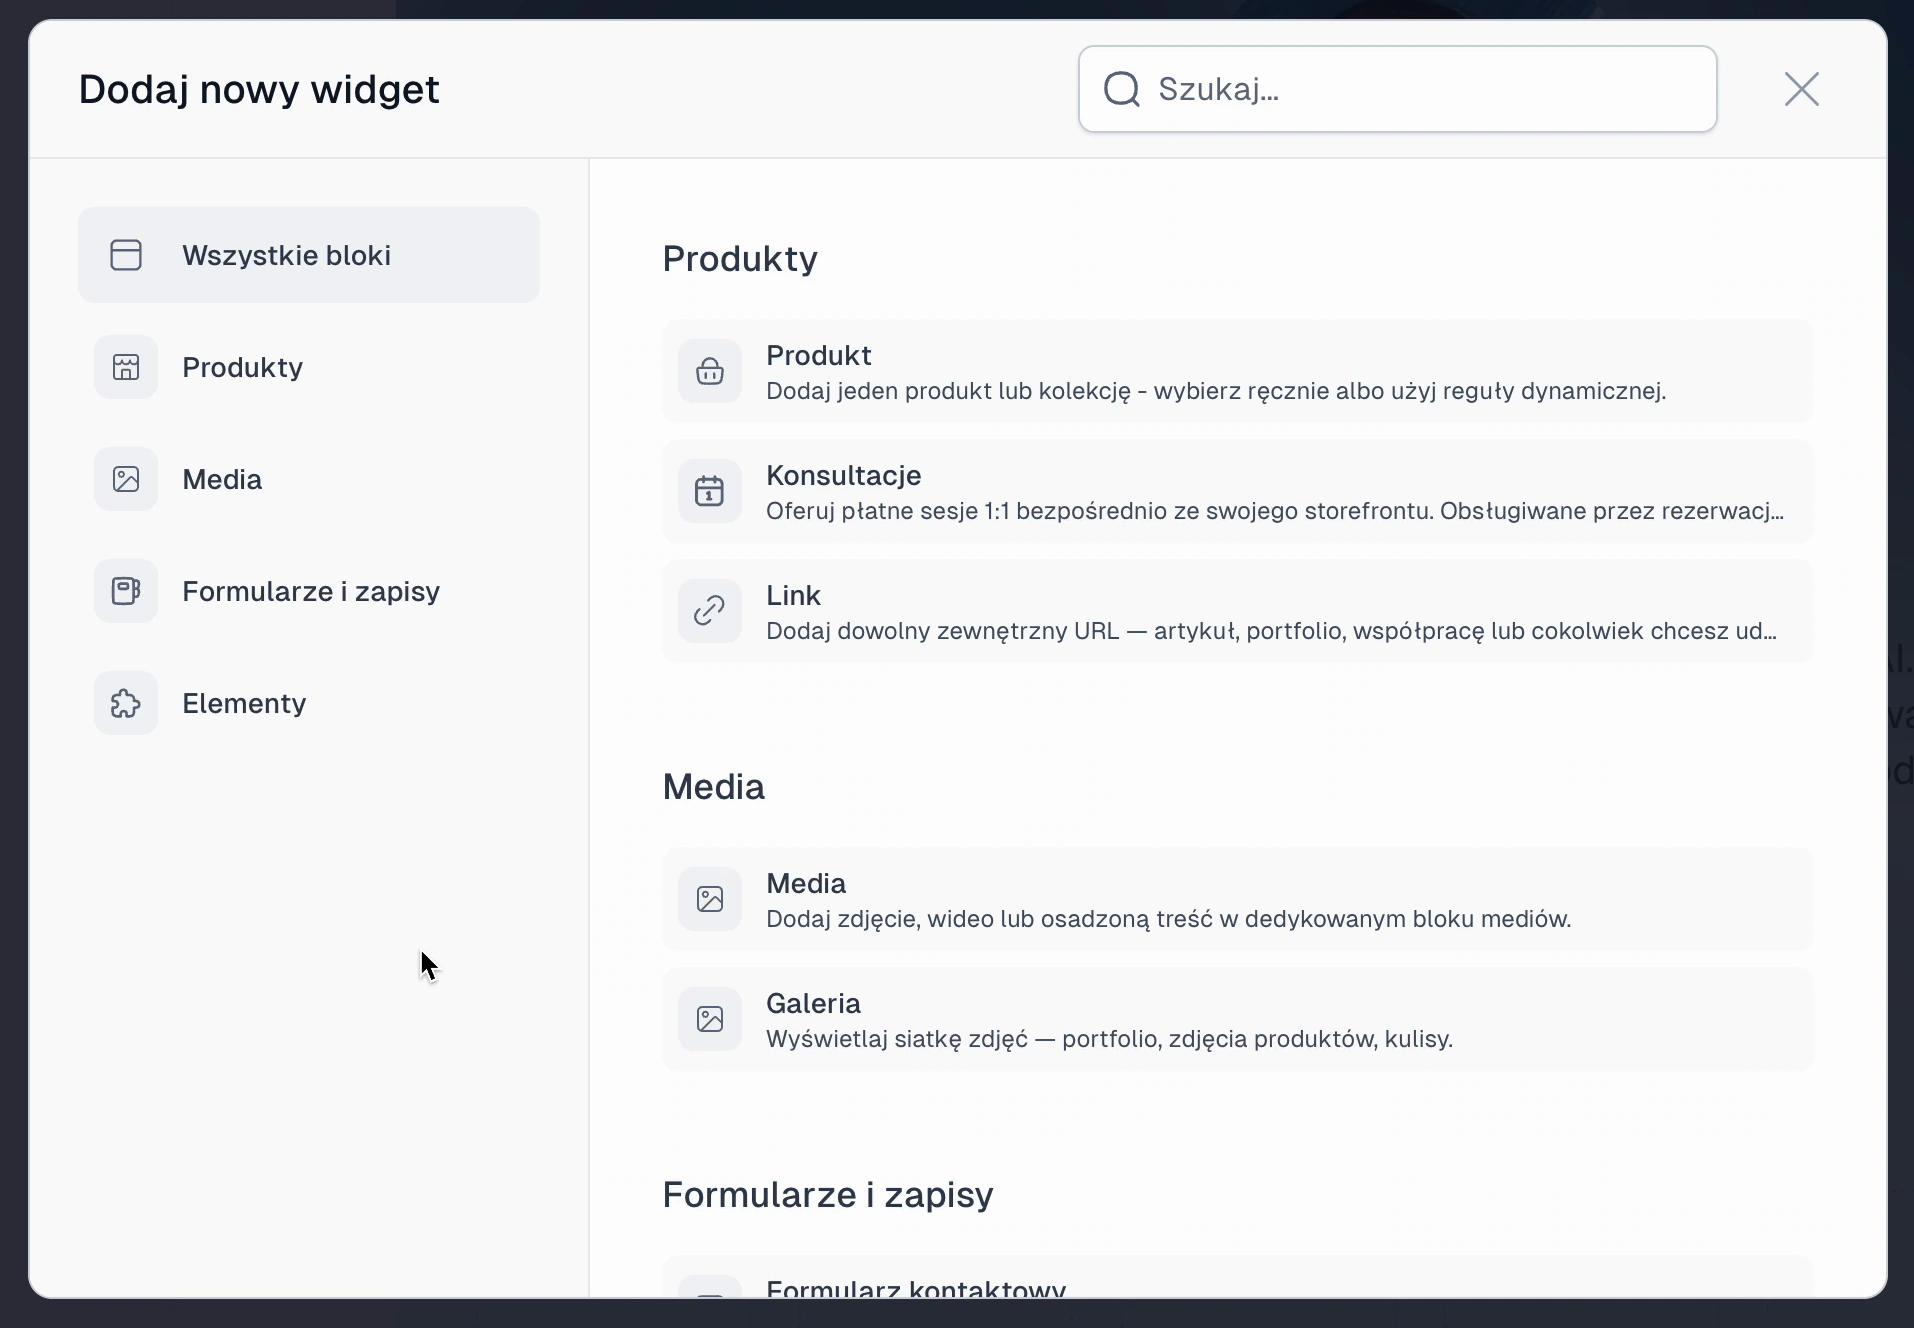
- Click + Add widget.
- Pick a category: Products, Media, Forms and signups or Elements.
What you can add:
- Products - Product (products you created in Easytools), Consultations (paid 1:1 sessions, for example booked through Zencal) and Link (any external URL, like an article or portfolio).
- Media - Media (a photo, video or embedded content) and Gallery (a grid of photos).
- Forms and signups - Contact form, Newsletter signup and Free download.
Show your products
- In + Add widget → Products, click Product.
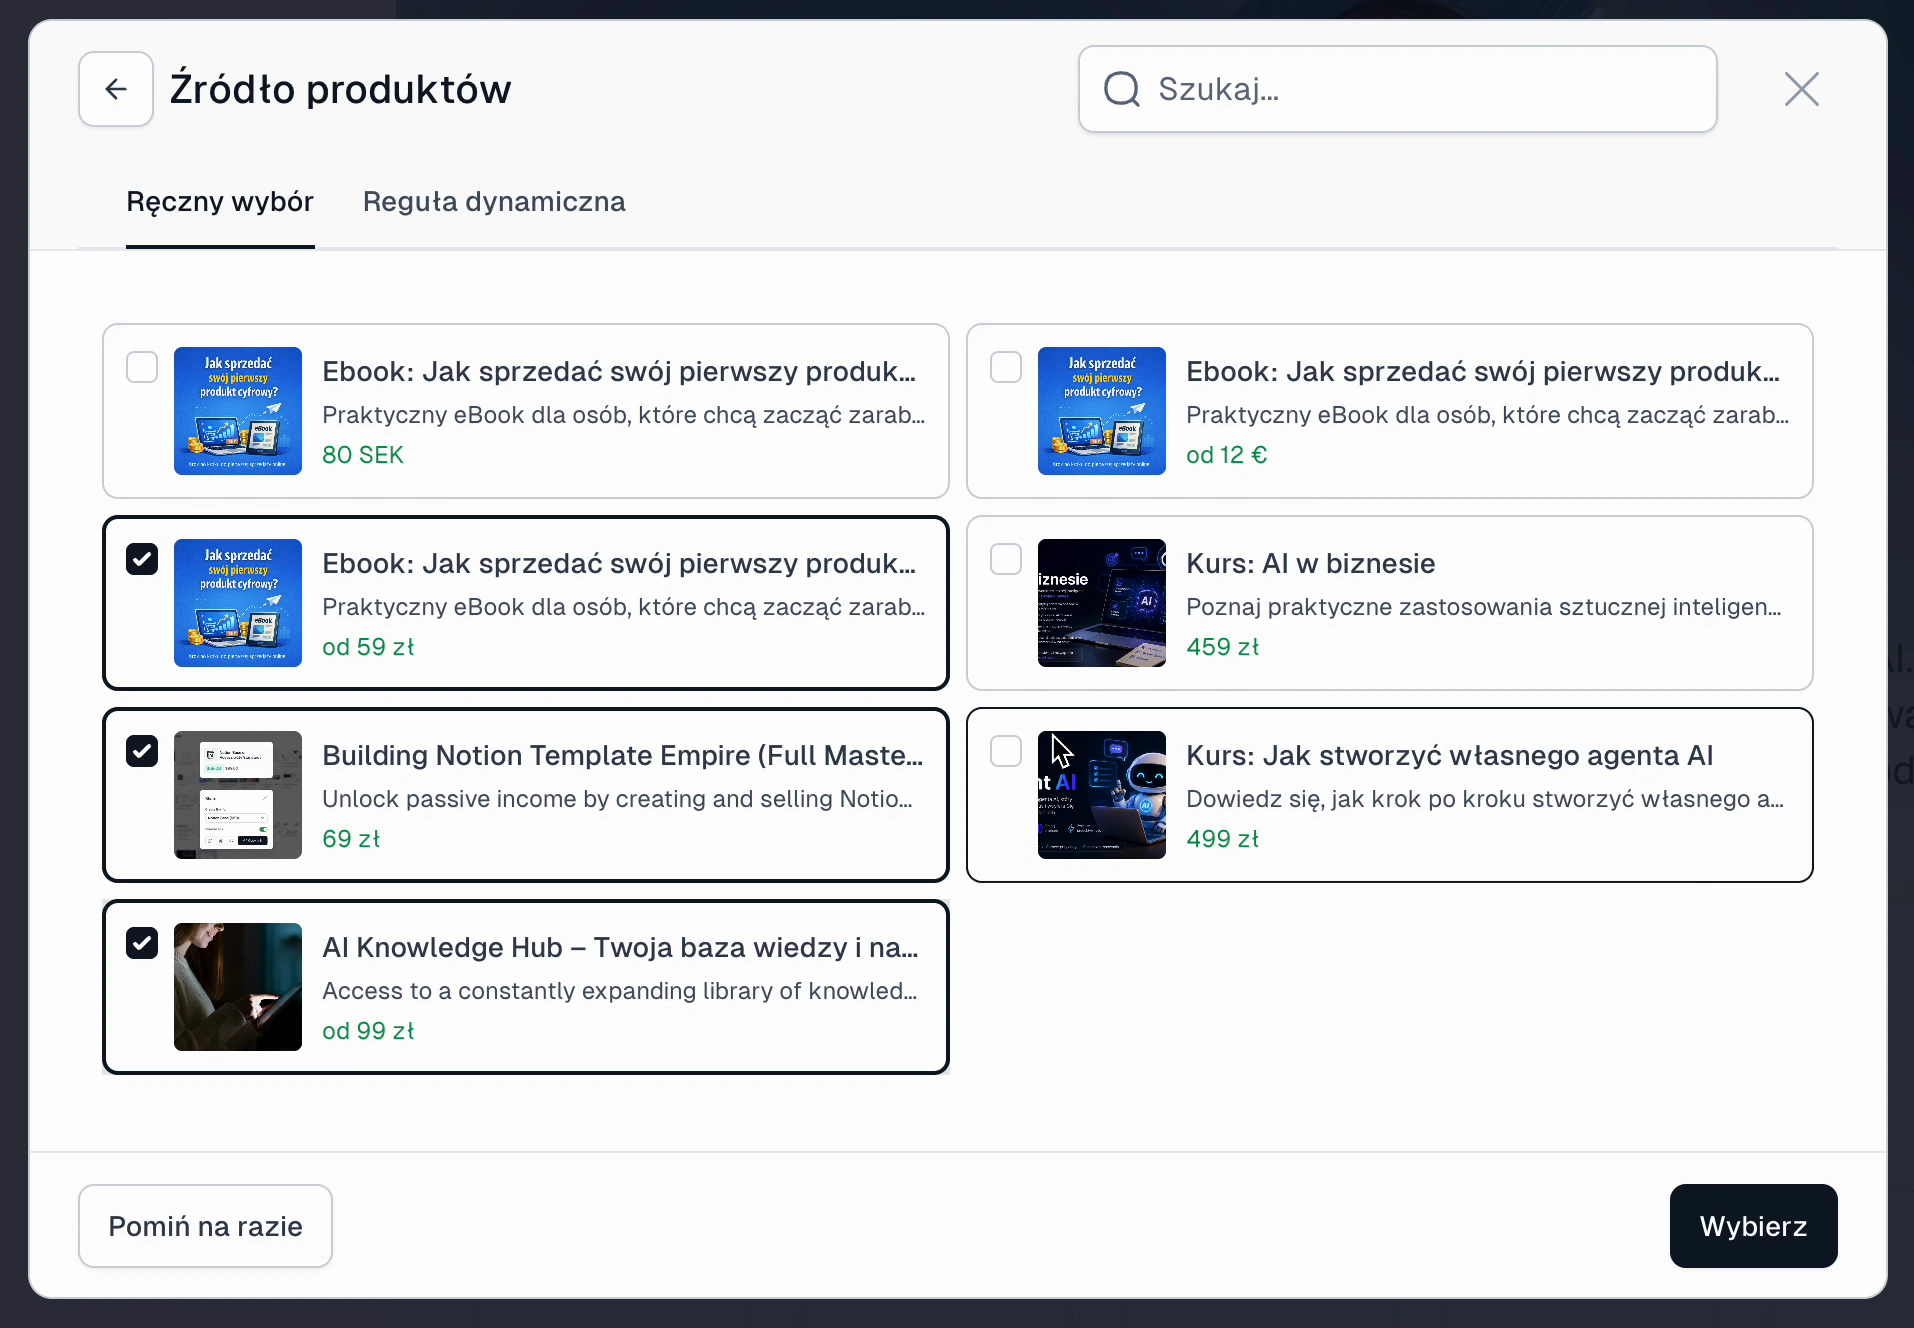
- On the Manual selection tab, you will see all products you created in Easytools. Tick the ones you want to show.
- Click Select.
- Choose a layout: Slider, List or Grid.
- Click Add widget.
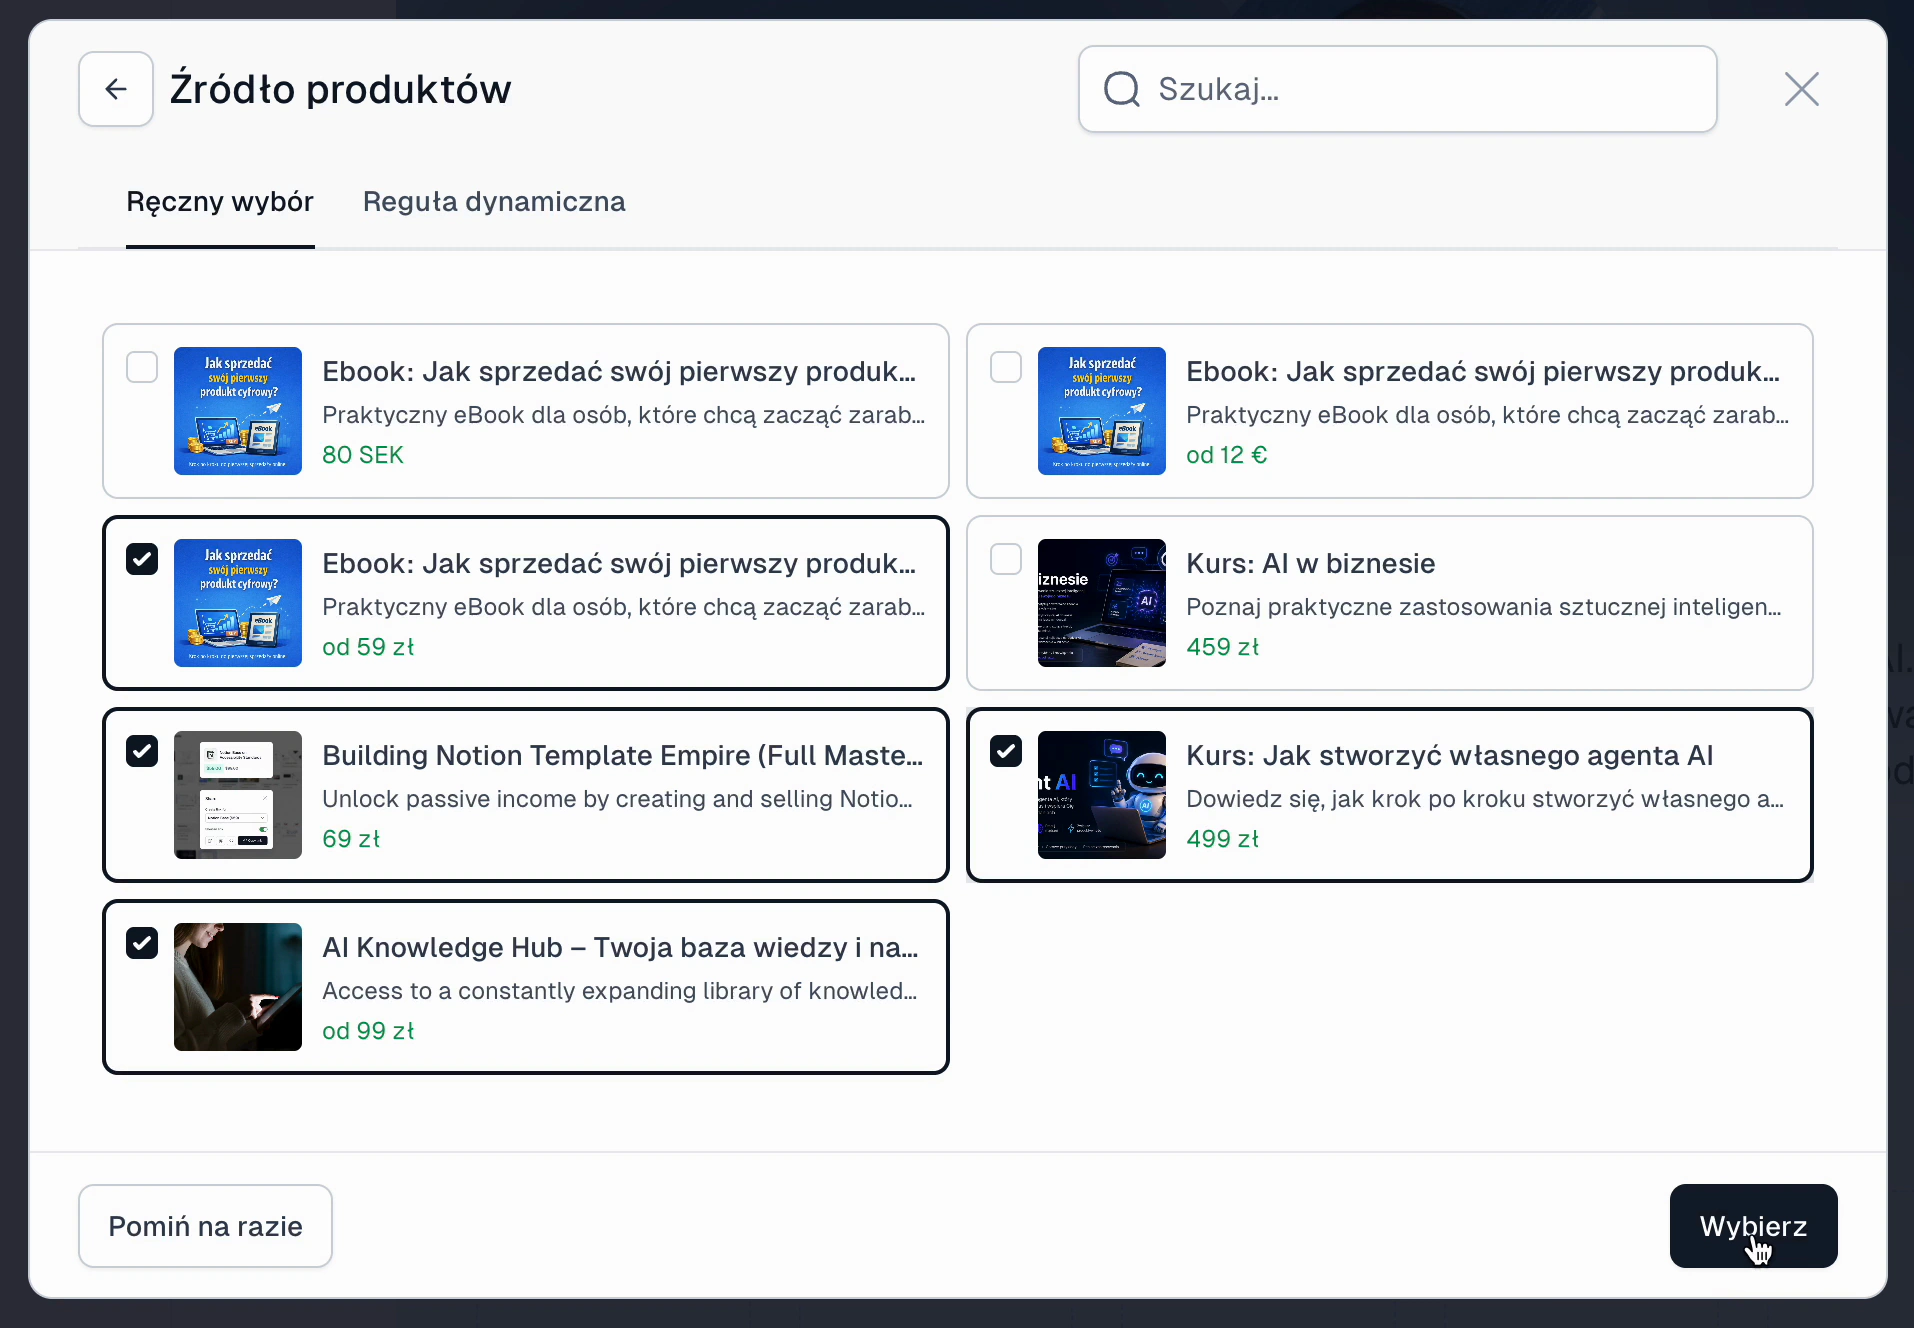
Your products now appear under your name and bio. In the Product collection panel on the left you can:
- change the order of products by dragging them,
- change the Title (by default “My products”),
- switch the layout, the product layout and the number of Columns,
- choose whether to show prices, images, descriptions and buttons,
- set the sort order and filter products by ownership status in Filtering and sorting.
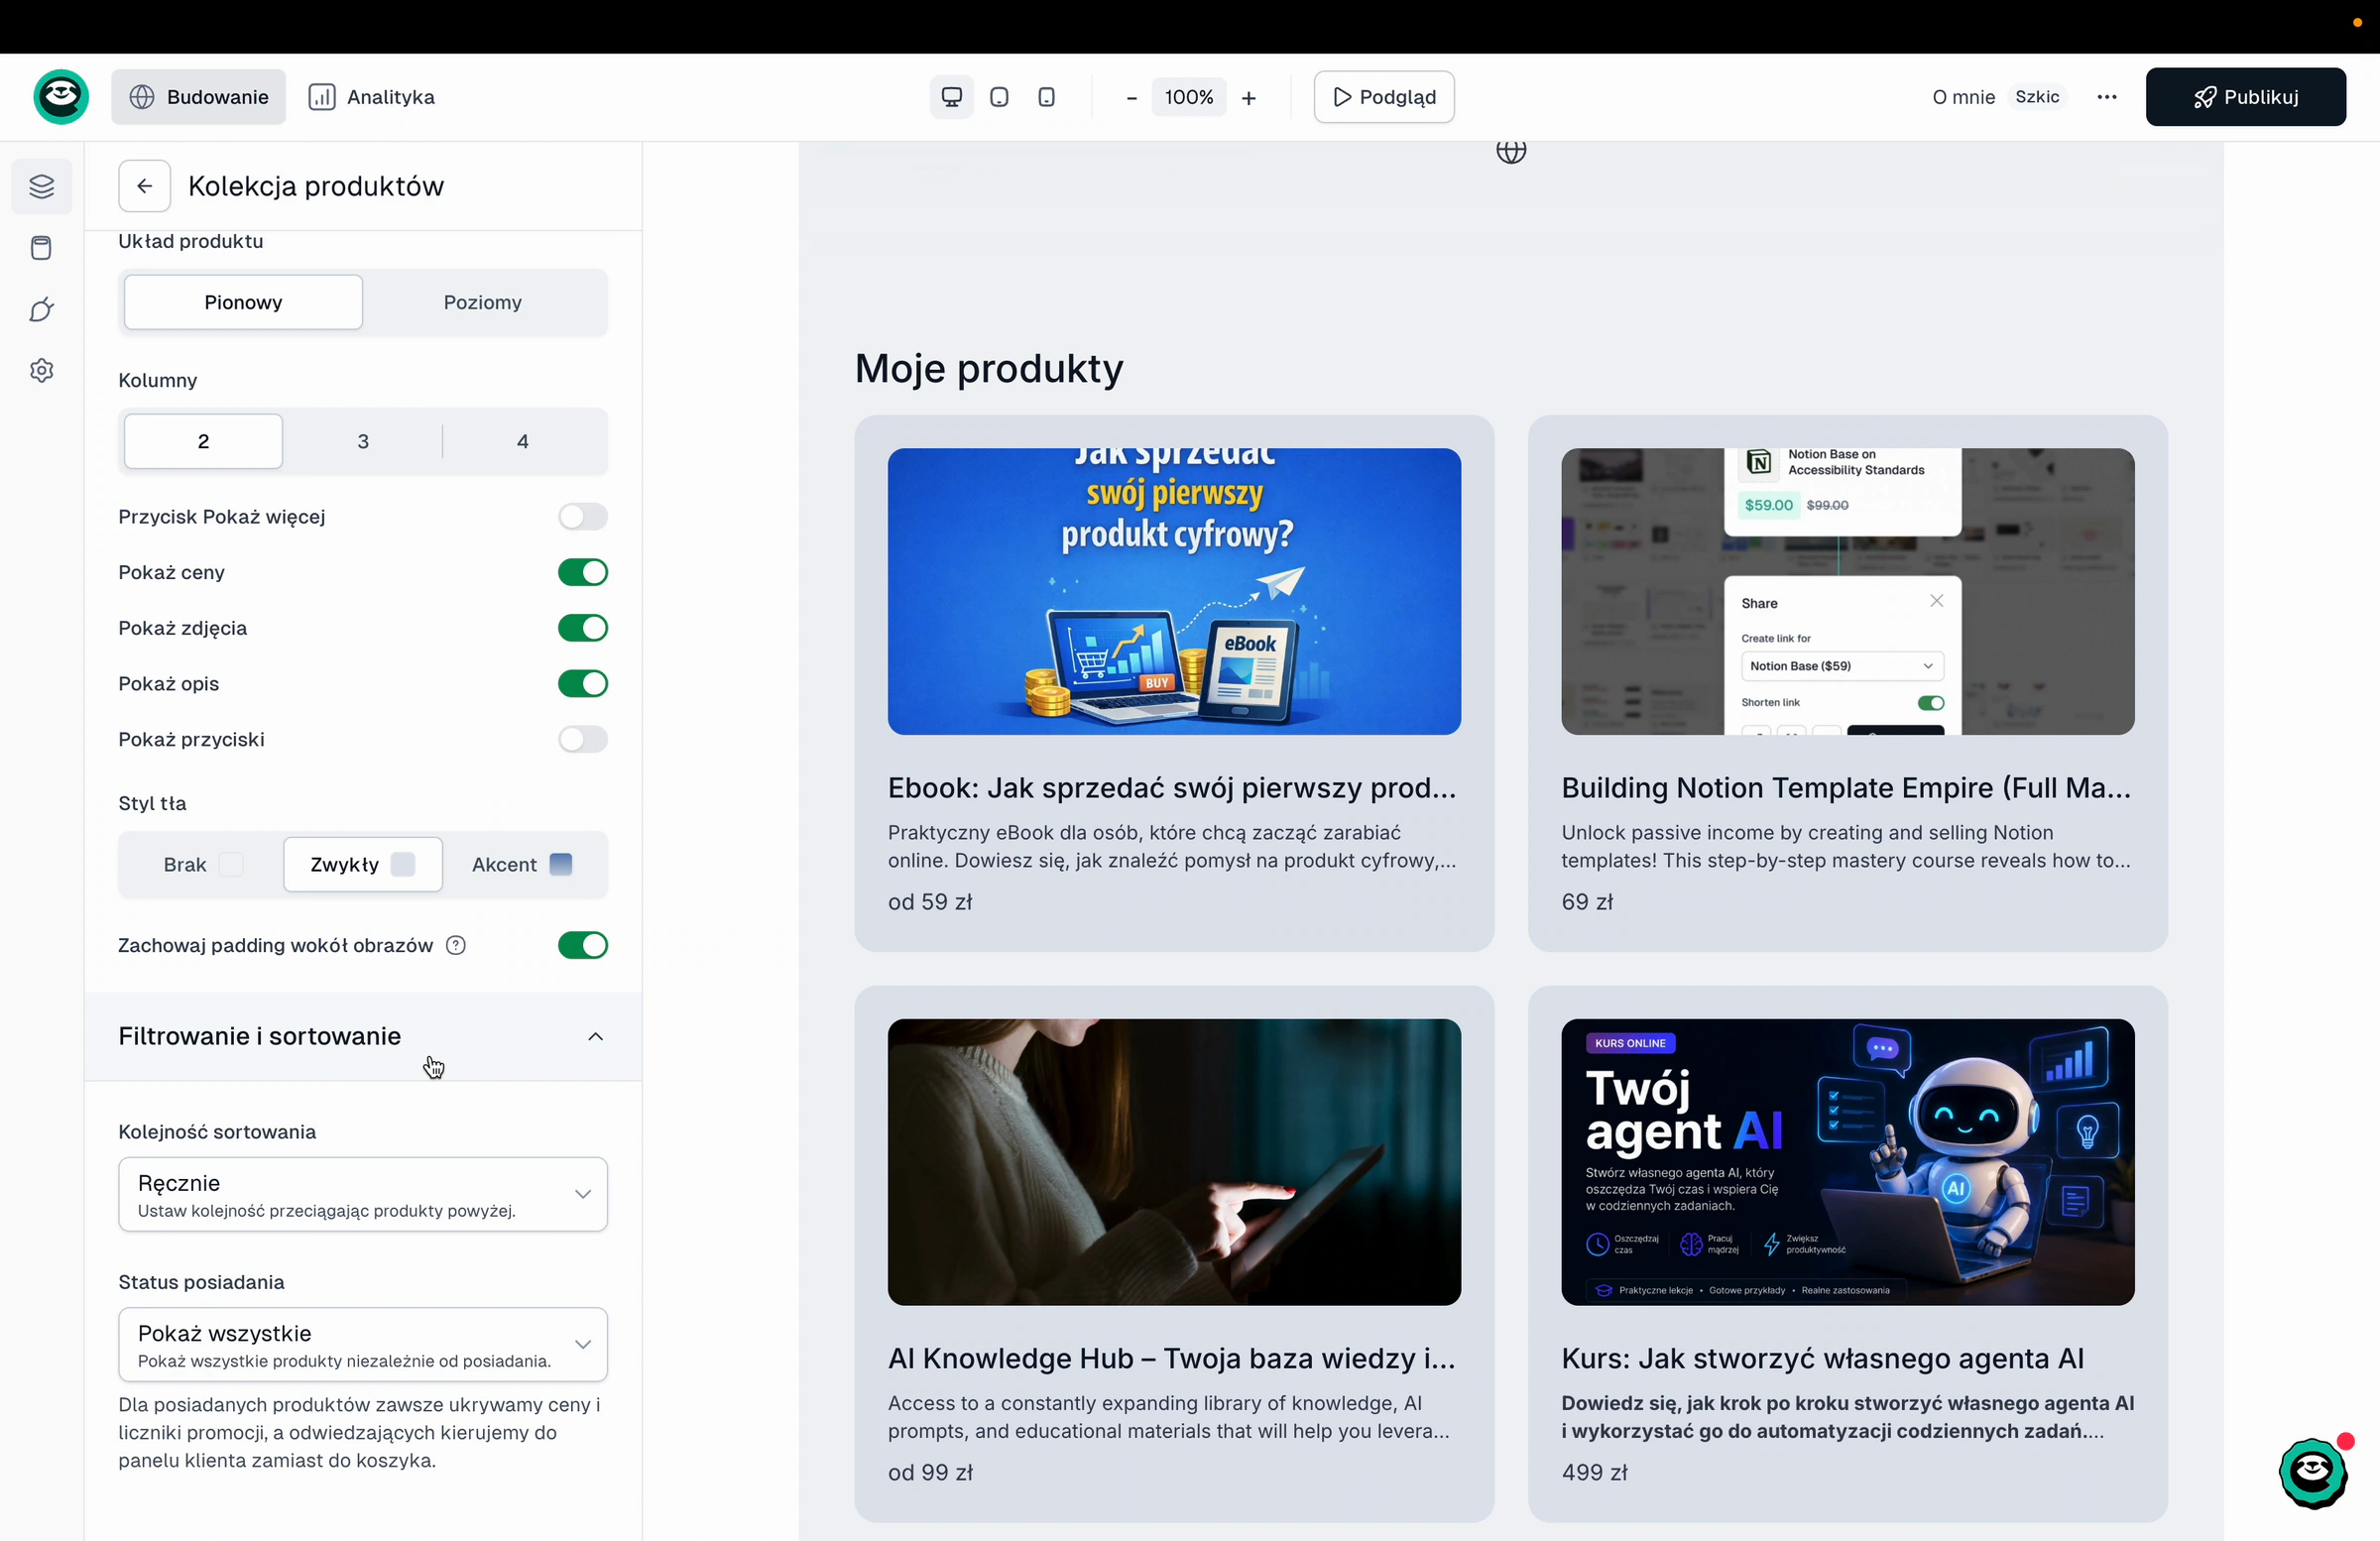
Note: For products a visitor already owns, prices and promo countdowns are always hidden, and the visitor is sent to the customer portal instead of the checkout.
Show products with a dynamic rule
Instead of picking products by hand, you can let the page choose them automatically.
- Add a Product widget and open the Dynamic rule tab.
- Pick a rule:
- On sale - all products with an active discount,
- With countdown timer - products with an active time-limited offer,
- Owned by visitor - products the visitor already bought,
- Not yet owned - everything the visitor has not bought yet,
- Related to owned (cross-sell) - cross-sells for what the visitor bought,
- All products - every product from your Easycart catalog.
- Click Select, choose a layout and click Add widget.
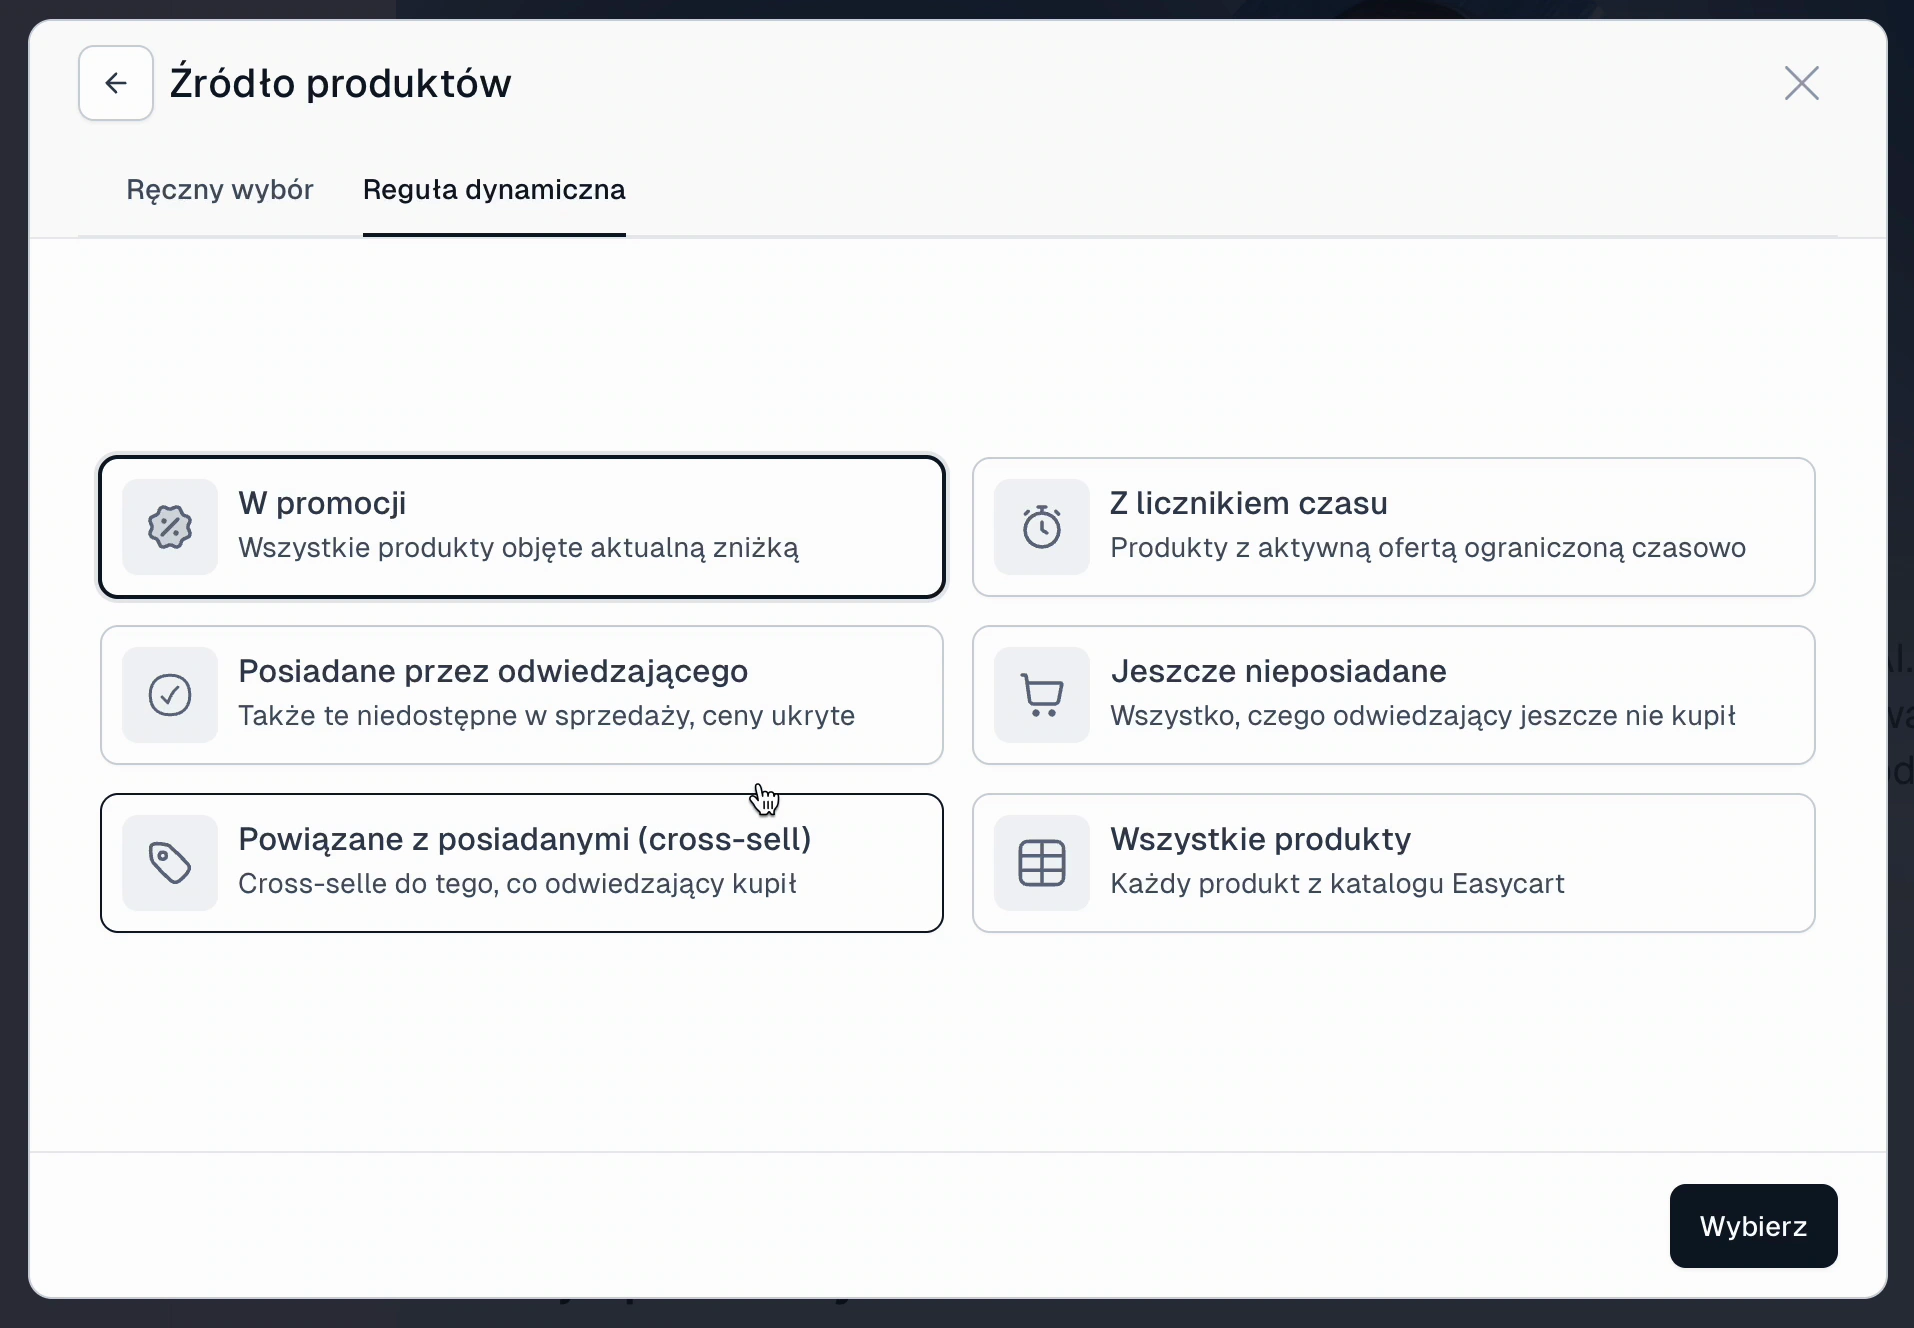
Products are matched to the rule each time the page is displayed. Rules based on purchases work for visitors logged in to Easytools - each of them sees products picked for them.
Collect emails with a free download
A free download lets visitors get a file in exchange for their email address. It is an easy way to build a mailing list.
- In + Add widget → Forms and signups, click Free download.
- Choose a layout: Banner, Tall row, Card or Narrow card, and click Add widget.
- In Data collection, select the Easymail list that new contacts should join.
- Under Download file, upload your file (PDF or ZIP) or add a link to it.
- Optionally, change the Success message and the Error message.
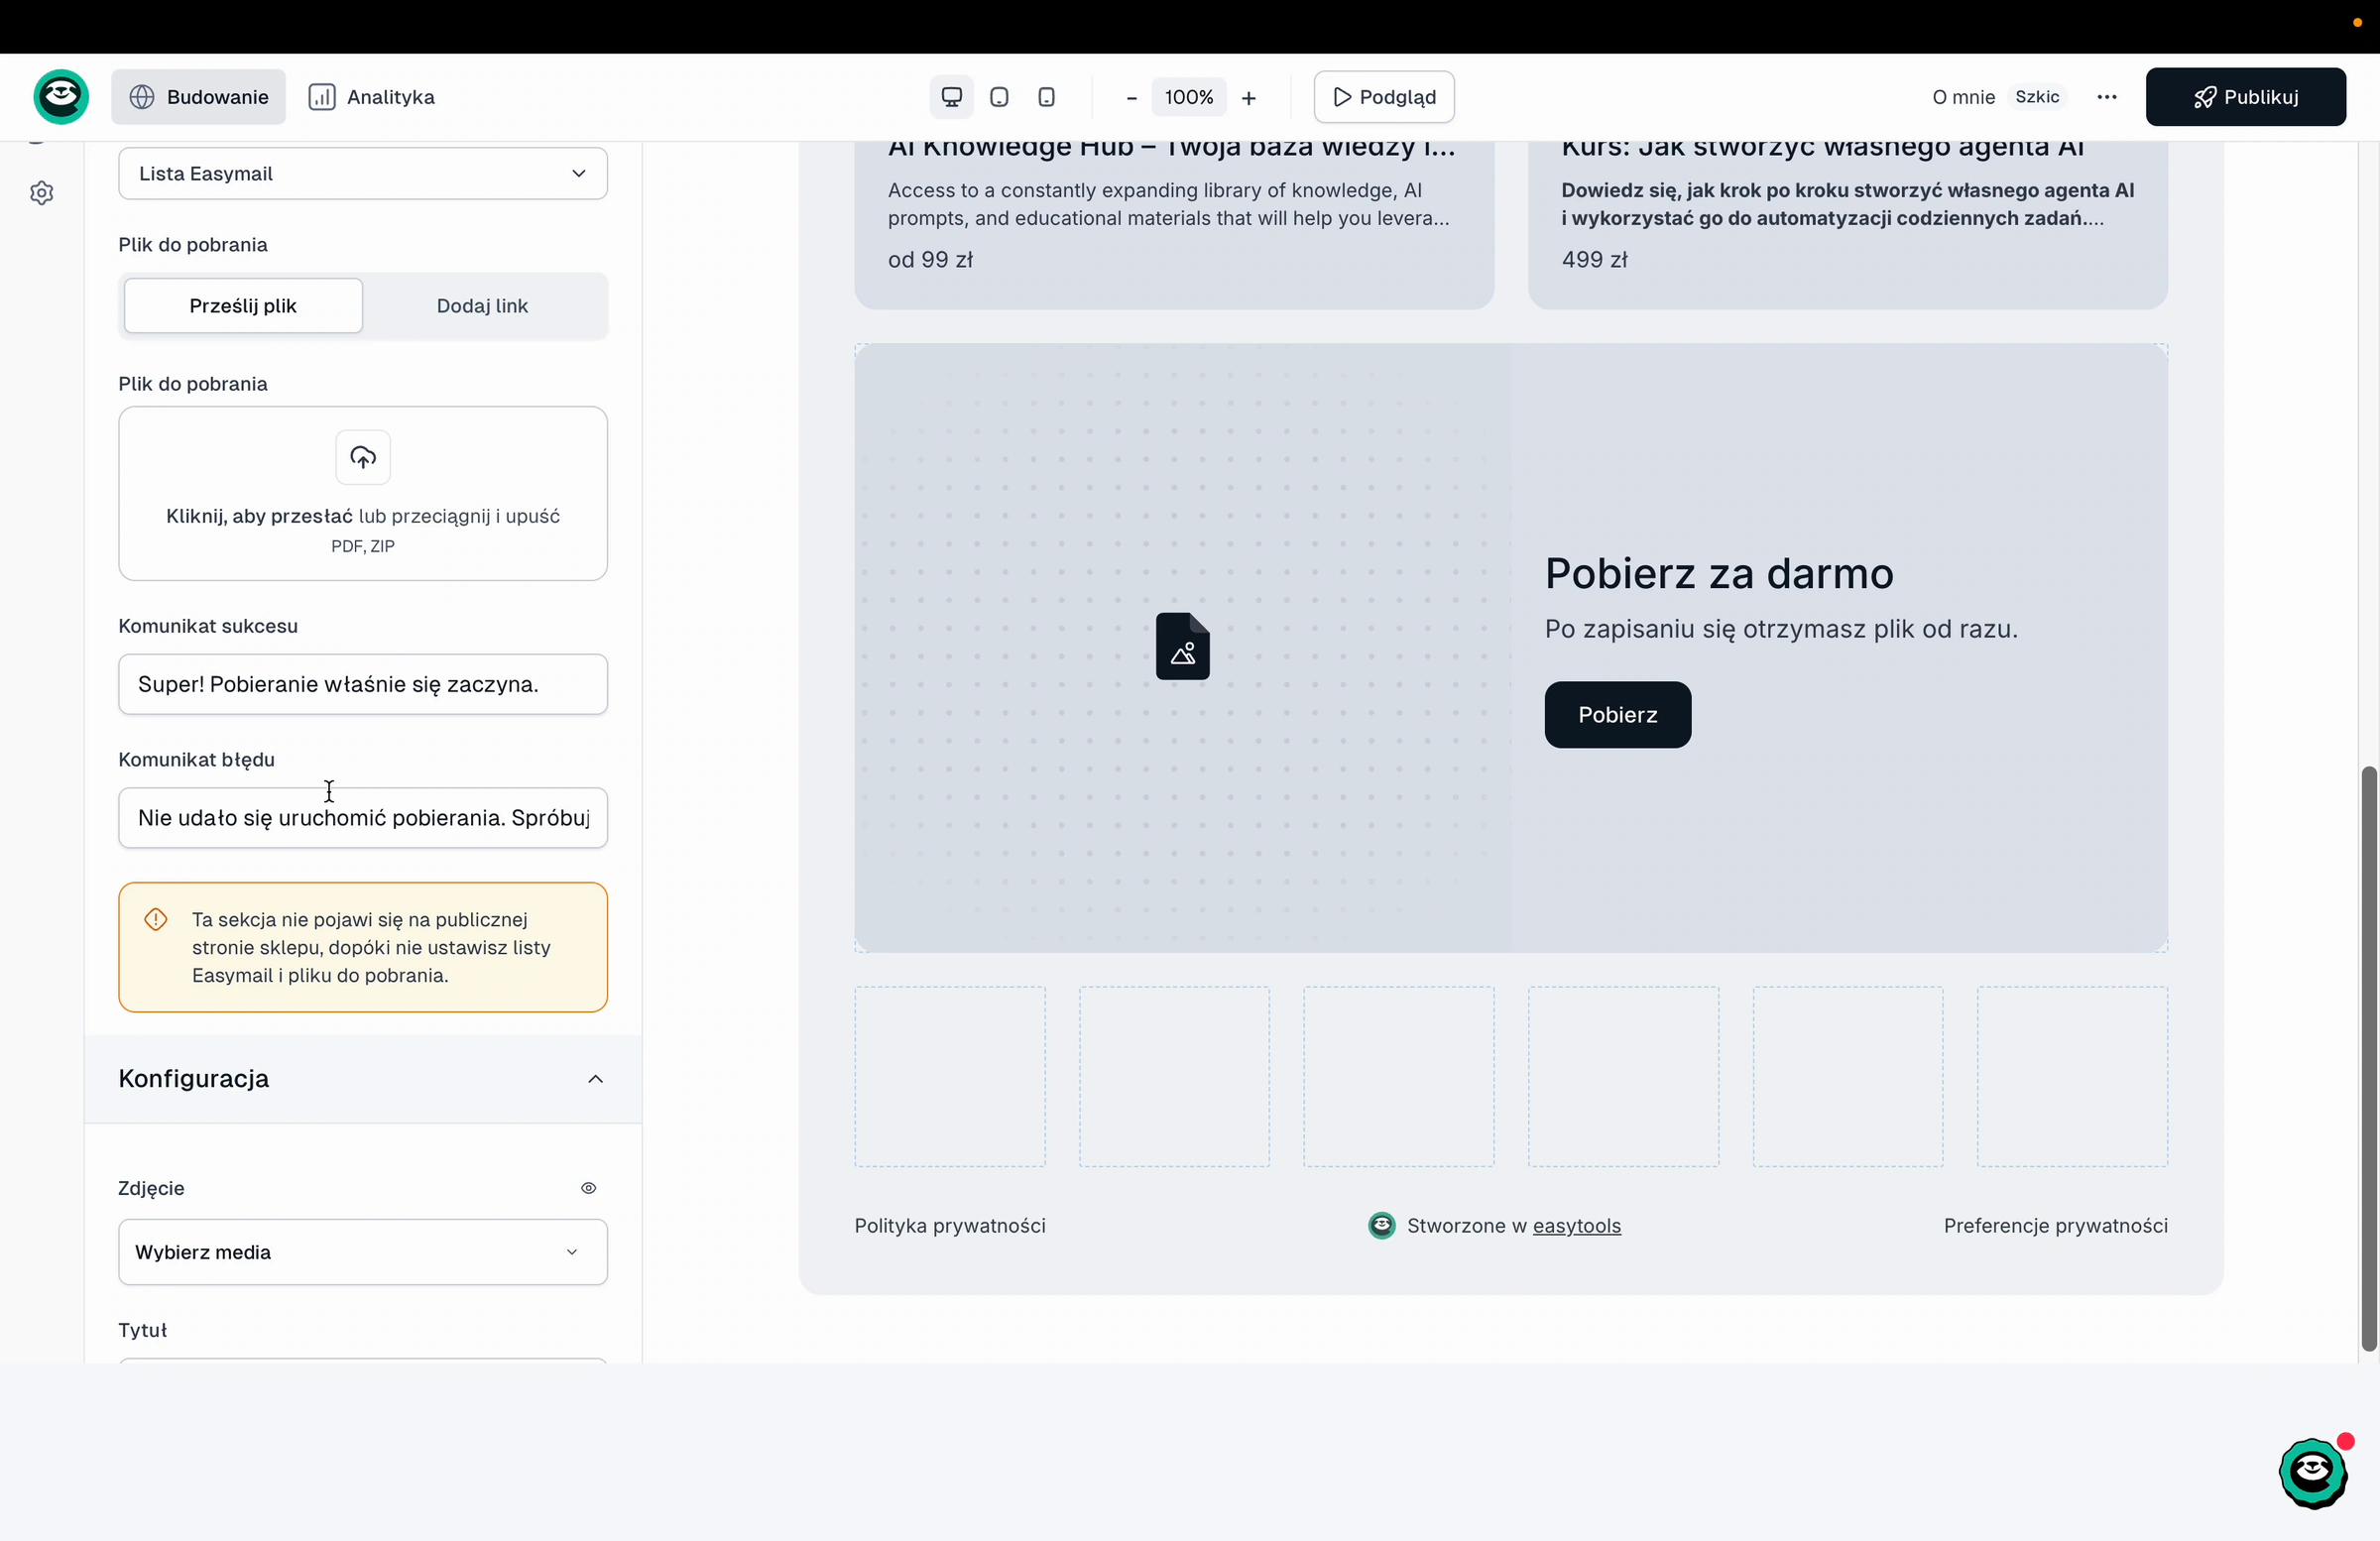
Important: The free download section does not appear on your public page until you set the Easymail list and the download file.
Once your list grows, you can send campaigns to it - for example, about your paid products.
Add a custom domain and analytics
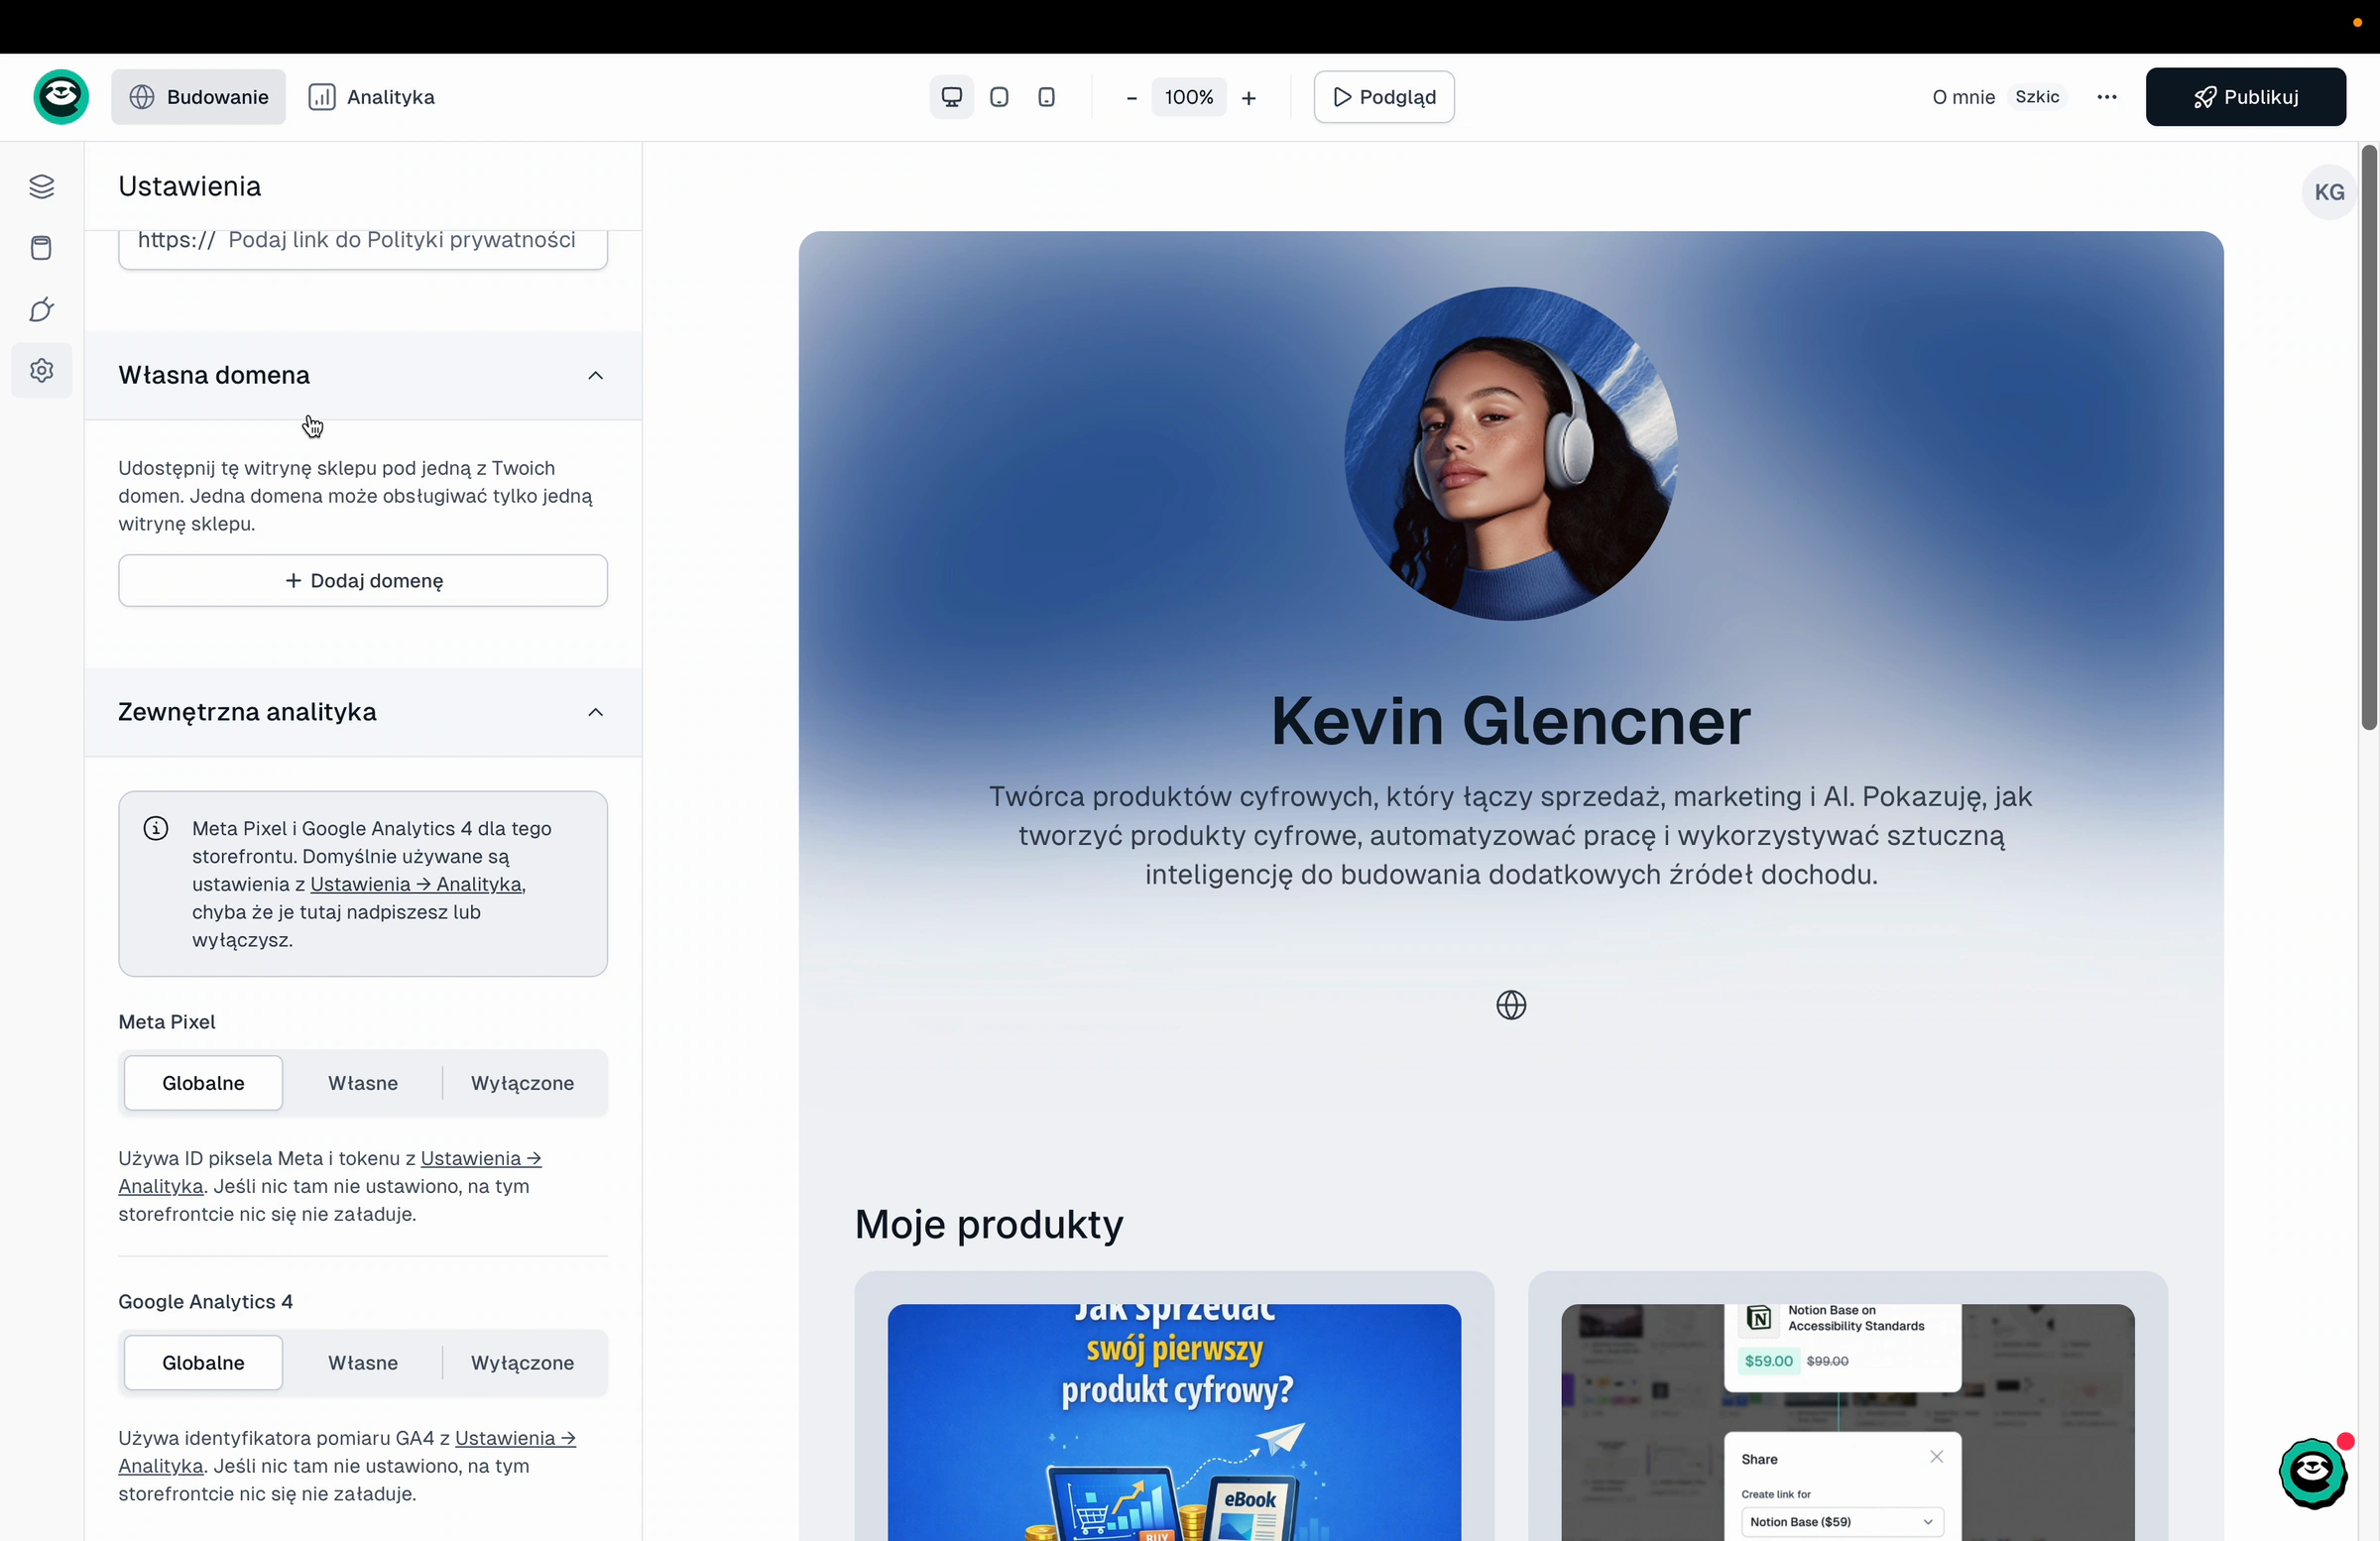
- Open the Settings tab.
- In Custom domain, click + Add domain to show your creator page on your own domain. One domain can serve only one page.
- In External analytics, set up Meta Pixel and Google Analytics 4. By default, the page uses your global analytics settings. Choose Custom to use different IDs for this page, or Disabled to turn tracking off.
Publish your page
When you are happy with the result, click Publish in the top right corner. Use Preview first if you want to see how the page looks to visitors.